Script editor in Jitterbit Studio
Introduction
In a project, the full script editor is displayed for scripts created as a project component. The inline script editor is present in transformations, which can be expanded to the full script editor by clicking the popout icon in the upper right of a script.
The full script editor contains all options covered on this page, while the inline editor offers a pared down version for quick editing.
For more information on types of scripts, see Script types and creation.
Access the script editor
The full script editor is the default script editor for scripts created as a project component:
To access the full script editor from within the inline version present within transformations, click the popout icon in the upper right of the script:
A full script editor is also shown in the script pad when opened from the project toolbar.
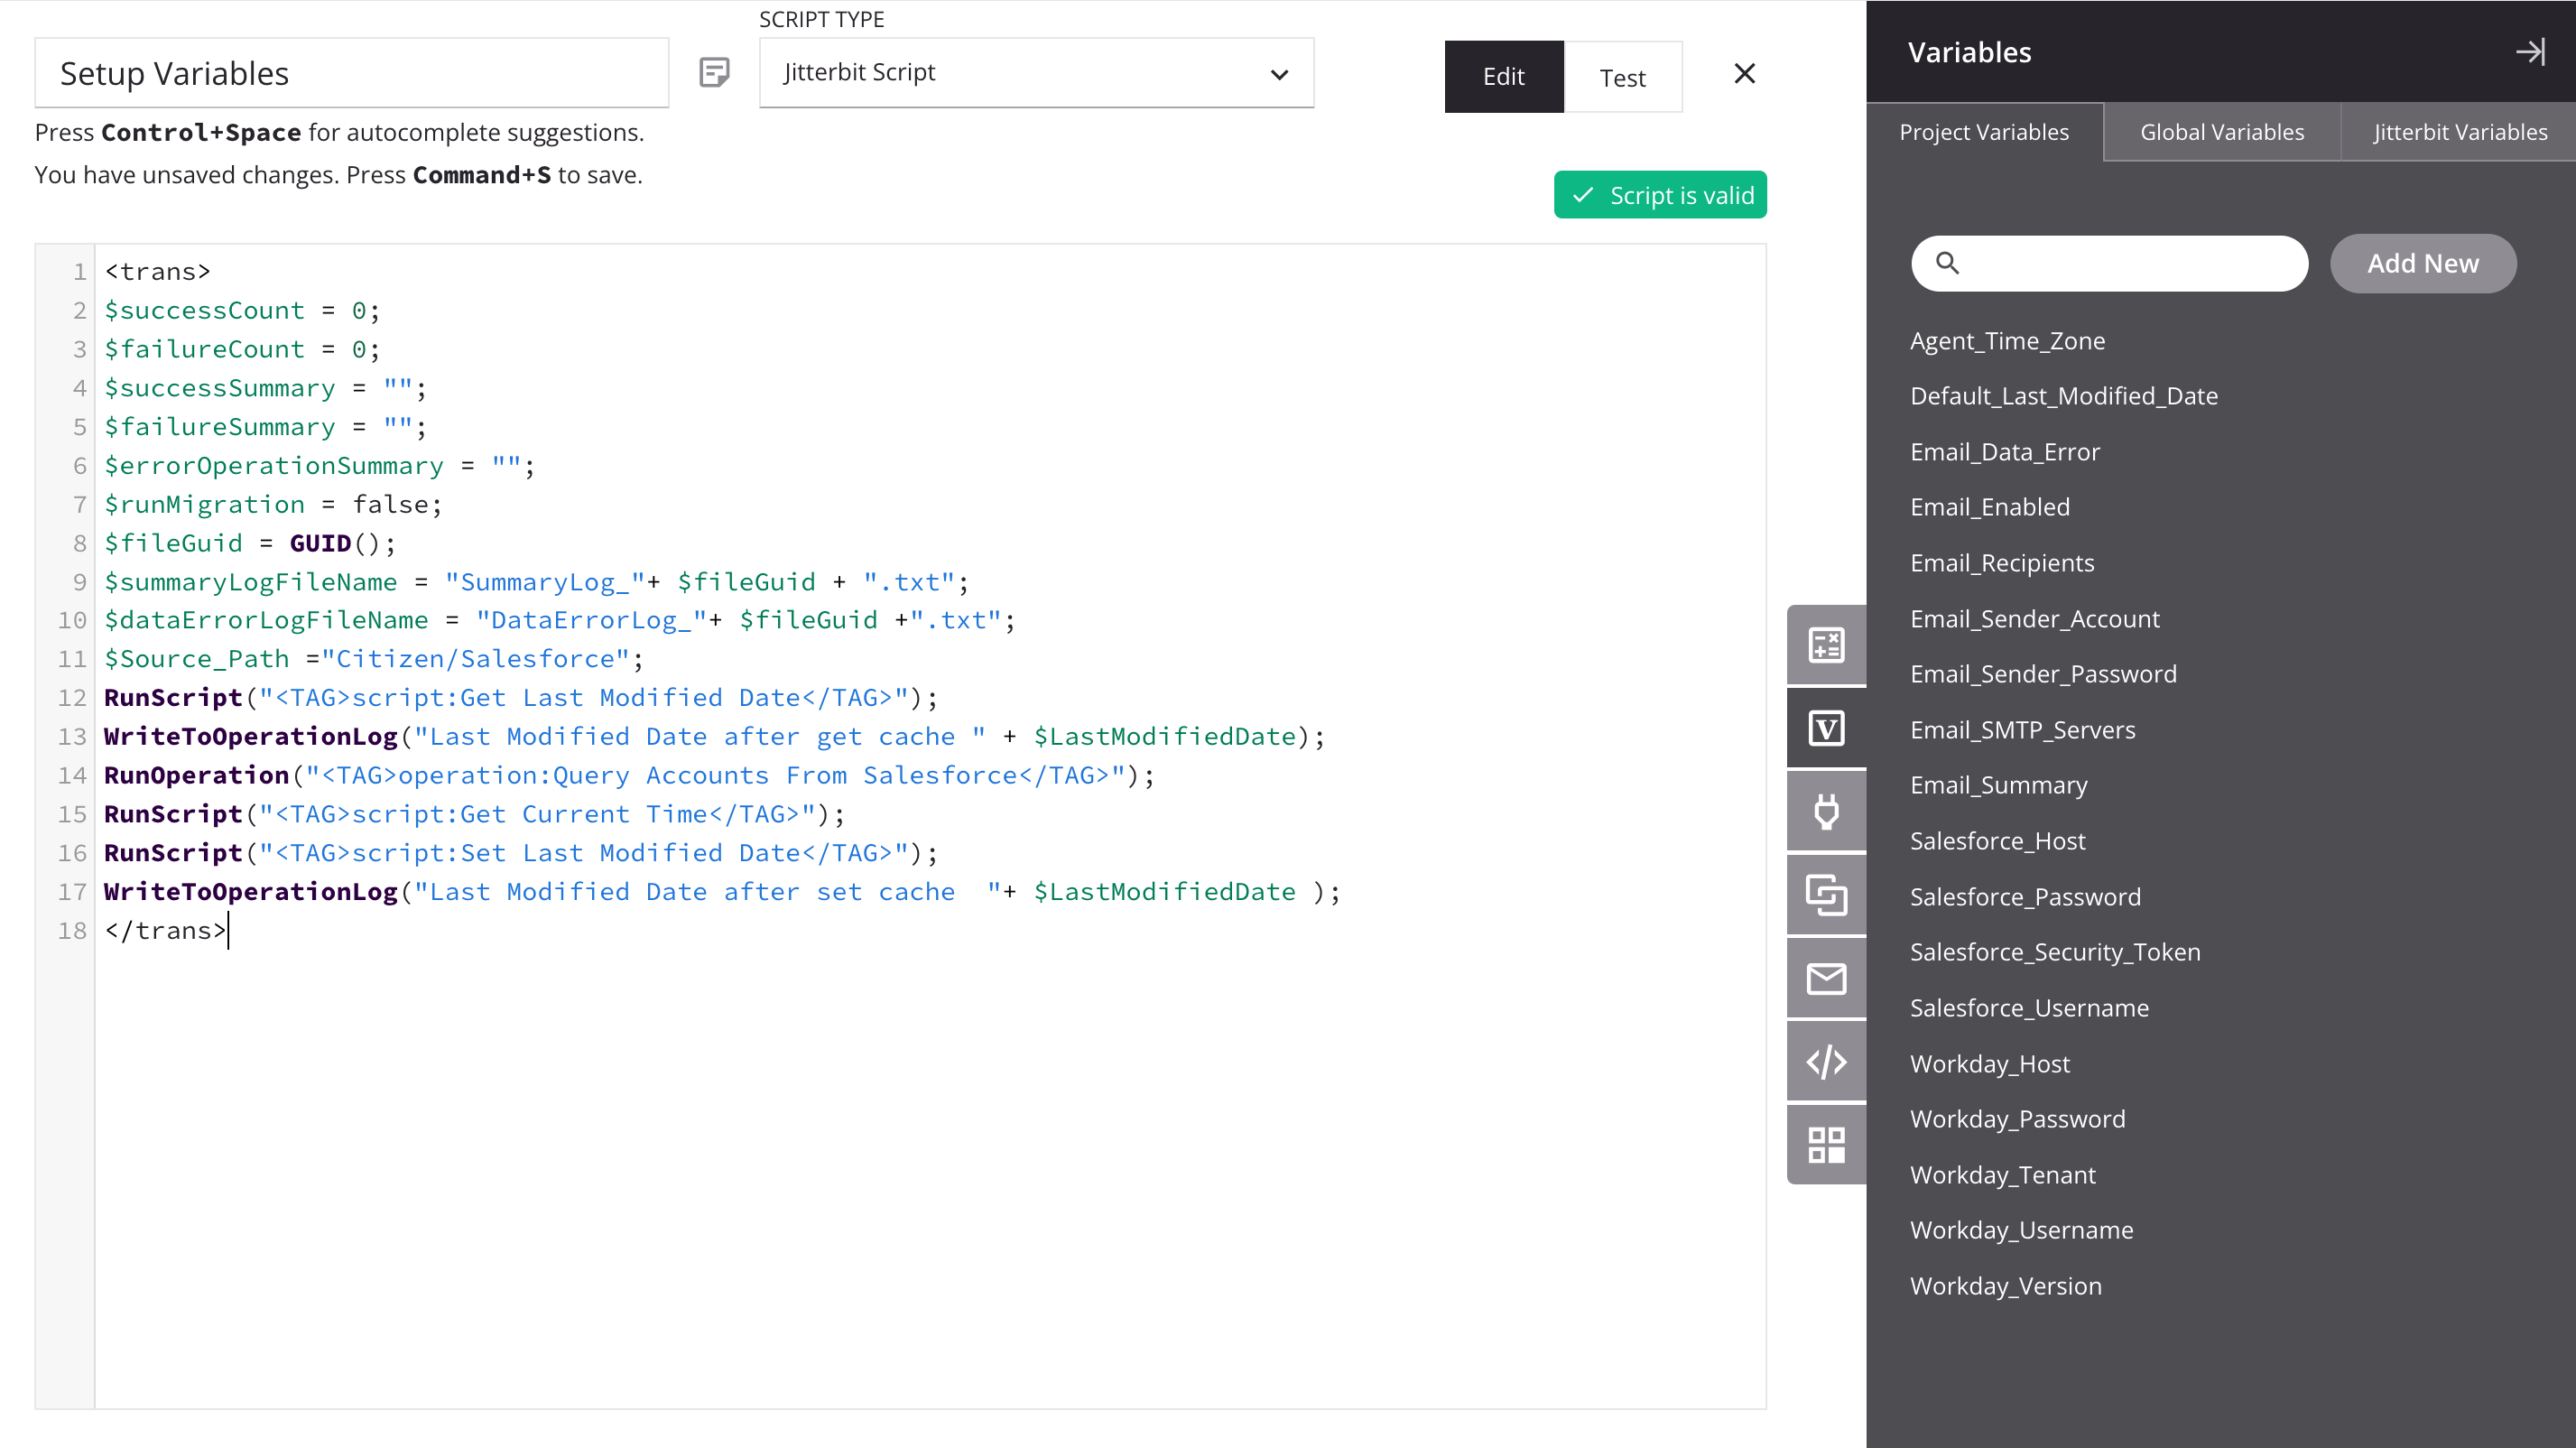
The page's tools and regions are mentioned throughout this page. They are identified in the image below:

Legend
① Rename a script
② Save status
③ Add notes
④ Select the script language
⑤ Toggle script modes
⑥ Find and replace
⑦ Shortcuts
⑧ Revert changes
⑨ Script validation
⑩ Script component palette
⑪ Script
Rename a script
When you create a new script, its default name is New Script. Subsequent new scripts with default names are appended with an incremented number in parentheses. Script names must be unique and must not contain forward slashes (/) or colons (:) to be valid.
To rename a script from within the script editor, click and edit the name field in the top left. Scripts can also be renamed from these locations:
- The project pane's Workflows tab (see Component actions menu in Project pane Workflows tab).
- The project pane's Components tab (see Component actions menu in Project pane Components tab).
- The design canvas (see Renaming workflows, operations, and operation steps in Design canvas).
Save status
After making changes to a script, save the script using Control + S (Windows or Linux) or Command + S (macOS).
If there are unsaved changes, an * asterisk is displayed next to the script name.
To learn more about auto-save, see Studio permissions, collaboration, and saving.
Add notes
You can add custom notes to a script that serve as documentation or reminders for yourself or project collaborators.
To add a note, click the note icon next to the script name and save status fields. An editable area opens, where you can enter the text of your note. Click Post to add the note to the script.
Your posted note is displayed, along with your name and a timestamp. Anyone with edit access to the script can remove notes by clicking the remove icon . To close the note, click another part of the interface. When one or more notes are present, an orange dot is displayed on the note icon:
Select the script language
Scripts created as a project component open in Jitterbit Script language by default. The language can be changed to JavaScript using the Script Type menu.
Scripts created within a transformation, either on a target field or on a node, are limited to Jitterbit Script language.
Toggle script modes
Scripts are opened in edit mode by default. To open the script in test mode, use the Edit/Test toggle to select Test.
For further details, see Script testing.
Find and replace
You can find and replace text within the script area of the currently open script using the find and replace tool. Click Search or press Control + F (Windows or Linux) or Command + F (macOS) to open the tool:

- Expand: Click to expand the Replace options below the Find options. Control + H (Windows or Linux) or Command + H (macOS) automatically opens the find and replace tool in this expanded state.
-
Find: Enter a string to search for in the script area. The search string is handled differently depending on the selected modifiers:
- Match case: Click to enable case-sensitive matching.
- Match word: Click to enable word matching, which excludes partial word matches from the results.
-
When searching, the Result navigator shows the number of matching results within the script area. It includes Previous and Next buttons for search result navigation.
-
Replace: Enter a string to replace matched results with. The following buttons control how the replace string is applied:
- Replace: Click to replace the search result currently selected in the Result navigator.
- Replace all: Click to replace all search results at once.
-
Close: Click to close the find and replace tool.
Shortcuts
Click Shortcuts or press Control + Shift + / (Windows or Linux) or Command + Shift + / (macOS) to reveal a shortcut reference popup that lists various shortcuts explained on this page.
Revert changes
You can revert all changes made in the currently open script to a rollback point created when the script editor was last opened in the current session, regardless of save status. Closing and reopening a script editor for a script will create a new rollback point.
This is useful for testing script possibilities and then restoring the script to its state before editing.
Click Restore to open the Revert Changes dialog:
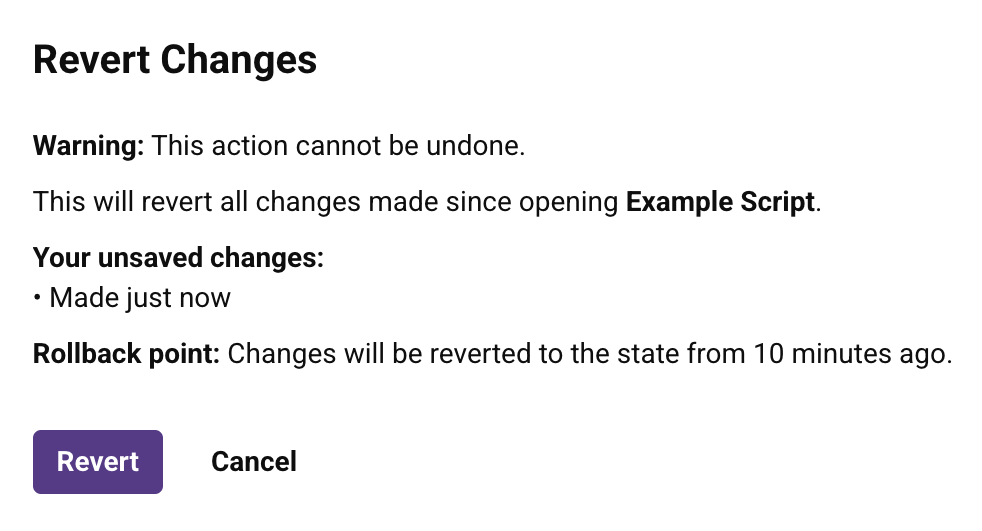
Click Revert to revert the changes to the identified Rollback point or Cancel to close the dialog.
Script validation
The validation of a script is checked with every keystroke.
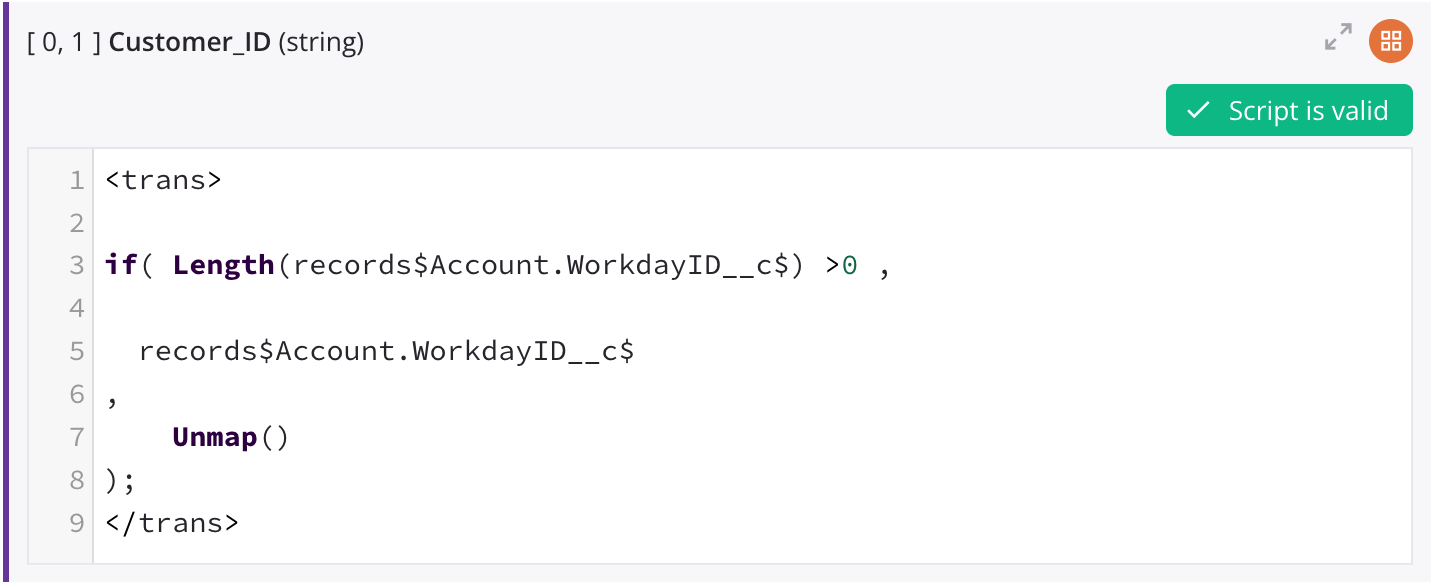
When a script is valid, a Script is valid message is displayed in green:

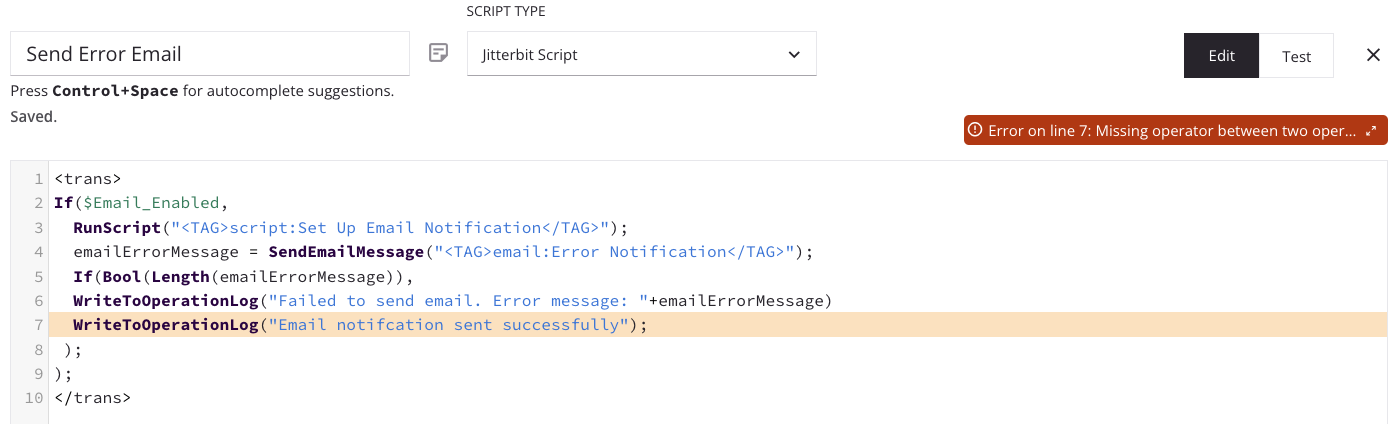
When an error is detected, a truncated error message is displayed in red with the script line containing the error highlighted. To view the entire error message, click the expand icon . The full error message opens in a dialog:
The error message dialog can be resized by clicking and dragging the bottom left corner of the dialog.
Script component palette
The script component palette is one of two types of component palettes. (The other type is the design component palette.)
The script component palette's tabs provide access to various components that can be used within a script:
To collapse the script component palette, click the collapse icon located in the top right of the palette. When collapsed, you can expand the script component palette by clicking on one of the palette's tabs.
To search within a tab, use the search box to enter a single keyword or keyword string. To clear the search, click the remove icon .
Each script component palette tab is summarized below, with additional details provided in Jitterbit Script or JavaScript depending on the language.
| Tab | Description |
|---|---|
| Source Objects | The Source Objects tab is present only for scripts created within a transformation. As this script type is limited to those using Jitterbit Script language, referencing source objects in scripts written in JavaScript is not applicable. Within a transformation script, you can reference source data by inserting a field's reference path, or you can reference source data nodes by inserting a node's reference path. To add a field or node reference path to a transformation script (Jitterbit Script only), use one of these methods:
|
| Functions | The Functions tab provides a list of functions available to use in a script for the language selected in the script (either Jitterbit Script or JavaScript). Within a script, you can use functions by inserting the function syntax appropriate for the script language. To add the function syntax to a script (Jitterbit Script or JavaScript), use one of these methods:
|
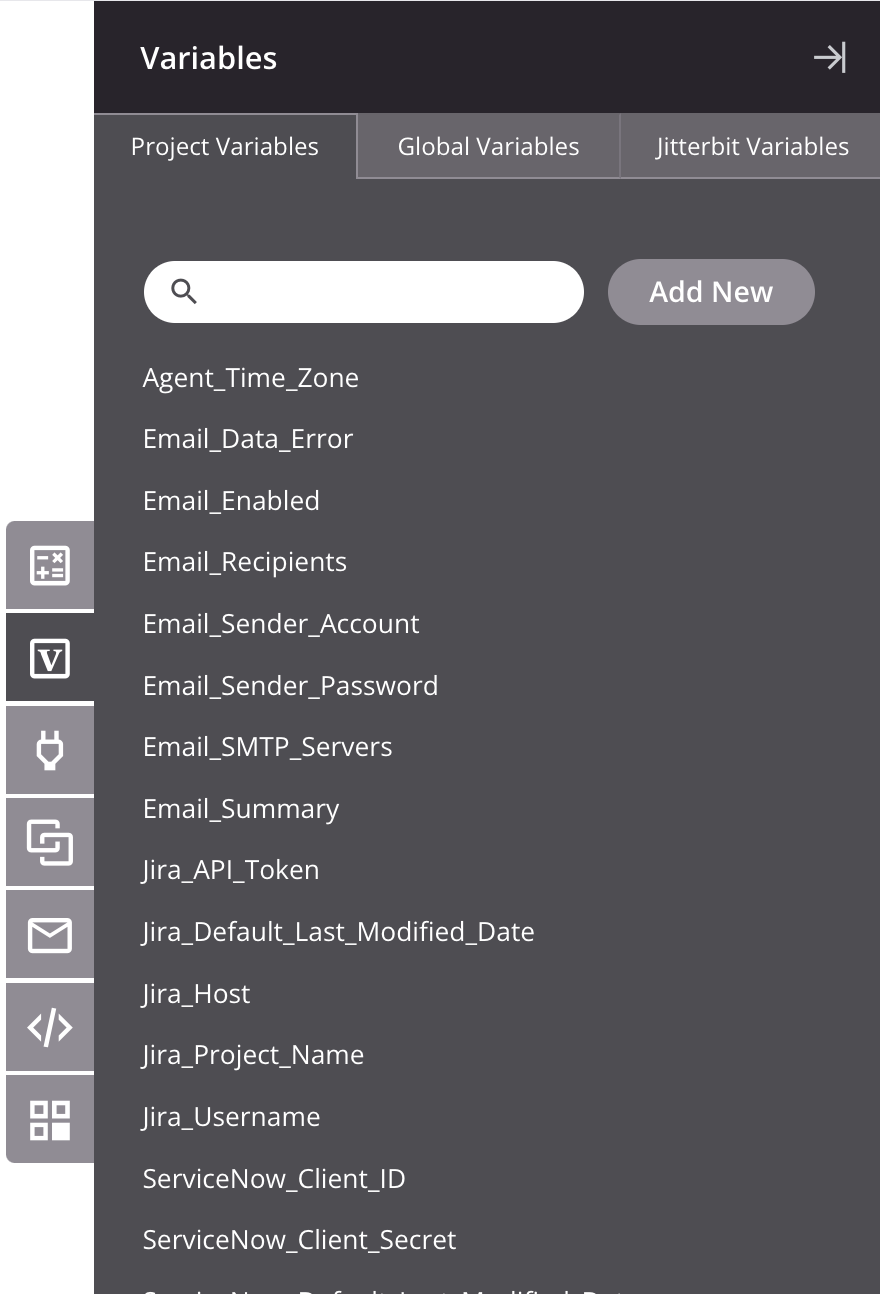
| Variables | The Variables tab provides access to variables that are available to reference globally throughout a project, including global variables, project variables, and Jitterbit variables. Depending on the variable, the following icons are available:
You can click the name of any component to open its configuration screen while preserving your current component palette context. Within a script, you can use variables by inserting the variable syntax. To add the variable syntax to a script (Jitterbit Script or JavaScript), use one of these methods:
|
| Plugins | The Plugins tab provides a list of plugins that can be run inside a script. Within a script, you can use a plugin as an argument for the RunPlugin function by inserting the plugin reference path. To add a plugin reference path to a script (Jitterbit Script only), use one of these methods:
|
| Operations | This tab provides a list of operations in the project that are available to reference in a script. Within a script, you can use an operation as an argument for functions by inserting the operation reference path. To add an operation reference path to a script (Jitterbit Script only), use one of these methods:
|
| Notifications | The Notifications tab provides a list of notifications in the project that are available to reference in a script. Within a script, you can reference a notification as an argument for the SendEmailMessage function by inserting the notification reference path. To add a notification reference path to a script (Jitterbit Script only), use one of these methods:
|
| Scripts | The Scripts tab provides a list of all other standalone project component scripts in the project — written in either Jitterbit Script or JavaScript — that are available to reference in a script. Within a script, you can reference another script as an argument for the RunScript function by inserting the script reference path. If a script contains project or global variables, an Expand/Collapse button will be visible. Click to view or hide the list of project and global variables present in that script. To add a script reference path to a script (Jitterbit Script only), use one of these methods:
Note While a Jitterbit Script can call a JavaScript, the reverse is not true. A Jitterbit JavaScript cannot call another script of any language. |
| Endpoints | The Endpoints tab provides a list of endpoints in the project that are available to reference in a script. Within a script, you can reference endpoints as an argument for functions by inserting the connection or activity reference path. To add a connection or activity reference path to a script (Jitterbit Script or JavaScript), use one of these methods:
For additional details, see Endpoints in Jitterbit Script or Endpoints in JavaScript. |
Script area
The script area is the text area where you enter a script using the appropriate language: Jitterbit Script or JavaScript.
In Jitterbit Script, scripts must be enclosed within a <trans> opening tag and </trans> closing tag, unless using functions that specifically call for code to be placed outside of these tags, such as several Database functions.
In JavaScript, scripts must be enclosed within a <javascript> opening tag and </javascript> closing tag.
These are the main features of the script area:
-
Line numbering: Line numbers are displayed along the left margin of the script area.
-
Syntax highlighting: Different colors are used to distinguish the different parts of an expression, such as function names, strings, and variables. When using Jitterbit Script, variable colors are based on their type:
-
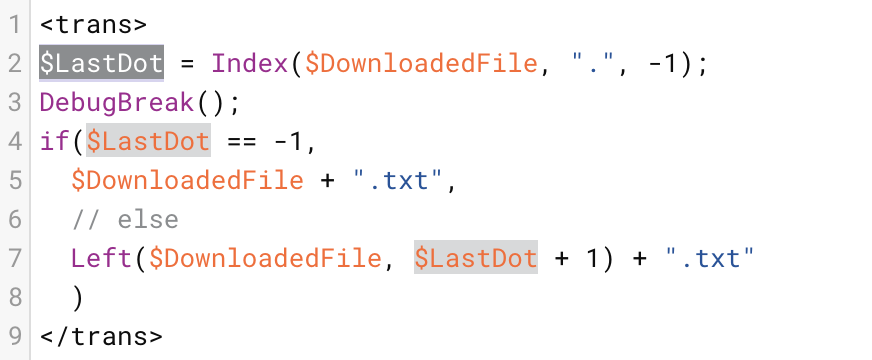
Variable name highlighting: If you double-click a variable's name in the script area, all references to it are highlighted for visibility:
-
Bracket highlighting: If you place the cursor immediately before or after a bracket that is part of a set of opening and closing brackets, each bracket of the set is displayed with a border around the bracket to highlight the set. These sets of brackets are highlighted:
(),[],{}. -
Drag-and-drop: Drag components from the component palette and drop them into the script area or a target field to automatically insert them with proper syntax. Visual indicators show where you can drop the component.
-
Auto-validation: Harmony provides basic syntax checking and highlighting of lines with errors. If the script passes basic syntax validation, a line below the script area reads Script is valid. If the script does not pass basic syntax validation, specific error information is provided here one line at a time. That is, after resolving an error on one line, additional syntax errors to resolve may be reported for subsequent lines.
-
Auto-completion: As you type, autocomplete suggestions are displayed. If the suggestions are hidden, press Control + Space to reveal them again. You can navigate through the list using the keyboard arrow keys and press Enter or Tab to insert the suggestion into the script area.
-
Code commenting: When a complete line or multiple lines of code are selected, press Control + / (Windows or Linux) or Command + / (macOS) to apply comment formatting (
//) to the selected lines. -
Reference navigation: When script or operation references are present in a script area using the functions like
RunScriptorRunOperation, Control-click (Windows or Linux) or Command-click (macOS) the reference to navigate to it directly in the design canvas:
Note
Script area reference navigation automatically saves the current state of the script.
-
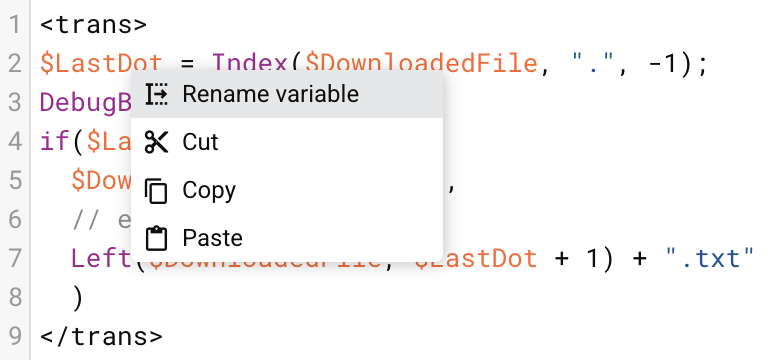
Smart variable renaming: Right-click a project or global variable's name in the script area to rename the selected variable and all existing references to it with the Rename variable option in the context menu that appears:
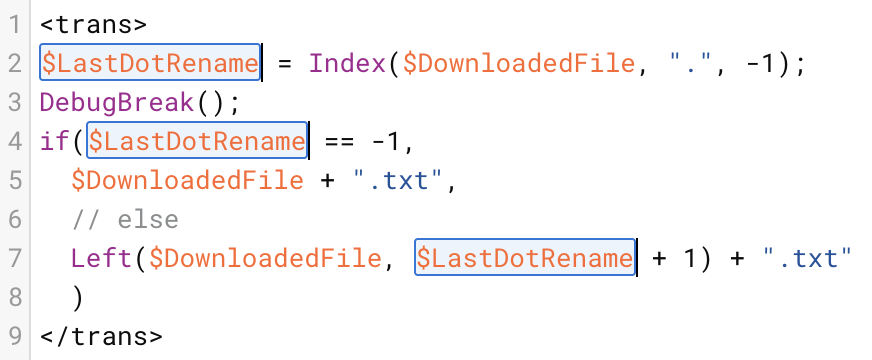
Click Rename variable to enable rename mode, highlighting all references to the selected variable for renaming:
Press Enter after renaming the selected variable to a valid name to show the Change variable name confirmation dialog:
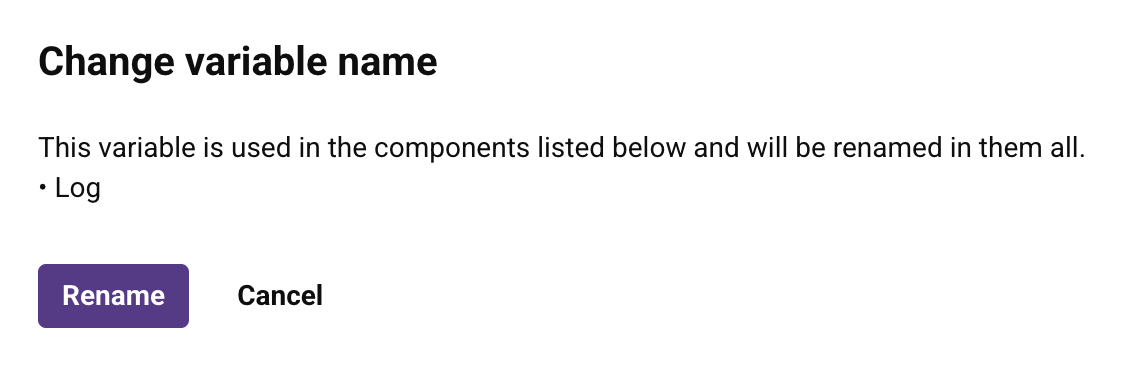
Click Rename to update all references in the currently open script and the other components listed in the confirmation dialog. This list may include other scripts and connector connections and activities.
Click Cancel to return to rename mode without committing any changes. To exit rename mode and restore the variable's previous name, click anywhere in the script area and press Escape.
In addition, standard browser features for controlling text font size may be used for accessibility.