Authentication prerequisites for the Google Drive connector in Jitterbit Studio
Introduction
These are the prerequisites for authenticating with the Google Drive connector using either a 3-legged OAuth 2.0 (3LO) client credential or a private key associated with a Google Cloud service account.
Note
Both authorization methods require Google Cloud Console access for configuration.
Agent version 10.83 / 11.21 or later is required to use 3-legged OAuth 2.0 authentication.
3-legged OAuth 2.0 (3LO)
Follow these steps to configure a 3-legged OAuth 2.0 (3LO) client:
-
In the Google Cloud Console, create a Google Cloud project or select an existing project for authentication.
-
Enable the Google Drive API for the selected project using the Google Drive API marketplace page.
-
Configure the OAuth consent screen for the selected project. For the Data Access > Add or Remove Scopes step, enter these Google Drive scopes:
Scope Activity https://www.googleapis.com/auth/driveAll https://www.googleapis.com/auth/drive.fileAll https://www.googleapis.com/auth/drive.metadataAll https://www.googleapis.com/auth/drive.metadata.readonlyList Files https://www.googleapis.com/auth/drive.meet.readonlyList Files https://www.googleapis.com/auth/drive.photos.readonlyList Files https://www.googleapis.com/auth/drive.readonlyGet File, List Files -
Navigate to APIs & Services > Credentials and click Create credentials > OAuth client ID to open the Create OAuth client ID configuration page:
-
Select Web application for Application type.
-
Enter any name for Name.
-
Add one of the following URLs (depending on your organization's region) to the Authorized redirect URIs list:
Region URL APAC https://apps.apac-southeast.jitterbit.com/design-studio/api/v1/oauth/authcodeEMEA https://apps.emea-west.jitterbit.com/design-studio/api/v1/oauth/authcodeNA https://apps.na-east.jitterbit.com/design-studio/api/v1/oauth/authcode
-
-
Click Create to generate the OAuth client and its credential file.
-
When complete, an OAuth client created dialog appears. Click Download JSON to download the JSON credential file containing the Client ID and Client secret for later use:
Example JSON credential file{ "web": { "client_id": "...", "project_id": "my-project-123456", "auth_uri": "https://accounts.google.com/o/oauth2/auth", "token_uri": "https://oauth2.googleapis.com/token", "auth_provider_x509_cert_url": "https://www.googleapis.com/oauth2/v1/certs", "client_secret": "...", "redirect_uris": [ "https://apps.my-region.jitterbit.com/design-studio/api/v1/oauth/authcode" ] } } -
Click OK to close the dialog. The newly generated credential is now shown under OAuth 2.0 Client IDs.
Configure an app registration in the Management Console
Follow these steps to configure required values for a Management Console private application app registration:
-
Gather the required information from the JSON credential file downloaded when configuring the Google Drive OAuth client above:
- Client ID (
client_id) - Client secret (
client_secret) - Authorization URL (
auth_uri) - Access token URL and refresh token URL (
token_uri)
- Client ID (
-
In the app registration's configuration, enter these Google Drive scopes:
Scope Activity https://www.googleapis.com/auth/driveAll https://www.googleapis.com/auth/drive.fileAll https://www.googleapis.com/auth/drive.metadataAll https://www.googleapis.com/auth/drive.metadata.readonlyList Files https://www.googleapis.com/auth/drive.meet.readonlyList Files https://www.googleapis.com/auth/drive.photos.readonlyList Files https://www.googleapis.com/auth/drive.readonlyGet File, List Files -
Set the app's Client ID to the
client_idvalue in your credential file. -
Set the app's Client Secret to the
client_secretvalue in your credential file. -
Set the app's Authentication URL to the
auth_urivalue in your credential file. For example,https://accounts.google.com/o/oauth2/auth. -
Set the app's Access token URL and Refresh token URL to the
token_urivalue in your credential file. For example,https://oauth2.googleapis.com/token. -
Go to Advanced options. In the Authentication request tab, create these key-value pairs under Parameters:
Key Value Send in response_typecodeRequest URL access_typeofflineRequest URL
Once the private application is registered on the App Registrations page, it is available to be selected in the OAuth application menu in the Google Drive connection when using the OAuth authentication option.
Private key authentication with a service account
Follow these steps to create a service account and grant roles to provide access to the Google Cloud project to be used with the Google Drive connector:
-
In the Google Cloud Console, create a Google Cloud project or select an existing project for authentication.
-
Enable the Google Drive API for the selected project using the Google Drive API marketplace page.
-
In the navigation menu, navigate to IAM & Admin > Service Accounts.
-
Click Create Service Account, located along the top of the page.
-
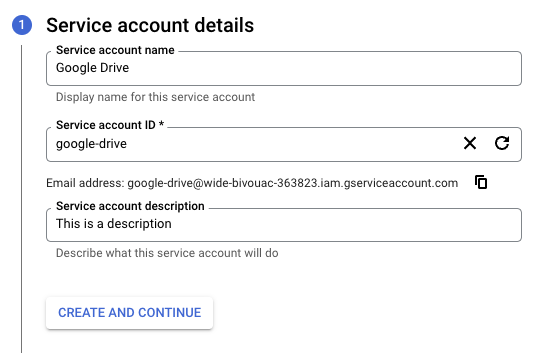
Enter the Service account details:
-
Service account name: Enter any string for the service account name.
-
Service account ID: This field is automatically populated to match the Service account name and can be edited, if desired.
-
Service account description: Enter a description for the service account.
-
-
Click Create and Continue.
-
Assign a role to allow access to the project (required for a successful connection in the Google Drive connector):
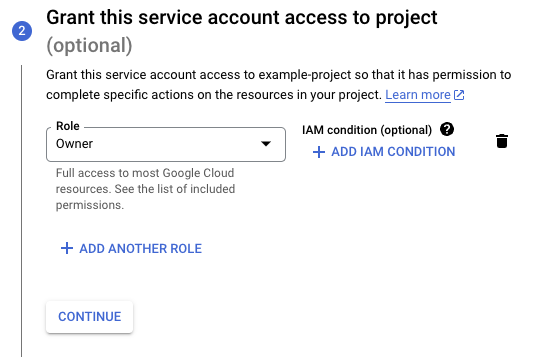
- Role: Using the menu, select Owner as the Role, then click Continue.
-
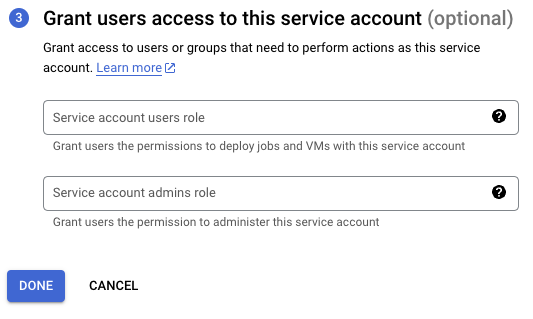
Optionally, grant access to the service account to specific users:
-
Click Done.
Note
To use the List files activity, you must separately grant access to these Google Drive scopes:
https://www.googleapis.com/auth/drive
https://www.googleapis.com/auth/drive.file
https://www.googleapis.com/auth/drive.readonly
https://www.googleapis.com/auth/drive.metadata.readonly
https://www.googleapis.com/auth/drive.metadata
https://www.googleapis.com/auth/drive.meet.readonly
https://www.googleapis.com/auth/drive.photos.readonly
Obtain service account credentials
Follow these steps to obtain the credentials required for connection configuration:
-
On the Service accounts page, click the Actions menu for the service account created above, then click Manage keys.
-
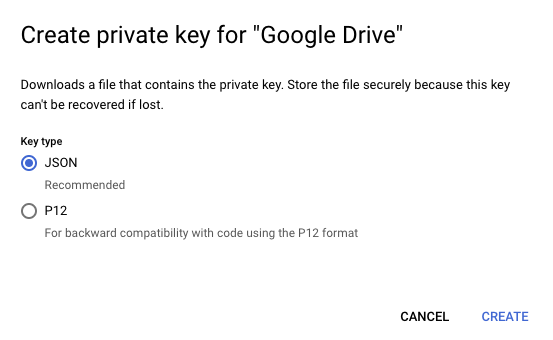
Click Add Key > Create new key, select JSON as the Key type, and then click Create to download the JSON file to your computer:
-
Open the downloaded JSON file in a text editor and retain the values of the
project_id,client_email, andprivate_keyto be used during connection configuration.