How to change button icon from solid to regular fill in Jitterbit App Builder
Overview
App Builder ships with Icon images that use the Solid icon state by default, meaning the icon appears with a solid fill. You can configure Theme information to override this and use the Regular icon state instead, so the icon appears as an outline of the shape without a fill. See Icon categories for the other icon sets available when selecting an icon.
The following examples show the same address-card icon on a Button control in each state:
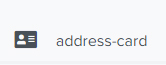
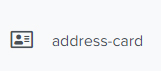
Change a button icon to a regular fill
To switch a Button control's icon from Solid to Regular, add a font weight style to the control and then override that style's weight, so the icon renders as an outline instead of a solid fill:
-
Navigate to the area of your application where you want to include the icon, and add it as you typically would. For example, select the
address-cardicon for a button named Test Button. -
Go to Action Drawer > Live Designer.
-
Select the control with the icon you want to modify.
-
Click More and select Styles.
-
Click + Style.
-
Select Font from the Style Categories panel, so the style list narrows to font-related options.
-
Locate Font Weight 400 from the Style panel and click + Add. This adds a font weight style to the control that you can then edit.
-
Click x to exit the Style screen.
-
Click the Open record icon for the style you just created, to open its full record.
-
Click the Edit Style button.
-
Select Controls from the Components panel, since you're styling a control rather than a page or panel.
-
Click Create under Styles.
-
Select Icon from Button as the Area, so the style targets the icon shown on a Button control specifically.
-
Select Font as Style Type, to match the Font Weight property you're about to set.
-
Set Font Weight to normal. This overrides the 400 weight added in step 7, which is what changes the icon from solid to regular.
-
Click Save.
-
Exit out of Style Settings and return to the Application UI Layer. Refresh the application view to confirm the icon now appears in its Regular state.