Alerts page in Jitterbit Management Console
Overview
| Purpose | Manage alerts sent to Harmony users |
| Location | Harmony portal menu > Management Console > Alerts |
| Page access | Users with Admin role permission |
Introduction
You can set up alerts to be sent to registered Harmony users and external recipients when certain events occur:
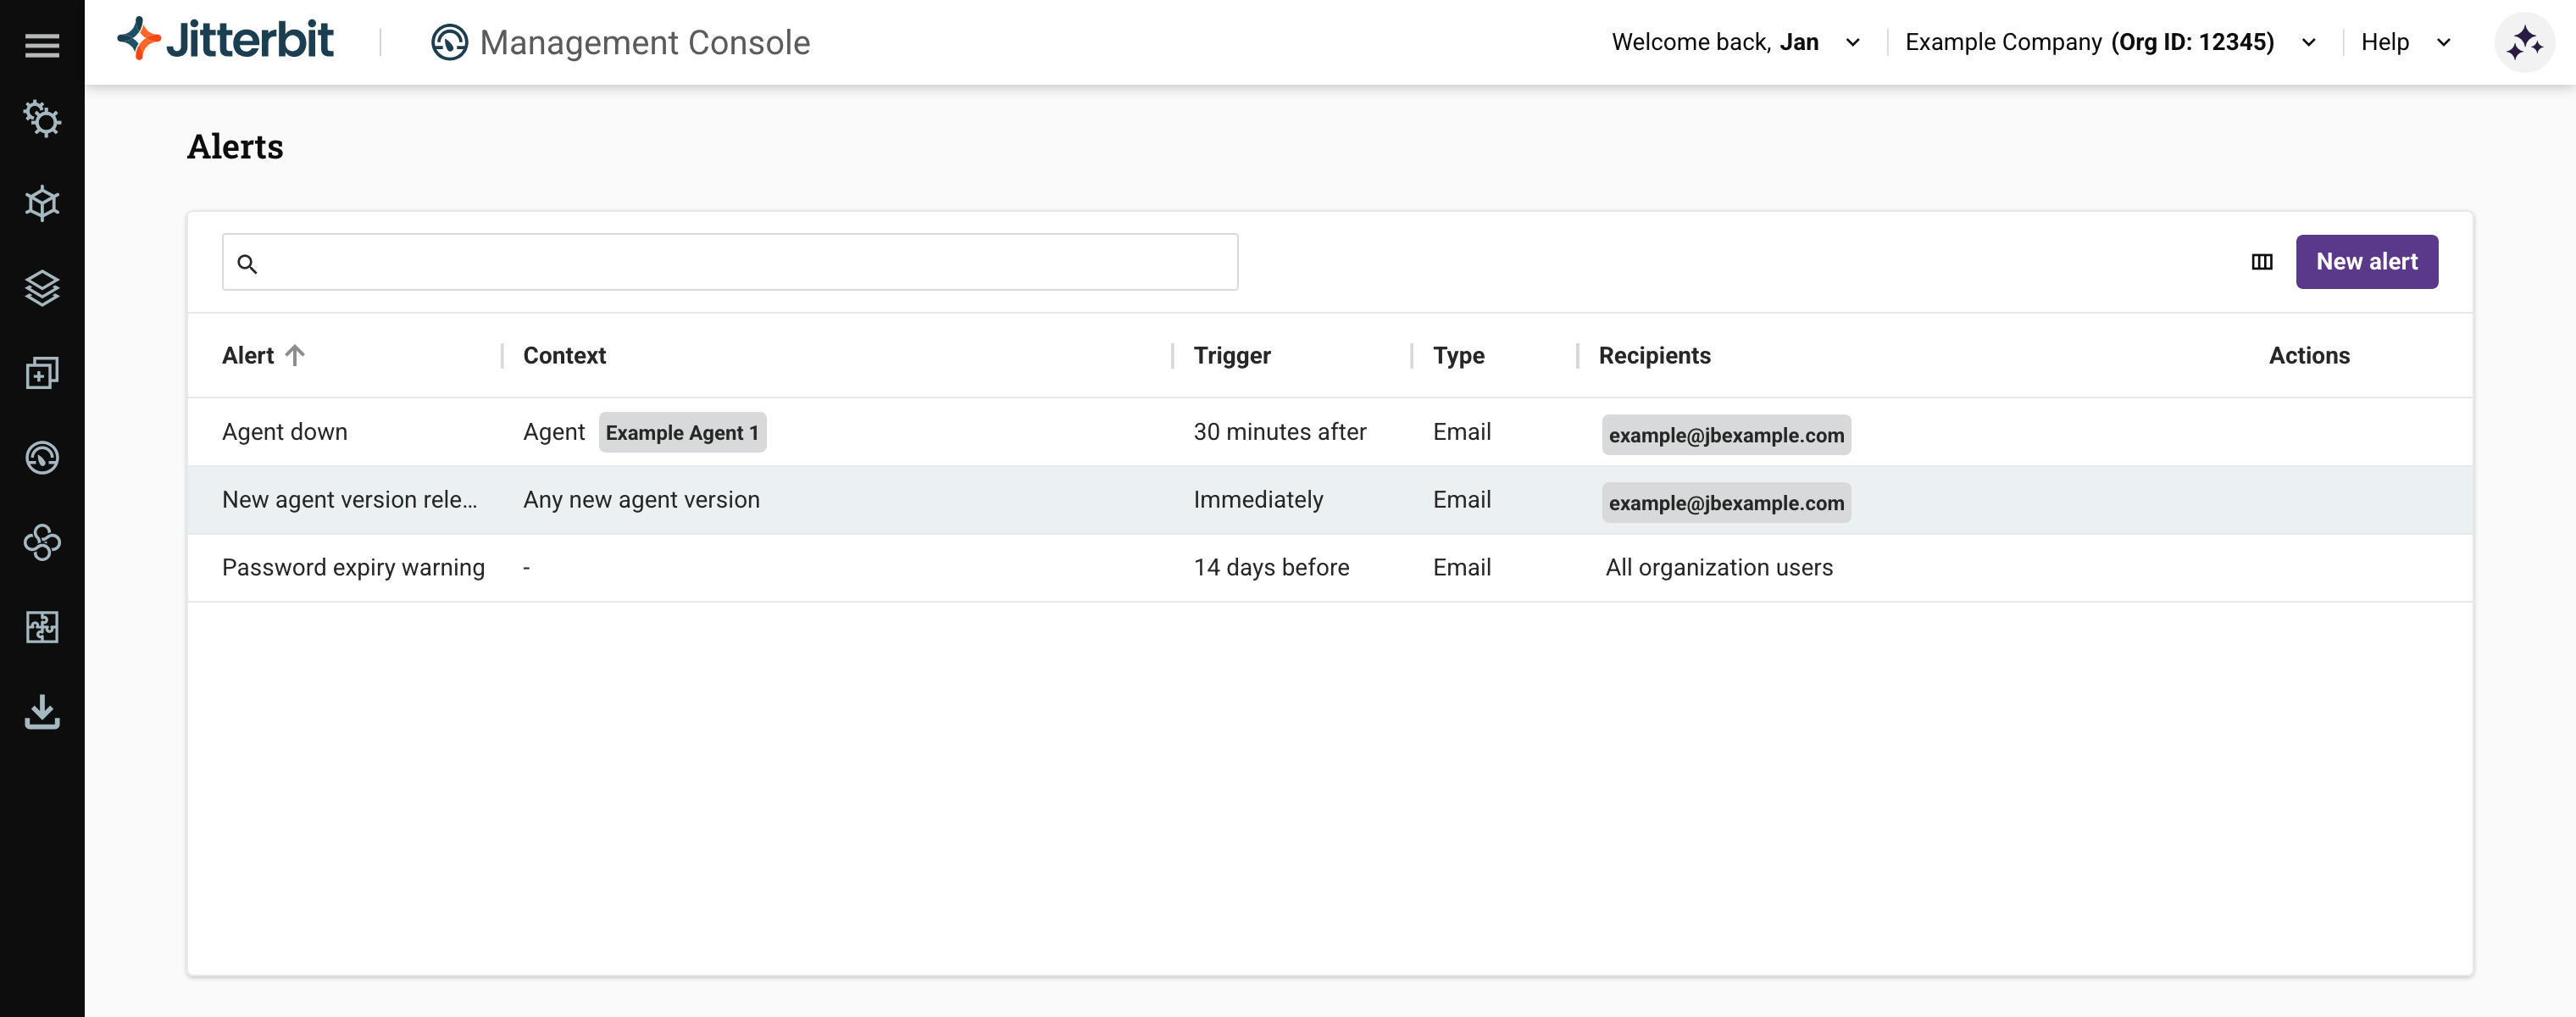
The available events are as follows:
-
Agent down: Alert selected users when a private agent is down for a specified duration.
-
Cloud logging status changed: Alert selected users when Cloud logging is enabled or disabled for a private agent group.
-
New agent version released: Alert selected users when a new version of the private agent software is available for download on the Harmony Downloads page. (The alert is sent regardless of which private agent versions you have running on your systems.) The check for a new available version is made every 24 hours.
-
Password expiry warning: Alert any user in the currently selected Organization when their Harmony password is set to expire within a defined number of days. (Users are not alerted if they are already inactive or have expired passwords at the time the alert is added.)
-
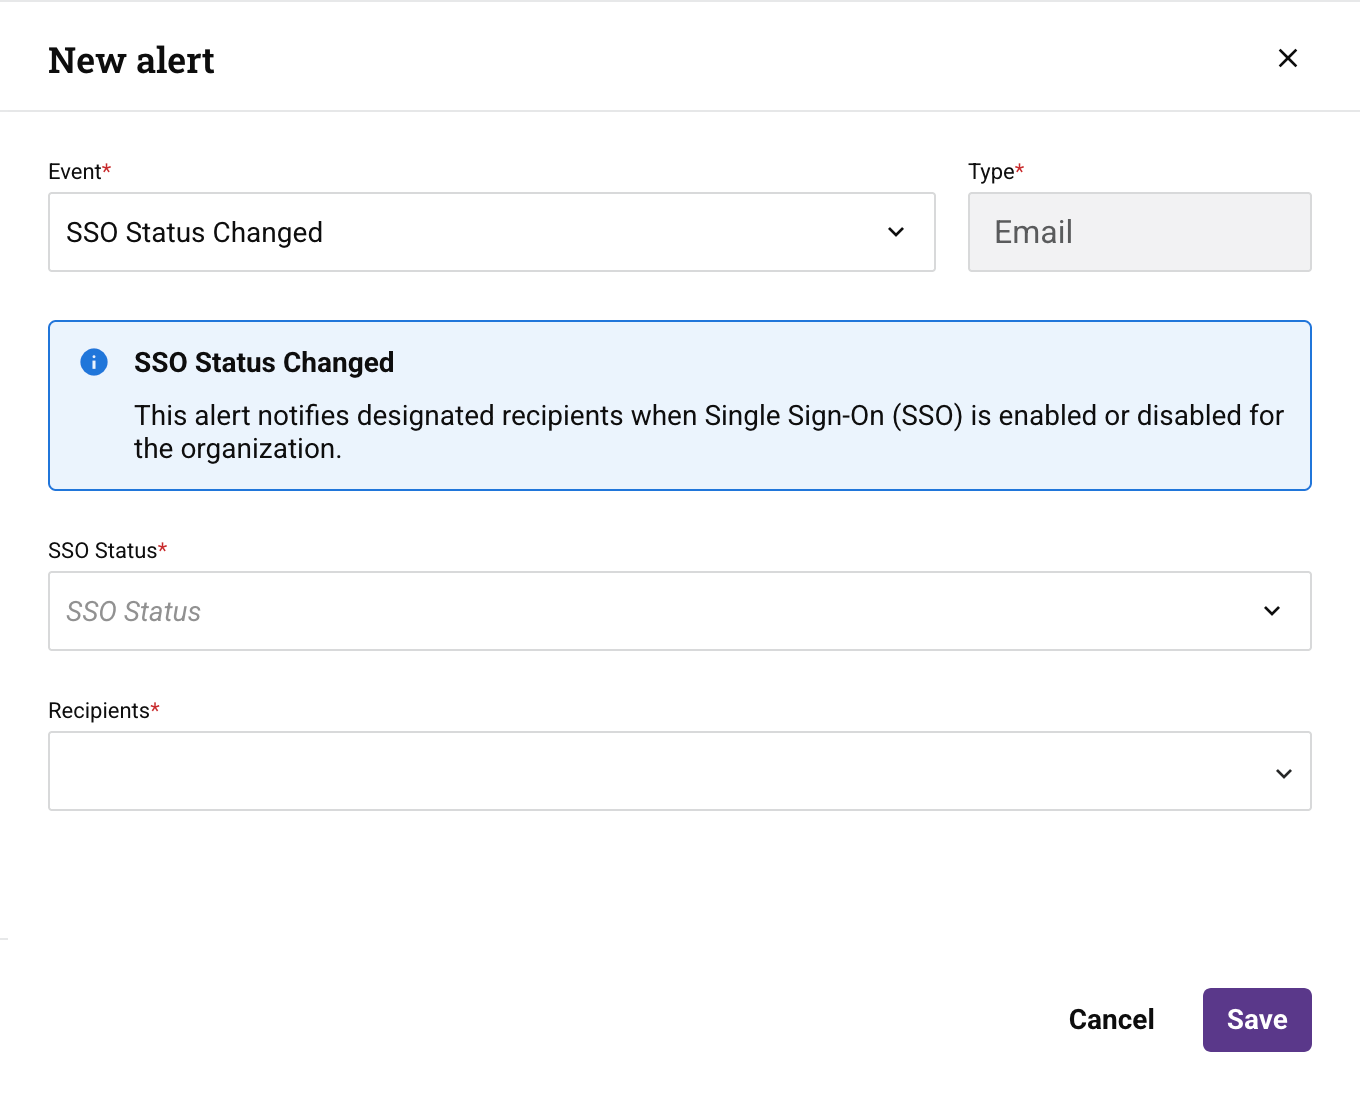
SSO Status Changed: Alert users with Admin role permission when Single Sign-On (SSO) is enabled or disabled for the organization. This alert is present by default for every organization, so no setup is required to start receiving these notifications.
An alert's Recipients field can include both registered Harmony users and external recipients: email addresses entered manually that are not associated with a Harmony user account. External recipients receive only the alert email notification. Adding an external recipient does not grant them a Harmony user account or any platform access, and they do not receive an account activation or password-reset email.
To open the Alerts page, use the Harmony portal menu to select Management Console > Alerts.
The page contains the following:
-
A toolbar, with these controls:
-
Search: Search for alerts by any column's value (except for Actions).
-
Filter Columns: Open the Columns drawer, to rearrange columns, or change their visibility.
-
Add an alert
To add an alert, follow these steps:
-
Click the New Alert button. The New alert drawer opens.
-
In the New alert drawer, set values for the following fields:
-
Event: Open the menu, then select one of Agent down, Cloud logging status changed, New agent version released, Password expiry warning, or SSO Status Changed. Different fields appear depending on your choice:
-
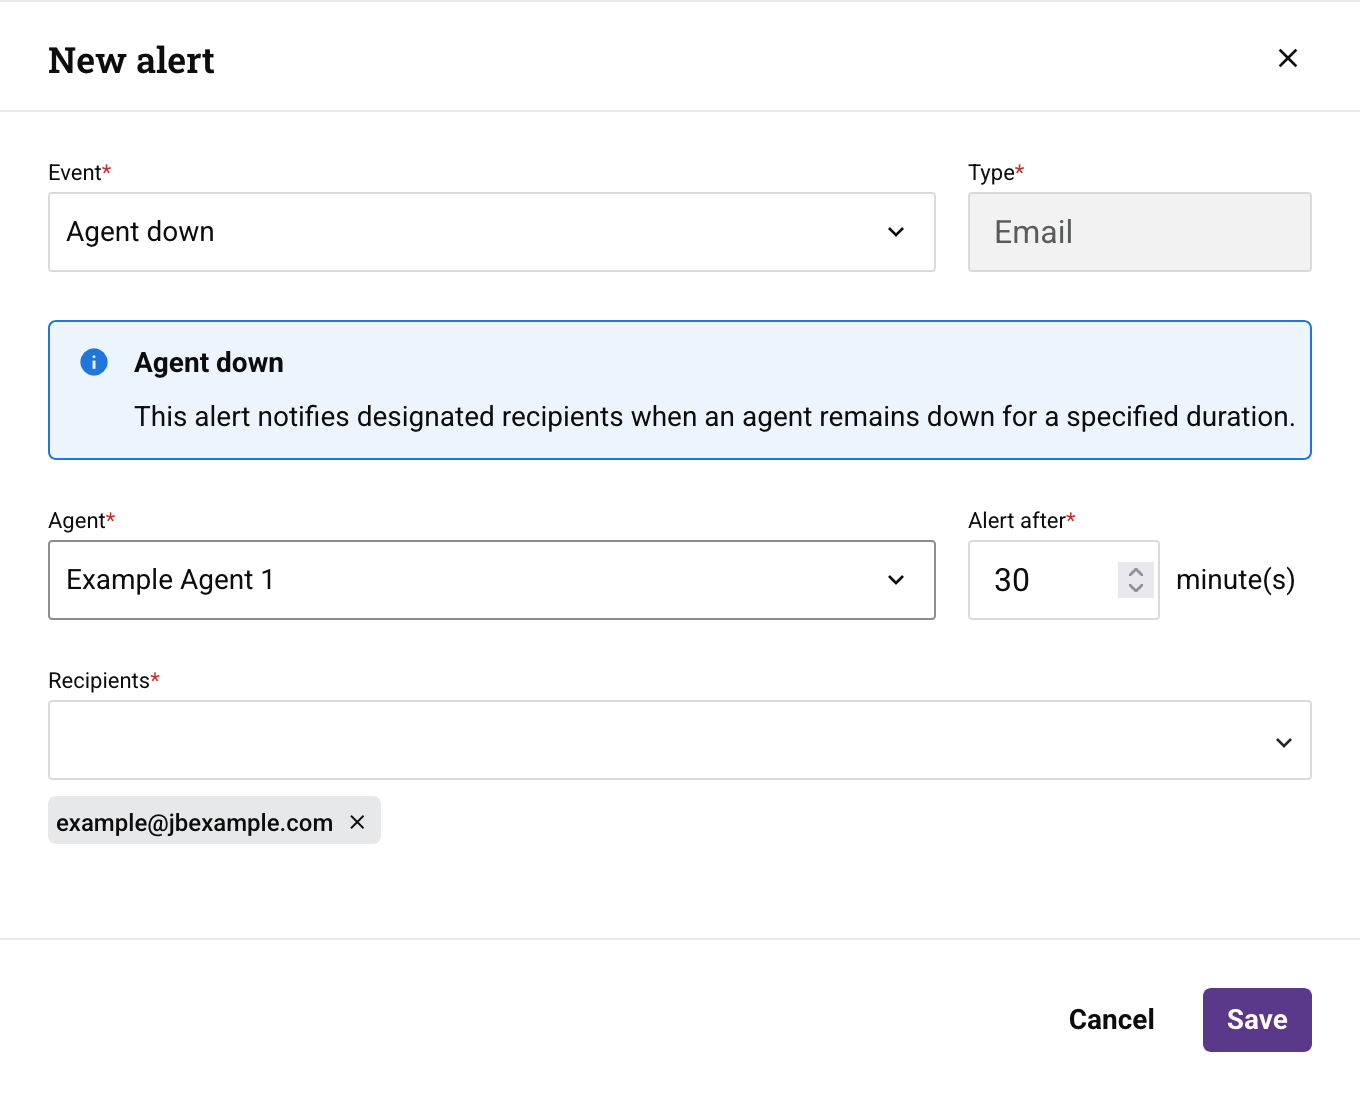
For Agent down:
-
Agent: Open the menu, then select the private agent to monitor. (To monitor additional agents, create individual alerts for them.)
-
Alert after: Enter how many minutes (from 6 to 1440) the agent is down before an alert is sent. If the agent remains down after the first alert, one or two additional alerts are sent at the same interval, for a maximum of three alerts in sequence.
-
Recipients: Open the menu to select registered Harmony users, or manually enter an email address to add an external recipient. Up to 10 recipients total, including any external recipients, can receive the alert.
-
-
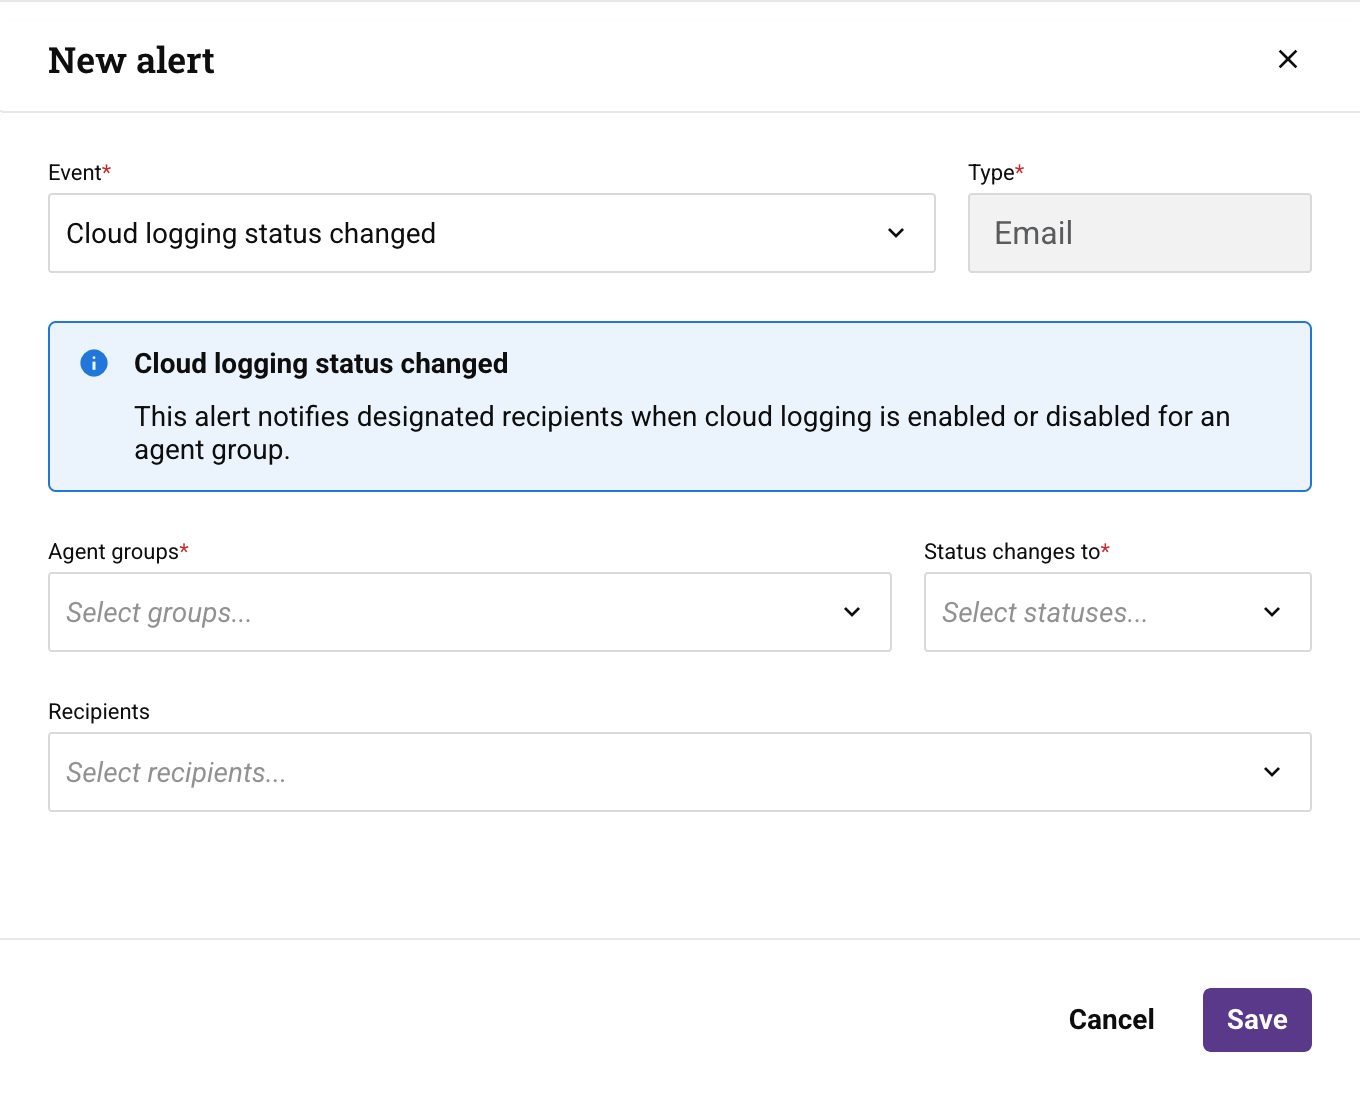
For Cloud logging status changed:
-
Agent groups: Open the menu, then select which private agent groups to monitor.
-
Status changes to: Select which Cloud logging status changes to monitor for the selected private agent groups:
-
Enabled: Select to send an alert when Cloud logging is enabled.
-
Disabled: Select to send an alert when Cloud logging is disabled.
-
-
Recipients: Open the menu to select registered Harmony users, or manually enter an email address to add an external recipient. Up to 10 recipients total, including any external recipients, can receive the alert.
-
-
For New agent version released:
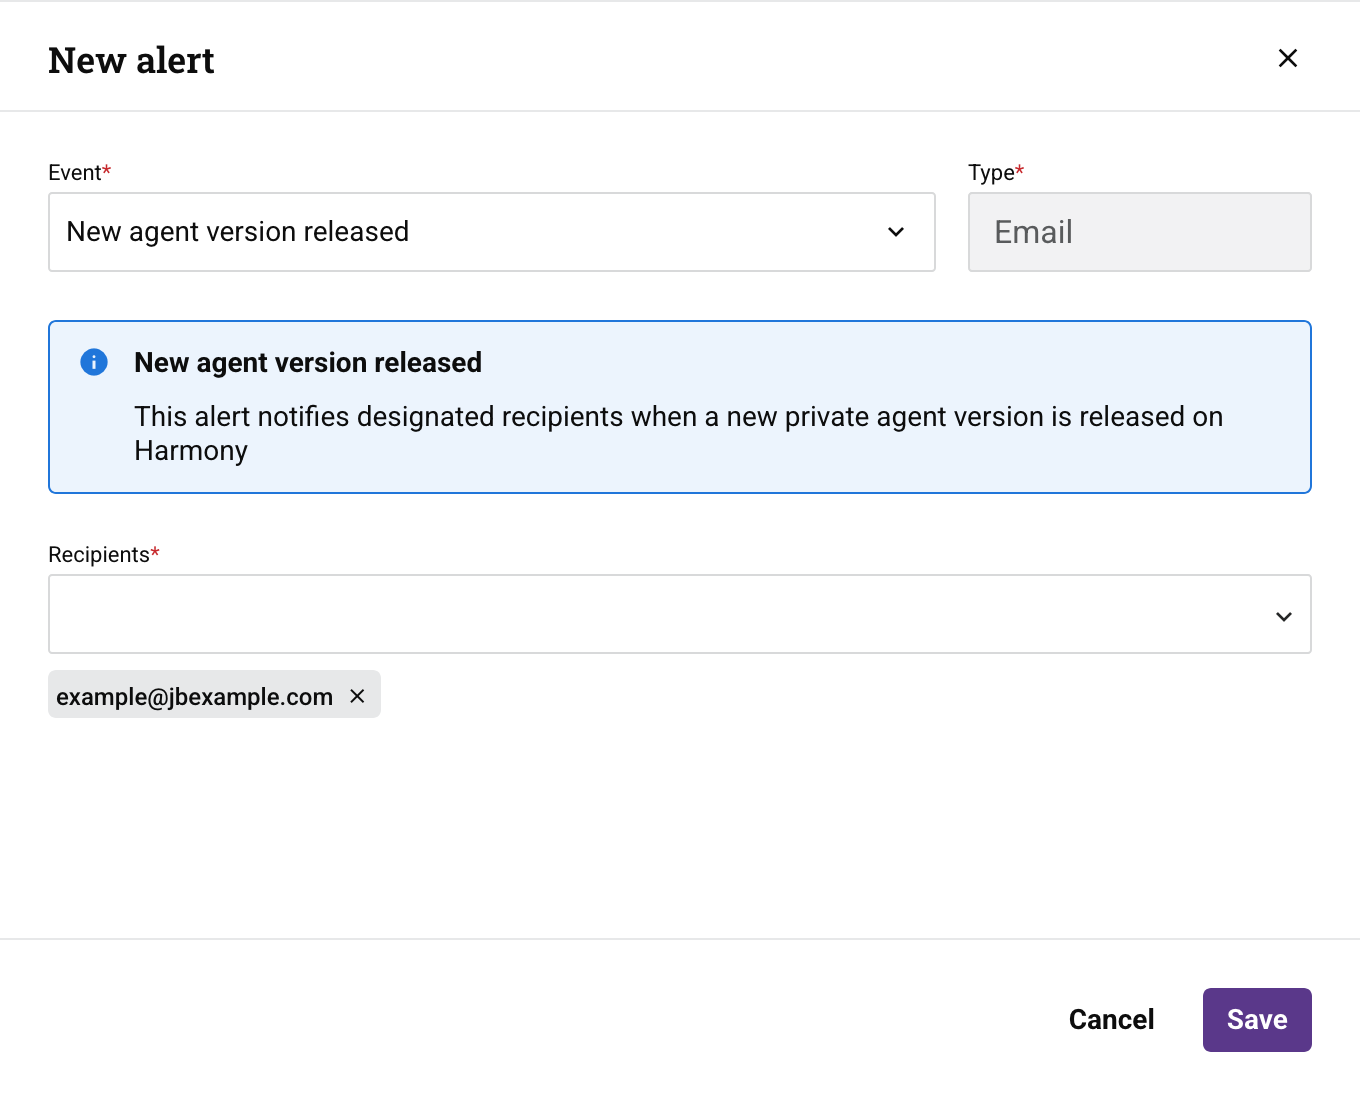
- Recipients: Open the menu to select registered Harmony users, or manually enter an email address to add an external recipient. Up to 10 recipients total, including any external recipients, can receive the alert.
-
For Password expiry warning:
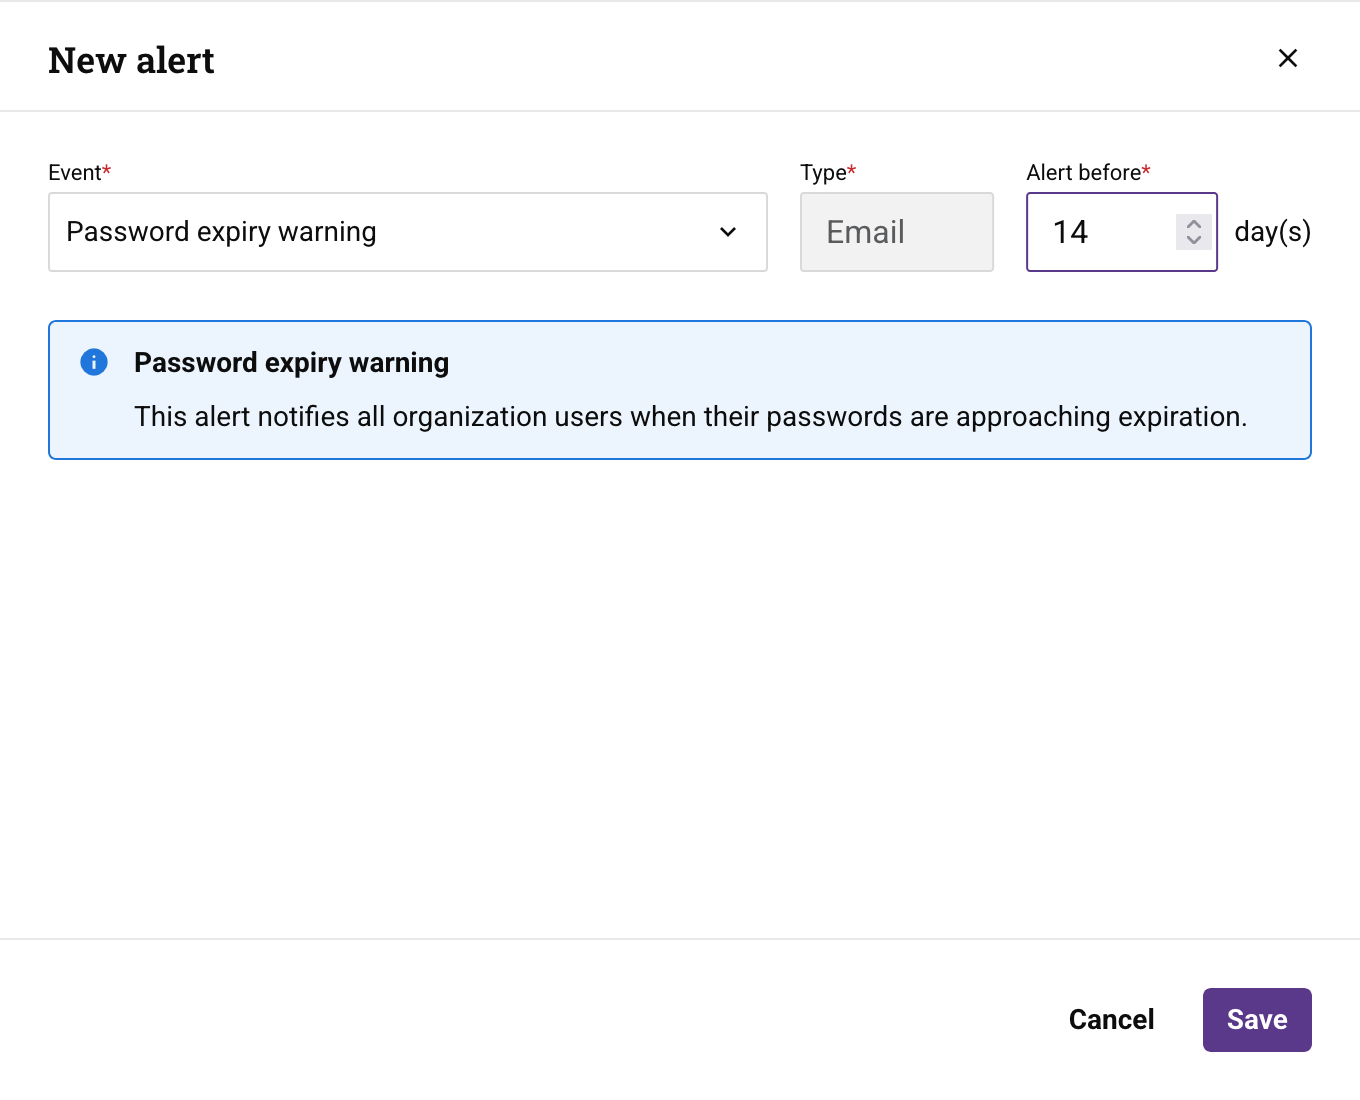
- Alert before: Enter how many days before password expiry to send the alert. The number of days is a minimum of 1 day, and a maximum of 90 days or the value for Expire user passwords in the User Management tab of the Management Console's Organizations page, whichever is smaller.
-
For SSO Status Changed:
-
SSO Status: Open the menu, then select the SSO status changes to monitor:
-
SSO Disable: Select to send an alert when SSO is disabled for the organization.
-
SSO Enable: Select to send an alert when SSO is enabled for the organization.
-
-
Recipients: Open the menu to select registered Harmony users, or manually enter an email address to add an external recipient. Up to 10 recipients total, including any external recipients, can receive the alert. If no recipients are selected, the alert is sent to all users with Admin role permission in the organization.
-
-
Note
The Type field is currently fixed to Email and cannot be changed.
All organizations have a default SSO Status Changed alert set to monitor for both the enabling and disabling of SSO.
-
-
Click the Save button.
Edit an alert
To edit an alert, follow these steps:
-
Hover on an alert, then click the Edit icon in the Actions column. The Edit alert drawer opens.
-
In the Edit alert drawer, you can change values depending on the type set for Event:
-
For Agent down, you can change the following:
-
Agent
-
Alert after
-
Recipients
-
-
For New agent version released, you can change the following:
- Recipients
-
For Password expiry warning, you can change the following:
- Alert before
-
For SSO Status Changed, you can change the following:
-
SSO Status
-
Recipients
-
-
For Cloud logging status changed, you can change the following:
-
Agent groups
-
Status changes to
-
Recipients
-
-
-
Click the Save button. (Unless you make changes, the Save button remains inactive.)
Delete an alert
To delete an alert, follow these steps:
-
Hover on an alert, then click the Delete icon in the Actions column. The Delete alert dialog opens:
Dialog text
Delete alert
Are you sure you want to delete the alertalertName?Please type "DELETE" to confirm.
-
To continue the action, enter the word DELETE where indicated in the dialog, then click the Delete button.
Table settings
You can sort tables, resize column widths, and rearrange columns:
-
To sort a table in ascending order, click a column heading. Click again to reverse the sort order.
-
To resize a column, drag a column's Resize bar.
-
To rearrange columns, click the Filter Columns icon. The Columns drawer opens with the following controls:
-
Search: Filter the list of columns. The search is not case-sensitive.
-
Show all: Click to show all columns. By default, all columns are shown.
-
Hide: The column is visible. Click to hide it.
-
Show: The column is hidden. Click to show it.
-
Move: Click and drag to adjust the order the column appears in.
-
Save: Click to save any changes.
-
Cancel: Click to discard any changes.
-