On-premise agent applications in Wevo iPaaS
The On-Premise Agent page is where you add a new application that uses a VPN (Virtual Private Network) on an existing on-premise agent. You can also view connected flows by agent or by application.
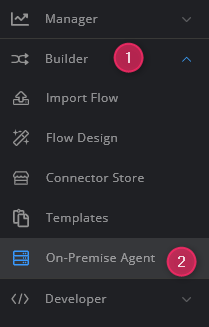
To access this page, use the Wevo iPaaS menu to select Builder > On-Premise Agent:
Add an application
To add a new application on an existing on-premise agent:
-
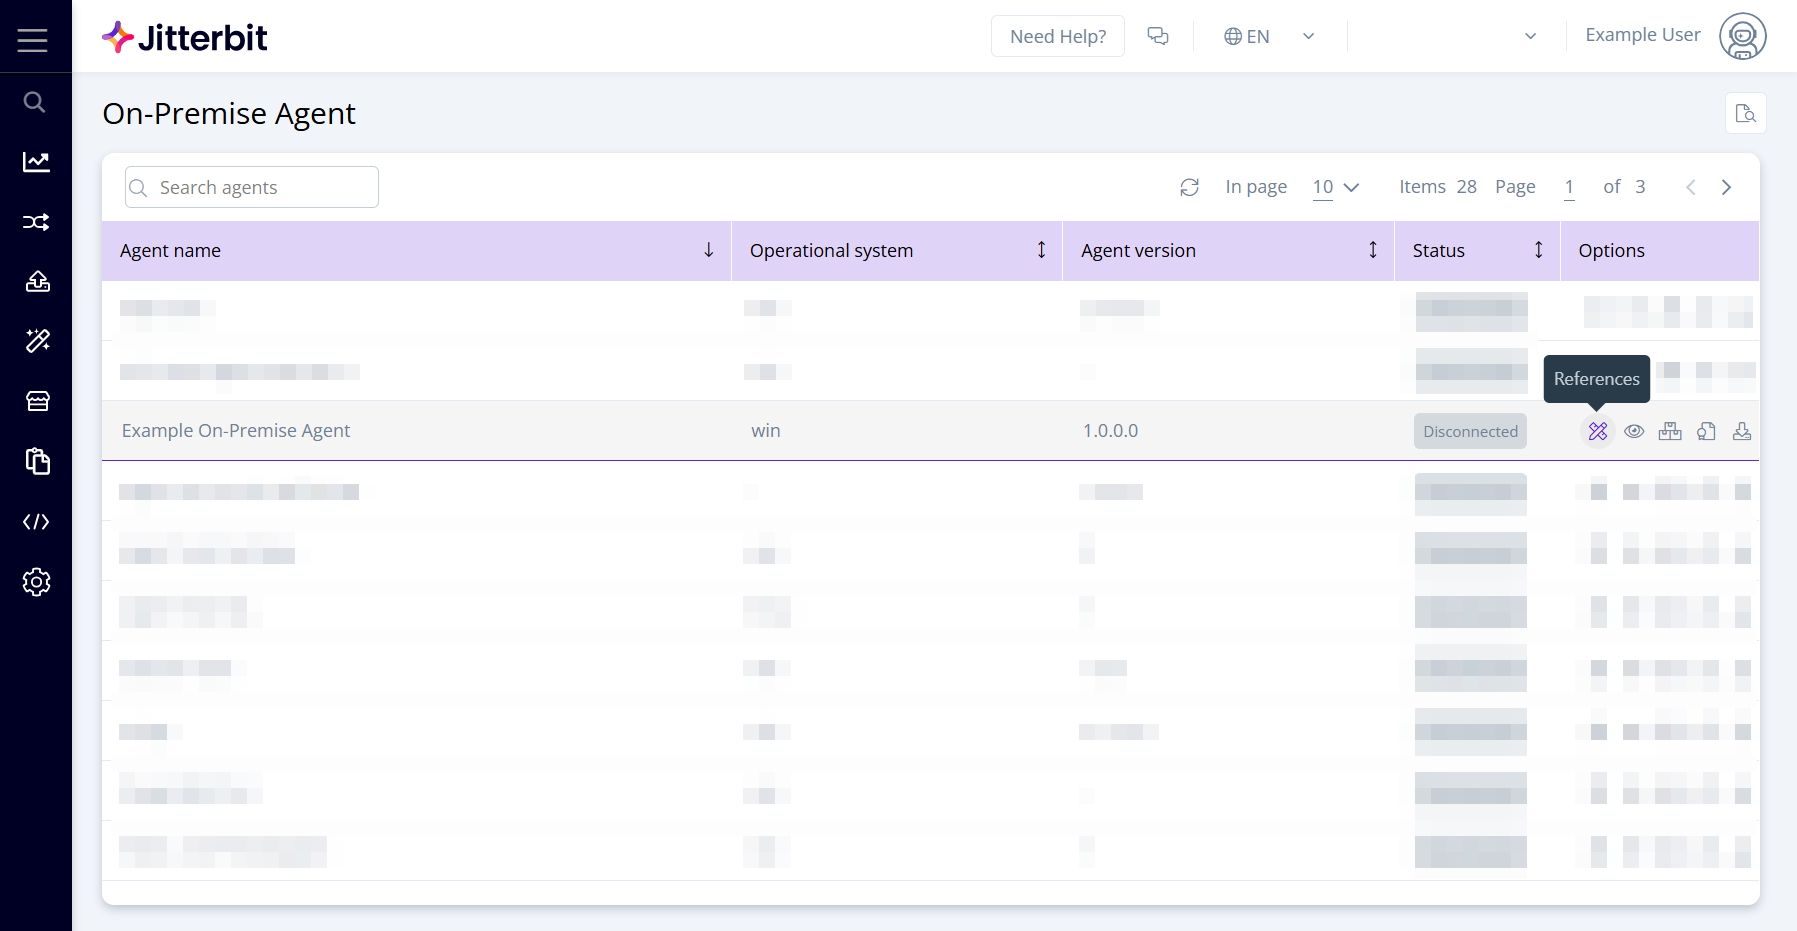
Click the Applications icon in the Options column for an agent:

The On-premise agent applications dialog opens, listing any applications created on that agent.
-
To add an application, click the Add application button:
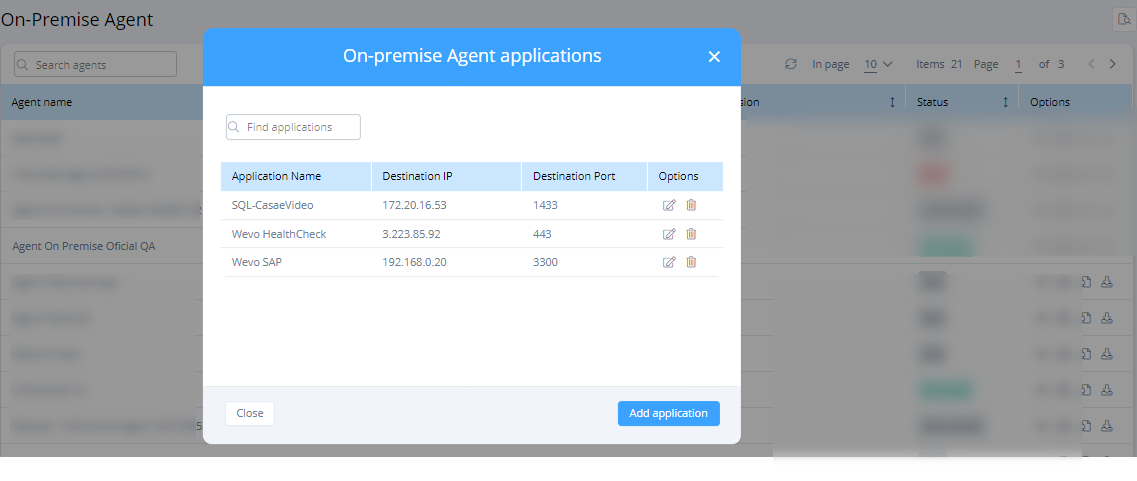
The Add application dialog opens.
-
Complete the following fields, then click Save:
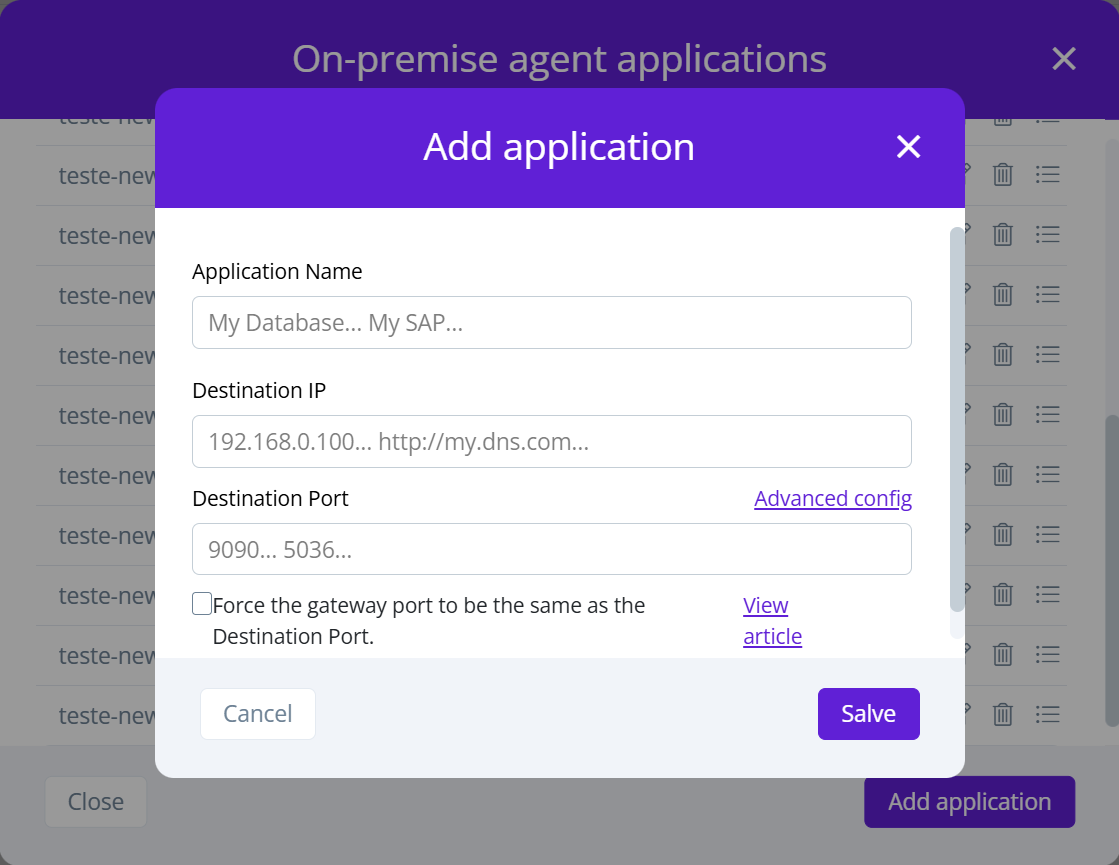
- Application Name: Enter a name for the application.
- Destination IP: Enter the IP address or hostname of the destination system.
- Destination Port: Enter the port of the destination system.
-
Advanced config: Click this link to show the following additional option:
- Force the gateway port to be the same as the Destination Port: Select this checkbox to configure the on-premise agent gateway to use the same port number as the Destination Port. If this checkbox is not selected, the gateway is assigned the next available port.
The new application should now be able to communicate successfully through the VPN you have configured.
View flows
You can view flows by agent or by application.
By agent
To view flows by agent:
-
Click the References icon in the Options column for an agent:
-
The Connected flows dialog opens, listing all connected flows in the agent and their statuses. You can filter the list by name or status:
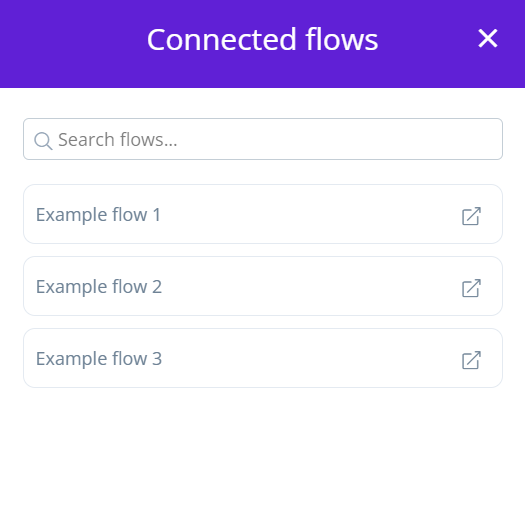
Click the shortcut icon of a flow to open it.
By application
To view flows for a specific application:
-
Click the Applications icon in the Options column for an agent:
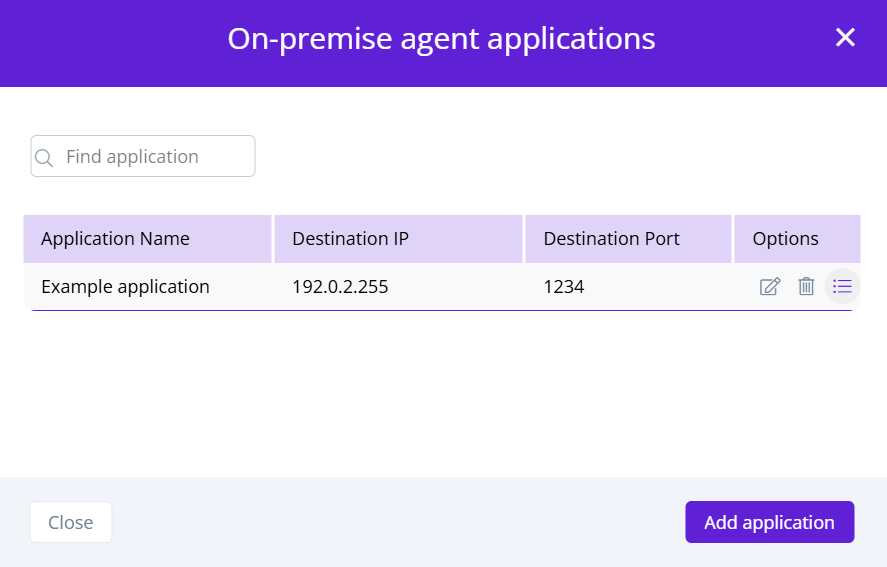
The On-premise agent applications dialog opens, listing any applications created on that agent.
-
To see the connected flows for a specific application, click the list icon in the Options column:
-
The Connected flows dialog opens, listing all connected flows in the agent and their statuses. You can filter the list by name or status:
Click the shortcut icon of a flow to open it.