App Registrations page in Jitterbit Management Console
Overview
| Purpose | Manage application registrations |
| Location | Harmony portal menu > Management Console > Customizations > App Registrations |
| Page access | Users with Admin role permission |
Introduction
On this page you can register third-party 3-legged OAuth 2.0 (3LO) applications for use with certain Studio connectors. Once the third-party 3LO application is registered here, you can authenticate a connection using 3-legged OAuth 2.0.
For more information on authenticating a connection with 3LO, see 3LO authentication.
Note
If you are using a cloud (Jitterbit-provided) application, an app registration is not needed to configure a connection.
You can view, create, edit, or delete registrations, and view and edit advanced options or view endpoint usage for a registration. A connector can be registered multiple times. Each is considered a unique connector app.
View
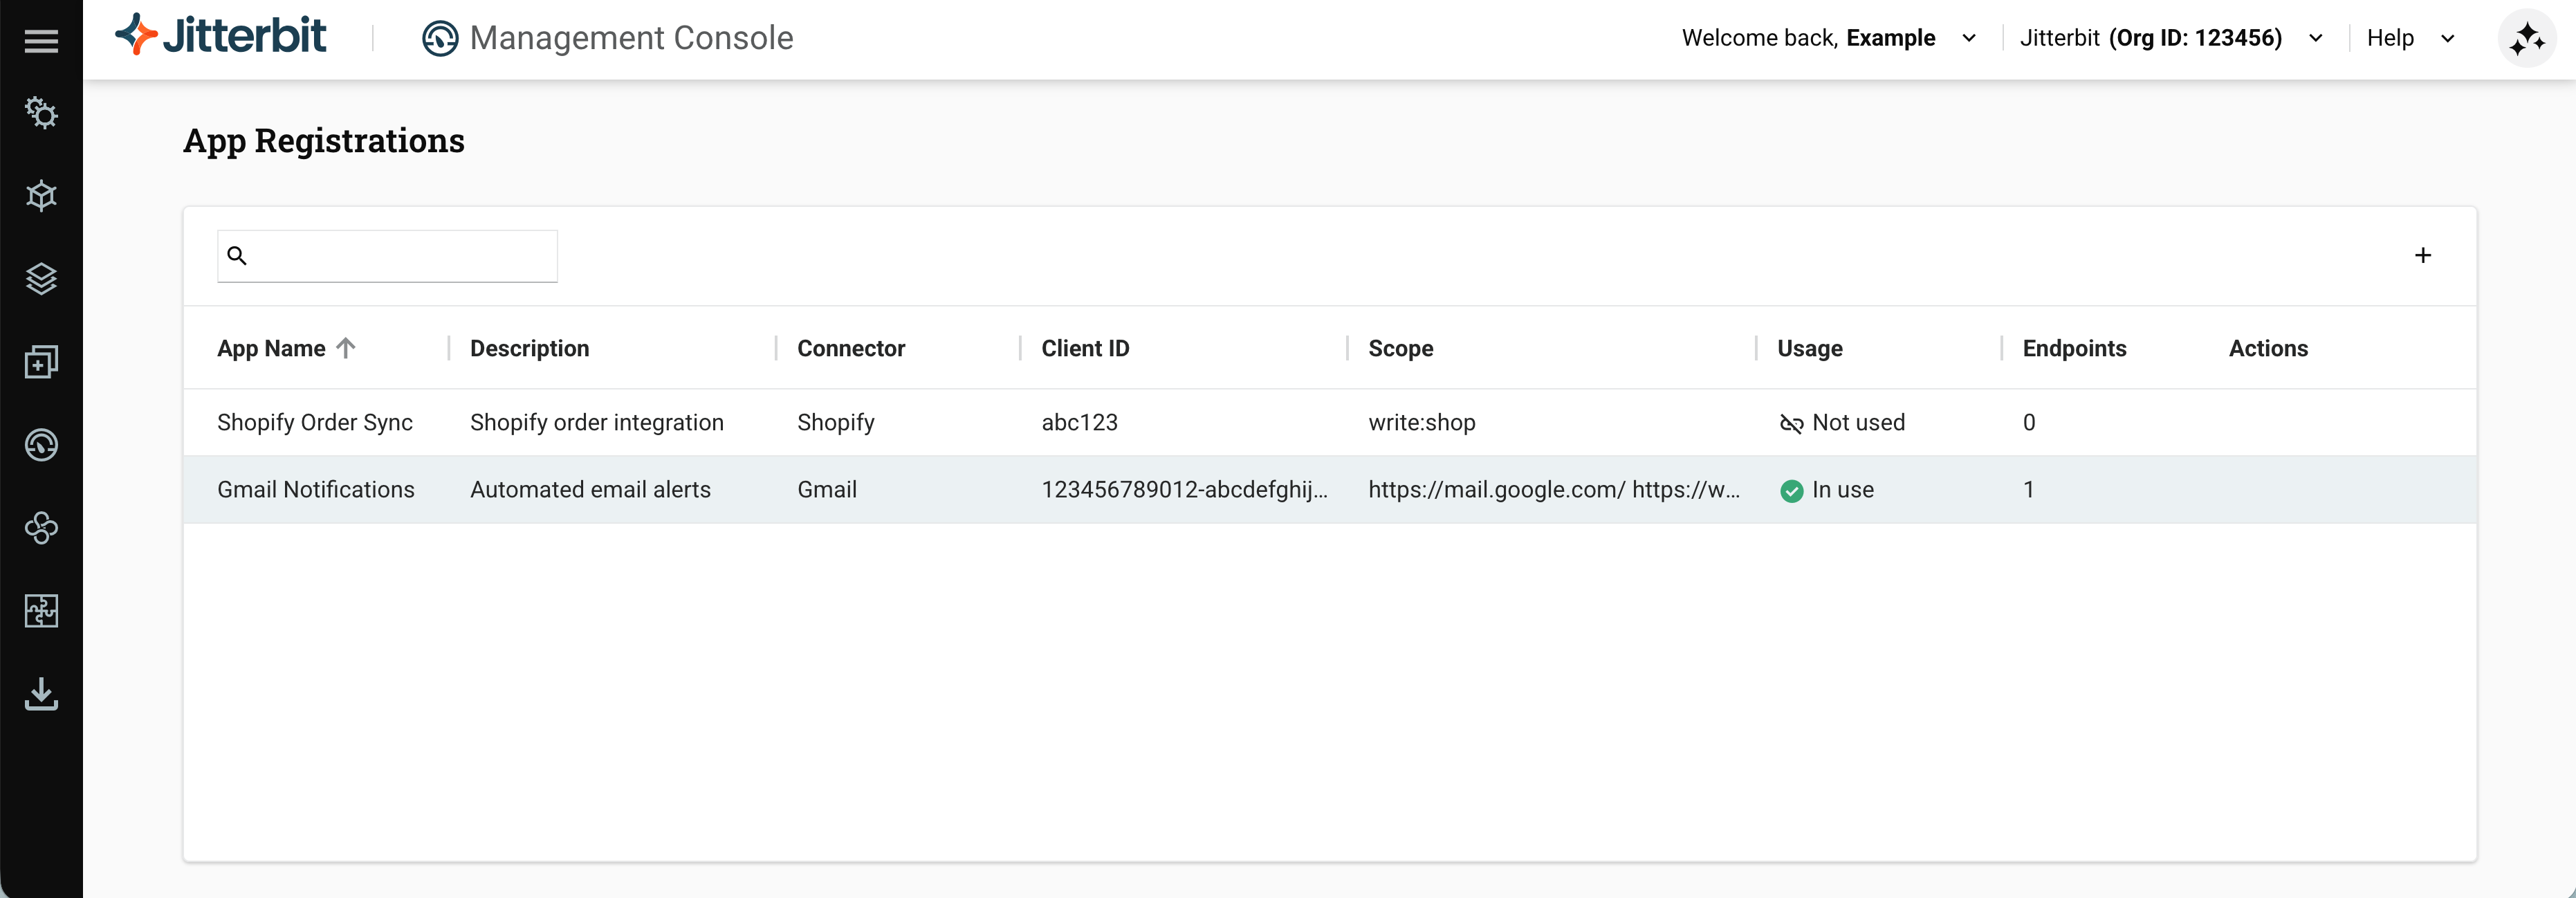
The body of the page contains a toolbar and a table listing available registrations:
-
Search: Enter text to find matching entries.
-
Create New: Create a new registration.
-
Usage: Whether the registration is referenced by any endpoints:
-
In use: One or more endpoints reference the registration.
-
Not used: No endpoints reference the registration.
-
-
Endpoints: The number of endpoints that reference the registration, based on the projects and environments you have access to. For details, see Endpoints usage.
-
Actions: Hover on a row to reveal the actions icons:
-
View details: Show advanced options and endpoint usage for the registration.
-
Edit: Edit the registration.
-
Delete: Delete the registration.
-
Click on any column heading (except Actions) to sort the table in ascending order by that column. Click again to reverse the sort order.
Create
To create a new connector app registration, click Create New. A new row appears in the table.
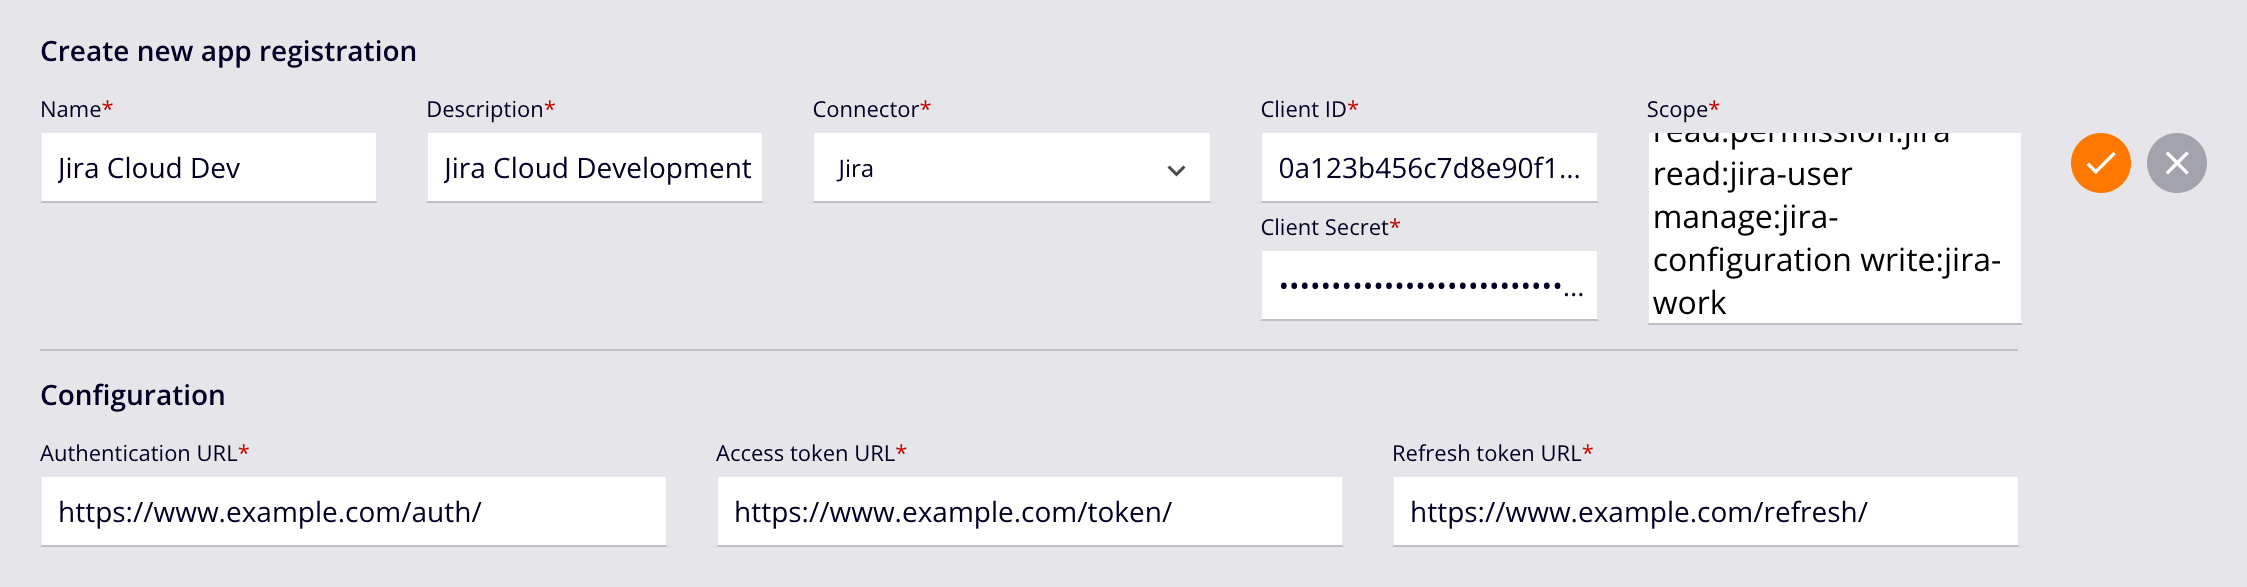
In the Create new app registration section, set values for the following fields:
-
Name: A name for the registration that is unique for the connector.
-
Description: A description for the registration.
-
Connector: Click to open the menu, then select one of the supported connectors. Currently, these connectors support 3LO:
-
Client ID: The client identifier assigned by the OAuth provider.
-
Client Secret: The client secret assigned by the OAuth provider.
-
Scope: One or more space-separated OAuth 2.0 scopes.
In the Configuration section, set values for the following fields:
-
Authentication URL: The URL to send an authorization request to.
-
Access token URL: The URL to send an access token request to.
-
Refresh token URL: The URL to request a new access token.
Click to save the values, or to cancel:
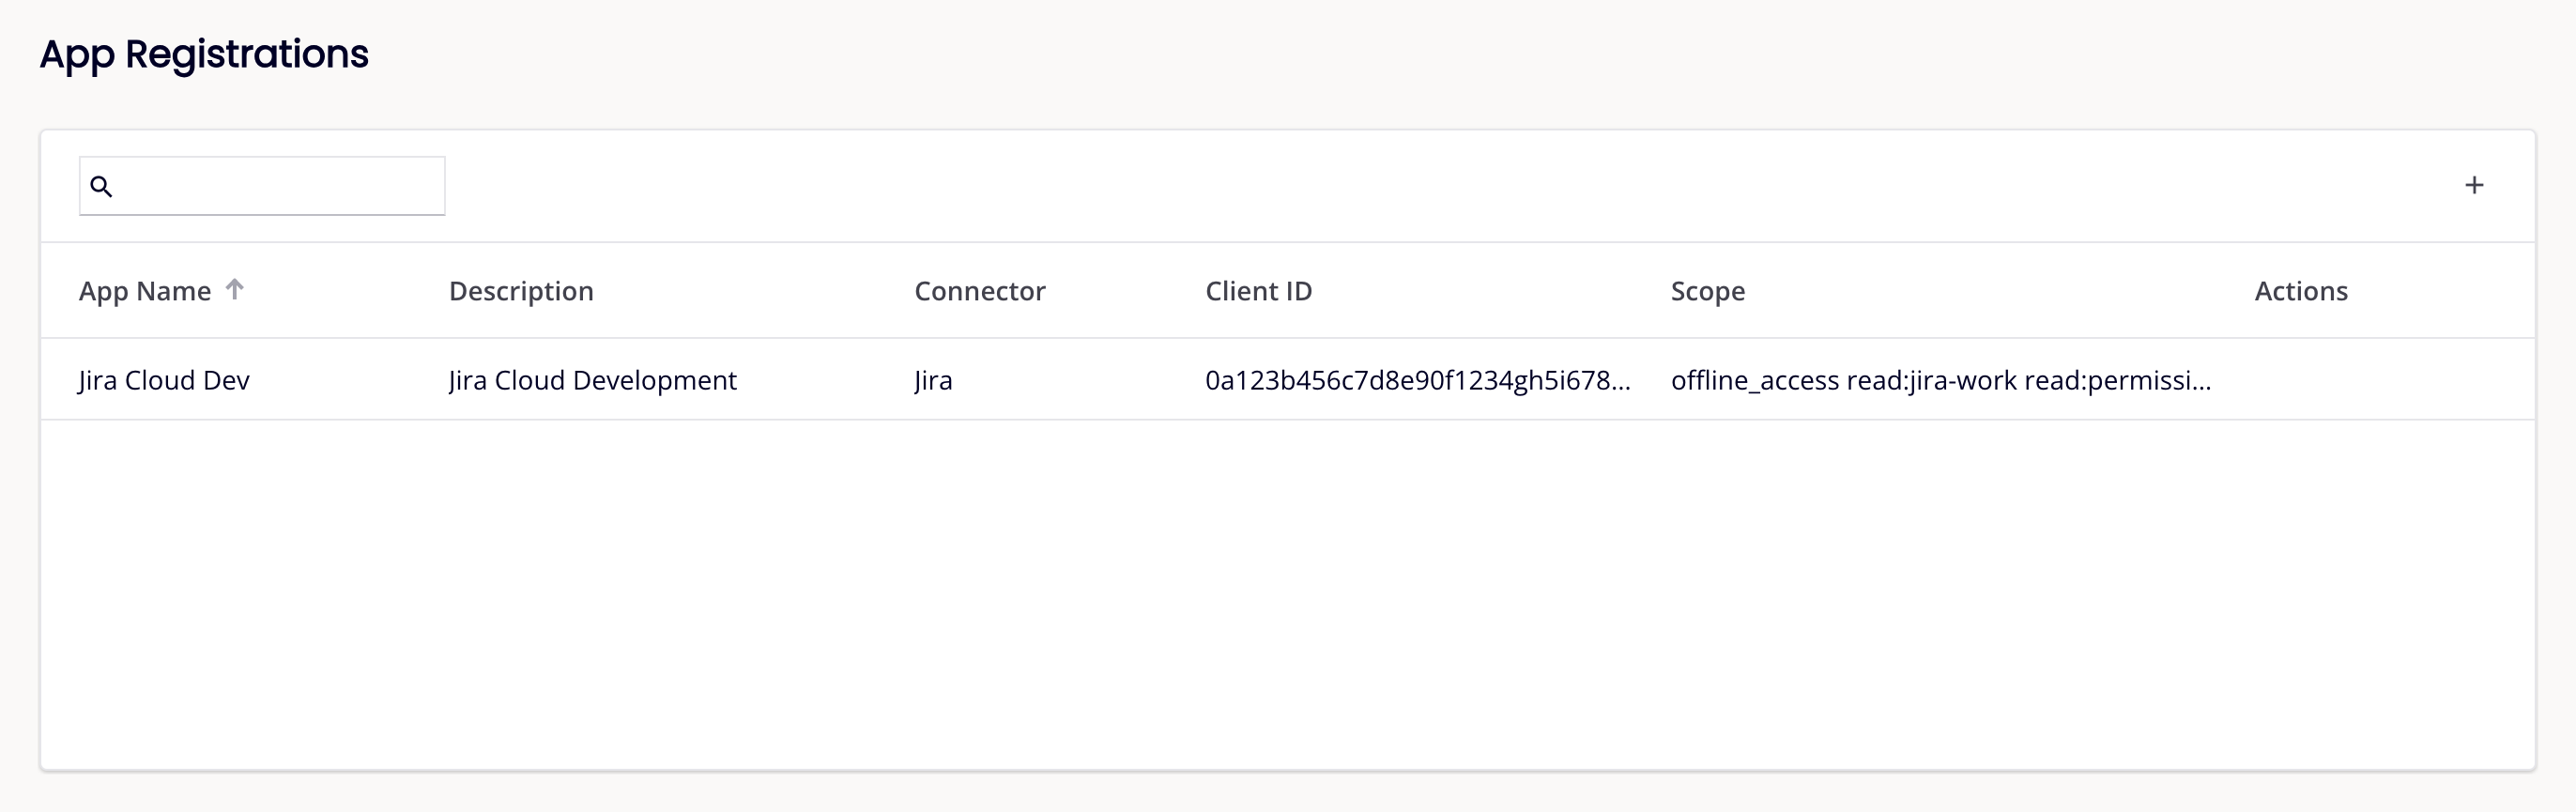
When successfully saved, the registration appears as a new entry in the table:
Edit
Hover on a registration in the table to reveal the actions icons, then click Edit. The Edit app registration pane appears:
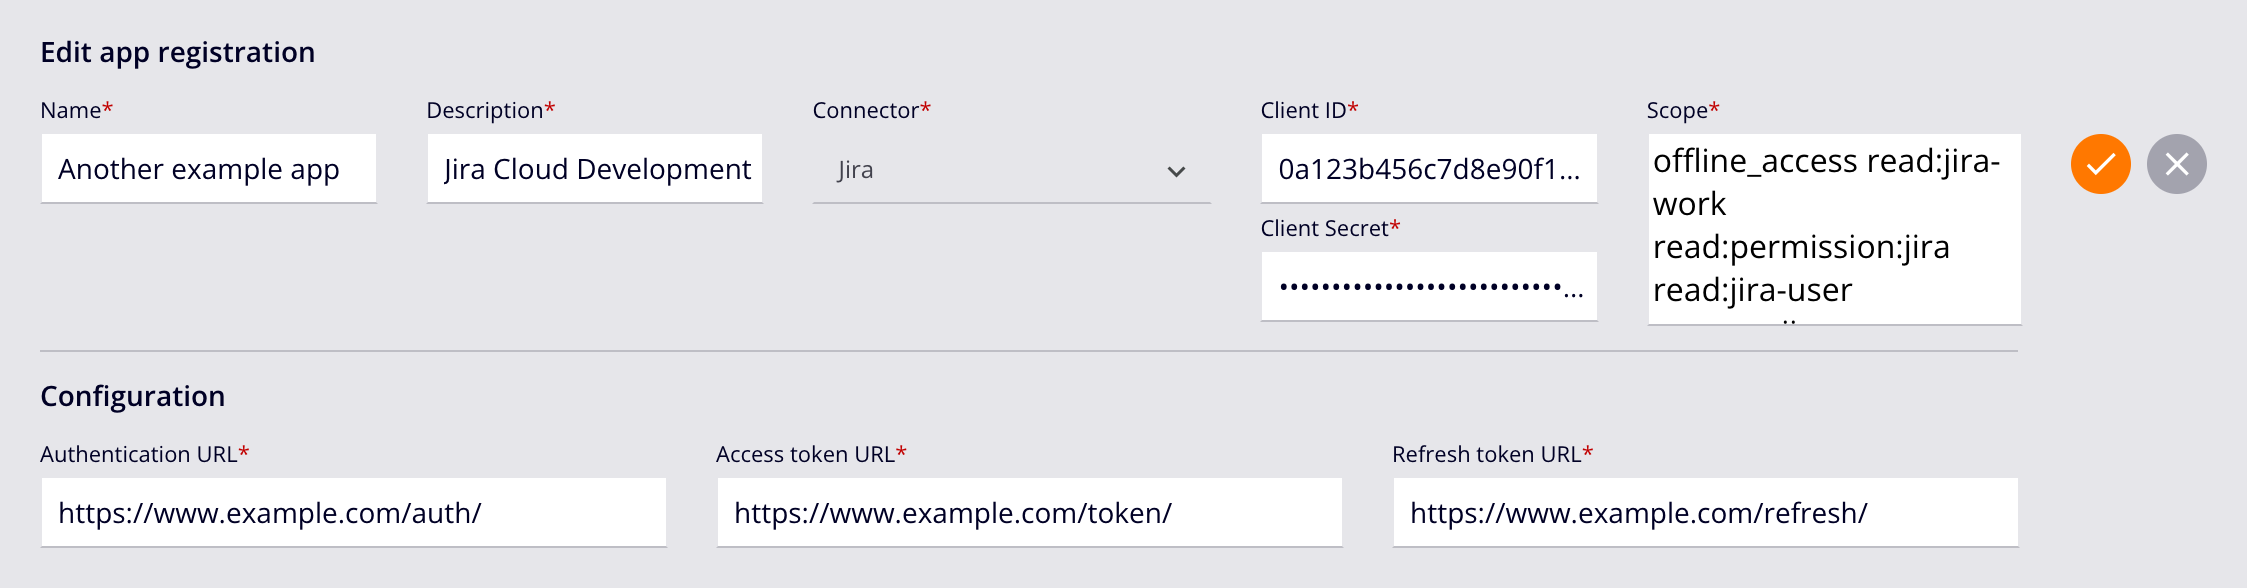
Edit the fields, then click to save the changes, or to cancel.
Note
A registration's Connector cannot be changed from its initial value.
Read the notification message that appears in the top-right part of the window. To close the notification, click the Close icon.
Delete
Hover on a registration in the table to reveal the actions icons, then click Delete. The Delete App Registration dialog opens:
Dialog text
Delete App Registration
Are you sure you want to delete the app registration appRegistrationName? This action cannot be undone.
Please type "DELETE" to confirm.
Enter the text DELETE then click Delete, or click Cancel to cancel the action.
Advanced options
The Advanced options drawer contains the default settings provided by the OAuth provider for each registration's token, and for the authentication, token, and refresh requests, plus the registration's endpoint usage.
To open it, hover on a registration in the table, then click View details. The drawer appears at the bottom of the page, containing these tabs:
Tip
If a tab has invalid settings, the Save button becomes inactive, and an error symbol appears beside the tab's label.
Token policy
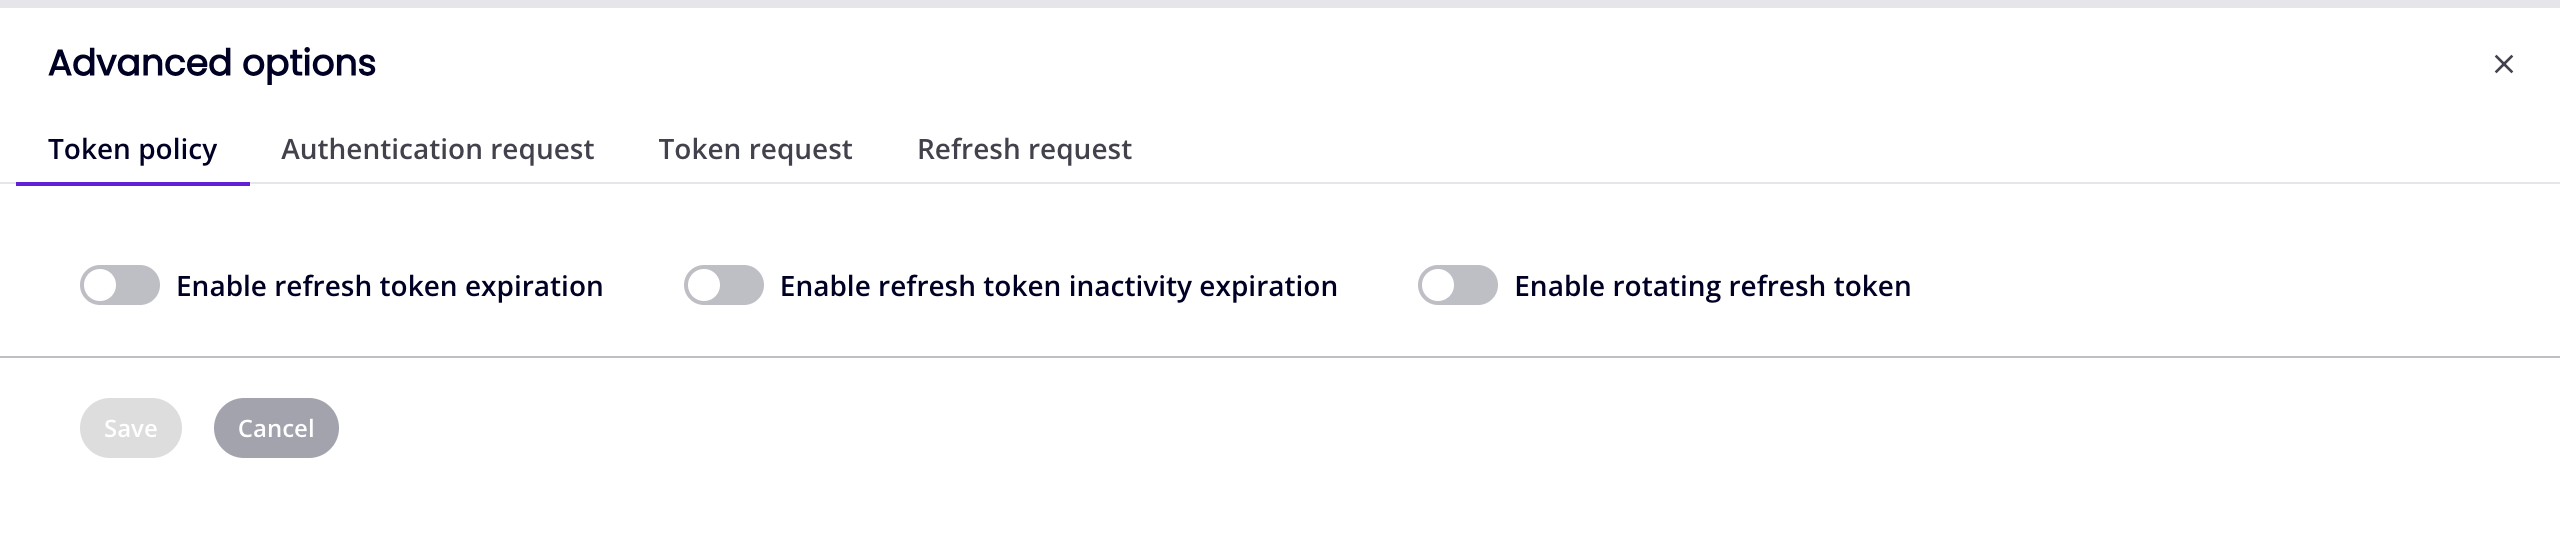
The Token policy tab contains settings for the token:
Important
Enable Token policy tab settings only if they are also enabled in the OAuth provider.
The following settings are available:
-
Enable refresh token expiration: When toggled on and used in combination with a connection's Receive Expiration Notification and Days for Expiration Notification settings, you will receive email notifications and a notification banner throughout the Harmony portal reminding you to obtain a new refresh token when the current one is expired or is approaching expiration. When a refresh token expires, all dependent operations will fail at runtime.
When this setting is enabled, the email notification is sent to the Harmony organization administrators (members of a role with the Admin permission, and the user who last deployed the project).
To set the expiration period, enter a whole number greater than zero, then click the menu and select one of Seconds, Hours, or Days.
Tip
The recommended setting for this value should match that used in the OAuth provider itself. For example, if an OAuth provider's refresh token expiration is 1 year, set the Expire after value to 1 year.
-
Enable refresh token inactivity expiration: When toggled on, refresh tokens that have been inactive for the specified amount of time are marked as expired in the Harmony platform. Use the Expire after field to specify the interval after which an inactive refresh token is marked as expired.
Important
Use this setting in alignment with the OAuth provider's inactivity setting. Enabling this setting when the OAuth provider does not have an inactivity setting defined will cause valid refresh tokens to be incorrectly considered to be expired in the Harmony platform. Conversely, if the OAuth provider does have this setting defined, but it is not enabled and specified here in the Harmony portal, the endpoint might use a stale refresh token, potentially causing issues based on the OAuth provider's refresh token rules.
-
Expire after: To set the expiration period, enter a whole number greater than zero, then click the menu and select one of Seconds, Hours, or Days.
Tip
The recommended setting for this value should match that used in the OAuth provider itself. For example, if an OAuth provider's refresh token inactivity expiration is 90 days, set the Expire after value to 90 days.
-
-
Enable rotating refresh token: Click to enable token rotation.
Click Save to save changes, or Cancel to abandon them.
Authentication request
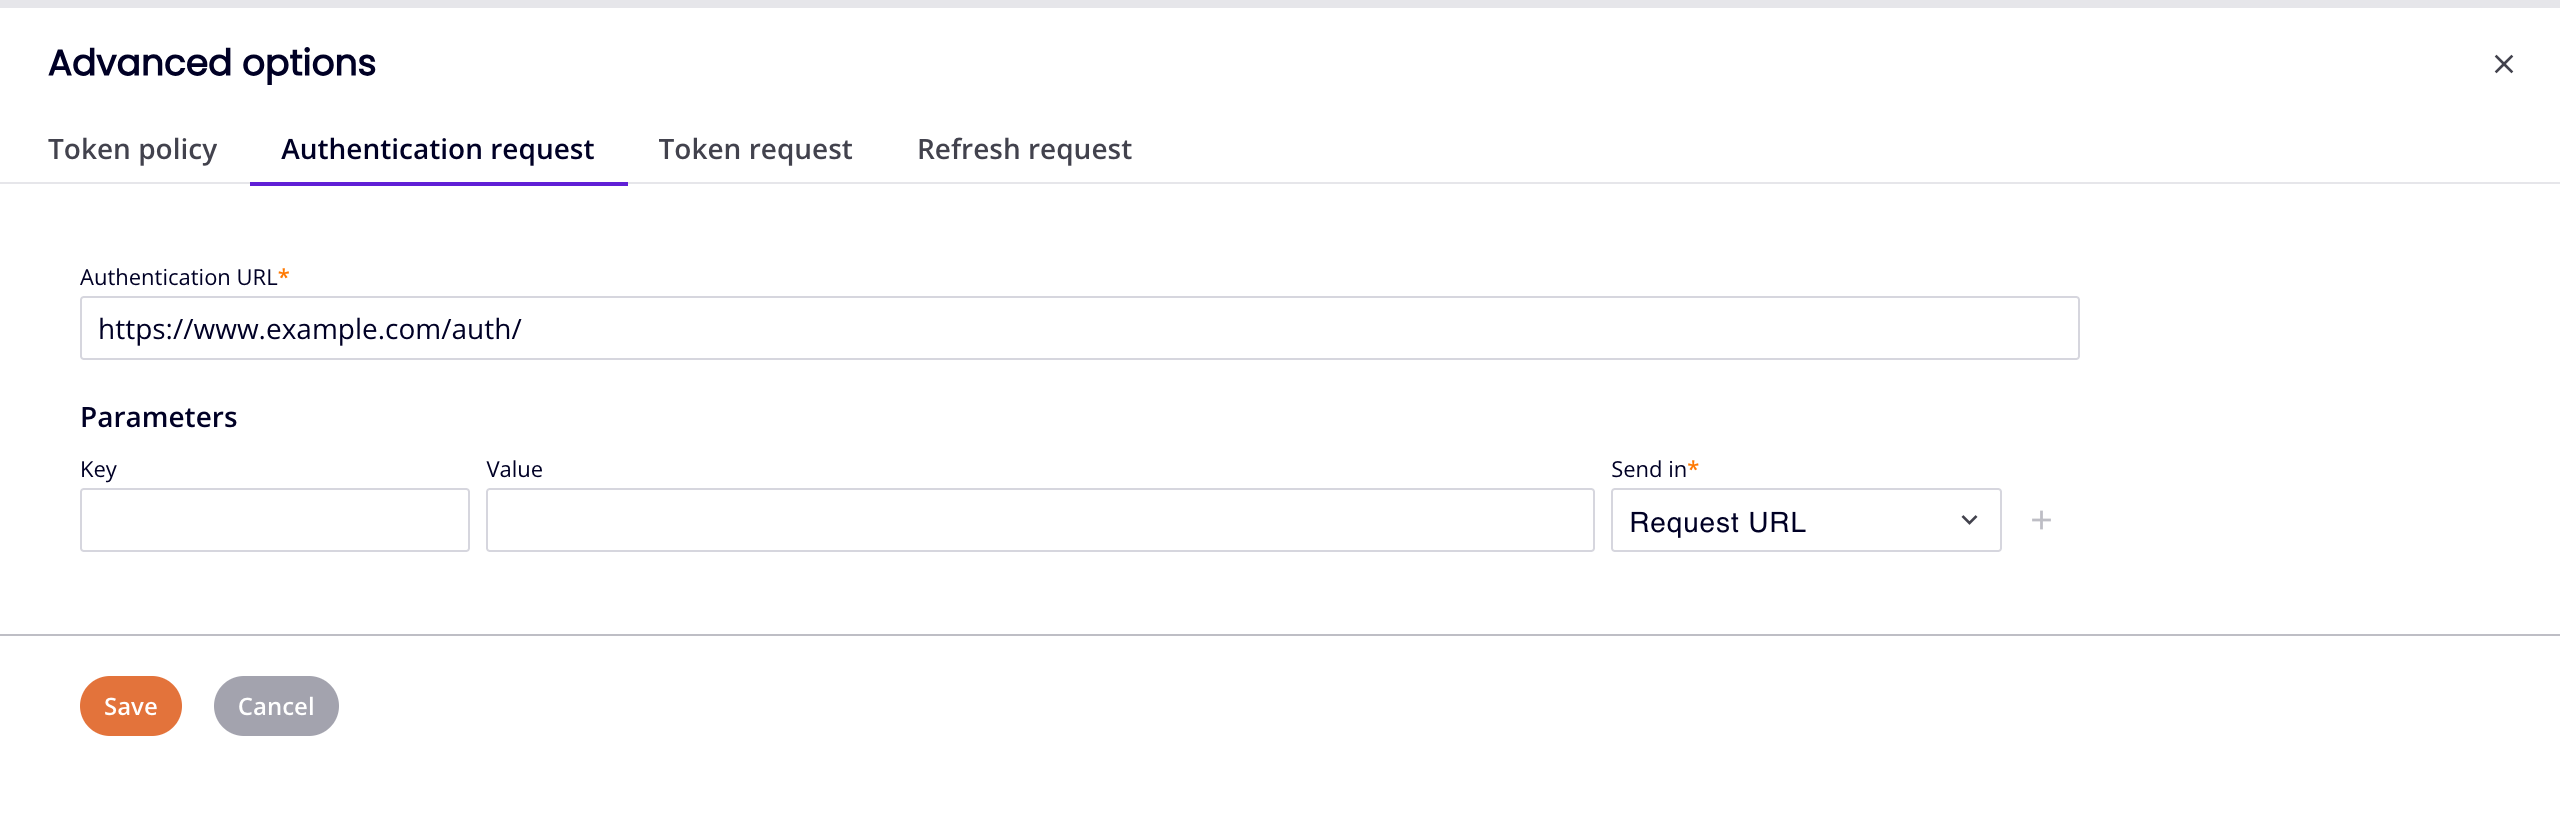
The Authentication request tab contains settings for the token authentication request:
-
Authentication URL: The URL to send an authorization request to.
-
Parameters: To add a parameter, enter values for Key and Value, click the Send in menu to select Request URL or Request Header, then click Add. The parameter appears as a new row in the table. Repeat for each parameter you want to add.
Click Save to save changes, or Cancel to abandon them.
Token request
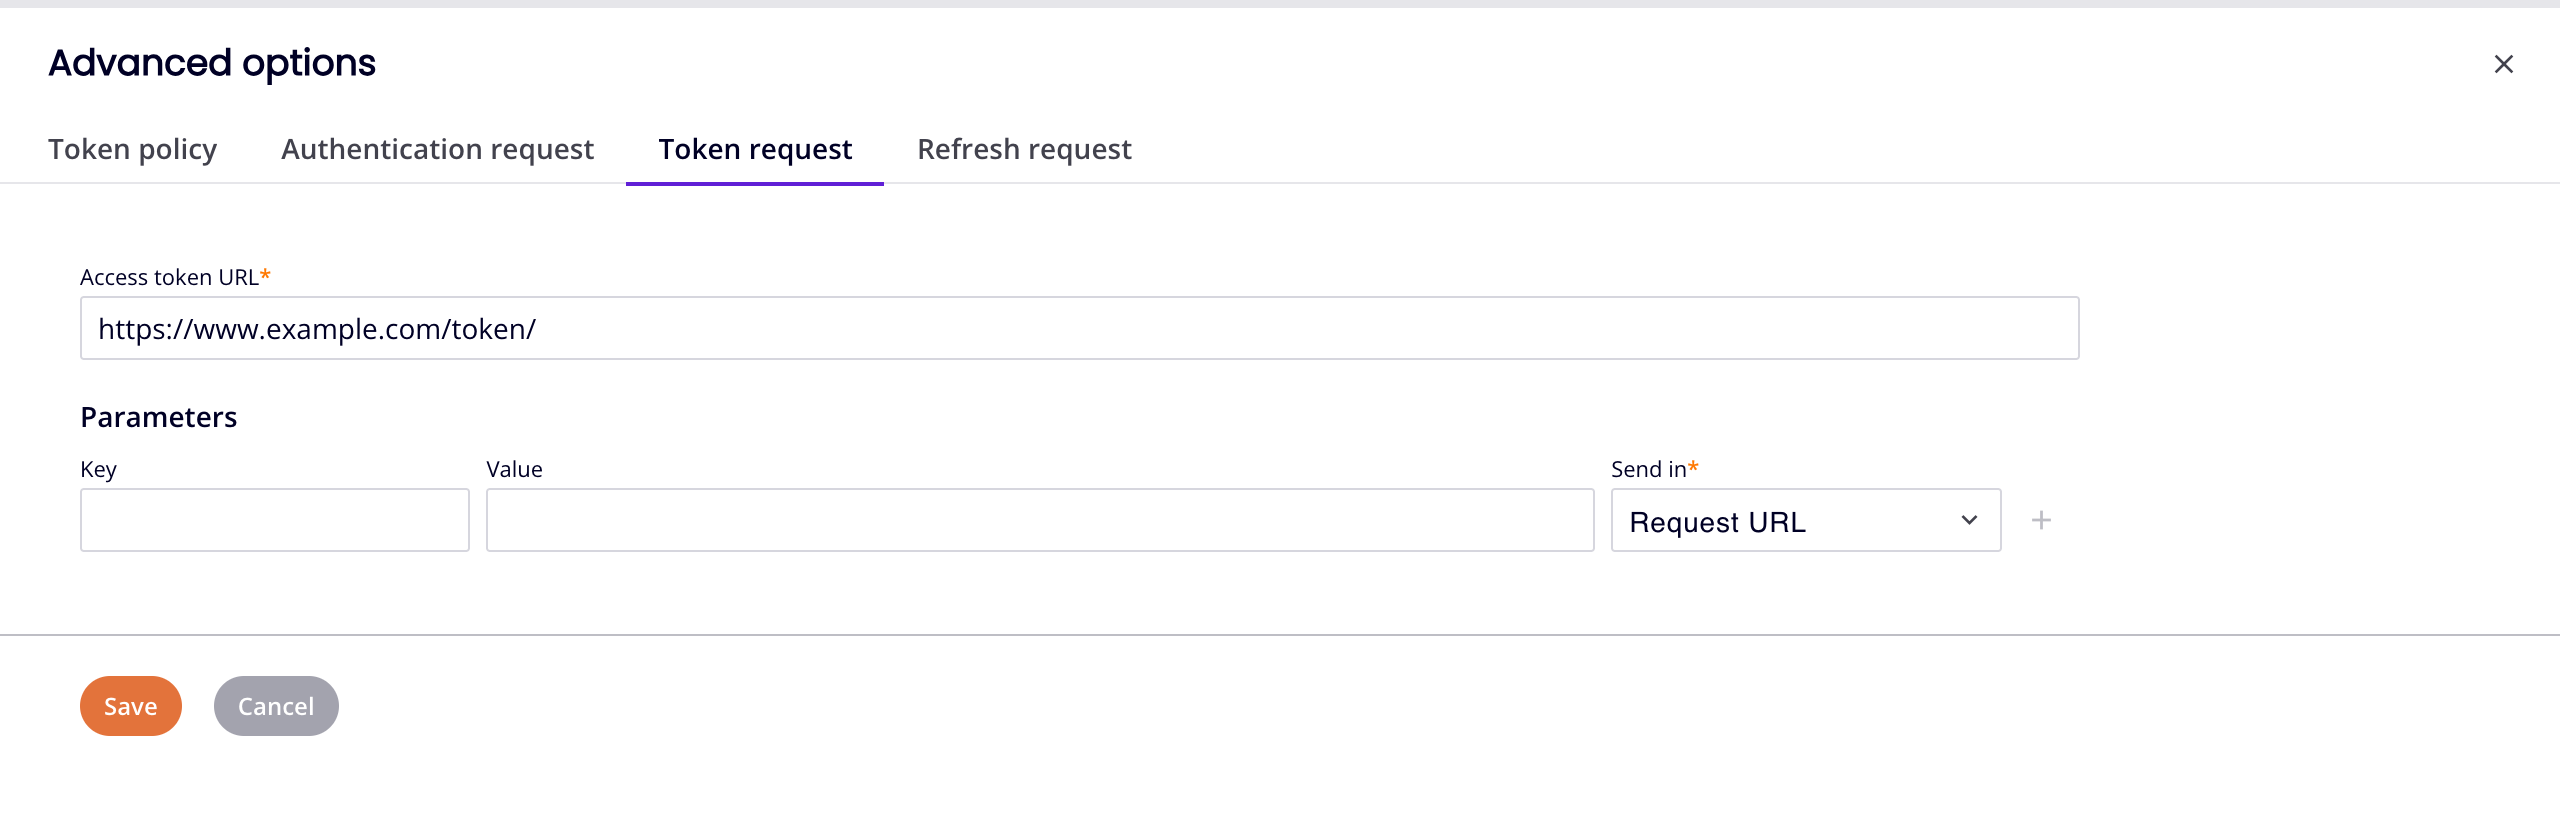
The Token request tab contains settings for the token request:
-
Access token URL: The URL to send an access token request to.
-
Parameters: To add a parameter, enter values for Key and Value, click the Send in menu to select Request URL, Request Header, or Request Body, then click Add. The parameter appears as a new row in the table. Repeat for each parameter you want to add.
Click Save to save changes, or Cancel to abandon them.
Refresh request
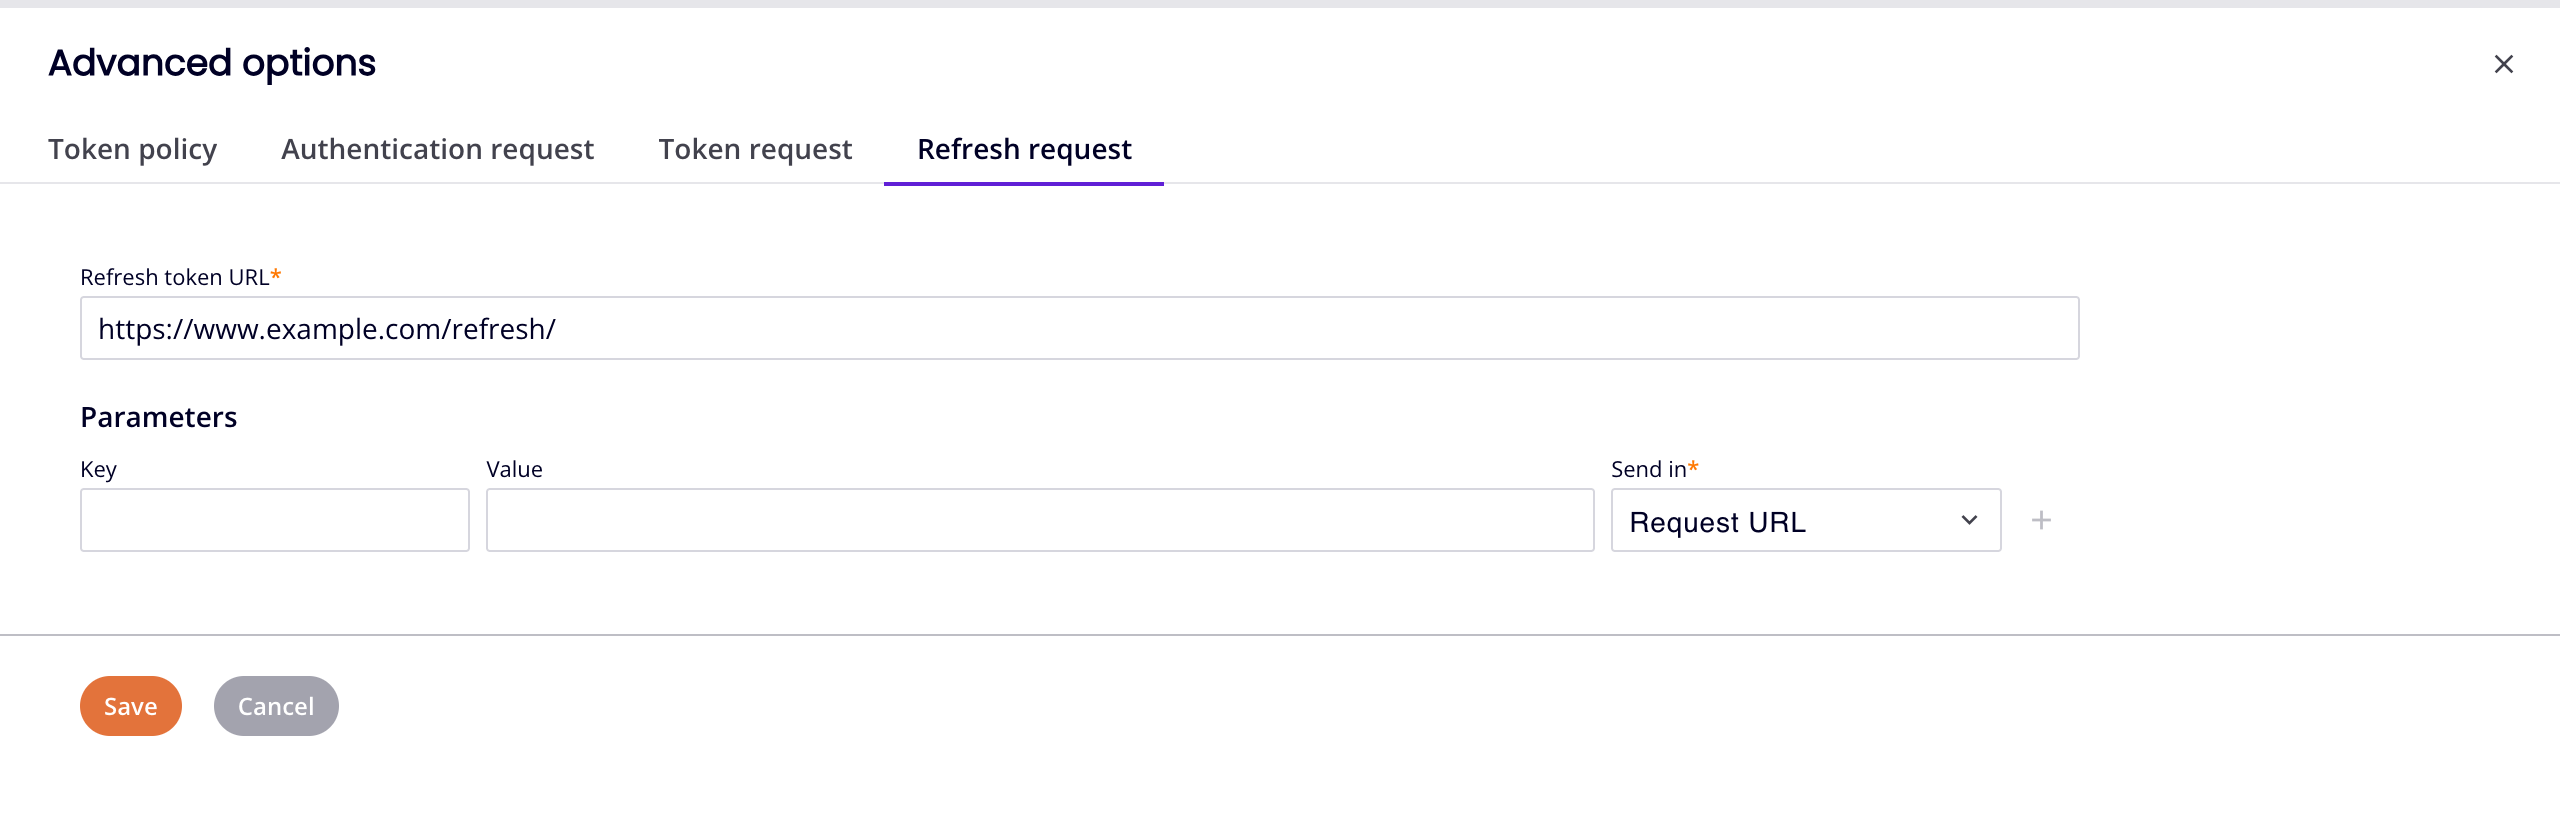
The Refresh request tab contains settings for the token refresh request:
-
Refresh token URL: The URL to request a new access token.
-
Parameters: To add a parameter, enter values for Key and Value, click the Send in menu to select Request URL, Request Header, or Request Body, then click Add. The parameter appears as a new row in the table. Repeat for each parameter you want to add.
Click Save to save changes, or Cancel to abandon them.
Endpoints usage
The Endpoints usage tab lists the endpoints that reference the registration:
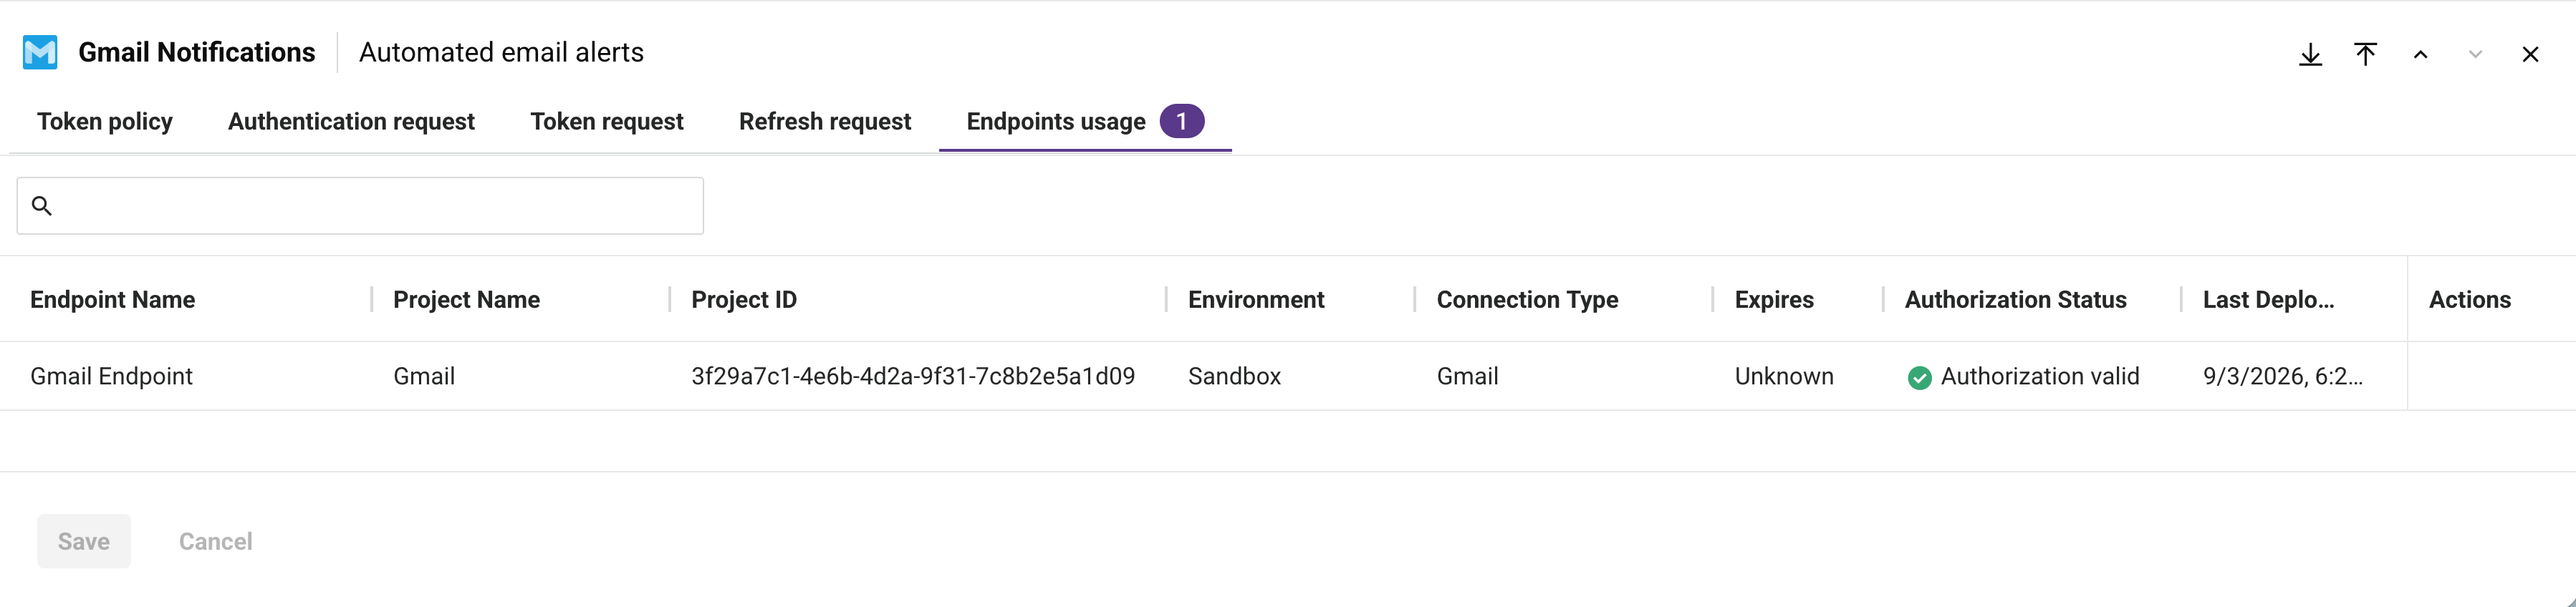
This tab shows configuration references, not runtime activity. For endpoint activity based on operation runs, see the Endpoints Usage page.
The following columns appear in the table:
-
Endpoint Name: The name of the endpoint that references the registration.
-
Project Name: The name of the project containing the endpoint.
-
Project ID: The unique identifier of the project.
-
Environment: The environment where the endpoint is used.
-
Connection Type: The connector used by the endpoint.
-
Expires: The token's expiration status, if available.
-
Authorization Status: The endpoint's current authorization status, if available.
-
Last Deployed: The date and time the endpoint was last deployed.
-
Actions: Hover on an endpoint to reveal this action:
- Go to endpoint: Opens the endpoint's configuration in Studio.
If the registration is not referenced by any endpoints, the tab displays:
Empty state text
No endpoints currently reference this app registration.
Troubleshooting
For related troubleshooting, see the following in the Harmony troubleshooting guide: