Projects in Jitterbit Studio
Introduction
The Projects page contains a repository of all accessible Studio projects. From this page, you can create a new project, import an existing project, or select an existing project to design.
After opening a project, you design it using the tools provided in the project designer:
In addition, the configuration screens of individual components such as transformations, scripts, connections, and activities can be opened for editing.
As you work on projects, Studio remembers the display states that you were last using for a given project the next time you open it.
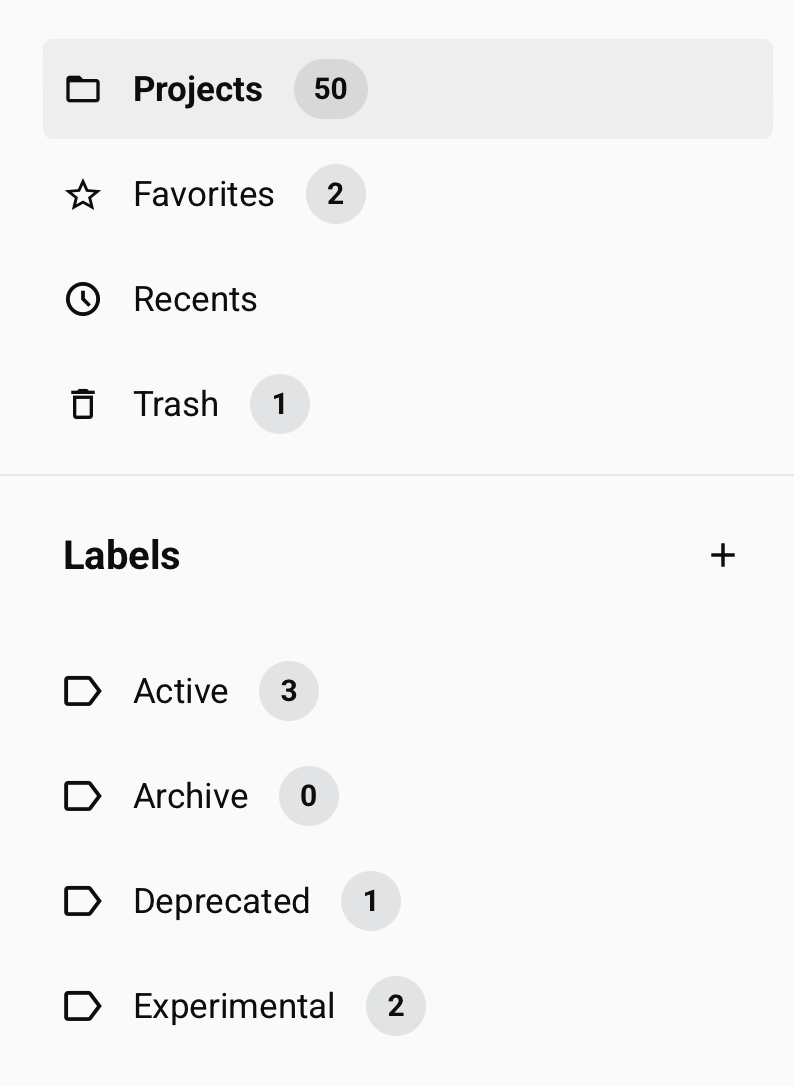
Access the Projects page
The Projects page is the landing page for Studio, which is accessed directly through the Harmony portal. From other Harmony portal pages, use the Harmony portal menu to select Studio > Projects.
Projects
The Projects page displays an organization's projects, filtering controls, and several actions:
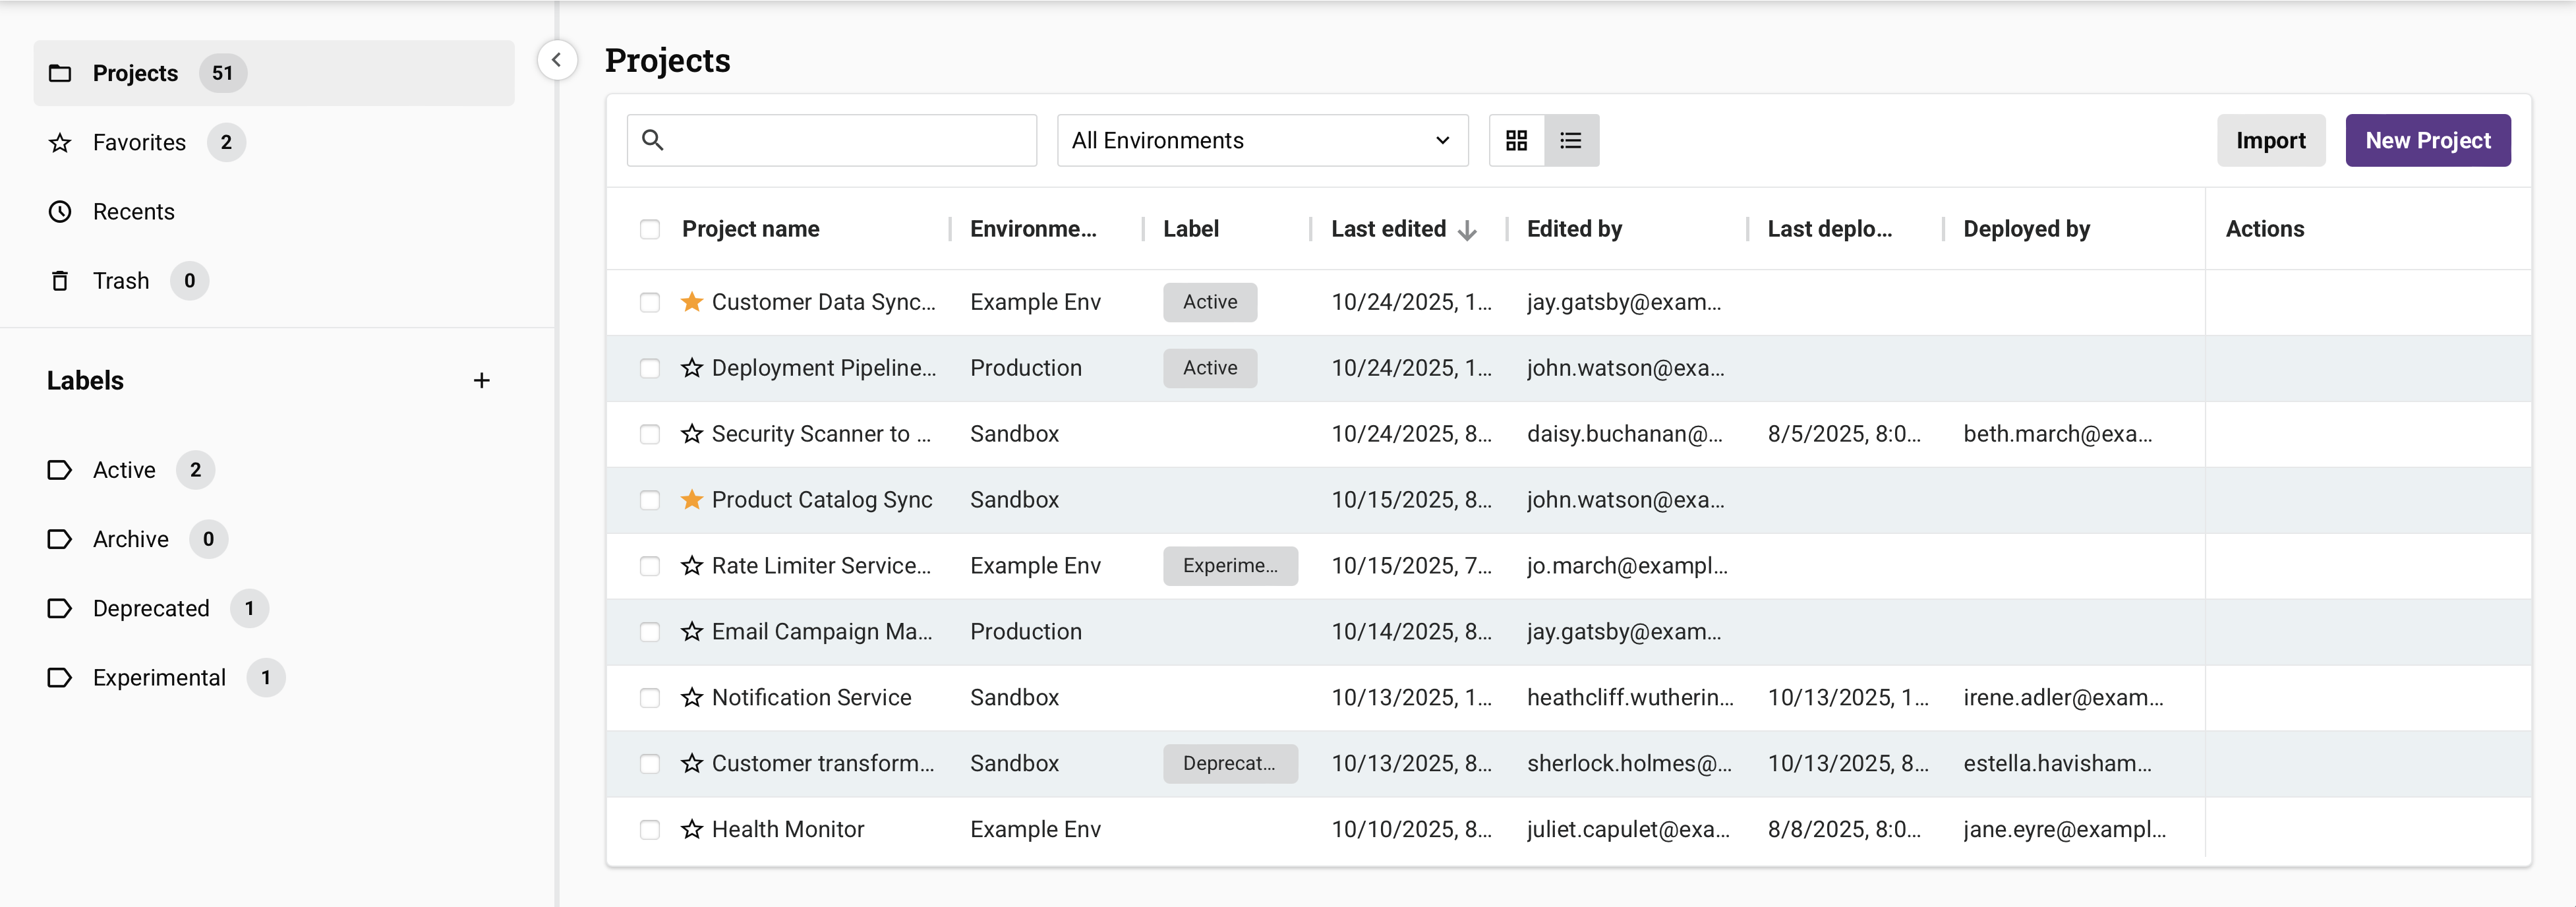
- Search: Enter any part of a project name in the search box to filter projects by name. The search is not case-sensitive.
- All Environments: Use the menu to filter the projects by environment. By default, projects from all environments appear, sorted by project name. The next time you load the Projects page, your last selected filter is preselected.
- View: Click the tile view or list view icon to toggle the display format for projects on this page. Tile view is the default view. The next time you load the Projects page, your last selected view is preselected.
- Import: Click to open the project import screen, where you can import Studio projects in JSON format (see Project exports and imports).
- New Project: Click to open the project configuration screen, where you can create a new project (see Create a new project in Project creation and configuration).
- Favorite: Click to add the project to the Favorites folder. When you favorite a project, it appears with a yellow star.
- Drawer: Click the carets to view or hide project folders and labels (the drawer is open by default). To resize the drawer, position your cursor over the dividing line between the drawer and the project list, then drag to adjust the width. Studio remembers the width when you leave the Projects page or log out.
Project folders and labels
When the project drawer is open, the following folders are displayed:
-
Projects: Shows accessible projects (those that are not in the trash or permanently deleted). The number of accessible projects for the selected organization, using any applied filters and search criteria, is displayed next to the folder.
-
Favorites: Shows projects that users in your organization have starred as favorites.
-
Recents: Shows projects that users in your organization have recently accessed.
-
Trash: Shows projects that are in the trash. Projects that have been moved to trash are kept there for 90 days before being permanently deleted, unless deleted manually. The number of projects in the trash for the selected organization using any applied filters and search criteria is displayed next to the folder.
-
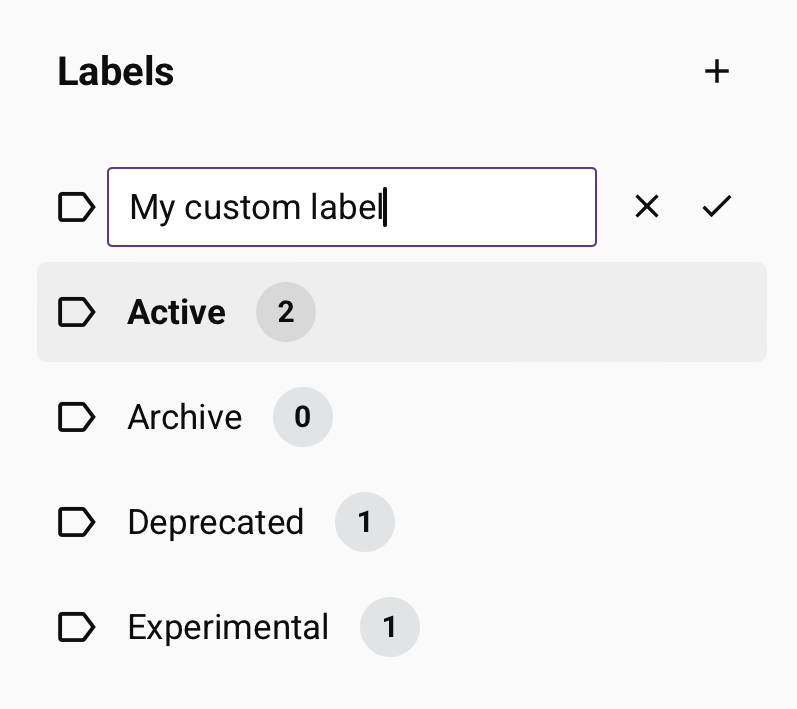
Labels: Shows any user-created labels. Click a label name to display projects that belong to it. Assign projects to labels by using the Label action in list view or tile view.
-
New label: Click to open a text field for label creation. Enter a name and click to create the label, or click to cancel:
-
Label actions: Hover over a label and click to access these actions:
-
Label color: Change the label's color using the color picker.
-
Delete label: Delete the label. If the label is assigned to any projects, a confirmation dialog appears. This dialog informs you that deleting the label will remove it from all projects it is assigned to. You can proceed with the deletion or cancel to keep the label and its project assignments.
-
-
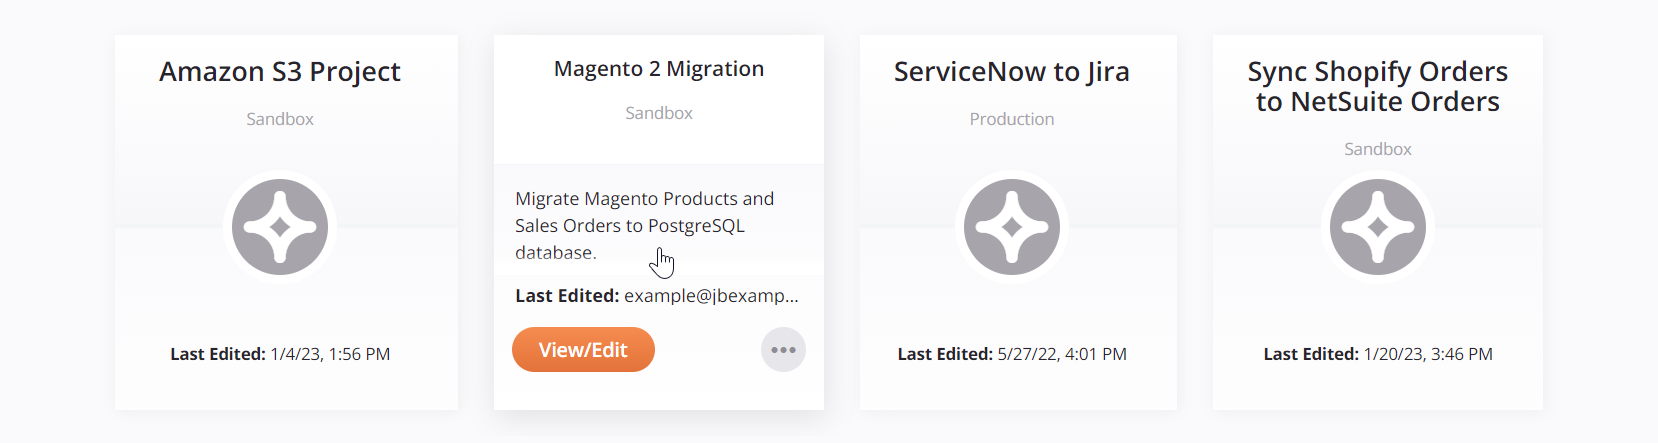
Tile view
To access tile view, select the tile view icon .
Tile view displays projects as tiles. Hover over a project tile to reveal additional actions:
-
Project name: The name of the project.
-
Select: You can select multiple projects to perform bulk actions. Select projects individually or select them in groups by clicking one project and Shift-clicking another to select that range of projects. When projects are selected, these actions become available at the top of the table:
- Delete (remove selected projects; maximum 10 at once)
- Label (assign labels to selected projects)
- Favorite (add selected projects to the Favorites folder)

-
Favorite: Click to add the project to the Favorites folder. When you favorite a project, it appears with a yellow star.
-
-
Environment: The environment where the project is stored.
-
Last edited: The local browser date and time when the project was last edited.
Hover over the project tile to reveal additional information and actions:
- Edited by: The username of the user who last edited the project.
- Label: Click to assign labels to a project. When you click this icon, select one or more user-created labels to assign to the project. When a project has multiple labels, the first label is displayed alongside a count indicator (for example, +2) showing the number of additional labels. Hover over the count indicator to view all label names in a tooltip.
- View/Edit: Opens the project in the project designer.
- Description: The project description is displayed (if one was provided).
-
Additional actions: Opens a menu with these additional actions:
Projects folder menu item Description 
Project settings opens the project configuration screen, where you can edit the project name and description, or export or delete the project (see Edit project settings in Project creation and configuration). 
Project history opens a drawer on the right side of the Projects page where you can view the project's history events, snapshots, tag events, and restore the project (see Project history). 
Logs opens the project's operation logs in the Management Console's Runtime page. The page is filtered to show the operation logs for any operations that have been deployed and executed within the project. 
Project variables opens the project variables drawer, where you can view, edit, and add new project variables (see Project variables). 
Export opens the project export screen, where you can export the project as a JSON file (see Project exports and imports). 
Move to trash removes the project from the environment in Studio and the Harmony cloud. Projects can be restored up to 90 days after being moved to the trash. After 90 days, the project is permanently deleted and cannot be restored. Trash folder menu item Description 
Restores the project to its original environment and moves it from the Trash folder into the Projects folder. This action does not restore the project history or restore the project to the Harmony cloud (the project must be deployed before executing). 
Permanently deletes the project. This action cannot be reversed.
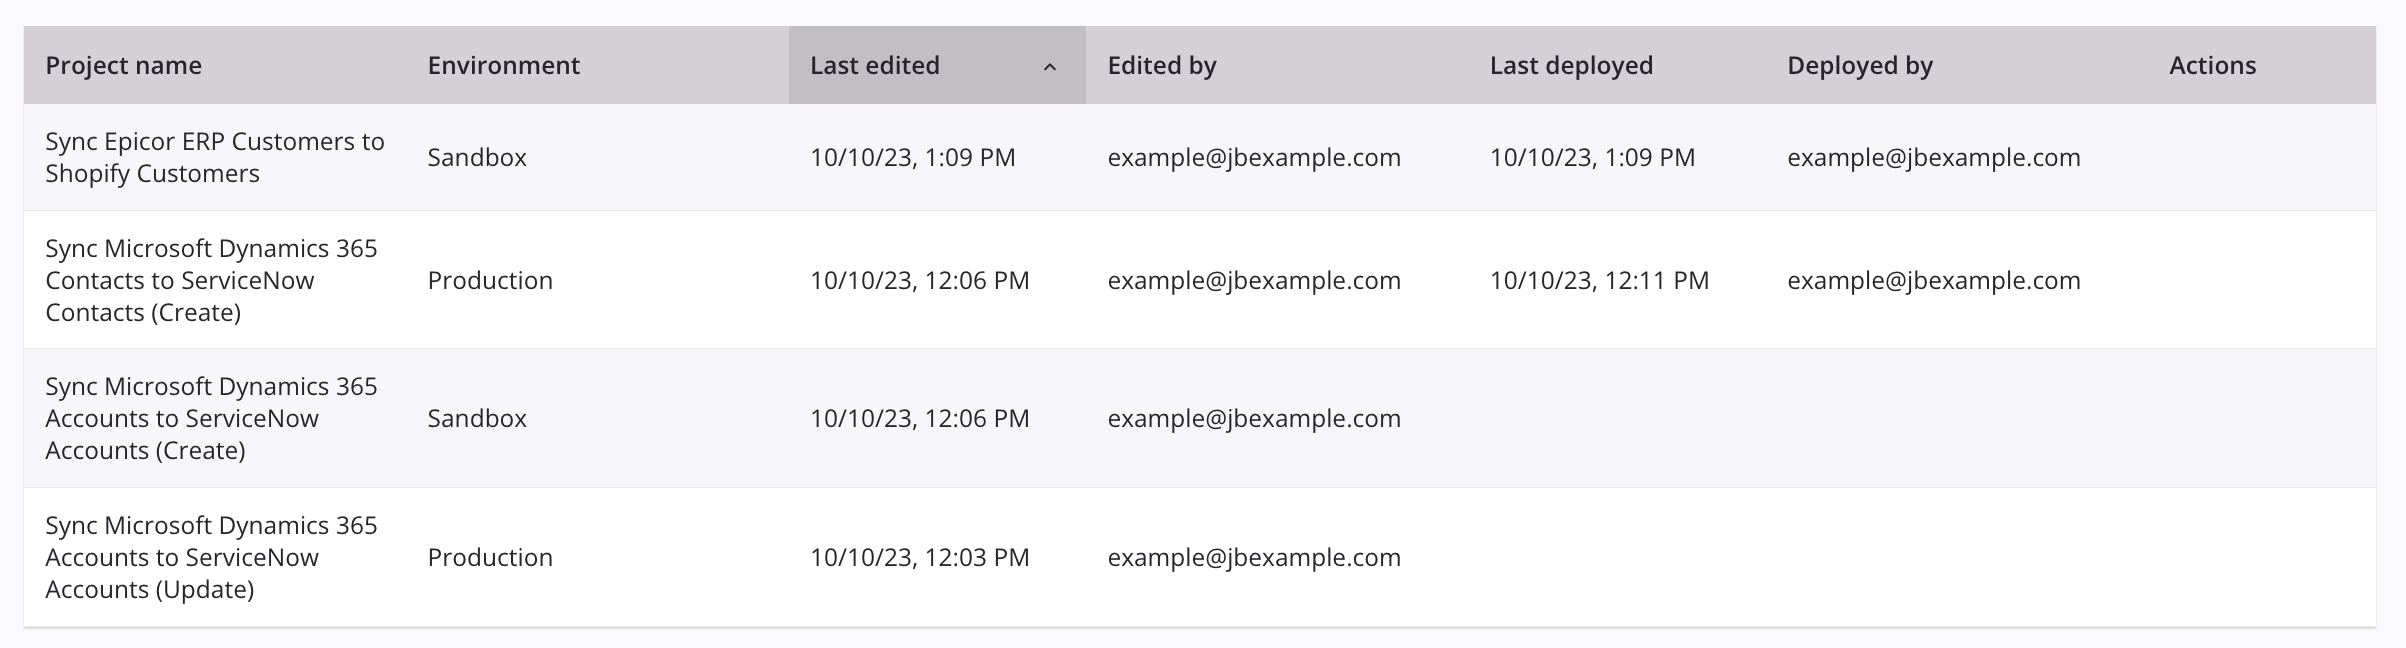
List view
To access list view, select the list view icon .
List view displays projects in a table with the columns described in this section. You can sort each column except the Actions column by clicking the column header. Additional actions in the Actions column appear when you hover over a project row:
-
Project name: The name of the project. Click the name to open the project in the project designer.
-
Select: You can select multiple projects to perform bulk actions. Select projects individually or select them in groups by clicking one project and Shift-clicking another to select that range of projects. When projects are selected, these actions become available at the top of the table:
- Delete (remove selected projects; maximum 10 at once)
- Label (assign labels to selected projects)
- Favorite (add selected projects to the Favorites folder)
-
Favorite: Click to add the project to the Favorites folder. When you favorite a project, it appears with a yellow star.
-
-
Environment: The environment where the project is stored.
- Label: Labels assigned to the project. When a project has multiple labels, the first label is displayed alongside a count indicator (for example, +2) showing the number of additional labels. Hover over the count indicator to view all label names in a tooltip.
- Last edited: The local browser date and time when the project was last edited.
- Edited by: The username of the user who last edited the project.
- Last deployed: The local browser date and time when any part of the project was last deployed. This column is not shown for projects in the Trash folder.
- Deployed by: The username of the user who last deployed any part of the project. This column is not shown for projects in the Trash folder.
- Trashed: Visible only when you access the Trash folder. The local browser date and time when the project was moved to the trash.
- Trashed by: Visible only when you access the Trash folder. The username of the user who moved the project to the trash.
- Sort: To sort the table, click any column header except Actions.
-
Actions: Hover over a project row to reveal additional actions. These actions are not visible when you access the Trash folder.
- Edit: Opens the project in the project designer.
- Label: Click to assign labels to a project. When you click this icon, select one or more user-created labels to assign to the project.
- Description: Opens a tooltip with the project description.
-
Move to trash: Removes the project from the environment in Studio and the Harmony cloud. The project moves to the Trash folder. You can restore the project up to 90 days after moving it to trash. After 90 days, the project is permanently deleted and cannot be restored.
-
Additional Actions: Opens a menu with these additional actions:
Projects folder menu item Description Project settings opens the project configuration screen, where you can edit the project name and description, or export or delete the project (see Edit project settings in Project creation and configuration). Project history opens a drawer on the right side of the Projects page where you can view the project's history events, tag events, and restore the project (see Project history). Logs opens the operation log screen, which includes logs for any operations that have been deployed and executed within the project (see Operation logs). Project variables opens the project drawer, where you can view, edit, and add new project variables in the Project Variables tab (see Project variables). Export opens the project export screen, where you can export the project as a JSON file (see Project exports and imports). Permanently deletes the project. This action cannot be reversed.
These actions are available when accessing the Trash folder:
-
Restore: Restores the project to its original environment and moves it into the Projects folder. This action does not restore the project history or restore the project to the Harmony cloud (the project must be deployed before executing).
-
Delete Permanently: Permanently deletes the project. This action cannot be reversed.