Monitor a process queue in Wevo iPaaS
A process queue is a method of organizing data sent by a flow. They can sit in the queue until they are integrated into their target systems. This page describes how to monitor the status of your process queues.
Access a process queue
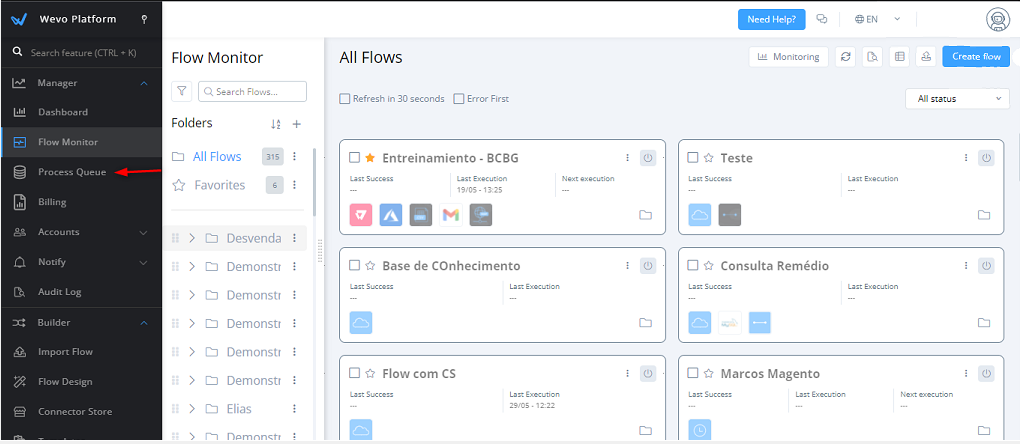
To access the Process Queue page, use the Wevo iPaaS menu to select Manager > Process Queue:
On the Process Queue page, you can access process queues as follows:
-
Browsing: To browse between pages, use the next and back arrows. There is a counter showing how many pages of records exist. To update the information, click the refresh icon.
-
Search: Click the magnifying glass to locate a specific queue more quickly by typing its name and searching for it.

View queue records
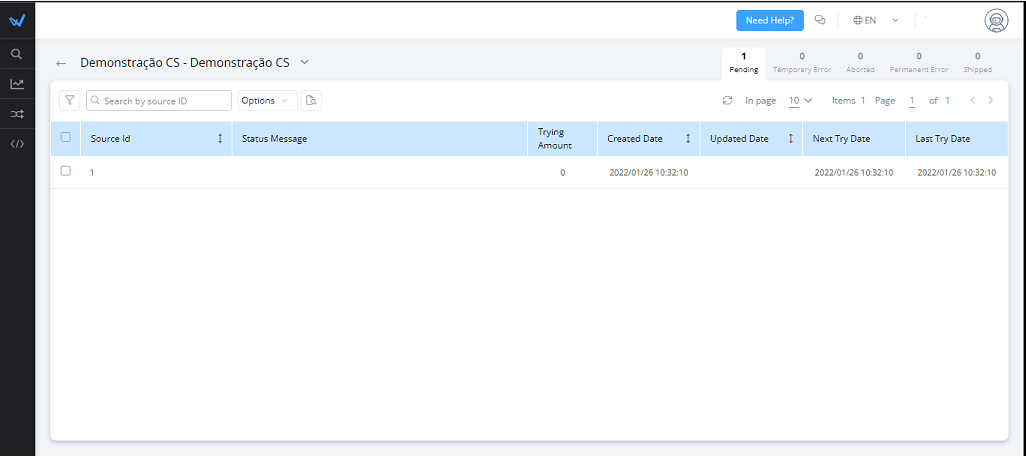
Click on one of the queues or Details to display the records. They will be shown like this:
-
Source ID: A unique code that identifies the record of a single process.
-
Trying Amount: A counter that keeps track of how many attempts were made to integrate a process.
-
Created Date: When a record was created.
-
Updated Date: When the most recent update was made to the record.
-
Next Try Date: When the next attempt to integrate the process is scheduled to take place.
-
Last Try Date: When the most recent attempt to integrate the process took place.
Note
When you click on a piece of data in a process queue, a window is opened where you can view all the information described above, as well as a few others, like the time of each attempt, and the ID, queue ID, destination ID, and message body of that piece of data.

Status
You can see counters on the right side of the screen that keep track of how many records on that queue have each of the five possible statuses. This is what each one of them means:

-
Pending: This queue represents all processes whose integrations are still pending.
-
Temporary error: If a process hasn't integrated for any reason, it will be assigned a Temporary error status, and will remain there as long as it still has pre-configured reattempts to go through.
-
Aborted: When the integration of a process is deliberately prevented, an Aborted status is assigned. The Abort a record section below shows how you can prevent an integration from taking place.
-
Permanent error: After a process that had been assigned a Temporary error status has exhausted all of its pre-configured reattempts and the integration still wasn't successfully completed, it gets assigned a Permanent error status, and remains there indefinitely unless any issues are manually fixed.
-
Shipped: This status means that a record was successfully integrated.
Queue options
The Options menu along the top of a process queue's details table has these options:

-
Edit queue: Edit the name and description of your process queue.
-
Send to Email: Generate a spreadsheet with the process queue's data, or only the data pertaining to a certain status, and send it via email. Additional information about this option is provided in Send to Email below.
-
Connected flows: Opens a dialog showing a list of flows connected to the dynamic storage and their statuses. You can filter the list by name or status:
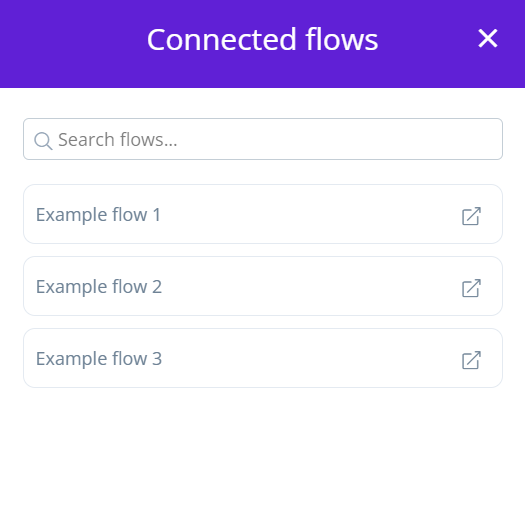
Click the shortcut icon of a flow to open it.
-
Data retention: Opens a dialog where you can change the length of time process queue data is stored.
-
Delete items: Use this option to delete the data in a process queue. To do so, select all the records you want to delete then click Delete items.
-
Move to Aborted: Allows you to assign the Aborted status to a process, thus preventing the integration.
-
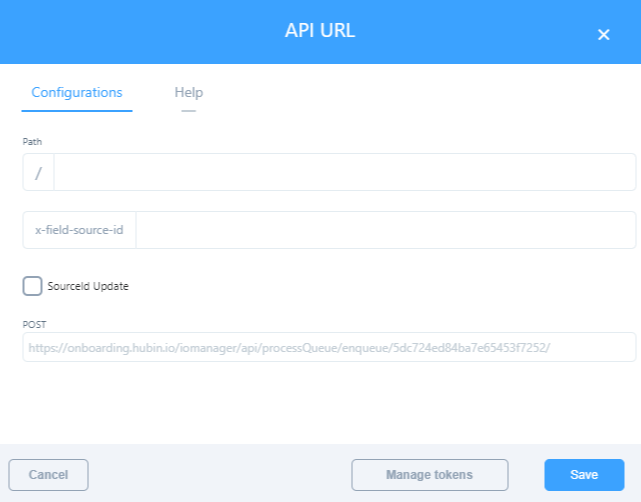
API URL: You can enter information of the API that will be activated when the process queue's data are sent to integration.
Abort a record
You can manually prevent the integration of a record by moving it to the Aborted status. To do so, follow these steps:
-
Search for the record whose status you want to alter.
-
Select its checkbox.

-
Click Queue options to see a list of options:

-
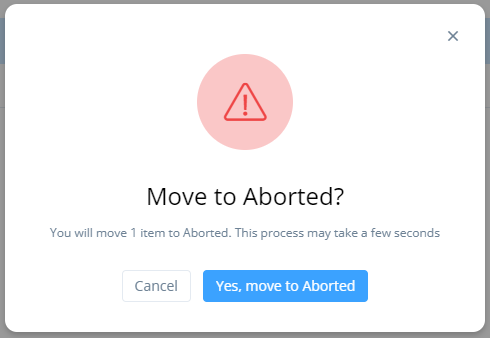
Click Move to Aborted and confirm. You can do that to more than one record if you want.
Audit log
This feature allows you to audit your records based on their actions. See Audit log to learn more.
Send to Email
You can download the records in a spreadsheet that can be easily shared, which can be helpful if there is ever a need to draft reports, for instance. To do so, click the queue's Options menu and select Send to Email.
The Send to Email dialog opens, where you specify the following:
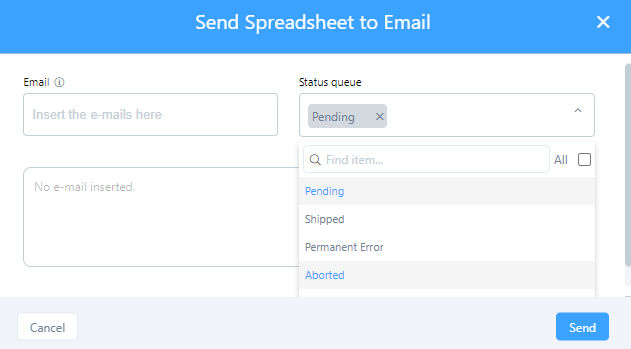
- Status: Use the menu to select or remove statuses of the records you want to download.
- Date interval: Select the date interval of the records you want to download. The interval is based on the Created Date.
- Send to: Enter each recipient email address, one at a time, clicking the icon after entering each one to add it to the text box below.
Click Export to send an email to the specified recipients with a link to download the requested data as a package of ZIP files with the following file structure.
File structure
The initial emailed ZIP file has the following naming convention:
{Tenant}-{Process queue name up to 20 characters}-{Statuses}-{UTC date in format yyyyMMDD}_{UTC time in format HHmmssZ}.zip
For example:
exampletenant-Example Process Queue-Pending - Shipped-20250625_8374b381.zip
When decompressed, that file decompresses into a second layer of ZIP files divided by status (1 status per ZIP) and quantity (maximum of 10 CSV files in each ZIP). The names of this second layer of ZIP files are prefixed with a file index starting at 0, followed by c for "compressed", followed by the specific status for that ZIP, followed by the base name of the initial ZIP file:
{Index}{c}-{Status}-{Tenant}-{Process queue name up to 20 characters}--{UTC date in format yyyyMMDD}_{UTC time in format HHmmssZ}.zip
For example:
0c-Pending-exampletenant-Example Process Queue-20250625_8374b381.zip
When decompressed, each of the second layer of ZIP files decompresses into CSV files (maximum of 10,000 lines per CSV) that contain the requested data. The CSV files are prefixed with a file index starting at 1 and the status, followed by the base name of the initial ZIP file:
{Index}-{Status}-{Tenant}-{Process queue name up to 20 characters}-{UTC date in format yyyyMMDD}_{UTC time in format HHmmssZ}.csv
For example:
1-Pending-exampletenant-Example Process Queue-20250625_8374b381.csv