Project history in Jitterbit Studio
Introduction
This page describes how to view project history, manage snapshots, and restore projects. Project history is stored for a maximum of 180 days. Snapshots remain available indefinitely. When you export a project, both the project history and snapshots are cleared from the exported version.
Access project history and snapshots
You can access the Project history drawer from the following locations:
- The design canvas (see Design canvas actions menu).
- The Projects page (see Card view or List view).
The drawer contains two tabs:
- Project history: Shows a list of project changes and deployments. Each entry includes the date, time, and the user who performed each action.
- Snapshots: Shows a list of snapshots created automatically or manually.
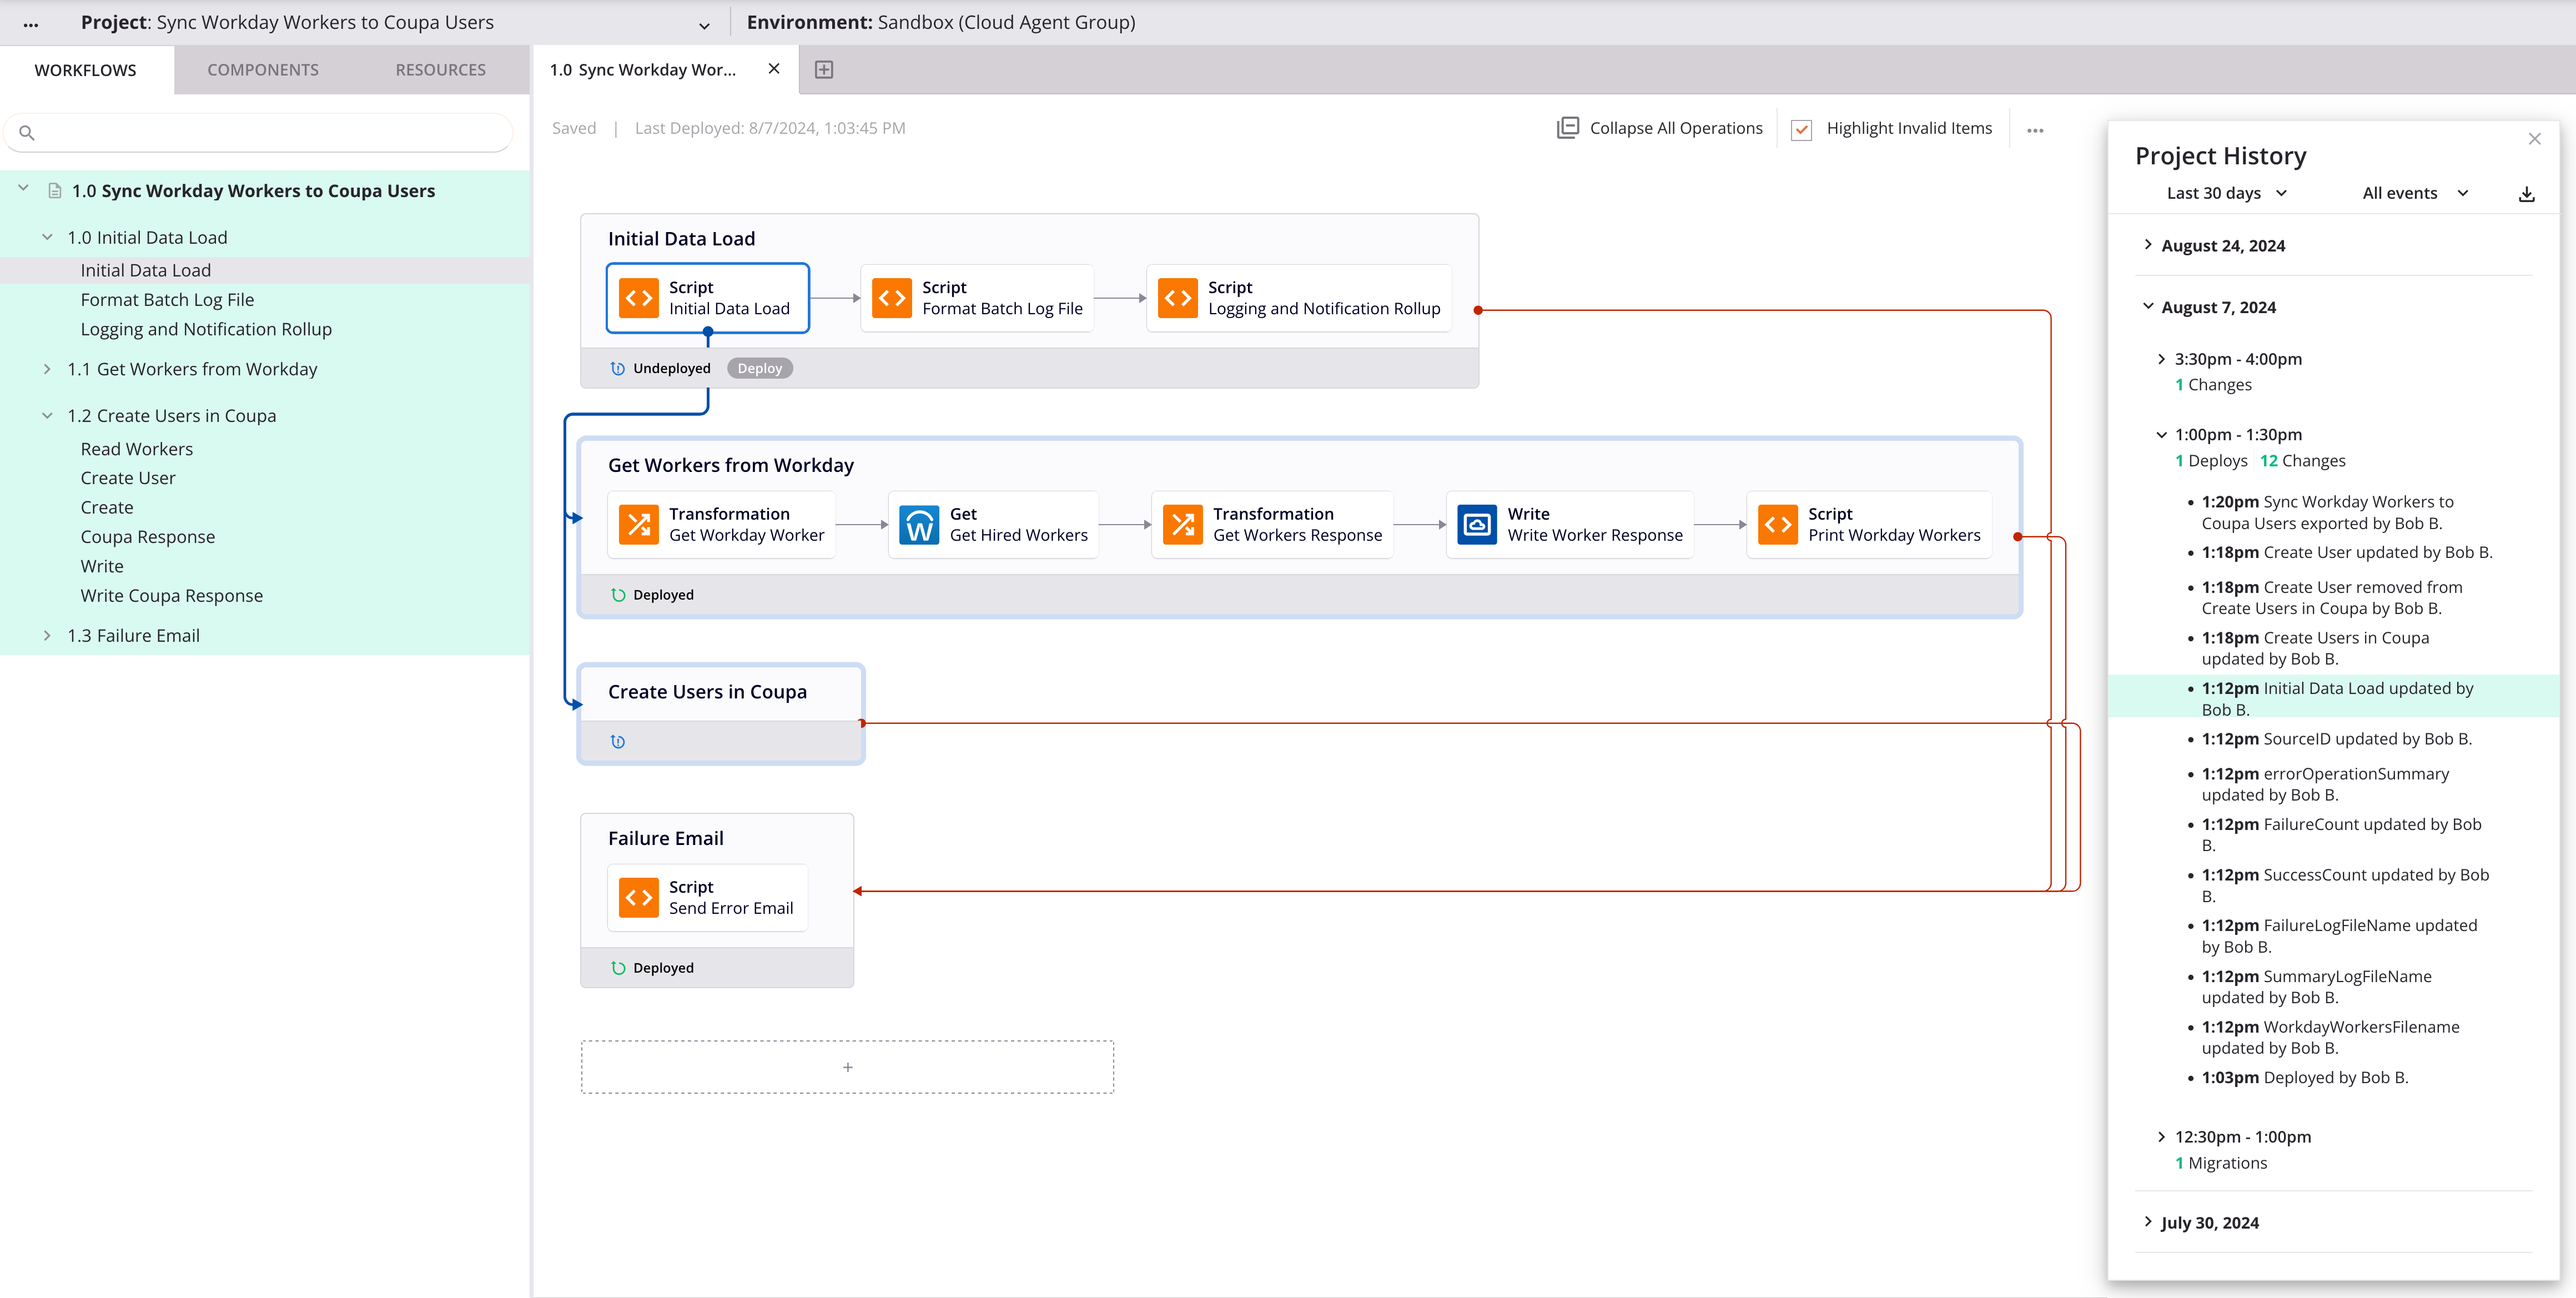
View project history
Project history events are grouped by day in reverse chronological order. Each event is listed individually with its timestamp and shows the user's first name and last name initial.
Component change events display an icon that identifies the component type. Hover over the icon to view a tooltip showing the type (for example, "Script", "Global Variable", or "Transformation").
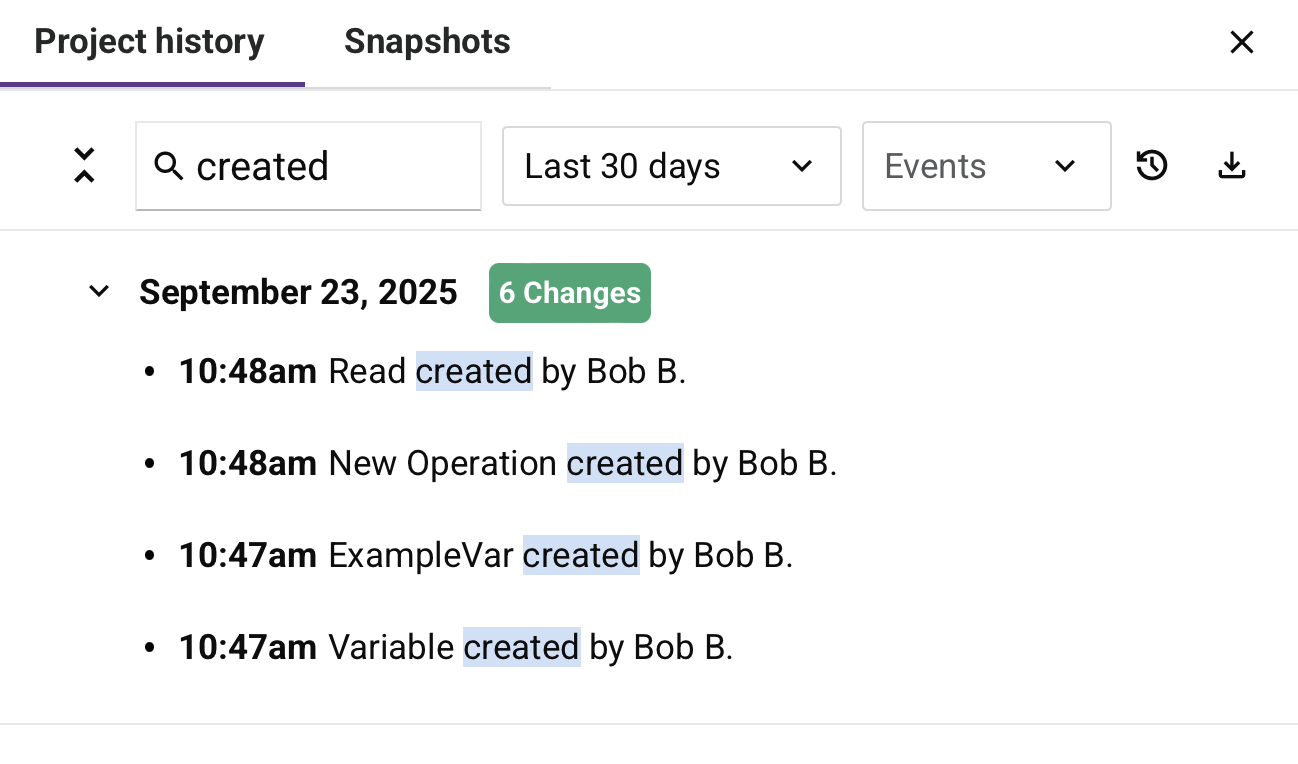
Filter history
The following controls are available to filter the history view:

-
Search box: Enter a single keyword or keyword string. Only events containing the keyword string appear, and the keyword string is highlighted in blue.
-
Timeframe menu: Select Last 30 days, Last 60 days, Last 90 days, or Last 180 days.
-
Event type menu: Select which event types to display. The following options are available:
- All events: Displays all project history events with any tags.
- Deploys: Displays deployment events only.
- Migrations: Displays full project transfers only.
- Imports: Displays import events only.
- Transfers: Displays selective transfer events only.
- Tagged: Displays events that have been tagged.
View event details
To view or collapse event details, click the caret next to a day header to expand or collapse all events for that day.

The following additional controls are available:
- Expand / Collapse all: Expands or collapses all event details at once.
- Restore last deployed version: Restores the project to the last deployment.
- Download as CSV: Downloads current filtered history data.
Event types
The following table describes each event type:
| Event Type | Actions |
|---|---|
| Change: Component created, updated, or deleted. For scripts, transformations, and connector endpoint and activity configurations, detailed change information is expanded by default as nested bullet points. These details can be expanded or collapsed using the caret icons. When you click a change event for a created or updated component, the design canvas focuses on the component (outlined with a blue border), the Workflows tab displays with a green background, and the component is selected in the Components tab. | Click to view the component. |
| Export: Project exported at a specific date and time. | View details only. |
| Import: Component imported. A Replace icon indicates that the imported component replaces an existing component. A New icon indicates that the imported component is new. | View details only. |
| Transfer: Selective transfer event, along with the event's project history tag, if present. | Add tags and comments or restore. |
| Migrate: Full project transfer to or from another environment, along with the event's required project history tag. | Add tags and comments or restore. |
| Deploy: Project deployment, along with the event's project history tag, if present. | Add tags and comments or restore. |
| Restore: Project restored to previous version, along with the event's project history tag, if present. | Add tags and comments or restore. |
Detailed change information
For script, transformation, and connector endpoint and activity configuration components, detailed change information is shown by default as nested bullet points beneath the change event entry:

The detailed changes may include the following:
- Script type changes (for example, "Script type was changed from JavaScript to Jitterbit Script").
- Script content changes (shown as "Script body was changed").
- Transformation mapping changes.
- Connector endpoint and activity configuration field changes, including authentication field changes (for example, "Authentication type changed").
- Other direct configuration updates.
Note
Indirect changes are not logged. For example, if a script or transformation was changed indirectly by changing the value of a variable used in a script, that detail is not logged. However, a change to the variable component itself is still logged separately.
Compare changes
For script and transformation change events that include body or mapping rule updates, a View changes icon appears next to the change detail entry. Click View changes to open a diff view that shows a side-by-side comparison of the component content before and after the change.
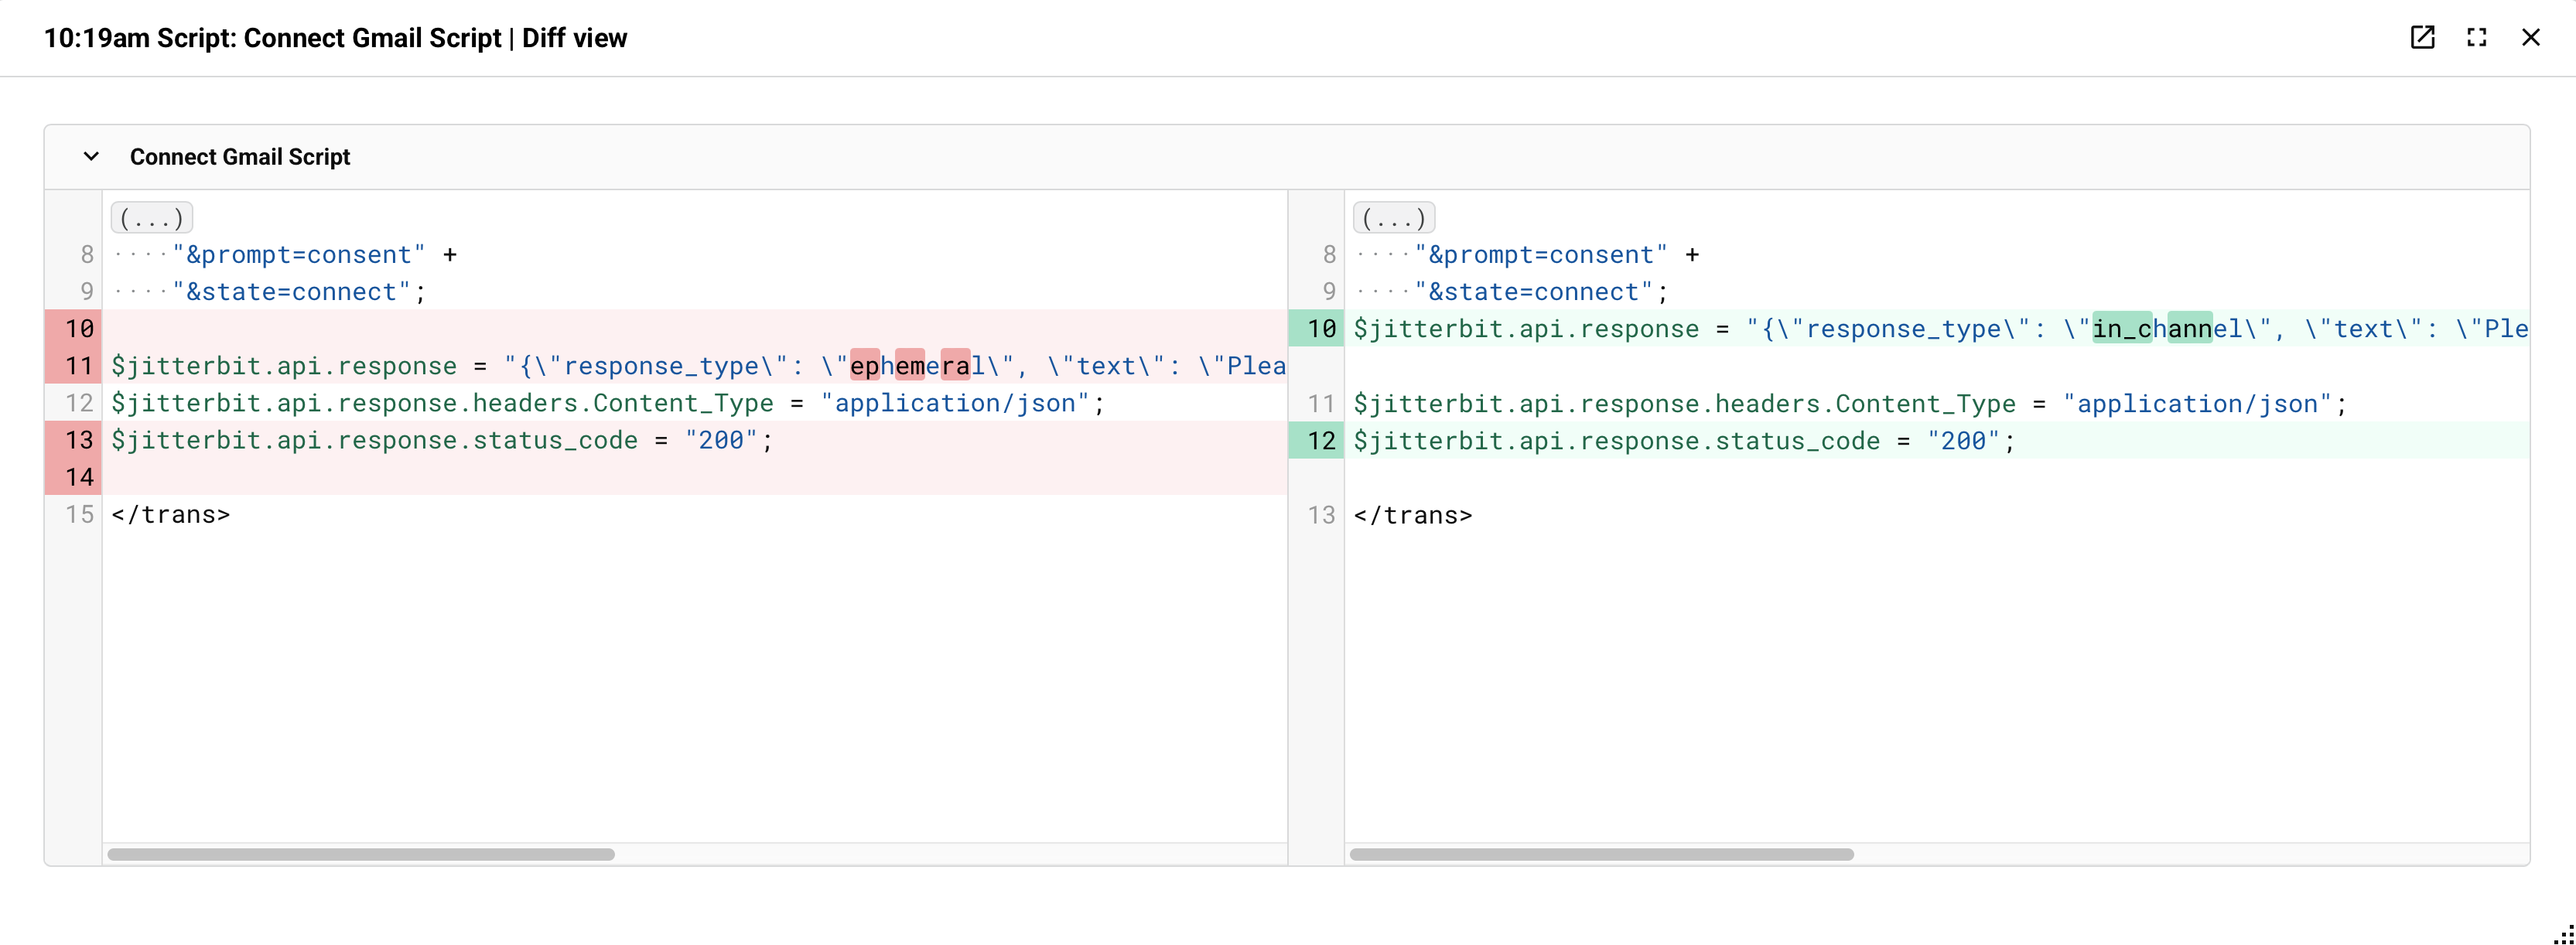
The diff view title bar displays the event timestamp, component type, and component name (for example, "7:06am Script: Fine Tune Data"). The following controls are available in the title bar:
-
Pop-out: Opens the diff view in a new popup window.
-
Maximize / Restore: Expands the diff view to fill the available screen space or returns it to its default size.
-
Close: Closes the diff view.
You can drag the diff view by its title bar to reposition it anywhere on the screen, and resize it by dragging its edges or corners.
The diff view shows two panels side by side:
- Left panel: Shows the previous version of the content. Removed lines are highlighted in red.
- Right panel: Shows the updated version of the content. Added lines are highlighted in green.
For transformations, each changed mapping rule appears as a collapsible section labeled with the field path (for example, "Mapping rule json/isActive"). Click the caret to expand or collapse individual sections. A vertical scrollbar is available when the diff contains many changes.
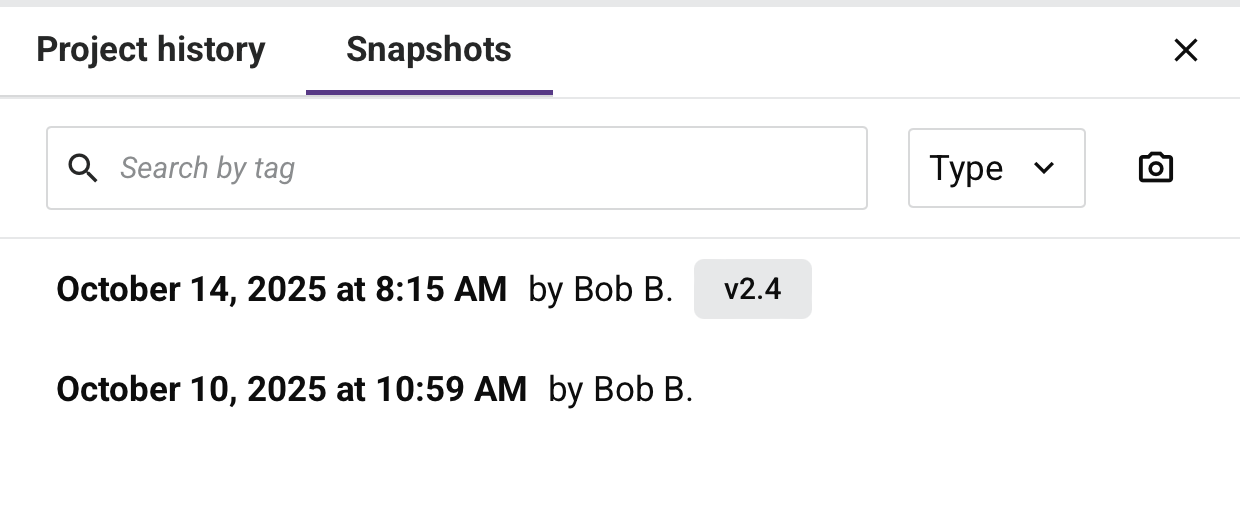
Manage snapshots
Snapshots capture your project state at specific points in time. Automatic snapshots are created during deployments, transfers, and imports. You can also create manual snapshots.
Create a manual snapshot
To create a snapshot, complete these steps:
-
Open the Snapshots tab in the project history drawer.
-
Click the Create snapshot icon.
-
The New snapshot dialog includes the following fields:
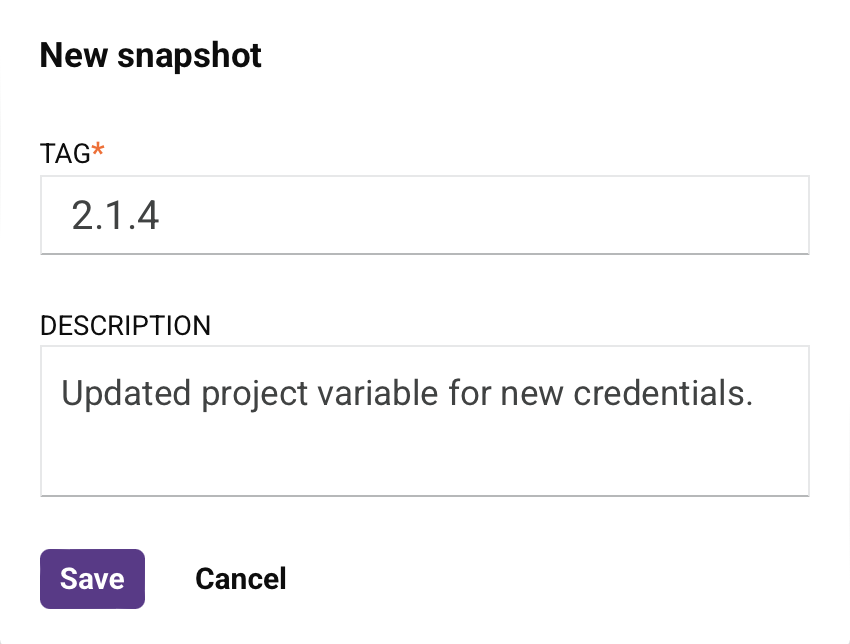
- Tag: Enter a unique tag to label the snapshot (required).
- Description: Enter an optional description.
-
Click Save.
Snapshots are stored indefinitely.
Filter snapshots
The following controls are available in the Snapshots tab:

-
Search by tag: Enter tag names to find specific snapshots.
-
Type menu: Filter by Automatic or Manual snapshots:
-
Automatic: Automatic snapshots are captured during these events:
- Deployment: The project designer at the time of deployment.
- Transfer or migration: The target project designer before the transfer or migration is applied.
- Import: The project designer before the import is applied.
-
Manual: Snapshots created manually.
-
Tag events and snapshots
Transfer, deploy, and restore events can include tags and comments for versioning and organization.
Tag requirements
Transfer events must be tagged from the project transfer screen before the project can be transferred.
Deploy events can be configured to require tags or comments. To require tags or comments at deploy time, enable Require tags when deploying in the project setting's Deploy tab. When enabled, you see a dialog that requests the required tag or comment when you deploy the project.
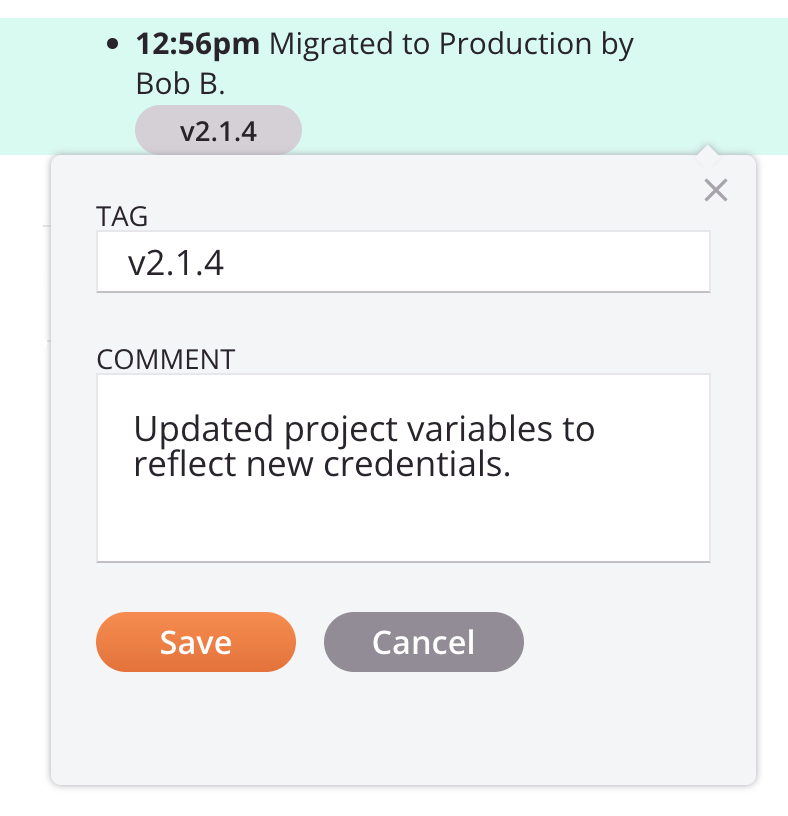
Add or edit tags
To add or edit a tag, complete these steps:
-
Hover over the event or snapshot.
-
Click Details.
-
The dialog includes the following fields:
-
Tag: Enter a label (unique tag recommended but not required).
-
Comment (events) or Description (snapshots): Enter additional information.
-
-
Click Save.
You can edit tags and comments that you added. Tags and comments added by other users are view-only.
Restore a project
Project backups are automatically created when you transfer, deploy, or restore a project.
Restore to a specific version
To restore a project, complete these steps:
-
In the project history drawer, locate the event or snapshot you want to restore to.
-
Hover over the event or snapshot.
-
Click Restore this version.
-
In the confirmation dialog, click Restore.
The project designer reverts to the selected version. This action does not affect the deployed version. Redeploy the project to deploy the restored state.
Alternatively, you can restore your project to the last deployed version by using the Restore last deployed version icon (described above).
Note
Project restore events cannot be undone or redone.
Restore corrupted projects
If a project is corrupted and cannot be opened, you can access the project history from the project's action menu on the Projects page and restore the project to an earlier state before corruption occurred.
Collaborate during restore
When multiple users work on the same project simultaneously and someone restores the project, the following occurs:
- An informational dialog appears for all active users.
- Closing the dialog updates their view to reflect the restored project state.
This behavior prevents unexpected changes to active work sessions without warning.