Deploy a project in Jitterbit Studio
Introduction
This page describes how to deploy projects, workflows, or operations to the Harmony cloud. After you deploy an operation and its dependencies, you can execute those operations. For more information, see Operation deployment and execution.
Deployment methods
You can deploy projects using two methods:
-
Deploy: Deploys all operations used by a project's workflows. When you use this option, the project is immediately deployed or validation errors that prevent deployment are reported.
-
Configurable Deploy: Deploys selected workflows and operations. When you use this option, a deployment configuration screen opens where you can choose which workflows and operations to deploy.
Note
When you rename a project that you previously deployed, the new project name is automatically deployed and updated in Harmony. No other part of the project is automatically deployed.
Deploy
You can access the Deploy option from the following locations:
- The project toolbar (see Project actions menu in Project toolbar).
- The design canvas (see Deploy/migrate actions menu in Design canvas).
When you select Deploy, all operations used by a project's workflows are immediately deployed. For the deploy to succeed, all workflows and operations in the project must be valid. Unused components that are not part of the logical flow of a project workflow are not deployed.
If any workflows or operations are invalid, a dialog displays the specific validation errors. For documentation on each error and how to resolve it, see Workflow validity and Operation validity.
Configurable deploy
You can access the Configurable Deploy option from the following locations:
- The project toolbar. For more information, see Project actions menu in Project toolbar.
- The design canvas. For more information, see Deploy/migrate actions menu in Design canvas.
When you select Configurable Deploy, a deployment configuration screen opens where you can define a tag and comment and choose which workflows or operations to deploy.
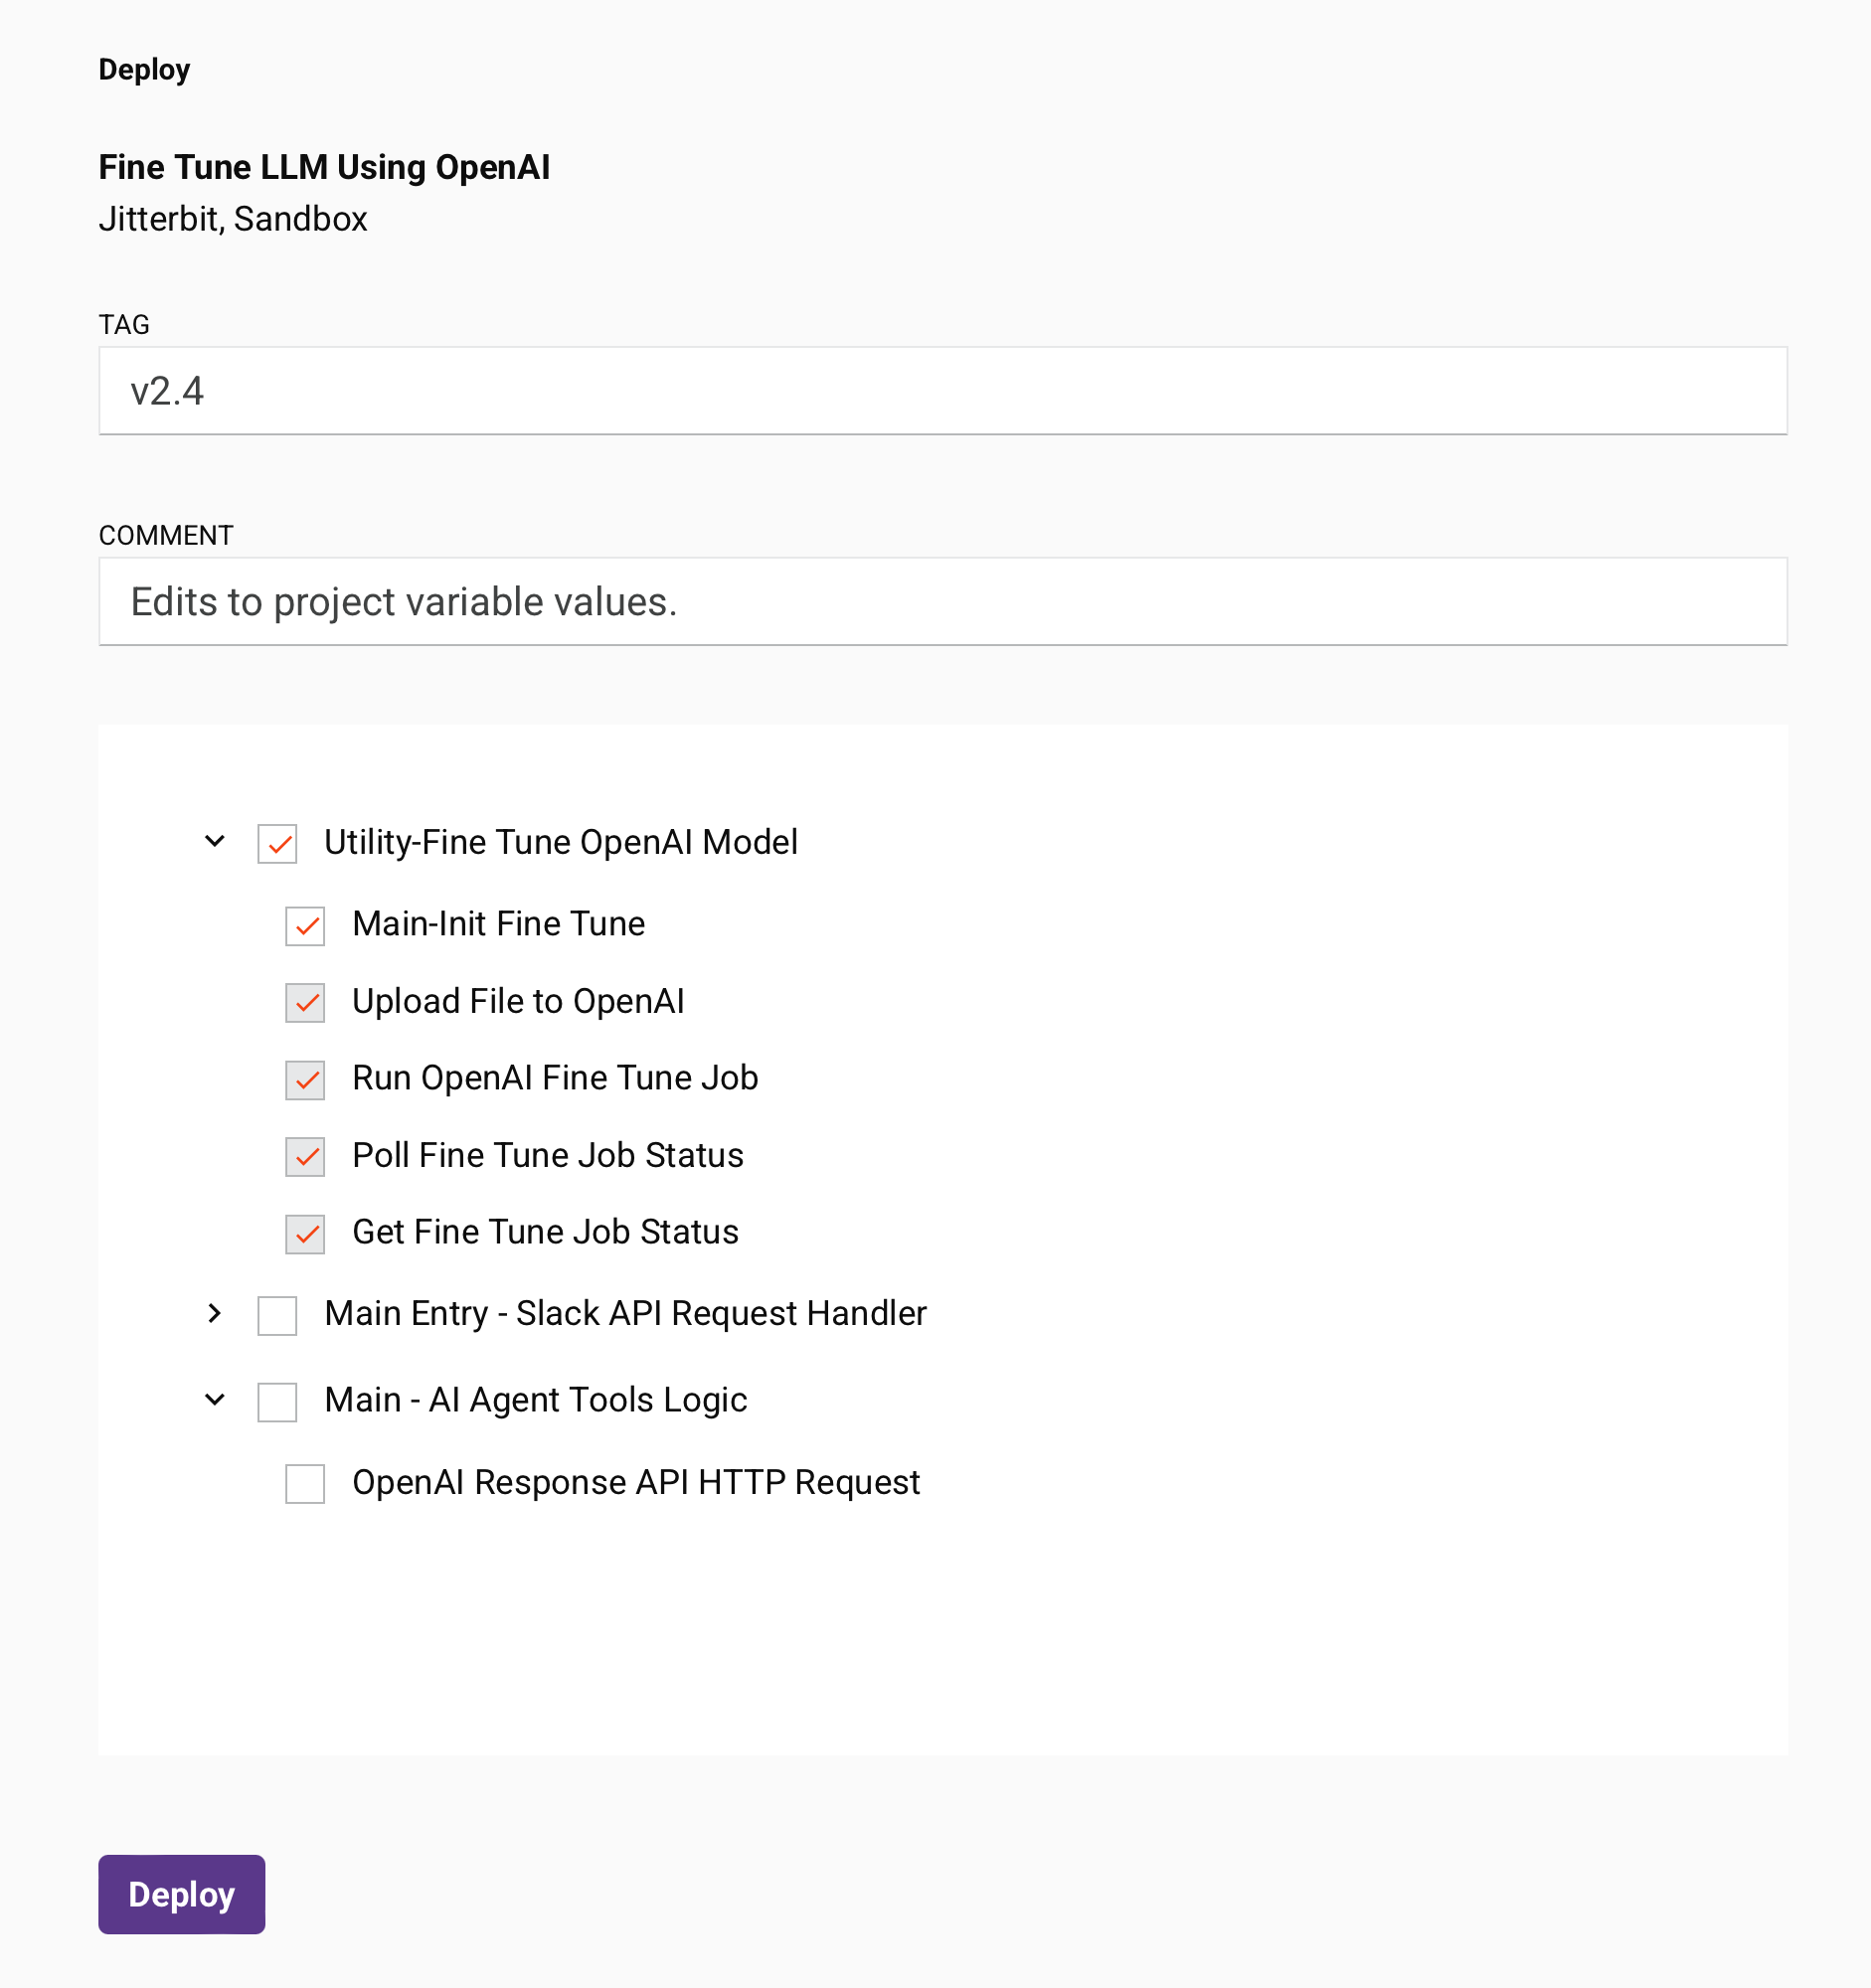
-
Project Information: The top of the screen displays the project name and the Harmony organization and environment where the project exists.
-
Tag: Enter a tag to label the deploy event. The tag appears as a label on the deploy event and is recorded in the deploy details accessible from the project history. This field may be required depending on project-level deployment settings.
-
Comment: Enter a comment to describe the deploy event. The comment is recorded in the deploy details accessible from the project history. This field may be required depending on project-level deployment settings.
-
Select Workflows and Operations: Select the workflows or operations to deploy. By default, none are selected. You must select at least one item to enable the Deploy button.
When you select a workflow or operation, any dependent workflows or operations are also selected and cannot be cleared.
To collapse or expand workflows and operations, use the carets displayed to the left of the workflow or operation name.
Invalid workflows or operations appear in red italicized text. You must select only valid items to enable the Deploy button.
-
Deploy: Click to deploy the selected workflows or operations.
Deployment requirements
You can configure deployment requirements for each project during project creation and configuration.
If project-level deployment settings require a tag or comment, a dialog appears when you initiate a deploy so you can enter the required information. The configurable deploy screen also provides these fields.
Dialog text
Deploy Requirements
Your organization requires a comment and a tag when deploying.
-
Tag
-
Comment
-
Tag: Enter a tag to label the deploy event. The tag appears as a label on the deploy event and is recorded in the deploy details accessible from the project history.
-
Comment: Enter a comment to describe the deploy event. The comment is recorded in the deploy details accessible from the project history.
-
Add Comment and Tag: Click to add the tag, comment, or both, and continue with the project deploy.
-
Cancel: Click to close the dialog and return to the previous screen without deploying.