Create and configure an operation in Jitterbit Studio
Introduction
An operation is the smallest unit within a workflow that is independently executed on an agent and recorded by Harmony. Operations are used to define what an integration process should do and when it should be done.
Operations are comprised of a combination of activities and tools:

The specific combination and order of these components must follow the set of valid patterns. For details on these patterns, see Operation validity.
This page explains the parts of an operation, then covers adding steps to operations, accessing menu options, renaming operations, expanding/collapsing operations, reordering operations, and reusing, removing, or moving operation steps.
Parts of an operation
Operations are formed by arranging activities and tools within an operation on the design canvas. The operation may consist of only a single script, or the arrangement may form a sequence of steps consisting of one or more activities or tools. The specific combinations that are allowed are described in Operation validity.
Activities
An activity is a component that is created from a connection and that can be configured to interact with an endpoint. Activities can be used in an operation as either a source or a target and can be configured with data schemas that represent the request and response schemas for the interaction with the endpoint. In addition to being used as an operation step, some activities can also be referenced in scripts (see Endpoints in Jitterbit Script).
For more information about the basics of connectors, as well as resources for configuring connections and activities by each connector type, see the pages under Connectors.
Sources
A source activity is any activity that provides data within an operation, which can then be transferred to a target unchanged or changed by a transformation prior to reaching a target.
Source activities require a data schema only if they will be used as input in a transformation:
- If the source activity is providing data that will be transformed, it must have a response data schema, which is either automatically provided or can be defined while configuring the activity or transformation.
- If the source activity is providing data that will not be transformed, a response schema does not need to be defined, as the response schema is not used in the operation.
Activities that are typically (but not necessarily) used as sources include those with one of these words in the name of the activity:
- Download
- Get
- Read
- Request
- Query
Targets
A target activity is any activity that receives data within an operation. This data can come from a source activity, from a transformation, or from other input such as variables or scripts.
Target activities require a data schema only if they are receiving data that has been transformed or if they provide a response that you want to write to another target:
- If the target activity is receiving data that has been transformed, it must have a request data schema, which is either automatically provided or can be defined while configuring the activity or transformation.
- If the target activity is receiving data that has not been transformed, a request schema does not need to be defined, as the request schema is not used in the operation.
- If a specific type of target activity provides a response, then you can also have a response data schema. If you want to write the response to another target, the response data schema is either automatically provided or can be defined while configuring the activity or transformation. If the target type provides a response, an operation is not required to write the response to another target; that is, a response schema may be provided but can be ignored within the operation if it is not required.
Activities that are typically (but not necessarily) used as targets include those with one of these words in the name of the activity:
- Add
- Create
- Delete
- Insert
- Post
- Put
- Response
- Upload
- Update
- Upsert
- Write
Tools
A tool is a project component that provides the interface to apply specific logic or conditions to data within an operation.
Scripts
A script that is created as a project component can be used as a step in an operation to transform data, perform calculations, or perform logic validation. For example, you can use a script before or after an activity to retrieve data and then process script logic, or you can run a validation script before proceeding to a transformation. For more information, see Script types and creation.
Transformations
A transformation is a project component that is used as a step in an operation to map or transform inputs to a resulting output by moving data, cleaning data, or applying business logic. After you create a transformation, you must configure it by mapping various inputs, such as source objects, variables, or scripts, to the resulting target output, usually a target data structure. For more information, see Transformations.
Additional tools
Additional tools are available in the design component palette's Tools tab (see Tools in Design component palette). These project components implement a specific function and are intended to replace the need to use scripting for certain scripts used as project components. For more information, see Tool types and creation.
Add steps to an operation
Operations are made up of project components consisting of activities or tools. To create operations, you place those components in a workflow on the design canvas as steps of an operation.
Choose the component's location within a new or existing operation
The method of adding a component to an operation depends on whether the operation is being newly created or is already existing:
-
New Operation: An operation drop zone is displayed on the design canvas wherever you can add a component to create a new operation. In a workflow that does not yet have any operations, the drop zone is displayed at the top of the design canvas by itself. In a workflow that has at least one operation, a drop zone is displayed at the bottom of the design canvas by itself, below the last operation. To show additional operation drop zones, hover above an existing operation.

-
Existing Operation: Existing operations are displayed on the design canvas with a light gray background. Hovering to the left or right of a component in an existing operation shows a component drop zone wherever you can add a component to an existing operation.

After you have decided on the location, the steps to add the component are different depending on if the component is an activity or a script or transformation, covered next.
Create connections, then add and configure activities
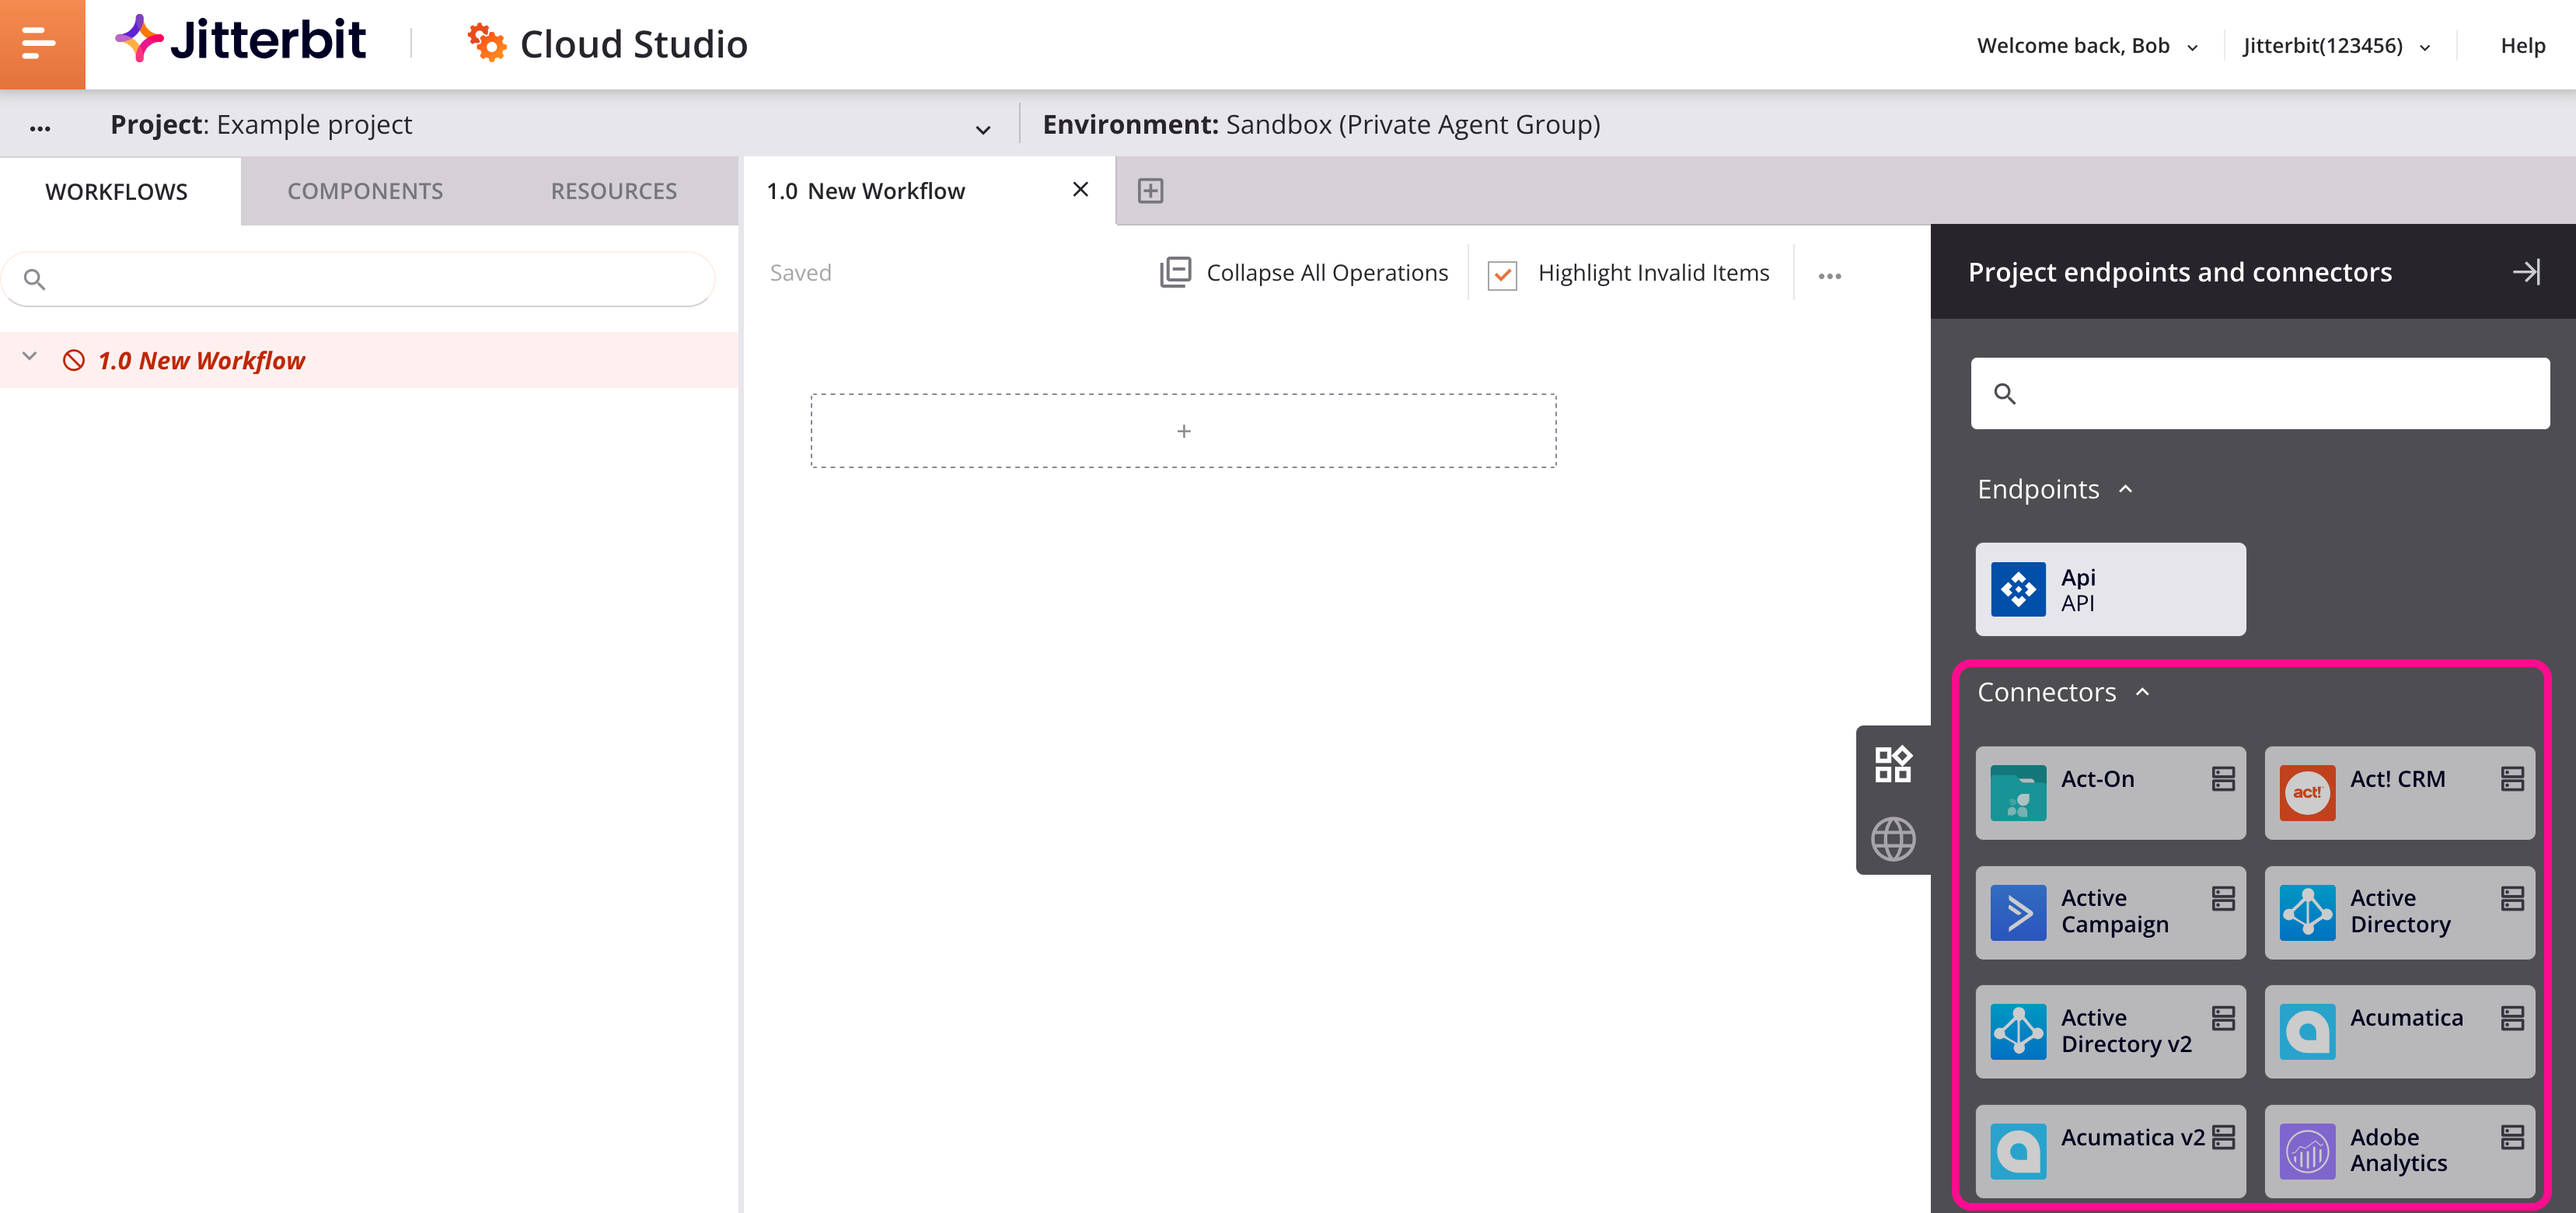
The design component palette provides access to connectivity resources. Here, connectors provide the interface entering user-provided input such as credentials to create a connection. Within the component palette, the Connectors filter shows the types of connectors that can be configured:

Each connector is represented by a connector folder icon labeled with the connector name. Click a connector to open a configuration screen to create a new endpoint for access to a particular data resource:

For detailed instructions on configuring a connection, see the specific connection under Connectors. Each time you create a new connection, you must do so from the connector folder icons accessible in the Connectors filter.
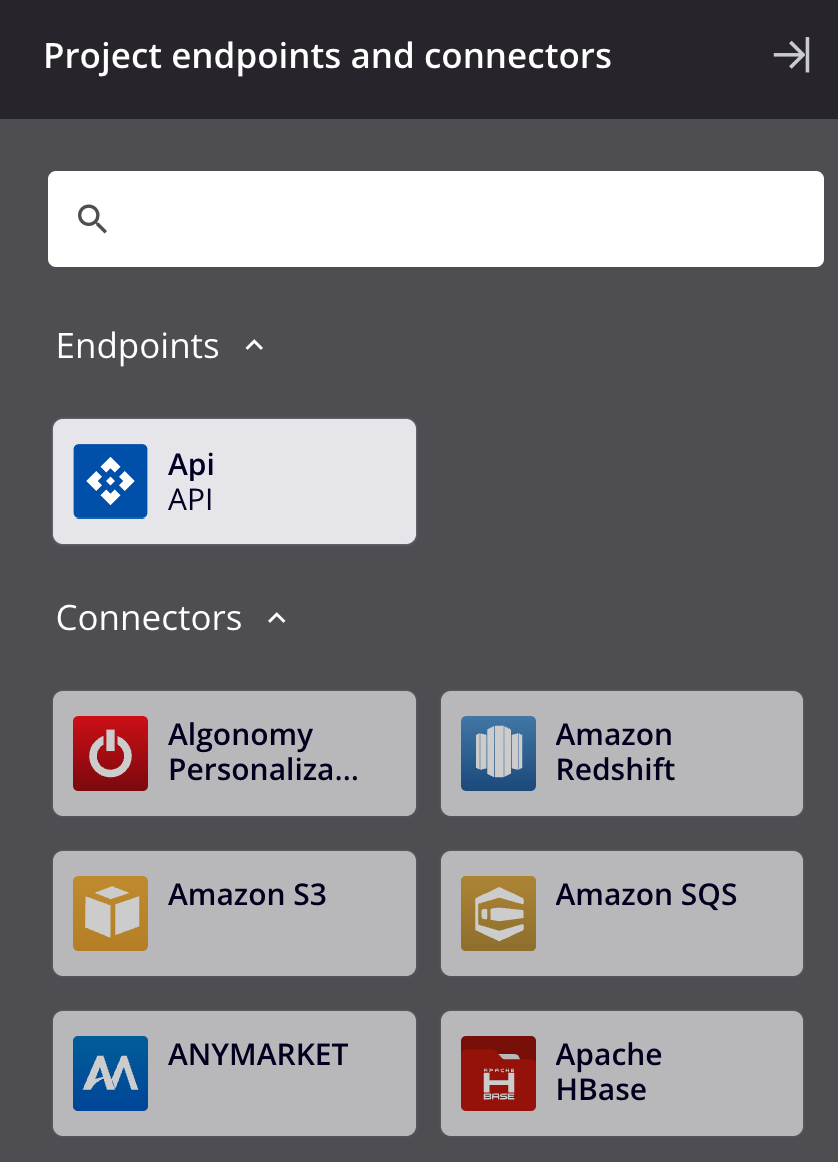
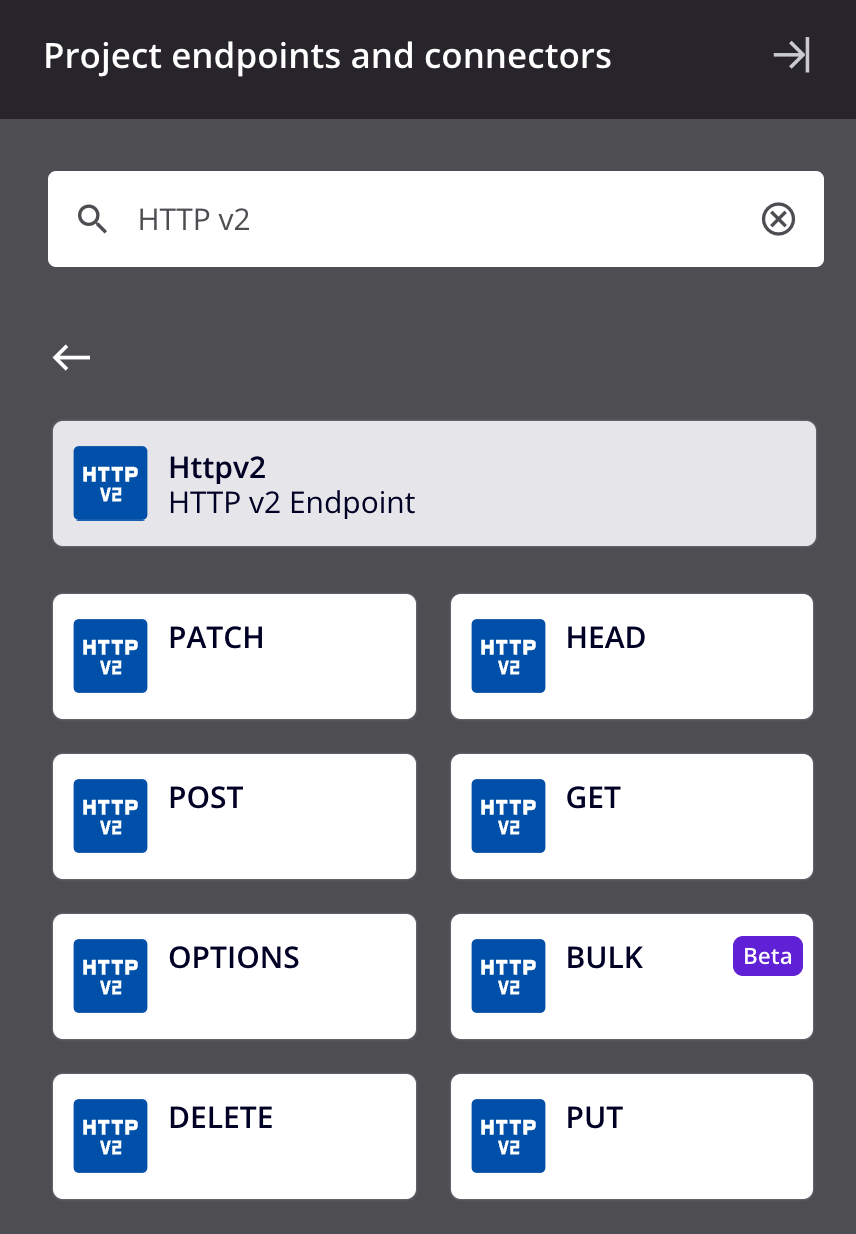
Once you have created a connection, it is shown in the Endpoints filter. Click an endpoint to open its folder and reveal the types of activities — interactions with an endpoint — that can be configured for that connection.

An endpoint refers to a specific connection and its activities, which are configured as sources (to provide data) or targets (to consume data) in a project.
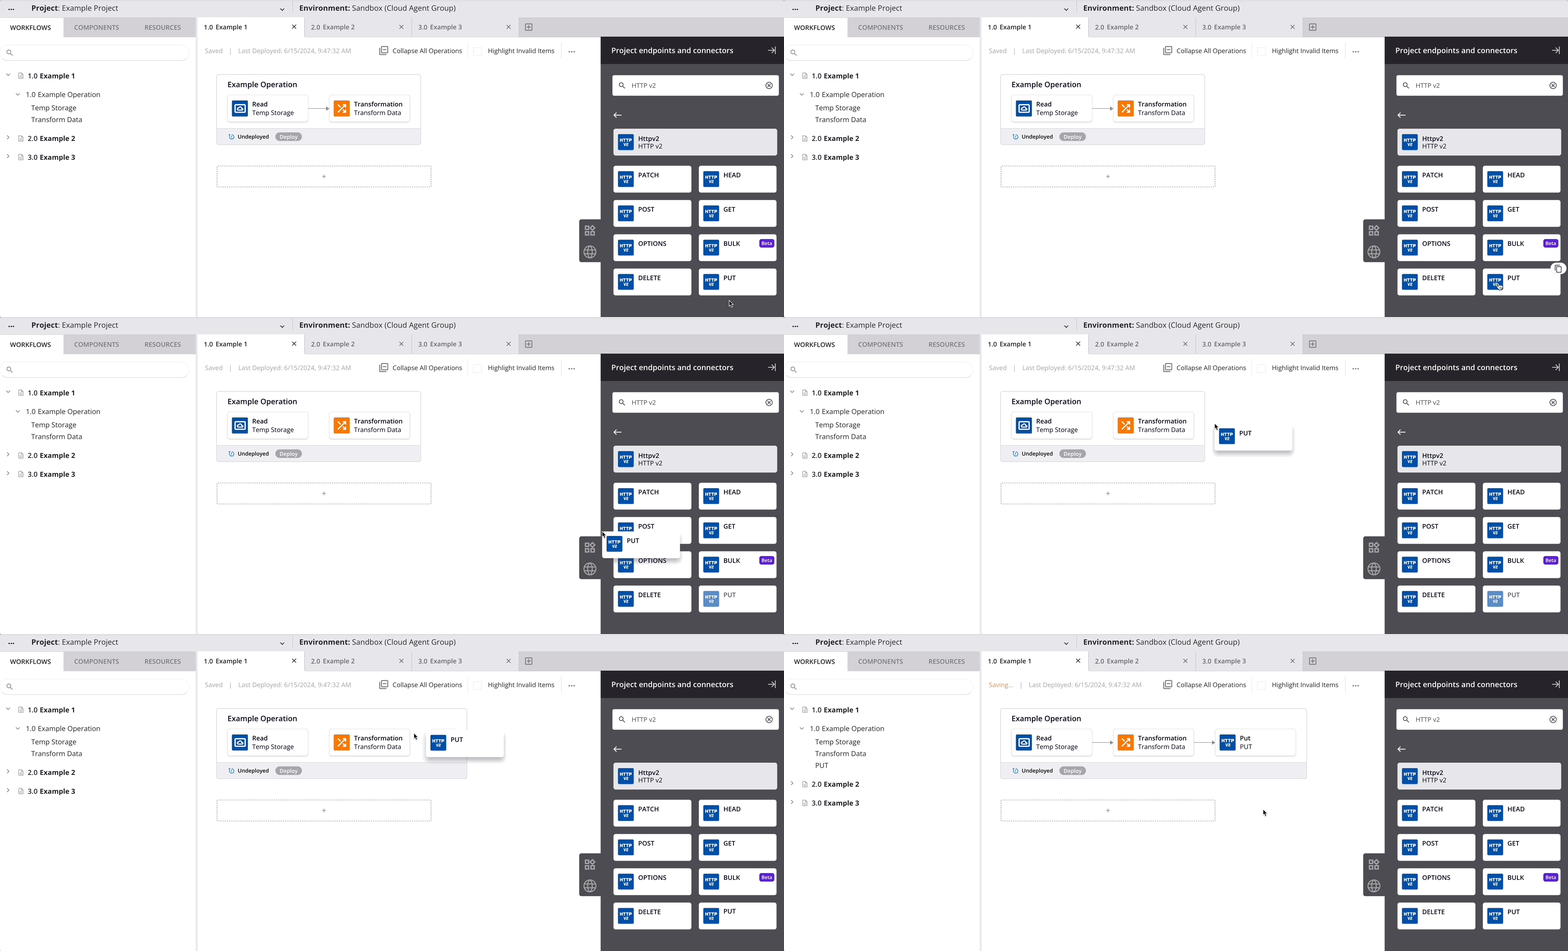
To create an instance of an activity, place an activity type on the design canvas by dragging it or copying it to an operation or component drop zone:

Once an activity is created, you can double-click it to configure it as described for each specific activity under Connectors.
Add and configure tools
You may also want to add tools to an operation. A tool can be created from these locations:
-
The project pane's Components tab using the Create New menu (see Components tab actions menu in Project pane Components tab).
-
The design component palette's Tools tab (see Tools in Design component palette).
In addition to the above, script and transformation tools can be created from the design canvas using a drop zone (see Drop zone actions menu in Design canvas):

When you add a script or transformation, its configuration screen opens automatically. For details on configuration, see Transformations and Scripts, respectively.
Note
Operation steps may be configured in any order. However, note that a schema provided in an adjacent activity takes precedence over a schema defined in a transformation. Whether you choose to define a schema in an activity or in a transformation depends on your use case. For more information, see Schema usage.
Operation actions menu
After an operation is created, menu actions for that operation are accessible from these locations:
-
The project pane's Workflows tab (see Component actions menu in Project pane Workflows tab).
-
The project pane's Components tab (see Component actions menu in Project pane Components tab).
-
The design canvas (see Component actions menu in Design canvas).
Rename operations and operation steps
When you create a new operation, its default name is New Operation. Subsequent new operations with default names are appended with an incremented number in parentheses. Operation names must be unique and must not contain forward slashes (/) or colons (:) to be valid.
Operations and operation steps can be renamed from these locations:
-
The project pane's Workflows tab (see Component actions menu in Project pane Workflows tab).
-
The project pane's Components tab (see Component actions menu in Project pane Components tab).
-
The design canvas (see Renaming workflows, operations, and operation steps in Design canvas).
Operation steps can also be renamed from their individual configuration screens.
Expand or collapse operations
When an operation is created, it is expanded by default. Operations can be collapsed or expanded individually or all at once:
-
Collapsing an Individual Operation: To collapse an individual operation, click the collapse icon in the operation action bar.
Collapsing an operation displays only the operation name and its deploy status:

-
Expanding an Individual Operation: To expand an individual operation when it is collapsed, click the expand icon in the operation action bar.
-
Collapsing All Operations: To collapse all operations in a workflow, click Collapse All Operations or the collapse all icon at the top of the design canvas.
-
Expanding All Operations: To expand all operations in a workflow when they are collapsed, click Expand All Operations or the expand all icon at the top of the design canvas.
Reorder operations
Operations can be reordered within or between workflows from the project pane's Workflows tab (see Reorder operations in Project pane Workflows tab).
Operations can be reordered within the same workflow from the design canvas (see Reorder operations in Design canvas).