Proxy server for Jitterbit private agents
Introduction
You can configure a private agent to communicate via a proxy server. How you do this depends on your agent's platform, and whether the agent is already installed and running. In any case, you must know the details of the proxy server (hostname, port number, login credentials). These are referred to in the following sections by the placeholder keywords shown below, which you should replace with the values for your proxy server:
| Keyword | Value |
|---|---|
HOSTNAME |
Hostname or IP address. |
PORT |
(Optional.) Port number. Default: 0. |
USERNAME/PASSWORD |
(Optional.) Username and password for servers requiring authentication. |
NTLM_DOMAIN |
(Optional.) NTLM domain for NTLM authentication. |
Tip
For an HTTPS proxy, you must add a certificate to the Java keystone.
Configure a proxy during agent setup
To configure a proxy while setting up an agent, follow these steps:
-
On the Login Credentials page of the standard installer, click Enable Proxy.
-
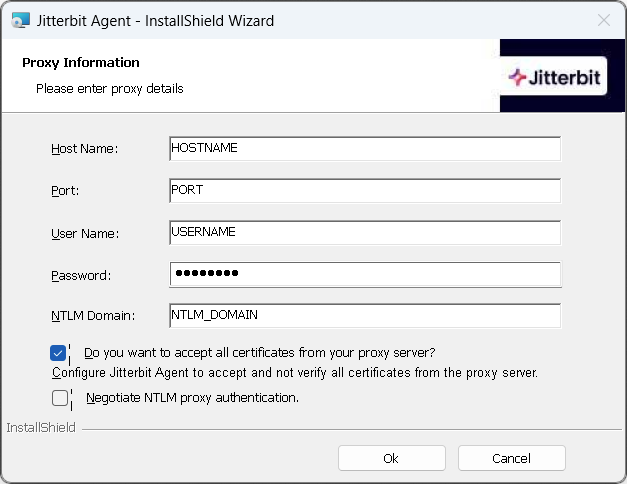
On the Proxy Information page, enter your proxy server's information, select the options you want, then click the Ok button:

-
Restart the agent.
You can not configure a proxy server before agent setup, and must use the command line or configuration utility after agent setup.
-
In the Configure step, add the arguments shown below to the
jitterbit-configcommand before running it:jitterbit-config --proxy-host HOSTNAME[:PORT] \ --proxy-user USERNAME \ --proxy-password PASSWORD \ --proxy-ntlm-domain NTLM_DOMAIN -
Restart the agent.
-
Set up a reverse proxy.
-
Configure Docker to use a proxy server.
-
Set values for the following environment variables to be passed to your container's environment (passed with the
-e/--envor--env-fileoptions):Environment variable Value PROXY_SERVER_HOSTNAMEHOSTNAMEPROXY_SERVER_USERNAMEUSERNAMEPROXY_SERVER_PASSWORDPASSWORDPROXY_SERVER_PORTPORThttp_proxyhttp://host.docker.internal:8888https_proxyhttps://host.docker.internal:8888 -
Start the container using manual registration and environment variables.
Configure after agent setup
To use a proxy after setting up an agent, follow these steps:
You can configure a proxy on the command line or with the configuration utility:
-
In a Command Prompt or PowerShell, run the
JitterbitUtils.execommand:JitterbitUtils.exe --set-http-proxy-host HOSTNAME[:PORT] ` --set-http-proxy-username USERNAME ` --set-http-proxy-pwd PASSWORD ` --set-http-proxy-domain NTLM_DOMAIN -
Restart the agent.
-
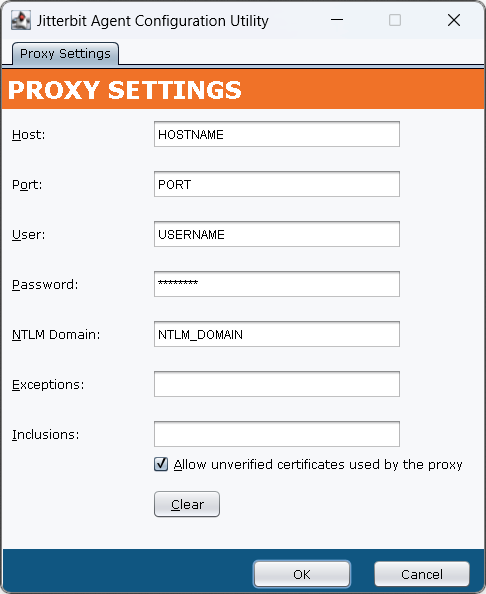
Select Start > Jitterbit Agent > Configure Jitterbit. The Jitterbit Agent Configuration Utility opens.
-
Enter your proxy server's information, select the options you want, then click the OK button:

-
Restart the agent.
-
Run the
jitterbit-utilscommand:jitterbit-utils --set-http-proxy-host HOSTNAME[:PORT] \ --set-http-proxy-username USERNAME \ --set-http-proxy-pwd PASSWORD \ --set-http-proxy-domain NTLM_DOMAIN -
Restart the agent.
Communicating via a proxy with a private API gateway
If you're using a private API gateway with an agent proxy configuration, you must specify the gateway host's IP address in the Exceptions field or with the jitterbit-utils command line option --set-http-proxy-exceptions.
Disable proxy
To stop a private agent from using the configured proxy server, follow these steps:
-
Run this command:
JitterbitUtils.exe --disable-http-proxy -
Restart the agent.
Note
This does not disable an NTLM proxy. To do that, use the configuration utility.
-
Select Start > Jitterbit Agent > Configure Jitterbit.
-
When the Jitterbit Agent Configuration Utility opens, click the Clear button, then the OK button.
-
Restart the agent.
-
Run this command:
jitterbit-utils --disable-http-proxy -
Restart the agent.