Configure or modify a trigger in Wevo iPaaS
A trigger is the setting that defines how the integration process will start. Of several types of triggers, pick the one that best fits your integration rules.
To get a better understanding of the concept, take for instance an integration with a database that needs to run every 30 minutes. In that case, you could define a scheduler trigger that will automatically kickstart the process every half hour. There are other types of trigger you can choose from.
This page shows you how to configure or modify a trigger after a flow has been created.
Trigger configuration or modification
Find the flow you want to edit and click the icon that represents the trigger. A dialog box will be shown.
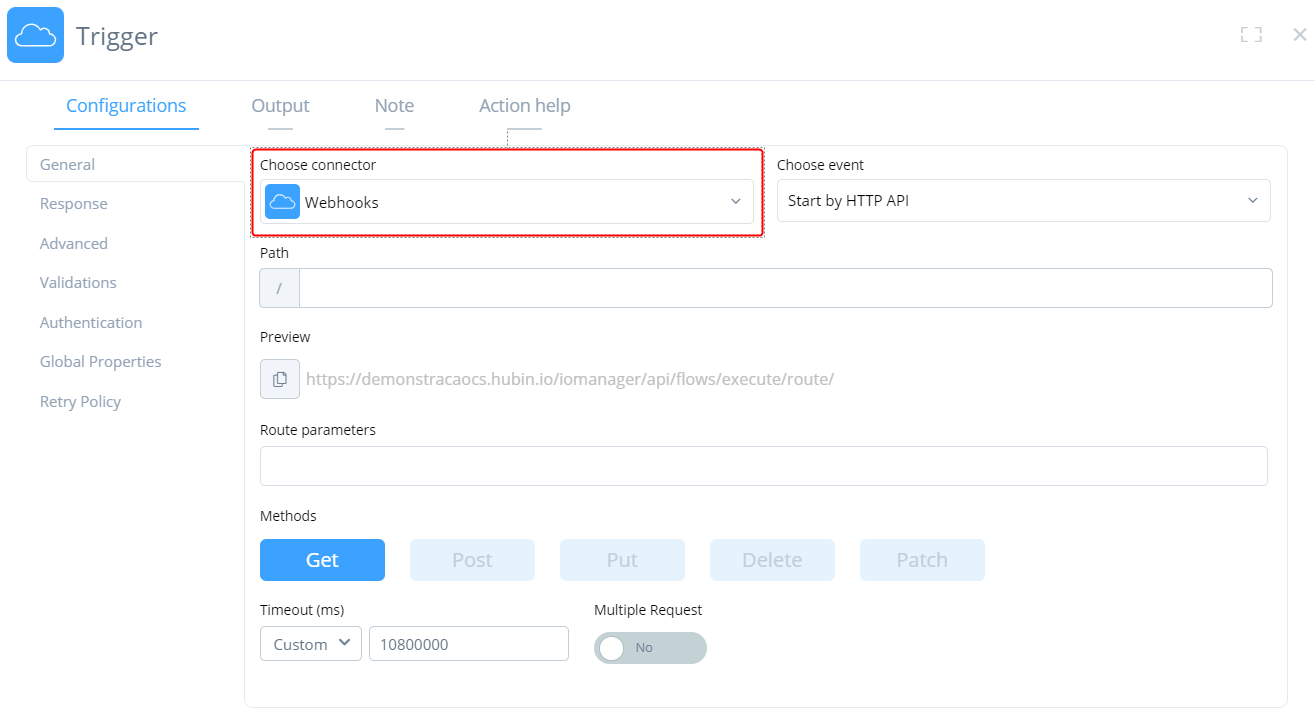
In the Choose Connector field, pick the trigger type, either a scheduler or an API.
Scheduler
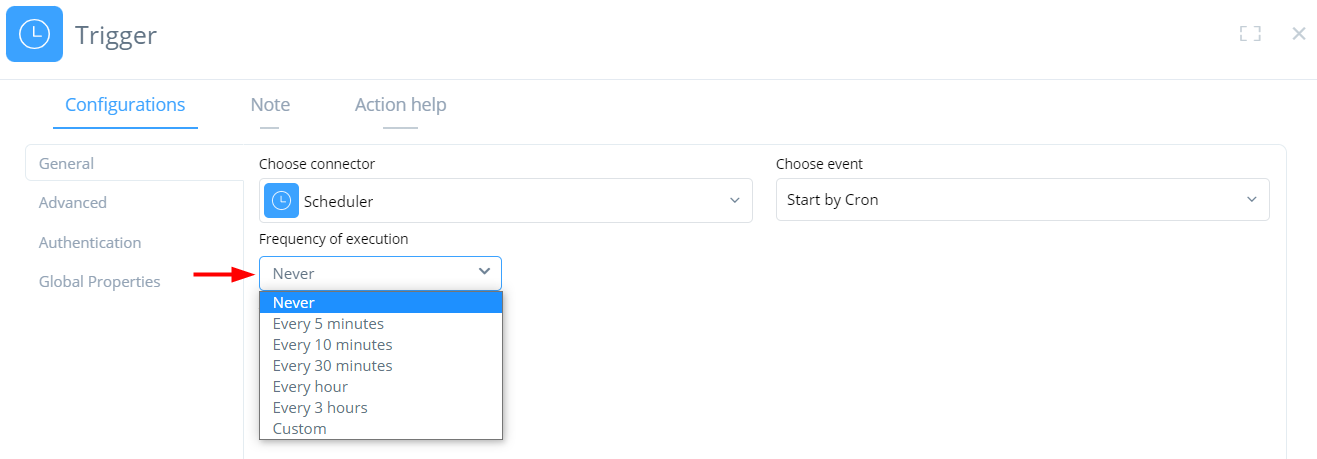
The Scheduler trigger allows you to schedule the times at which a flow should periodically execute. When you pick this option, you must decide how often the flow will run.
-
Frequency of Execution: Use the options in this menu to decide how much time should pass between executions. If you'd like a customized frequency, you can do that by inserting a cron code.
-
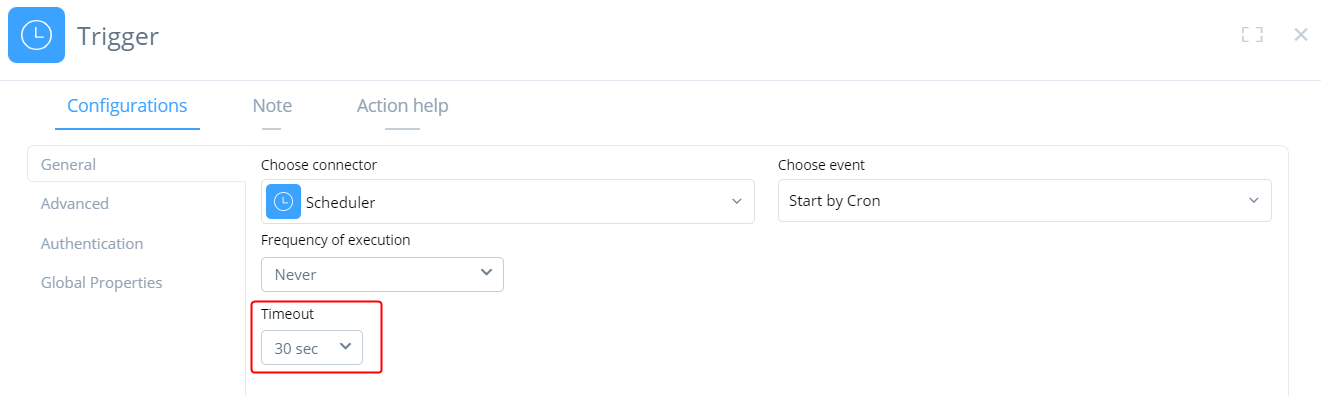
Timeout: Use this field (highlighted below) to determine the maximum amount of time your flow has for each execution.
Webhook
The Webhook trigger means that a process will be started every time the flow route is called. This kind of trigger means that you will be exposing an API to the internet with a URL created by the platform that will be able to accept API requests. See below how to configure a Webhook trigger:
-
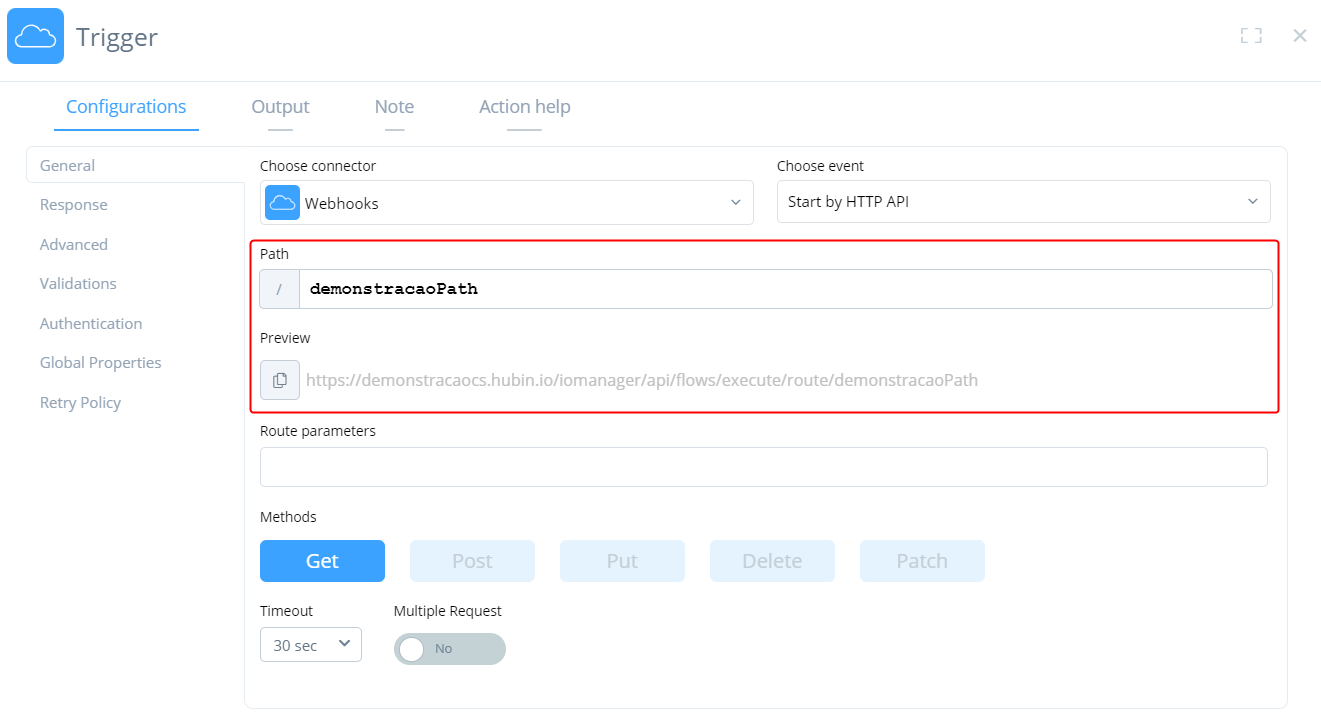
Path: Use this field to customize your API URL. When you create a path here, it is shown at the end of the link that is shown in the Preview field right underneath, like the example shows.
-
Route parameters: You can also define route parameters. In the Path field, use the following syntax:
${parameter}. Once you insert your parameters like that, they are automatically shown in the Route parameters field: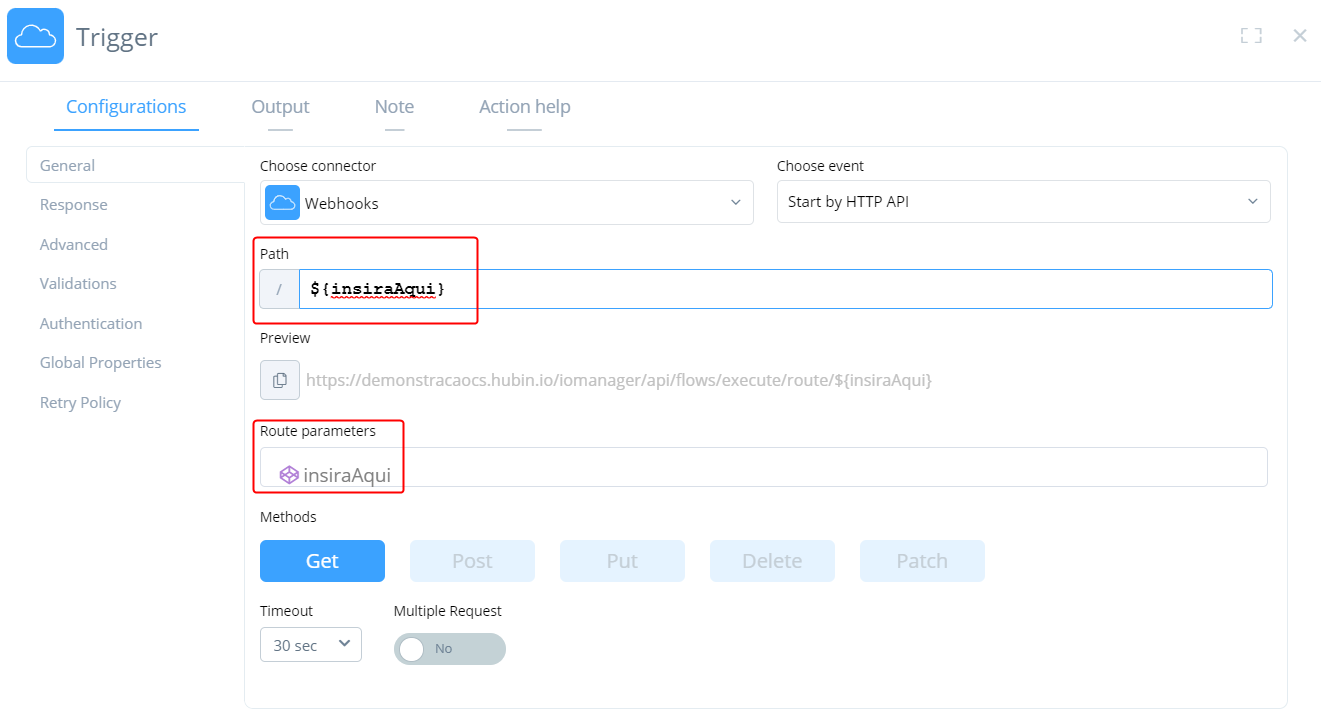
-
Methods: Use this field to pick the method that will be used during the API call. You may select more than one method. Learn more in API verbs.
-
Timeout: You can define the timeout in seconds. For webhook triggers, the upper limit is 30 seconds.
-
Multiple request: By configuring this field, your API will be able to receive more than one request in parallel, which means that while a flow is being run, it may receive other requests.
Authentication
When you activate this option, users will need to be authenticated in order to be able to call the API at all. Otherwise, it won't be possible to test it directly through the browser.
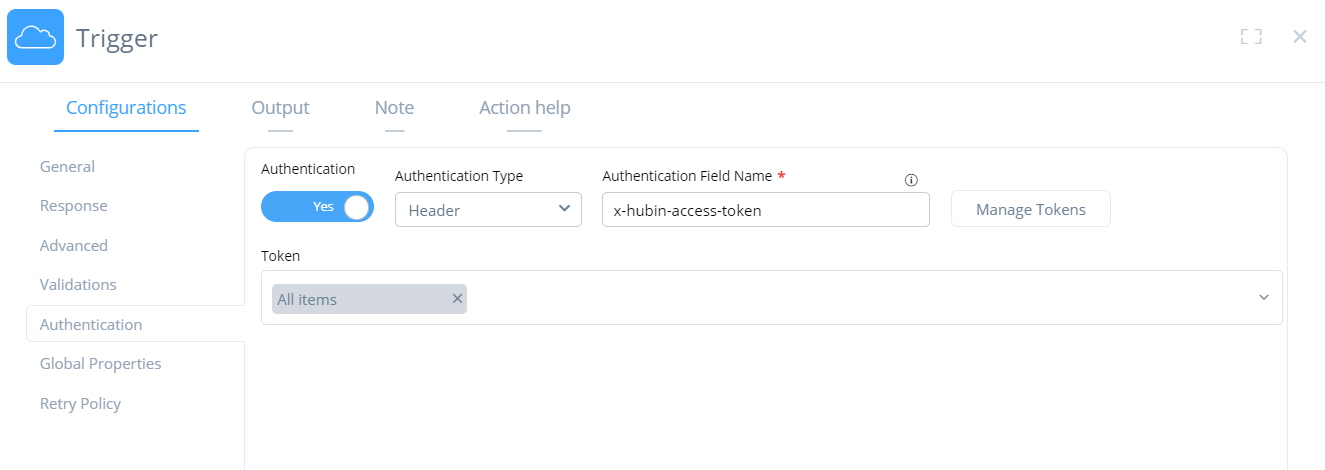
As you've seen, this option requires that users authenticate. That can be done with tokens. To create tokens:
-
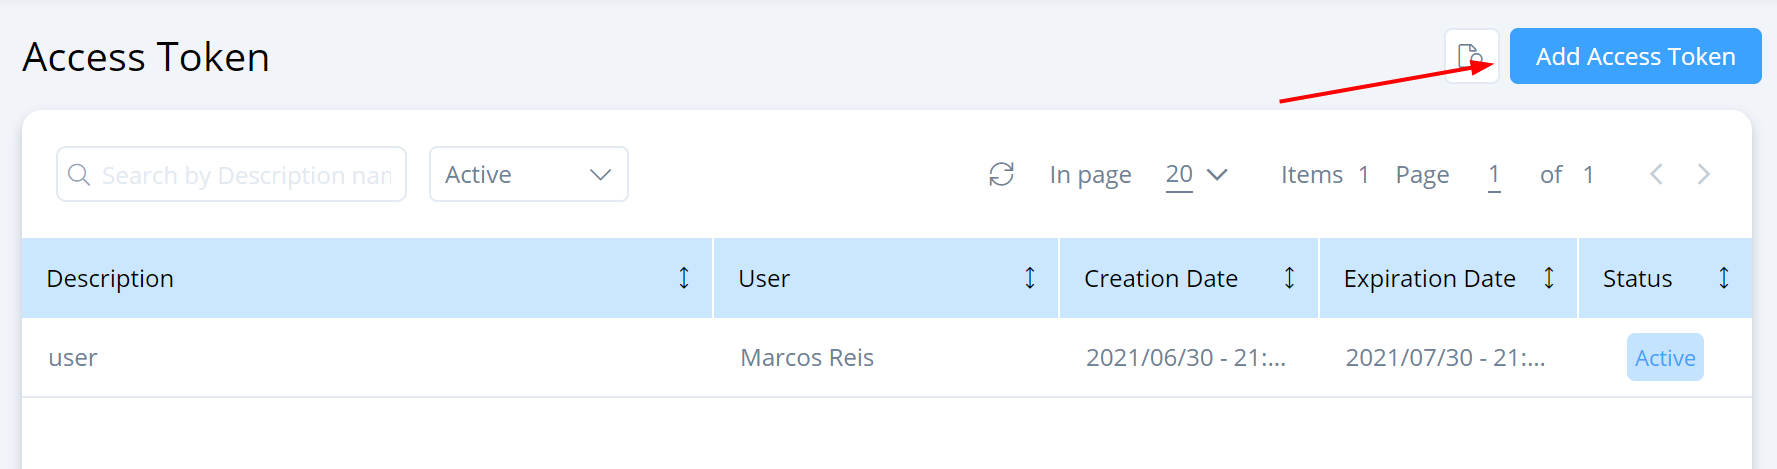
Click Manage Tokens. You will be taken to the Accounts page.

-
Once you're there, go to Security > Access Token. In the table that will be shown, click Add New Token.
-
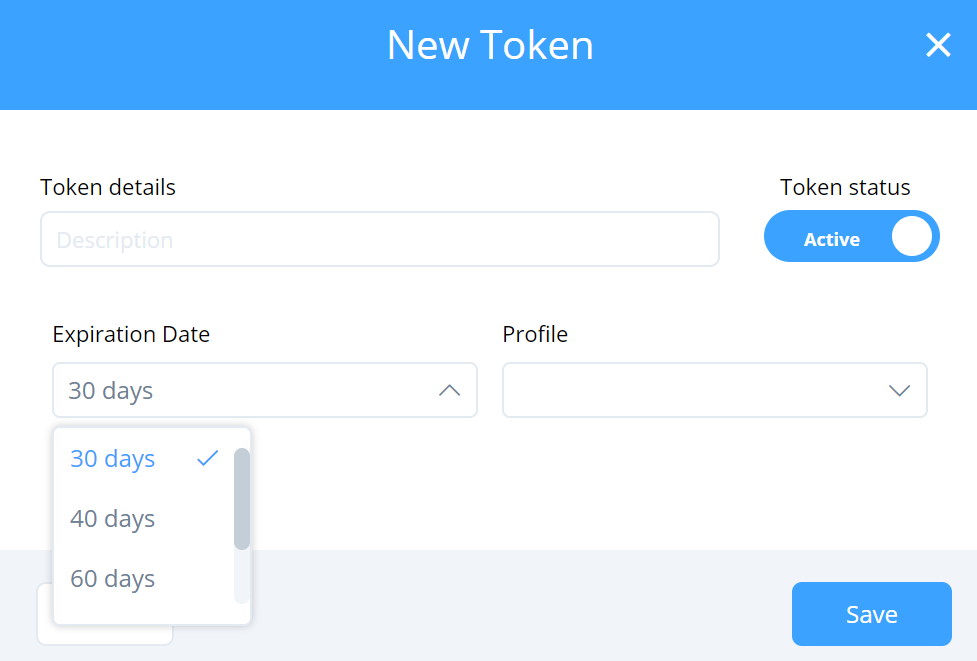
Use the Token Details field to add a brief description, then use the Expiration Date menu to choose how long it should last. Next, in the Profile menu, pick who is creating the token. Click Save to finish the process.
Response
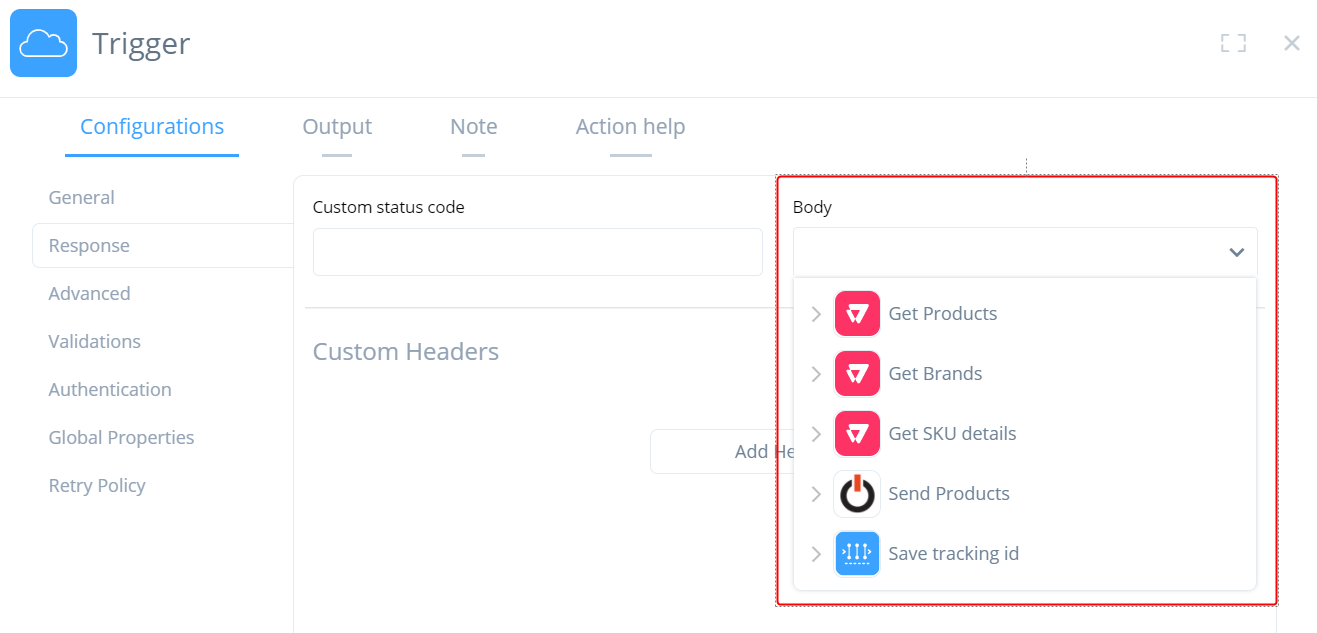
With this field, you can define which response will be shown in the application that will send a request to the API flow. You can select the output of a connector as the response, as shown in the screenshot below:
-
Body: Use this menu to select a tool or connector whose output will be shown as a response.
-
Custom Status Code: Insert the API status code that should be shown in the call.
-
Header: Use this option to define how the response should be read. Click Add Header and fill in the information. For instance, by inserting
Content-typein the Key field andtext/htmlin the Value field, the response can be read in HTML format.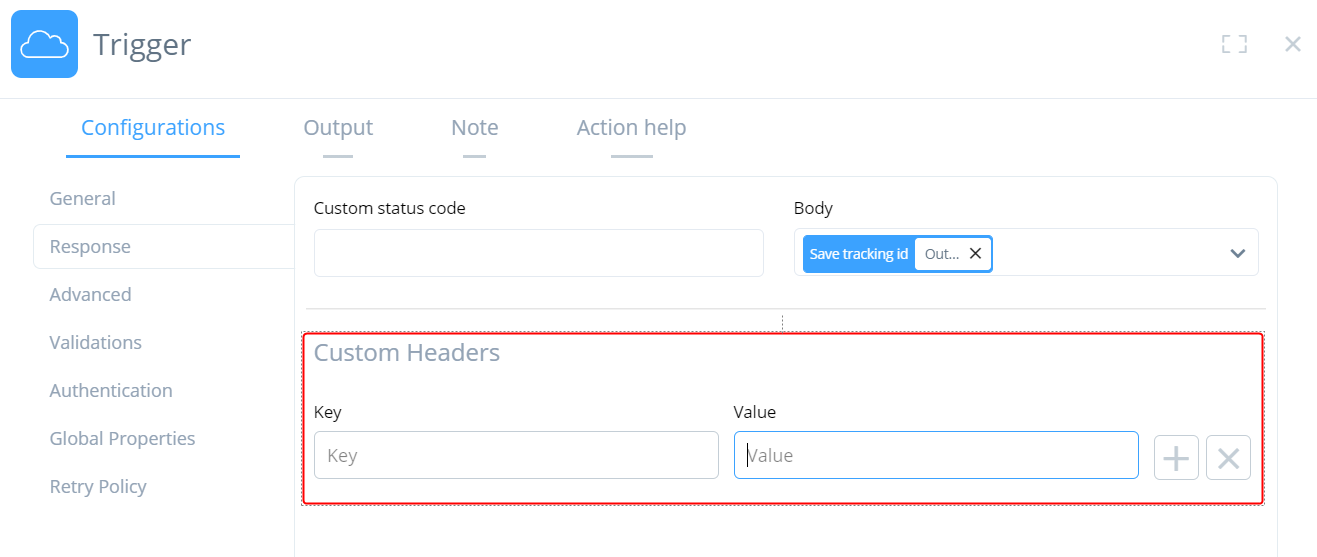
Flow reference
Flow reference is a trigger that kickstarts a flow automatically after another one is completed, either synchronously or asynchronously. In order for that to occur, the origin flow must contain the Flow reference tool in its integration.
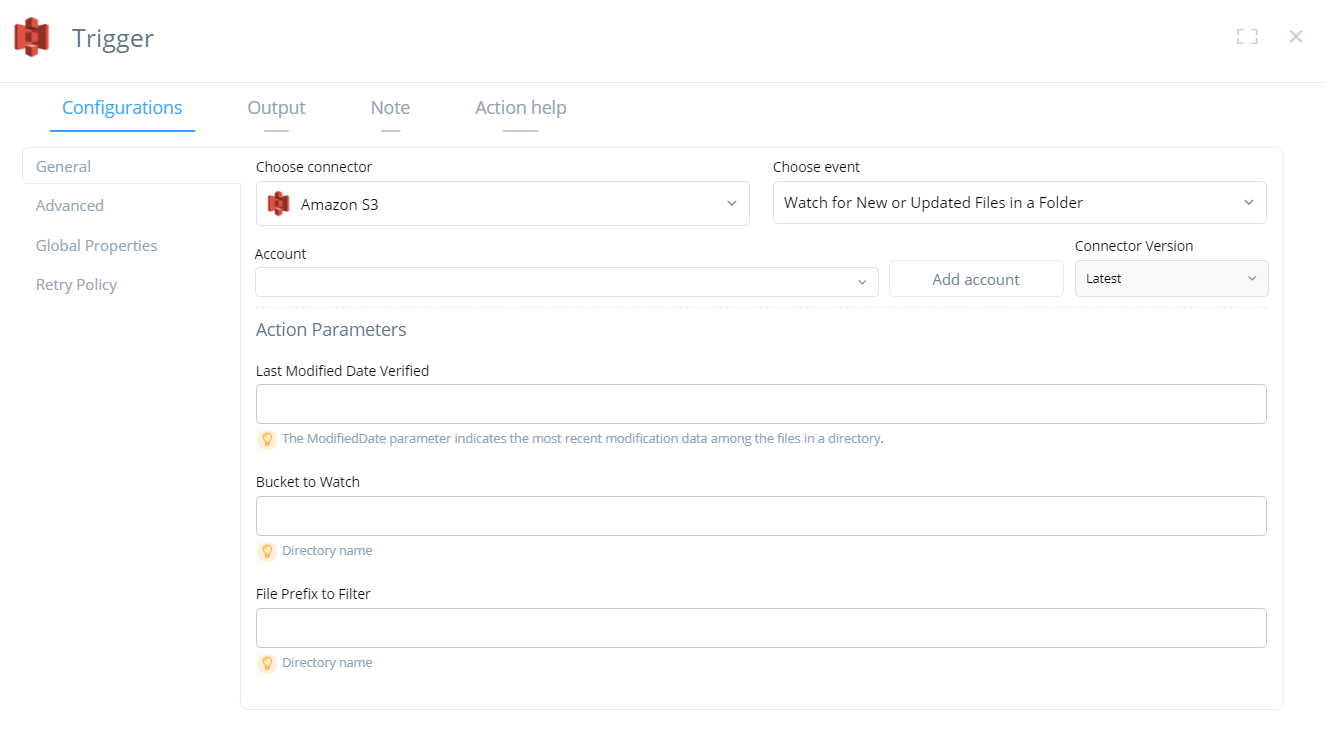
Event trigger
An event trigger starts your flows automatically in real time when specific events occur in your connected systems, such as when a record is inserted. Event triggers eliminate the need for a scheduler or an API trigger. To learn more, see Event triggers.