View and restore archives in Jitterbit EDI
Introduction
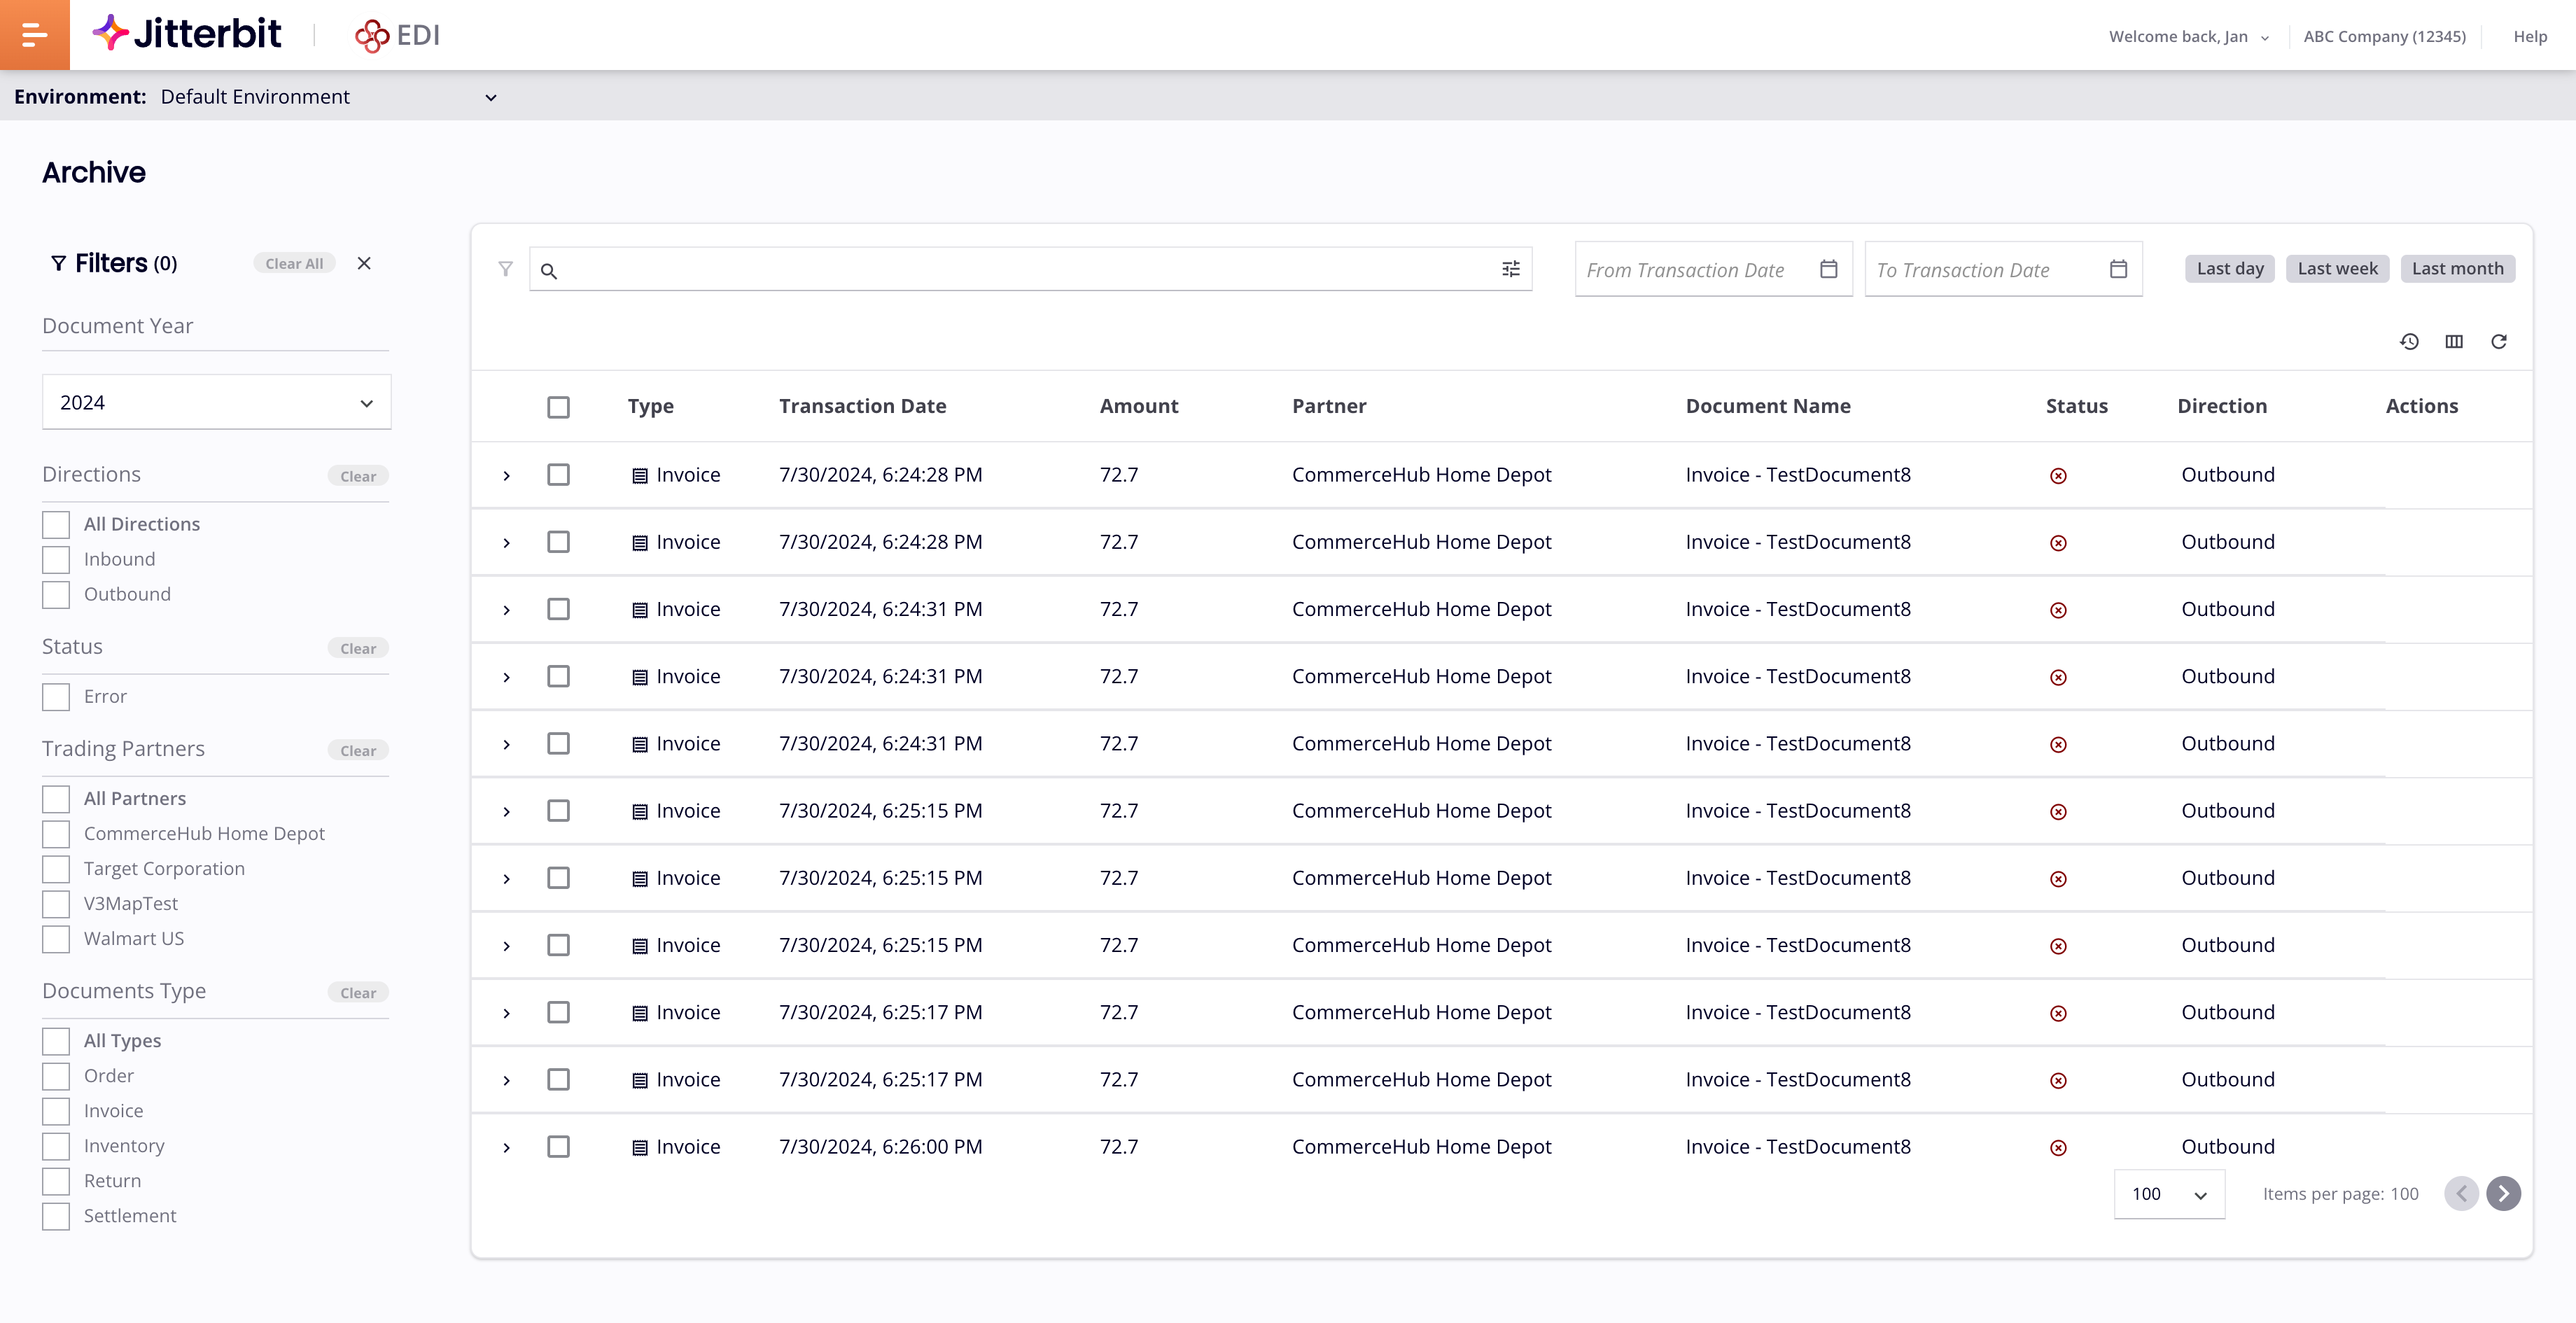
When transactions are archived, either automatically or manually, they appear on the Archive page (Harmony portal menu > EDI > Archive). This page has two areas, a Filters pane (left), and a table of archived transactions (middle/right):
From here, you can do the following:
Find archived transactions
To find archived transactions, use any of the following:
-
The filters pane, to find archived transactions based on their direction, status, partner, or document type.
-
The date filter, to find archived transactions occurring within a specified year or date range.
-
The search bar, to find archived transactions by document ID, or a combination of other transaction details, including document references and control numbers.
Filters pane
To filter archived transactions by direction, status, partner, or any of the document types defined in partner workflows, use the Filters pane (highlighted):
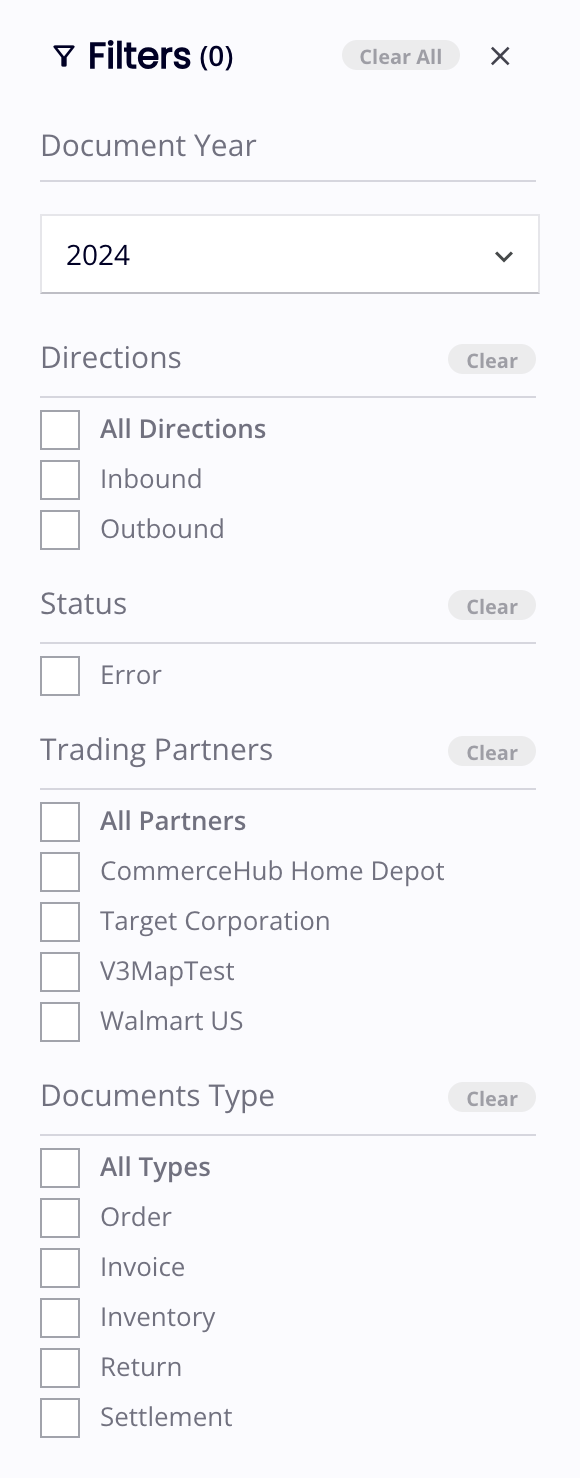
Each filter shows the number of matching items next to its label. To clear all filters, click the Clear All button. To close the filters pane, click the Close icon. To open it again, click the Filters icon (next to the search bar).
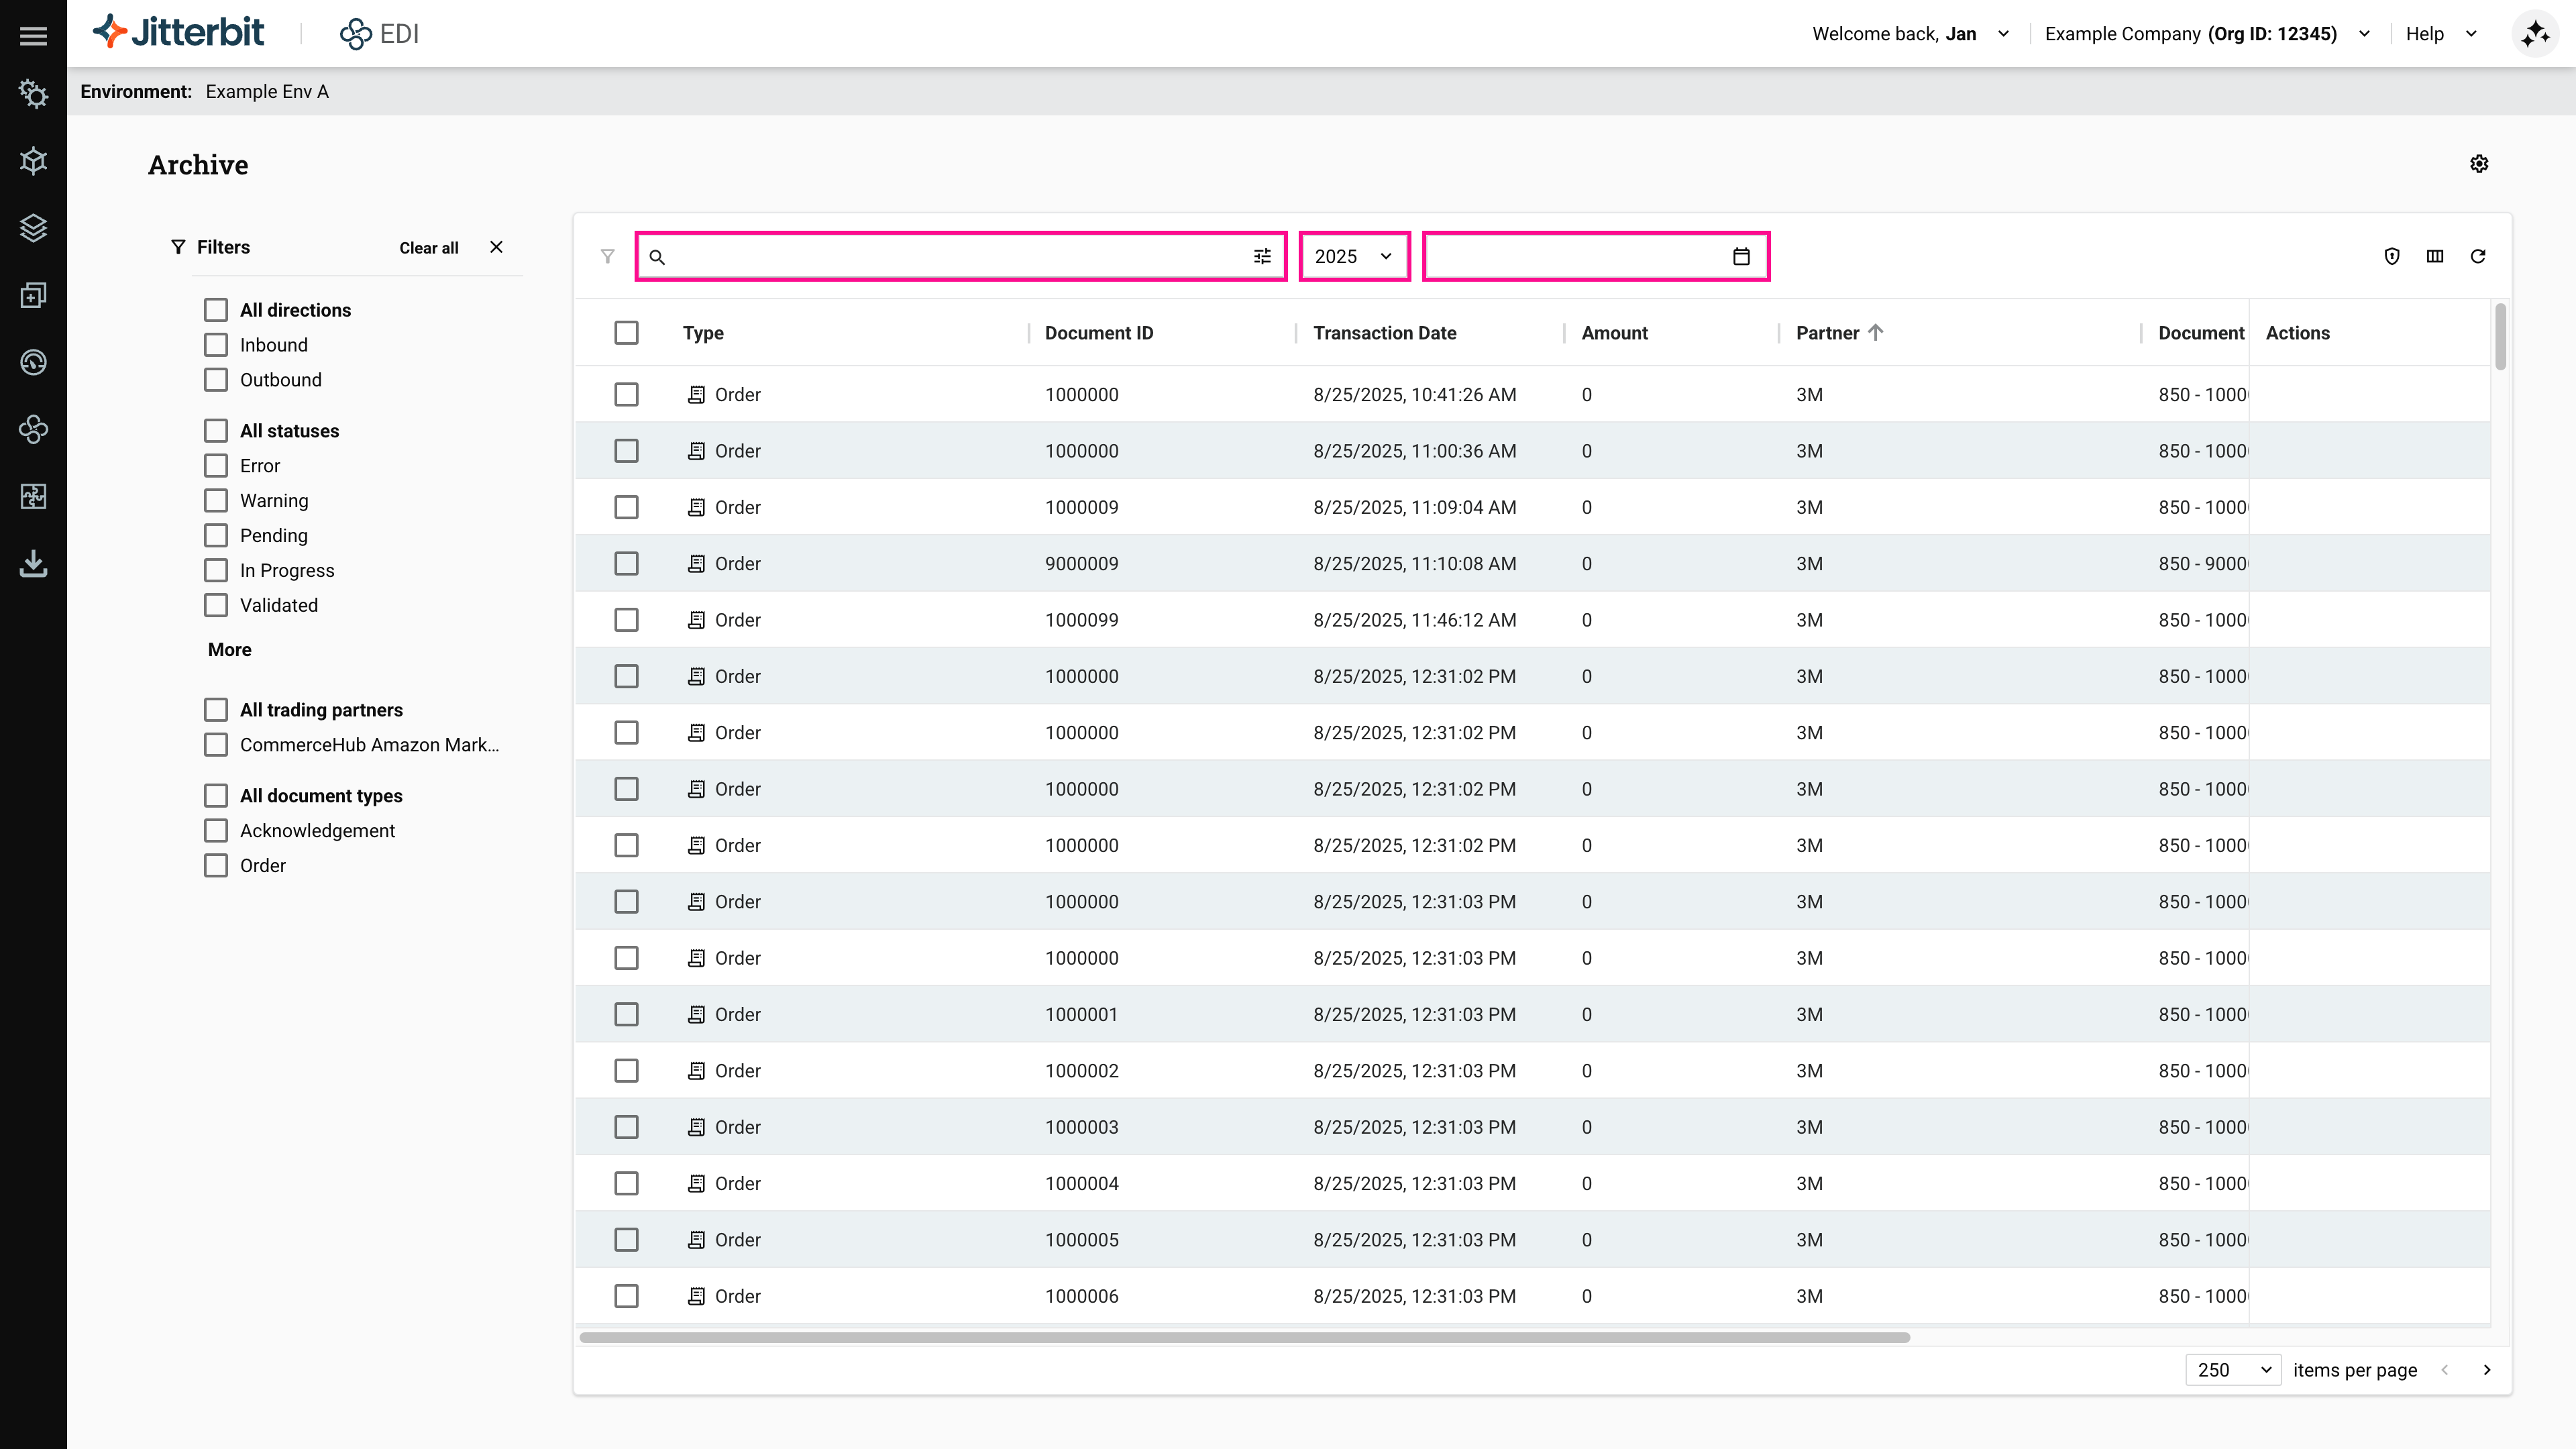
Search bar and date filters
To find archived transactions using simple queries, enter all or part of a document ID in the search bar, then press return. To clear the search text, delete it or click the Clear icon.
To filter archives to a specific year, click the Year menu and select one.
To filter archives to a specific date range, click the Calendar icon. A date picker opens where you can set the start and end dates for the display period, using either relative or absolute date ranges.
The search bar and calendar button highlighted:
To use advanced queries, click the Advanced button. The advanced search builder opens:
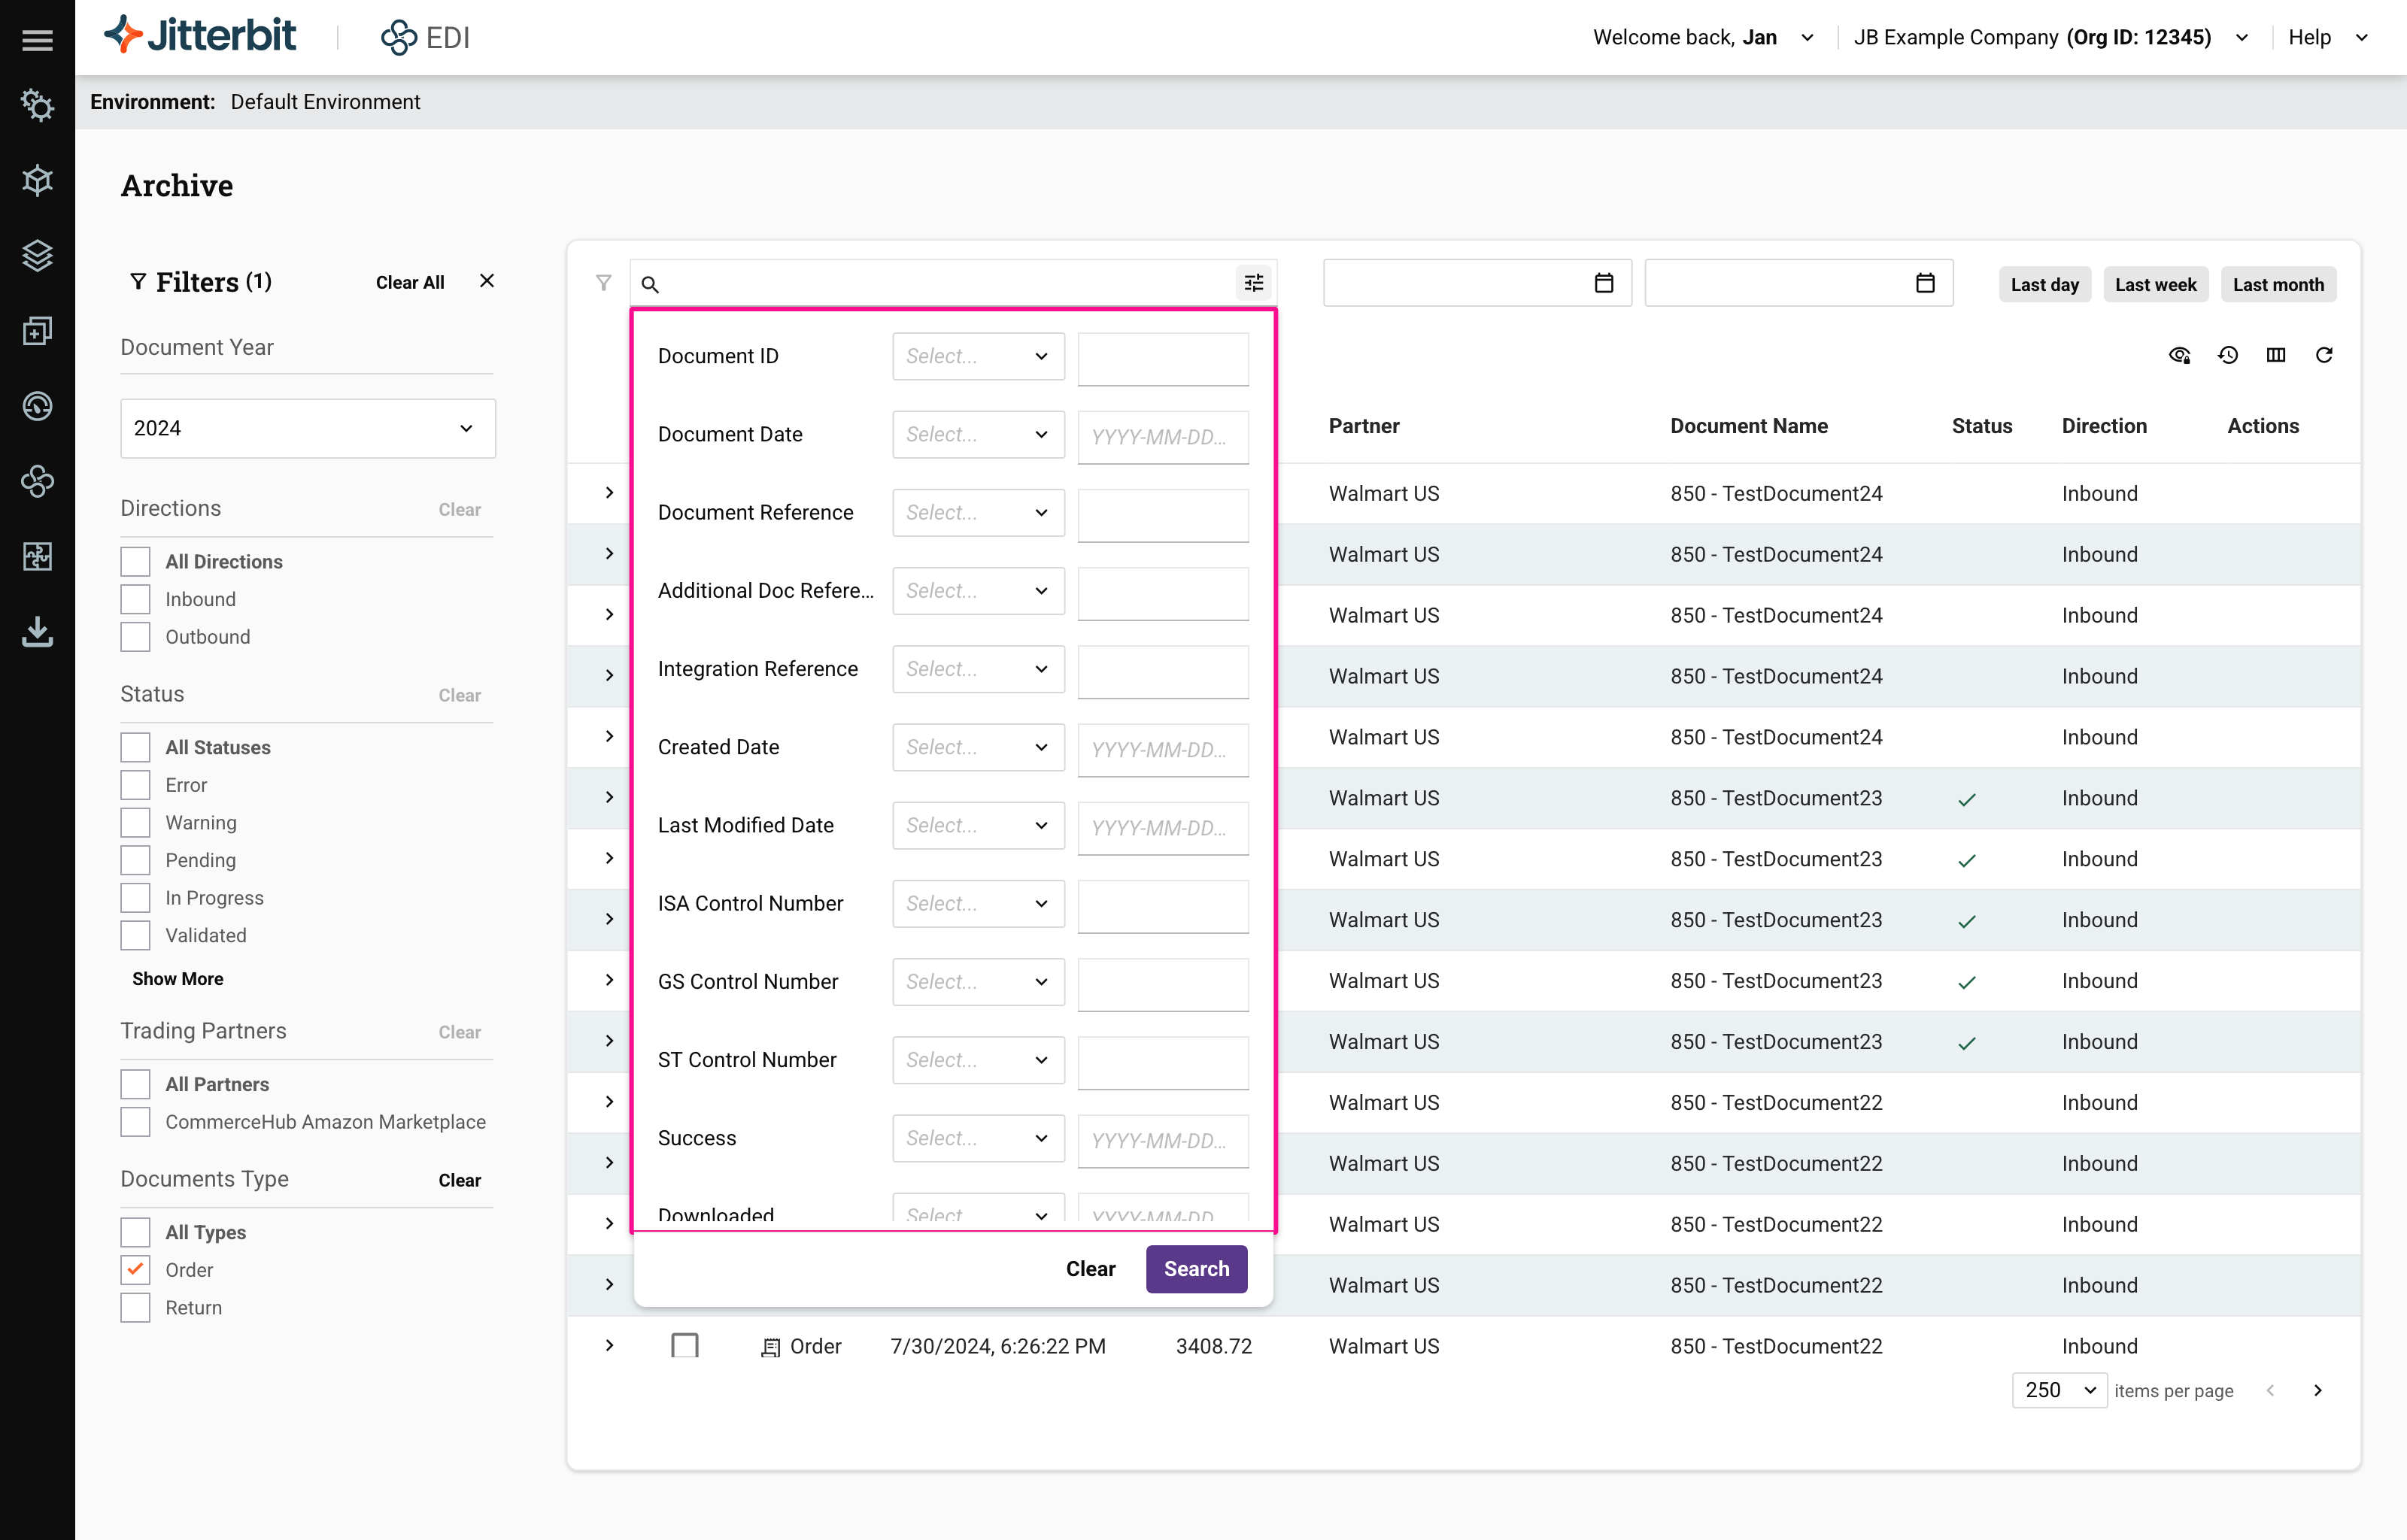
For each field, select a match operator from the menu, then enter a value to match with.
There are two sets of operators, depending on the value type:
-
Text value operators:
- Equal: Show results where the value equals that entered.
- NotEqual: Show results where the value is not equal to that entered.
- StartsWith: Show results where the value starts with that entered.
-
Date value operators:
- After: Show results where the value is after that entered.
- Before: Show results where the value is before that entered.
- Equal: Show results where the value equals that entered.
When your query is ready, click the Search button. To close the advanced search builder, click the Advanced or Clear buttons.
Manage archived transactions
To manage archived transactions, use the following:
-
Enable PII: Click to temporarily reveal PII. In the Enable PII dialog, enter your Harmony user password, select when to hide it again, then click the Enable button. (Your account must have administrator privileges to view PII.) PII is automatically hidden again after the period you select. The available periods are 15 minutes, 30 minutes, 1 hour, 12 hours, or 24 hours.
-
Filter columns: Click to rearrange columns.
-
Refresh: Click to refresh the table.
When one or more archives are selected, these additional icons appear:
-
Print: Click to open your system's print dialog for saving or printing the selected archived transactions.
-
Restore: Click to restore the selected archives.
Tip
On the Trading Partners > Transaction management tab, you can set an option to continuously delete (purge) documents as soon as they are archived, or delete the content from a specific document.
Status column icons
The following icons in the Status column indicate an archived transaction's status set by the EDI for Cloud v2 Set Status activity:
| Symbol | Status |
|---|---|
| Warning | |
| Pending | |
| Validated | |
| Rejected | |
| In Progress | |
| Completed | |
| On Hold | |
| Acknowledged |
In addition, system-generated values include Success or Error, or an empty status.
Archived transaction details
To show or hide an archived transaction's details, hover on one, then click the Details icon in the Actions row. (Alternatively, click anywhere on a row.) The details for an archived transaction open in a drawer with two tabs, Document information and Messages.
Above the tab are the following:
-
The document type number and ID.
-
The document type name.
-
The archived transaction's status.
-
Enable PII: Click to temporarily reveal PII. You are prompted to enter your Jitterbit password. Click the Proceed button to continue.
-
Restore: Click to restore the current archive.
Document information
The Document information tab contains the archived transaction's document details (the format of which depends on the document type), and the Related Docs and Views panes:
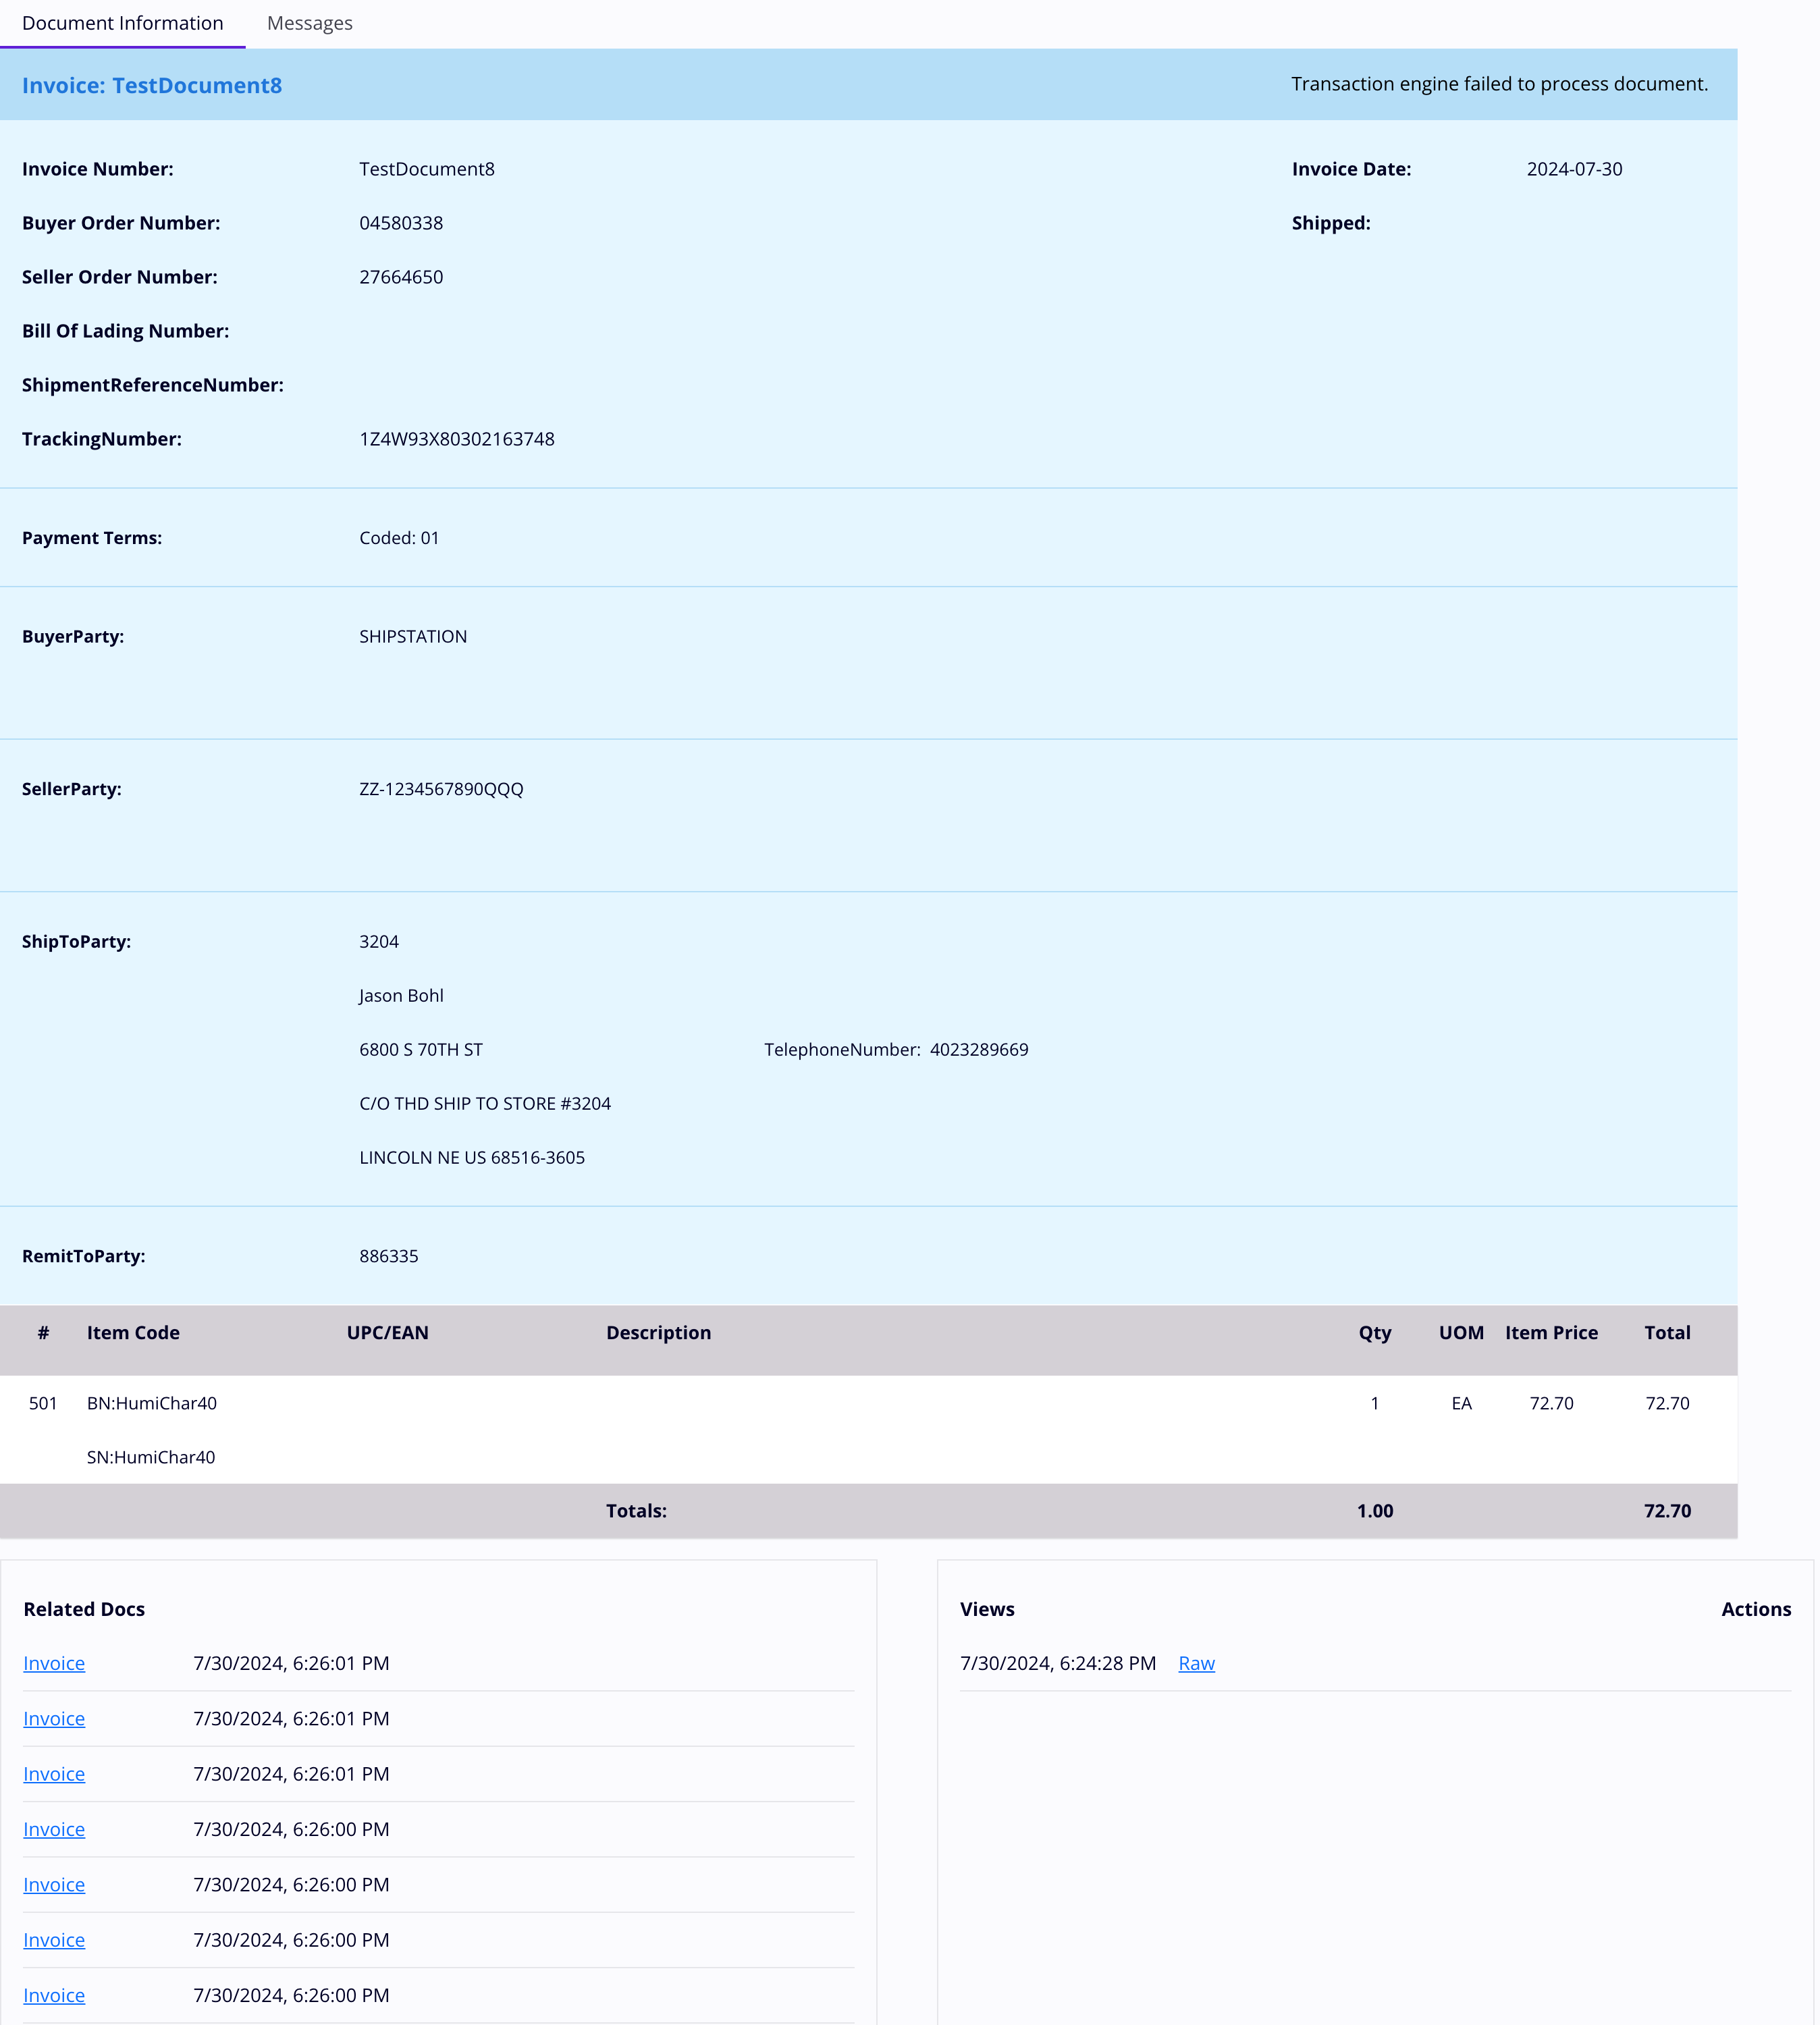
-
The Related Docs pane shows related documents for the same order number. Click a link to open a related document in a new tab.
-
The Views pane shows document views, with links to the raw data for each view. Hover on a view to reveal these action icons:
- View: Click to view the document in a dialog window.
- Save: Click to save the document as a text file.
- Copy: Click to copy the document's contents to your system's clipboard.
- Print: Click to open your browser's print dialog.
Click a Raw link to view the data. The following icons:
- Save: Click to save the document as a text file.
- Copy: Click to copy the document's contents to your system's clipboard.
- Print: Click to open your browser's print dialog.
N2 data type
The Document information panel shows EDIXml X12 N2 (numeric) data fields with a precision of two decimal places.
Messages
The Messages pane contains messages related to the archived transaction (including links to Functional Acknowledgments (ACK)).

To show only error messages, click Show Only Errors. To show or hide child messages, click the carets.
Table settings
You can sort the table, change the order and visibility of the columns, and set how many items appear on a page.
To sort the table, click a column heading. Subsequent clicks reverse then reset the sort order, which is indicated by an arrow.
To rearrange the columns, click the Columns icon. The Columns drawer opens:
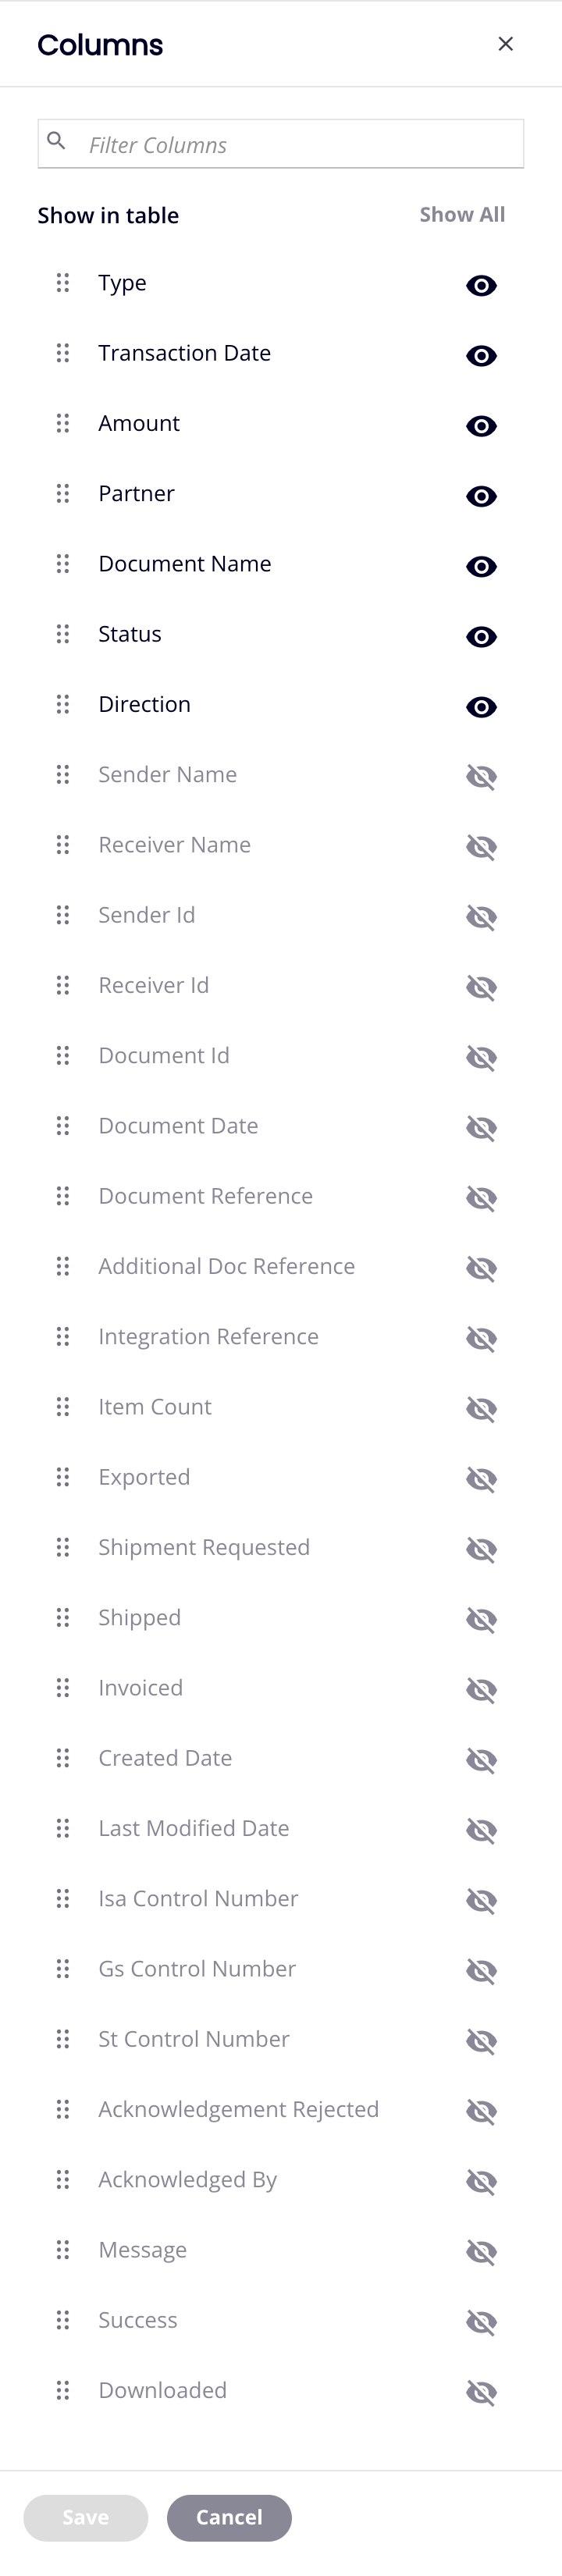
Use the Filter Columns search bar to find columns. Click the and icons to hide or show columns. Drag the icon to move columns.
At the bottom of the pane are the page controls (highlighted below):

To set how many items appear on a page, click the Items per page menu, then select 100, 250, or 500. To jump to the next or previous page, click the or buttons.
View settings
To open the Settings drawer, click the Settings icon:
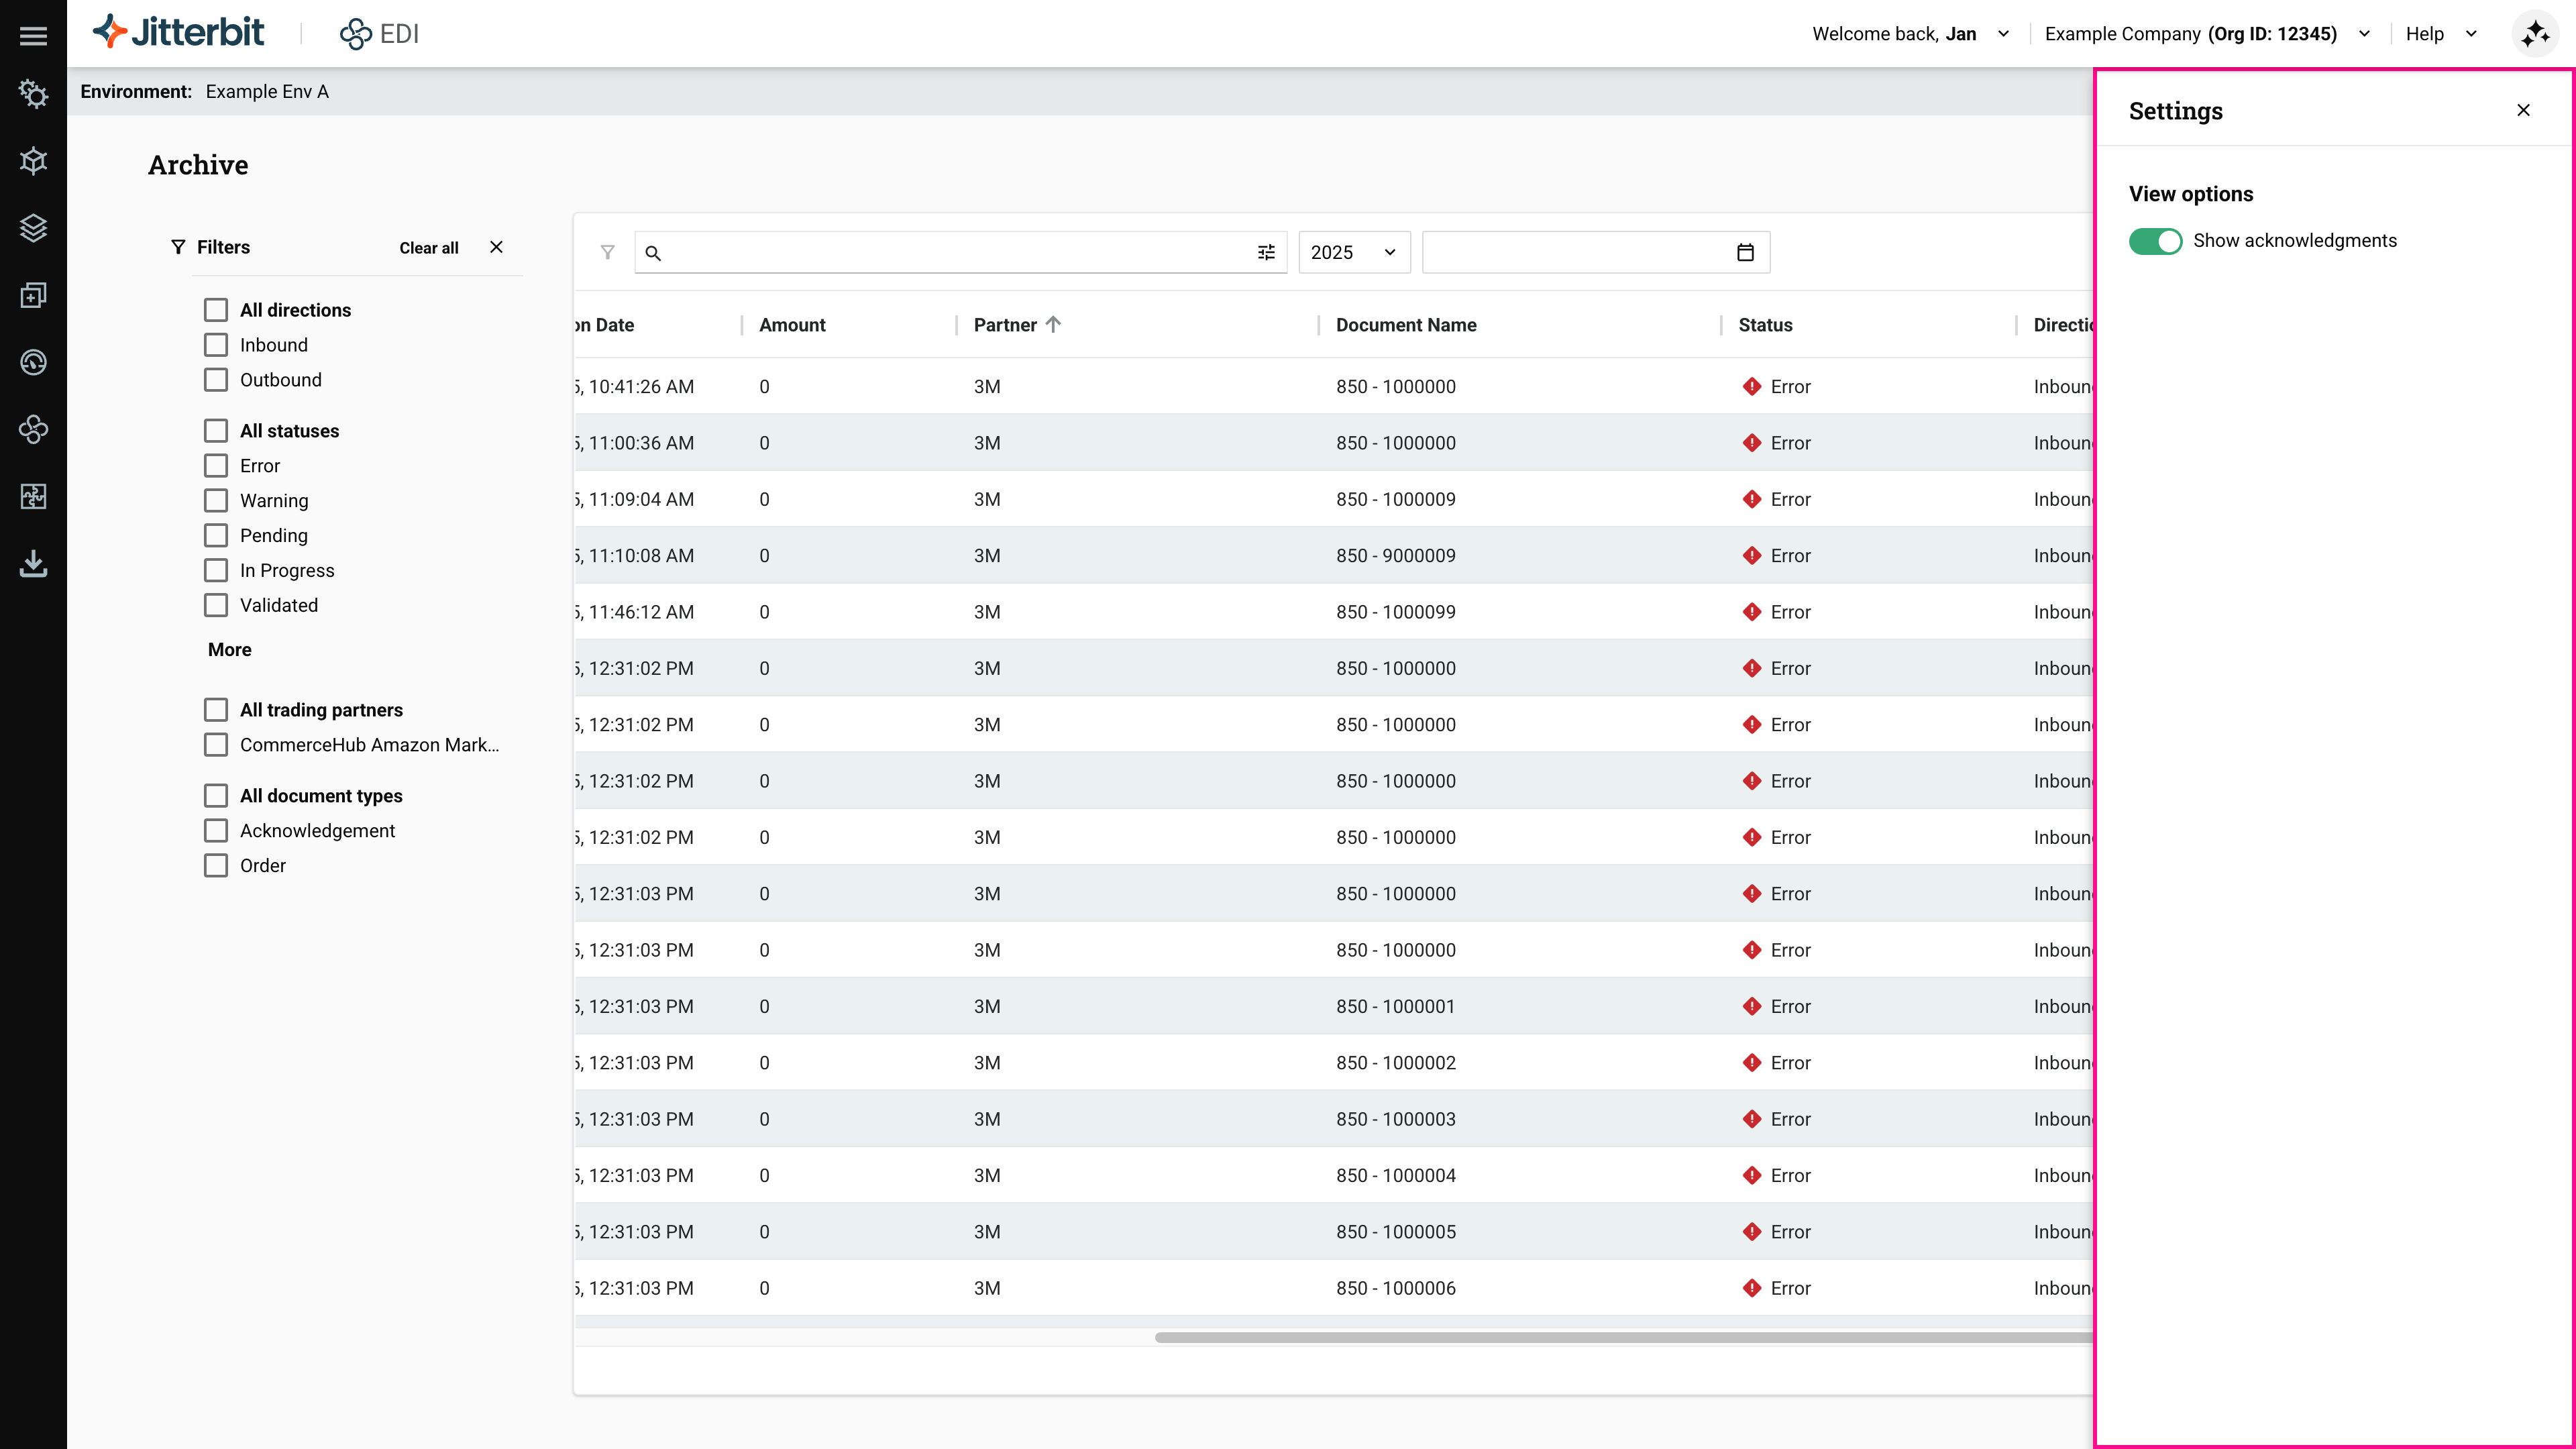
The drawer contains the following controls:
- Show acknowledgments: Click to show or hide transaction acknowledgments.
Restore archived transactions
To restore a single archive, hover on its Actions column and click the Restore icon. To restore many items, use the checkbox column to select them, then click the Restore icon.
To allow time for reviewing restored transactions, they remain viewable on the Transactions page for 24 hours before being automatically re-archived, although you can opt to manually re-archive a restored transaction before the end of this period.