XML schema advanced types in transformations in Jitterbit Integration Studio
Introduction
When using a schema that contains derived types or substitution groups, some input from the user is required before you can proceed with the transformation mapping.
Specify the schema
Derived types or substitution groups are common in XML-based XSD and WSDL schemas. You can upload these types of schemas in an activity or in a transformation, or they may be fetched directly from the endpoint by some connectors. For example, response schemas returned by a saved search in a NetSuite Search activity often contain derived types.
More information about defining schemas is available under Schemas.
Select derived types or substitution group
Once the schema is specified, you select the derived types or substitution group within the transformation. There may be nodes for which you can select derived type(s) on either the source or target side of the transformation.
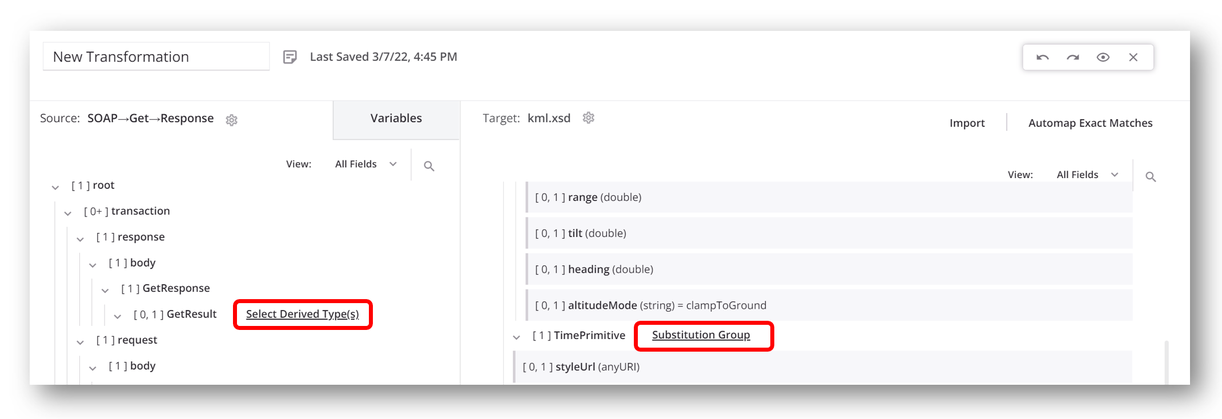
A link to Select Derived Type(s) or Substitution Group is displayed next to the node name as applicable:

The user interface is the same for both selecting derived types and selecting a substitution group.
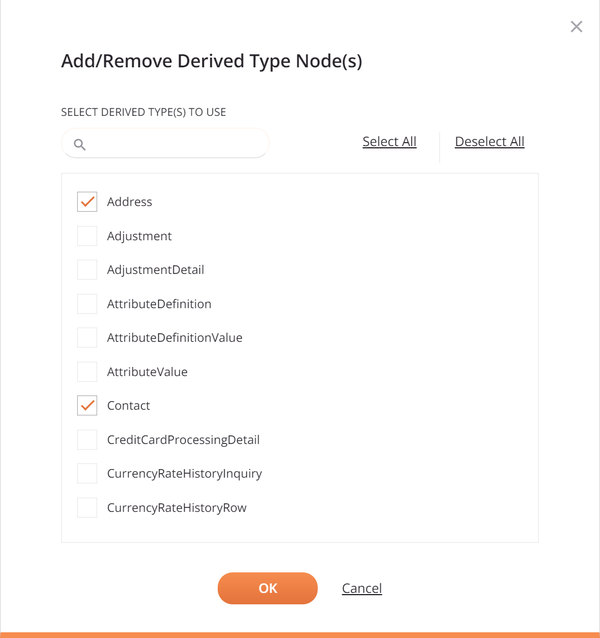
Click the link Select Derived Type(s) or Substitution Group to open a dialog where you can select from the available nodes:

To filter the list of nodes, enter any part of the node name into the search box. The search is not case-sensitive.
Select the desired nodes using the checkboxes next to the node names. The Select All and Deselect All links can be used to select or clear all nodes at once. Then click OK to use the derived-type nodes within the schema.
Note
When selecting a large number of derived-type nodes at once, on the order of 30 or more, the system may be very slow to respond in updating the transformation.
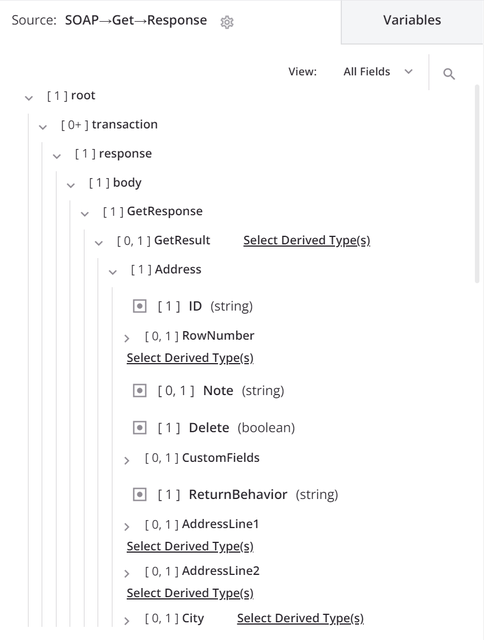
The selected nodes are then shown within the schema, and can be expanded or collapsed to show additional child nodes and fields within them:

After selecting nodes, to change your selections, again click the link Select Derived Type(s) or Substitution Group to return to the selection screen and add or remove nodes as appropriate.
You can then proceed with the transformation mapping as normal, mapping the source fields within those selected nodes to target fields, or mapping to target fields within selected nodes.