Communication settings in Jitterbit EDI
Introduction
Jitterbit EDI uses the FTP and AS2 communications protocols to exchange documents with partners.
There are no default settings for either protocol, so you must configure them yourself. You do this on the EDI Admin page, in the Communication settings tab:
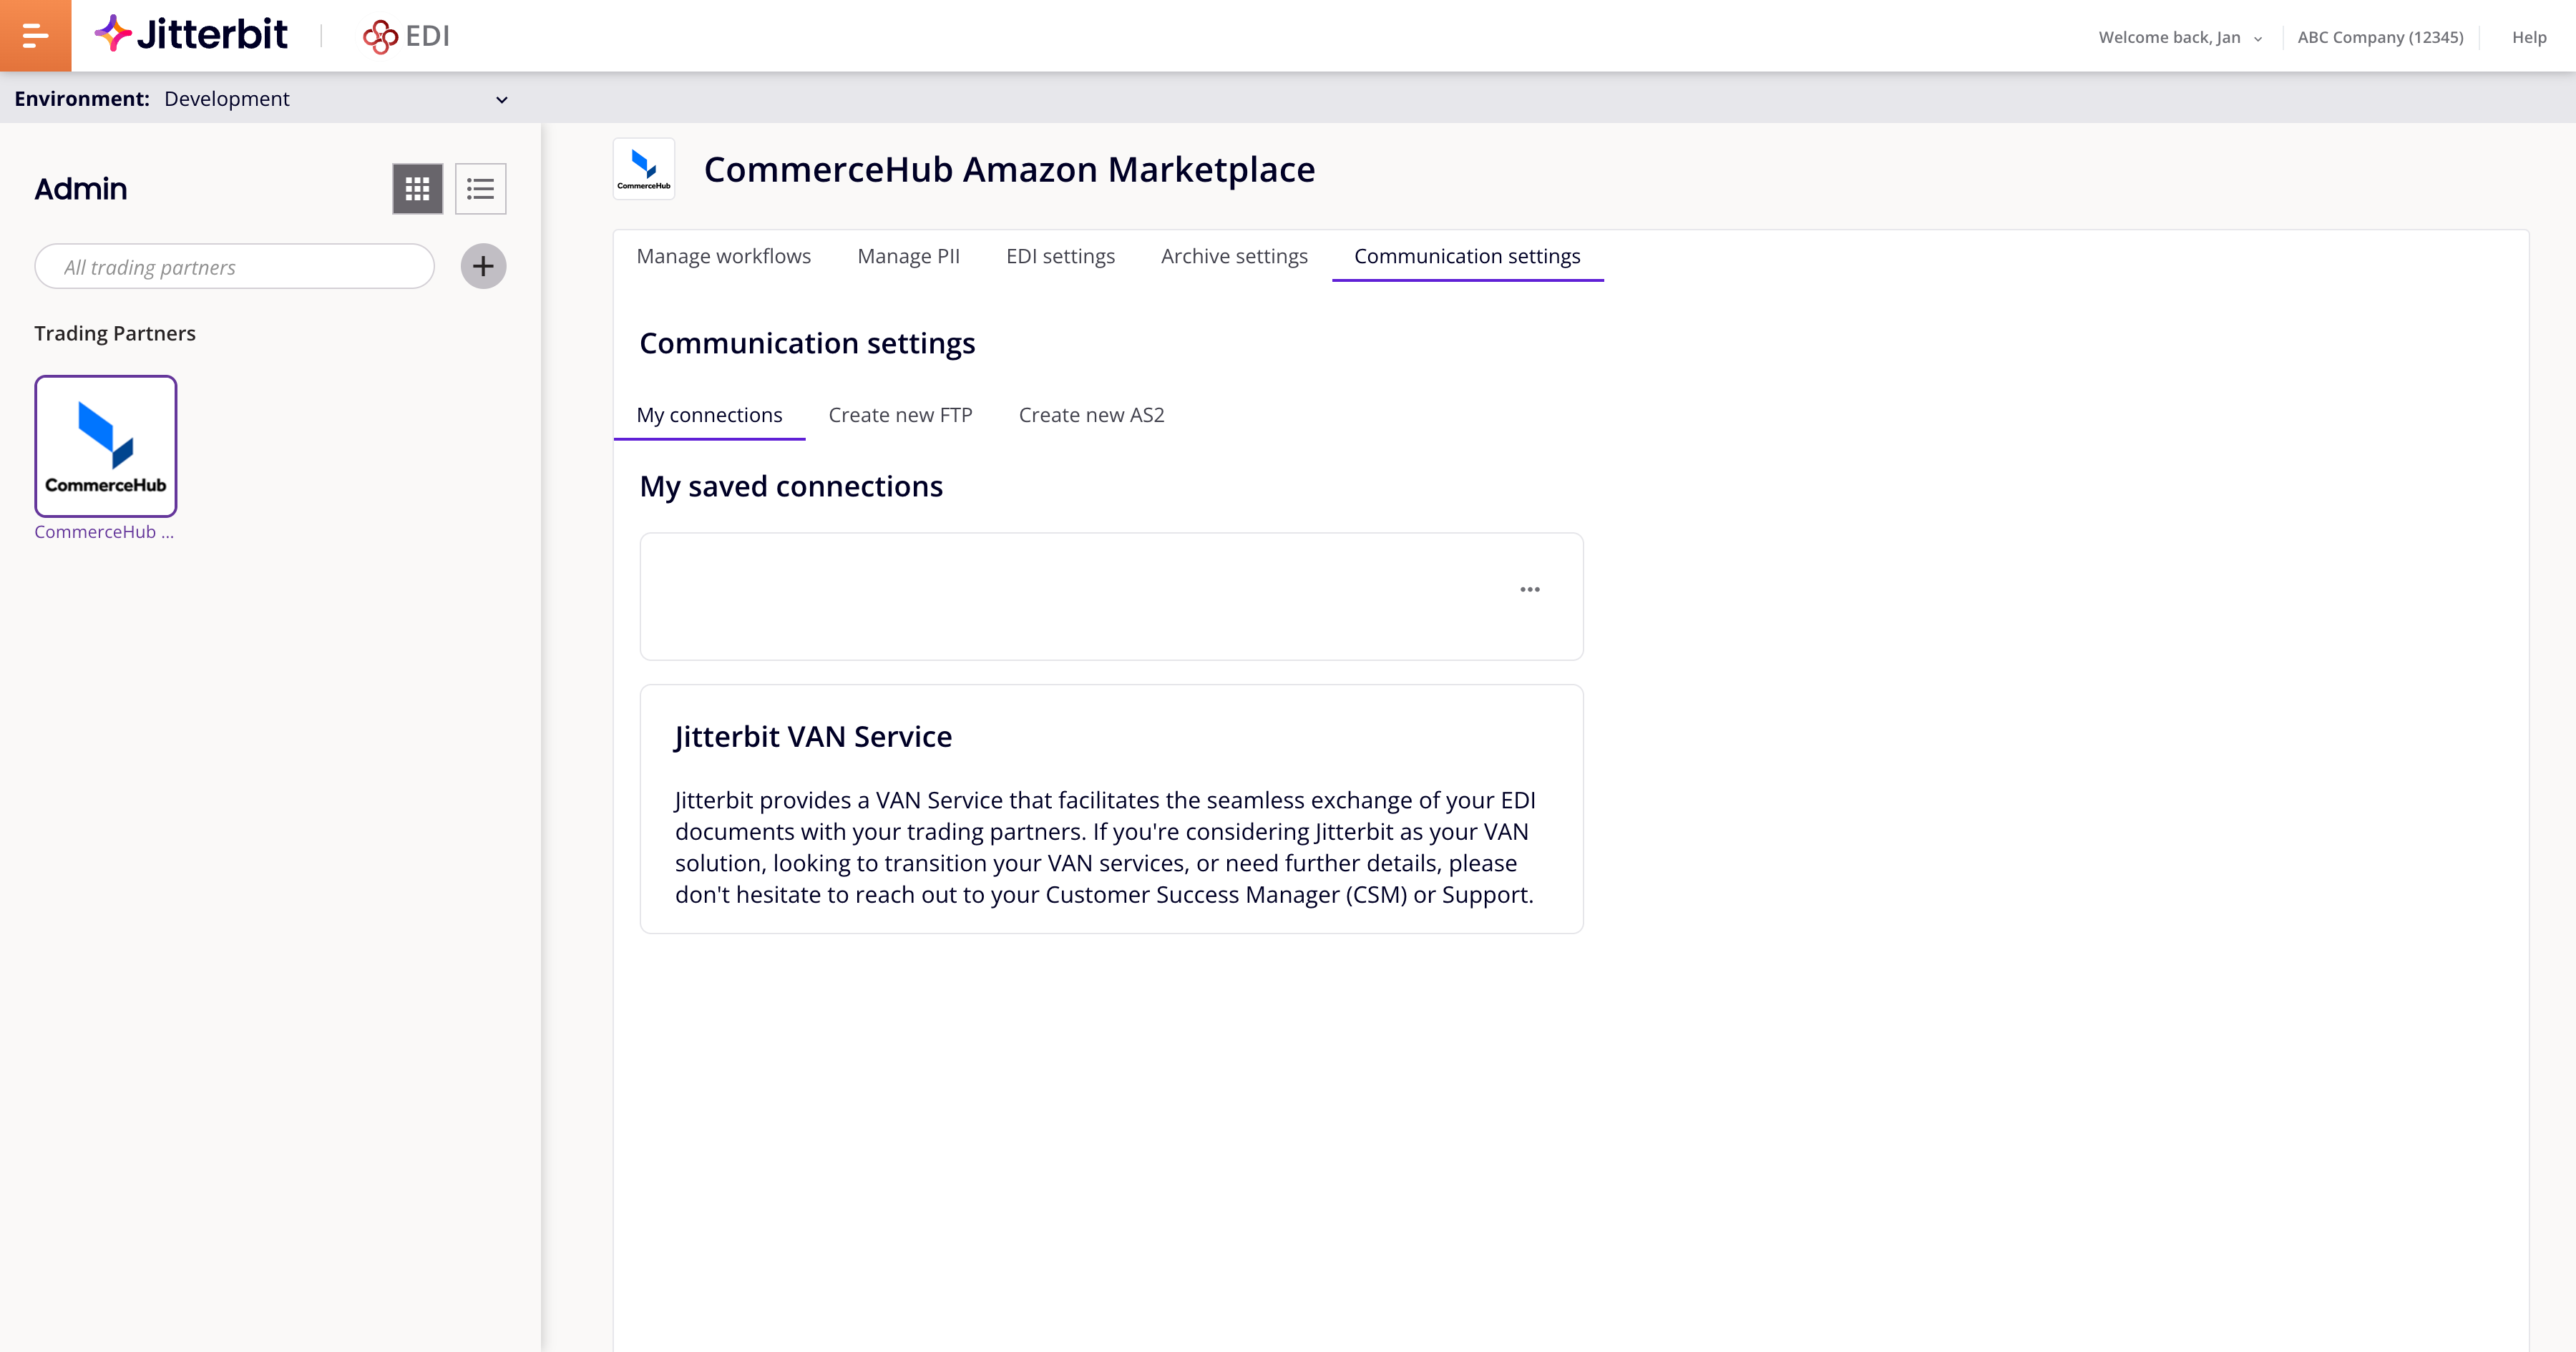
You can assign any connection to any partner. When you delete partners, their connections are preserved.
Jitterbit VAN Service
The Jitterbit VAN service is a managed connection. To have it set up, contact Jitterbit support or your Customer Success Manager (CSM). When configured, you can assign it to a partner.
Filter connections
By default, you can only see connections that are active and assigned. To see other connections, use the filter toolbar:

It comprises the following:
- Search bar: Enter text to search for a connection.
- Connection menu: Open the menu, then select Select all connections to select all options, or select one or more of the following options:
- AS2: AS2 connections.
- FTP: FTP connections.
- Van service: VAN service connections.
- Status menu: Open the menu, then select Select all statuses to select all options, or select one or more of the following options:
- Active: Active connections.
- Inactive: Inactive connections.
- Assigned: Assigned connections (selected by default).
- Unassigned: Unassigned connections.
Create an FTP connection
To create an FTP connection, follow these steps:
-
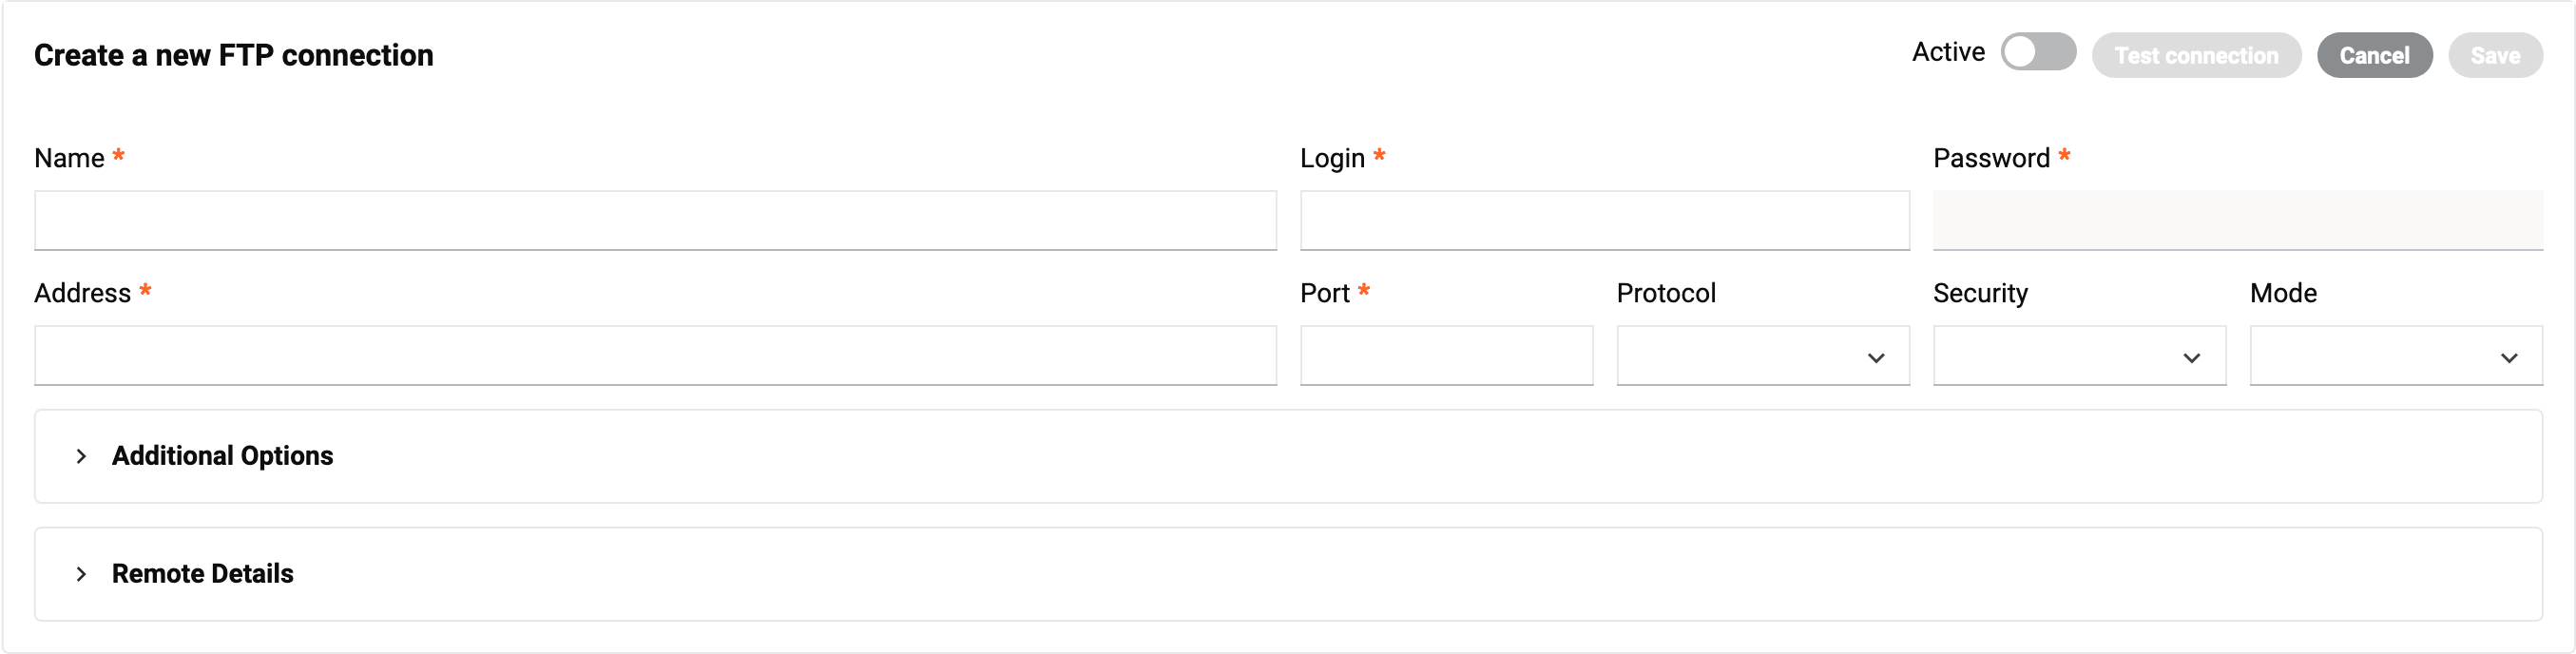
Click the New button, then select FTP connection. The Create a new FTP connection panel appears (highlighted):
-
Set the following toggles:
- Duplicate Transaction Check: Turn on to check for duplicate transactions transmitted via this connection.
- Active: Turn on to make the connection available for use. (This also reveals the Automation tab.)
-
In the basic settings group, set values for the following fields:

- Name: A name for the connection.
- Login: The username for the FTP server.
- Password: (Optional.) The password for the FTP server. Leave blank if no password has been set.
- Address: The IP address or host name of the FTP server.
- Port: The port number as a positive integer. (Your firewall must allow traffic on the port.)
- Protocol: FTP or SFTP.
- Security: The security type, one of Explicit, Implicit, or None.
- Mode: The FTP mode, Active or Passive.
-
(Optional) Expand the Additional Options panel, then set values for the following fields:

- SSL settings: Additional SSL settings.
- Retrieval mask: A filename mask, which can contain the following wildcard characters:
?: Any single character.*: Any two or more consecutive characters.
- Send private key: Enable to authenticate a client when it connects to an SFTP server.
- Download active: Enable to use active FTP mode. Turn off to use passive FTP mode.
- Delete file after download: Enable to delete the file from the FTP server after it has been downloaded.
-
Expand the Remote Details tab, then set values for the following fields:

- Remote download folder: The folder on the remote server where files are downloaded from.
- Remote upload folder: The folder on the remote server where files are uploaded to.
- Remote upload file name: The filename for uploaded files. You can also include any of the supported filename parameters to generate the filename you want.
- Remote upload file extension: The filename extension for uploaded files, either
.edior.xml. - Remote download file name start index: The remote download filename start index.
001is recommended. - Remote download file name end index: The remote download filename end index.
999is recommended.
-
(Optional) To test the connection, click the Test connection button. This button becomes active when all required fields are filled. (It does not apply to SFTP connections.)
-
When the connection is active, the Automation tab becomes visible:

To set how often and when to run an FTP connection, set values for the following fields:
- Frequency: How often to run the FTP service. Select one of 15 minutes, 1 Hour, 12 Hours, Daily, or Weekly.
- Next run: When to next run the service. Select any of the date-time fields and enter a numeric value, or click the calendar icon to pick a date and time.
-
Click the Save button. The new connection is now ready for you to assign it to a partner.
Create an AS2 connection
Important
To enable AS2 communication, your partner must configure their firewall (add to their whitelist) the IP address 40.71.22.62.
To create an AS2 connection, follow these steps:
-
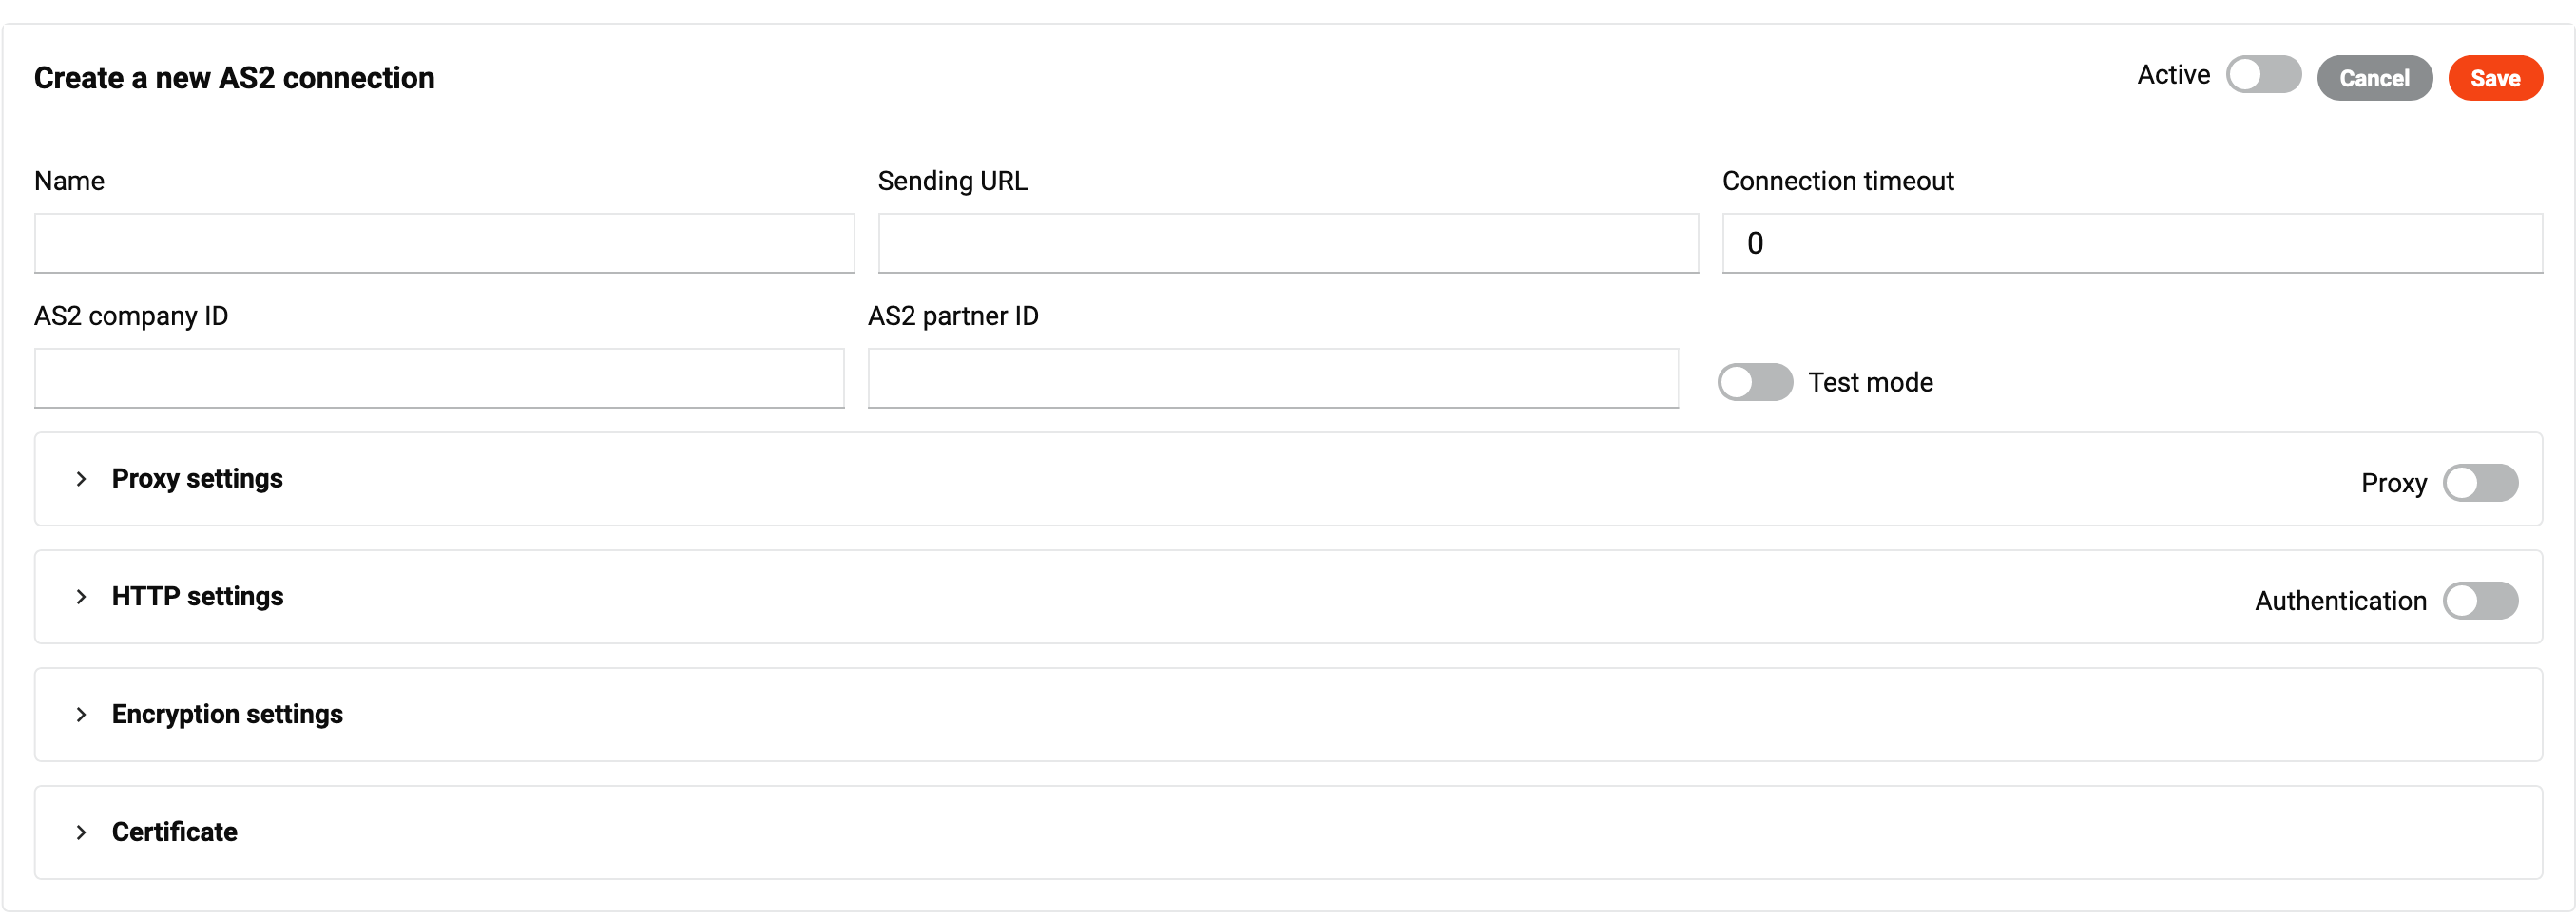
Click the New button, then select AS2 connection. The Create a new AS2 connection panel appears (highlighted):
-
Set the following toggles:
- Duplicate Transaction Check: Turn on to check for duplicate transactions transmitted via this connection.
- Active: Turn on to make the connection available for use.
-
In the basic settings group, set values for the following fields:

- Name: The connection name.
-
Sending URL: The URL provided by the trading partner for sending documents through the AS2 connection. It must be included as part of the AS2 configuration.
Receiving URLs
You must also provide your trading partner one of these receiving URLs, according to your Harmony account's region:
- North America:
na.as2.jitterbitedi.com/receiver.aspx - EMEA:
emea.as2.jitterbitedi.com/receiver.aspx
- North America:
-
Connection Timeout: The initial connection timeout.
- AS2 Company ID: The AS2 company identifier.
- AS2 Partner ID: The AS2 partner identifier.
-
(Optional) Expand the Proxy settings tab, then set values for the following fields:

- Proxy: Enable the proxy server.
- Address: The proxy server address.
- Domain: The proxy server domain.
- Username: The proxy server username.
- Password: The proxy server password.
-
(Optional) Expand the HTTP settings tab, then set values for the following fields:

- Authentication: Enable HTTP authentication.
- Authentication Type: The HTTP authentication type. Select one of the following:
- Authentication user: The username for HTTP authentication.
- Authentication password: The password for HTTP authentication.
- Subject: The subject describing the purpose of the endpoint.
-
(Optional) Expand the Encryption settings tab, then set values for the following fields:

- Signature algorithm: The signature algorithm.
- Encryption algorithm: The encryption algorithm.
- Sign: Enable to reject unsigned incoming messages.
- Encrypt: Enable to reject unencrypted incoming messages.
- Request MDN: Request an MDN (message disposition notification).
- Request MDN signed: Request a signed MDN.
- Compress: Enable to use ZLIB compression.
-
(Optional) Expand the Certificate tab:

The tab has two regions:
- My certificates: Certificates for your organization. These are private certificates, which must be in
pfxformat, and contain only private keys. - Partner certificates: Certificates for the trading partner. These are public certificates, which must be in
.cerformat, and contain only public keys.
Uploaded or created certificates appear as a row, showing the name, expiry date, and the following icons:
- Assign: Assign the certificate to the connection.
- Download: Download the certificate as a
.cerfile. - Delete: Delete the certificate. To confirm the action, enter the word DELETE in the dialog's text field, then click the Delete button.
To upload a certificate, follow these steps:
- Click the Upload icon for either party.
-
In the panel that opens, enter values for Certificate name and Password:

-
Click the Upload file button, then select the certificate file. (Accepted file types are
.cerand.pfx.) - In the Upload certificate panel, click the Save button.
To create a certificate for your organization, follow these steps:
- Click the Create icon.
-
In the panel that opens, enter values for Certificate name and Validity years

-
In the Create a new certificate panel, click the Save button.
- My certificates: Certificates for your organization. These are private certificates, which must be in
-
In the Create a new AS2 connection panel, click the Save button. The new connection is now ready for you to assign it to a partner.
Manage connections
Assign
To assign a connection, select a partner in the trading partners pane, then click Assign.
The word Assigned and a check mark appear in green on the connection to show it is now assigned to the currently selected partner.
Note
Many partners can use the same connection, but a partner can have only one assigned connection at a time.
Edit
To edit a connection, click a connection's Edit icon.
Edit the connection's details, then click Save.
Delete
To delete a connection, click the Delete icon. To confirm the action, enter the word DELETE in the dialog's text field, then click the Delete button.
Note
Assigned connections cannot be deleted. To delete an assigned connection, assign a different one to the selected partner.