Obtaining a Microsoft Dynamics CRM connector application ID in Jitterbit Design Studio
Overview
These are the instructions on obtaining the application ID for a Microsoft Dynamics CRM instance, required for creating a Microsoft Dynamics CRM connection.
Obtaining the application ID
Follow these steps to obtain the application ID for a Microsoft Dynamics CRM instance:
-
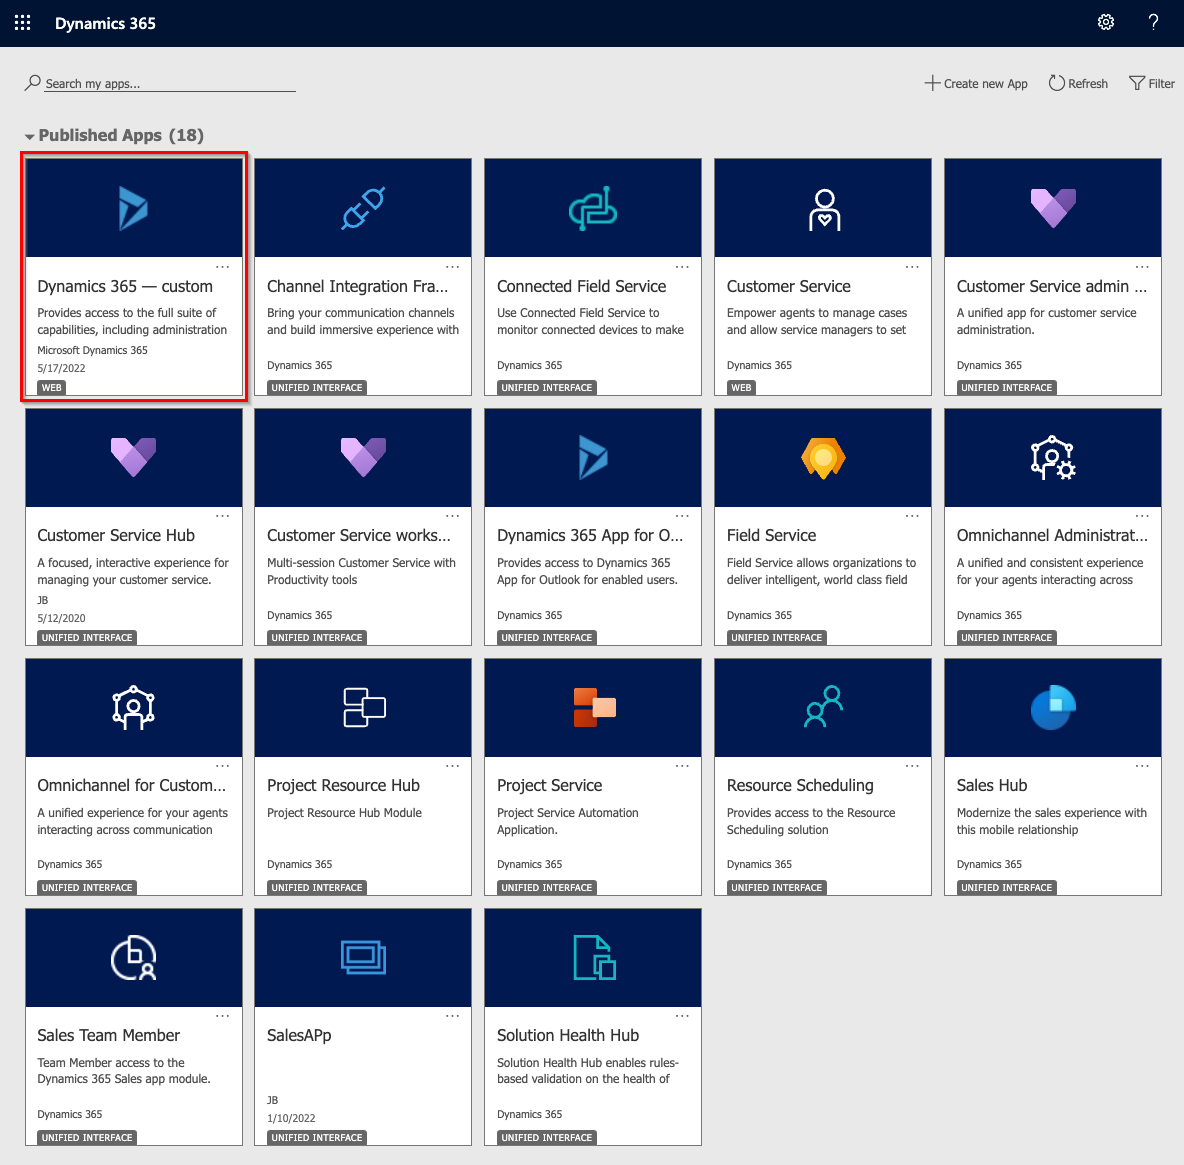
From the Microsoft Dynamics CRM instance landing page, click the Dynamics 365 — custom card:
-
Click the App Launcher icon in the upper left corner:

-
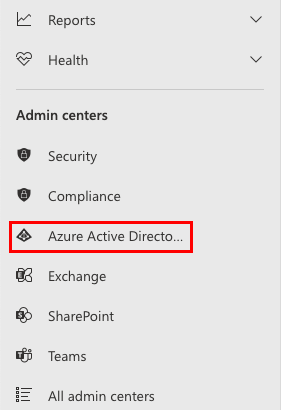
From the app launcher, click Admin.
-
In the menu under Admin centers click Azure Active Directory:
-
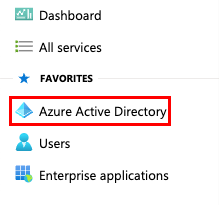
In the Microsoft Azure dashboard menu, click Microsoft Entra ID:
-
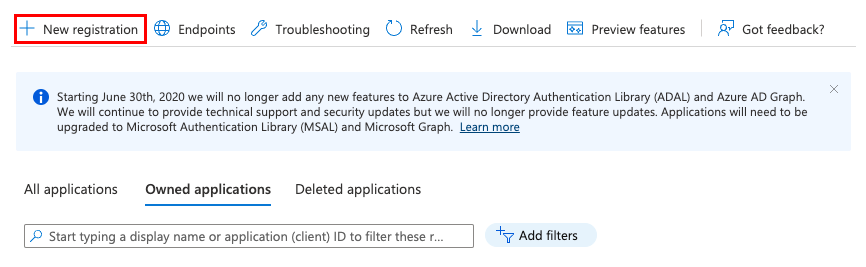
An additional menu will display. From the Manage section of the menu click App registrations:

-
On the App registrations page, click New registration:
-
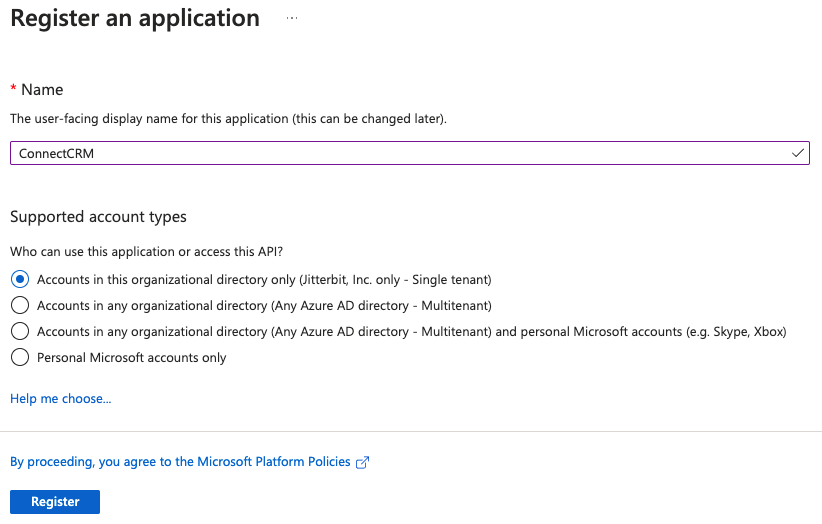
On the Register an application screen, specify the initial details of the application:
-
Enter a Name. For example, ConnectCRM.
-
Under Supported account types, select the appropriate option for your situation.
-
-
After clicking Register, click Manifest under the Manage category on the left. Ensure that
allowPublicClientis set totrueand click Save: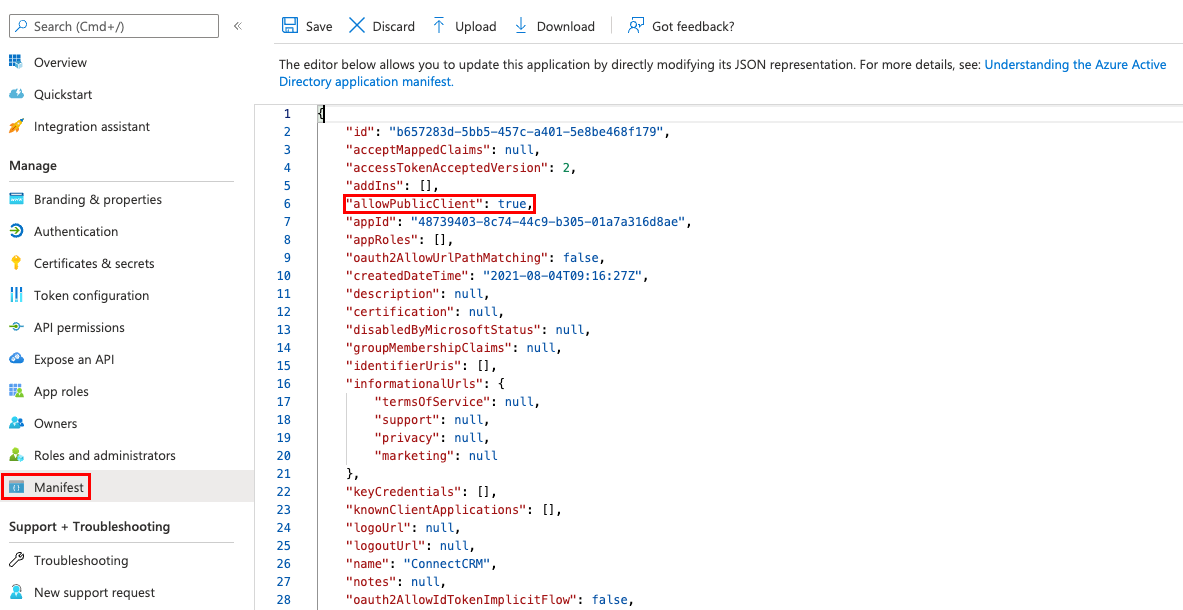
-
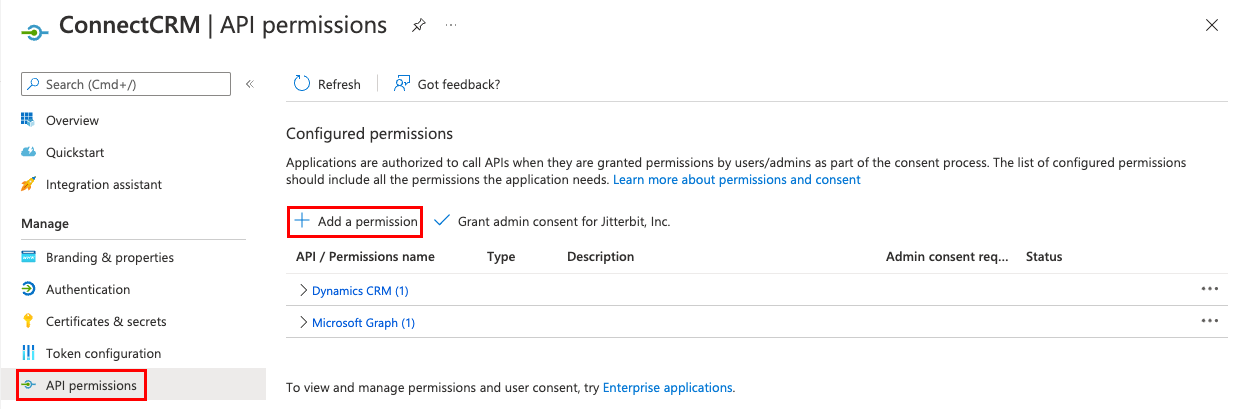
Click API permissions under the Manage category on the left. Under Configured permissions click Add a permission:
-
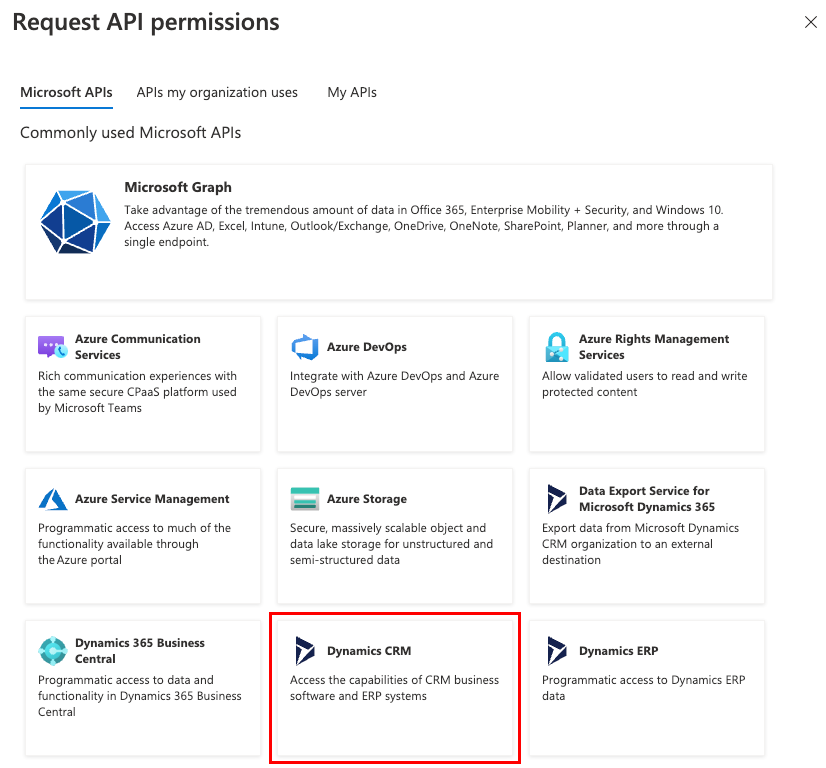
On the Request API permissions screen, select Dynamics CRM:
-
The Permission section is displayed. Within it, select the user_impersonation permission and then click Add permissions.
-
You are returned to the API permissions screen for the application. Under Configured permissions, click Grant admin consent for
<Directory>: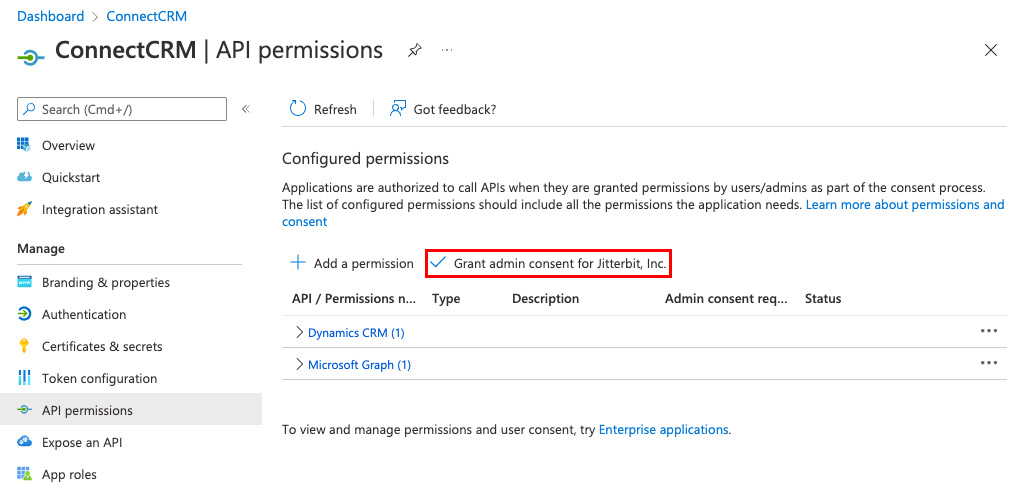
-
Acknowledge the dialog to grant consent for the directory:

-
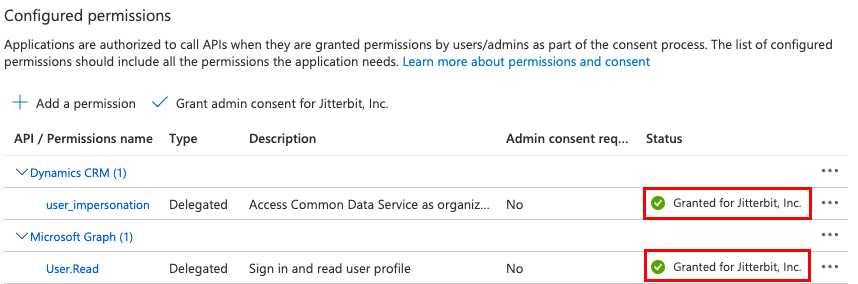
Under Configured permissions the Status column will show that consent has been granted for each added permission:
-
On the Overview screen, the Application (client) ID is displayed. Retain this for later use, as it will be required when configuring a Microsoft Dynamics CRM connection:
