Create a new app in Jitterbit App Builder
Introduction
You can create a new app in the following ways:
-
Use the Create New Application one-step wizard ( Action Drawer > Site Menu > + App). With the one-step wizard, you only need two clicks and an app name. Everything else is done for you.
-
Use the Create New Application multi-step wizard (IDE > + Application). With the multi-step wizard, you enter an app name, and can choose a data source and the home page layout.
-
Use the AI App Assistant. With the AI App Assistant, you create a working application by engaging in an interactive written dialog with an AI chatbot.
One-step wizard
To create a new application using the one-step wizard, follow these steps:
-
Select Action Drawer > Site Menu.
-
If there are existing apps, click the + App button. If there are no apps, click the + Create button.
-
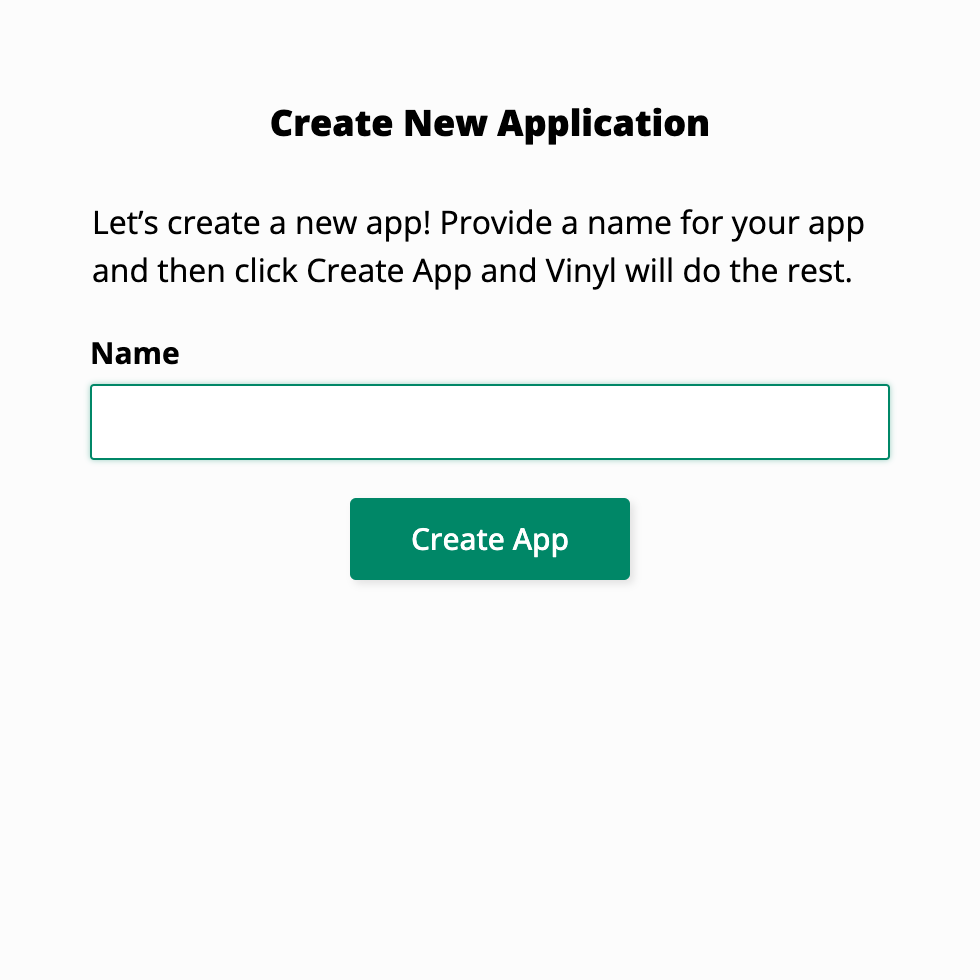
The Create New Application wizard dialog opens:
-
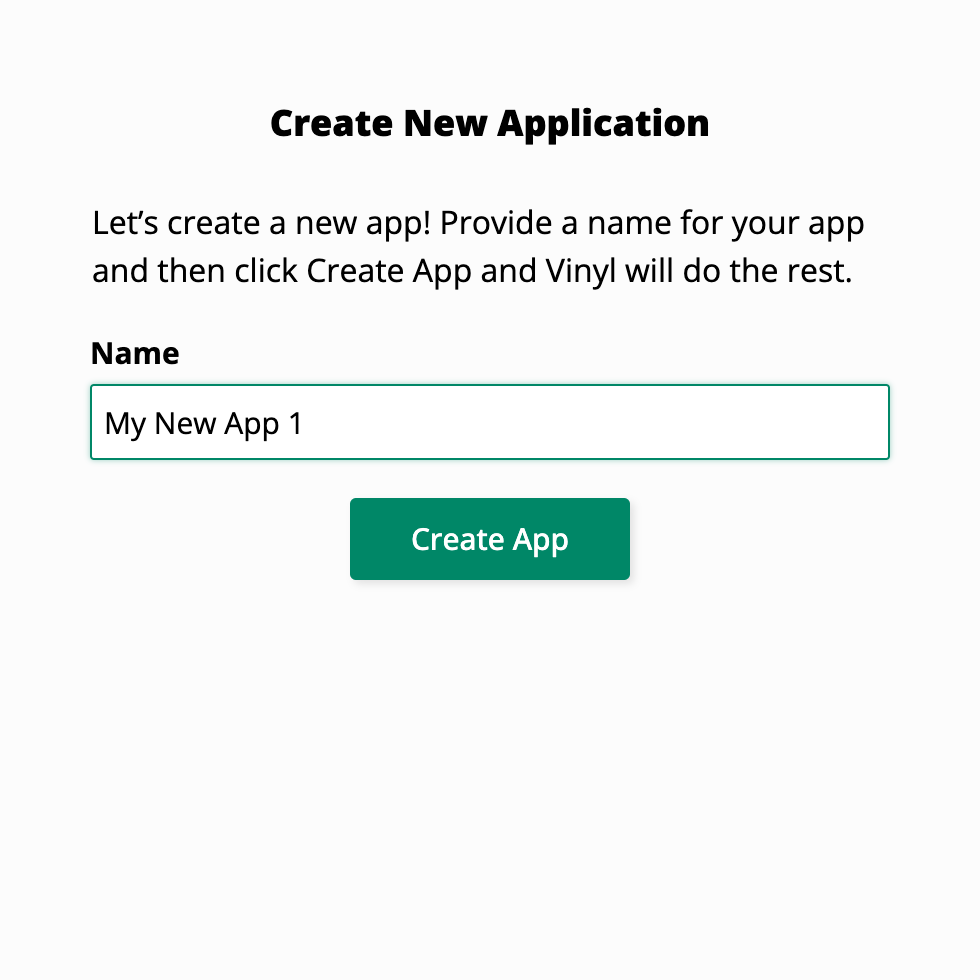
In the Name field, enter a name for your new app:
-
Click the Create App button.
-
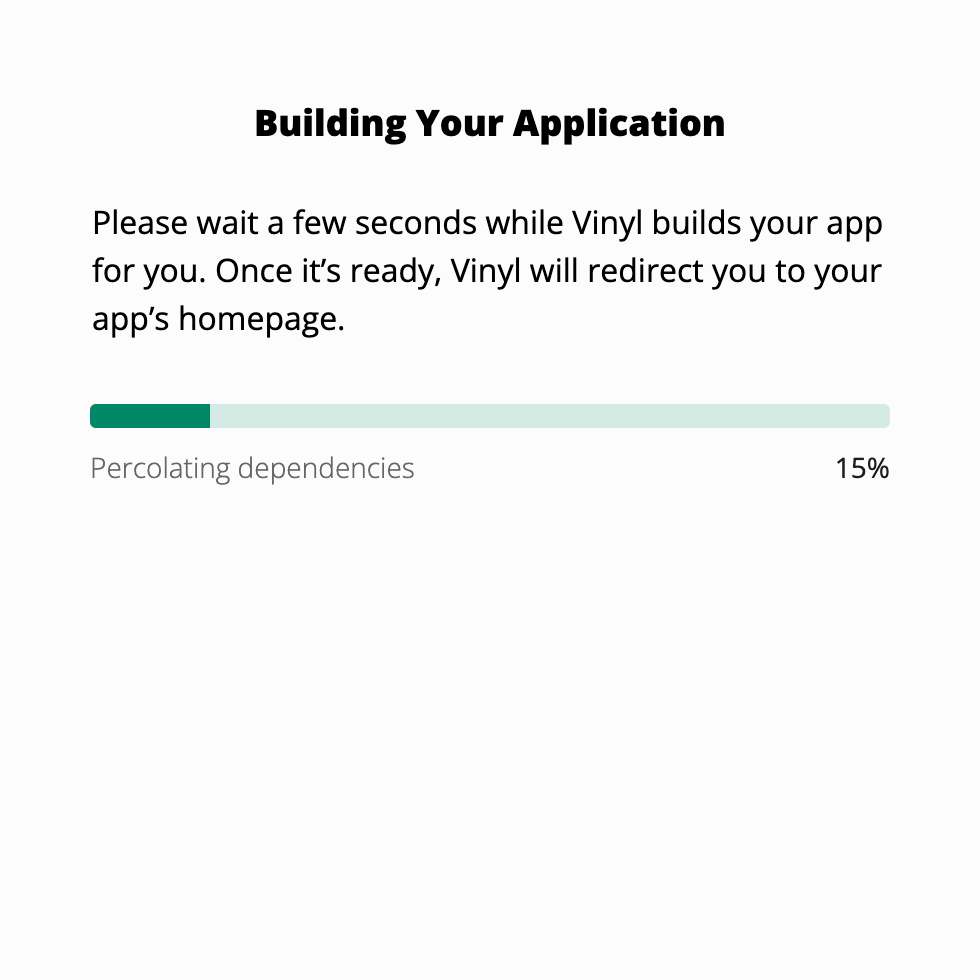
A Building Your Application dialog shows messages and a progress bar to illustrate the creation of your app:
-
When the app is ready, its Home screen opens, where you can continue to develop your app.
Multi-step wizard
The multi-step wizard provides options to create a new app data source or use an existing one.
Create Database
To create a new application with a new data source, follow these steps:
-
Select Action Drawer > IDE.
-
In the Build section, click the Application button.
-
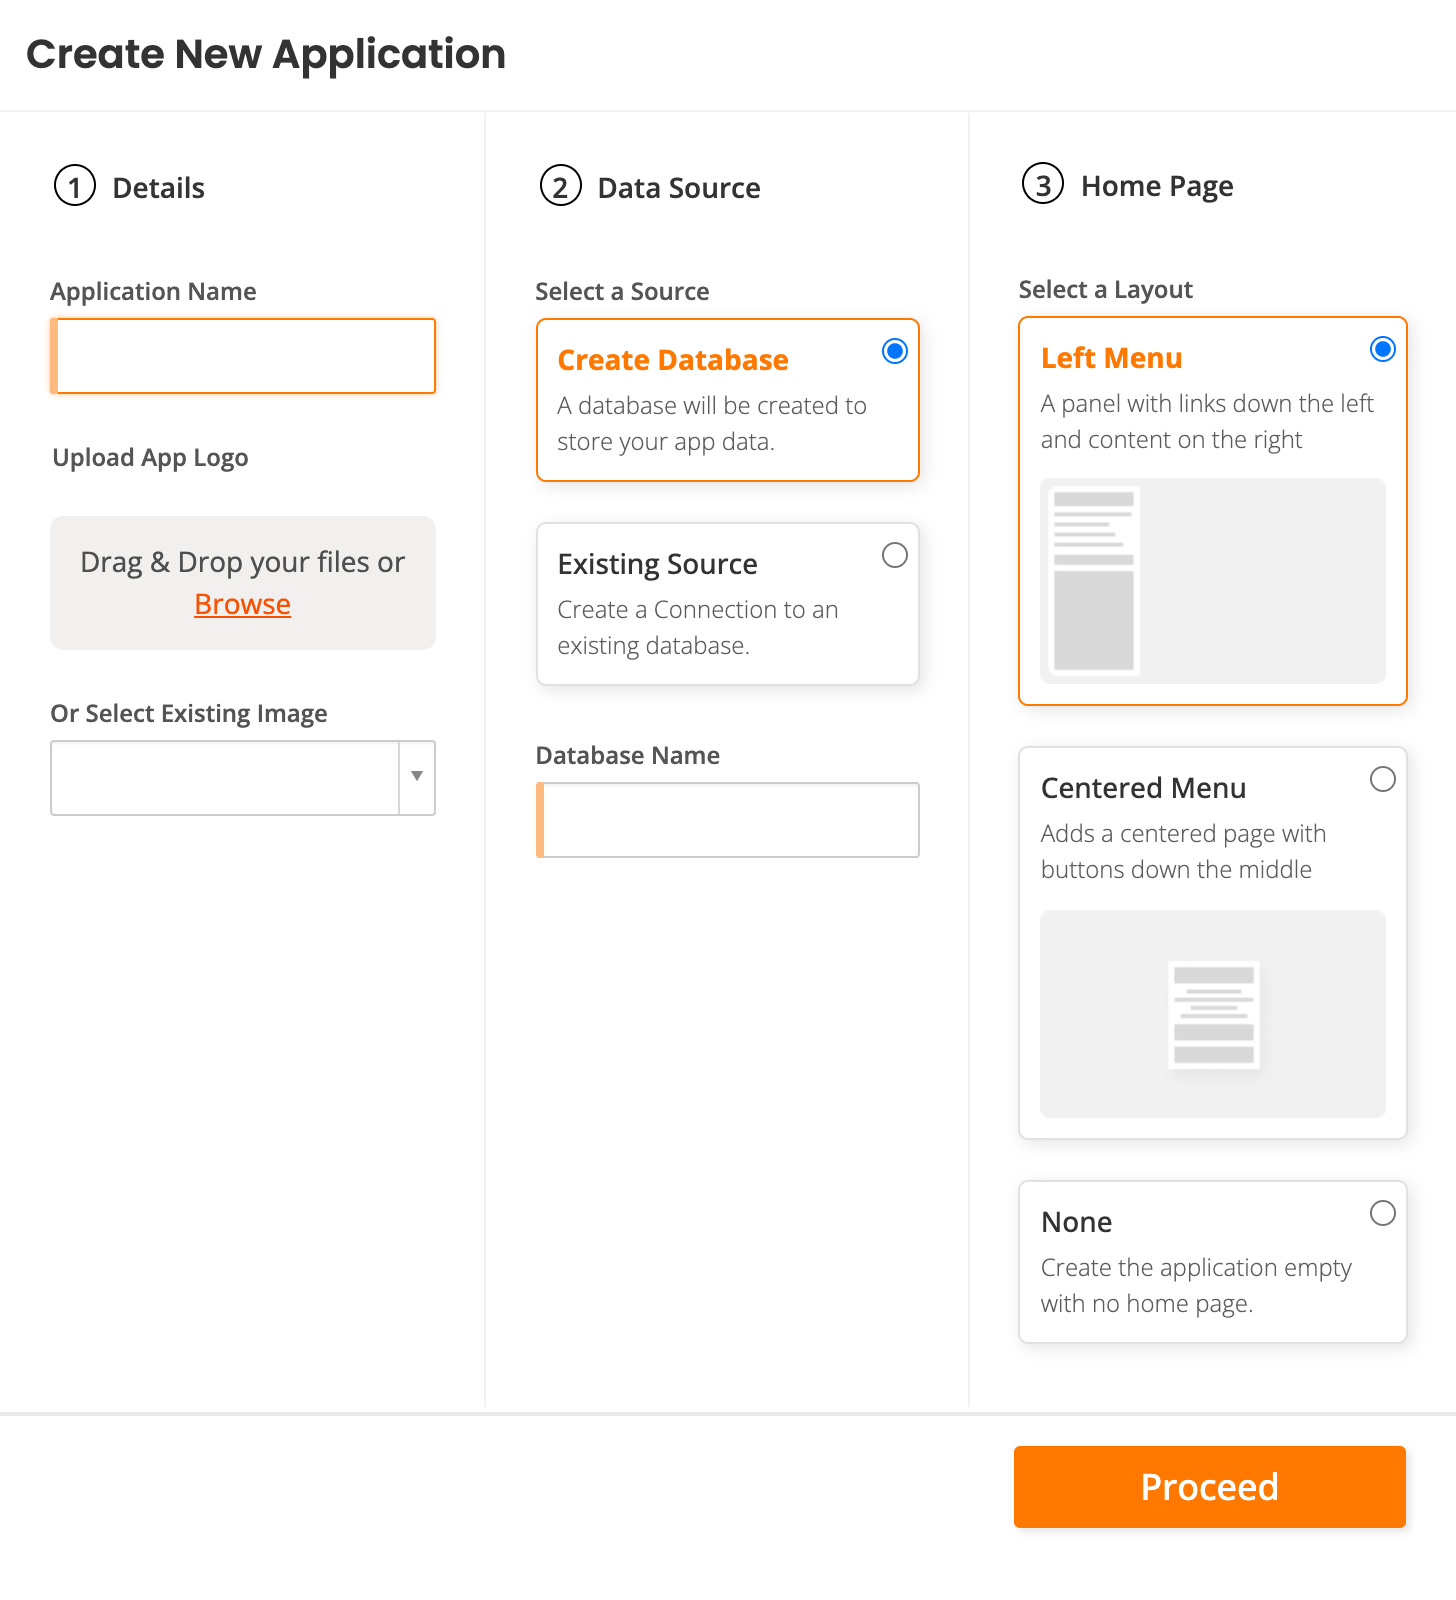
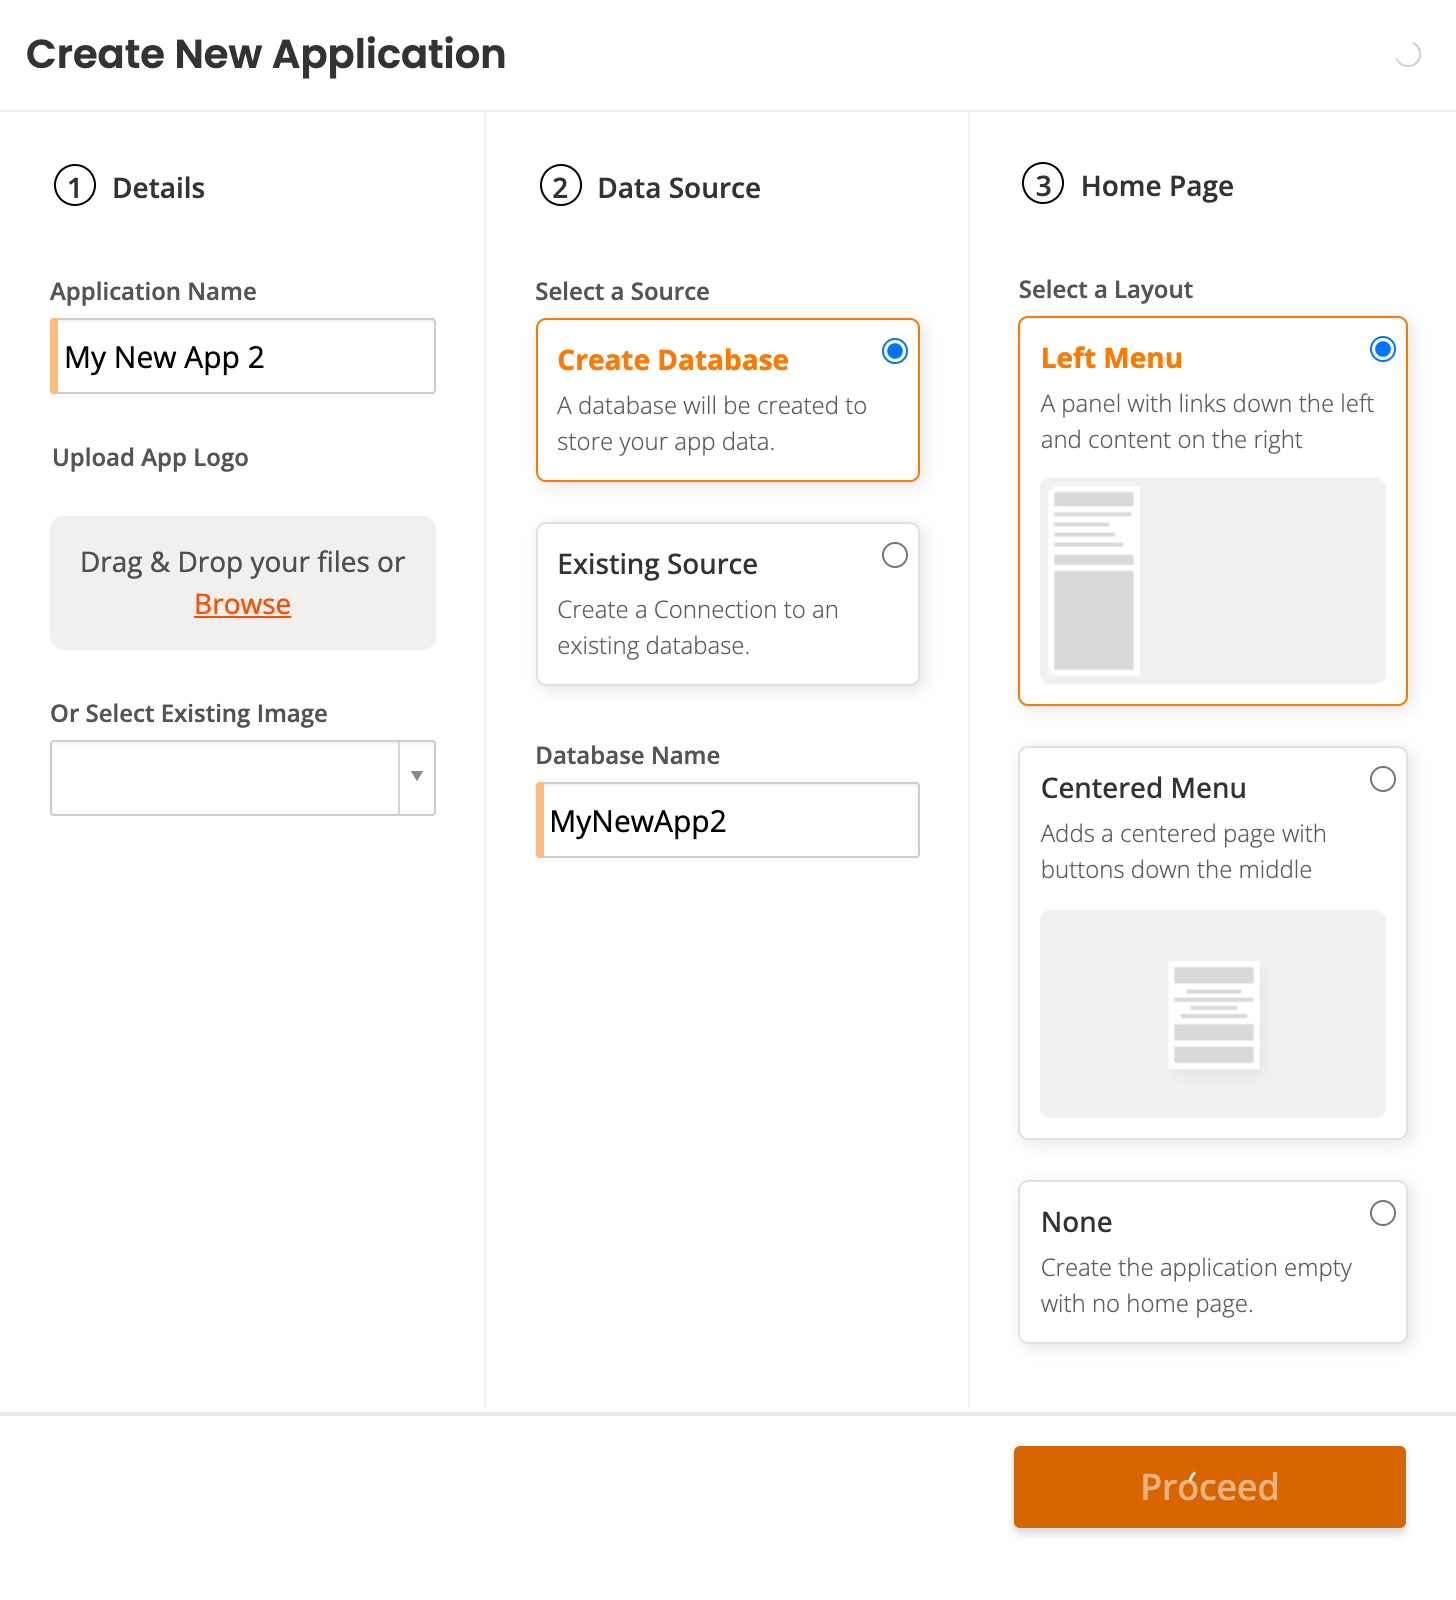
The Create New Application dialog opens:
-
In the ① Details section, do the following:
-
Enter a name for your new app in the Application Name field.
-
(Optional.) Under Upload App Logo, either drag and drop an image, click Browse to find one, or select an existing image from the dropdown menu.
-
-
In the ② Data Source section, select Create Database (the default setting).
-
(Optional.) Enter a name in the Database Name field. If you leave this blank, one is provided based on the application name.
-
In the ③ Home Page section, select how the home page should look.
-
Click the Proceed button:
-
While the app is being created, the Proceed button is inactive and animated.
-
When the app is ready, its Home screen opens, where you can continue to develop your app.
Existing Source
To create a new application with an existing data source, follow these steps:
-
Select Action Drawer > IDE.
-
In the Build section, click the Application button.
-
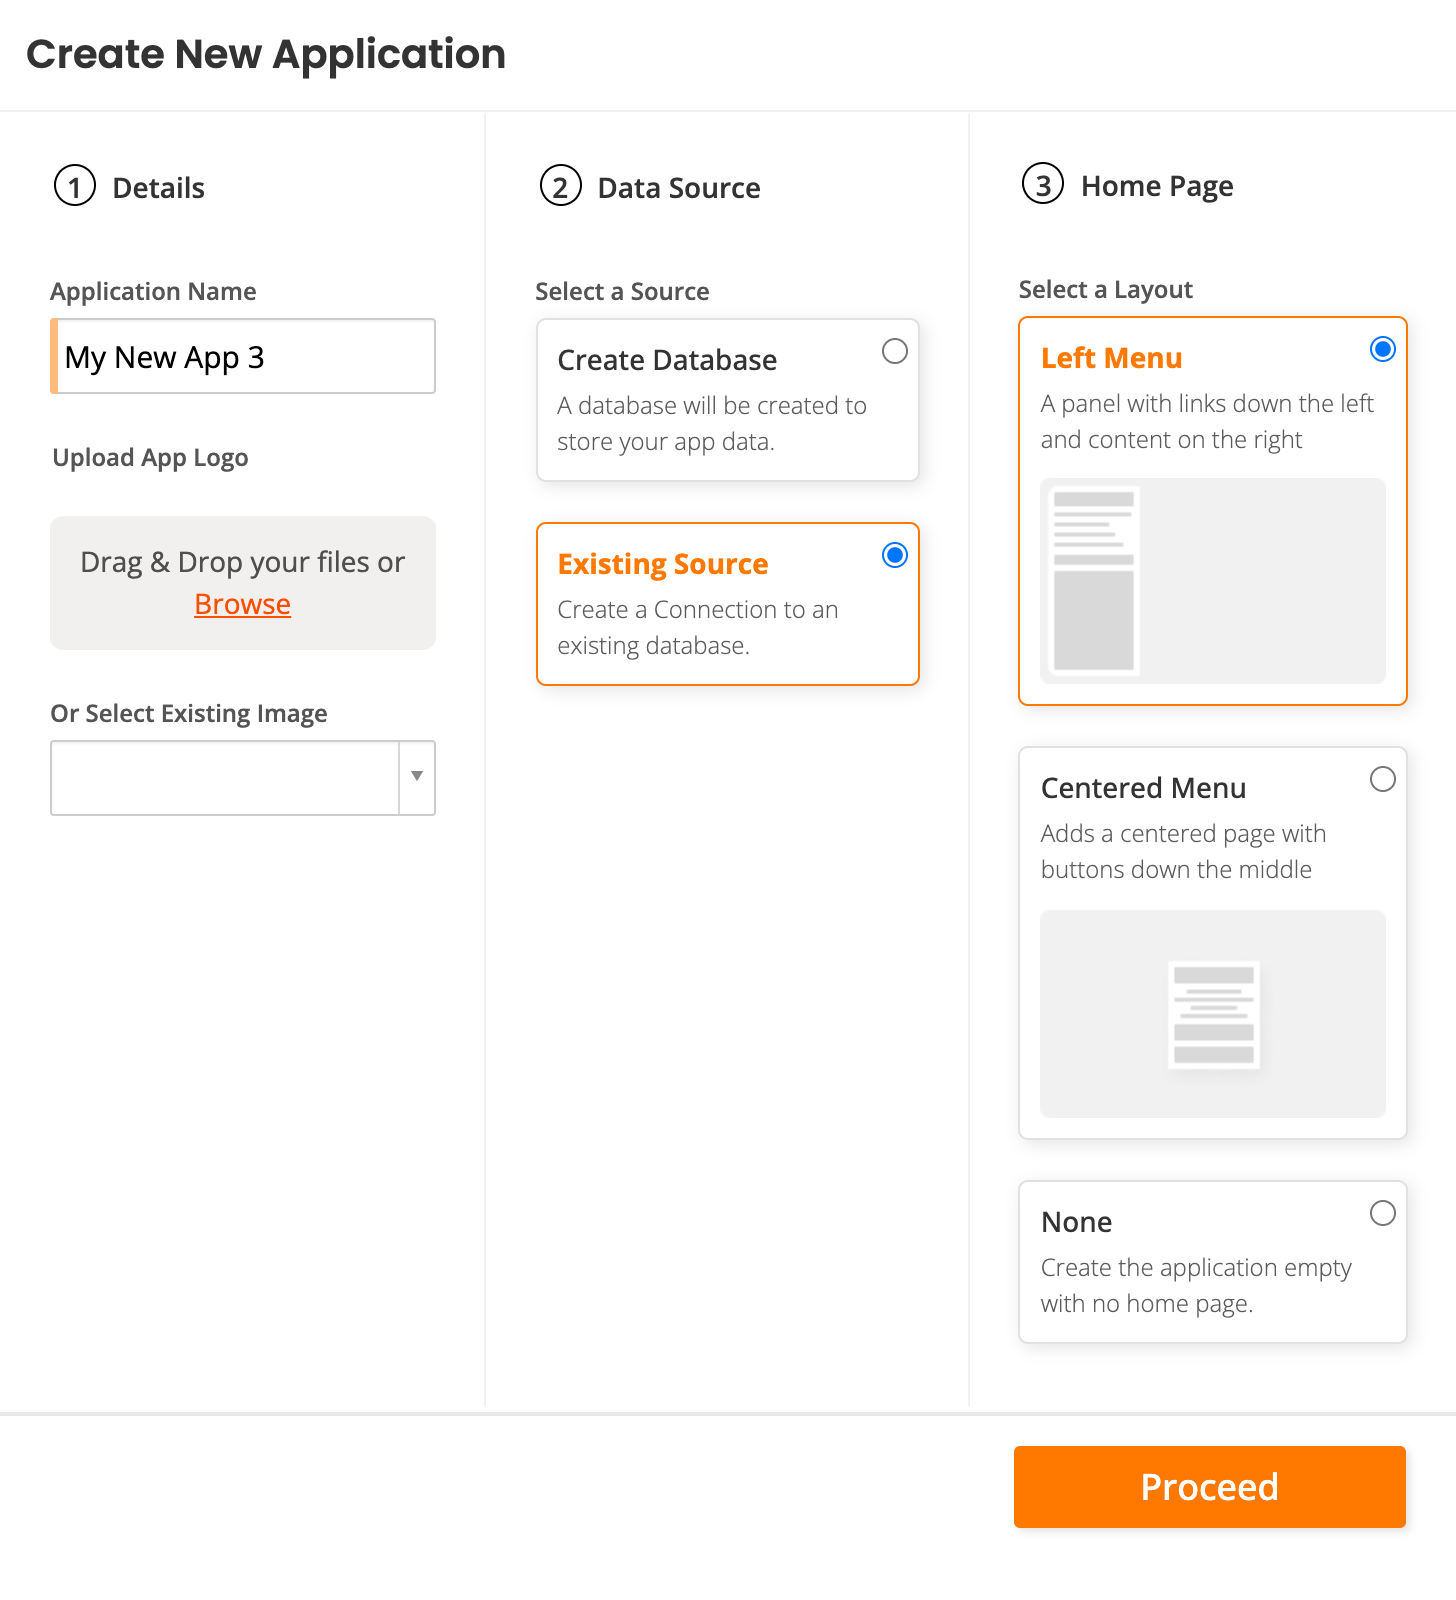
The Create New Application dialog opens.
-
In the ① Details section, do the following:
-
Enter a name for your new app in the Application Name field.
-
(Optional.) Under Upload App Logo, either drag and drop an image, click Browse to find one, or select an existing image from the dropdown menu.
-
-
In the ② Data Source section, select Select Existing Source.
-
In the ③ Home Page section, select how the home page should look.
-
Click the Proceed button:
-
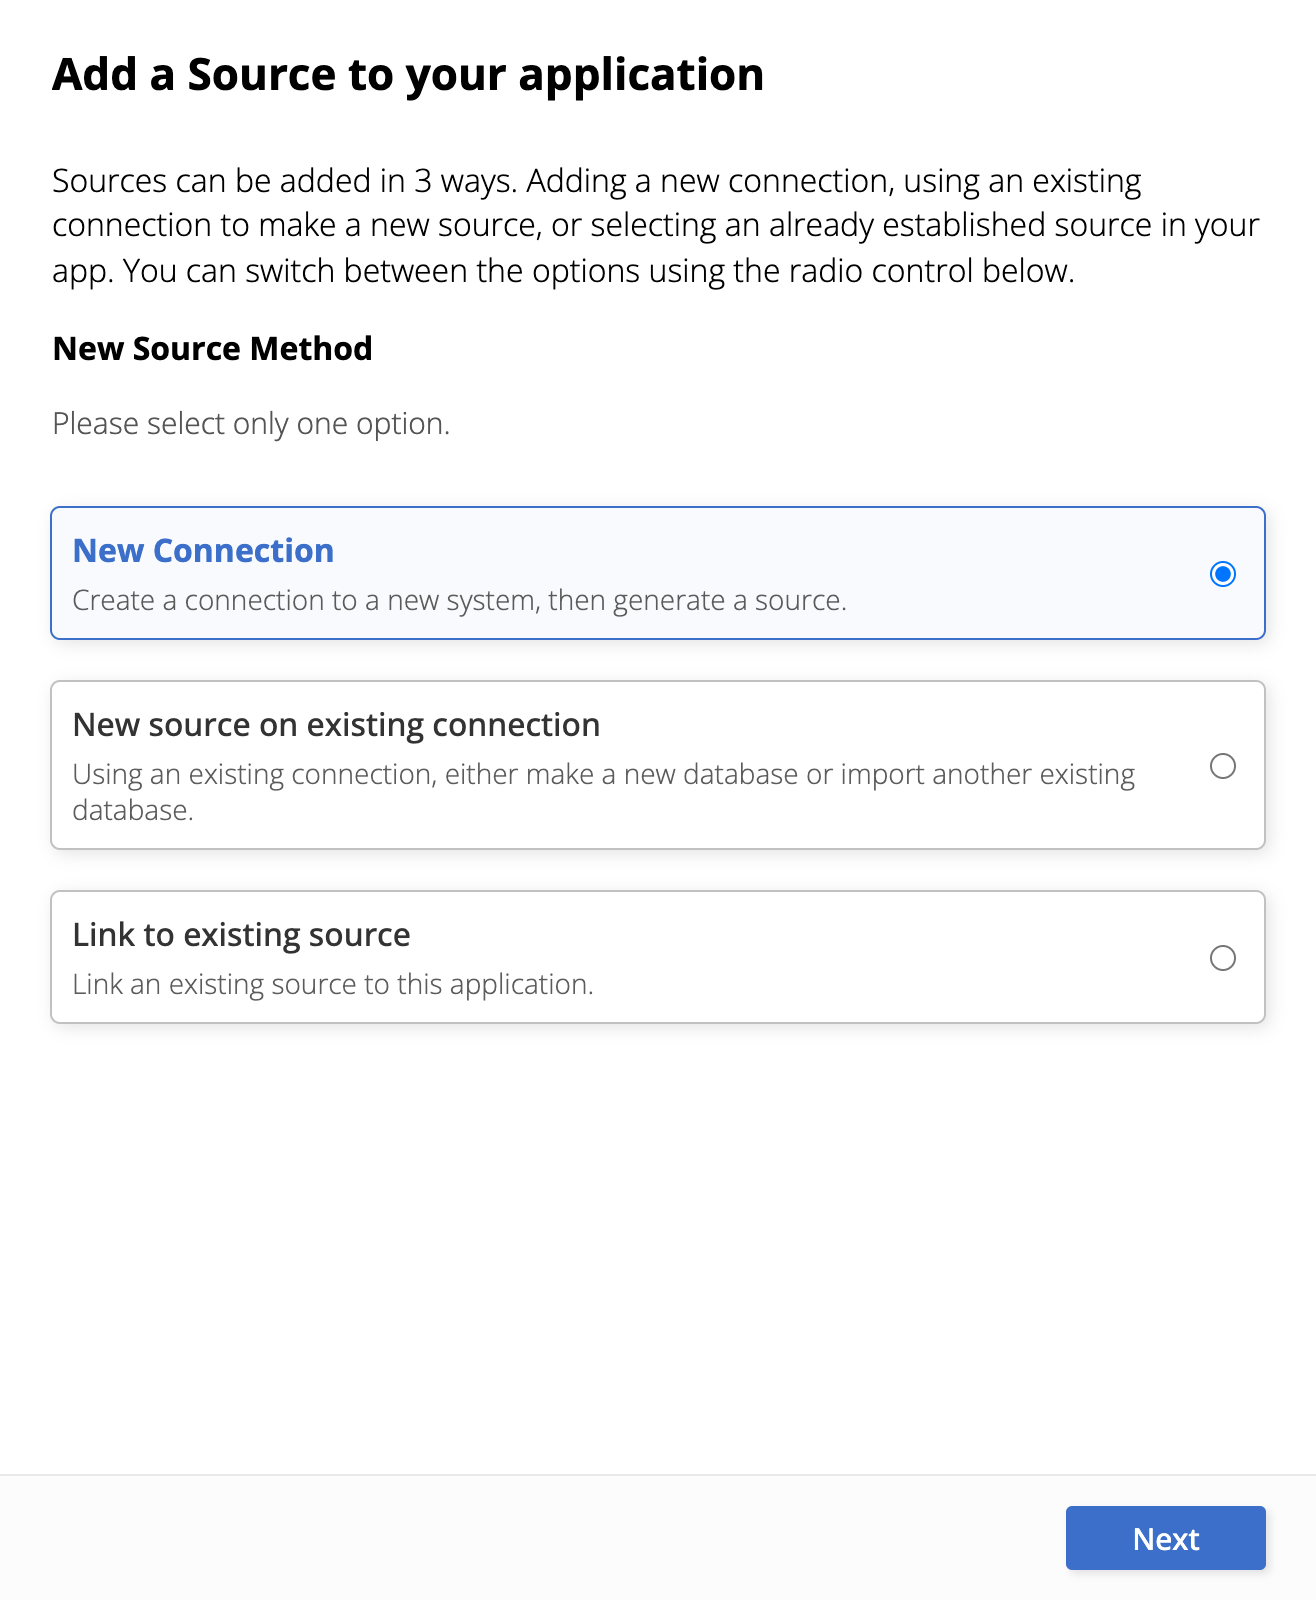
The Add a Source to your application dialog opens:
-
Select one of the following options:
-
New Connection: Create a new connection and source.
-
New source on existing connection: Use an existing connection.
-
Link to existing source: Link an existing source.
Important
Make your choice carefully. After this step there is no way to return to a previous step. If you close the dialog before reaching the final the step, your app is created but without a fully configured data source. To complete the process, edit the app and configure it using the standard IDE tools.
-
-
Click the Next button.
-
A sequence of pages steps you through configuring the choice made above. When each step's configuration is complete, click the Next button to progress to the next step.
-
The last page shows a summary of your choices. Click the Done button to complete the wizard and create your app.
-
When the app is ready, its Home screen opens, where you can continue to develop your app.