Portal Manager page in Jitterbit API Manager
Introduction
The Portal Manager page allows you to generate OpenAPI documentation for all custom and proxy APIs in an environment at once. The resulting documentation is displayed on the API Portal page, where you can interact with it by testing APIs. To generate documentation for an individual API instead, use the Documentation tab on the APIs page. This page describes the user interface of the Portal Manager page within API Manager.
Limitations
The Portal Manager page has these limitations:
- Generation of OpenAPI documentation for OData APIs is not supported when using Regenerate Docs. To generate documentation for an individual OData API, use the Documentation tab on the APIs page.
- Generation of OpenAPI documentation for API services using a custom request method is not supported due to a limitation of the OpenAPI specification. APIs that include only custom method API services are shown with an API tag name only.
- Only a single API Portal page for each environment can be created in a Harmony organization.
Access the Portal Manager page
To access the Portal Manager page, use the Harmony portal menu to select API Manager > Portal Manager.
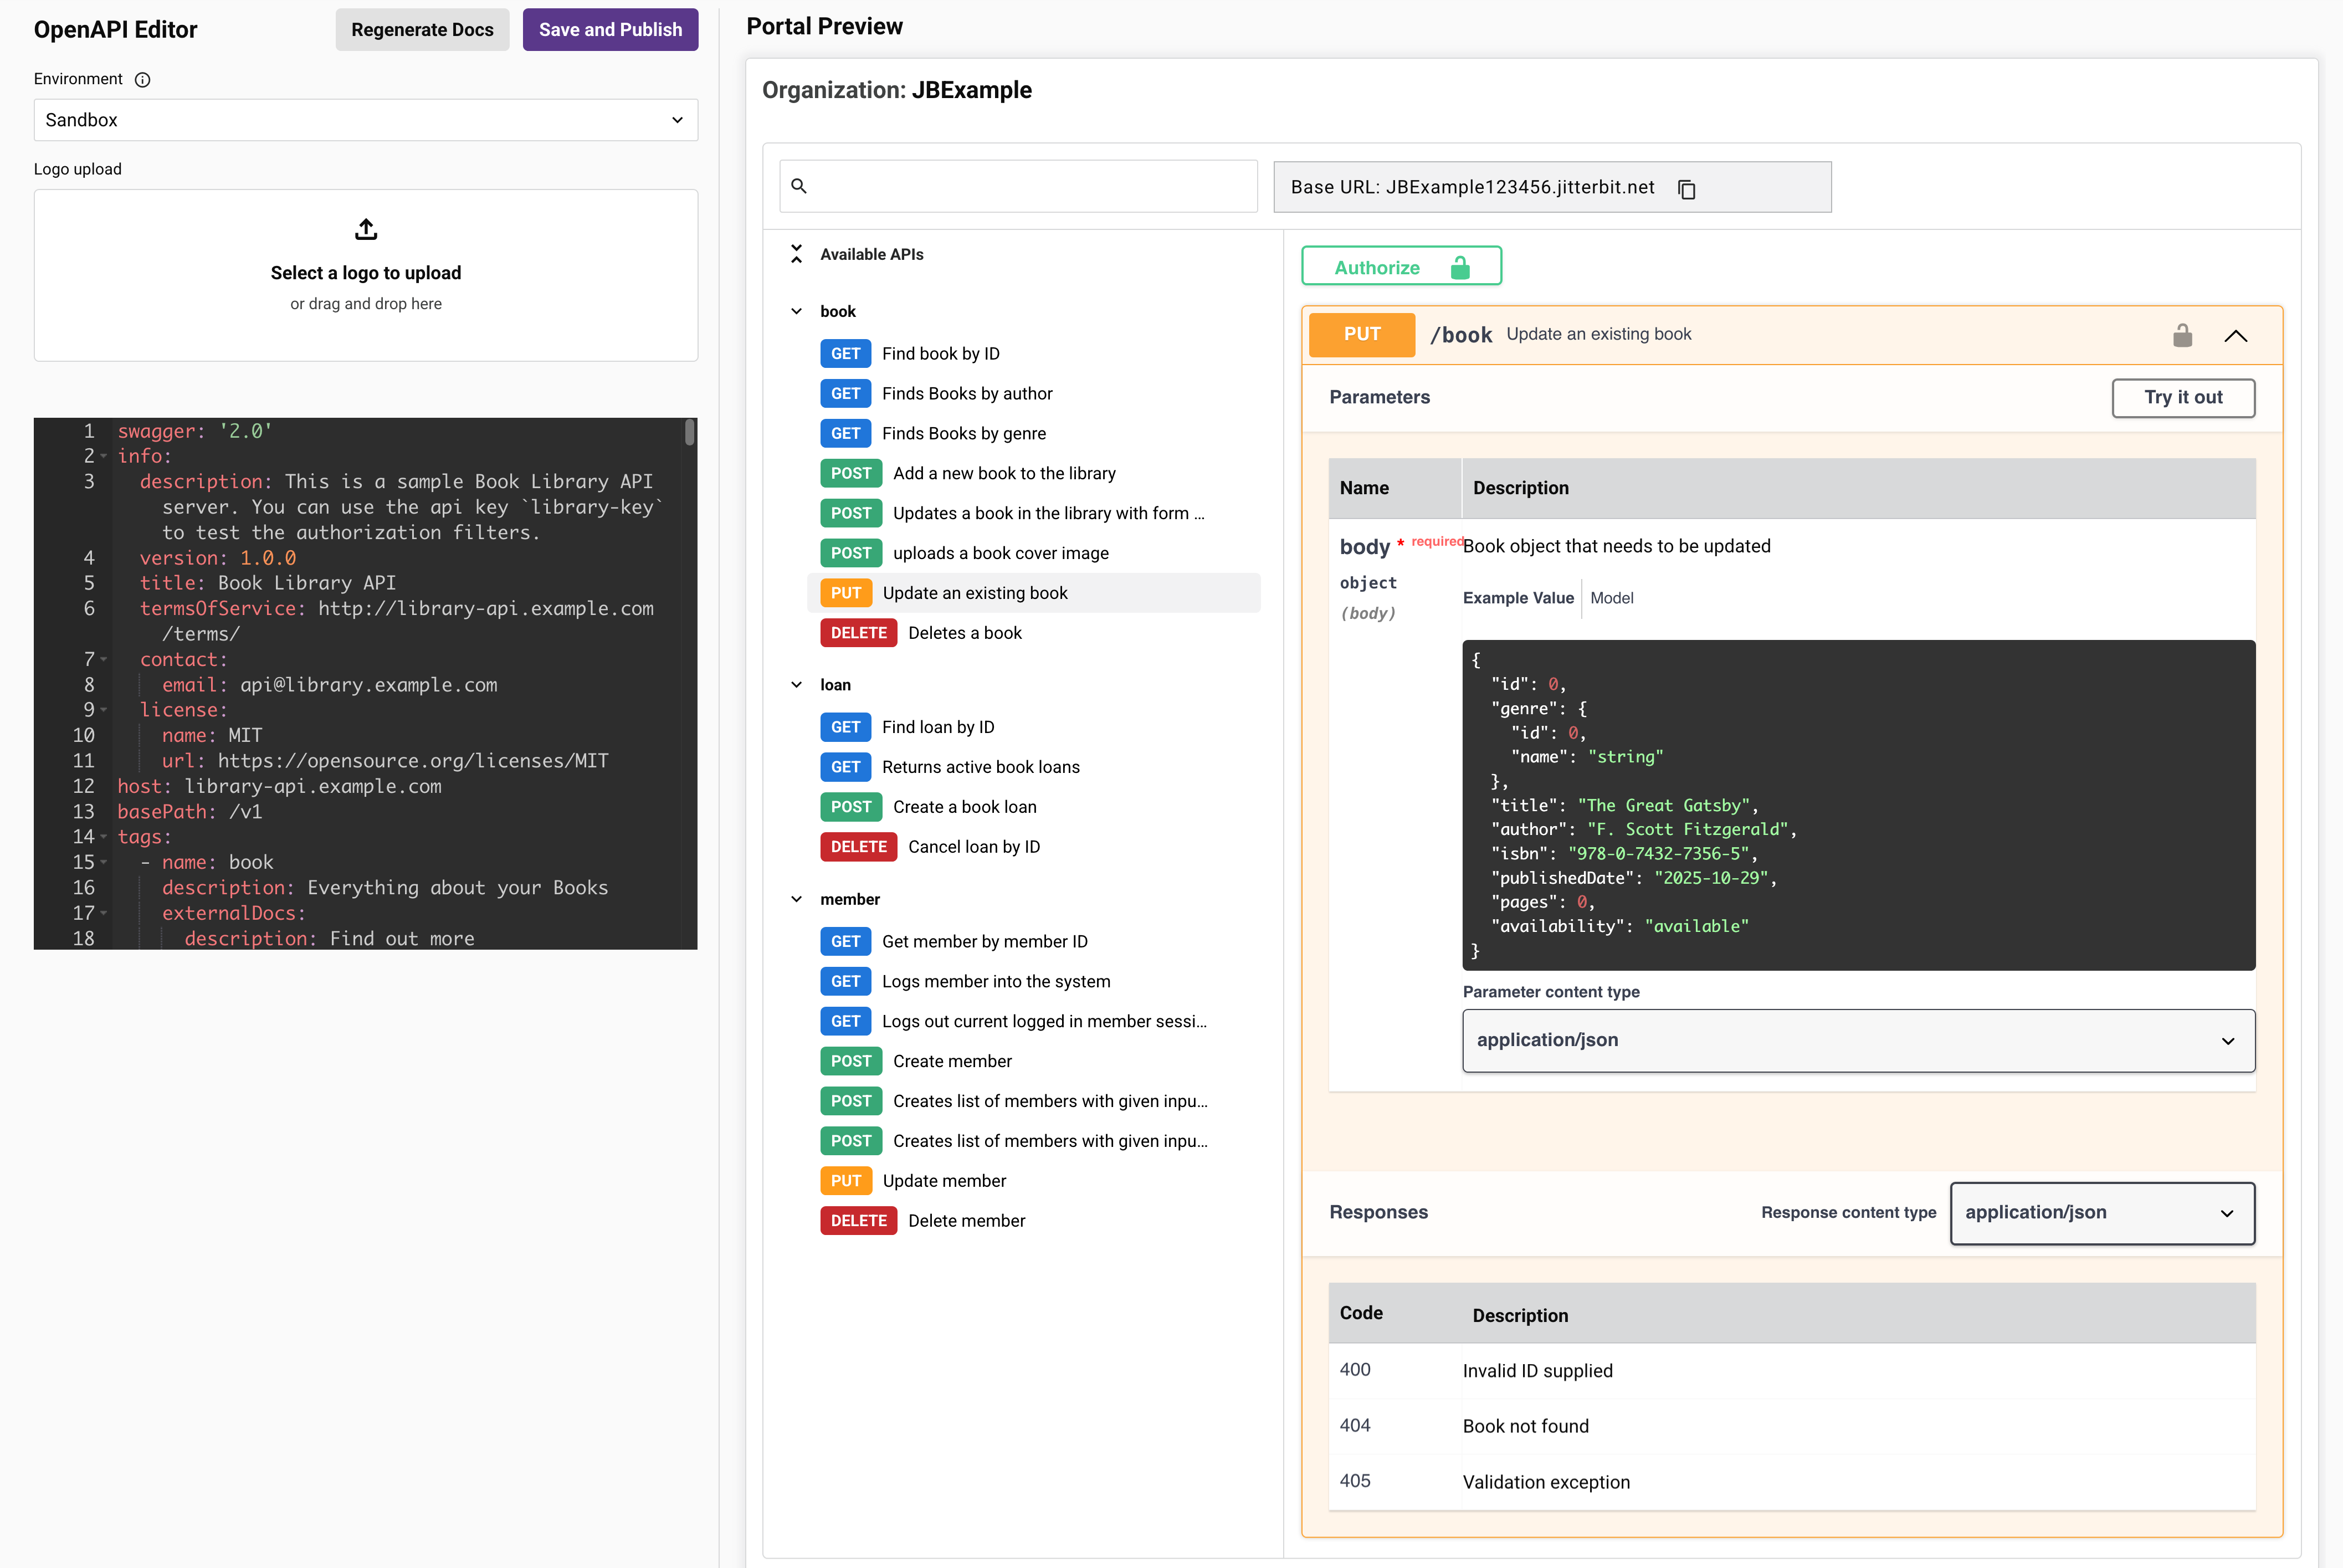
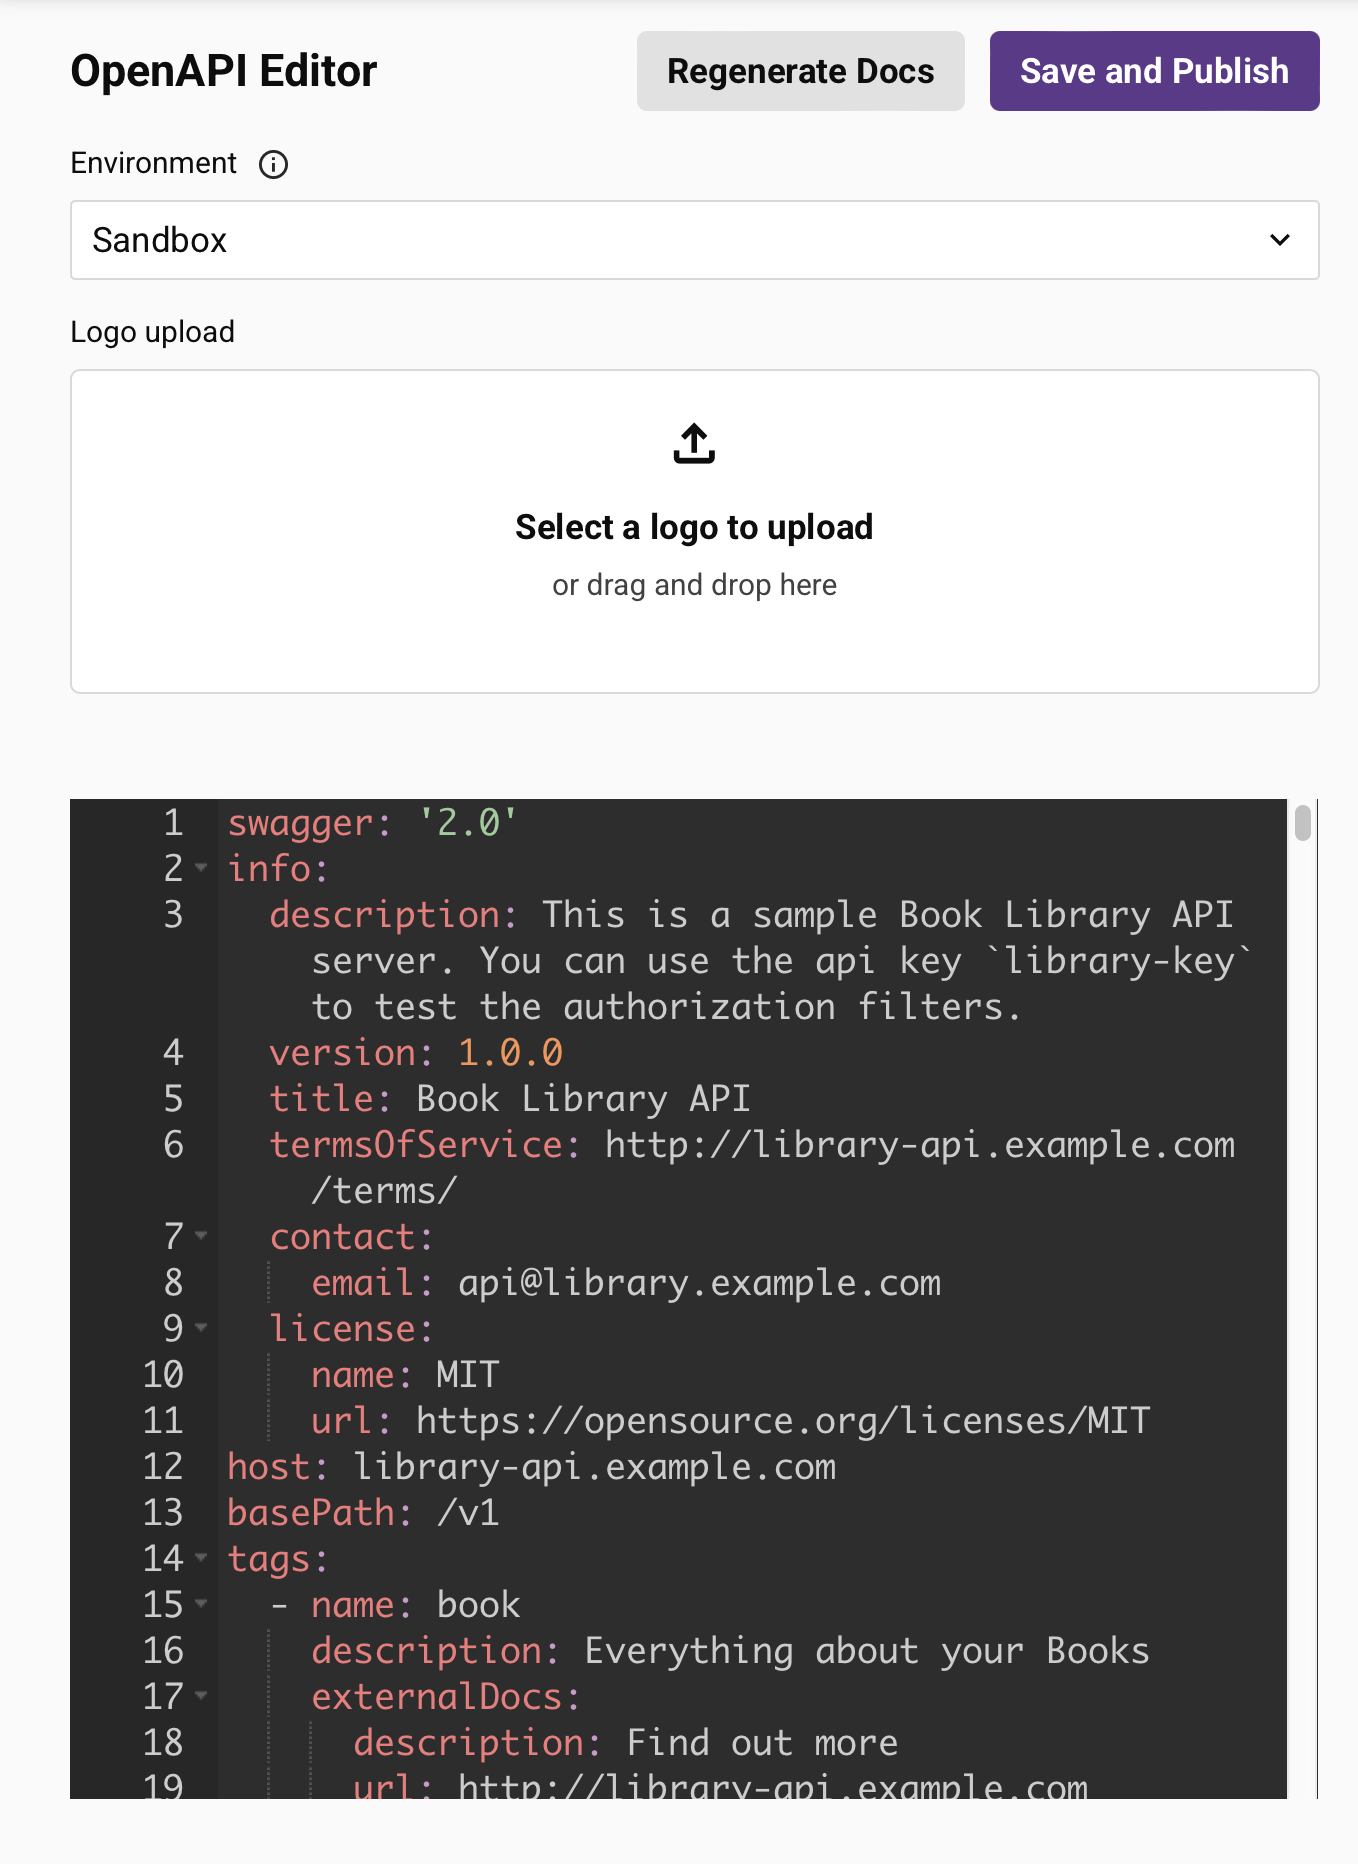
OpenAPI Editor
The OpenAPI Editor includes the following controls:
-
Environment: Use the menu to select the environment where OpenAPI documentation will be generated and then displayed on an organization's API Portal page.
Note
Only a single API Portal page for each environment can be created in a Harmony organization.
-
Logo upload: You can customize the API Portal page by dragging and dropping an image to the upload zone or manually selecting one. Your upload is automatically published to the API Portal page without needing to click Regenerate Docs or Save and Publish.
-
Regenerate Docs: Click to overwrite and publish OpenAPI 2.0 documentation to the API Portal page for all custom and proxy APIs in the selected environment. OData APIs are excluded. If you have published a new custom or proxy API and want to automatically regenerate documentation to include any new APIs, you must use this option.
Warning
Using this option overwrites existing API documentation, including any customizations. Before using this option, it is recommended to make a manual copy of the existing API documentation by copying it into an external text editor. After regenerating documentation, manually re-apply any customizations by pasting them into the API documentation editor as appropriate.
-
Save and Publish: Click to save and publish the API documentation to the API Portal page. If you have applied any customizations to the automatically generated API documentation, you must use this option to publish the documentation on the API Portal page.
-
Editor: When you add OpenAPI definitions in the editor, they are rendered as interactive Swagger UI documentation in the Portal Preview. You can edit the OpenAPI definitions directly within the editor. These are examples of customizations for the API documentation:
-
Populate metadata about the API, including Fixed Fields such as
title,description,termsOfService,contact,license, andversion. -
Manually overwrite documentation using the OpenAPI Specification 3.0.
After making edits to the API documentation, click Save and Publish to save and publish the documentation to the API Portal page.
-
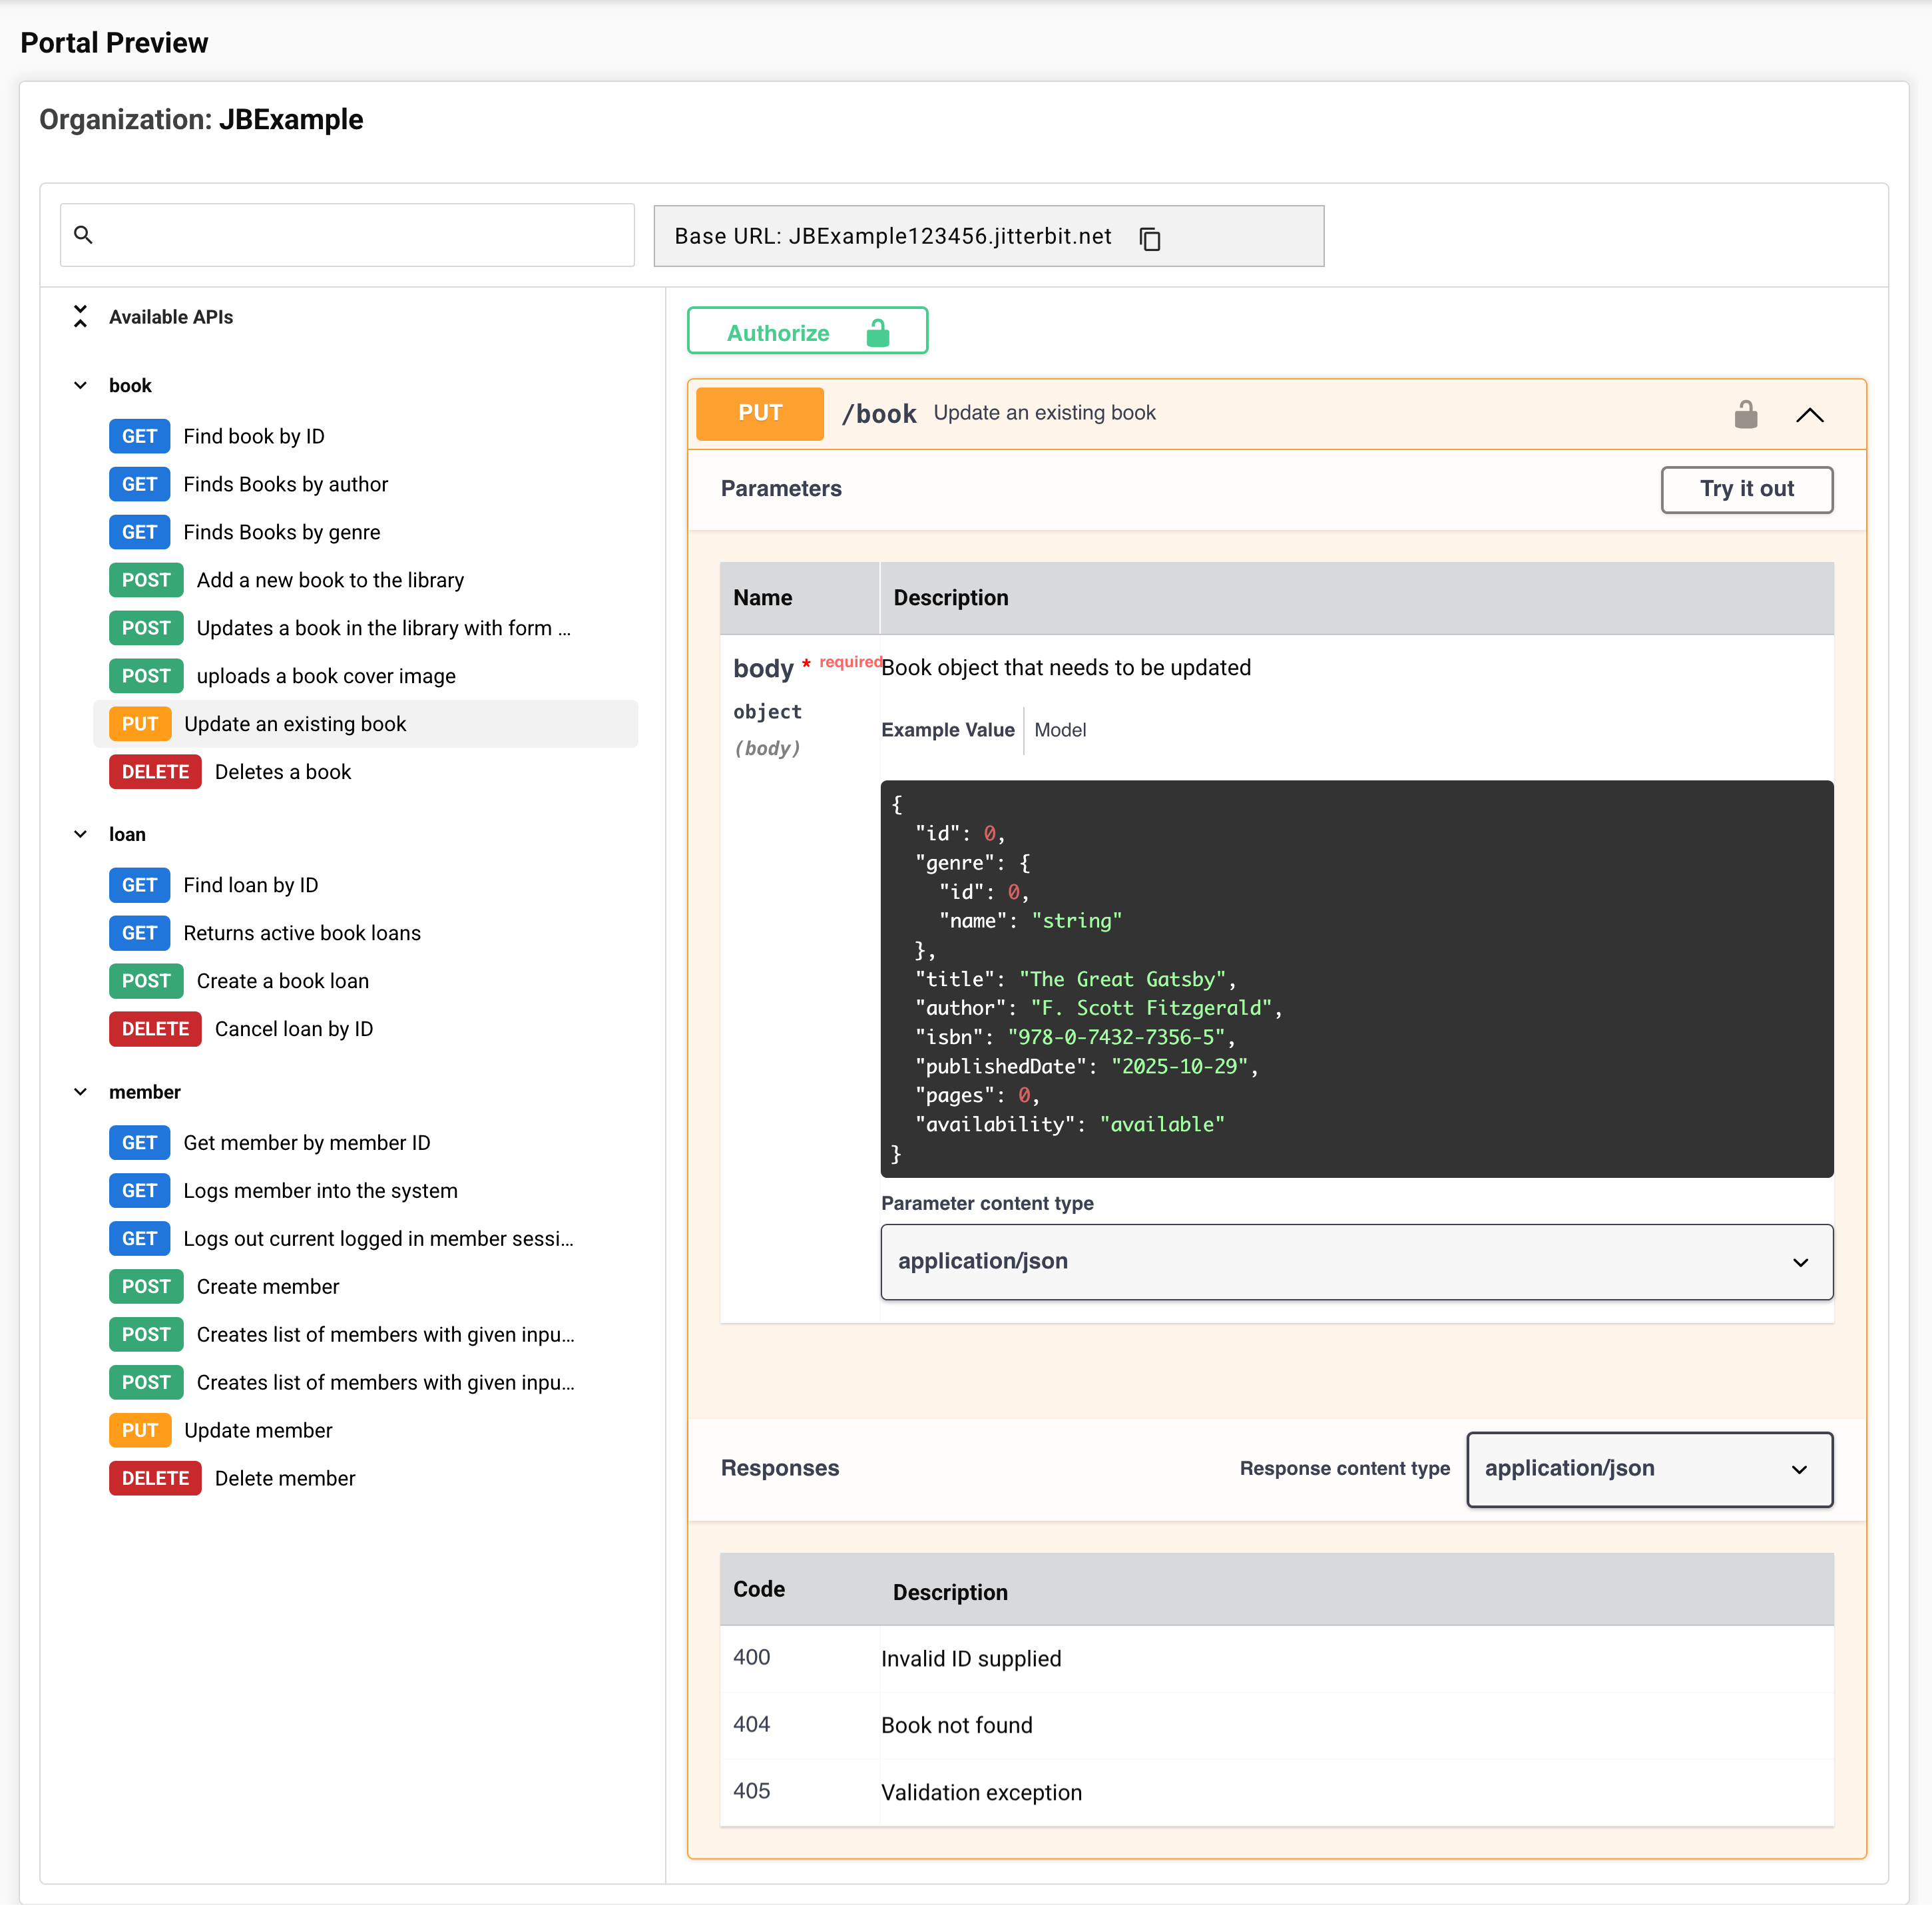
Portal Preview
You can view the API definitions as interactive Swagger UI documentation in the Portal Preview.
-
Organization: The Harmony organization currently being accessed.
-
Search: Enter an API name, service name, or method to filter the Available APIs to those matching the query.
-
Base URL: The base URL for the API service. Click the copy icon to copy the base URL to your clipboard.
-
Available APIs: Groups your API services by the service root, for example,
bookorloan. Click the carets to expand or collapse the APIs in that group. Use Expand/Collapse all to show or hide the list of APIs.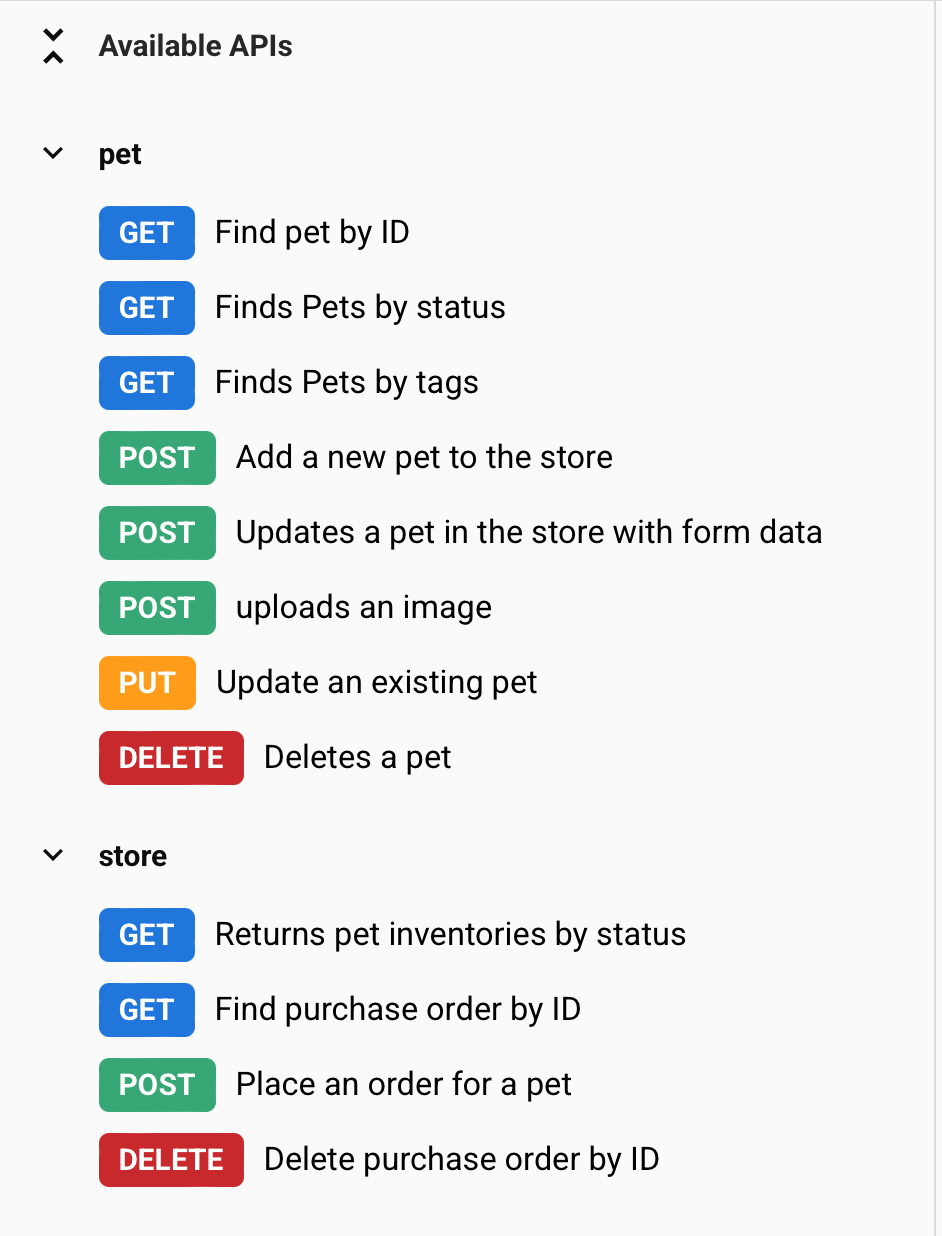
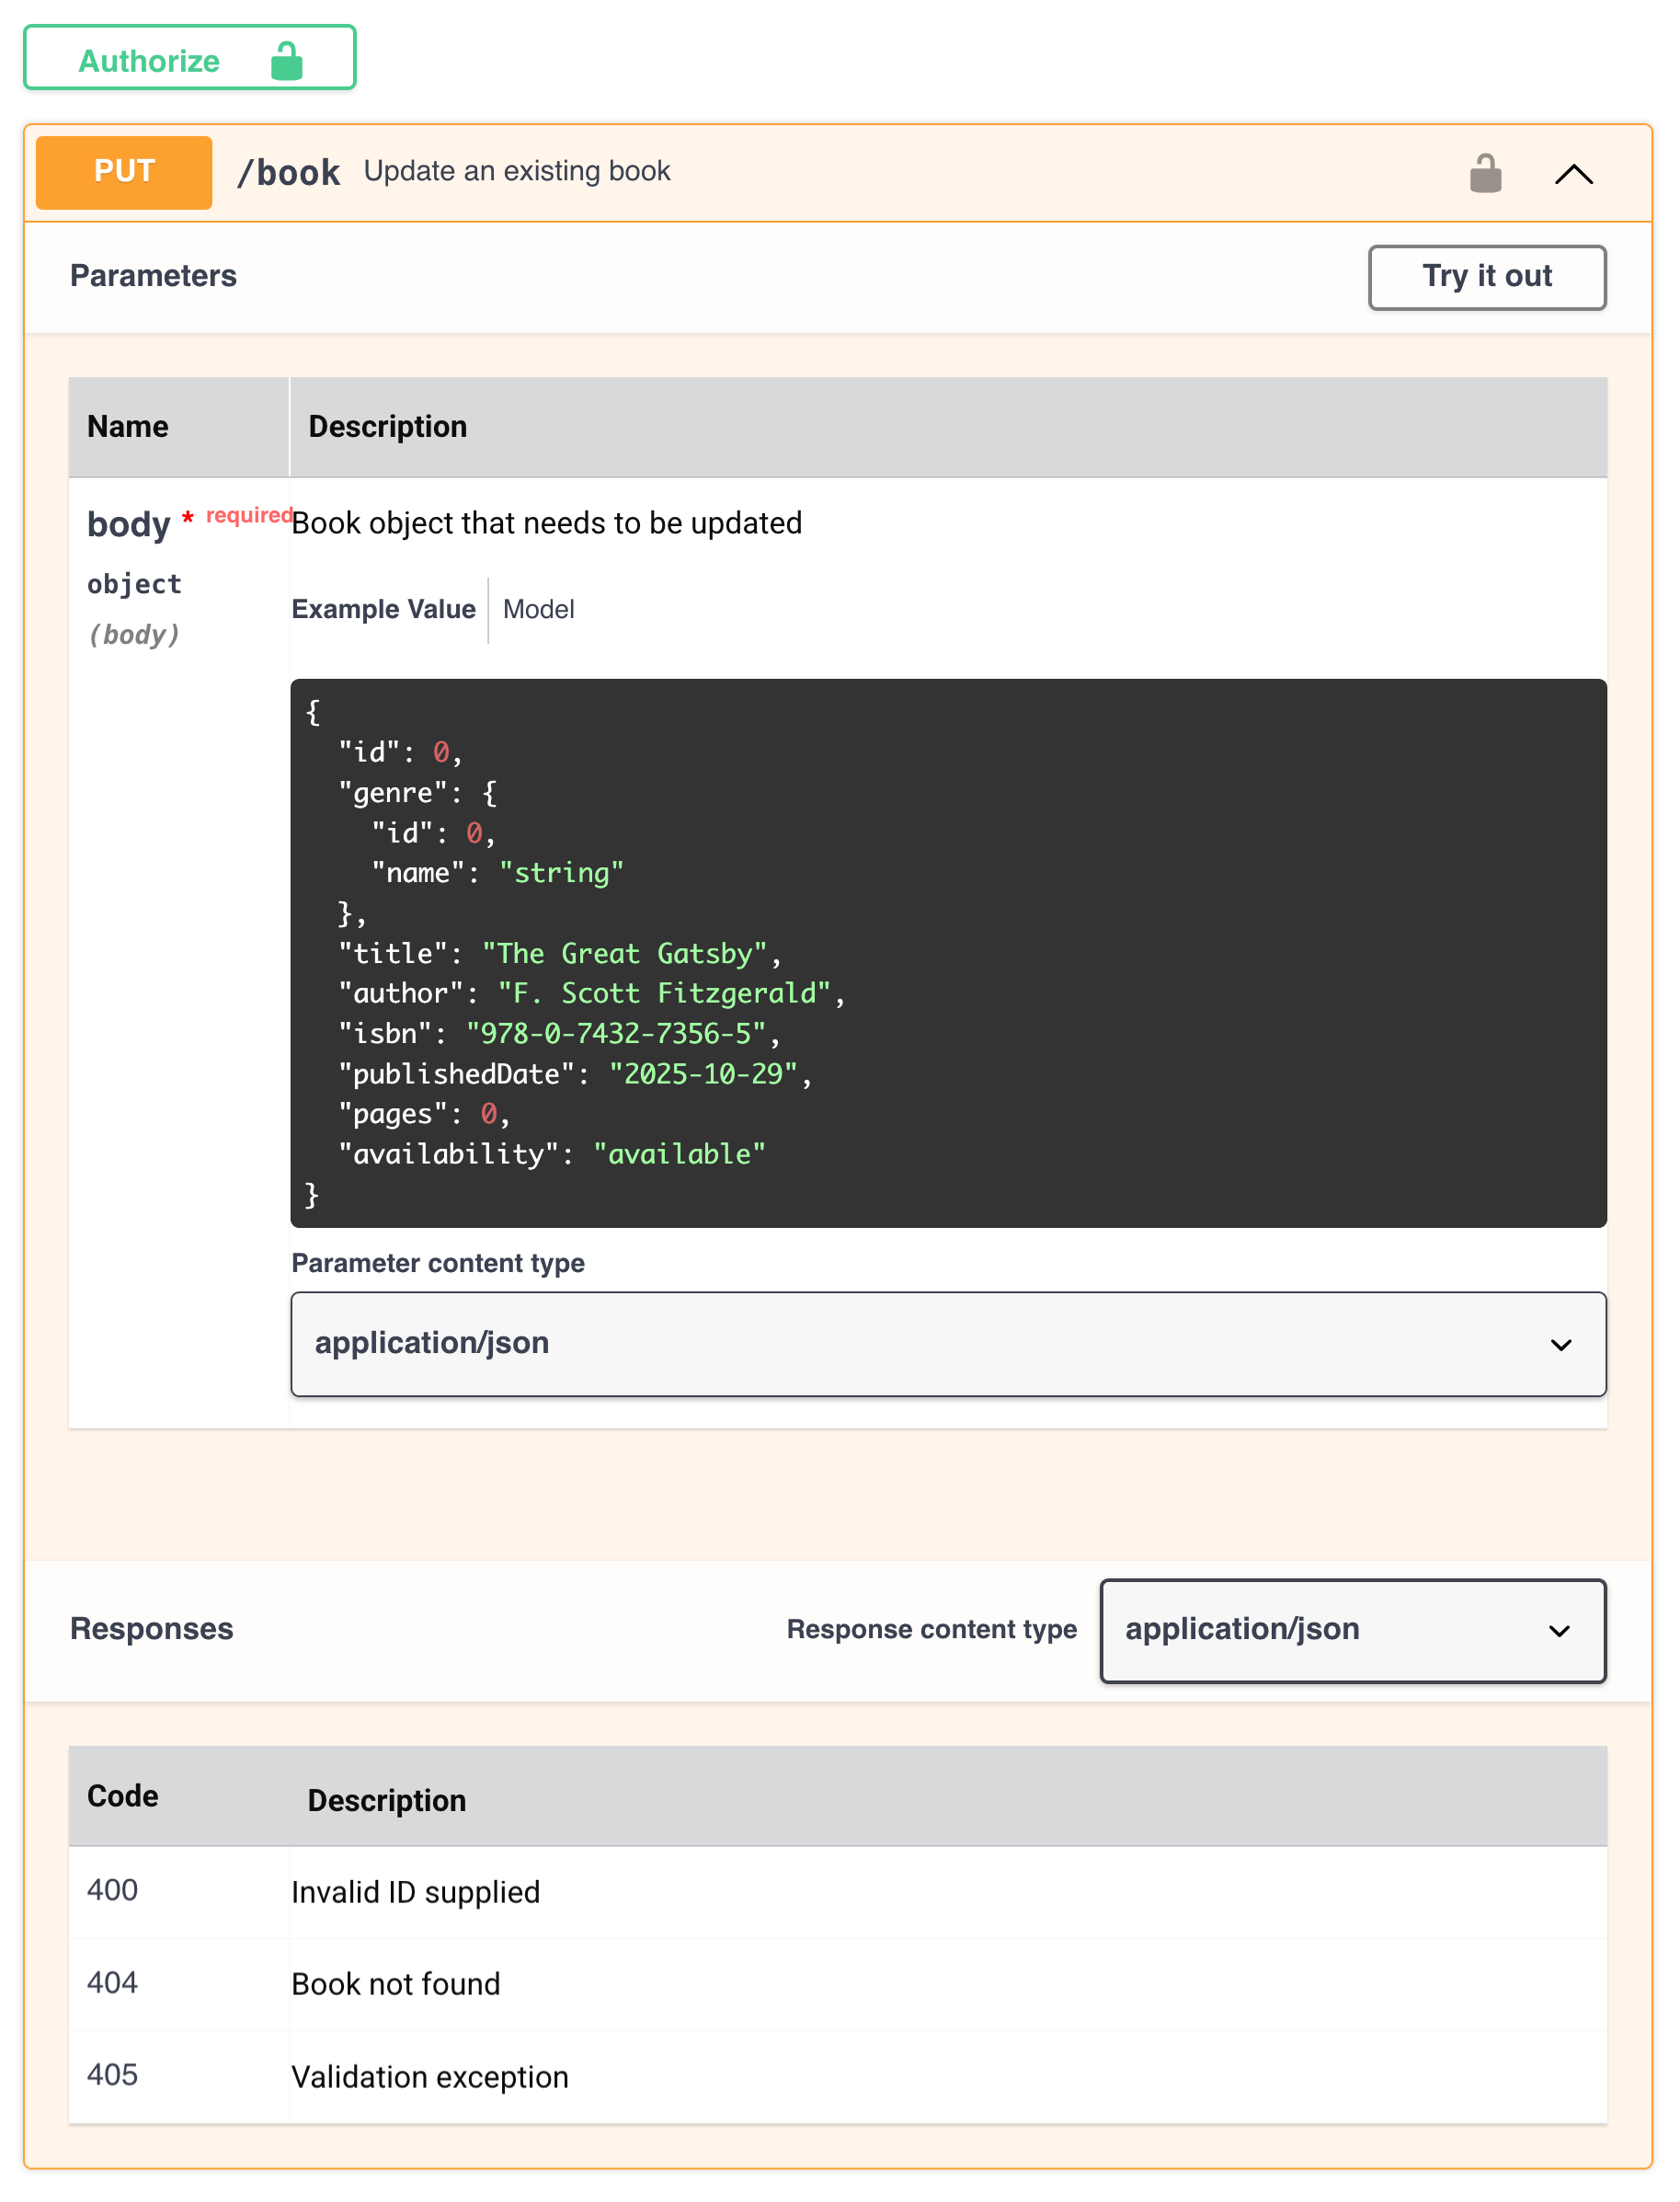
Test APIs
When you select an API endpoint, its interactive Swagger UI documentation appears on the right side of the page. You can use the interactive Swagger to test the API services.
-
Authorize: If any of the APIs within the selected environment require an authorization set by an assigned security profile, an Authorize button is displayed. When you click Authorize, a dialog displays any available authorizations. Complete the input as required to test APIs with the provided authorization methods.
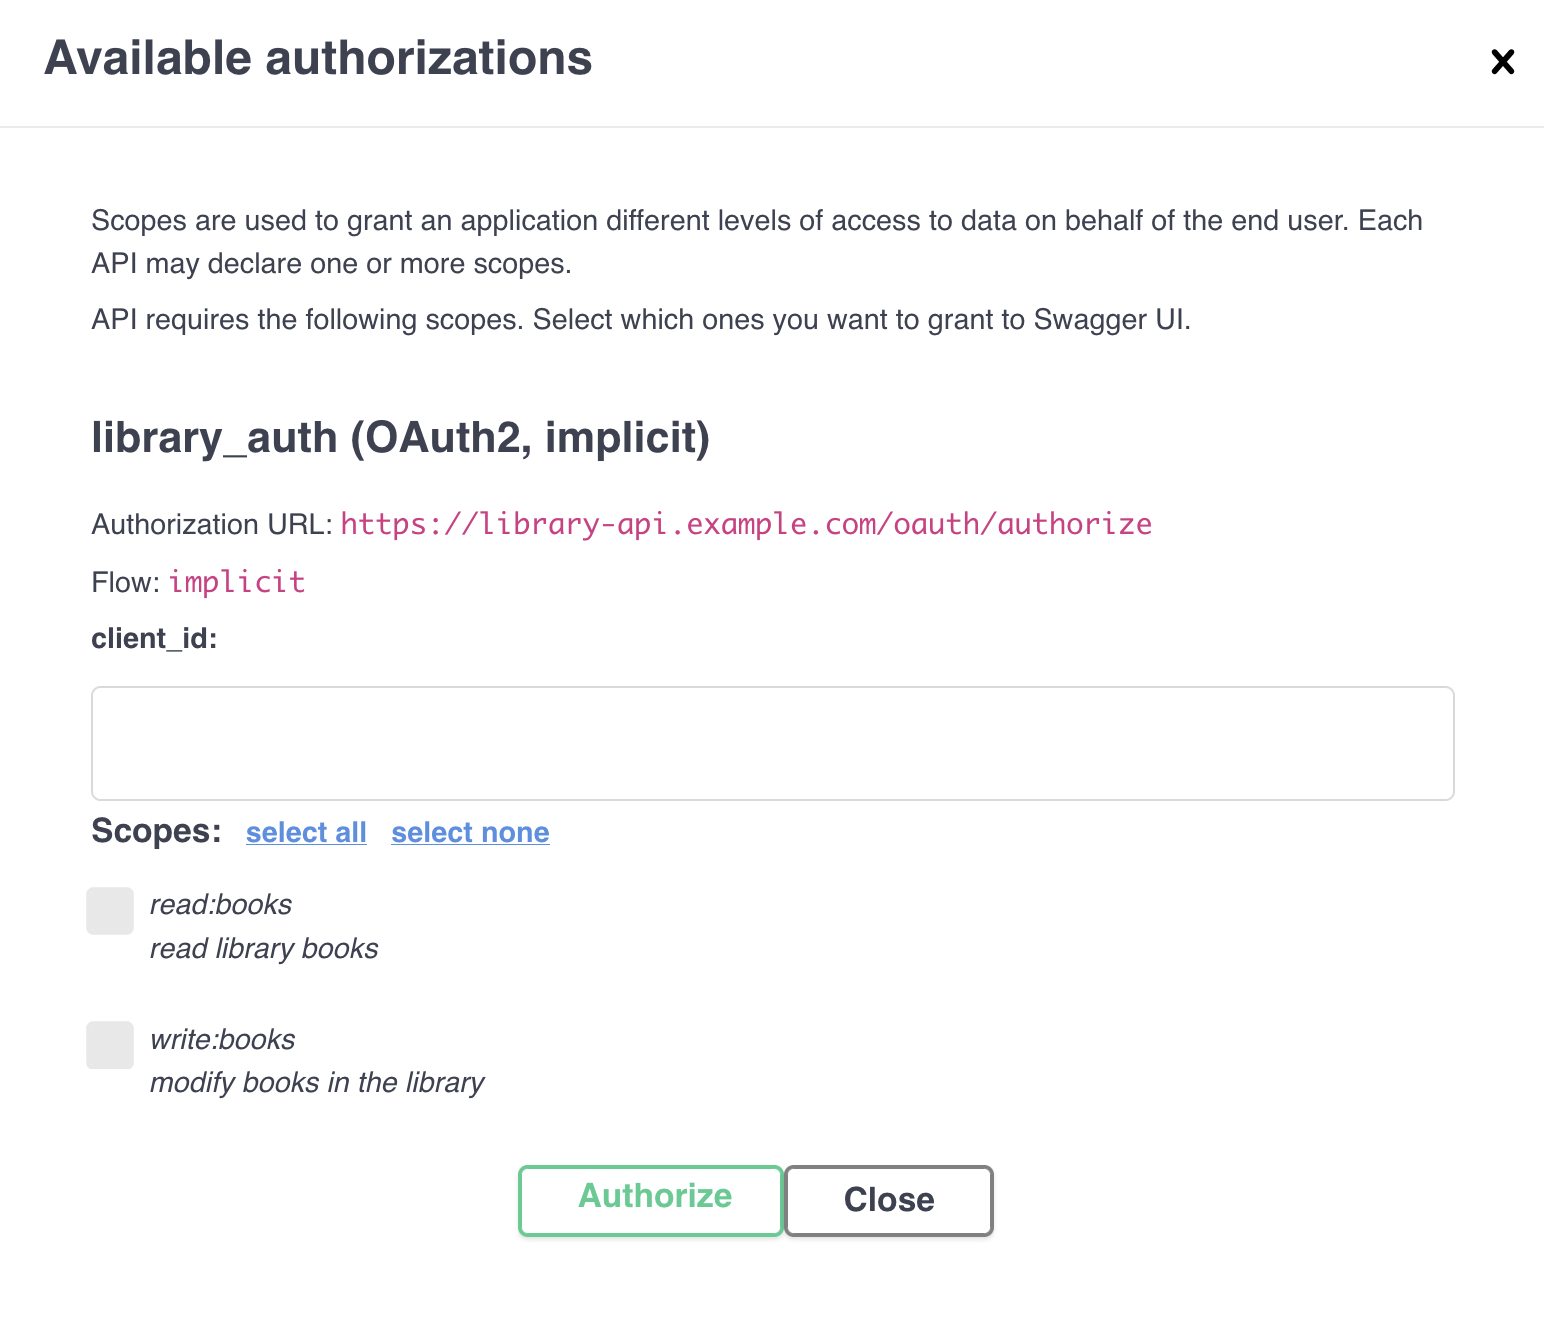
The authorization icon indicates whether the API service requires authorization:
 : No authorization is required.
 : Authorization is required.
-
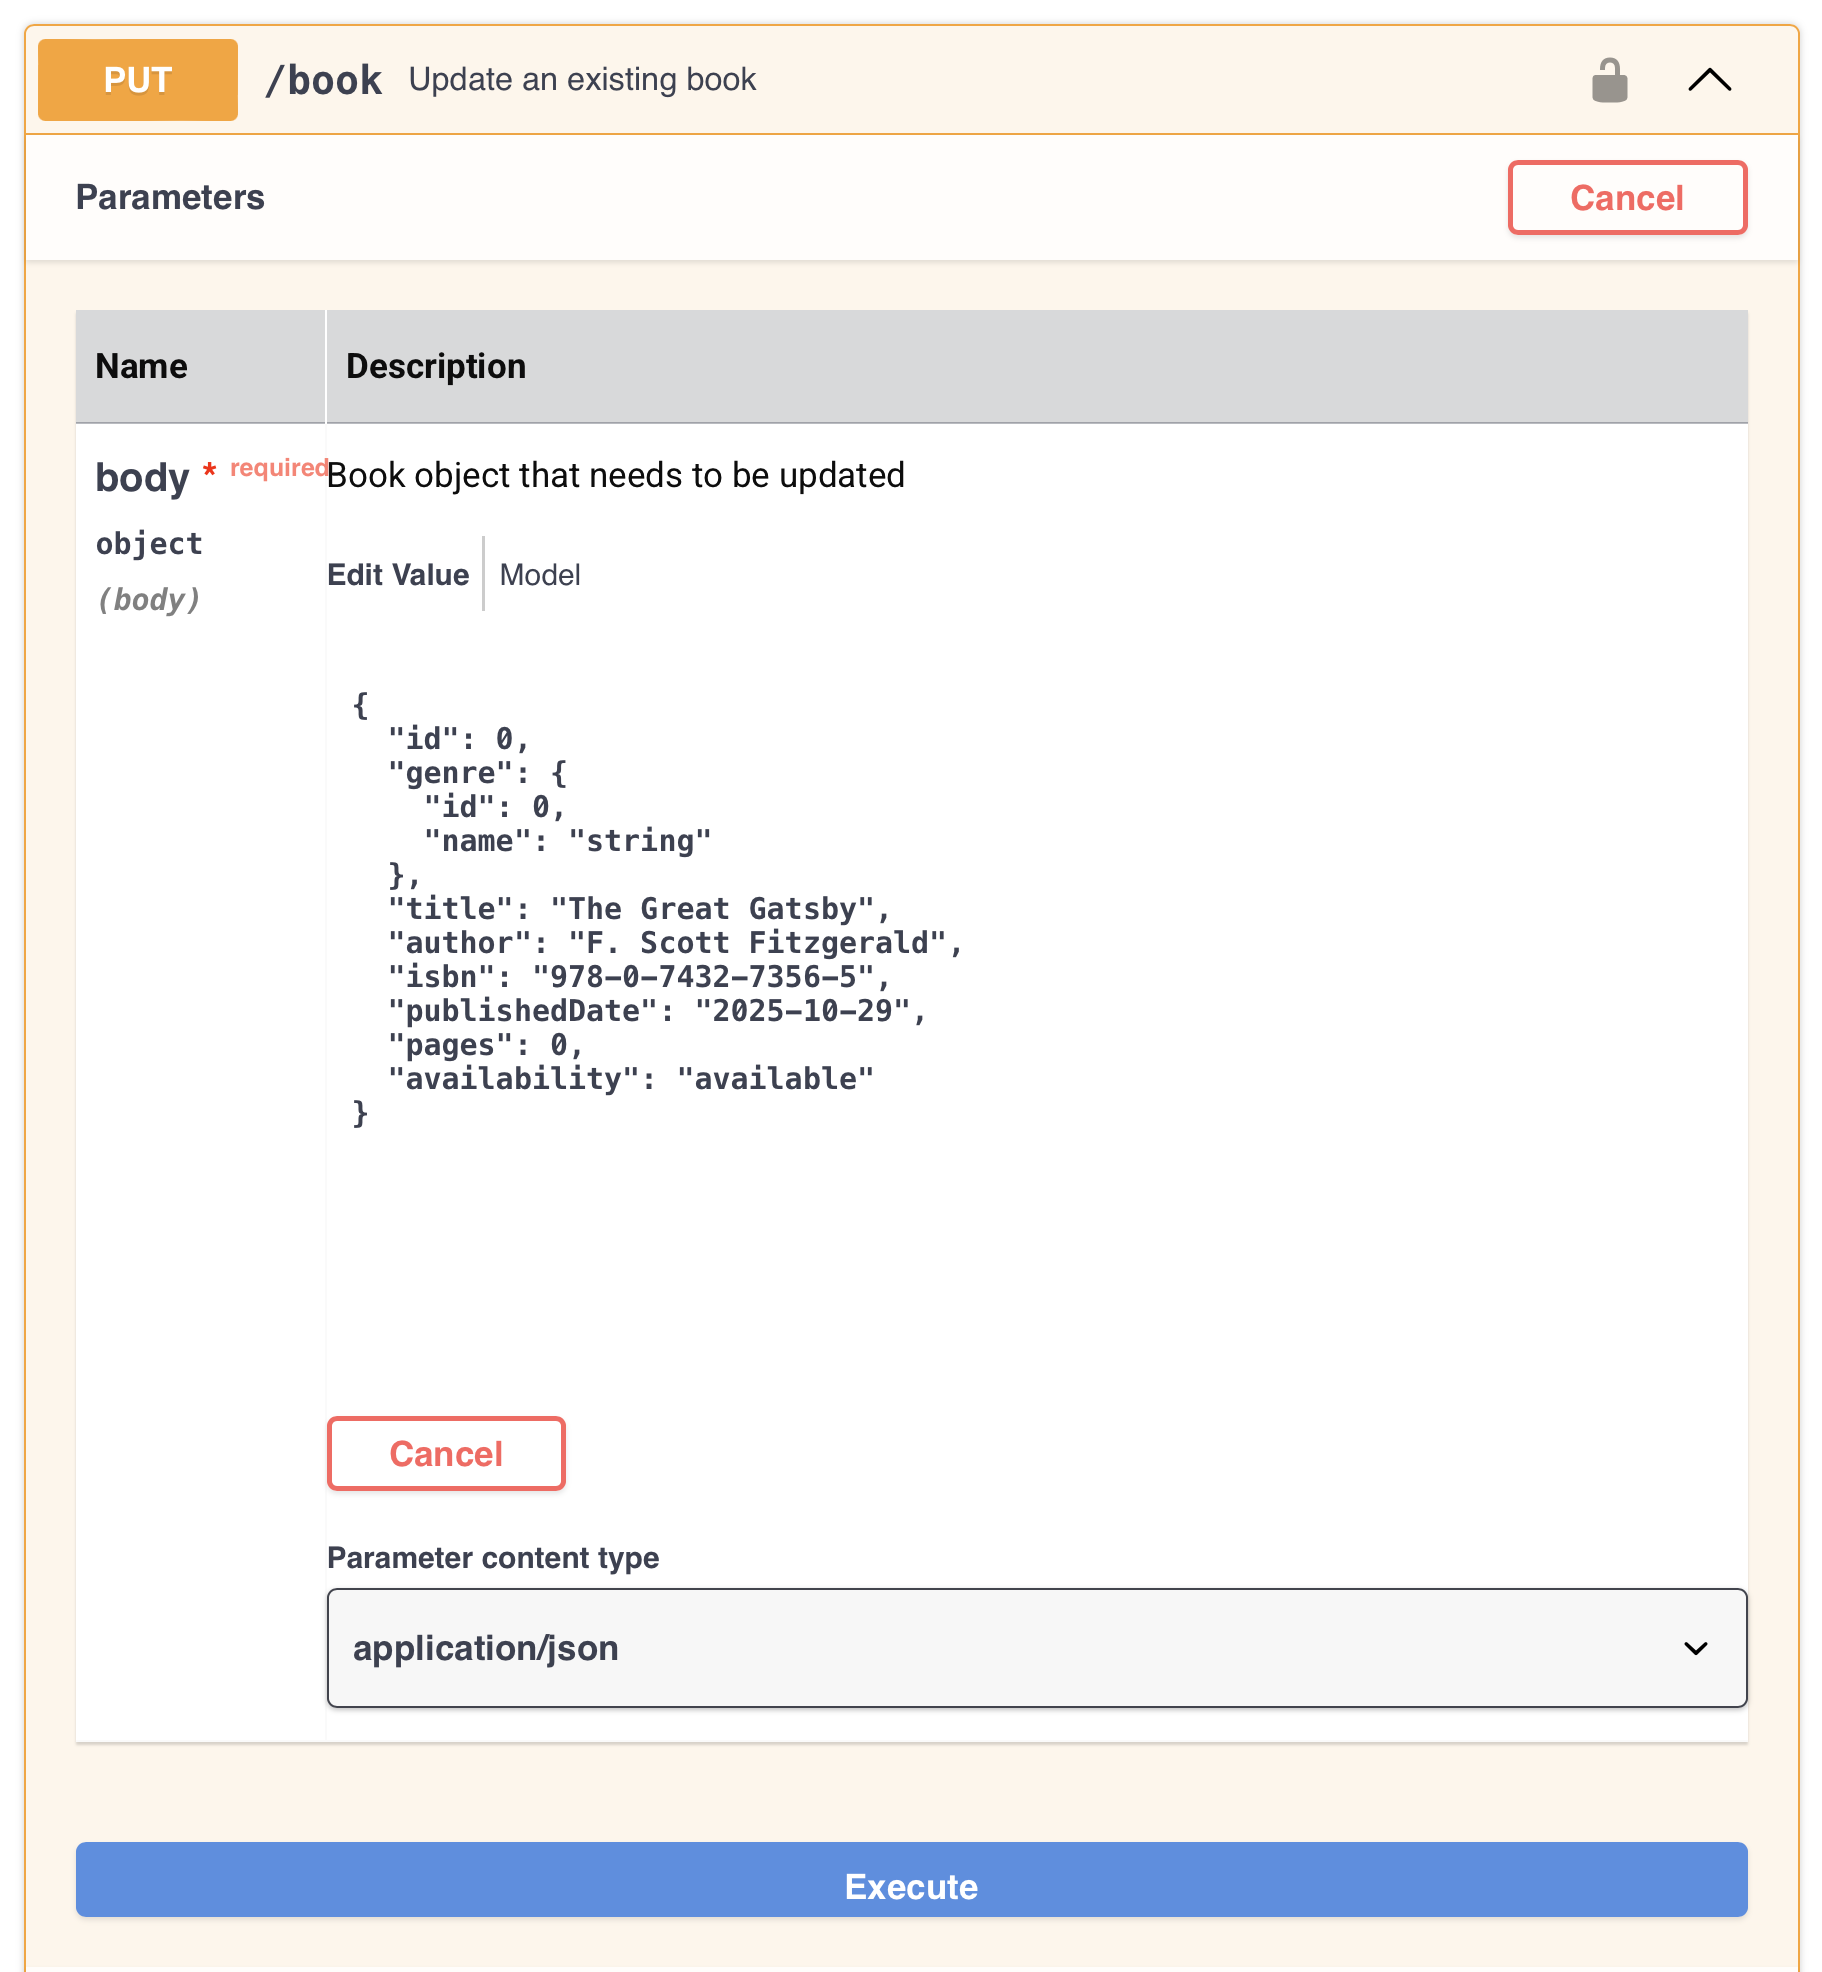
Try it out: Click to test the API. A configurable API request is expanded:
-
Cancel: Click to collapse the configurable API request.
-
Execute: After any request fields are configured, click this button to generate the Curl and Request URL to use for testing.

-
Curl: The cURL request for the values entered for the API request fields. Click the copy icon to copy the cURL to your clipboard.
-
Request URL: The request URL for the values entered for the request fields.
-
Clear: Click to clear the values entered for the API request fields.
-
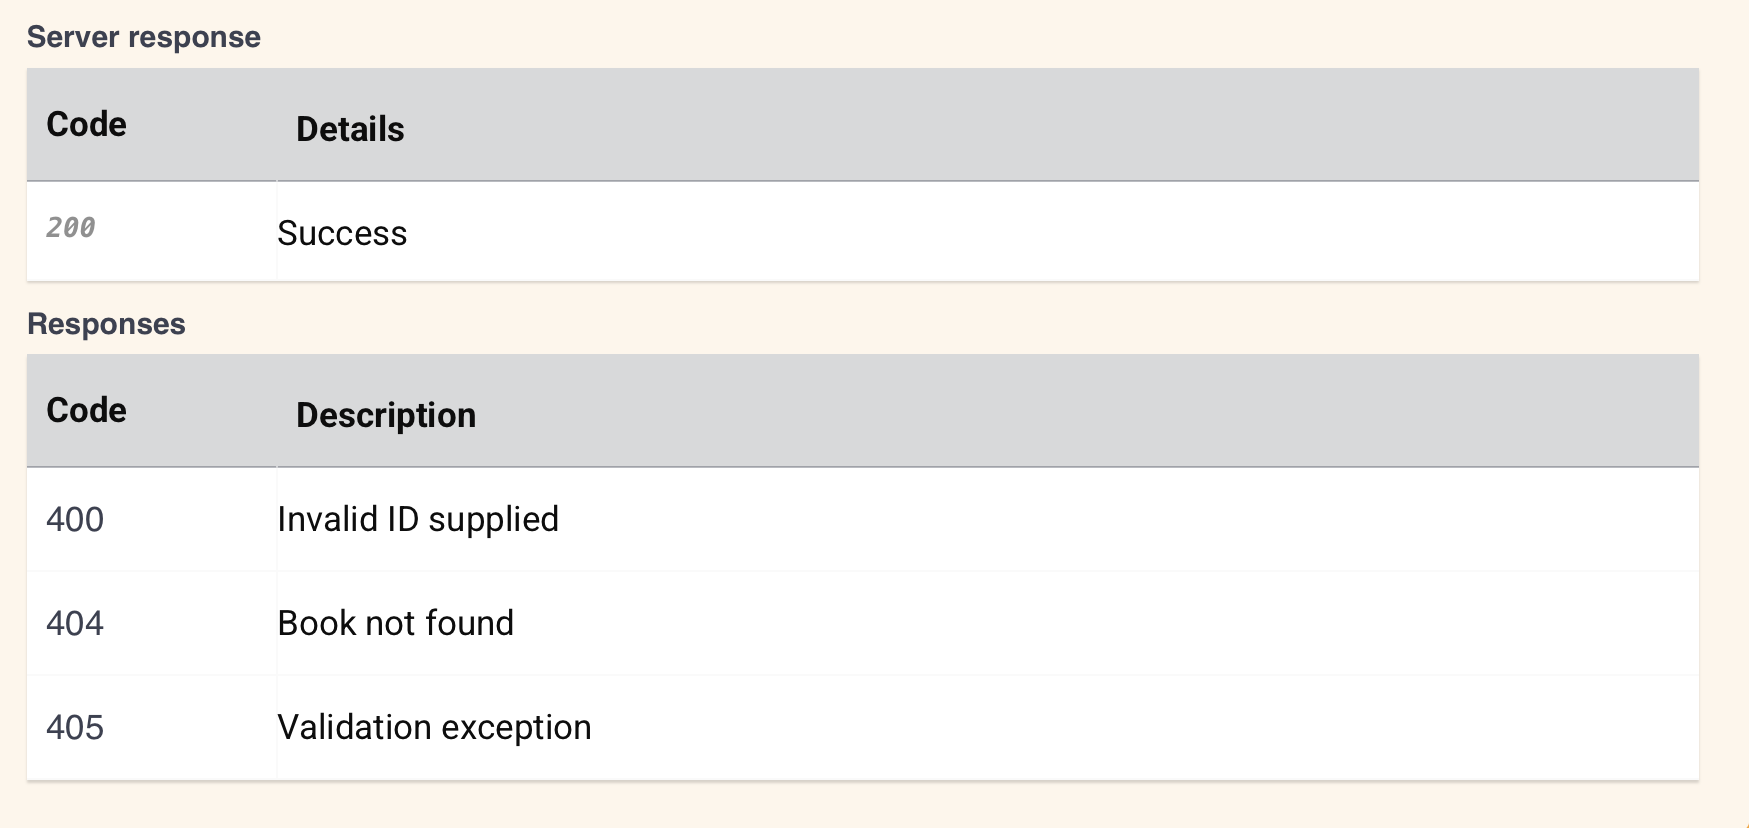
Each API service displays possible API responses that are included in the API documentation:
-
Server response: Displays any documented server responses.
-
Responses: Displays documented HTTP status codes and their descriptions.