Snapshots in Jitterbit App Builder
Introduction
At any point in your app's development, you can record the state of one of its objects as a snapshot, and group snapshots together as a named snapshot set. Later in your app's development, you can return the app to a previous state by restoring one of its snapshot sets.
A snapshot set can contain one or more snapshots of the following app objects:
- Application
- Assembly
- Bundle
- Collection
- Data Source
- Function
- Logical data type
- Page
- Procedure
- Rule
- View
Snapshots are recorded in the snapped object's changelog.
Important
Snapshots are automatically deleted by default 90 days after creation. To change this period, select IDE > Additional Settings > Snapshots, click the Configuration button, then change the value for Snapshot Expiry.
Create a snapshot set
To create a snapshot set, follow these steps:
-
Use one of the following commands for the app object you're working on:
-
Application: Select App Workbench > More > Snapshot.
-
Assembly: Select IDE > Additional Settings > Plugins > Assembly > More > Snapshot.
-
Bundle: Select IDE > Language Translations > Bundles > More > Snapshot.
-
Collection: Select IDE > Look and Feel > Manage > More > Snapshot.
-
Data Source: Select App Workbench > Data Sources > Snapshot.
-
Function: Select IDE > Additional Settings > Functions > Function > More > Snapshot.
-
Logical Data Type: Select IDE > Additional Settings > Logical Data Types > Logical Data Type > More > Snapshot.
-
Page: Select either of the following:
-
App Workbench > Pages > Page > More > Snapshot
-
Live Designer > More > Snapshot
-
-
Procedure: Select App Workbench > Data Sources > Procedures > More > Snapshot.
-
Rule: Select App Workbench > Rules > Rule > More > Snapshot.
-
View: Select App Workbench > Data Sources > Views > More > Snapshot.
-
-
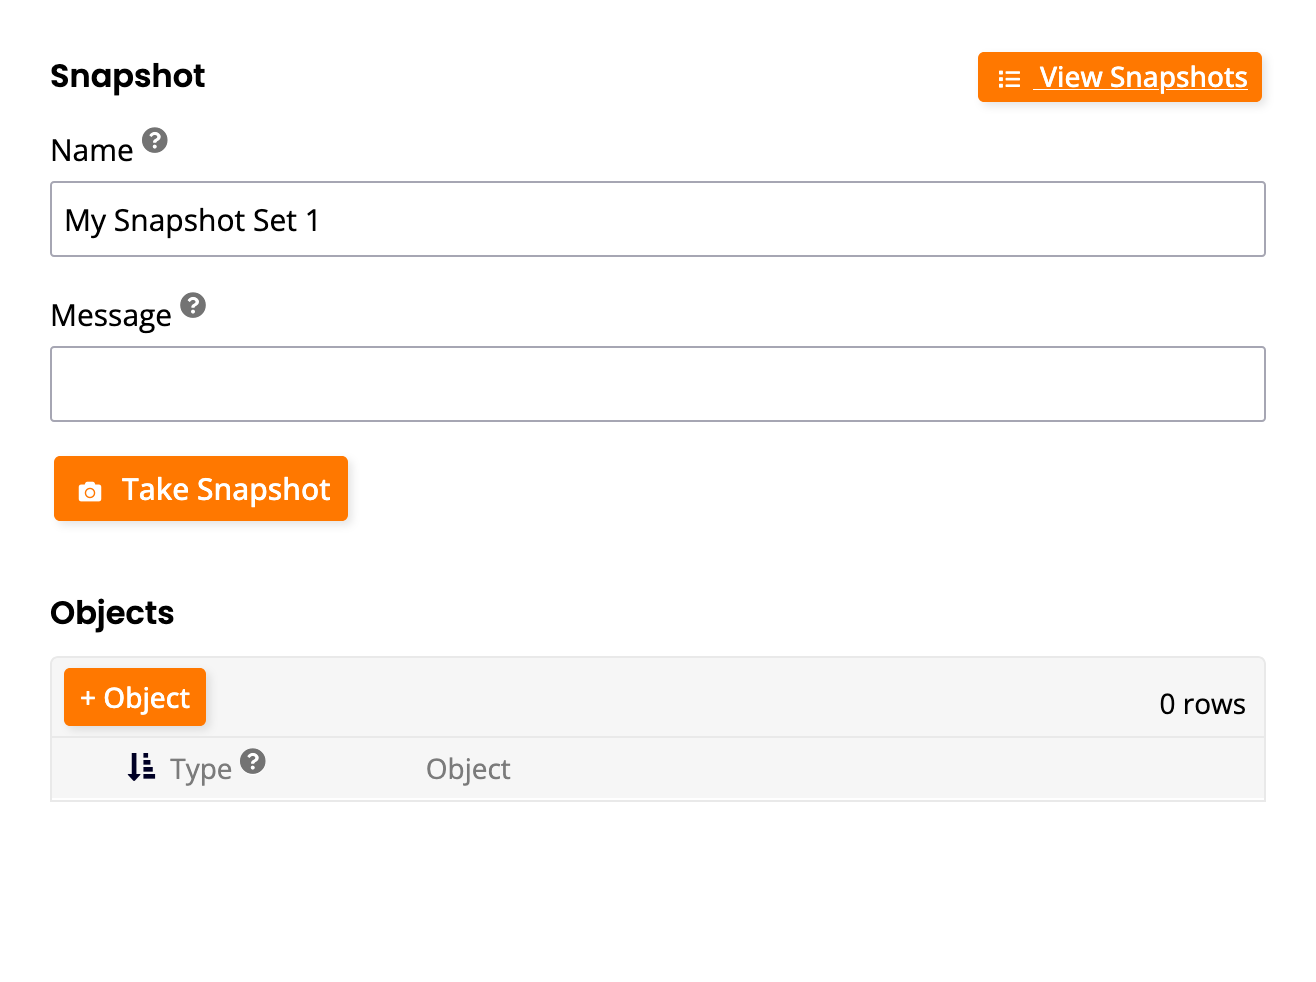
When the Snapshot dialog opens, follow these steps:
-
In the Name field, enter a name for this snapshot set.
-
In the Message field, enter a short description of this snapshot set.
-
Under Objects, click the + Object button. When the Object dialog opens, follow these steps:
-
Open the Type menu, then select the app object type. Use the additional menus to select the instance of the object type.
-
Click the Save button.
-
Repeat for each object in the snapshot set.
-
-
Click the Take Snapshot button. The Snapshot dialog closes.
-
View snapshot sets
To view snapshot sets, select IDE > Additional Settings > Snapshots. The Snapshot Sets page opens:
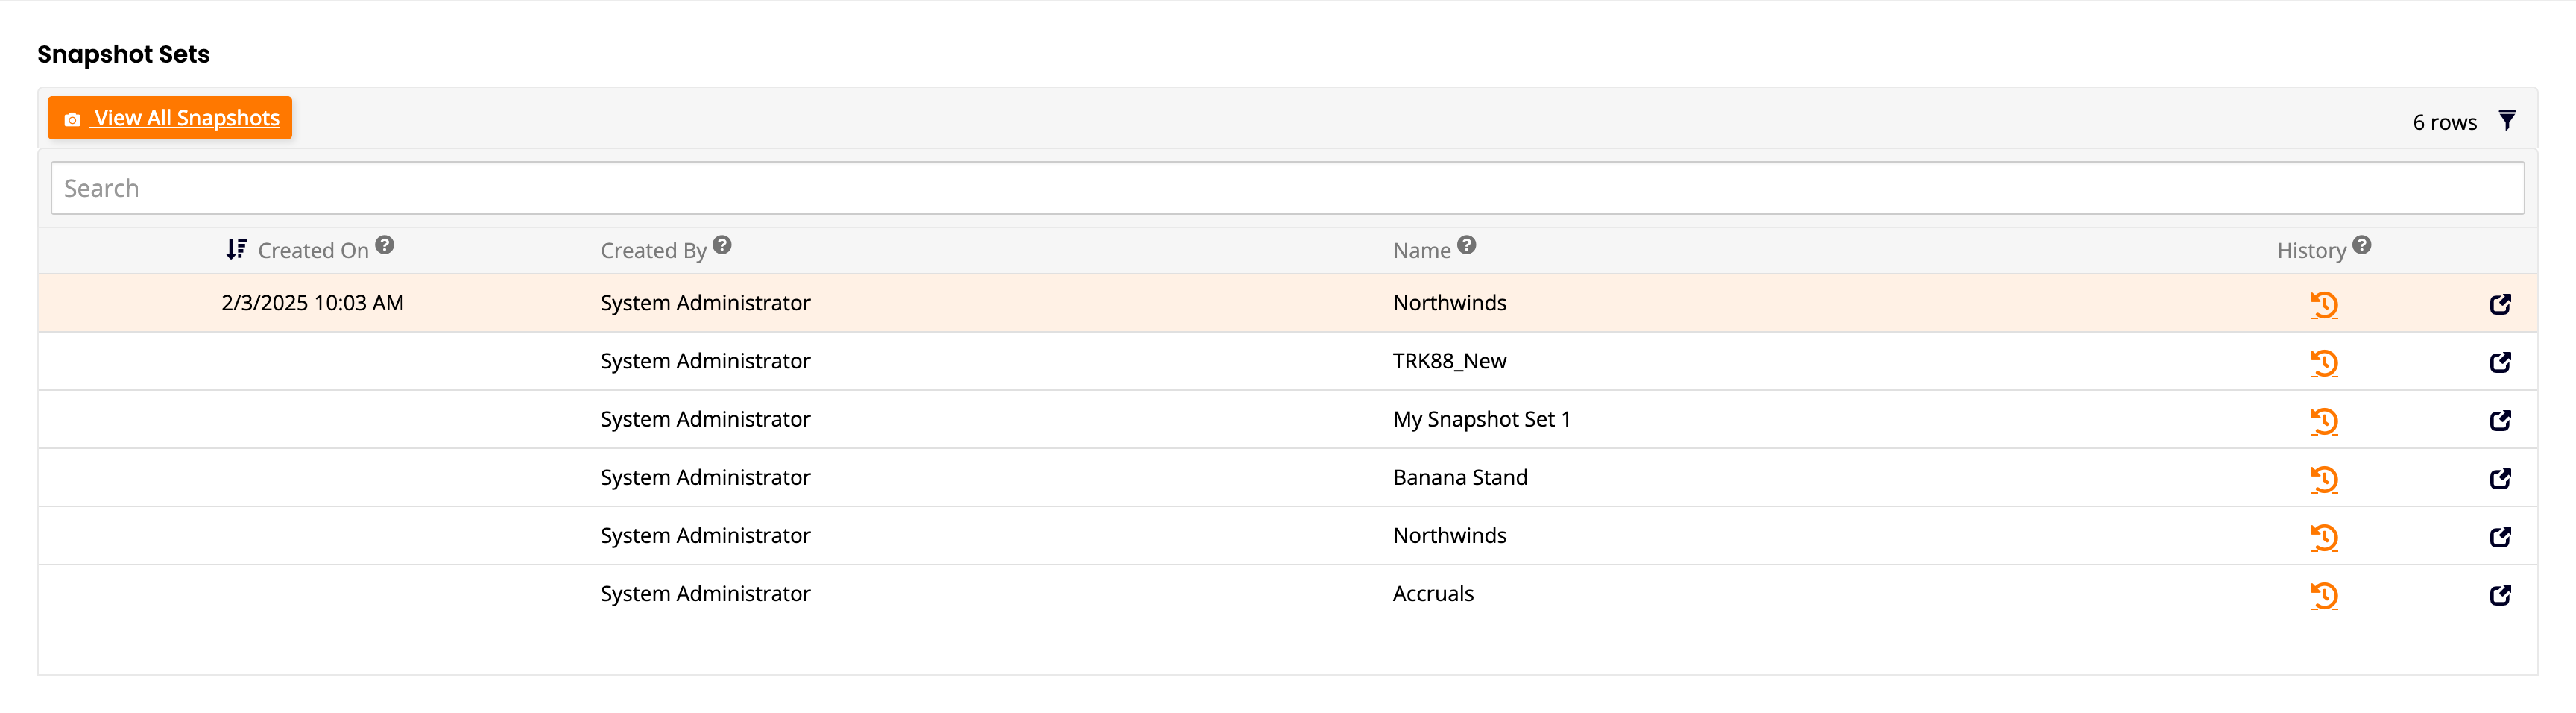
You can do the following on this page:
-
To see a complete list of individual snapshots, click the View All Snapshots button.
-
To see a snapshot set's history, click the icon in its History column.
-
To see the details of a snapshot set, or restore or delete a snapshot set, click its Open record icon.
Restore a snapshot
To restore a snapshot, follow these steps:
-
Select IDE > Additional Settings > Snapshots.
-
Click the Open record icon for a snapshot set.
-
(Optional) Enable the Take a Snapshot Before Restoring checkbox.
-
Click the Restore button.
Delete a snapshot
To delete a snapshot, follow these steps:
-
Select IDE > Additional Settings > Snapshots.
-
Click the Open record icon for a snapshot set.
-
Select More > Delete.