Jitterbit App Builder setup on Microsoft Azure
This page shows you how to run App Builder on Microsoft Azure. The instructions are divided into three steps:
When using these steps, keep the following in mind:
-
These instructions are intended for development, QA, and production environments of App Builder.
-
Steps 1 and 2 go over setting up a virtual network and using a database that comes with an Azure virtual machine, respectively. If your organization has its own standard practices for provisioning either and they differ from what's shown here, you should follow them.
Step 1: Set up a virtual network
If you already have a virtual network configured, you can use it. See the Microsoft documentation for how to use your existing virtual network with App Builder.
If you do not have a virtual network, Jitterbit recommends configuring one for traffic between the App Builder App Service and the database. The steps below show how to do that. The Microsoft documentation also offers a tutorial for creating a virtual network.
-
Sign in to the Azure portal with your Azure account.
-
In the portal, search for and select Virtual networks.
-
In the Virtual networks page, select + Create.
-
In the Basics tab of Create virtual network, enter the following information:
-
Select your Subscription and Resource group.
-
Pick a Name for your virtual network and select a region for it.

-
-
Select Next.
-
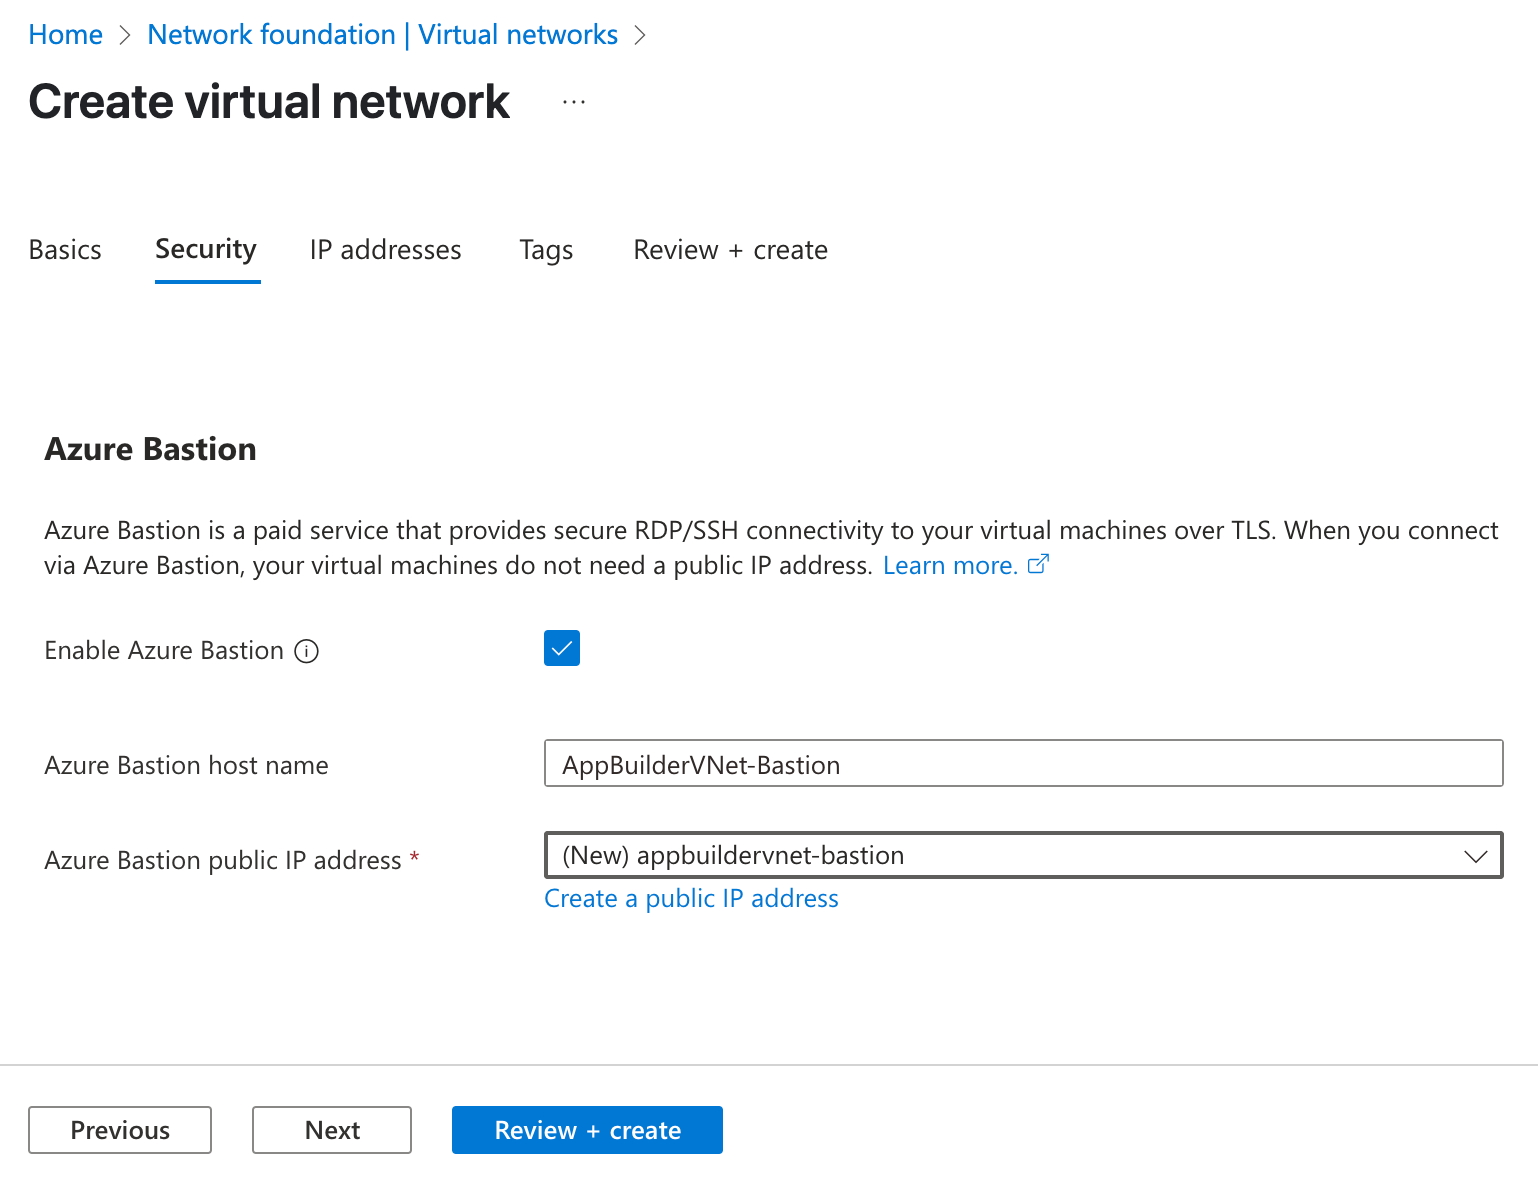
(Optional, but recommended) In the Security tab, select Enable Azure Bastion. (Azure Bastion is a Microsoft paid service to secure connections to virtual machines via private IP addresses.)
-
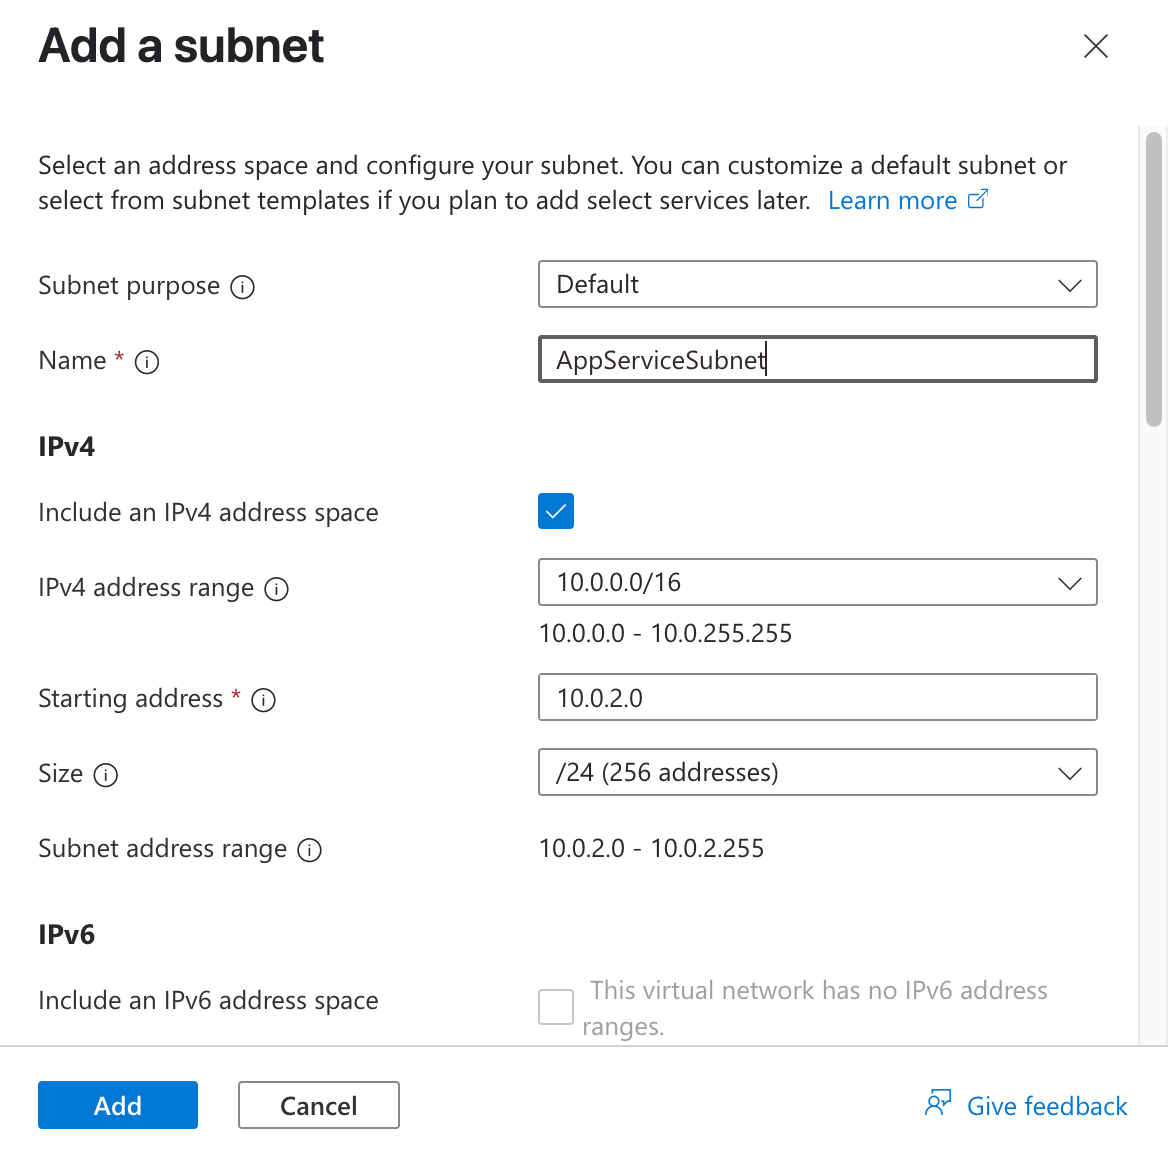
Select Next to proceed to the IP Addresses tab.
-
In the address space box in Subnets, select a subnet to use. You must have a subnet available to use for the App Service. If you don't, you can create one. The screenshot below shows a subnet called "AppServiceSubnet" being created:
-
Select Review + create at the bottom of the window. When validation passes, select Create.
Step 2: Set up a database
Azure lets you create a virtual machine with SQL Server pre-installed and running, which you can use as your database. These instructions follow this approach.
Important
If your organization has another method for starting SQL Server instances, you should follow the standard procedure.
-
In the portal, search for and select Virtual machines.
-
In Virtual machines, select + Create, then select Azure virtual machine.
-
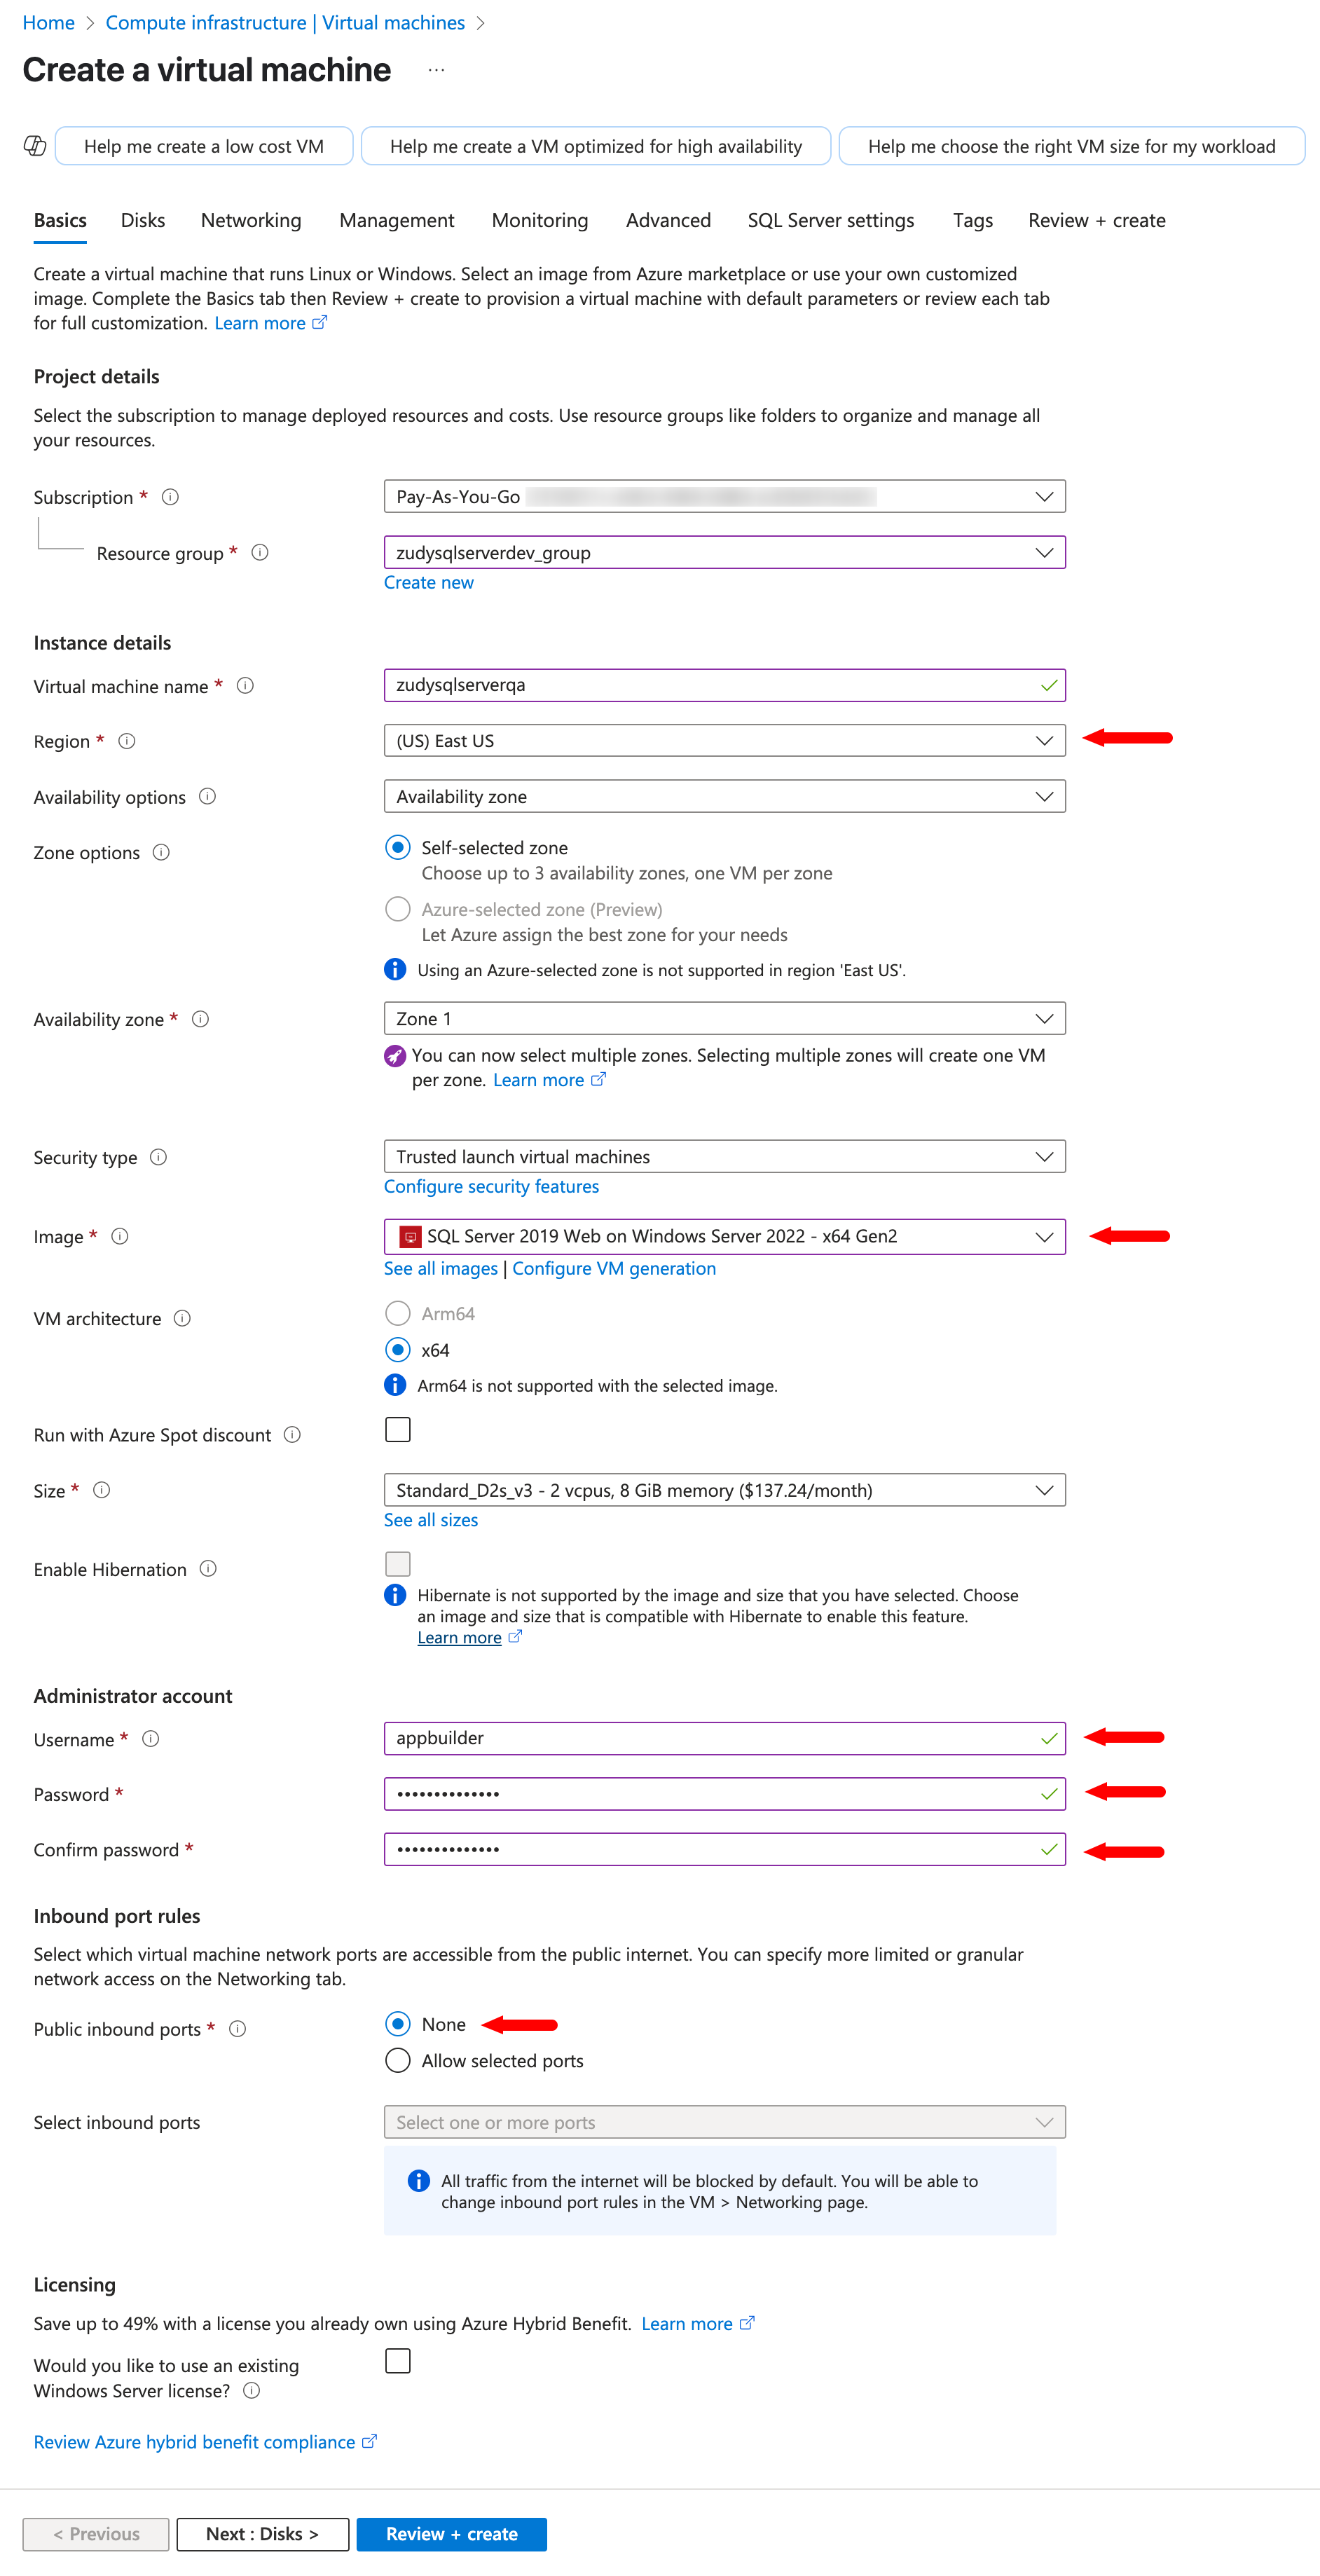
In the Basics tab of Create a virtual machine, enter your virtual machine's basic information. The image below shows a recommended configuration:
Notes
-
When selecting a region, make sure to select the same one here and when configuring your app service.
-
The configuration shown above is for setting up a QA or development framework, using the default server sizing recommended. If you are configuring a production environment, consider a larger sizing.
-
When selecting an image, click See all images to browse the Azure marketplace to find an appropriate one.
-
-
In the Disks tab, keep the default values.
-
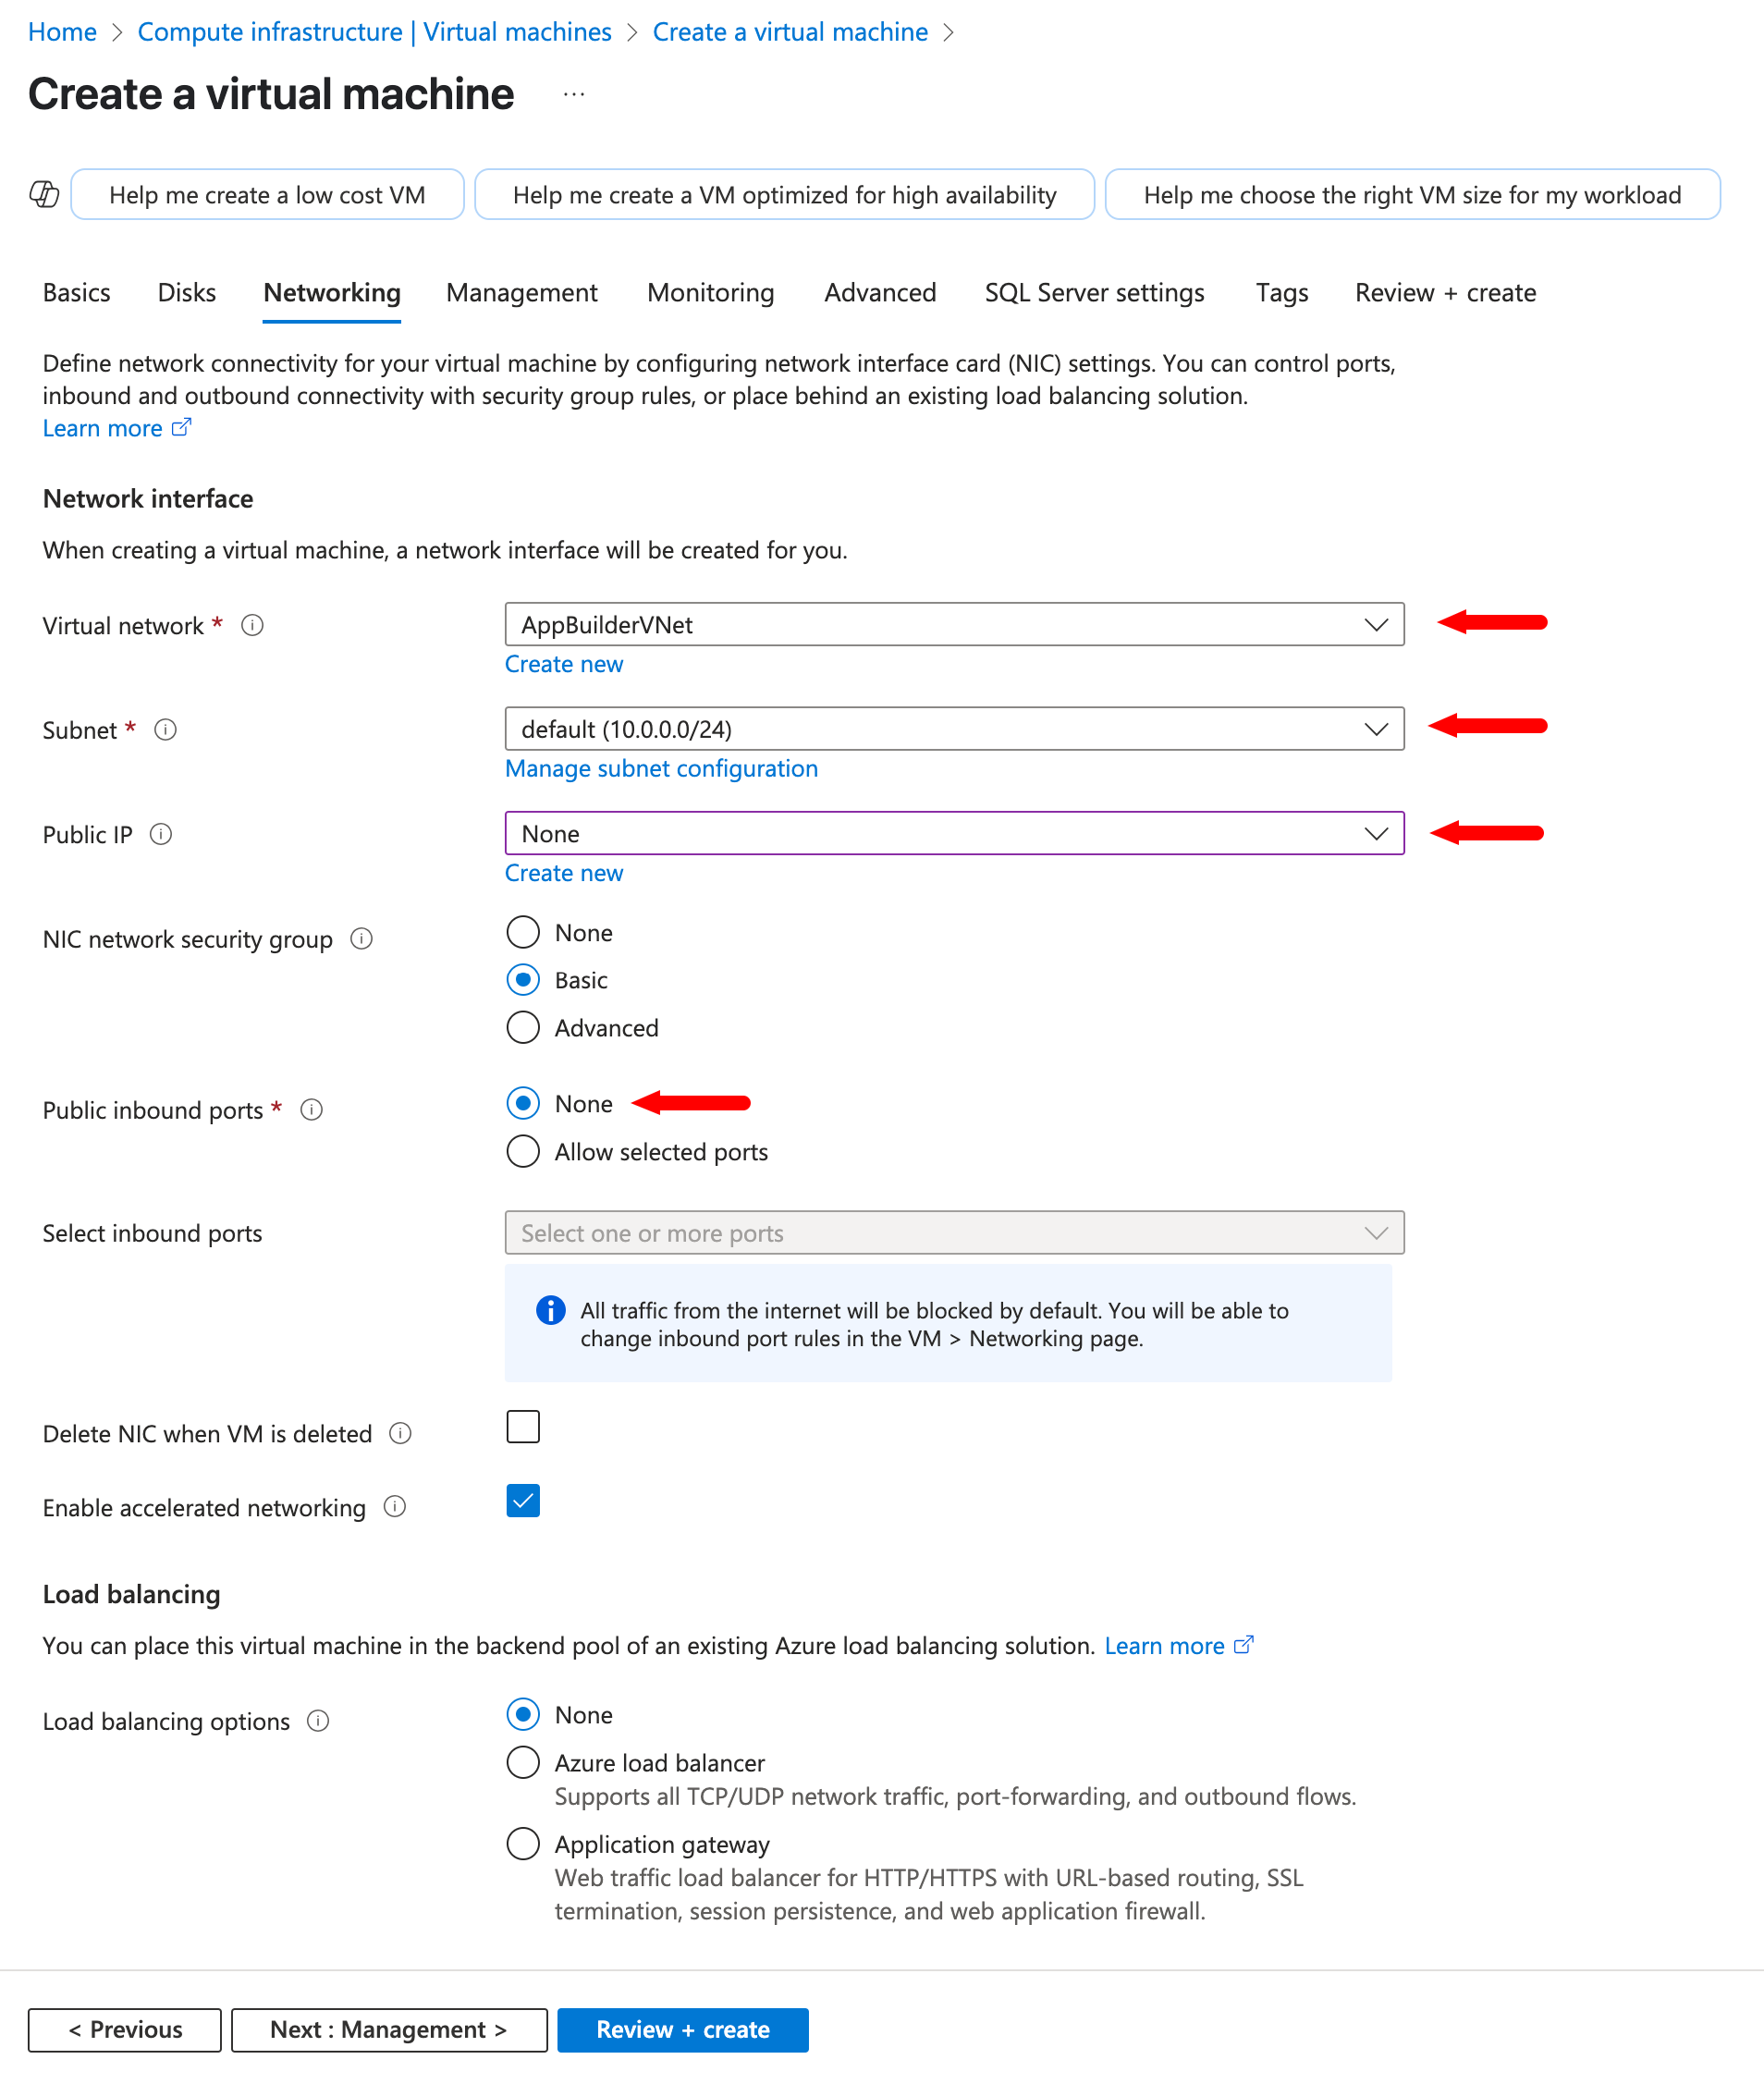
In the Networking tab, select the virtual network you want to use. Choose either the one you already have or the one created in Step 1.
-
In the Management, Monitoring, and Advanced tabs, keep the default values.
-
In the SQL Server Settings tab, enable SQL Authentication:
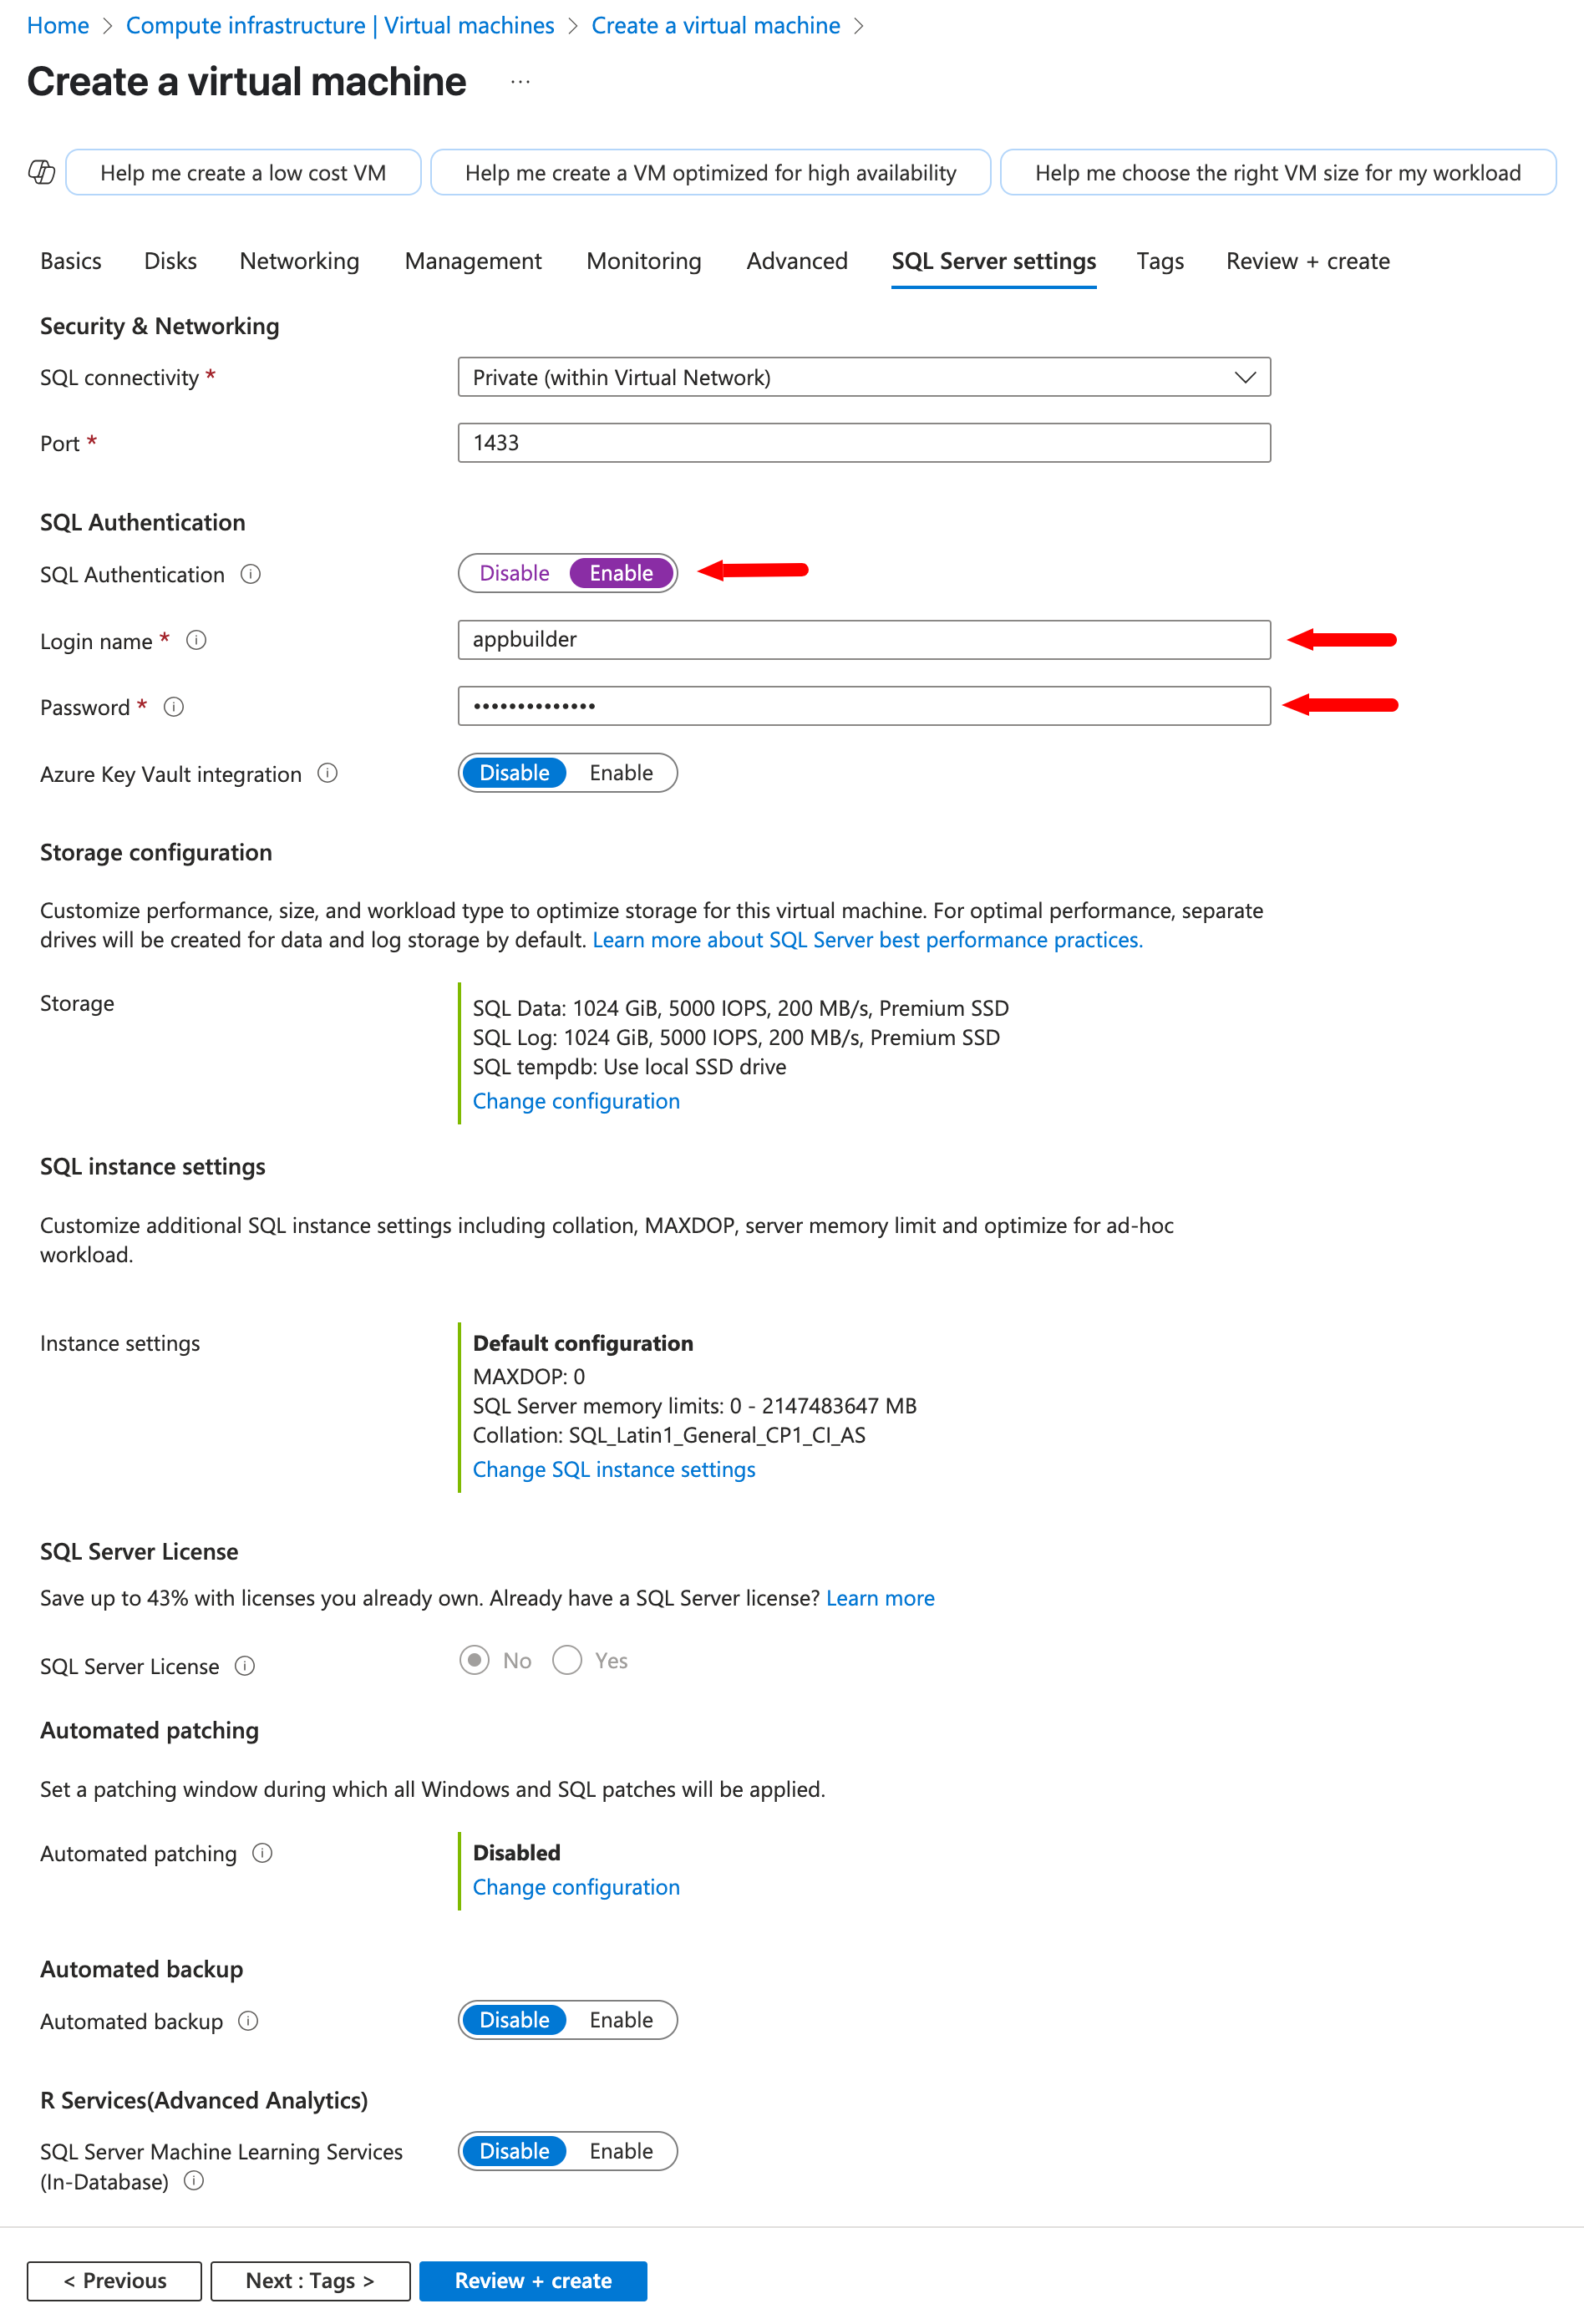
-
In the Tags tab, keep the default values.
-
In the Review + create tab, review the settings and select Create at the bottom of the page.
-
Wait for your virtual machine to deploy. Once it's deployed, you can see it in the Overview page.
Step 3: Set up an app service
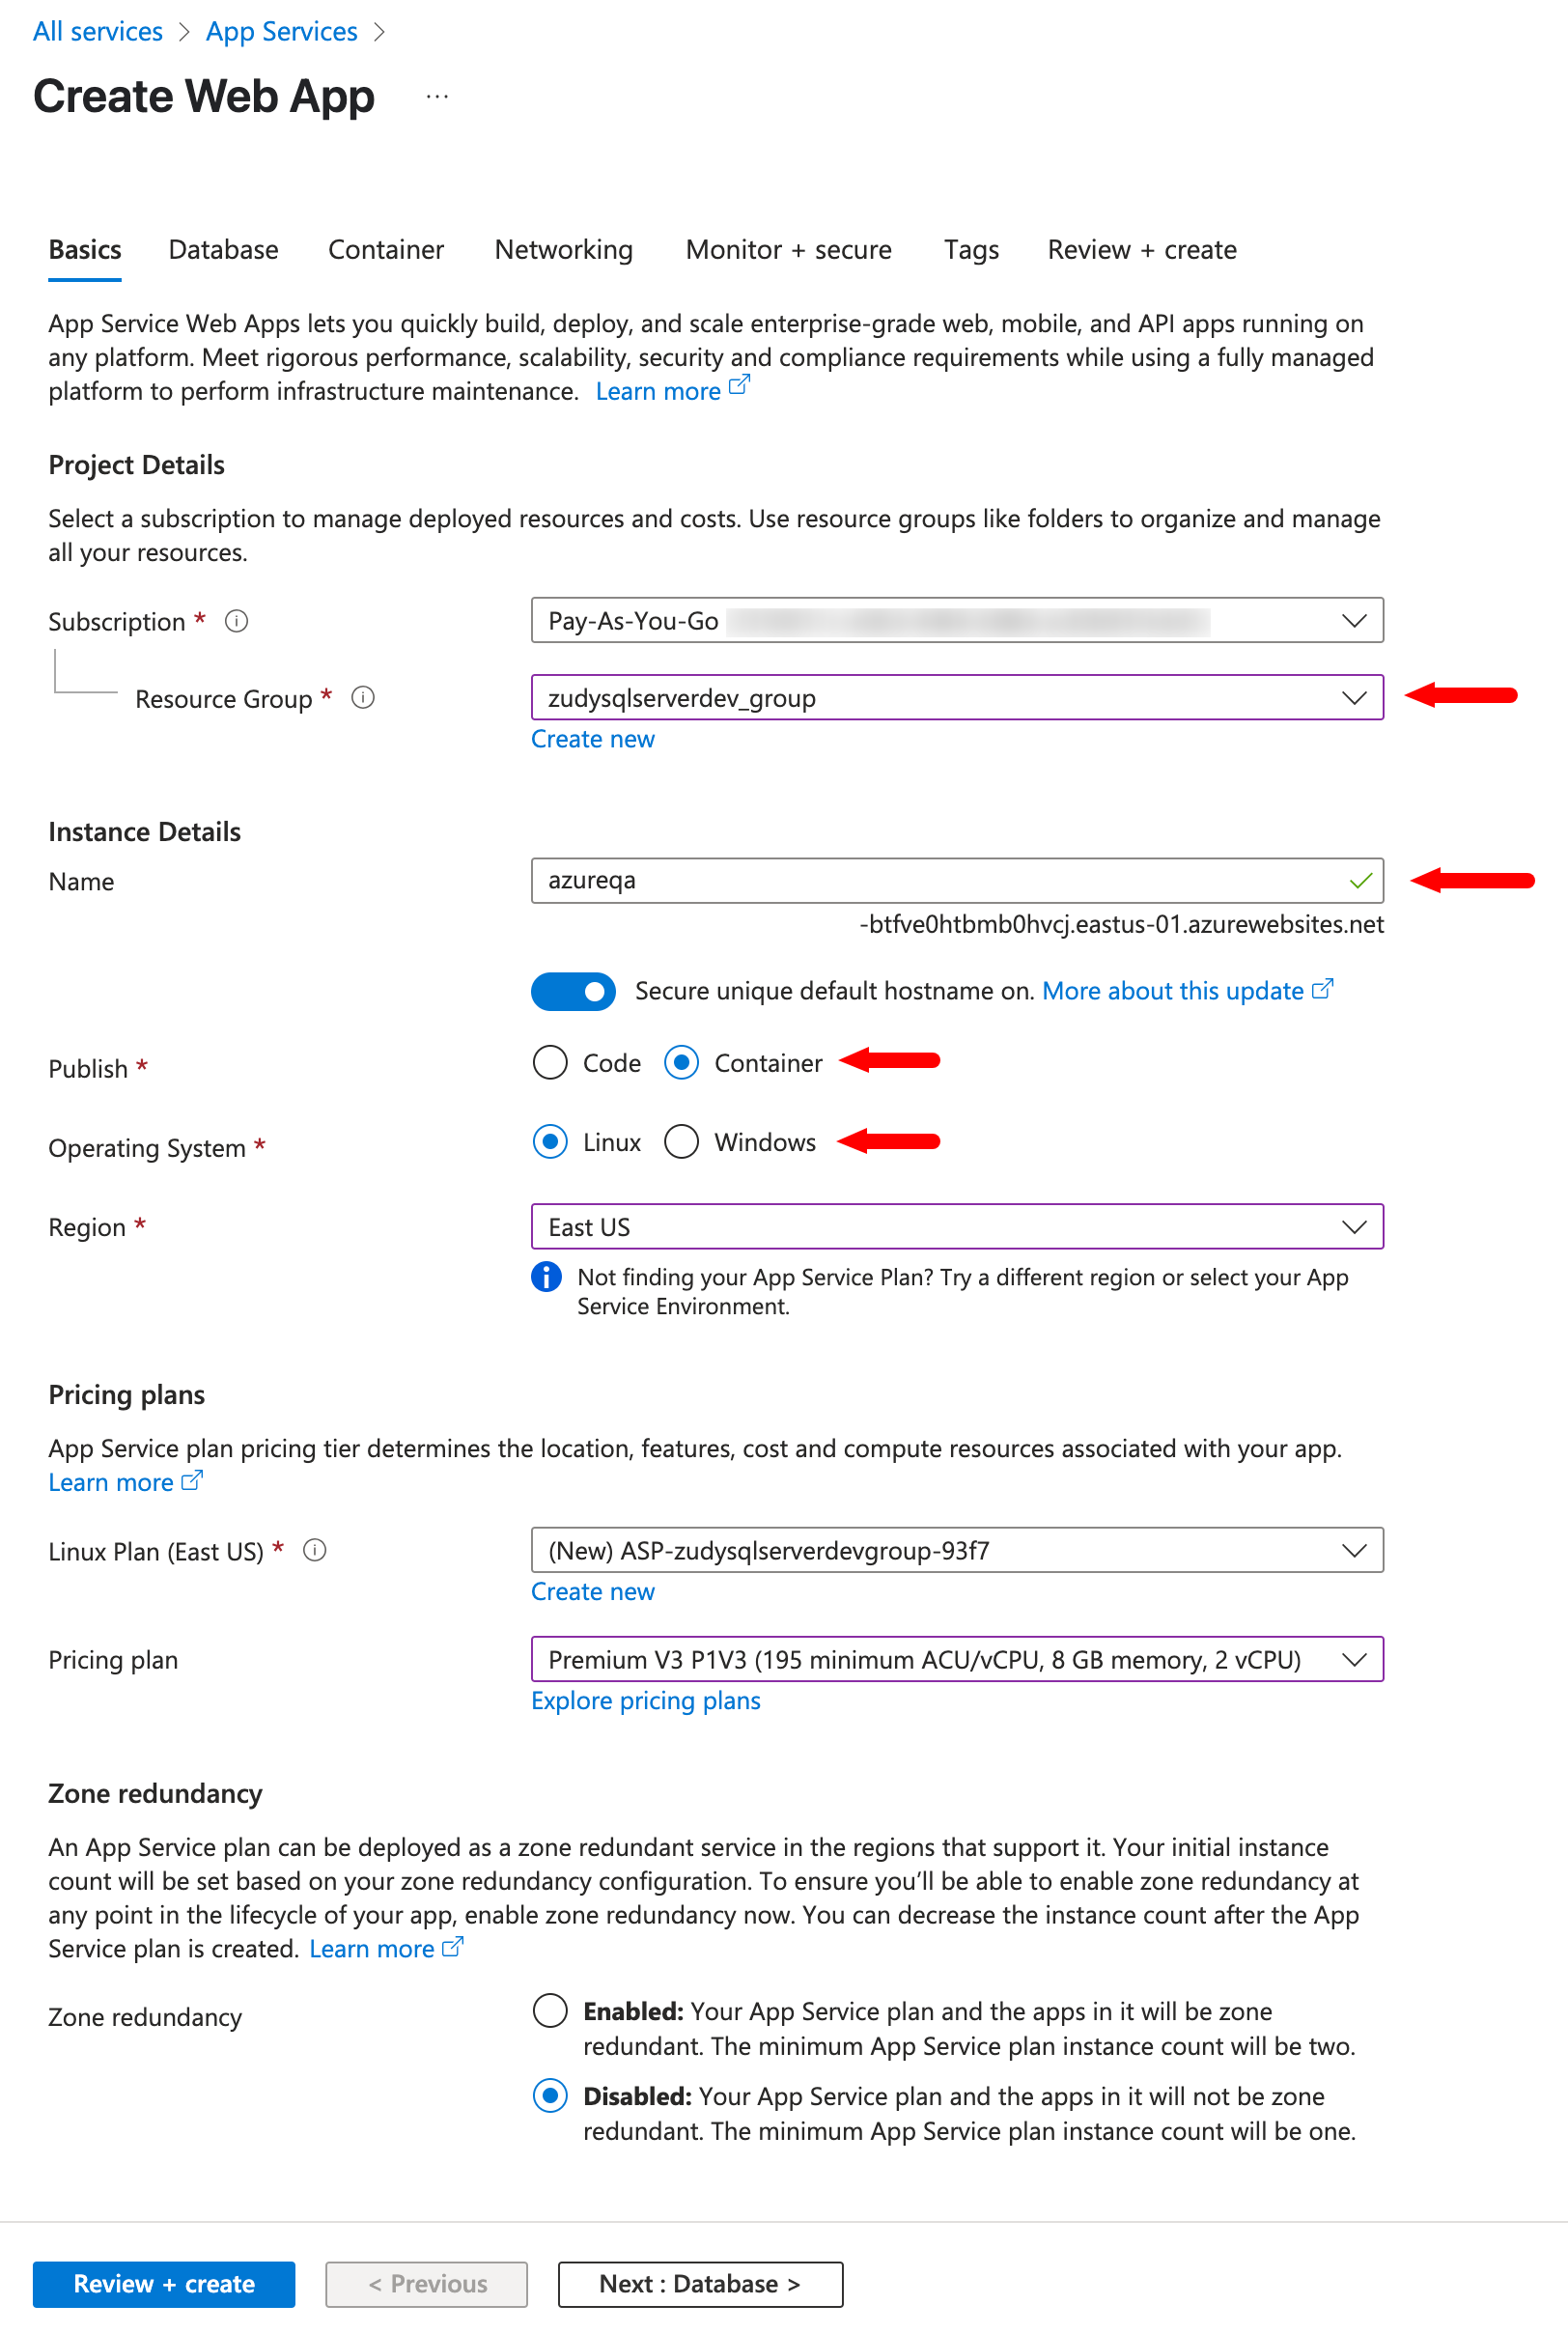
Configure App Builder to run on the Azure App Service platform. The screenshots below show the recommended settings for the different tabs of the Create Web App window. The arrows highlight the key areas.
-
In the Basics tab, select your subscription and resource group. Under Instance Details, make sure to select the same region you selected when setting up a virtual machine.
-
In the Database tab, use the default settings.
-
In the Container tab, specify the Image and Tag of a specific build of App Builder. Use the format
jitterbit/app-builder:4.45.12345.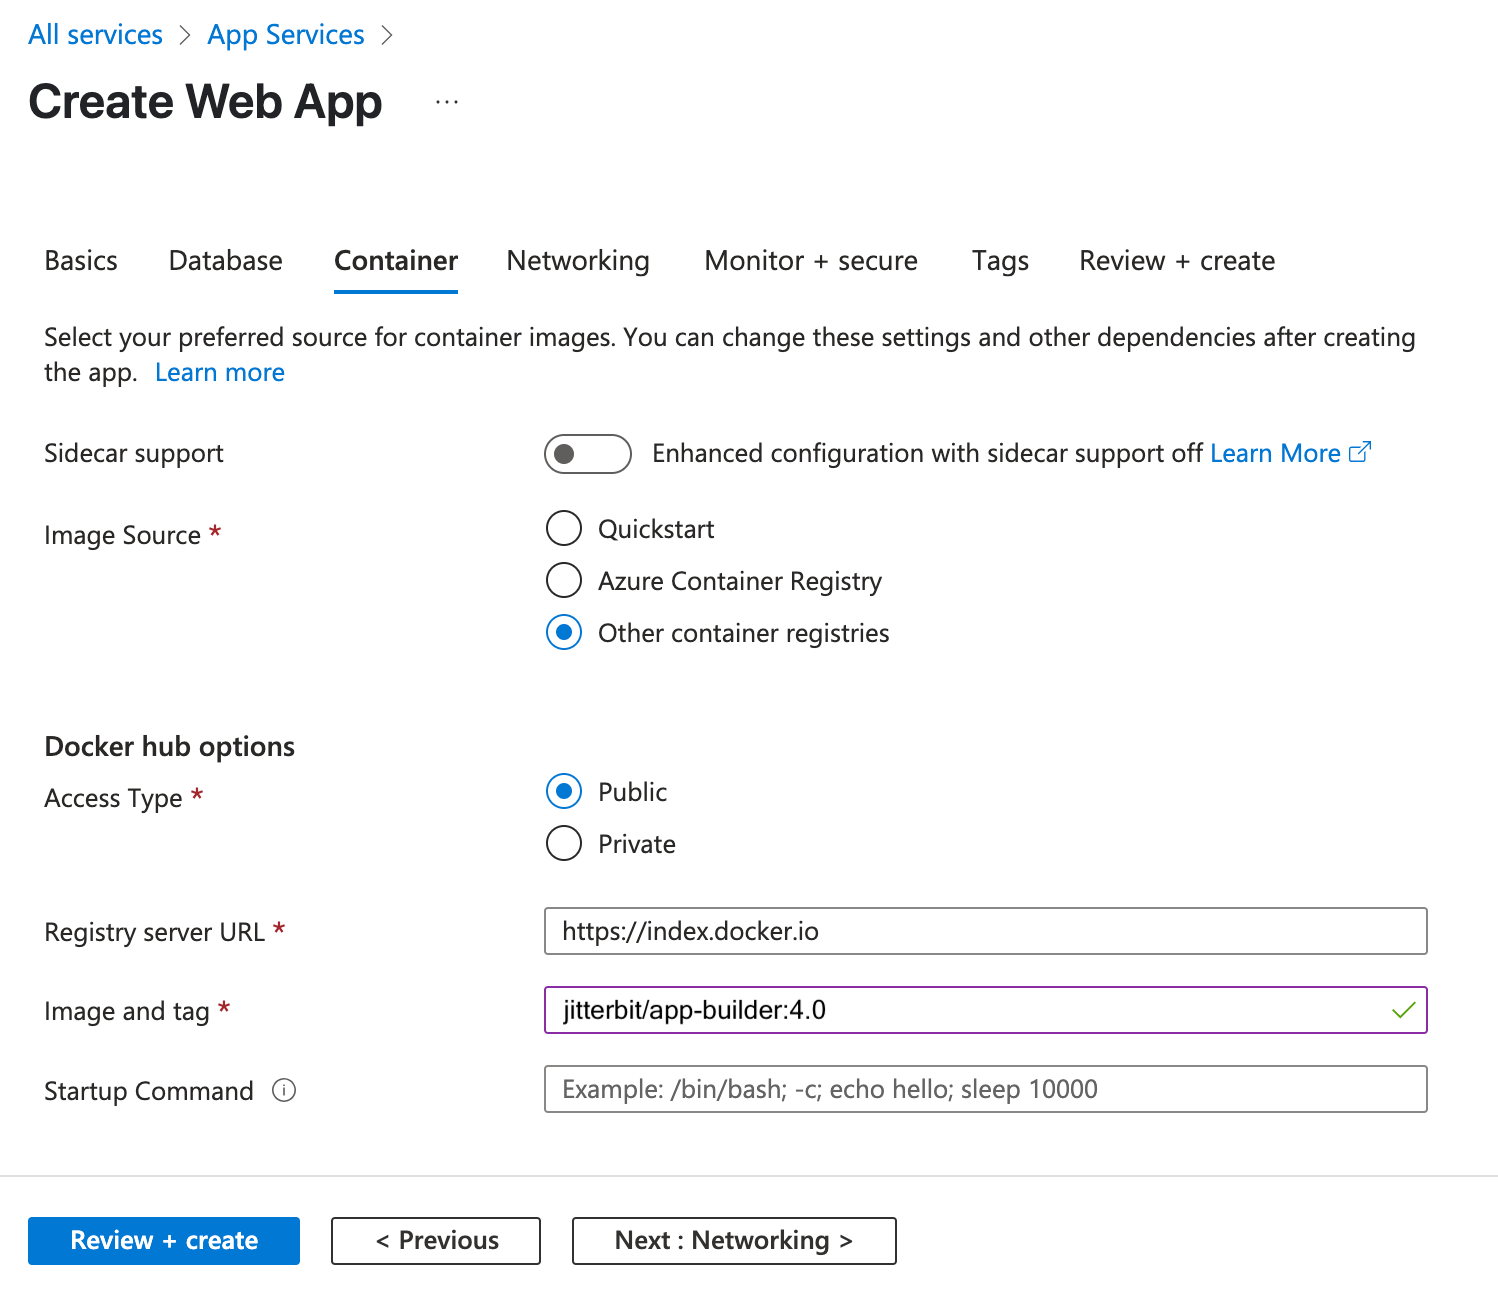
-
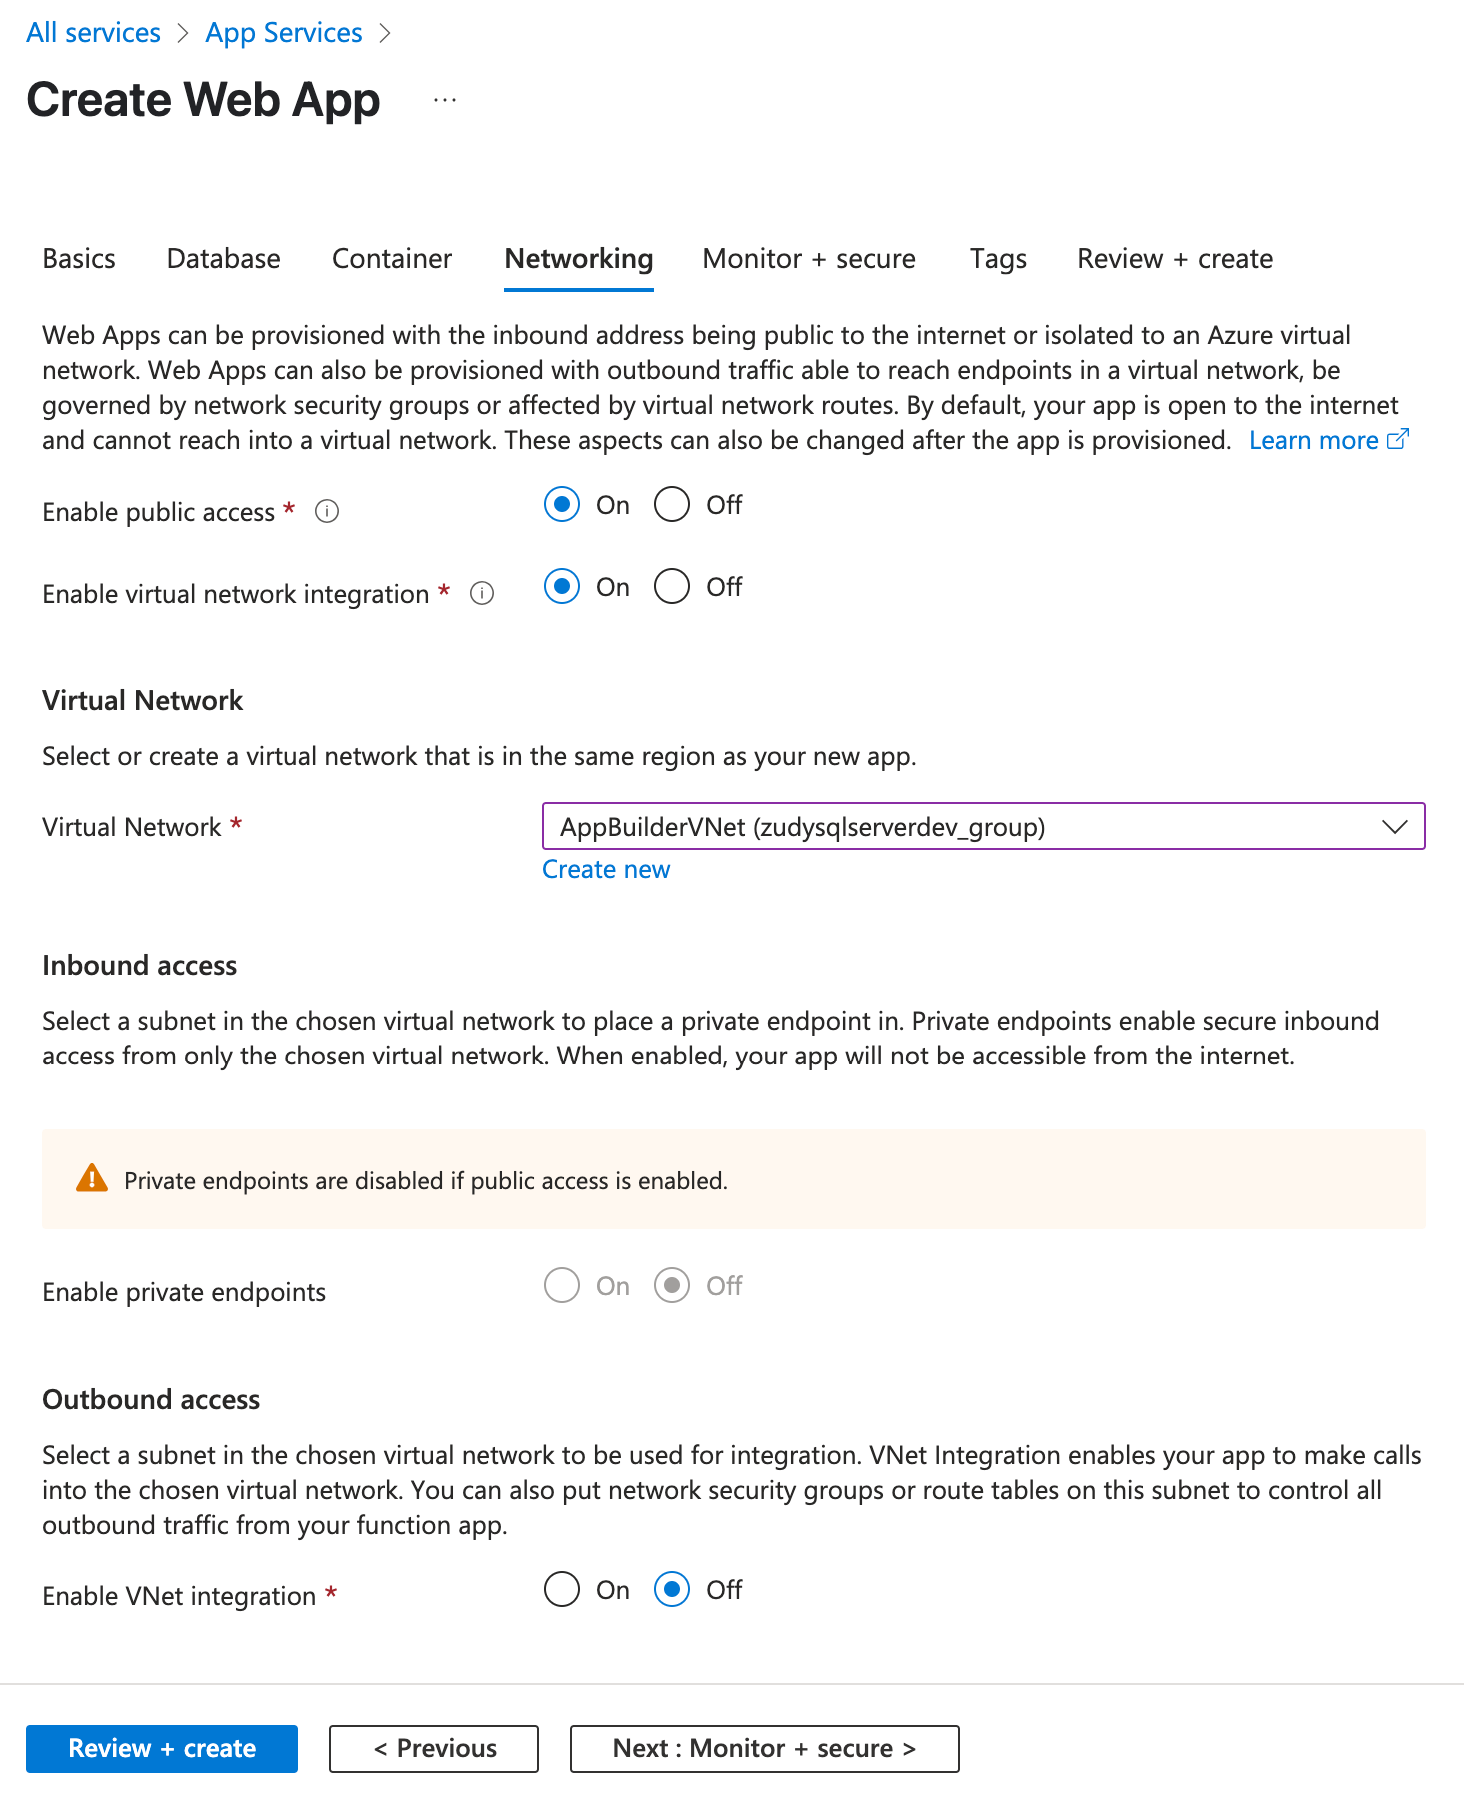
In the Networking tab, select the virtual network you created or selected in Step 2.
-
In the Monitoring, Tags, and Review + create tabs, use the default settings.
Once the deployment is complete, the Overview screen will look similar to this:

Step 3a: Update configuration for Docker
In order to set up your Azure App Builder instance to be used with Docker, follow these steps.
-
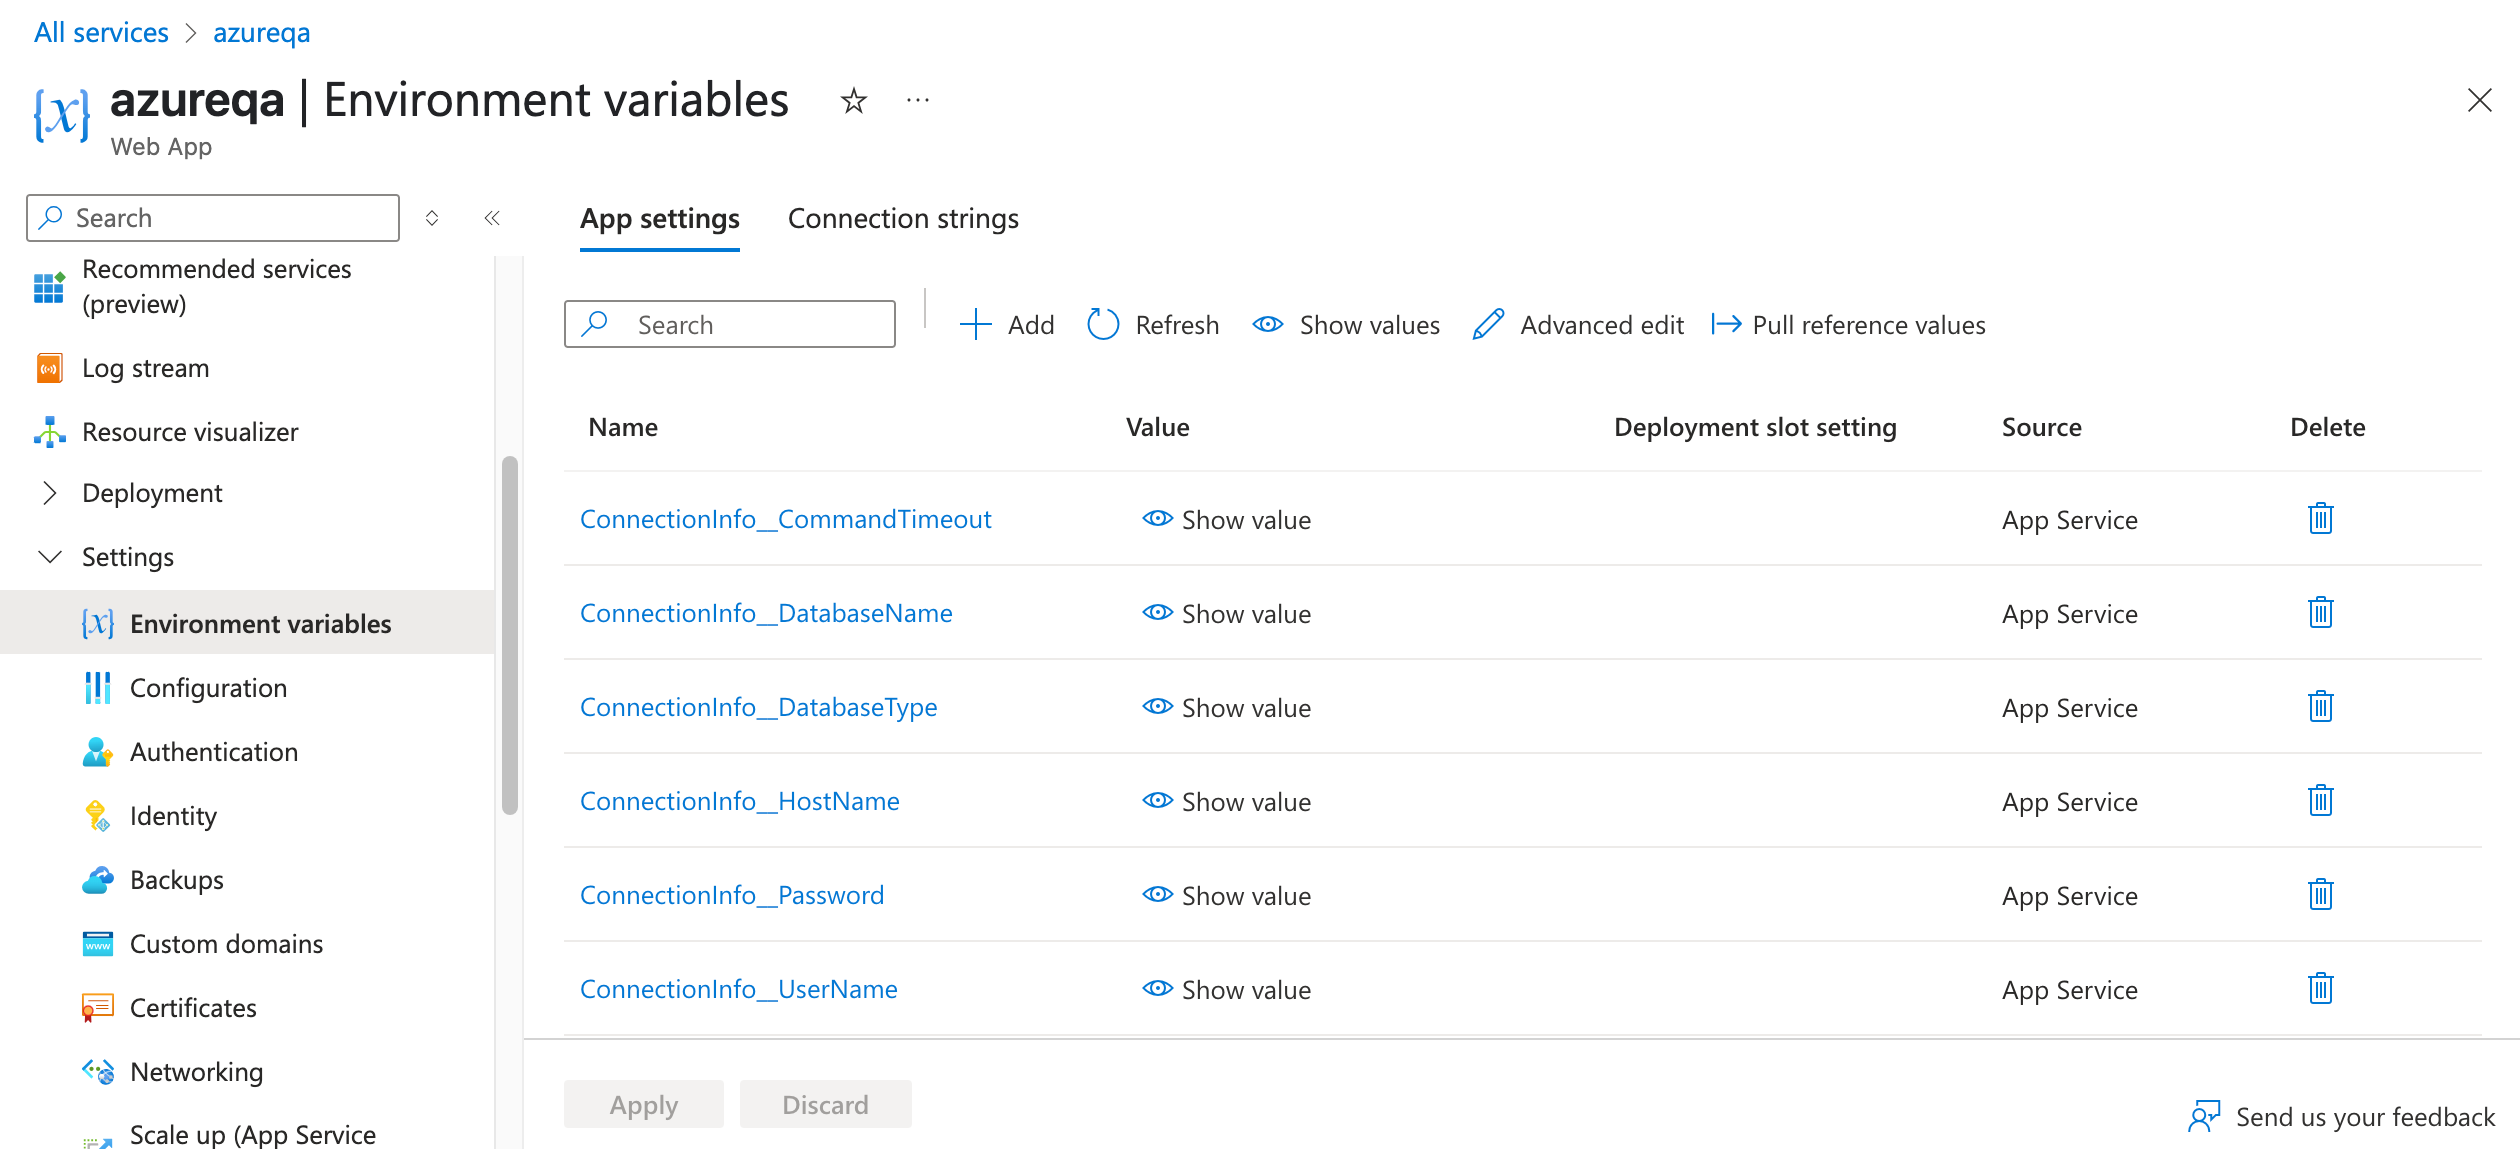
After locating the app you've set up in Step 3, go to Settings > Environment variables and select the App settings tab.
-
A list of the existing app settings is shown. Click + Add to add new ones:
Note
The database we provisioned in this example vnet was named zudysqlserverqa and is accessible via zudysqlserverqa.internal.cloudapp.net.
    ConnectionInfo__DatabaseType: 'SQLServer'
    ConnectionInfo__HostName: 'zudysqlserverqa.internal.cloudapp.net'
    ConnectionInfo__CommandTimeout: '300'
    ConnectionInfo__DatabaseName: 'App Builder'
    ConnectionInfo__UserName: 'appbuilder'
    ConnectionInfo__Password: 'YourDatabasePassword'
Step 3b: Enable virtual network integration
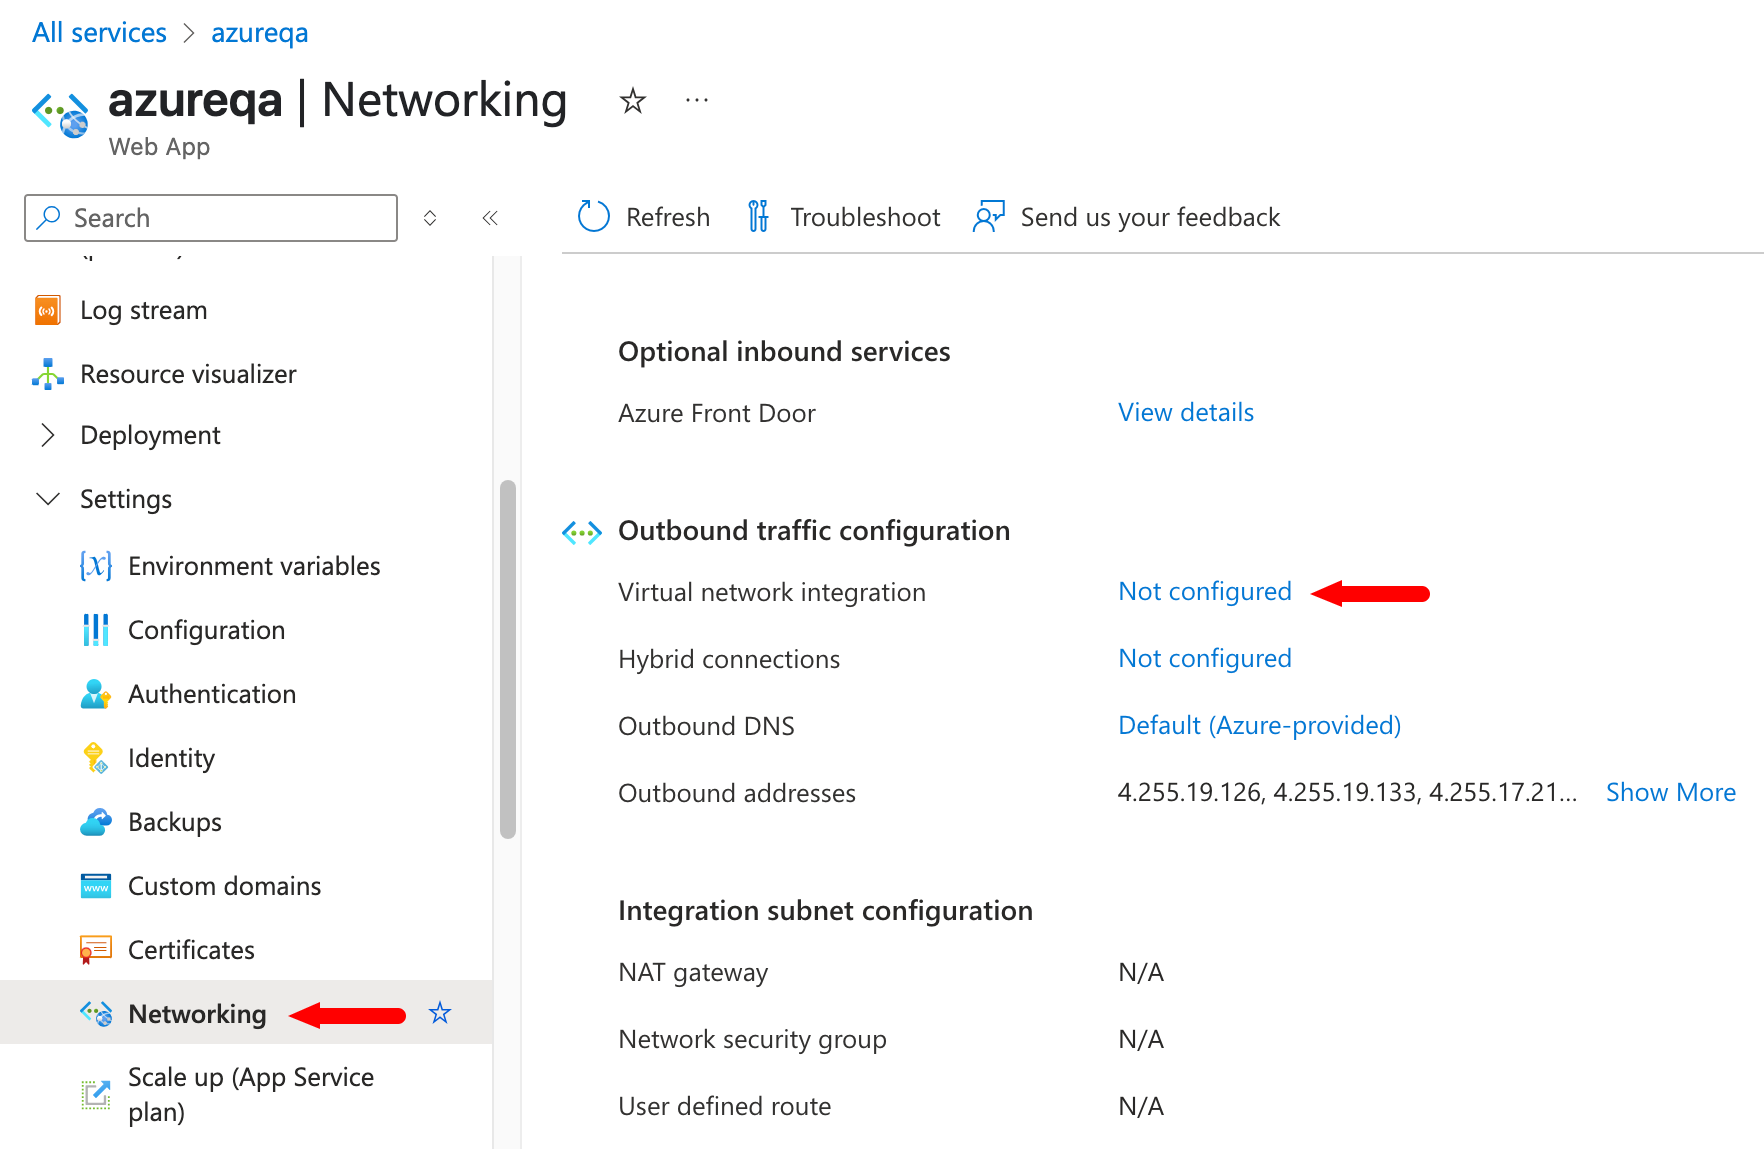
By integrating with a virtual network, you can reach private resources from your app within the virtual network. The steps described below show how to enable integration from the Azure portal. See the Microsoft documentation to learn about other ways to enable integration.
-
Go to your app in the Azure portal. Select Settings > Networking. Under Outbound traffic configuration, next to Virtual network integration, select the Not configured link.
-
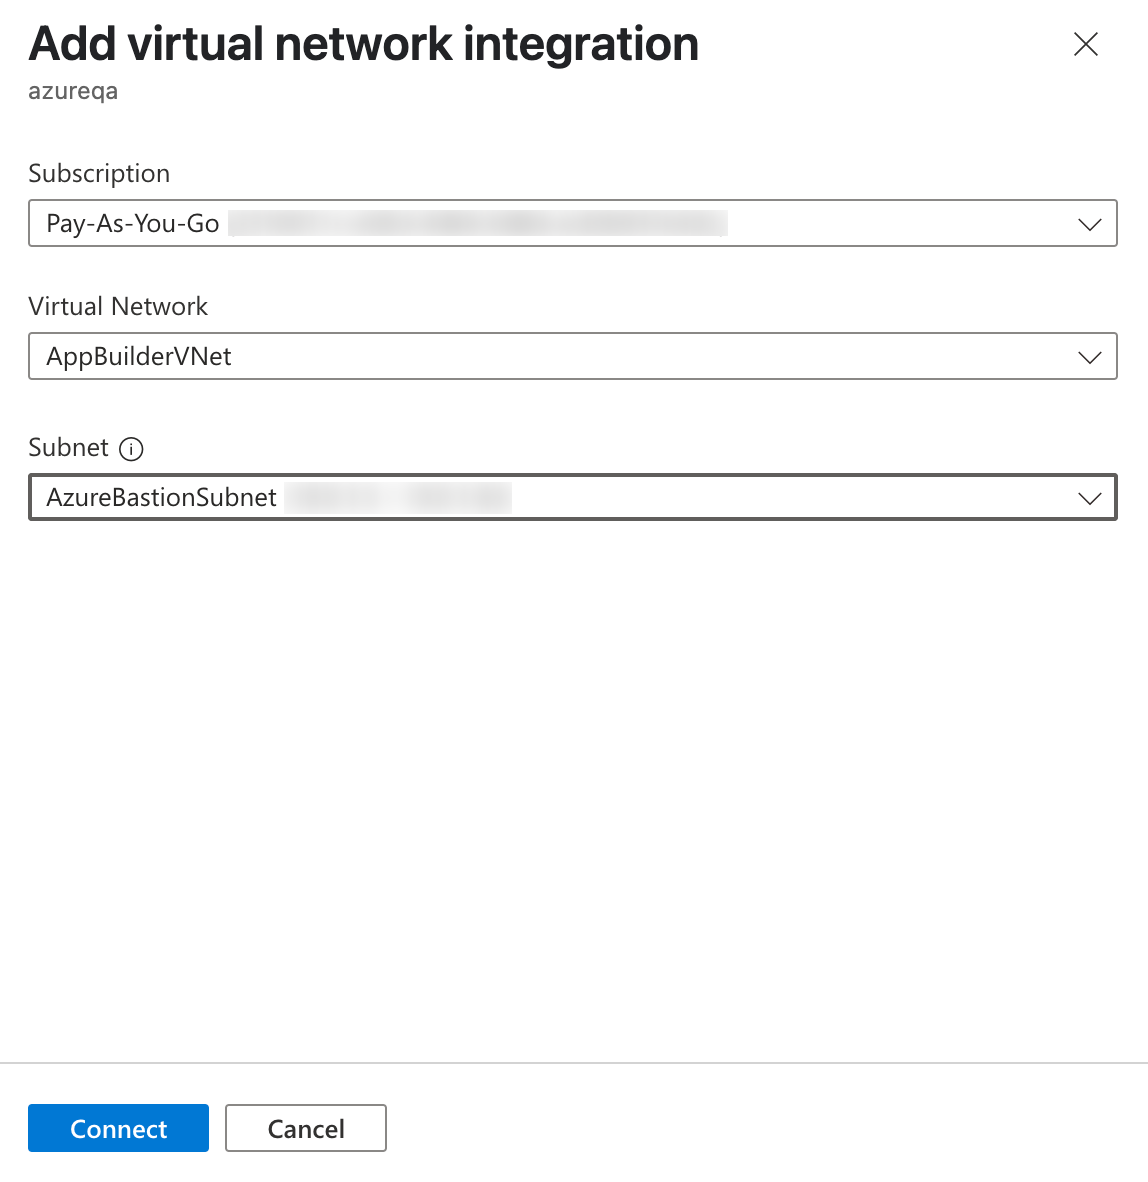
Select Add virtual network integration.
-
Select a subscription and virtual network. Click Connect.
-
During the integration, your app is restarted. When integration finishes, you can see the details of the virtual network that you integrated with.
Step 3c: Create file shares
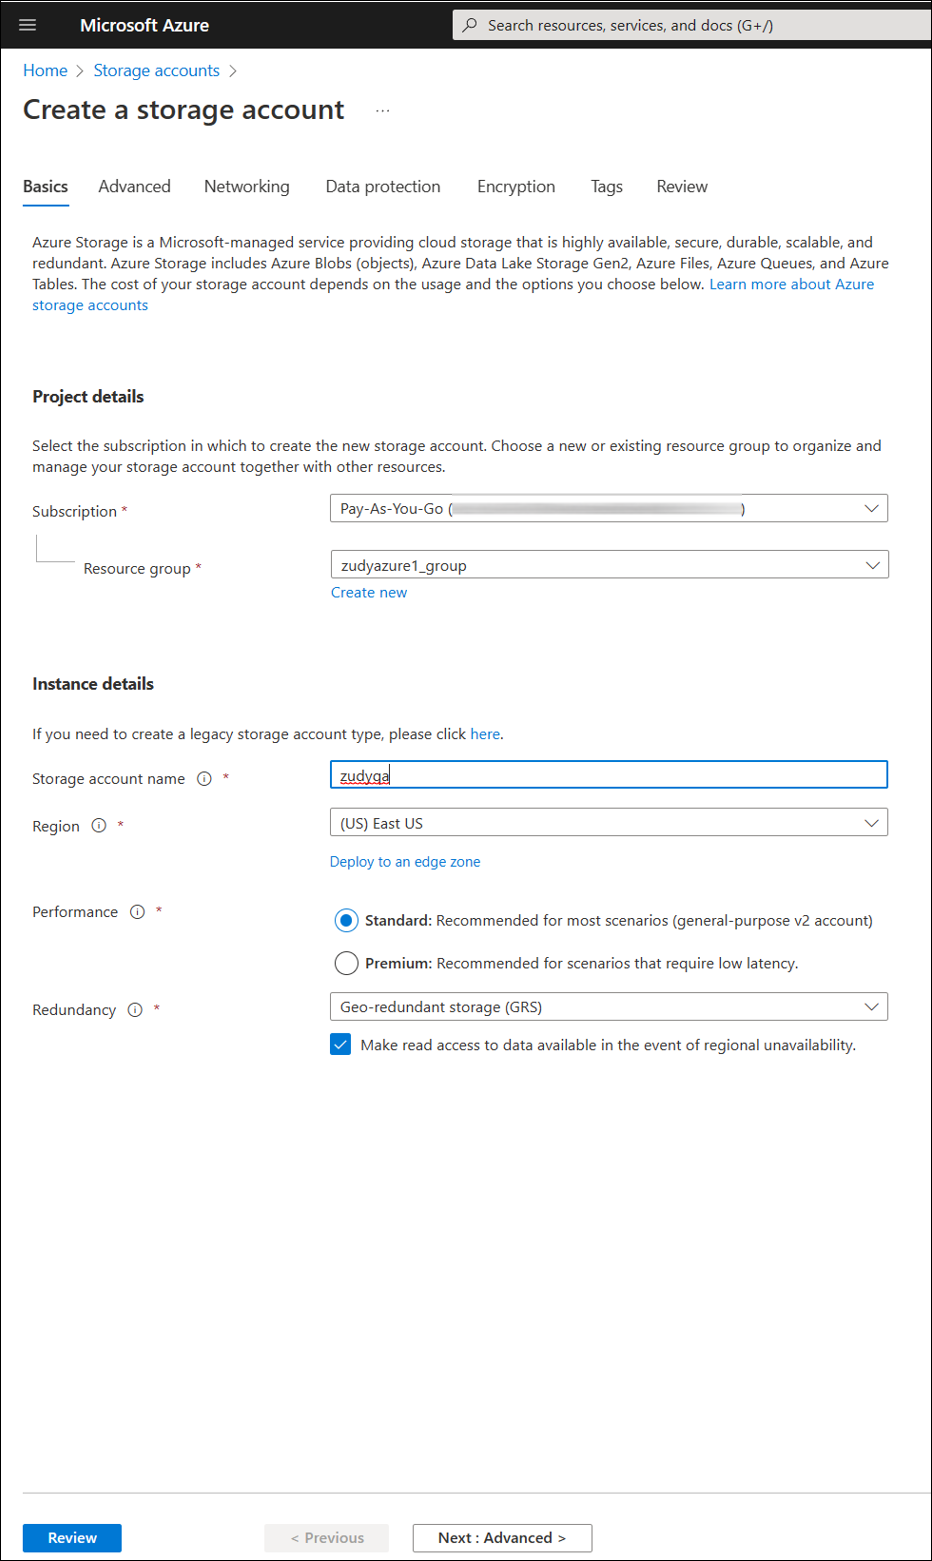
Azure offers fully managed file shares in the cloud. To use this feature, create a storage account using the following steps:
Note
This is a recommended configuration. For a complete description of all the fields in all the tabs, including how to create a storage account from other places besides the Azure portal, see the Microsoft documentation.
-
Use the search box at the top of the Azure portal to search for storage accounts, then select the matching result. Click + Create. The Create a storage account window opens.
-
In the Basics tab, select your Subscription and Resource Group, add a Name and pick a Region.
-
The remaining tabs can be left unchanged.
-
In the Review tab, review the configuration chosen and click Create at the bottom of the window.
Now that you've created a storage account, you can create file shares by following these steps:
-
Go to your newly created storage account. From the service menu, under Data storage, select File shares.
-
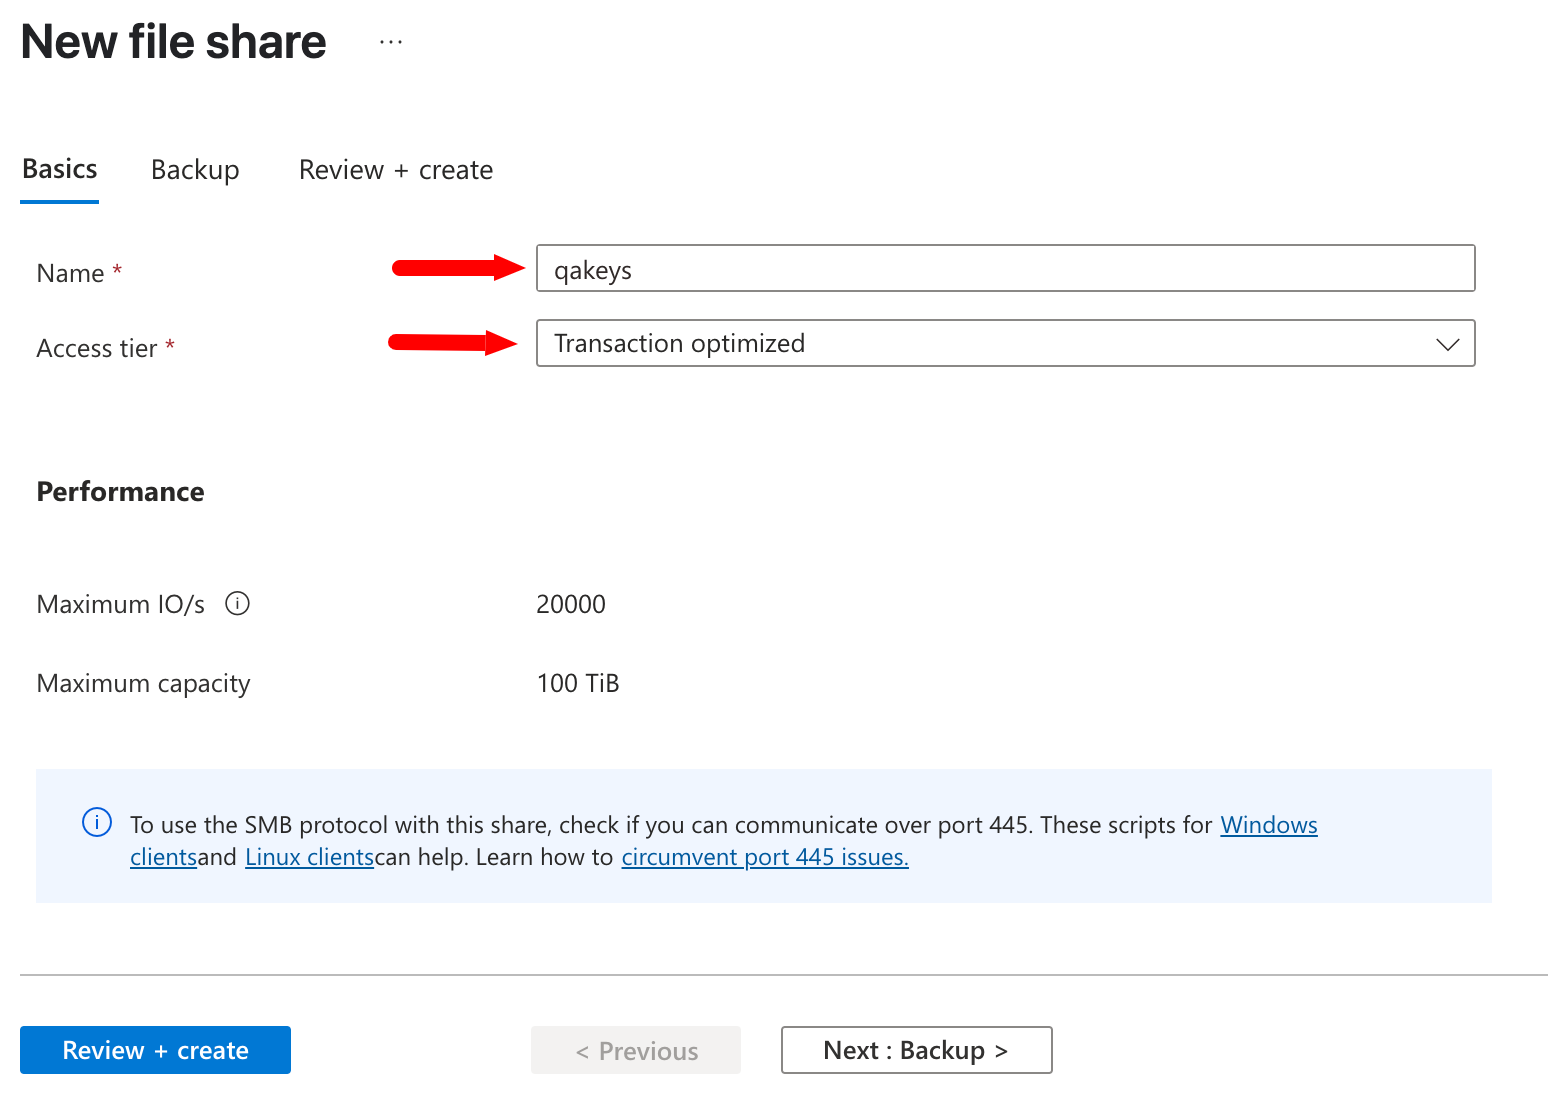
Select + File share to create a new file share.
-
Pick a Name and Access tier for your new file share:
Note
The name of your file share must be all lower-case letters, numbers, and single hyphens, and must begin and end with a lower-case letter or number. The name can't contain two consecutive hyphens. See the Microsoft documentation to learn more.
-
Select Review + create and Create to create the Azure file share.
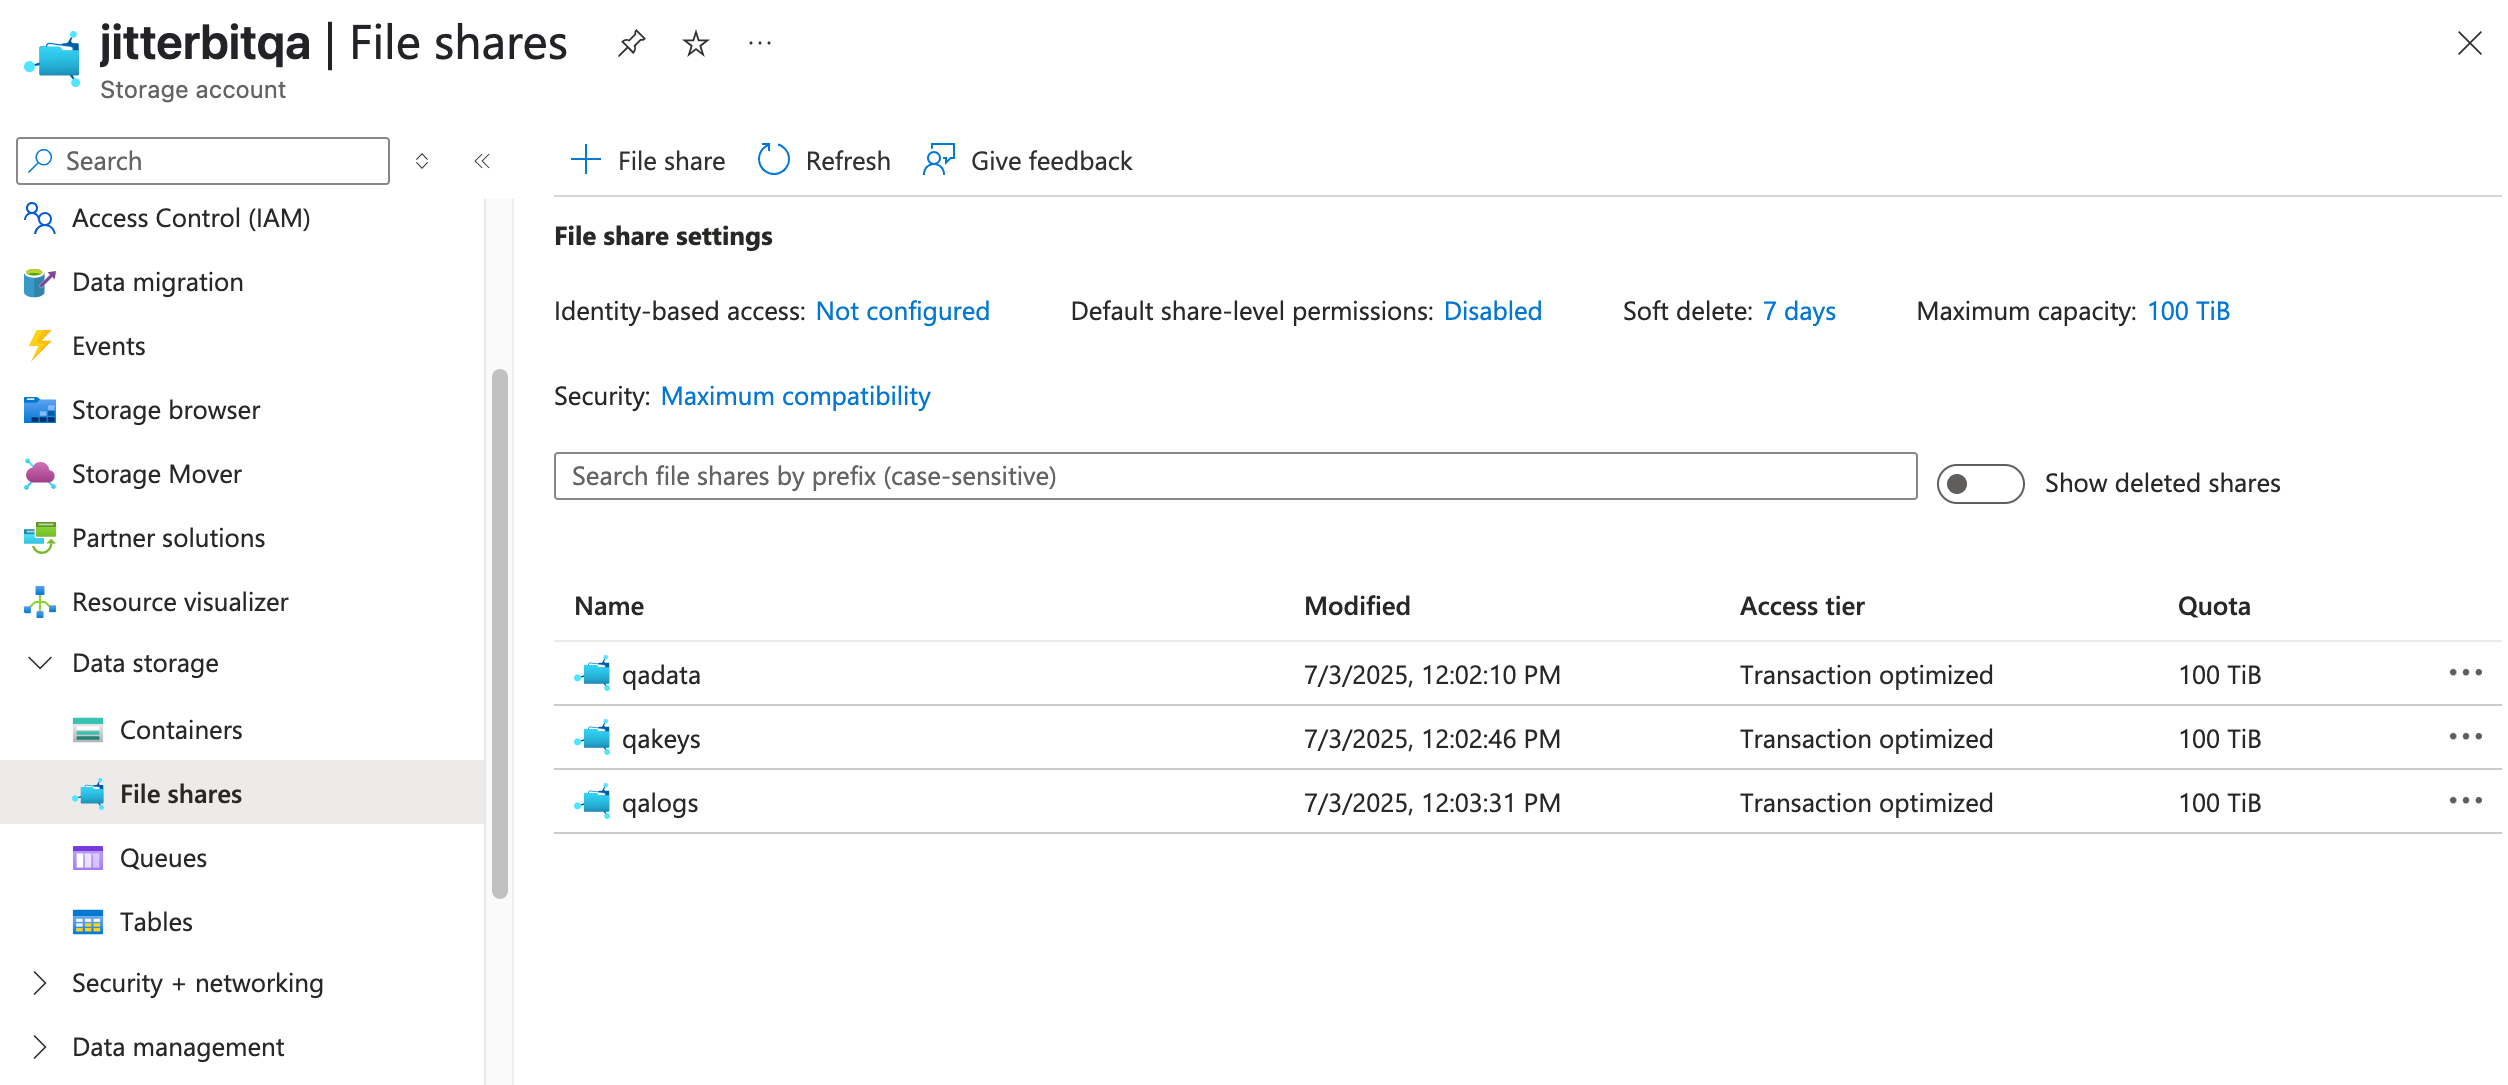
App Builder requires three file shares to persist data permanently, so repeat the steps above three times for the data, keys, and logs directories. At the end, you will see your three file shares listed in your storage account:
Step 3d: Mount the disks on the app service
-
In the Azure portal, navigate to your application.
-
From the left navigation, select Settings > Configuration. Select Path mappings, then New Azure Storage Mount. The following window opens:

-
Configure the storage mount. Repeat this process for each of the file shares you created in Create file shares. The Name and Mount path fields must be named exactly as shown in the table below to correspond with the file shares:
File share Name Mount path qadataappbuilder_data/app/dataqakeysappbuilder_keys/app/keysqalogsappbuilder_logs/app/logsThe Mount storage list should look like this:

-
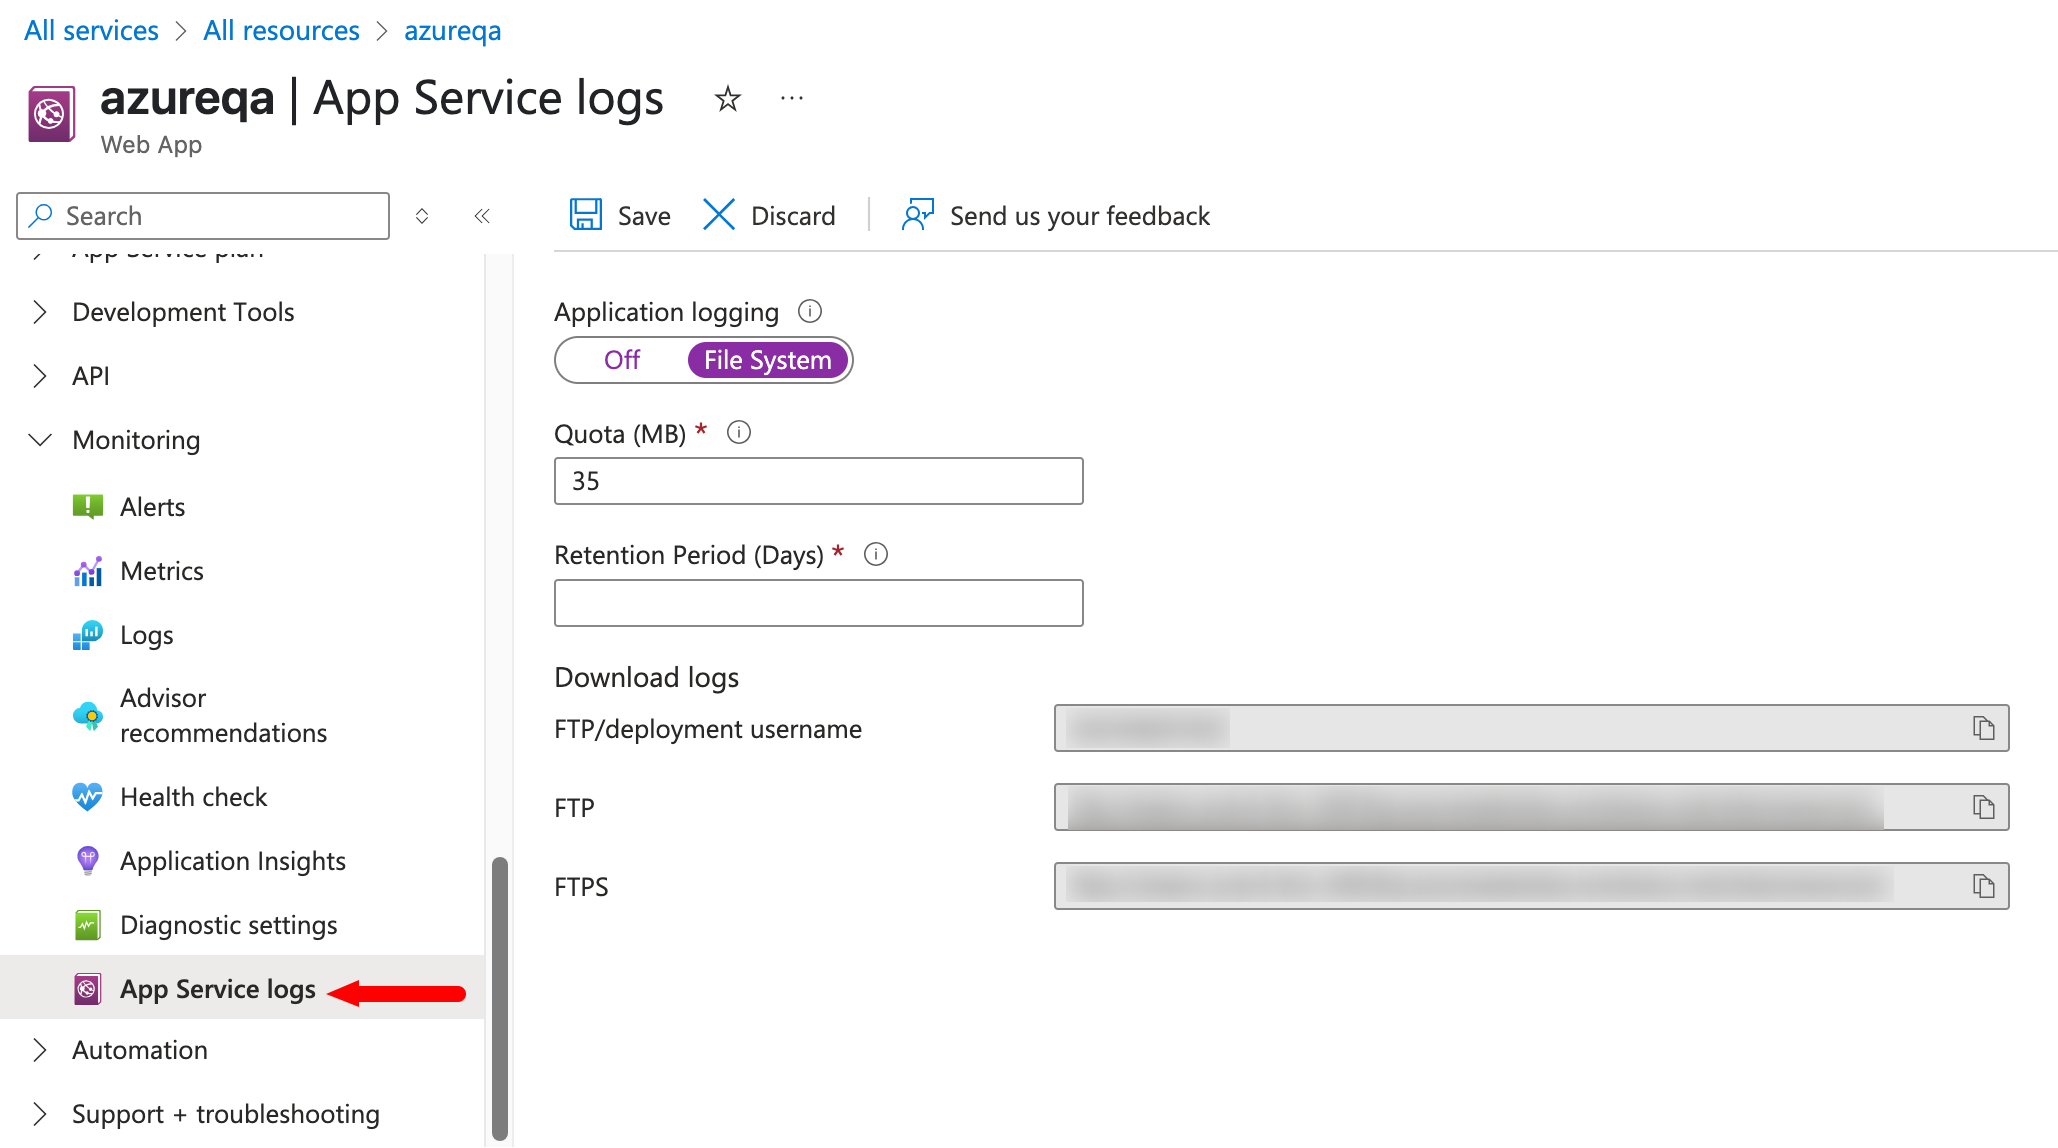
(Optional) To turn on app service logs, select Monitoring > App Service logs, then select File System under Application logging.
Next steps
App Builder takes some time to start when first installed. Once started, you can check the status using the address that was shown when setting up the app service.

You should verify that the file shares you created to store your keys and logs contain files. Visit your File shares page and open the file shares.
Set up Redis for multiple app service instances
For applications that make many requests, you can use Azure Cache for Redis to improve performance and scalability.
Configure Redis
-
In the Azure portal, search for and select Azure Cache for Redis.
-
In the Azure Cache for Redis page, select Create > Azure Cache for Redis.
-
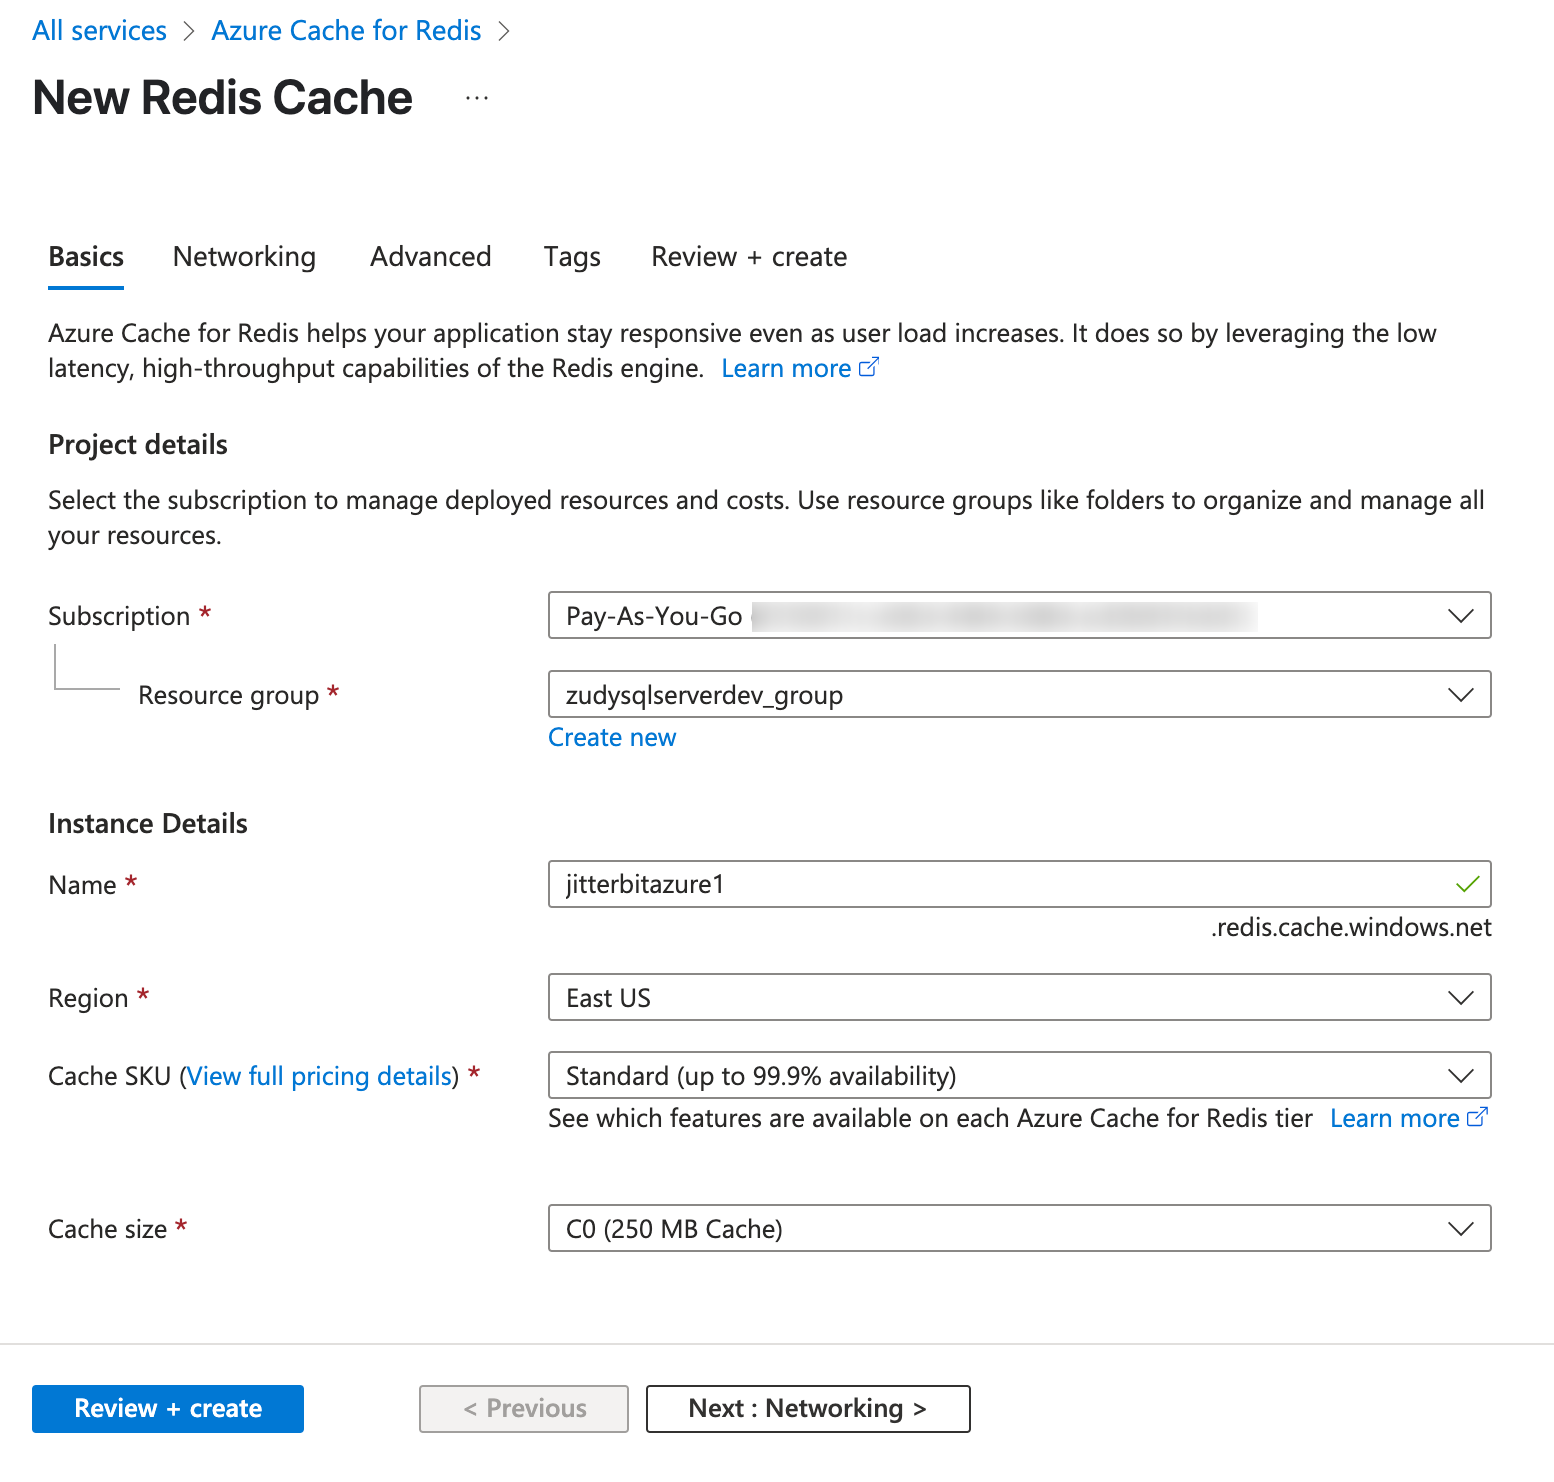
In the Basics tab of the New Redis Cache page, select a Subscription, Resource group, Region, and pick a unique name. Use the Cache size dropdown to select a cache size:
-
In the Networking tab, select Private endpoint. However, it's not necessary to create one in the section at the bottom of the window.
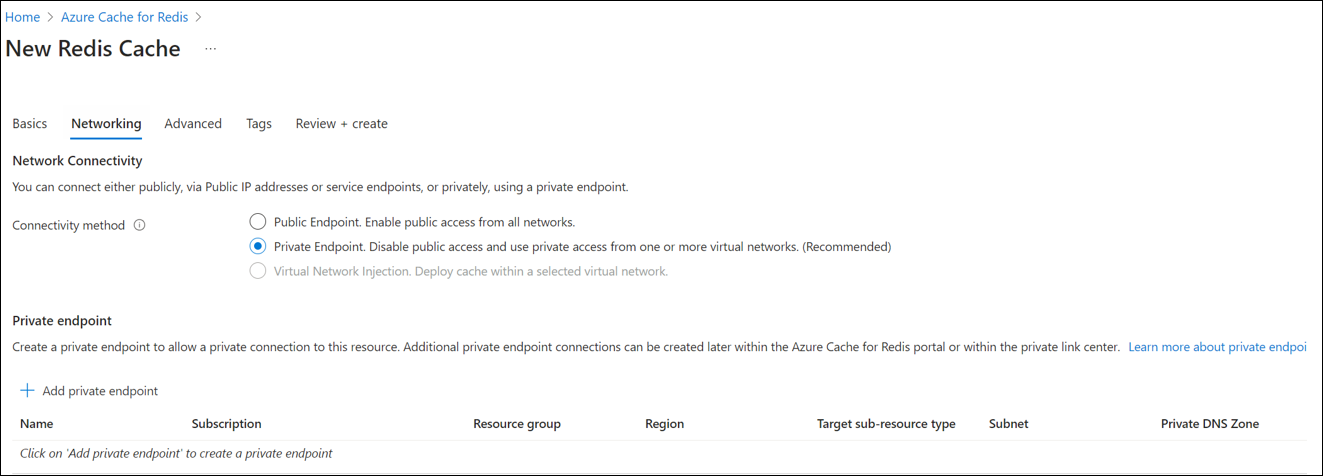
-
The remaining tabs can be left unchanged. In the final tab, click Create.
Configure Azure App Service to use Redis
Once you've configured Redis, a connection string for it will be available in Settings > Access Keys, as shown below:

Back in your App Builder App Service, follow these steps:
-
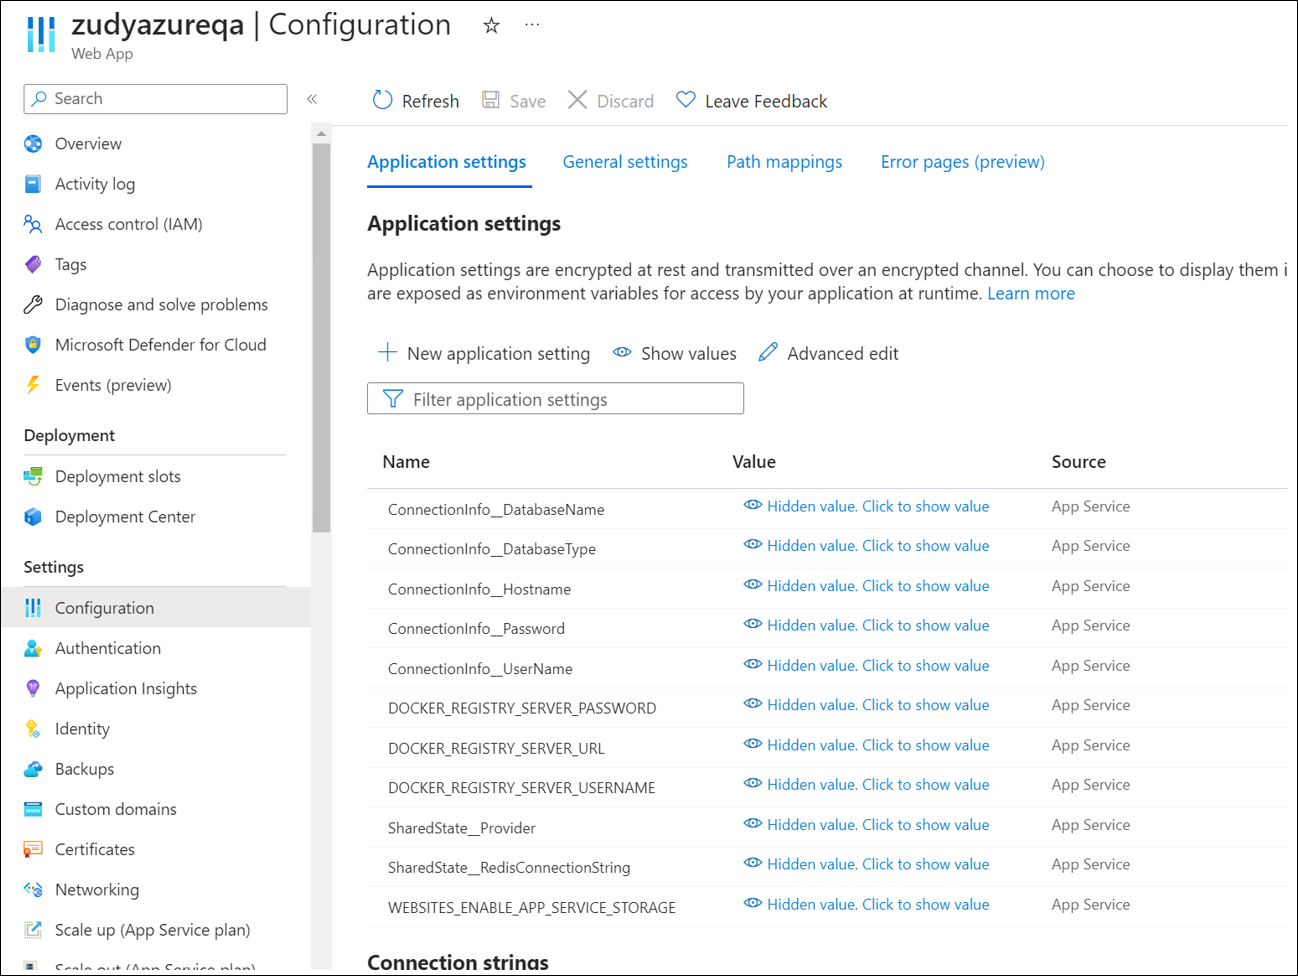
Go to Settings > Configuration.
-
In the Application settings tab, add these two new settings:
-
SharedState__Provider:
Redis -
SharedState__RedisConnectionString:
zudyazure1.redis.cache.windows.net:6380,password=<YourPassword>=,ssl=True,abortConnect=False
Save the configuration. The Application settings page will look like this:
-
-
App Builder now uses Redis for coordination between instances.