Notifications in Jitterbit App Builder
Introduction
Notifications are messages sent to logged-in app users when something happens. They can be sent via the following methods:
-
Email
-
SMS (using the Twilio service)
-
App Builder alert (an in-app popup that appears when the user is logged in to an app)
Notifications can be set up via the available notification servers.
System notifications are types of notification sent by system administrators to selected users when something happens, usually an event that affects multiple users.
Since App Builder 4.44, you can select IDE > Maintenance (Beta), then select the Notifications tab to view and manage notifications.
Notifications
A notification message can have multiple options that define how the user can respond.
For emails and App Builder alerts, URLs are included in the message that link back to App Builder.
For SMS, users can reply with the name of the option to run the associated event.
Notification links are active for 7 days, after which time they expire and are no longer active. (This expiry time cannot be changed.)
When options are present in a Notification, the User's response is automatically tracked by App Builder.
Notifications can include file attachments of many file types (e.g., .PDF, .DOCX, .TXT, .XLSX, etc.). If you are using file attachments, Notification will use the data/pdf directory if no other directory is specified. Alternatively if you do specify a FileDataSourceId, this is the location App Builder will look for the attachment(s).
To use the public data objects required for Notification your application requires App Builder (Sealed) to be configured as an available Data Source for the app. As well as being an available Data Source for the application, you need to establish or configure a link between the Data Sources.
App Builder will use URL information specified in the Notification Rule, if it is available. If not found, App Builder will fall back and use the Server Site default URL. The Server Site default value is configured from the IDE > Security Providers > More (from the Configuration panel) > Sites. For more information on sites and URL see the Sites and aliases article.
Options
Notifications can have 0 or more options. When there are no options, no user response is expected. In this case, the user response is not tracked, and no links are added to the outgoing message. This is considered an Informational notification.
When a Notification contains 1 or more options, a message is sent with URL links back into App Builder that allow the User to respond in some way. The User's response to the message (i.e. which option they selected) is tracked by the notification.
Configuration
Notification options can be configured in two ways:
-
Link to page: A link is provided which lets the user navigate to a page. Successfully navigating to the page is considering a complete response to the option.
-
Run page event: A link is provided which sends the user to a page and runs a specified event before the page is rendered. The User's response is considered complete once the event is triggered.
For a page to be eligible for either of these options, the page must be marked as Public in its Edge Case settings.
Example
An Administrator may execute an event that causes an email to be sent to a user. The email has some text and the following three buttons in it:
-
Review: When clicked, the user is taken to a specific page.
-
Approve: When clicked, the user is taken to a different page, and executes an event against some data objects in the page.
-
Reject: When clicked, the user is taken to a different page, and executes an event against the same page or a different page's data objects.
The event must be executed before the page is rendered as it may affect data that is contained in the panels on the page. To execute an event, the app developer must do the following:
-
Configure the Link To page as Public.
-
Include the event in either the Data Object for the page, or as one of the single row panel data sources on the page. (Further illustration of this point is available in the Data Object Event Binding section below.)
Data object event binding
App Builder limits the events that can be bound to a link. This limitation only allows for events that belong to a Data Object or Table that is bound to an unbound single row panel on the target page. For example, consider a page that has 6 single row panels:
Customer→CustomerAddress→CustomerMapEmployee→EmployeeAddress→EmployeeMap
In this example, Customer and Employee panels are not bound to any other panels on the page. Therefore, a developer can choose events from those two panels data sources (along with a page data object if one is specified).
App Builder also limits the events that can be bound to non-system events. For example, the developer can not link back to the Save, Insert, Update, or Delete events.
Notification registration
Linking to a notification
The Notification Registration page in App Builder allows the developer to link a Notification to an application. This is a 1 to 1 relationship. Additional information about the notification message can be configured within the notification registration.
Message creation
The notification message can be defined in the Template section of the Notification Registration page. This is the main content of the notification itself.
Substitutions are performed on the Template and use the {{fieldname}} syntax. Substitutions may add an optional url flag to indicate the value is a URL and requires url-encoding e.g. {{fieldname|url}}.
For substitution, the body may contain:
Hello {{CustomerName}},
In this example, CustomerName must be contained in the notification rule's columns along with the other required fields.
For emails, a Subject can be specified in the Notification Registration page. The Subject field also supports substitutions.
Translations
Notifications support rudimentary translations. There are three fields which are used for translations:
-
Notification Option Name.
-
Notification Registration Message.
-
Notification Registration Subject (for Emails).
When creating the notification message, App Builder will attempt to find translations for each of these fields, assuming that their content specifies the corresponding translation key. The developer also needs to add the keys to the translation bundle for the app manually (they are currently not imported automatically for an app). Care must be taken with the Template field to add the translation key as a raw string and not as HTML. There is a "code" icon at the bottom right of the Notification Registration Template field which allows you to directly edit the string.
Limitations
-
The event executed in the option link belongs to the Page Data or a Single Row Panel Data Object. Currently, we do not display any validation results or post messages for page level events. In other words, the event runs first, when it completes, the user is redirected to their page. When they arrive at their page, the event results are lost. Therefore, if the event has a post message or fails validation, the system will not show those results to the end user. The developer can easily workaround this by displaying data in their panels that changes based on the successful execution of an event.
Because of the above limitation, validation warnings will cause an event to not execute. We do not have a UI in place that allows for the User to accept or reject the warning.
-
The File table from an Amazon S3 data source cannot be pulled in by a Notification rule.
Notification public data objects
The public data objects used as Notification targets are defined below.
Common columns
These columns are common across the Notification public data objects:
| Name | Mandatory | Multi-Target | Example | Description |
|---|---|---|---|---|
| Binding() | No | Yes | CustomerID | If provided, this will identify the record matched to the option for this notification. Multiple bindings can be defined. |
The Email public data object is similar but not entirely consistent with the SMTP Email Plugin functionality. The columns for the Email public data object are as follows:
Note
If you are using more than one Email address to send To or Cc, separate values with a comma character.
| Name | Mandatory | Multi-Target | Example | Description |
|---|---|---|---|---|
| To() | Yes | Yes | 'user1@zudy.com,user2@zudy.com' | Comma-delimited list of email addresses to send to. Multiple To() fields can be targeted to send to multiple recipients (in addition to using comma-delimited values). An exception is thrown if this field is not provided or null. |
| Cc() | No | Yes | 'user1@zudy.com,user2@zudy.com' | Comma-delimited list of email addresses to cc. Similar to To(), multiple targets can be specified for automatic concatenation. |
| From | No | No | 'noreply@zudy.com' | Defines the from address for the email. If From is not provided, the from address defined in the Be_NotificationEndpoint record will be used. |
| App BuilderUrl | Depends | No | 'https://example.com/MyApp Builder' | App BuilderUrl is mandatory if the notification contains options. This url is used when generating links to the various notification options. This is the url to reach App Builder from the point of view of the message receiver. Does not require a trailing slash. |
| Attachment() | No | No | 'somepath/files/*' | If provided, will attach file(s) to the email. If the Attachment() string ends with an asterisk (*), the string is assumed to represent a directory path, and all file attachments in the directory will be attached to the email. |
| FileDataSourceId | No | No | UUID | Unique identifier that refers to the data source that should be referenced to locate the file attachment(s). |
| Language | No | No | 'es' | If provided, translations will be attempted for both the Template and Subject fields of the associated Notification Registration. As well, the Name of the notification options will be translated. |
Text message
The Text Message public data object is used for sending SMS. The columns for the Text Message public data object are as follows:
| Name | Mandatory | Multi-Target | Example | Description |
|---|---|---|---|---|
| To() | Yes | Yes | '+15559990000' | A single phone number in the format expected by Twilio. Multiple To() fields can be targeted to send to multiple recipients. An exception is thrown if this field is not provided or null. |
| Language | No | No | 'es' | If provided, translations will be attempted for the Template field of the associated Notification Registration. As well, the Name of the notification options will be translated in a future release. |
App Builder alert
The notification App Builder Alert public data object is similar but not entirely consistent with the Create_Notification public data object. The columns of the App Builder Alert public data object are as follows:
| Name | Mandatory | Multi-Target | Example | Description |
|---|---|---|---|---|
| To() | Yes | No | all | This column represents the user we are sending to. An exception is thrown if this field is not provided or null. You can use the following special expressions:
|
| From | No | No | who('userid') | This column represents the user this message is from. If not provided, the User running the action will be assumed. |
| Persistent | No | No | 1 | Boolean value that indicates whether the alert should be considered persistent. This attribute is only applicable when sending an alert to a UserId. All alerts have a Dismiss button that removes the alert from the User's notification panel. The User can ignore the alert or close their window or log out of App Builder. If persistent is true (1), the alert will be displayed repeatedly, each time the User logs in to App Builder, until the User actively dismisses the alert. Use this technique to ensure that an alert is read by the User. |
| Timeout | No | No | 15 | If provided, Timeout represents the amount of time (in seconds) to wait before automatically closing the alert popup. |
| SendToPushNotificationEnabledUser | No | No | 0 | If provided, the App Builder Alert can be configured to only send to Users who do not have a push notification enabled device. This allows a developer to send an App Builder Alert and Push Notification notification in the same event and prevent a User from receiving both a desktop notification and push notification. |
Push notification
The Push Notification public data object allows the notification to send a push notification to a User. The columns of the Push Notification public data object are as follows:
| Name | Mandatory | Multi-Target | Example | Description |
|---|---|---|---|---|
| To | Yes | No | 85cc99ff-b4a6-4a32-bfeb-537d346ee52c | To is the User (UserID) we are sending the push notification to. If the User does not have a push notification device, the notification rule will still succeed but no message will be sent. An exception is thrown if this field is not provided or null. |
| ToAppUserId | No | No | 100 | If the User is denoted by an application user id, this value should be provided in addition to the To field. |
| From | Yes | No | who('userid') | From represents the User this message is from. |
| Badge | No | No | 1 | If provided, this will set the badge number on the application icon. |
Notification setup
Example notification setup
These are the steps needed to set up a notification. (This example shows adding a Customer Approval Notification to the Northwinds Customers page.)
-
Create notification: Create a rule that targets a notification public data object:
- Navigate to App Workbench.
- Click Notifications.
- Click + Notification.
- Assign a Name. For example
CustomersRequestApprovalAlert. - Confirm Purpose is Notification.
- Select App Builder Alert as the Target. If you do not see this data object available, create a Data Source connection to App Builder (Sealed) for the app you're working in.
- Click Save.
-
Define notification mvSQL:
- Click the +Tables button.
- Add your 'select from' Table. For example
Customers. -
Add the following columns and click on the Columns tab to define:
Column Alias Target all To To "C".CustomerId CustomerId Binding() "C".CustomerName CustomerName Note
Note that we add
CustomerNameso that we can later use it as a substitution parameter in our Notification message.
-
Define notification options:
- Navigate to App Workbench.
- Click Notifications
- Select the Notification Business Rule. For example:
CustomerRequestApprovalAlert. -
Enter the Message information for the Notification into the Body field
For example: Please review the following customer:
Customer:
{{CustomerName}} -
Click the pencil icon and enter any Technical Help to help explain the Notification to other developers.
-
(Optional) Define a landing page and prelaunch event to run:
- From the App Workbench > Notfications page, select the Notification.
- Click the + Option button.
- Create a new option:
- Set Index to 10.
- Set Name to Review.
- Select the Link to Page value. In our example we'll link to the Northwinds 'Customer' page. If the page you want to link to doesn't show up, ensure that it's been marked as Public in Edge Case settings.
- Click the checkmark to save the record.
-
Register notification with an event: Register Notification as an Action with an Event. In this case, we're assuming the Event is associated with a button on the launching page. We'll also assume the event is called 'Request Approval'.
- Navigate to the Event for the Data Object.
- Click the Business Logic icon.
- Click the Events button.
- Select the Event. For example:
Request Approval. - Click on Register Existing from the Actions panel.
- Select Notification as the Action Type.
- Select the Notification we created in the previous step. For example:
CustomerRequestApprovalAlert. - Click Save.
- Verify that the Explicit Bindings are correct. For example:
CustomerId - CustomerId.
-
Test: At this point, the Notification is completely set up. Navigate to your page, and click the button that runs the notification event. All App Builder users on the system should see a pop up with the notification message.
Example SMS notification setup
These are the steps needed to set up an SMS notification. (This example shows adding a Customer Approval Notification to the Northwinds Customers page.)
Note
You will need a Twilio account to complete setup.
-
Setup App Builder security
- Navigate to IDE > Security Providers.
- Click + User Authentication on the User Authentication panel.
- Enter a Name (e.g.
Http Basic Auth). - Select HTTP Basic Authentication as the Type.
- Click Enabled to enable.
- Click Save.
- Enter a Name (e.g.
- Navigate to IDE > User Management.
- Double click the User record you want to authenticate as when a SMS reply comes in.
- Note that this User must have access to the following:
- App Builder application.
- The Event that will be executed on the notification itself.
- Click the Keys icon from Authentication.
- Click Create.
- Select the Http Basic Auth provider created earlier.
- Click Save.
Note
The secret "Key" that is created for this provider. The combination of the User Name and the secret Key will be used when configuring Twilio.
-
Setup Twilio:
-
Create messaging service:
- Log into your Twilio account.
- Navigate to Communications Cloud > Programmable SMS.
- Click Messaging Services.
- Create a new Messaging Service (Notifications, 2-way) and attach a Twilio phone number to it.
- Note down the MessagingServiceSid. This will be used for configuration later on.
- Enable the "Process Inbound Message" option.
- Enter the following Request URL:
- https://<username>:<secret_key>@<your_vinyl_server>/webhook/v1/vinyl/bridge_inbound
- E.g. https://admin:P124asfgOmkA@vinyl.zudy.com/webhook/v1/vinyl/bridge_inbound
-
Gather Twilio credentials
- Navigate to Console Dashboard > Settings.
- Note down the LIVE credentials:
- Account Sid
- Auth Token
-
-
Configure SMS endpoint:
- Navigate to IDE > Notification Servers.
- Double click the 'SMS' record.
- Add the following configuration:
- User Name: Twilio Account Sid
- Password: Twilio Auth Token
- MessagingServiceSid: Twilio Messaging Service Sid
-
Configure website URL:
- Navigate to IDE > Security Providers.
- Under Configuration click More > Sites.
- Click + Site.
- Set the URL value to your website URL. For example:
https://vinyl.zudy.com. - Click Save.
-
Configure SMS notification:
-
Create notification: Create a rule that targets a notification public data object:
- Navigate to App Workbench > Notifications.
- Click + Notification.
- Assign a Name.
- Select Notification as the Purpose.
- Select Text Message as the Target. If you do not see this data object available, create a Data Source connection to App Builder (Sealed) for the app you're working in.
- Click Save.
-
Define notification mvSQL:
-
Click the +Table button and add the Table the Rule requires. E.g.
Customers. -
Click the Columns tab and add the following columns:
Column Alias Target '+15551112222' (replace with your phone number) To() To() "C".CustomerId CustomerId Binding() "C".CustomerName CustomerName Note
We add "CustomerName" so that we can later use it as a substitution parameter in our Notification message.
-
-
Define notification options: In addition to defining the Message information, we will define two options for this Notification example. One which is activated by replying to the SMS, another which is a link to a page:
- Click the Notification navigation tab.
-
Enter the following message into the Message Body:
Reply {{1}} to approve {{CustomerName}}. Review {{Review}} -
Click the +Option button from the Options panel:
- Set Index to 10.
- Set Name to Review.
- Select the page to link to. In our example we'll link to the Northwinds 'Customer' page. If the page you want to link to doesn't show up, ensure that it's been marked as Public in Edge Case settings.
- Set the Option Type to 'Link'.
- Click the +Option button from the Options panel
- Set Index to 20.
- Set Name to 1.
- Select the page to link to. In our example we'll link to the Northwinds 'Customer' page and run the 'Approve' event.
- Set the Option Type to 'SMS Reply'.
-
Register Notification as an Action with an Event. In this case, we're assuming the Event is associated with a button on the launching page. We'll also assume the event is called 'Request Approval':
- Navigate to the Event for the data object.
- Click the Business Logic icon.
- Click the Events button.
- Select the Event. For example: Request Approval.
- Click on Register Existing from the Actions panel.
- Select Notification as the Action Type.
- Select the Notification we created in the previous step. For example:
Customer_RequestApprovalSms. - Click Save.
- Verify that the Explicit Bindings are correct. For example: E.g.
CustomerId-CustomerId.
-
Configure push notification: Push notifications are configured similarly to other notifications in App Builder. The App Builder server Administrator must configure the Push Notification endpoint correctly in order for them to work as expected. If you are configuring Push Notifications with Blabber API, you must download the iOS companion app, sign into the corresponding server with proper credentials, and enable push notifications on the app itself. In addition, an API key is required to complete the configuration.
-
Test: At this point, the Notification is completely set up. Navigate to your page, and click the button that runs the notification event.
-
Notification servers
The methods for sending notifications are listed in the Notification servers section of the IDE:
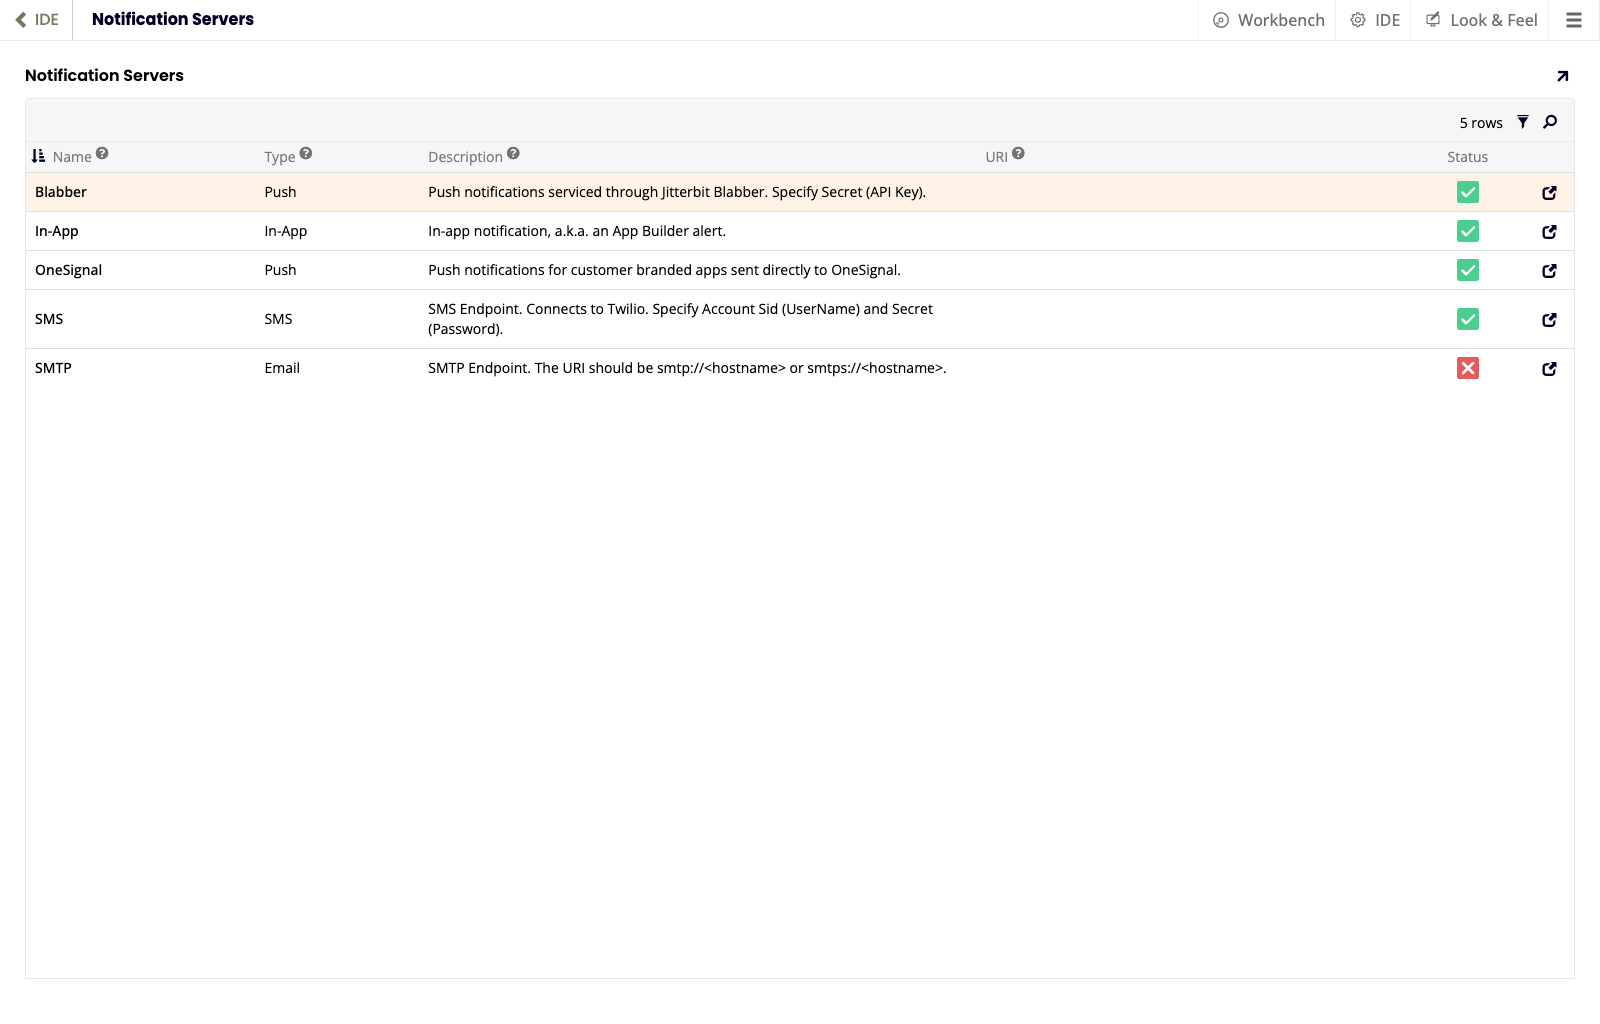
The list of servers is made of the following columns:
-
Name: The server's name.
-
Type: The type of notification that can be set up with that server.
-
Description: A brief description.
-
URI: The URI (if applicable).
-
Status: The server's current status.
Double click any row or click the icon at the end to see and edit details of a given server.
Note
Notification servers were previously known as notification endpoints.
System notifications
System notifications are shown to active users and remain in their Notification Center (under the hamburger menu) when dismissed.
Administrators can send system notifications immediately, or schedule them to be sent.
To set up a system notification, follow these steps:
-
Select IDE > Maintenance (Beta), then select the Notifications tab.
-
In the Scheduled Notifications panel, click the Schedule or Send Now button.
-
In the Notification dialog, enter values for the following fields:
-
To: Click the menu, then select one of the following:
- All
-
A group of users based on the following:
-
Their access to an application or data source granted by their groups or roles.
-
Security group.
-
Data source’s roles.
-
-
From: Defines who sent the notification (usually the service user).
-
Schedule For: (Optional) Schedule a notification to be sent later (for example, an hour before a planned application upgrade).
-
Expires On: A date/time when the notification expires and will no longer be shown to users. At this time, users who have seen and dismissed the message have the notification removed from their notification centers.
-
Body: The content of the message shown to users.
-
-
Click the Send or Schedule button.
A background service sends scheduled notifications. By default, the service is run by the Service User account. To change which user runs the service, follow these steps:
-
Select IDE > Maintenance (Beta), then select the Settings tab.
-
Click the Background Notification User menu, then select the user to run the service.