NetSuite connection guide for Jitterbit App Builder
Overview
This guide describes the system requirements and gives instructions for connecting App Builder to an Oracle NetSuite cloud database server.
System requirements
These are the minimum browser versions necessary:
-
Chrome: 84+
-
Firefox: 73+
-
Safari: 13.0.1+
-
Edge: 84+
-
Internet Explorer: 11+
Connection instructions
To connect App Builder with NetSuite, you must configure an integration in NetSuite and obtain tokens from it, which you will use to establish the connection. The following sections describe how to do each of those things.
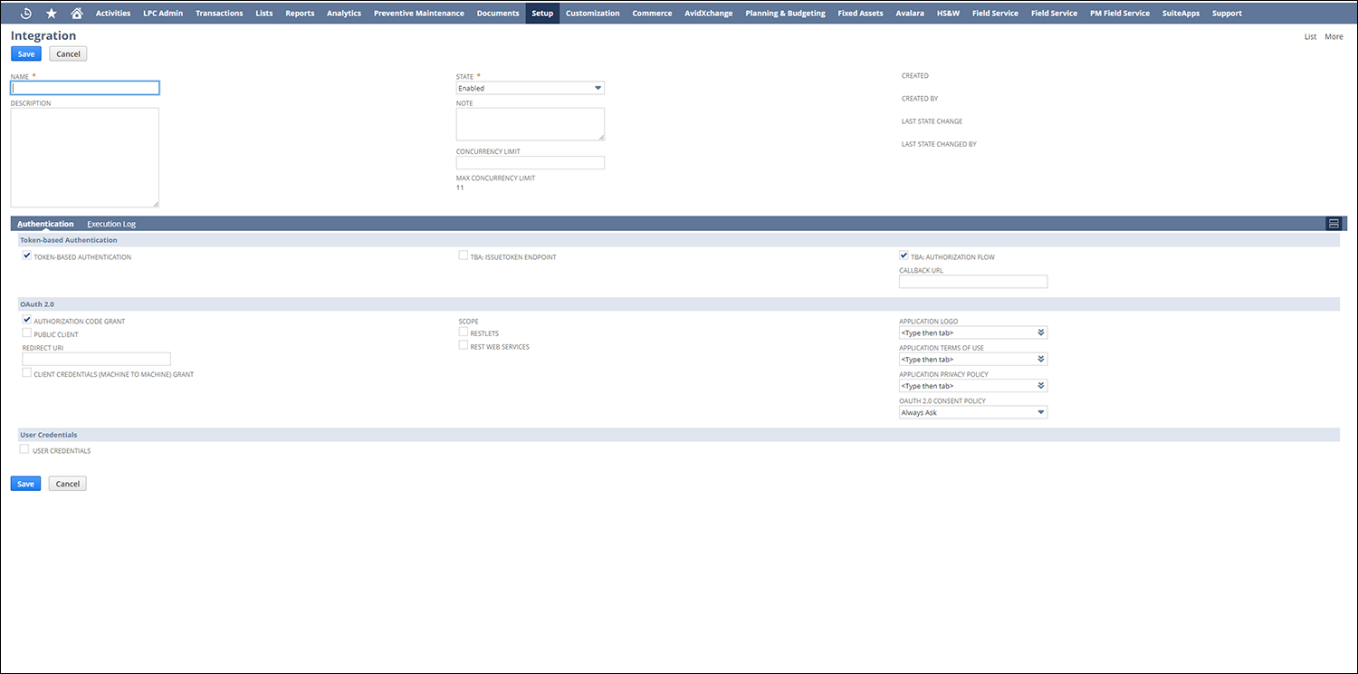
Configure a new NetSuite integration
Follow these steps to create a new integration in NetSuite that App Builder can connect with. You will need administrative access to NetSuite.
-
Log in to NetSuite as an administrator.
-
Navigate to Setup > Integration > Manage Integration > New.
-
Enter the required information and click the Save button. When the integration is configured, NetSuite generates a unique Client ID and Secret. Make a note of these values. You will use them to set up the App Builder connection.
Important
The Client ID and the Secret are only shown once. Make sure to copy their values before proceeding.
Generate access tokens
After you've configured the NetSuite integration, you must generate access tokens to allow App Builder to connect to it.
Follow the steps in the NetSuite documentation to generate tokens. You will need both the Token ID and the Token Secret.
Add a data server
Now that you've configured a NetSuite integration and obtained its access tokens, you are ready to connect App Builder to it. Open App Builder and follow these steps:
-
Select IDE > Data Servers.
-
Click the + Server button.
-
The following fields are shown:
-
In the Server Settings section:
-
Server Name: Enter a name for this server.
-
Type: Click to open the menu, then find and select NetSuite.
-
Instance Name: Enter the ID contained in your unique NetSuite URL. For example, if your URL is
https://1234567.app.netsuite.com/then your instance name is1234567.
-
-
In the Security Settings section:
- Security Provider: (Optional) Select a security provider from the menu.
-
In the Testing section:
-
Test Connection: Click to check your connection credentials. Note that the test will fail if you still haven't completed the Advanced Settings below. Complete the configuration first, then return to this dialog and test the connection.
-
Allow Challenge: Select this checkbox to let App Builder redirect the browser when it gets an OAuth challenge.
-
-
-
Click the Save button.
-
Click the Advanced Settings button in the Server Settings section. The Server (Advanced Settings) dialog opens.
-
Click the Edit button. The following fields are shown:
-
Advanced: In this field, enter the following information:
Schema={{ Schema }};
OAuthClientId={{ OauthClientID }};
OAuthClientSecret={{ OauthClientSecret }};
OAuthAccessToken={{ AccessToken }};
OAuthAccessTokenSecret={{ AccessSecret }};
IncludeChildTables=true;
Make the following replacements:
-
Replace
Schemawith either SuiteQL or SuiteTalk. See SuiteQL and SuiteTalk for help picking one. -
Replace
OauthClientIDwith the Client ID you noted down during integration configuration (see Configure a new NetSuite integration). -
Replace
OauthClientSecretwith the Secret you noted down during integration configuration (see Configure a new NetSuite integration). -
Replace
AccessTokenwith the Token ID you generated previously (see Generate access tokens). -
Replace
AccessSecretwith the Token Secret you generated previously (see Generate access tokens). -
The
IncludeChildTablesparameter is only required if you've pickedSuiteTalkas your schema and you need to write to tables with relationships to see the sub tables.
Note
Other parameters are supported, if you need them. See the NetSuite documentation to learn more.
-
-
Ping Timeout: The amount of time (in seconds) that App Builder will wait for a ping back from the server before timing out. The default value is 10.
-
Escape Query Parameter Name: Select to use parameters with reserved name values. This checkbox is enabled by default.
-
-
Click Save to confirm and save all your settings.
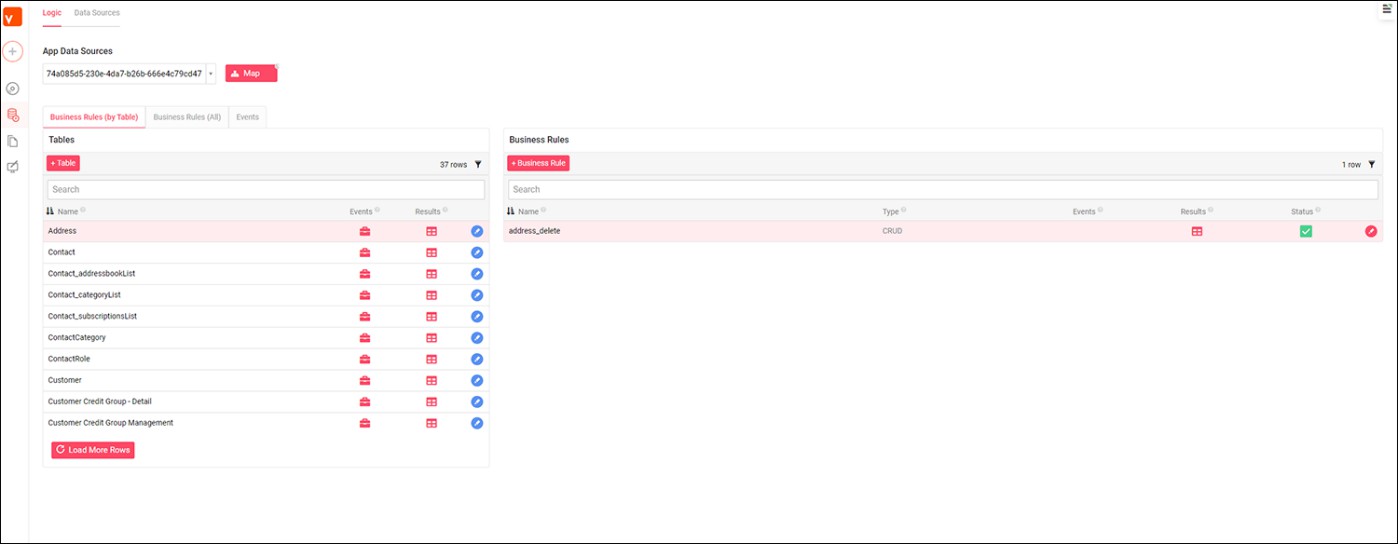
Add a data source
After the server has been added, it needs to be added in App Builder as a data source. To do this, follow these steps:
-
Navigate to IDE > Data Servers.
-
In the Data Servers table, locate the server you've added (see Add a data server above) and select its row. The Data Sources panel on the right will display the new data source, which will have been added automatically. Click Details.
Note
Clicking the Details button on the row of the server in the Data Servers table does not display the same options.
-
The top section will have the name you typed under Server Name when you added the server. Click the Edit button if you want to alter the Data Source Name, and have a unique display name. (By default, it has the same name as the server.)
-
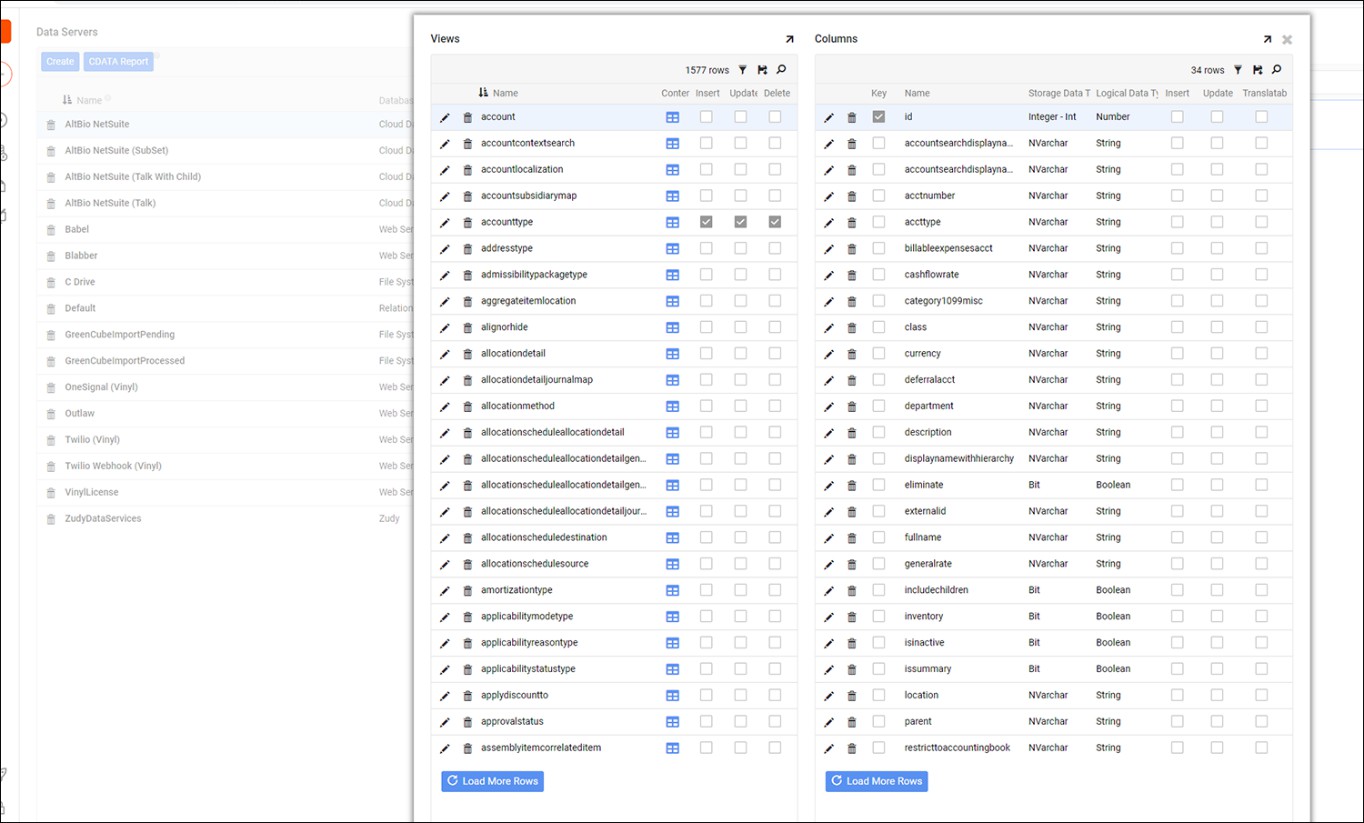
In the Data Storage Layer section, click Import. The Import Schema dialog opens.
-
In the Import From Pattern field, enter the subset of tables you want to import from the database using mvSQL syntax. If this field is left blank, all tables will be imported.
-
Click Import, then Proceed. The import will be scheduled to run in the background. Once you get a successful confirmation message, the tables imported will be displayed below.
NetSuite SuiteQL vs. SuiteTalk Web Services
When you add NetSuite as a data server in App Builder, you need to choose whether to use SuiteQL or SuiteTalk Web Services as your schema. The information below can help you determine which one best suits your needs.
SuiteQL is a query language based on the SQL database query language and used to query data from NetSuite. The default service supported in SuiteTalk is designed using a number of SOAP requests to retrieve data in a format more closely associated with the saved searching in NetSuite. This means that SuiteQL can be used to handle much more complicated queries than SuiteTalk. For instance, joins, aggregations, group by, order by, and formulas can all be handled server side using SuiteQL. Within App Builder itself, SuiteQL will allow you to display Objects as Views.
SuiteTalk Web Services is a SOAP-based web service used for integration with external systems, in this case App Builder. By design, SuiteTalk will only support some joins and predicates. SuiteTalk will provide you with table endpoints based on SOAP endpoints in NetSuite.
In general, SuiteQL is a more powerful option for executing queries faster against NetSuite due to its advanced support for handling SQL. Our recommendation is to use Suite QL for reading and object building and SuiteTalk for writing and updating data.
Limitations
-
NetSuite limits concurrency of queries that run against it by connection and licenses by connection pool, which impacts read performance.
-
NetSuite has some custom rules on filters that you will need to manipulate your data format to be able to properly filter.
-
NetSuite does not support the use of parentheses in object names.
Troubleshooting
If you experience issues with the Oracle NetSuite server, these troubleshooting steps are recommended:
-
Enable data logging to generate log files and data, which you can download and inspect.
-
Refer to the CData ADO.NET Provider for NetSuite documentation for detailed information.