Import an OpenAPI (Swagger) document to create an endpoint in Jitterbit App Builder
Introduction
Since version 4.45, you can create a REST endpoint from an OpenAPI (Swagger) document. App Builder uses the OpenAPI.net library, and supports document versions from Swagger 2.0 to OpenAPI 3.1 inclusive.
You can create an endpoint from either of these places:
-
IDE > Data Servers
-
App Workbench > Data Sources
This page shows the steps for both.
Create a REST endpoint from an OpenAPI (Swagger) document via the IDE
Follow these steps:
-
Select IDE > Data Servers.
-
Click the + Server button. The Server dialog opens.
-
Set values for the following:
-
Server Name: Enter a name for the server.
-
Type: Select REST API. (REST is automatically selected for Subtype.)
-
URL: Enter the endpoint root (base URL).
-
(Optional) Description: Enter a description.
-
-
Click the Save button.
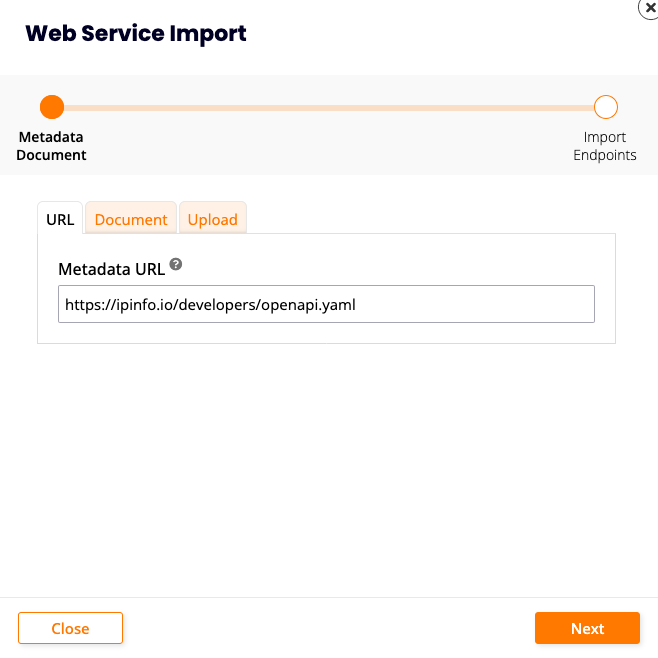
The following example uses the OpenAPI test document URL
https://ipinfo.io/developers/openapi.yaml: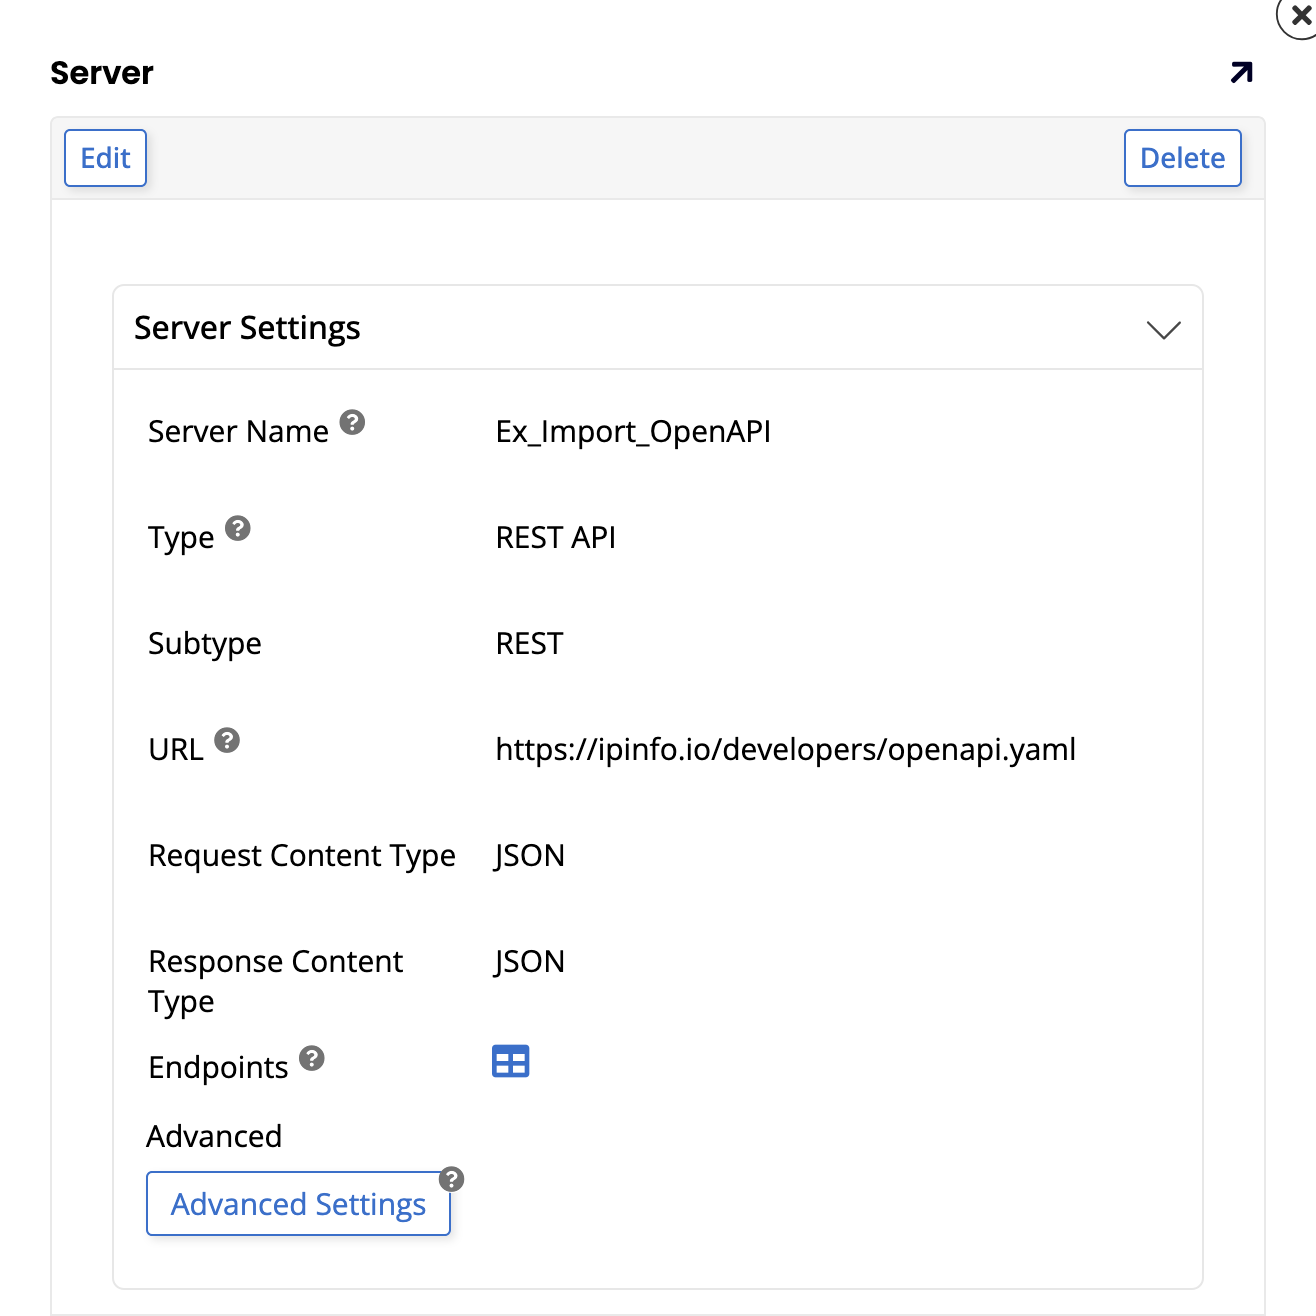
-
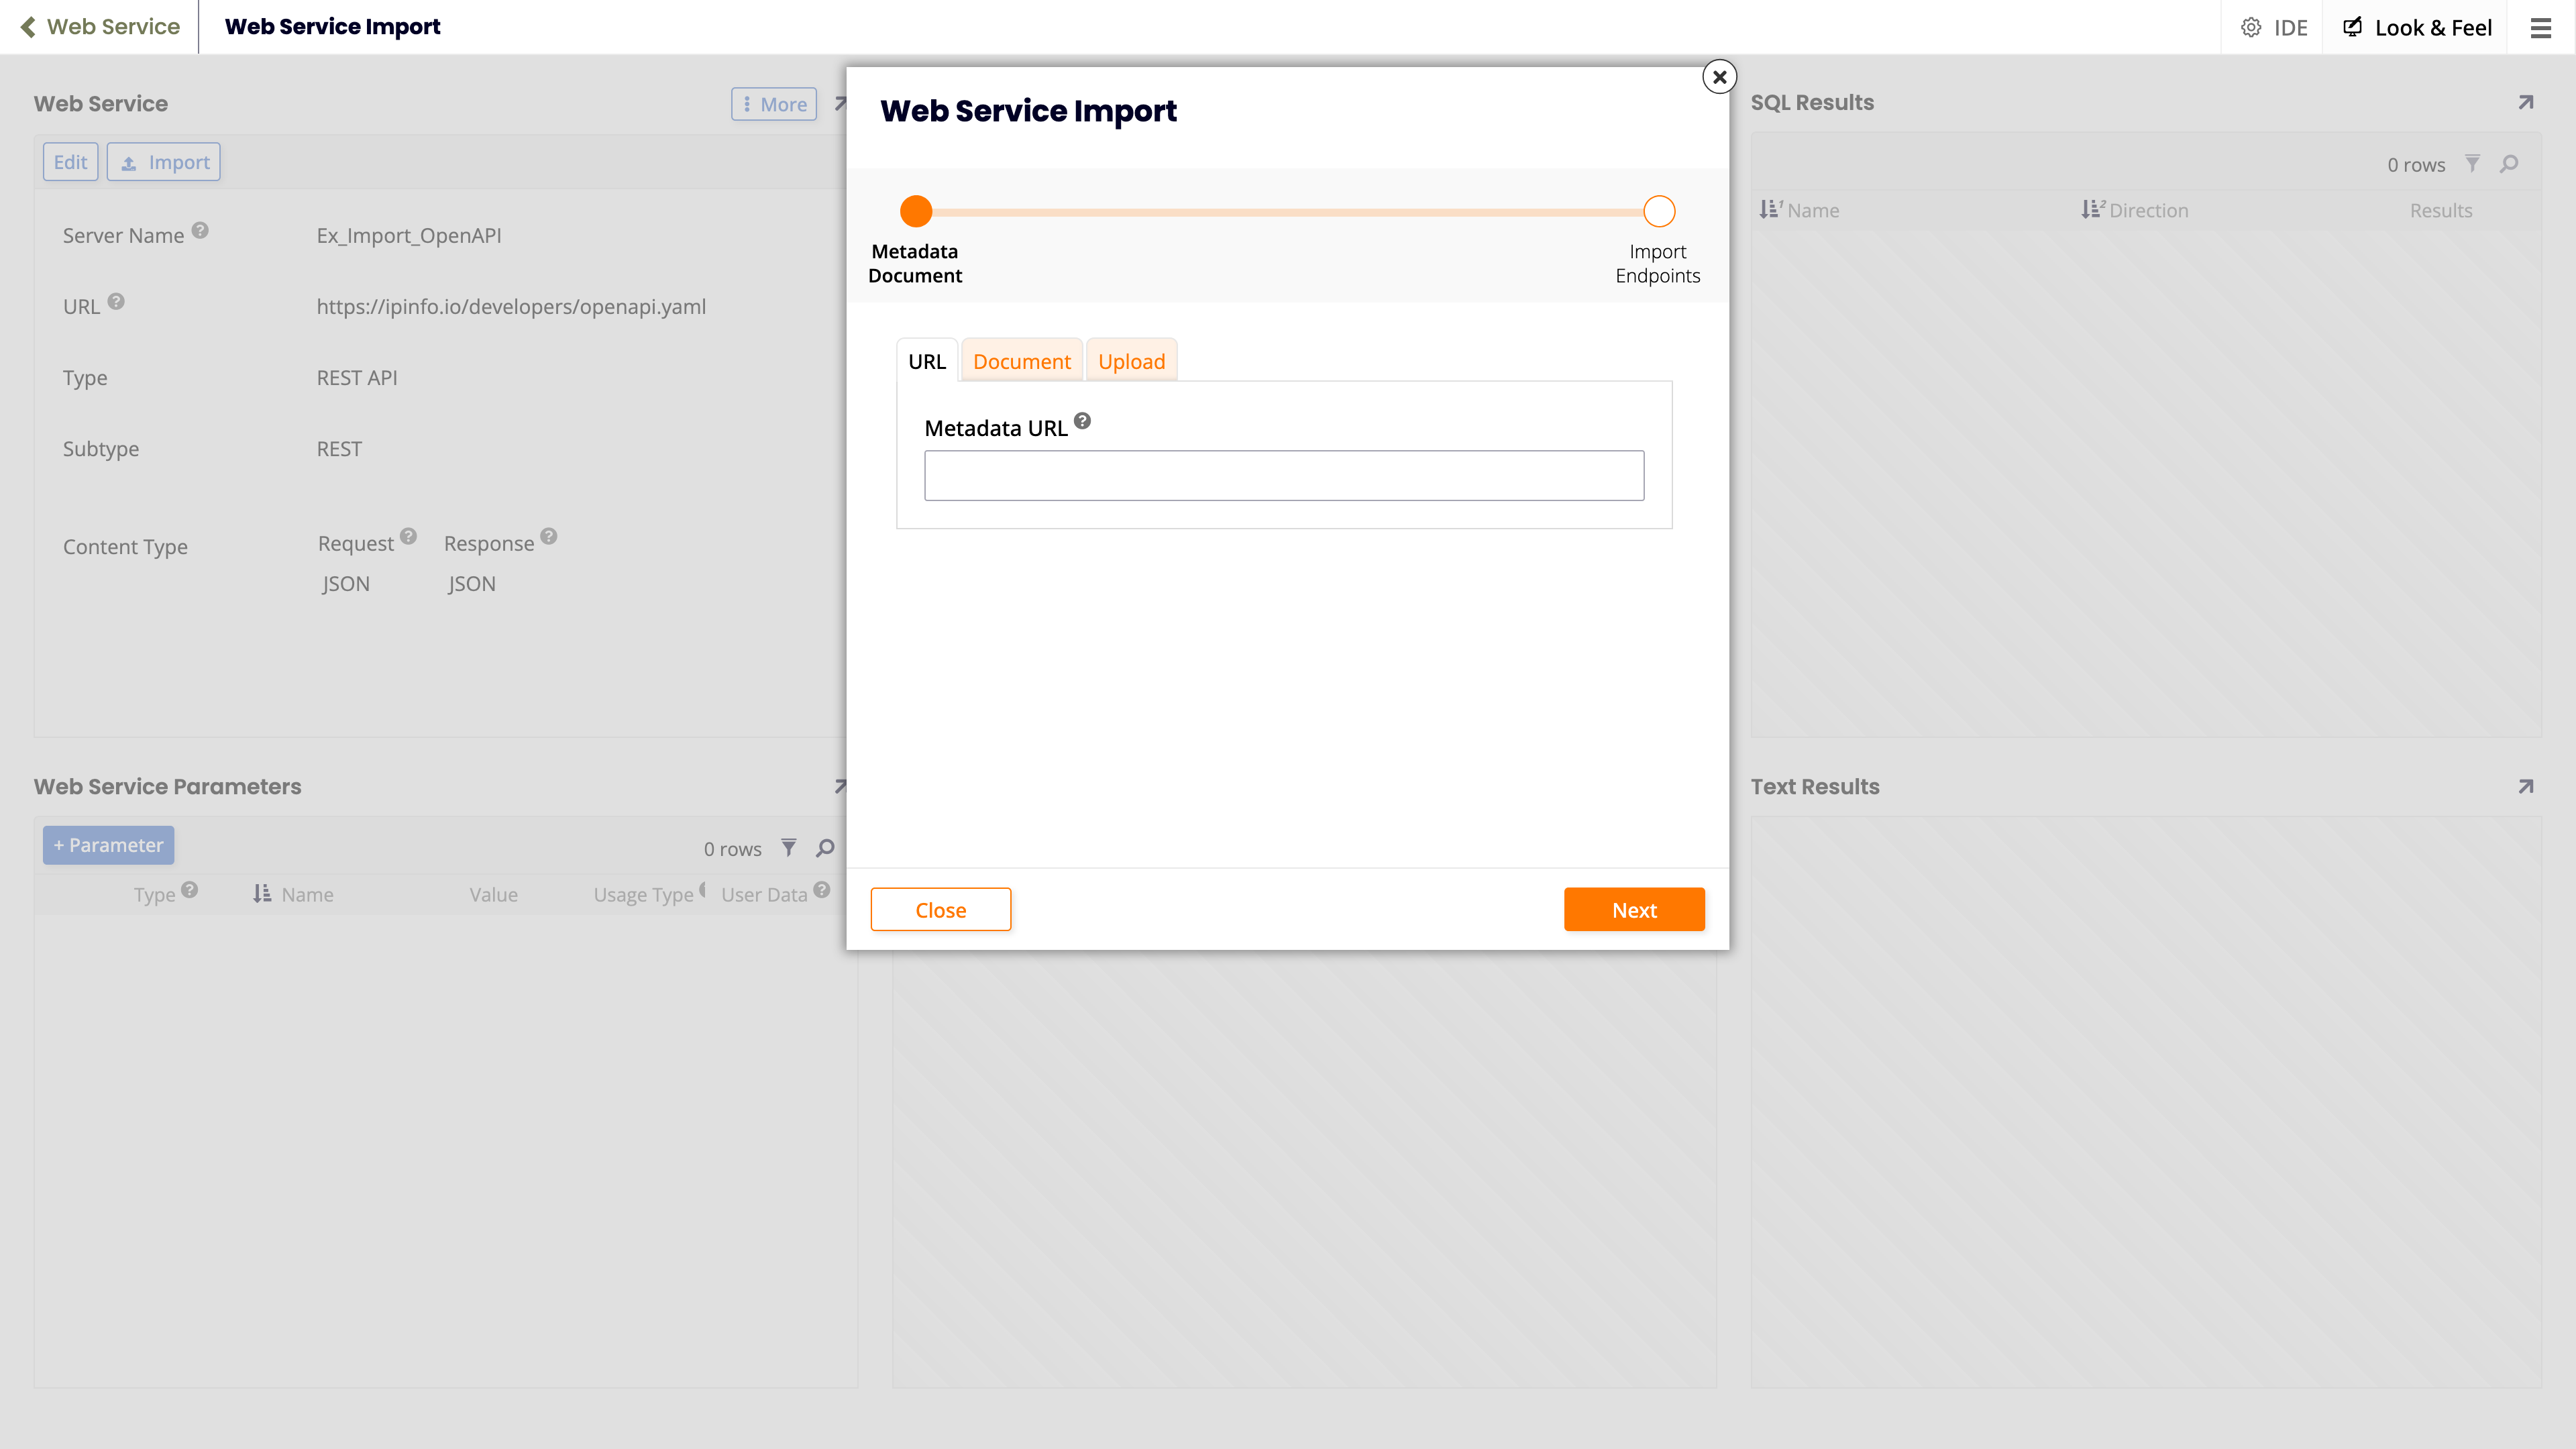
In the Server dialog, click the Endpoints icon.
-
In the Web Service panel, click the Import button. The first page of the Web Service Import wizard dialog opens:
-
Select one of the following tabs, depending on how you want to provide your document:
-
URL: Select to provide a URL for the document.
-
Document: Select to paste the content of a document.
-
Upload: Select to upload a document from your file system.
-
-
Click the Next button. The second page of the Web Service Import wizard dialog opens:

-
(Optional) To import one or more endpoints, do either of the following:
-
Enter a pattern in the Import by Name field, then click the Import button.
A pattern is a comma-delimited list of wildcard expressions which select a subset of tables to import. Each pattern uses the mvSQL
LIKEsyntax. You can use%to match zero or more characters, and_to match a single character. Characters in square brackets (for example[abc]) match any character in the group. -
Click any of the Import Schema buttons to import endpoints.
-
-
Click the Finish button.
Create a REST endpoint from an OpenAPI (Swagger) document via the App Workbench
Follow these steps:
-
Select App Workbench from the action drawer, or Workbench from the application menu, then click Data Sources.
-
Click the + Source button. The Add a Source to your Application dialog opens.
-
Select the New Connection option, then click the Next button. The Choose Connection Type wizard page opens.
-
Under Connection Category, select the REST option.
-
Under Types of Connections, select the REST API option, then click the Next button.
-
Select or set up a security provider, or click the Skip button. The Create New Connection wizard page opens.
-
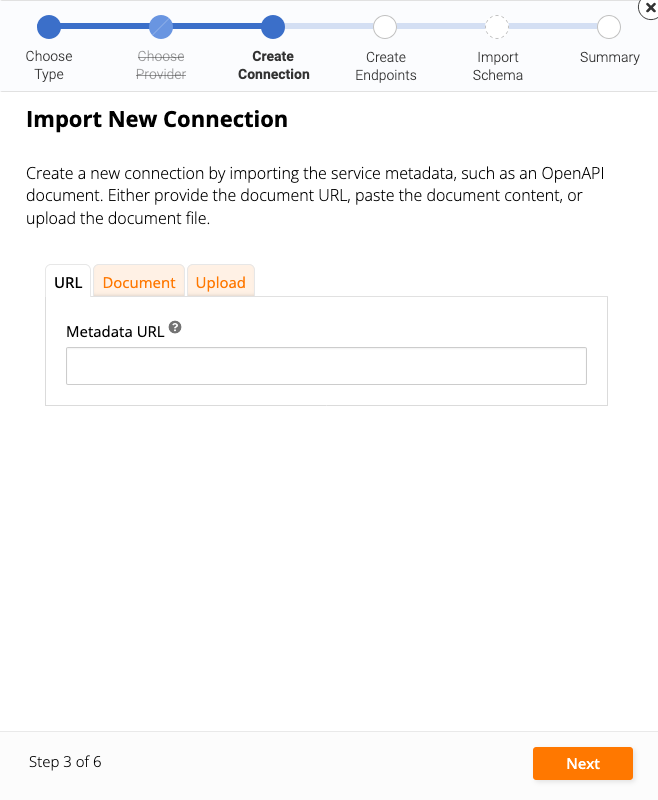
Click the Import button. The Import New Connection dialog opens:
-
Select one of the following tabs, depending on how you want to provide your document:
- URL: Select to provide a URL for the document.
- Document: Select to paste the content of a document.
- Upload: Select to upload a document from your file system.
-
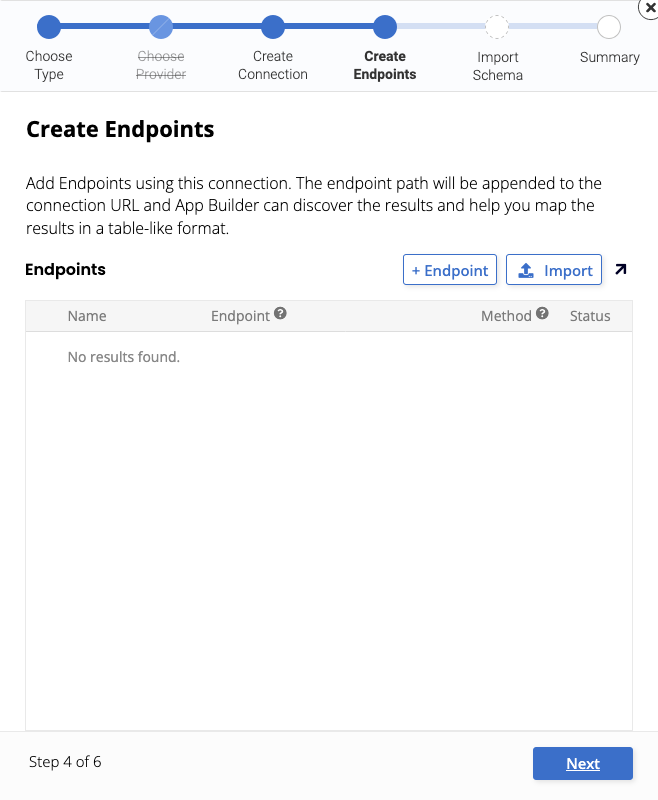
Click the Next button. The Create Endpoints dialog opens:
-
Click the Import button. The Web Service Import dialog opens again:
-
Click the Next button.
-
(Optional) To import one or more endpoints, do either of the following:
-
Enter a pattern in the Import by Name field, then click the Import button.
A pattern is a comma-delimited list of wildcard expressions which select a subset of tables to import. Each pattern uses the mvSQL
LIKEsyntax. You can use%to match zero or more characters, and_to match a single character. Characters in square brackets (for example[abc]) match any character in the group. -
Click any of the Import Schema buttons to import endpoints.
-
-
Click the Finish button. The Create Endpoints wizard page reappears:
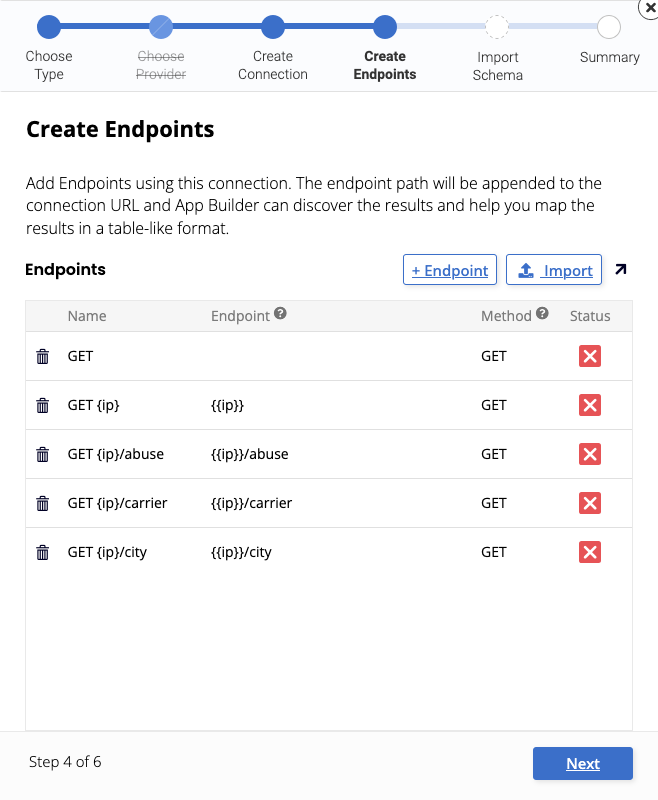
-
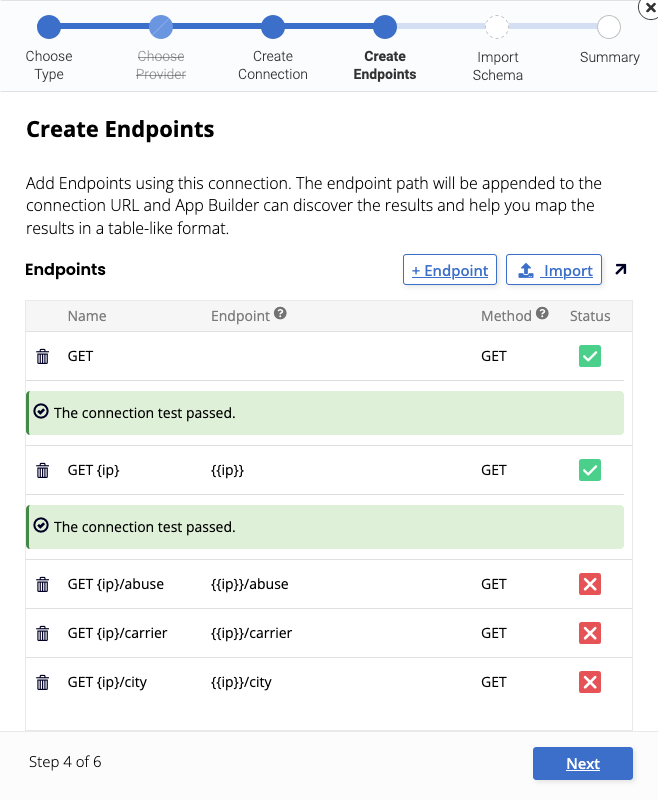
To test the endpoints, click any of the icons in the Status column. When successful the icon changes to :
-
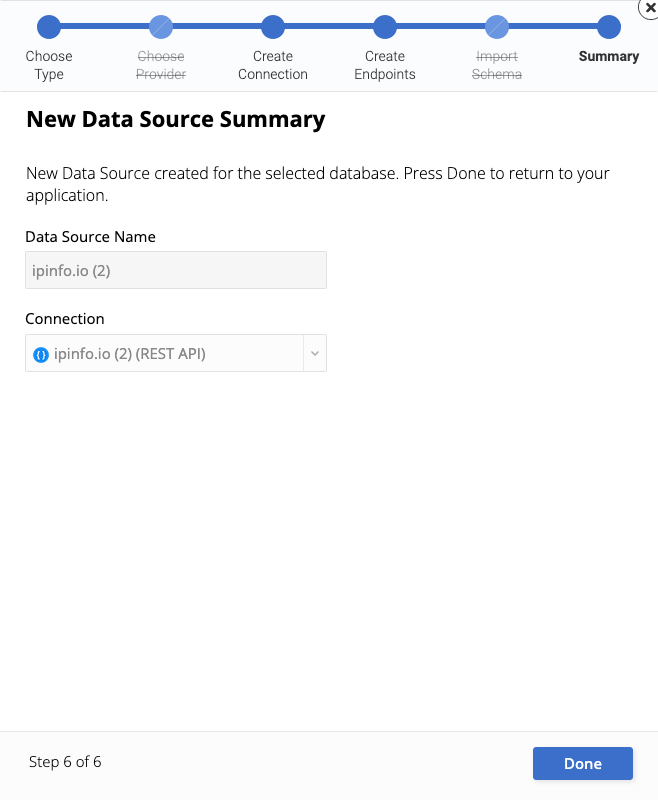
Click the Next button. The New Data Source Summary dialog opens:
-
Click the Done button.