Build an app with the Jitterbit App Builder AI Assistant
Introduction
Since version 4.45, you can use the App Builder AI Assistant chatbot to design and build new applications, and modify existing ones.
Interactions are real-time chat sessions consisting of your inputs (or prompts) and the AI Assistant's responses to them. You can use text or images to explain what you want, or to find out what the AI Assistant can do. The AI Assistant has many capabilities, but also some limitations.
This table shows the languages that you can chat in, and the App Builder version in which support for the language was added:
| Language | Version |
|---|---|
| English (US) | 4.45 |
| German | 4.50 |
| Portuguese (Brazil) | 4.50 |
Prerequisites
To use the Jitterbit App Builder AI Assistant, you must have the following:
-
The Jitterbit App Builder AI Assistant option included in your App Builder license.
Important
AI Assistant features are hidden unless your Harmony license includes the App Builder AI Assistant option. Contact your Customer Success Manager (CSM) to have the App Builder AI Assistant added to your Harmony license.
-
An API key from Azure OpenAI (since App Builder 4.48) or OpenAI. The model deployment must have a TPM (tokens per minute) rate limit sufficient for your usage. For a single concurrent developer, we recommend at least 550,000 TPM allocated to the model.
Tip
Azure OpenAI has TPM quotas and rate limits. Default TPM quotas vary by Azure account type. You can view and configure your TPM quota up to the maximum allowed for your subscription offer type via the Azure AI Foundry portal. If your allowed maximum TPM quota doesn't meet the minimum recommendation, you can submit a request to increase the limit.
Open AI's TPM limits are based on your usage tier and model. See rate limits for the OpenAI GPT-4.1 model to ensure your usage tier supports the required TPM limit.
Build an app using the AI Assistant
To build an app with the Jitterbit App Builder AI Assistant, follow these steps:
-
You can open the AI Assistant using either of these options:
-
Select Action Drawer > AI Assistant.
-
On the Site Menu, click the AI Assistant button.
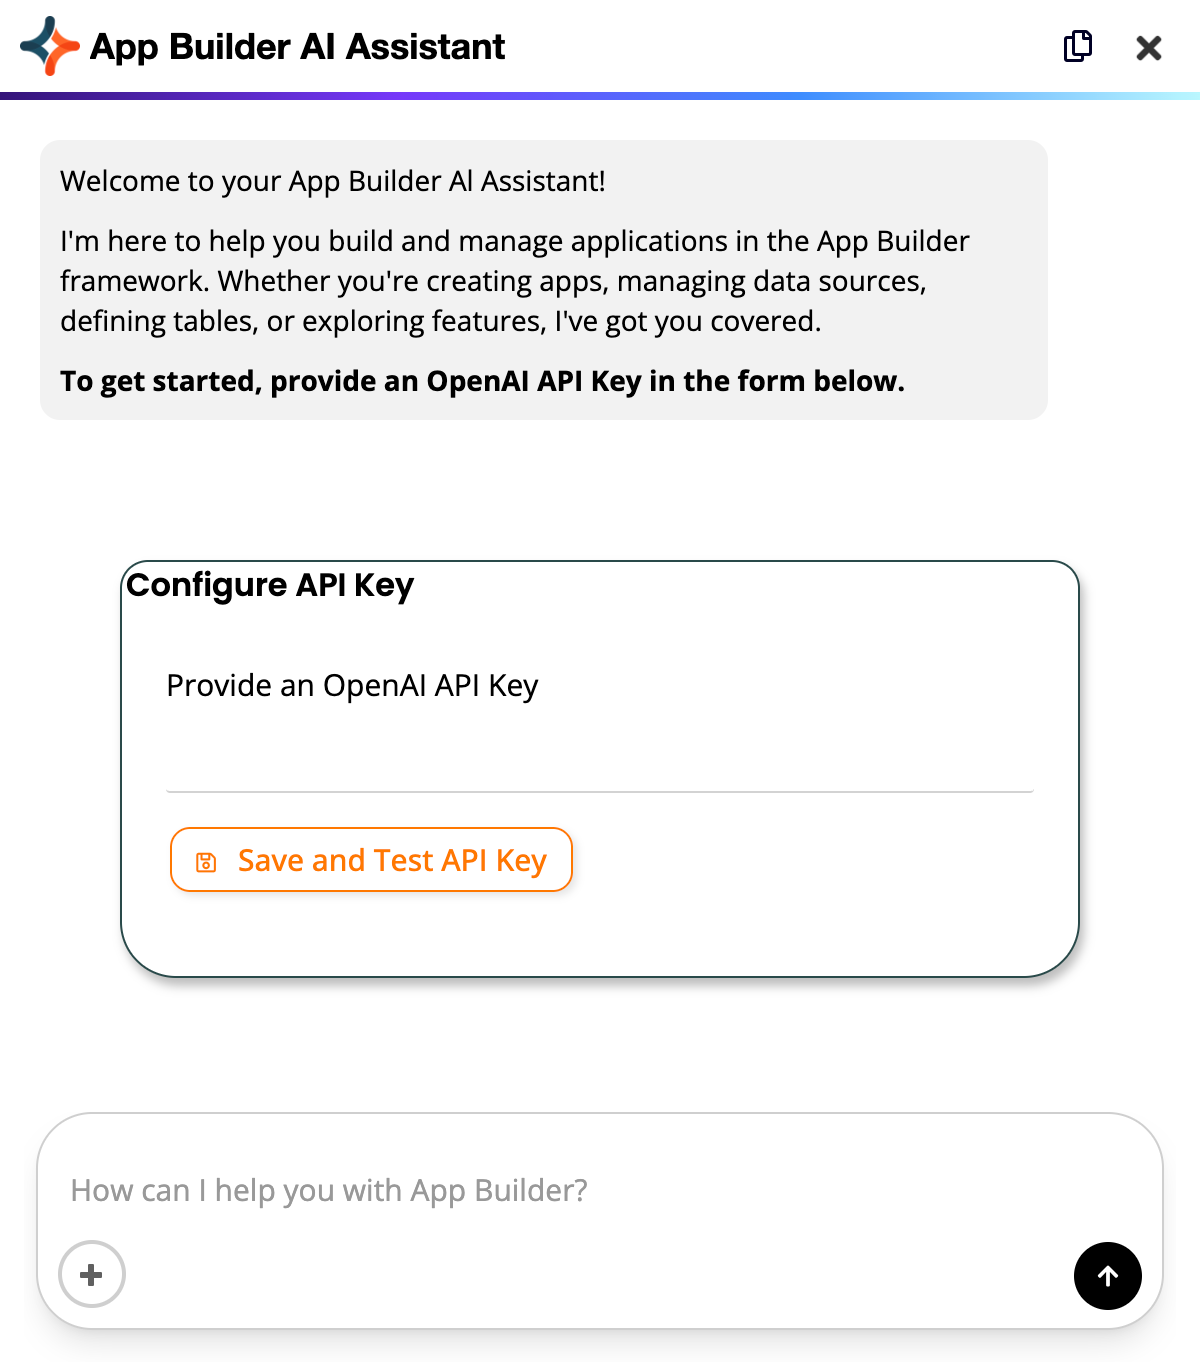
The App Builder AI Assistant panel appears on the right side of the screen:
-
-
The first time you use the AI Assistant, it will prompt you to add an API key. You only need to do this once. The AI Assistant will prompt you again in future sessions only if you don't already have an API key set.
Enter your API key, then click the Save and Test API Key button to verify connectivity. (As an alternative you can set the API key through the UI.)
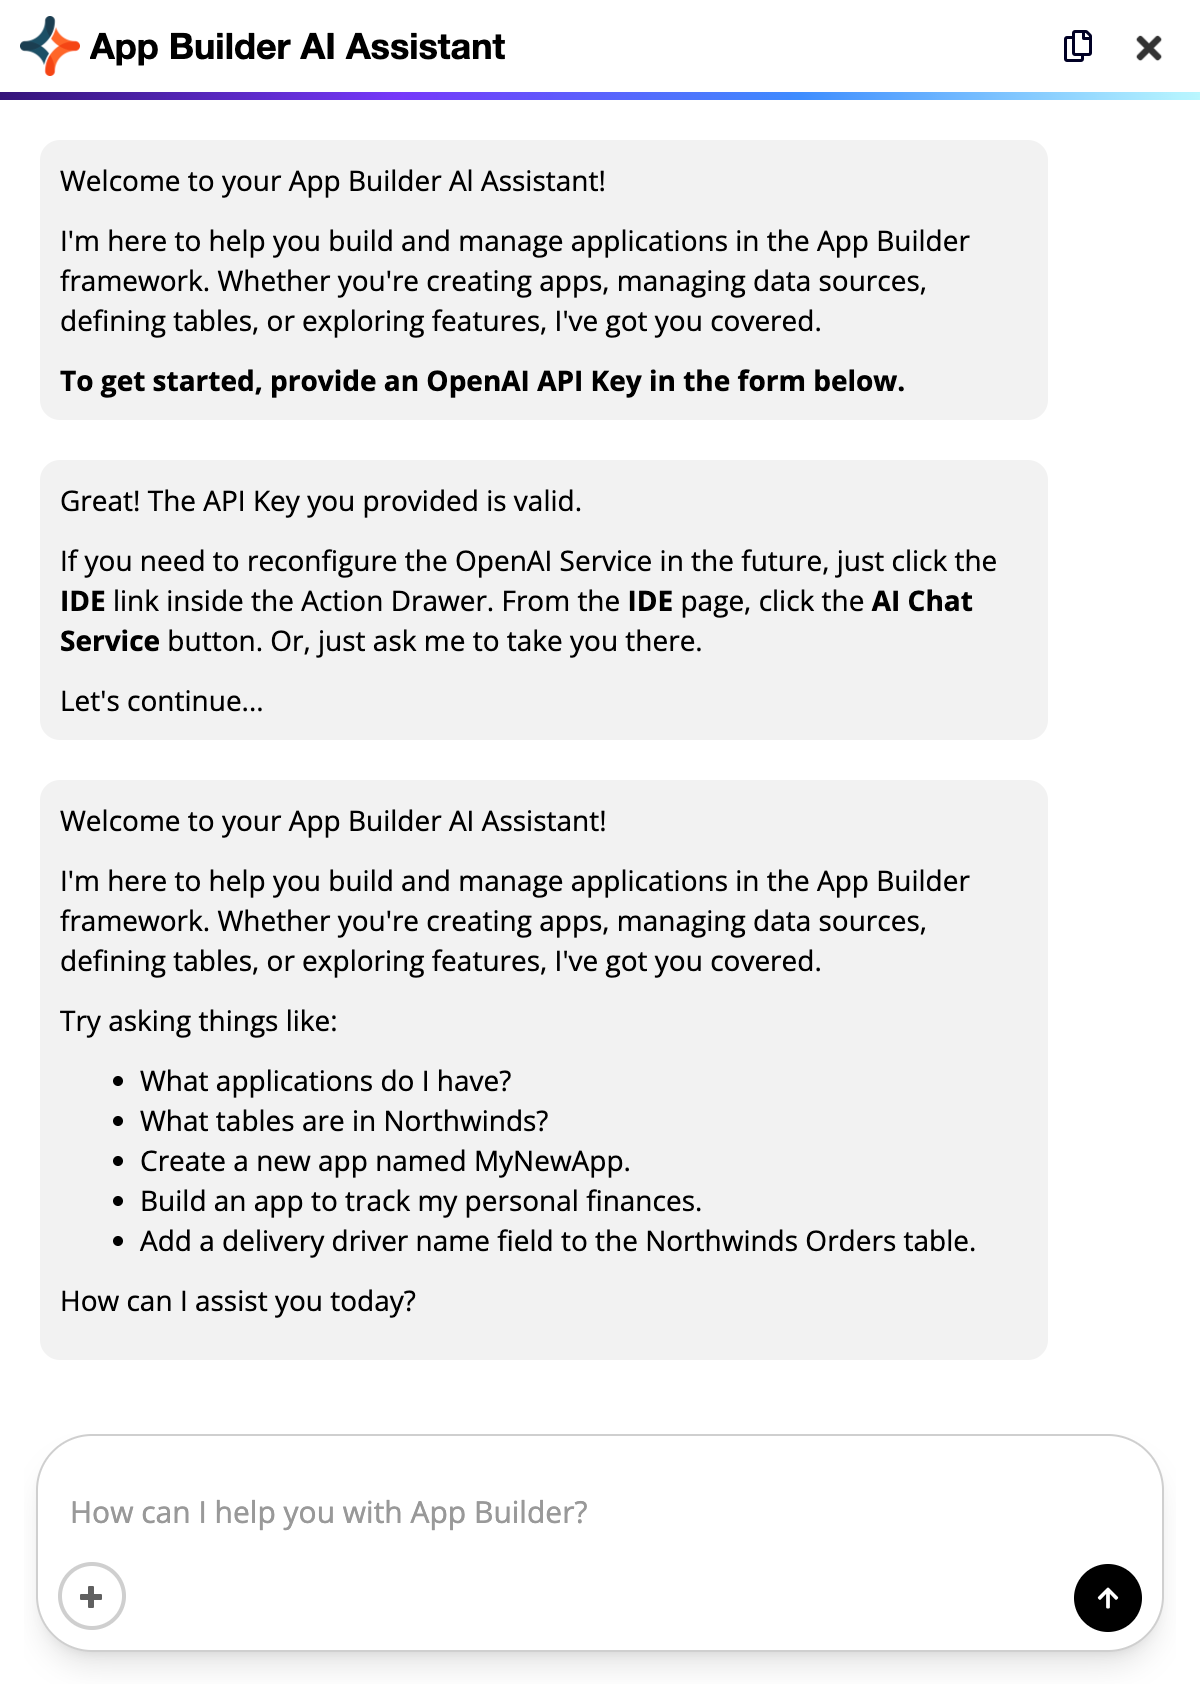
If the API key test is successful, the AI Assistant lets you know and displays an introduction. This introduction will appear each time you open a chat session.
-
Read the introduction, then begin typing prompts to design and build your app.
To submit prompts, press Enter or click the Submit button.
To include images in your prompt, click the Upload an image button.
-
You can accept, correct, or refine the AI Assistant's suggestions, or ask for refinements or alternatives.
Building an app this way an interactive and iterative process that usually needs several prompts and responses, possibly spread over more than one chat session.
-
When you are happy with what the AI Assistant describes, tell it so.
When it has built the app, it provides a link to it. Click the link to open the app.
After you have tested the app, you can ask the AI Assistant to modify it.
AI Assistant administration
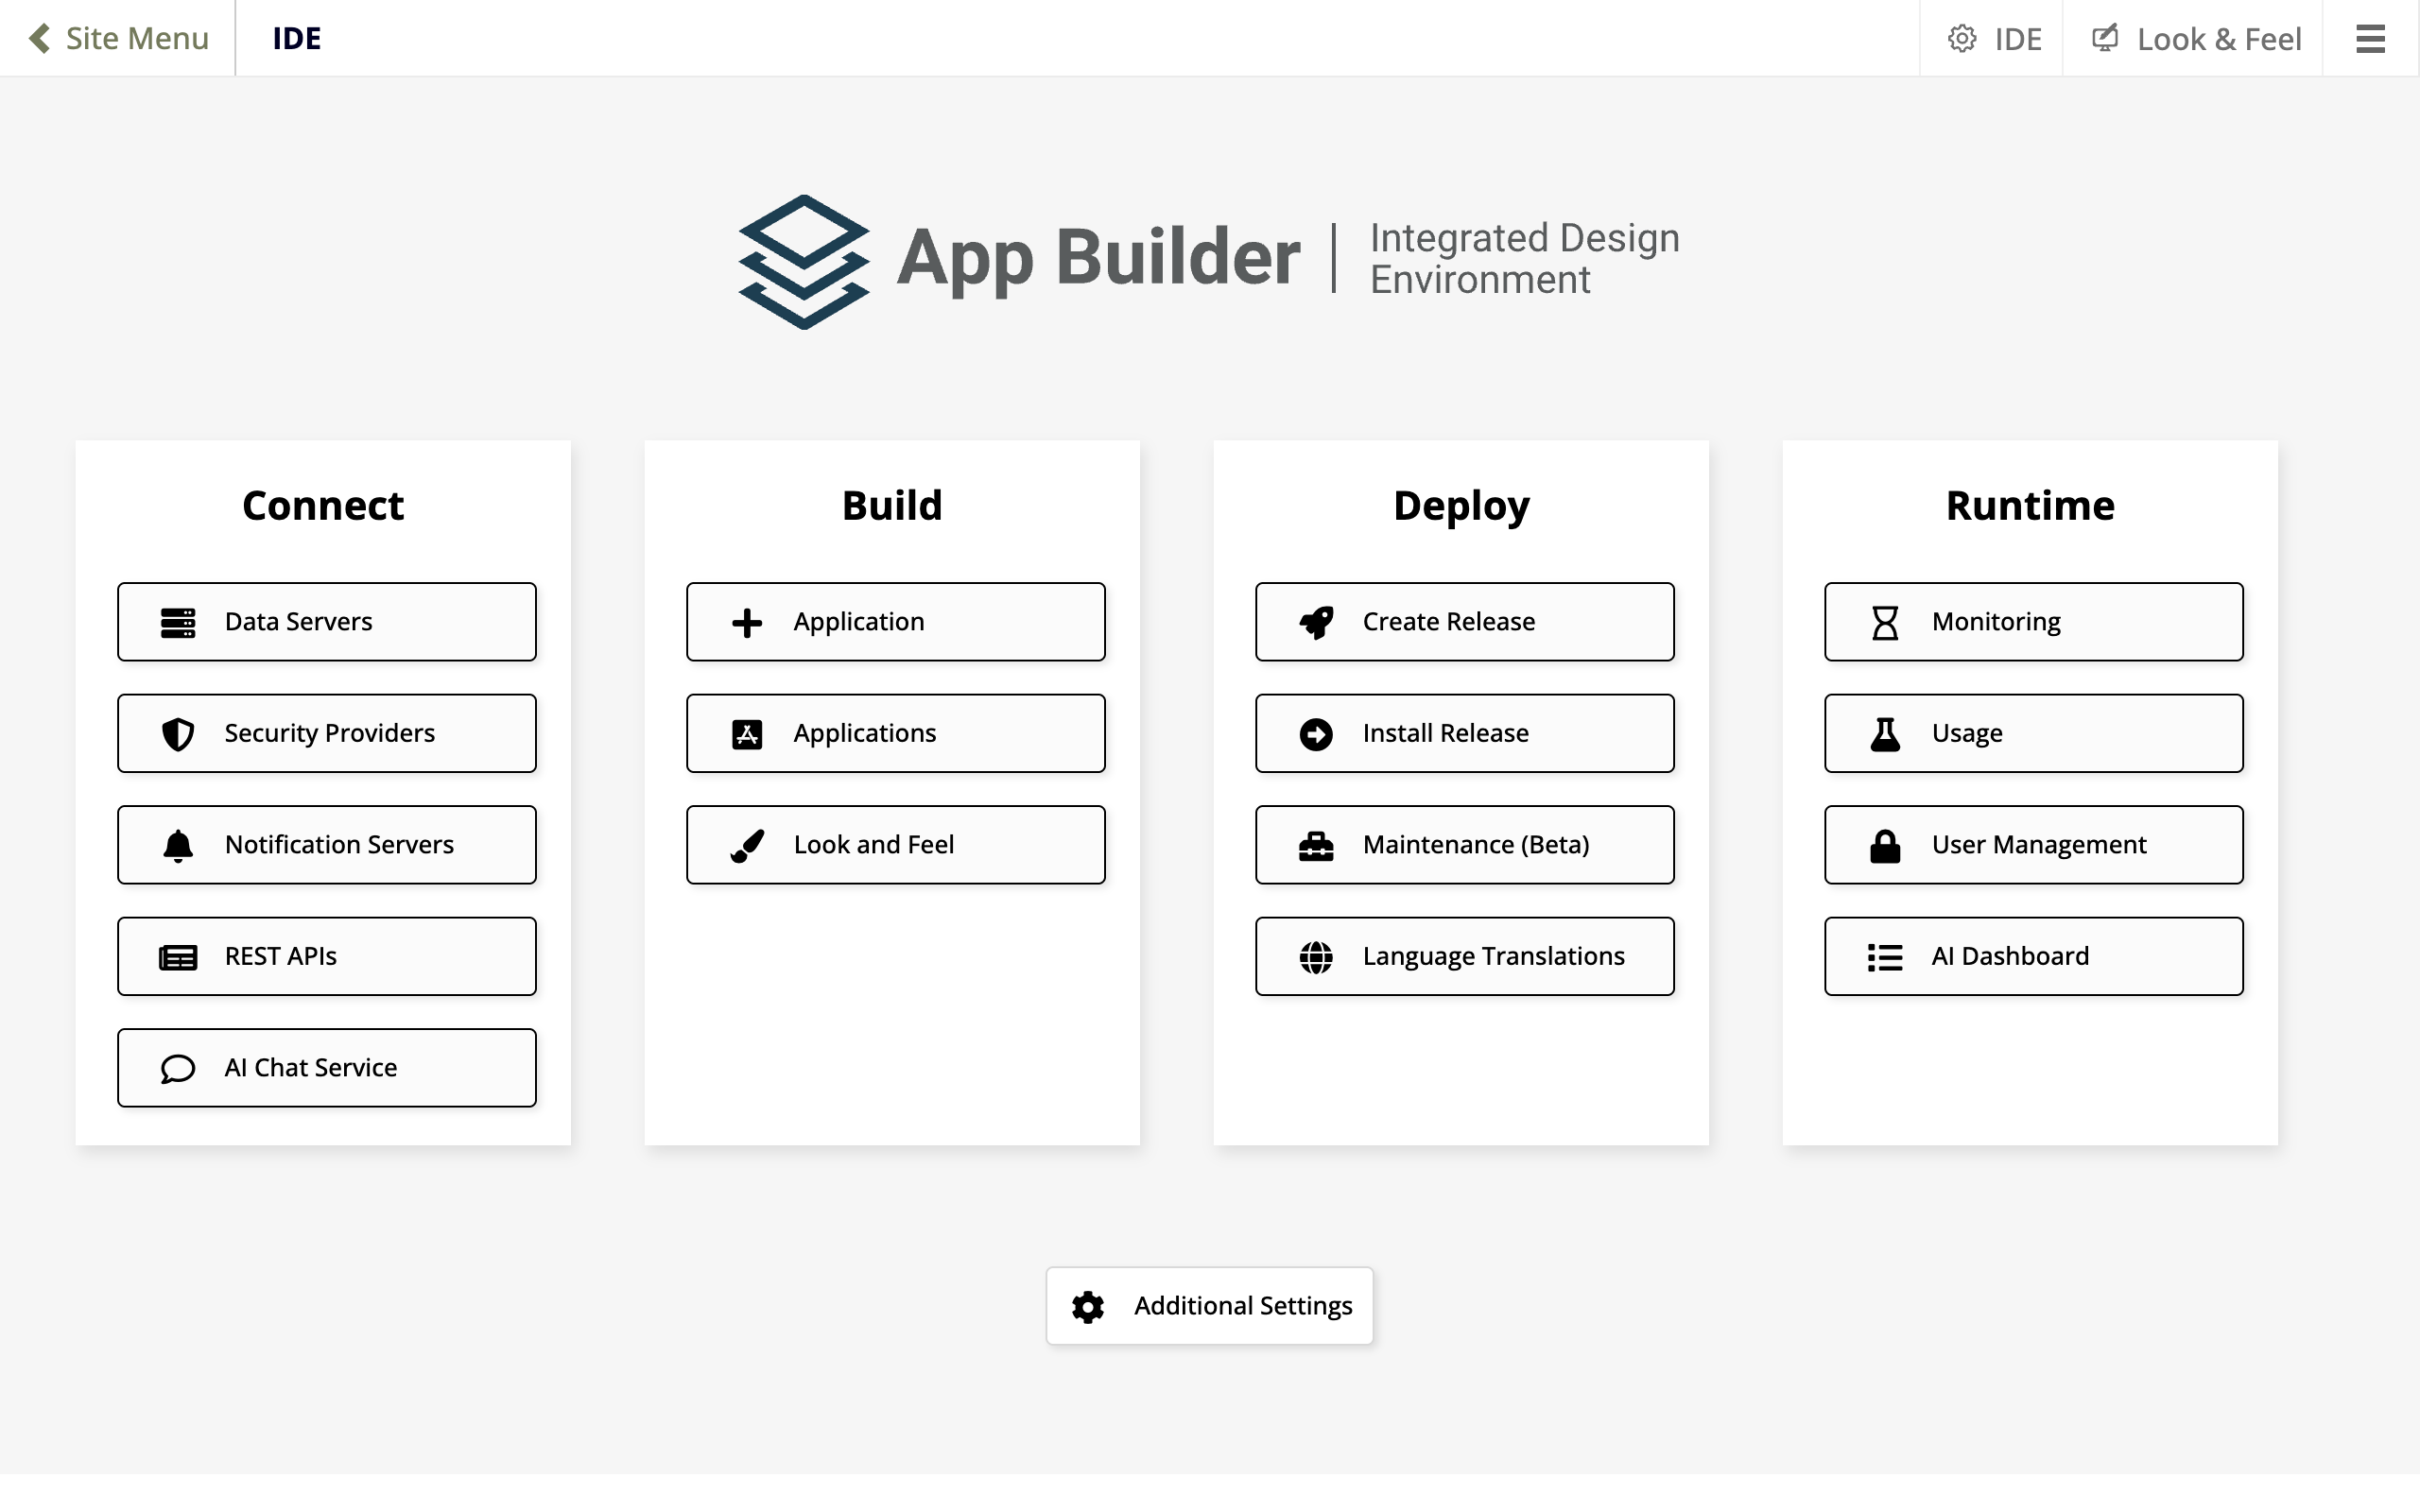
When AI Assistant features are enabled, the IDE includes two additional buttons, under the Connect and Runtime sections:
-
AI Chat Service: Click to set your API key, and change the LLM.
-
AI Dashboard: Click to go to the dashboard, a chat management and messages page.
Set your API key
When you open the AI Assistant without an API key configured yet, it will prompt you to add an API key through the chat window.
To set an API key through the UI, follow these steps:
-
Select IDE > AI Chat Service. The AI Service dialog opens.
-
Set values for the following:
-
Api Key: Enter your API key.
-
Model: Click to open the menu, then select the model for the AI Assistant to use. (Currently, models from OpenAI and Azure OpenAI are supported. Jitterbit tests and supports only the gpt-4.1 model from each vendor.)
-
-
(Optional) Click the Test button to test your API key.
-
Click the Save button.
Tip
You can also set the API key in the AiServices section of the appsettings.json file, but the setting here takes precedence.
AI Dashboard
The AI Dashboard is a page to help you or Jitterbit Support debug chat sessions and inspect their performance:
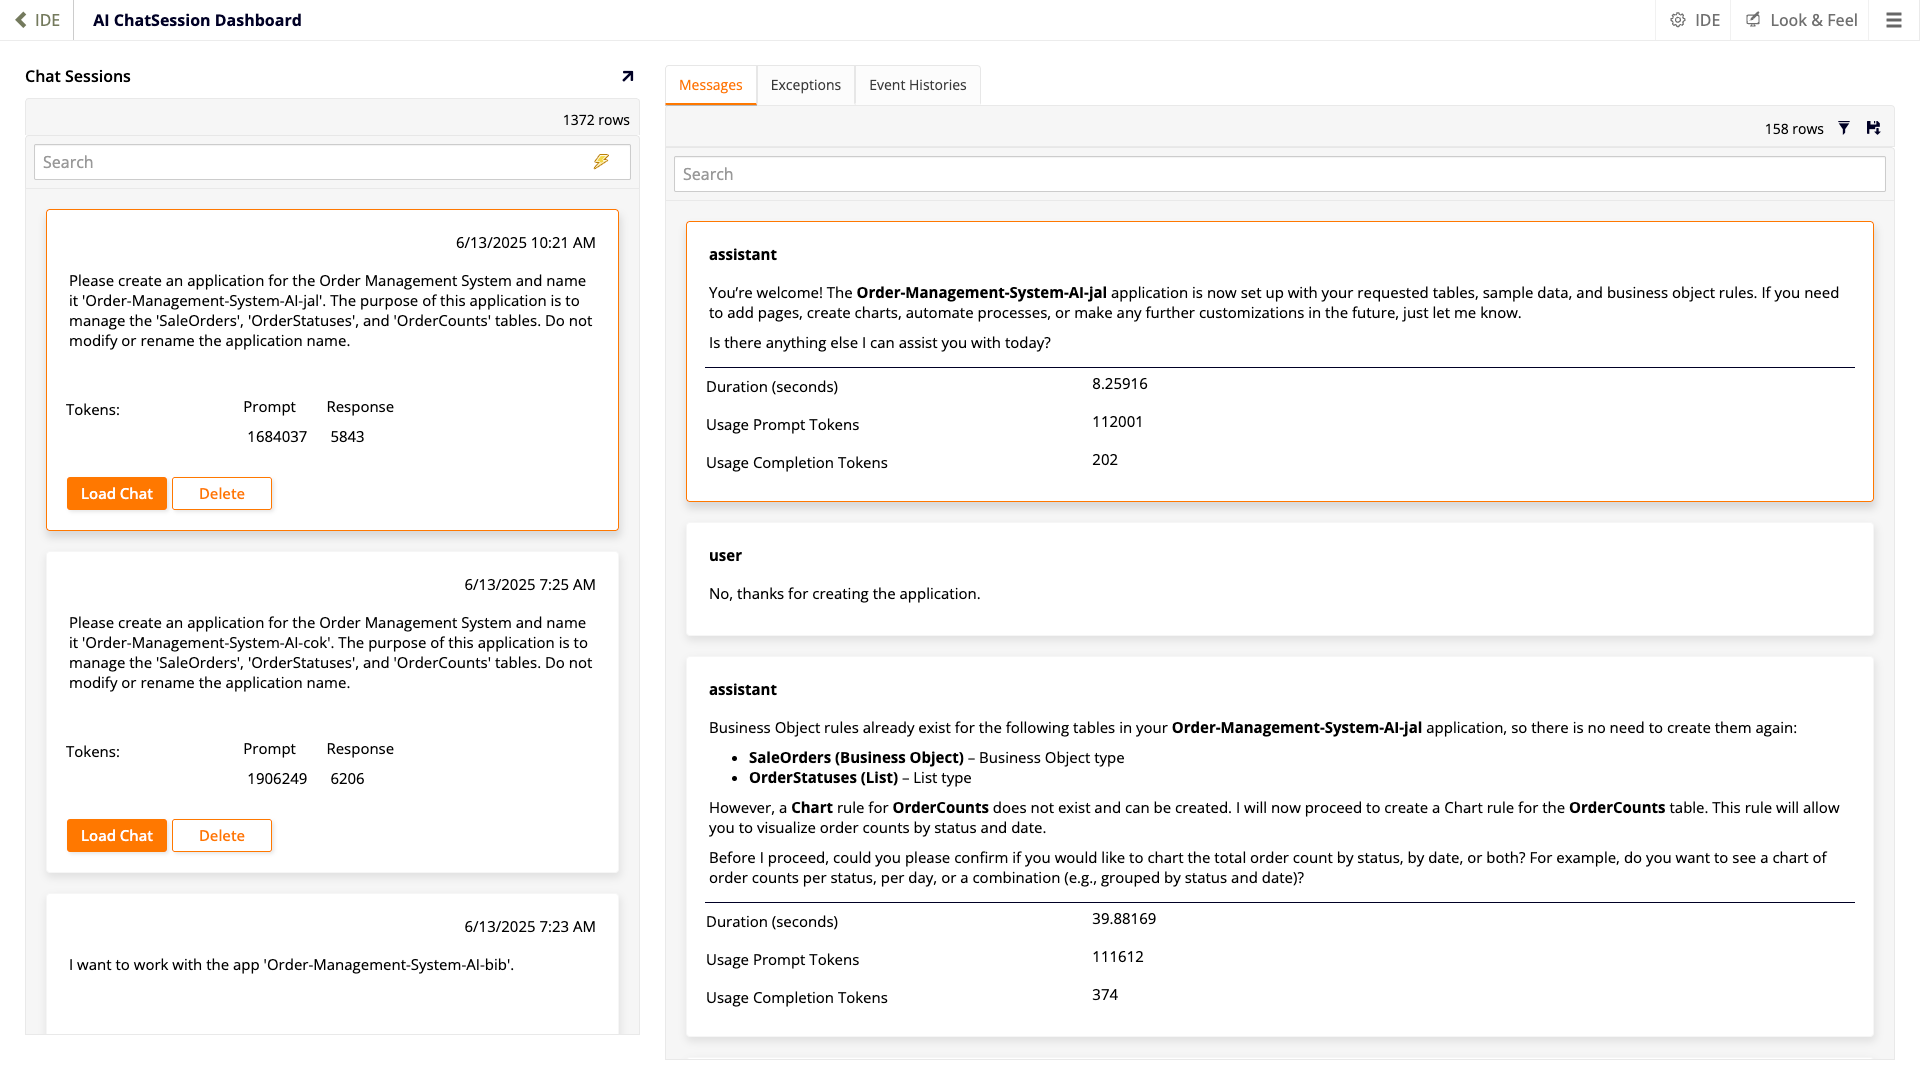
The page consists of the following sections and tabs:
-
Chat Sessions section: Shows all AI Assistant chat sessions for all users. Each session box includes the date and time when the chat began, and how many LLM tokens were used for prompts and responses. Use the search bar to search chats by their
ChatSessionId. When you click a session, messages related to it are loaded into the Messages tab.To load the chat session (all prompts and responses) into the AI Assistant chat window, click the Load Chat button. Once loaded, click the chat window Copy button to copy the text of the entire chat session to your system clipboard. To permanently delete a chat session, click the Delete button.
-
Messages tab: This shows the content of each individual user prompt and AI Assistant response for the selected chat session. AI Assistant messages include the duration in seconds, and the number of prompt and completion tokens used. Click the Filter icon to open a dialog where you can set various filters for messages.
-
Exceptions tab: This shows exceptions for debugging purposes.
-
Event Histories tab: This is a table showing App Builder events for debugging purposes.
Capabilities and limitations
Currently, the Jitterbit App Builder AI Assistant can do the following:
-
Create and configure applications.
-
Link and manage data sources.
-
Design schemas (define tables, columns, and relationships).
-
Generate and insert test or example data.
-
Create UI pages, panels, and fields.
-
Build business rules (queries, CRUD, validation, and defaults).
-
Set up events and actions (including notifications).
-
Select and preview themes.
The AI Assistant cannot do the following itself. You must do them manually using the App Builder UI:
-
Develop custom plugins, stored procedures, or external code.
-
Create or configure advanced API endpoints.
-
Configure database servers or advanced connections.
-
Manage advanced security, users, or roles.
-
Manipulate production or non-test data.
-
Develop custom UI widgets or components.
-
Configure IDE-only features (responses, plugin actions, system settings).
Additionally, there are the following known issues with the AI Assistant:
-
The AI Assistant may ask you to specify which page you wish to work on even if you are currently viewing the app page in question. (The AI Assistant cannot see which app page you are currently viewing.)
-
The AI Assistant may have difficulty deleting objects that are referenced by other objects. (For example, it can't delete a table if there are rules and pages referencing it.)
Example prompts
The App Builder AI Assistant is an assistant in the broadest sense of the word. It can answer questions, give you ideas for apps, suggest improvements to existing apps, or outline its plan of approach, all before it starts building an app. These example prompts should give you an idea of what you can ask the AI Assistant.
Tell me which parts of an app you can build, and which parts you can't.
What current apps in the system have the most tables?
Give me an outline of how you would build an app for retrieving and storing foreign currency exchange (FX) rates.
Create an HR application called "My HR" handling all HR functionality at my global clog company. We have 18,000 employees. I need an enterprise level HR application with an enterprise level schema. Basically, You come up with the schema and the page design since I don't know anything about HR. Again, think of any large HR system, think of all of the functionality supported by those systems, think of the schema required to support that functionality, and build that for us. When planning the schema, include Lookup tables in your design, and do not limit yourself in any way.
Remove the Activity Types page from the CRM app
Important
You are prompted to confirm this action. Deleted pages cannot be recovered.
In the CRM app, create a new page called 'Activity Types'. Add it to the 'Configuration' menu, and make it a 'Popup Form' type. Next, add a 'Grid' panel. For its source, create a new rule called 'ActivityType (Business Object)'. Select all columns for the rule and the panel. Take me to the page when done.
Add a new page to the CRM app that looks like the one attached.
Submit a request to increase your TPM quota
If using Azure OpenAI and your TPM quota doesn't meet Jitterbit's 550,000 minimum recommendation, you can use Microsoft's request form to request an increase.
Here is a sample of what to provide in the Justification field of the request, replacing the information highlighted below:
I will be using the GPT-4.1 model to run the AI Assistant for Jitterbit App Builder, a low-code application development platform. Jitterbit recommends a TPM of 550,000 to support 1 concurrent developer using the AI Assistant but my current subscription limits me to <Insert your current limit here> TPM. This is preventing us from using the AI Assistant. Documentation for the App Builder AI Assistant is available on Jitterbit's website: https://docs.jitterbit.com/app-builder/documentation/ai-quickstart/.
If Microsoft denies your request, open an Azure support request for Service and subscription limits (quotas) and specify it has Production impact to trigger a human review of the case.