APIs page in Jitterbit API Manager
Introduction
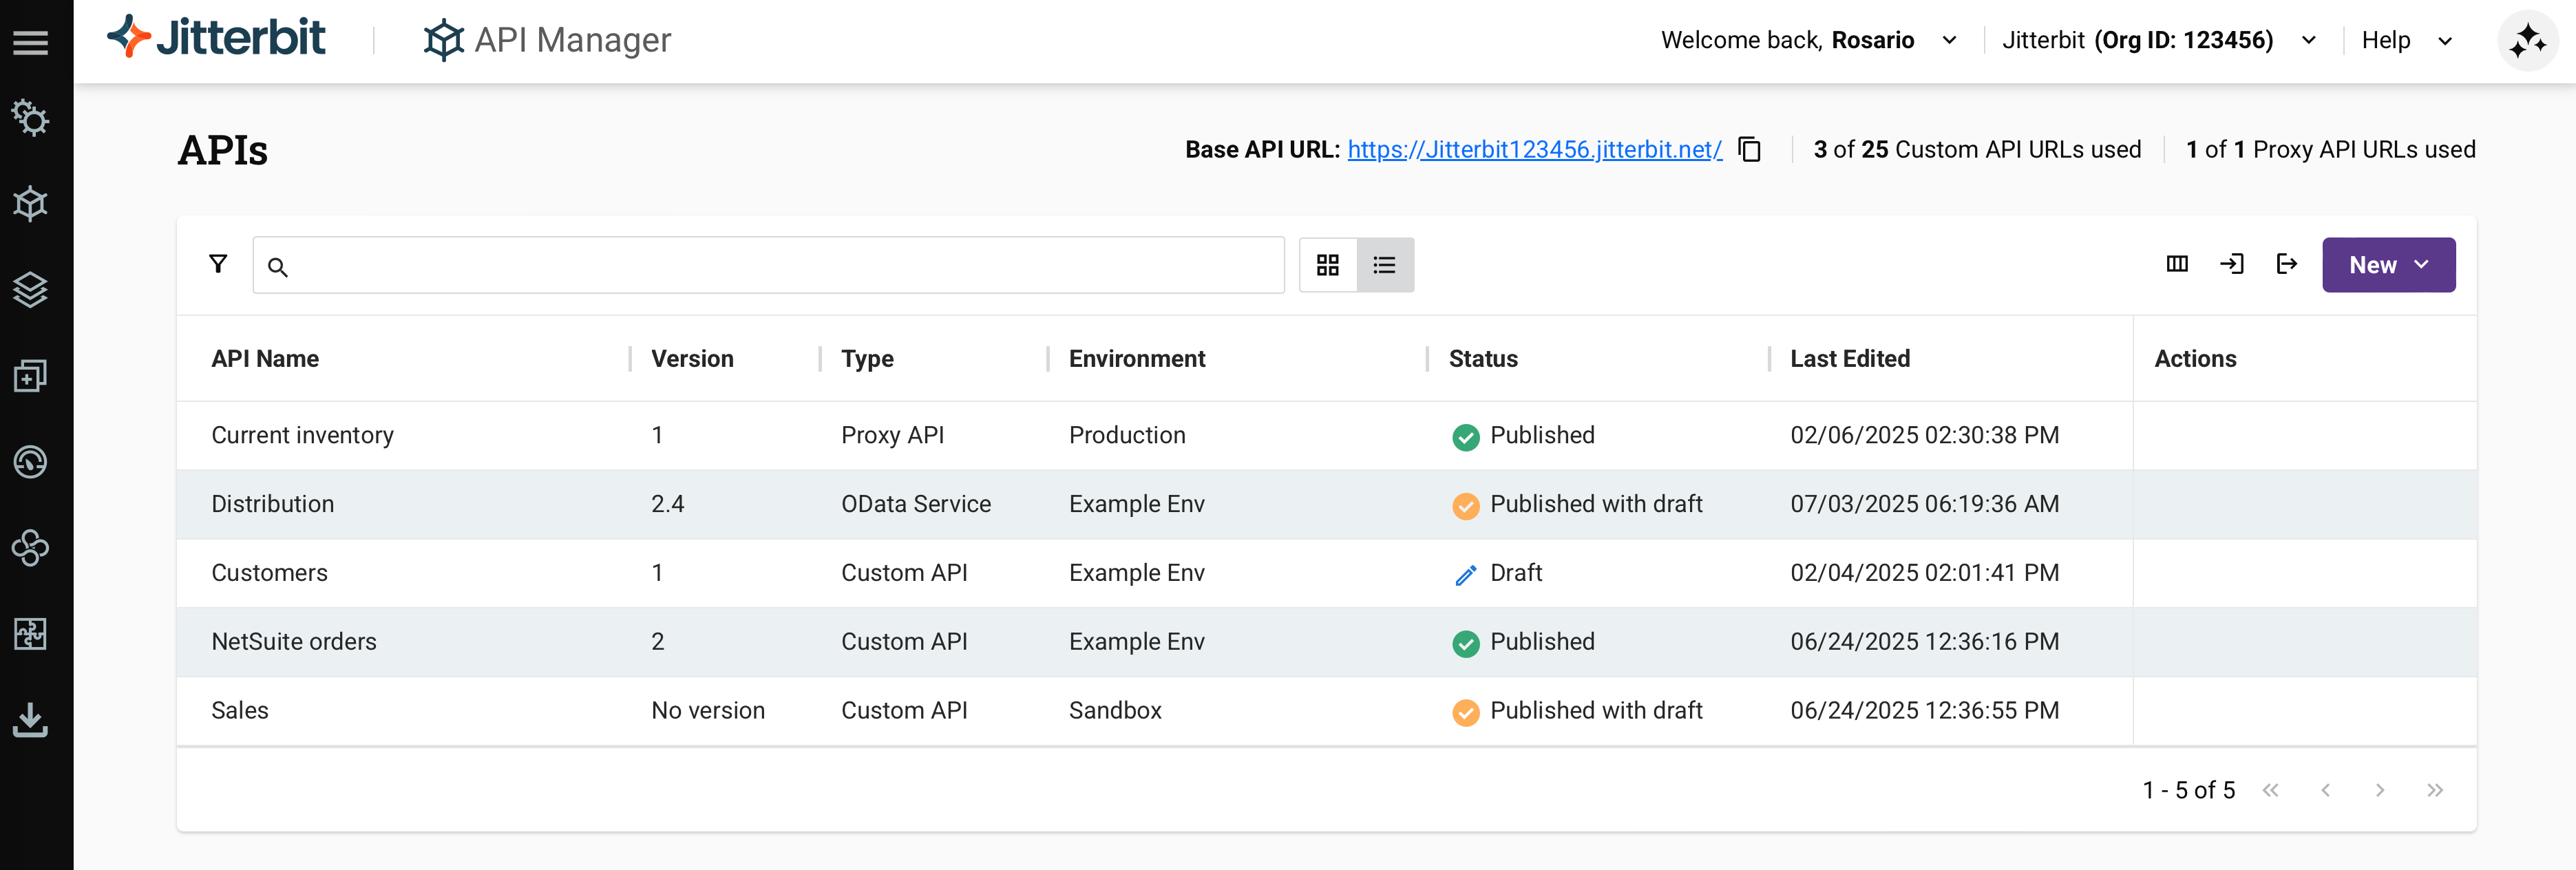
The APIs page is the main page of API Manager. It lets Harmony organization administrators manage three types of APIs:
You can create APIs by using the APIM AI Assistant with natural language prompts or manually using the configuration screens.
Note
To use the APIM AI Assistant, your Harmony license must include the APIM AI Assistant option. Contact your Customer Success Manager (CSM) to add this option to your license.
Members of a role that has been granted Read environment access can view only the APIs in that environment. Members of a role that has been granted Write environment access have write access in that environment.
To access the APIs page, use the Harmony portal menu to select API Manager > APIs.
APIs page header
The header along the top of the APIs page includes these controls:

-
Base API URL: The base API URL of the Harmony organization. Click the Copy icon to copy the URL to your clipboard. (A confirmation of the action appears.)
-
Custom API URLs used: The number of currently used custom API URLs out of the total number of custom API URLs allowed by the organization's subscription. Currently used API URLs include those used by published custom APIs and OData APIs and their published clones. Draft APIs do not count as in-use API URLs.
-
Proxy API URLs used: The number of currently used proxy API URLs out of the total number of proxy API URLs allowed by the organization's subscription. Currently used proxy API URLs include those used by published proxy APIs and their published clones. Draft APIs do not count as in-use API URLs.
-
Filter: Opens a pane with controls to filter the table by API Type, API Status, API Group, Environment, Security Profile, User Role, Last Edited, and Last Published dates:
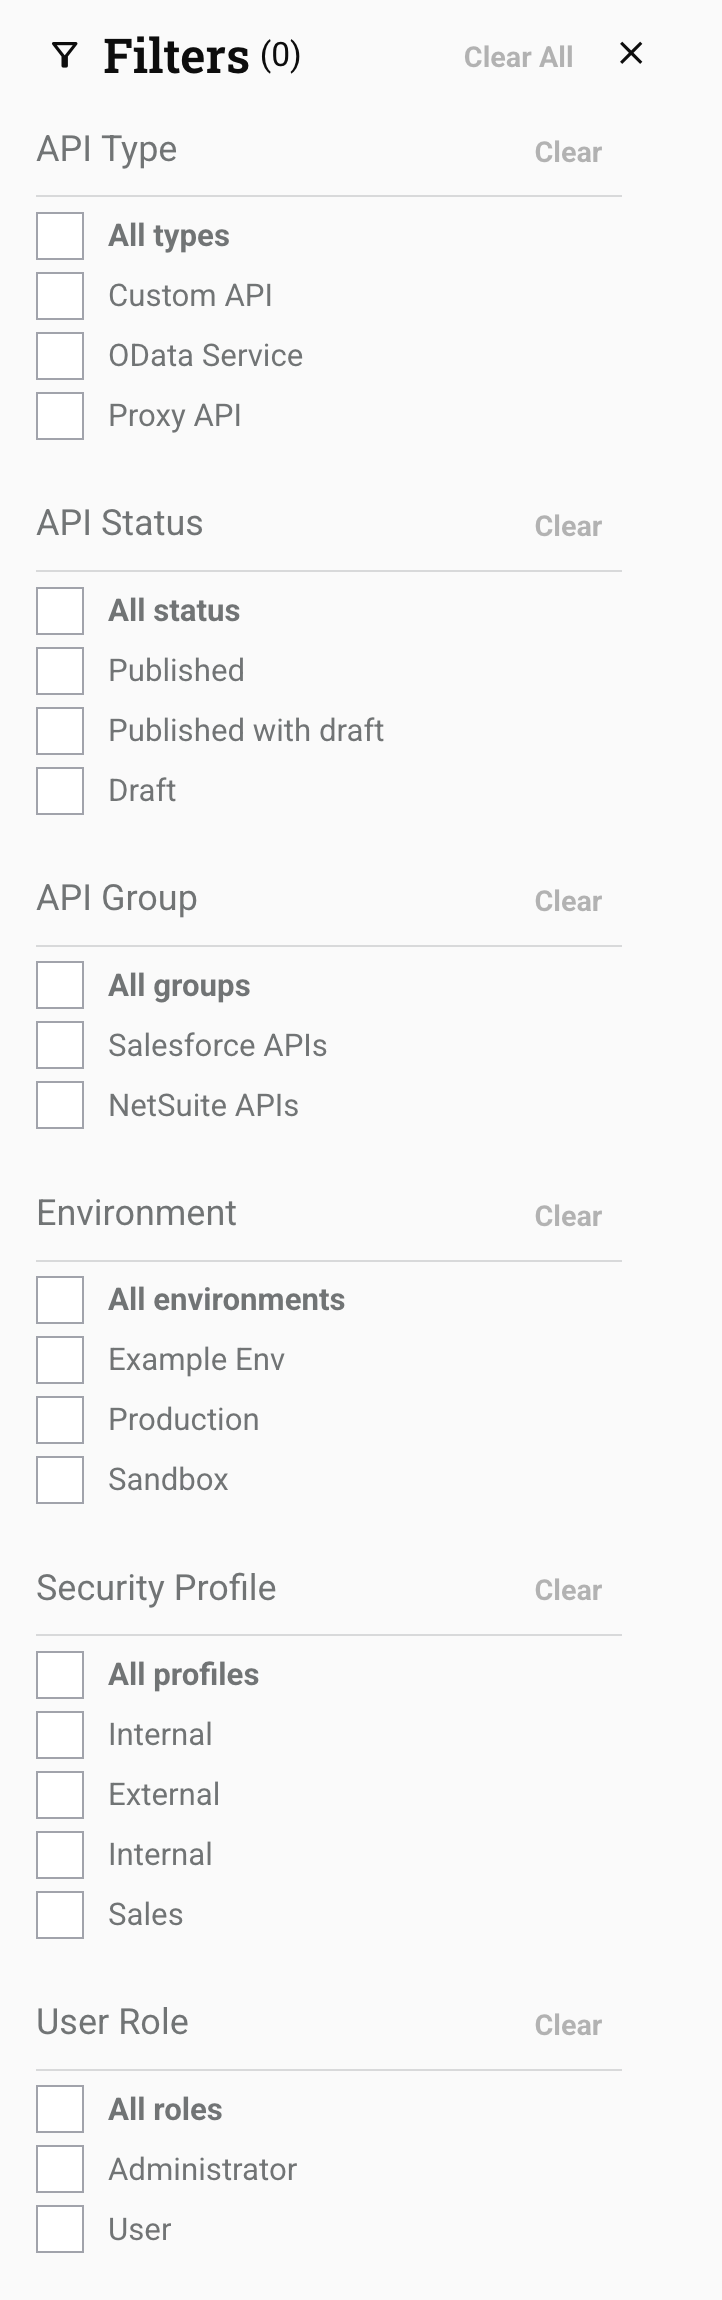
Filters are applied immediately. Use the Clear or Clear All buttons to reset filters, and the Close button to close the pane. When the pane is closed and filters are active, a numeric badge on the 7 Filter icon shows the total number of applied filters.
-
Search: Enter any part of the API name, version, environment, type, description, status, or the date or time when the API was last published or edited into the search box to filter the list of APIs. Use alphanumeric characters only. The search is not case-sensitive.
-
View: Click the list view or card view icon to toggle the format used to display APIs on this page. The next time you load the APIs page, the last selected view is preselected.
-
Download all: Downloads the details of all selected APIs as a CSV file. This option is available when one or more APIs are selected. Click to open the Download API details dialog, where you can select additional fields to include and use to reorder them. Some fields are pre-selected and cannot be removed. Click Download to save the file.
-
Import API: Opens the API import screen, where you can import APIs in APK format (see Exporting and importing APIs).
-
Export API: Opens the API export screen, where you can export selected APIs in APK format (see Exporting and importing APIs).
-
New: Click to select one of the following options:
-
Build with AI: Opens the APIM Assistant to create an API using natural language prompts. For more information, see Using the AI Assistant.
Note
To use the APIM AI Assistant, your Harmony license must include the APIM AI Assistant option. Contact your Customer Success Manager (CSM) to add this option to your license.
The following options appear only if a corresponding API URL is available:
-
Custom API: Opens the custom API configuration screen to manually create a new custom API.
-
Proxy API: Opens the proxy API configuration screen to manually create a new proxy API.
-
OData API: Opens the OData API configuration screen to manually create a new OData API.
-
List view
To access list view, select the List view icon.
List view displays APIs in a table. Each column is described below. Click on an API row to open the API details drawer.

The available columns are as follows:
-
API Name: The name of the API.
-
Version: The version of the API, as entered during API configuration.
-
Type: The type of API, one of Custom API, OData API, or Proxy API.
-
Environment: The environment where the API is stored.
-
Status: The API's status, one of Published, Published with draft, or Draft.
-
Last Edited: The last saved date (in
MM/DD/YYYYformat), time (inHH:MM:SSformat), and the time period (AMorPM) in local browser time. -
Service root: The API's public name, as entered during API configuration.
-
Group: The name of any API groups the API belongs to.
-
Edited By: The name of the user who last saved the API.
-
Last Published: The publication date (in
MM/DD/YYYYformat), time (inHH:MM:SSformat), and the time period (AMorPM) in local browser time. -
Published By: The name of the user who last published the API.
-
Gateway: The API gateway used by the API.
-
Services: The number of services configured for the API.
-
Actions: Hover over the API row to reveal additional actions:
-
Details: Opens the API details drawer (described in the next section).
-
Copy API base URL: Click to copy the API's base URL to your clipboard. A confirmation message appears when the action is complete.
-
Export: Opens the folder selector for your local machine. Select a folder to save the API export. For more information, see Export and import APIs.
-
Download: Downloads the API details as a CSV file. Click to open the Download API details dialog, where you can select additional fields to include and use to reorder them. Some fields are pre-selected and cannot be removed. Click Download to save the file.
-
Edit: Opens the Summary & Confirmation page for the API, where you can edit the API's settings.
-
More actions: Opens a menu with these actions:
API menu item Description Clone Opens the API configuration screen (see Custom API configuration, OData API configuration, or Proxy API configuration), prepopulated with the configuration details of the cloned API and updated defaults for these fields: - API Name: The API name is prepended with Copy of.
- Service Root: The service root is prepended with Copyof.
- Version: The version is appended with -2. This number does not increment with additional clones.
Delete Permanently deletes the API. On clicking Delete, a confirmation dialog is displayed to confirm that you want to permanently delete the API. Caution
OpenAPI documentation displayed on the API Portal page is not automatically updated when you delete an API. To update OpenAPI documentation, use the Portal Manager page or the Documentation tab on the APIs page.
View on portal (Enabled only for custom or proxy APIs with a Published or Published with Draft status.) Opens the API Portal page for the API. View logs Opens the API Logs page, which displays processing and debug logs (if debug logging is enabled) for all APIs. Analytics Opens the Analytics page, which displays consumption and performance metrics for all APIs.
-
List view page settings
You can sort the table, rearrange its columns, or refresh its contents:
-
Sort: To sort the table in ascending order, click any column heading. Click again to reverse the sort order.
-
Columns: To change the arrangement and visibility of columns, click Filter columns. The Columns drawer opens:
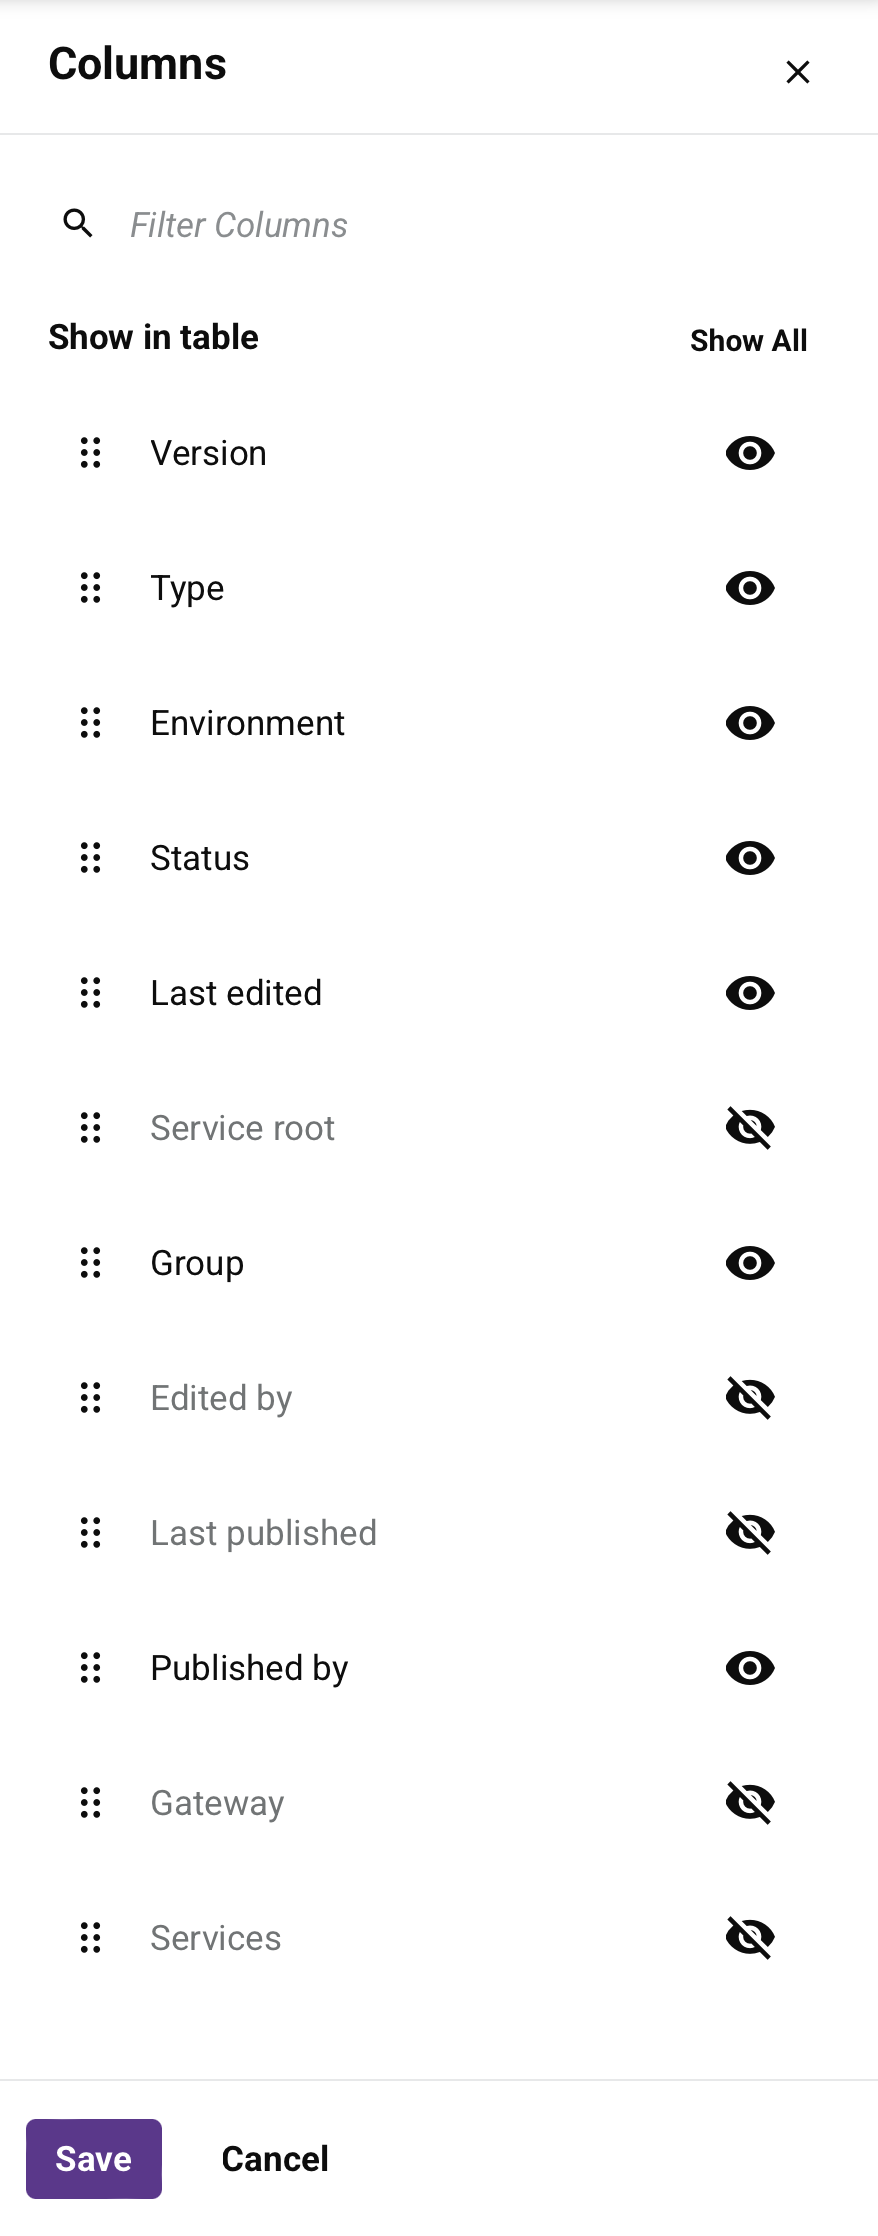
The drawer has the following controls:
-
Search: Enter any part of the column name into the search box to filter the list of columns. Use alphanumeric characters only. The search is not case-sensitive.
-
Show All: Make all columns visible.
-
Move: Drag and drop to change the position of the column relative to others.
-
Hide: The column is visible. Click to hide it.
-
Show: The column is hidden. Click to show it.
-
Save: Save the columns.
-
Cancel: Close the drawer without saving changes.
-
Card view
To access card view, select the Card view icon.
Card view displays APIs as cards in a grid.

Each card displays the following information:
-
API name: The name of the API. Hover on the card and click the Copy icon next to the name to copy the API's service URL to your clipboard. The icon indicates the API type:
Icon API type Custom API OData API Proxy API -
Services: The number of services configured for the API.
-
Version: The version of the API, as entered during API configuration.
-
Environment: The environment name and class where the API is stored.
-
Status icon: A colored icon to the left of the last edited user's email indicates the API's current status:
Color Status The API is published. The API is published with a draft. The API is a draft. -
Last edited by: The email address of the user who last edited the API.
-
Last edited date: The date (in
MM/DD/YYformat) and time (inHH:MM AM/PMformat) when the API was last edited, in local browser time.
Click a card to open the API details drawer. Click the actions menu icon in the top-right corner of a card to open a menu with these actions:
| API menu item | Description |
|---|---|
| View logs | Opens the API Logs page, which displays processing and debug logs (if debug logging is enabled) for all APIs. |
| View on portal | (Enabled only for custom or proxy APIs with a Published or Published with Draft status.) Opens the API Portal page for the API. |
| Analytics | Opens the Analytics page, which displays consumption and performance metrics for all APIs. |
| Export | Initiates a download of the API to a file named apis-export.apk. This file can then be imported into a different environment or organization (see Export and import APIs). |
| Clone | Opens the API configuration screen (see Custom API configuration, OData API configuration, or Proxy API configuration), prepopulated with the configuration details of the cloned API and updated defaults for these fields:
|
| Delete | Permanently deletes the API. On clicking Delete, a confirmation dialog is displayed to confirm that you want to permanently delete the API. Caution OpenAPI documentation displayed on the API Portal page is not automatically updated when you delete an API. To update OpenAPI documentation, use the Portal Manager page or the Documentation tab on the APIs page. |
API details drawer
You can open the API details drawer from list view, by selecting an API in the table or clicking Edit, or from card view by clicking a card. A drawer opens at the bottom of the window with these tabs depending on the API type:
| Tab | API types |
|---|---|
| Profile | All |
| Settings | All |
| Existing API | Proxy APIs only |
| Services | All |
| Security profiles | All |
| User roles | Custom APIs and OData APIs |
| Request headers | Proxy APIs only |
| Documentation | Published APIs only |
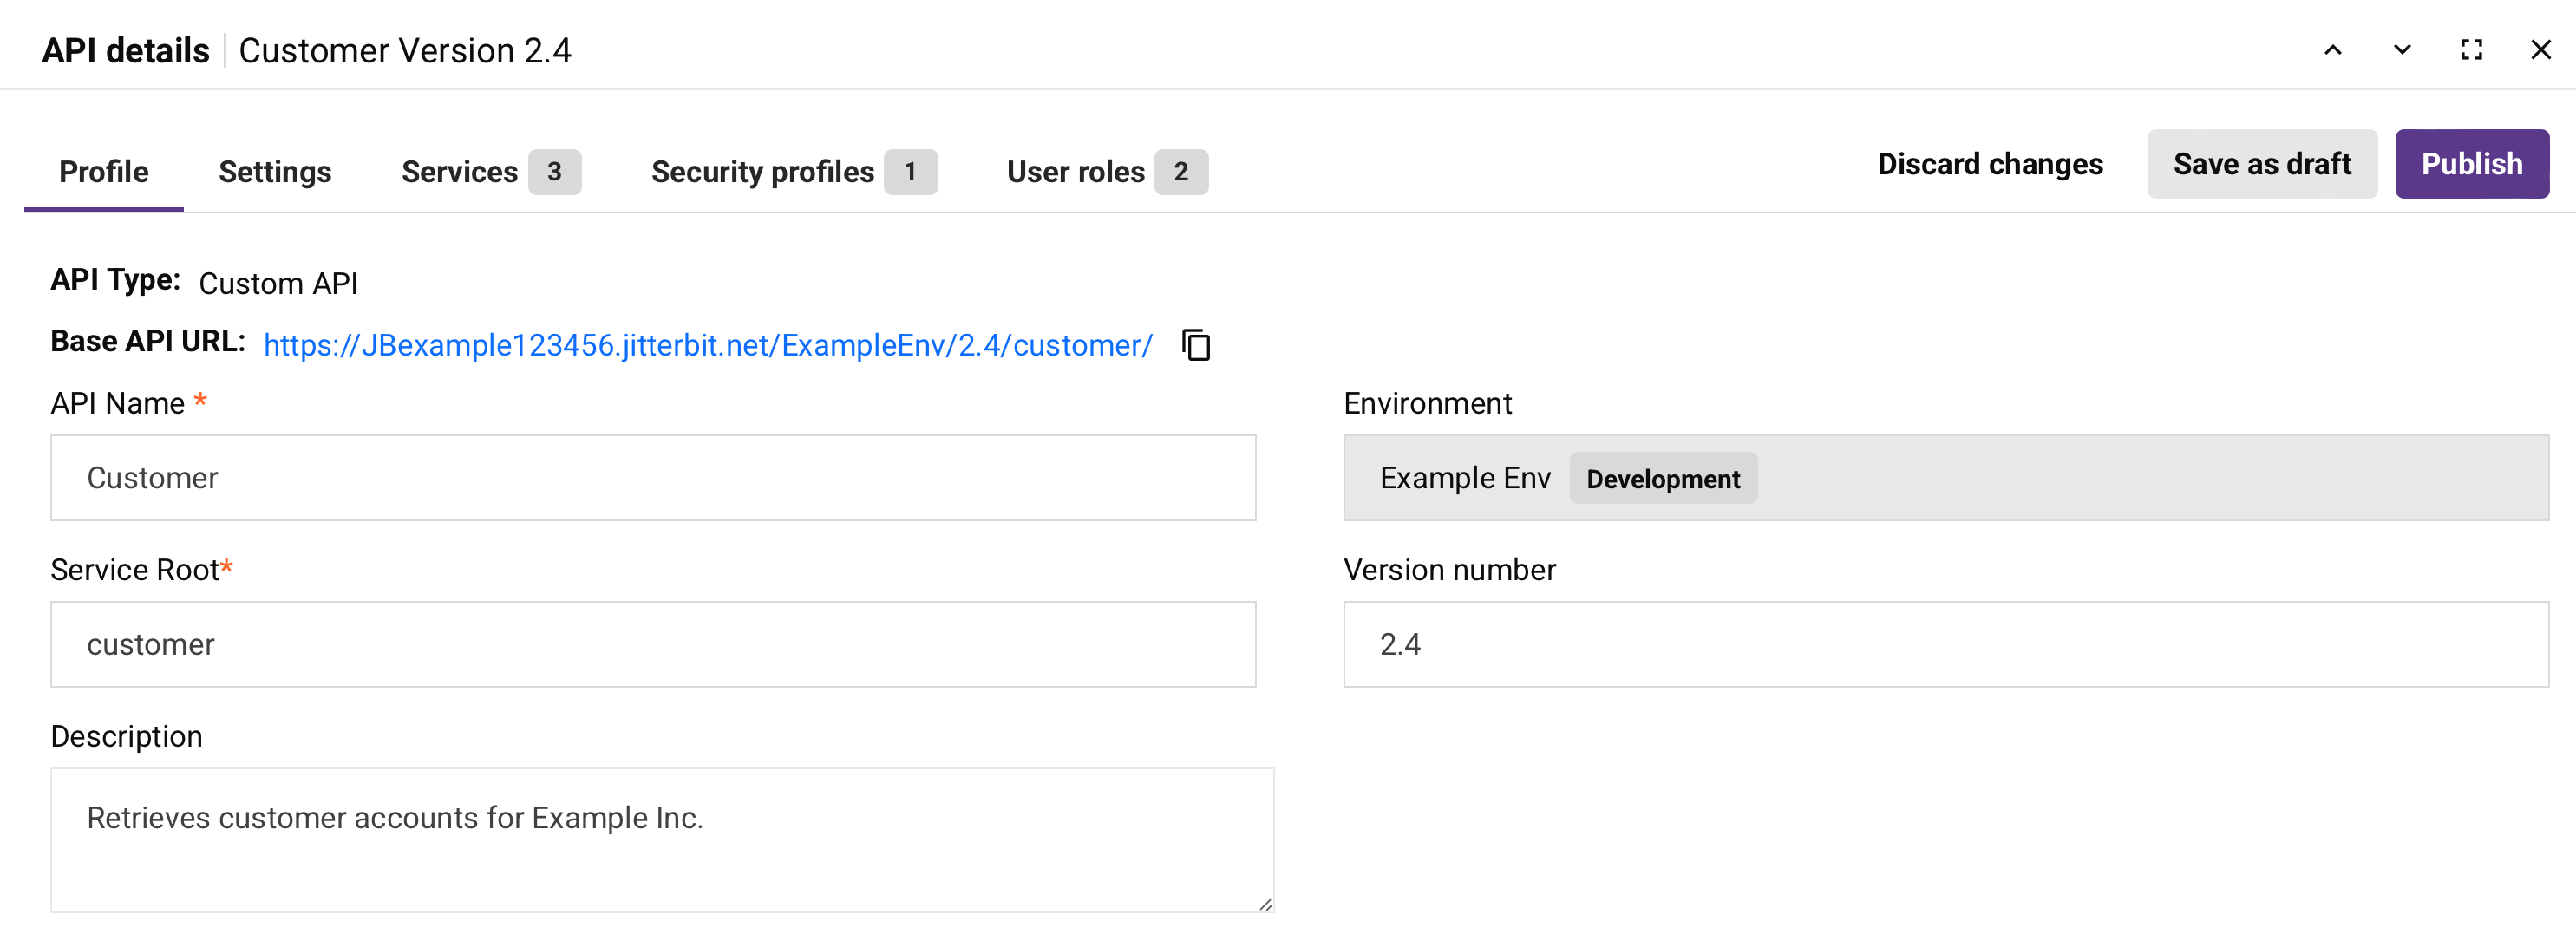
The drawer's header displays these details and controls:

-
API name and version: Displays the name of the API and its version, if applicable.
-
Previous / Next: Navigates through the organization's list of APIs.
-
Expand: Expands the drawer to full screen. Once expanded, click the Minimize icon to return to the previous view.
-
Close: Closes the drawer.
-
Discard changes: After making changes, click to close the drawer without saving changes made to any step. A message asks you to confirm that you want to discard changes.
-
Save as draft: Saves any changes to the API in Draft status or Published with Draft status:
-
Draft: A new API or an API whose status was Draft when Save as Draft was used. Drafts do not count against your subscription limit.
-
Published with Draft: An API whose status was Published when Save as Draft was used. An API that is published with a draft counts against your subscription limit because the API is accessible even though its draft is not.
-
-
Publish: Saves changes to the API in Published status. The API is live and accessible within five minutes. A published API counts against your subscription limit because the API is accessible. A dialog indicates the API is live. Click Copy URL to copy the API service URL.
Profile tab
The Profile tab displays general information about the API:
-
API type: The type of API, one of Custom API, OData API, or Proxy API.
-
Base API URL: The API's base URL.
-
API Name: The name of the API for internal identification purposes. The following special characters are allowed:
()-_ -
Service Root: The public name of the API to use as part of the API's service URL. By default, this field is populated with the API name converted to camel case. This field does not allow spaces or certain special characters. Using special characters other than an underscore (
_) is not recommended. The following special characters are allowed:._~()$;/?:@=&'!*,+- -
Description: (Visible only for custom APIs and OData APIs.) The description of the API.
-
Environment: The environment where the API resides. This field cannot be edited.
-
Version Number: The version used as part of the API's service URL. This field allows a maximum of 48 characters and does not allow spaces or certain special characters. Using special characters other than a period (
.) or a hyphen (-) is not recommended. Common naming conventions include incrementing versions, such asv1.0,v1.1,v1.2, or using a date when the API was published, such as2025-08-28.
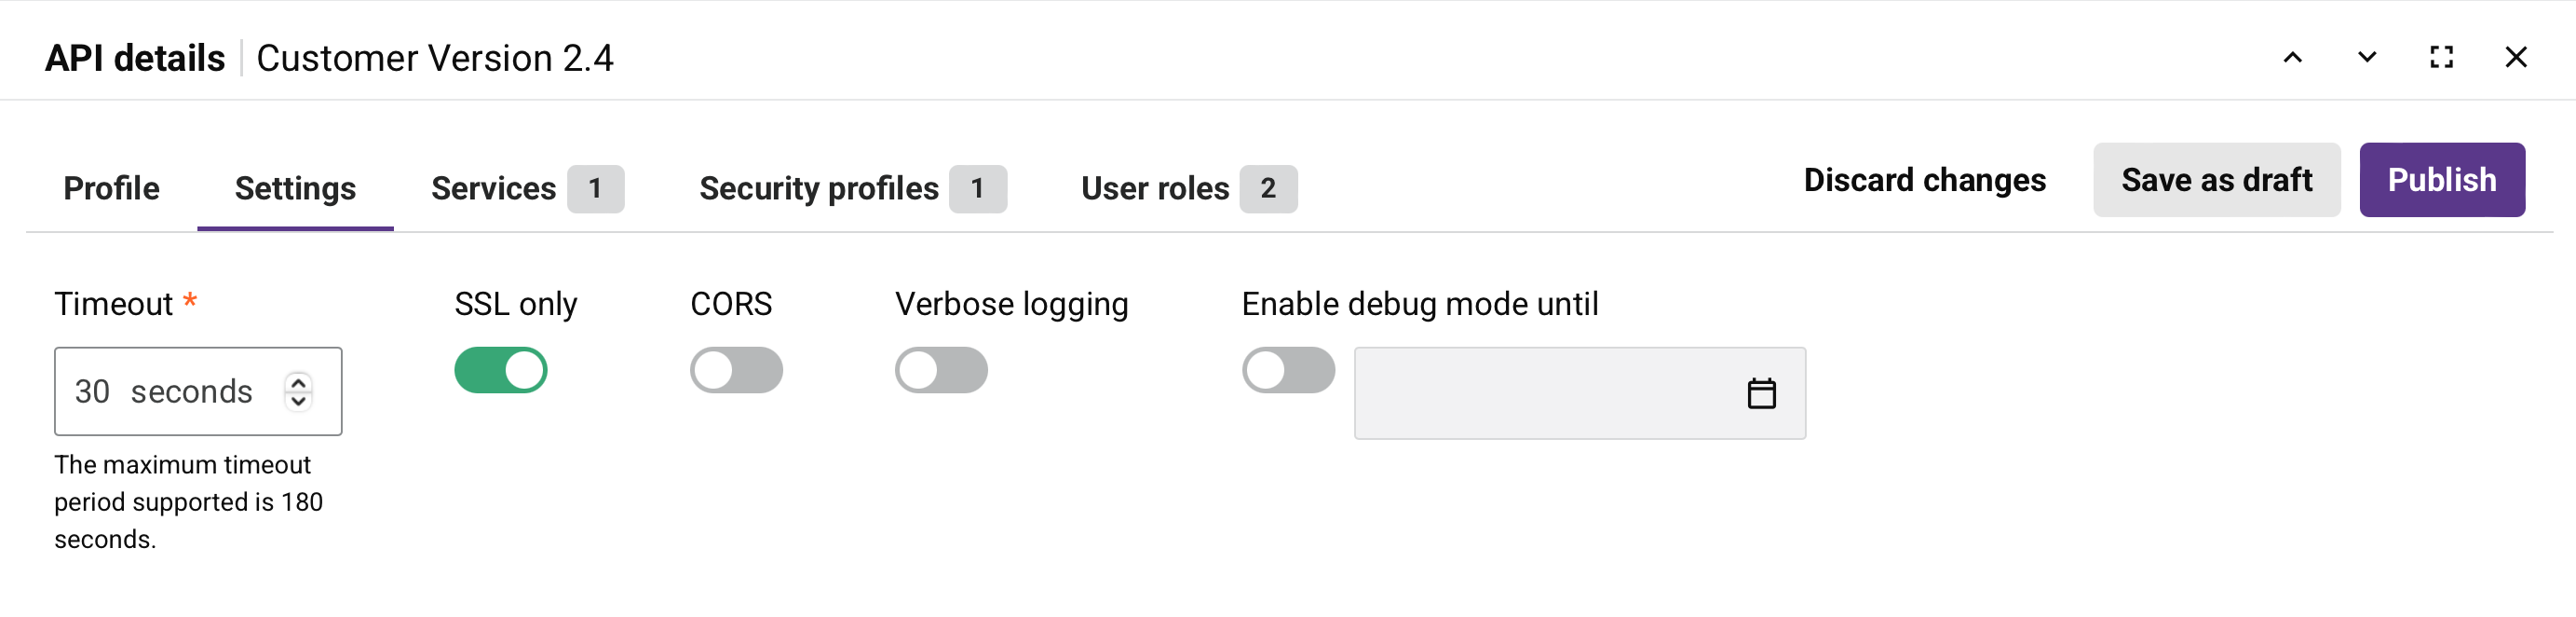
Settings tab
In the Settings tab, you can view or edit an API's settings:
-
Timeout: The number of seconds before the API times out. The default is 30 seconds. The maximum is 180 seconds.
Note
This setting is independent of the operation timeout setting in Studio or Design Studio. Operation timeout settings are not used unless a private agent is used and the
EnableAPITimeoutsetting in the private agent configuration file is enabled. -
SSL only: When enabled (default), data is encrypted through SSL and HTTPS is enforced for all API requests and responses (recommended).
When disabled, data passed through API requests and responses is not encrypted and can be intercepted and viewed by others. This could potentially expose sensitive information.
-
CORS: When enabled, the Cross-Origin Resource Sharing (CORS) mechanism is used (not recommended).
Warning
CORS causes operations using the
OPTIONSmethod to run without authentication. -
Verbose logging: When enabled, verbose logging for APIs includes request and response data in each API log to help monitor incoming and outgoing data and facilitate debugging. This setting is disabled by default, as it can create large log files.
-
Enable debug mode until: Displays the date and time when debug mode will be disabled.
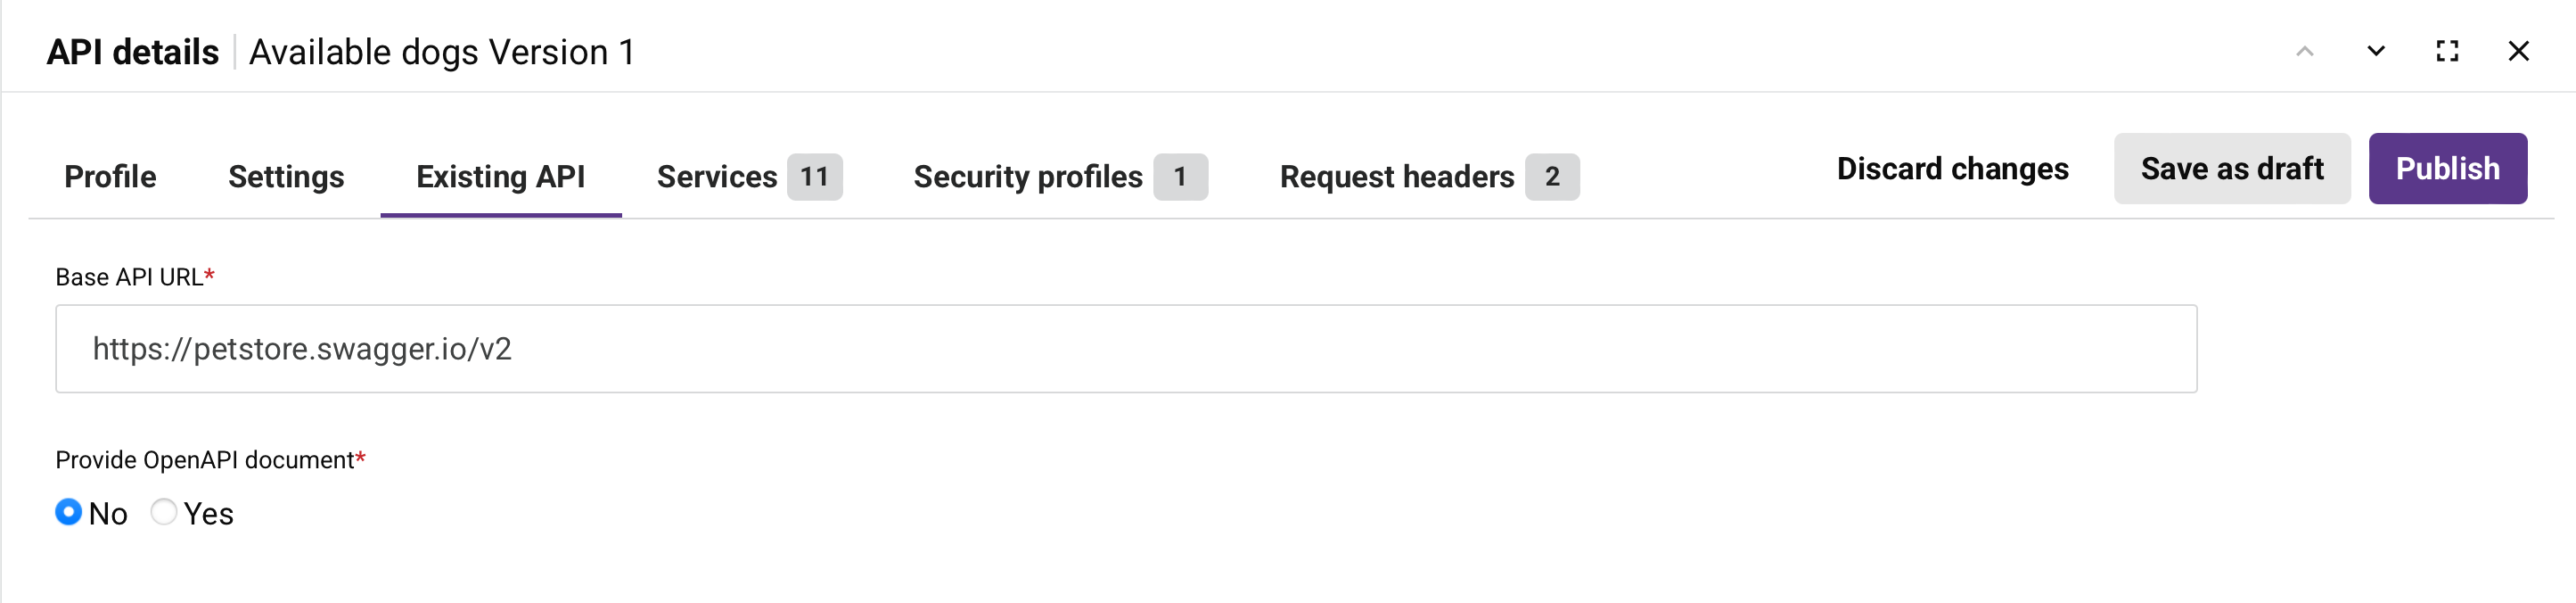
Existing API tab
In the Existing API tab, you can view and edit a proxy API's base URL:
Note
This tab is visible only for proxy APIs.
-
Base API URL: The base URL of the API to proxy.
Note
If the API provides a single service, you can enter the complete API URL, including the service path.
-
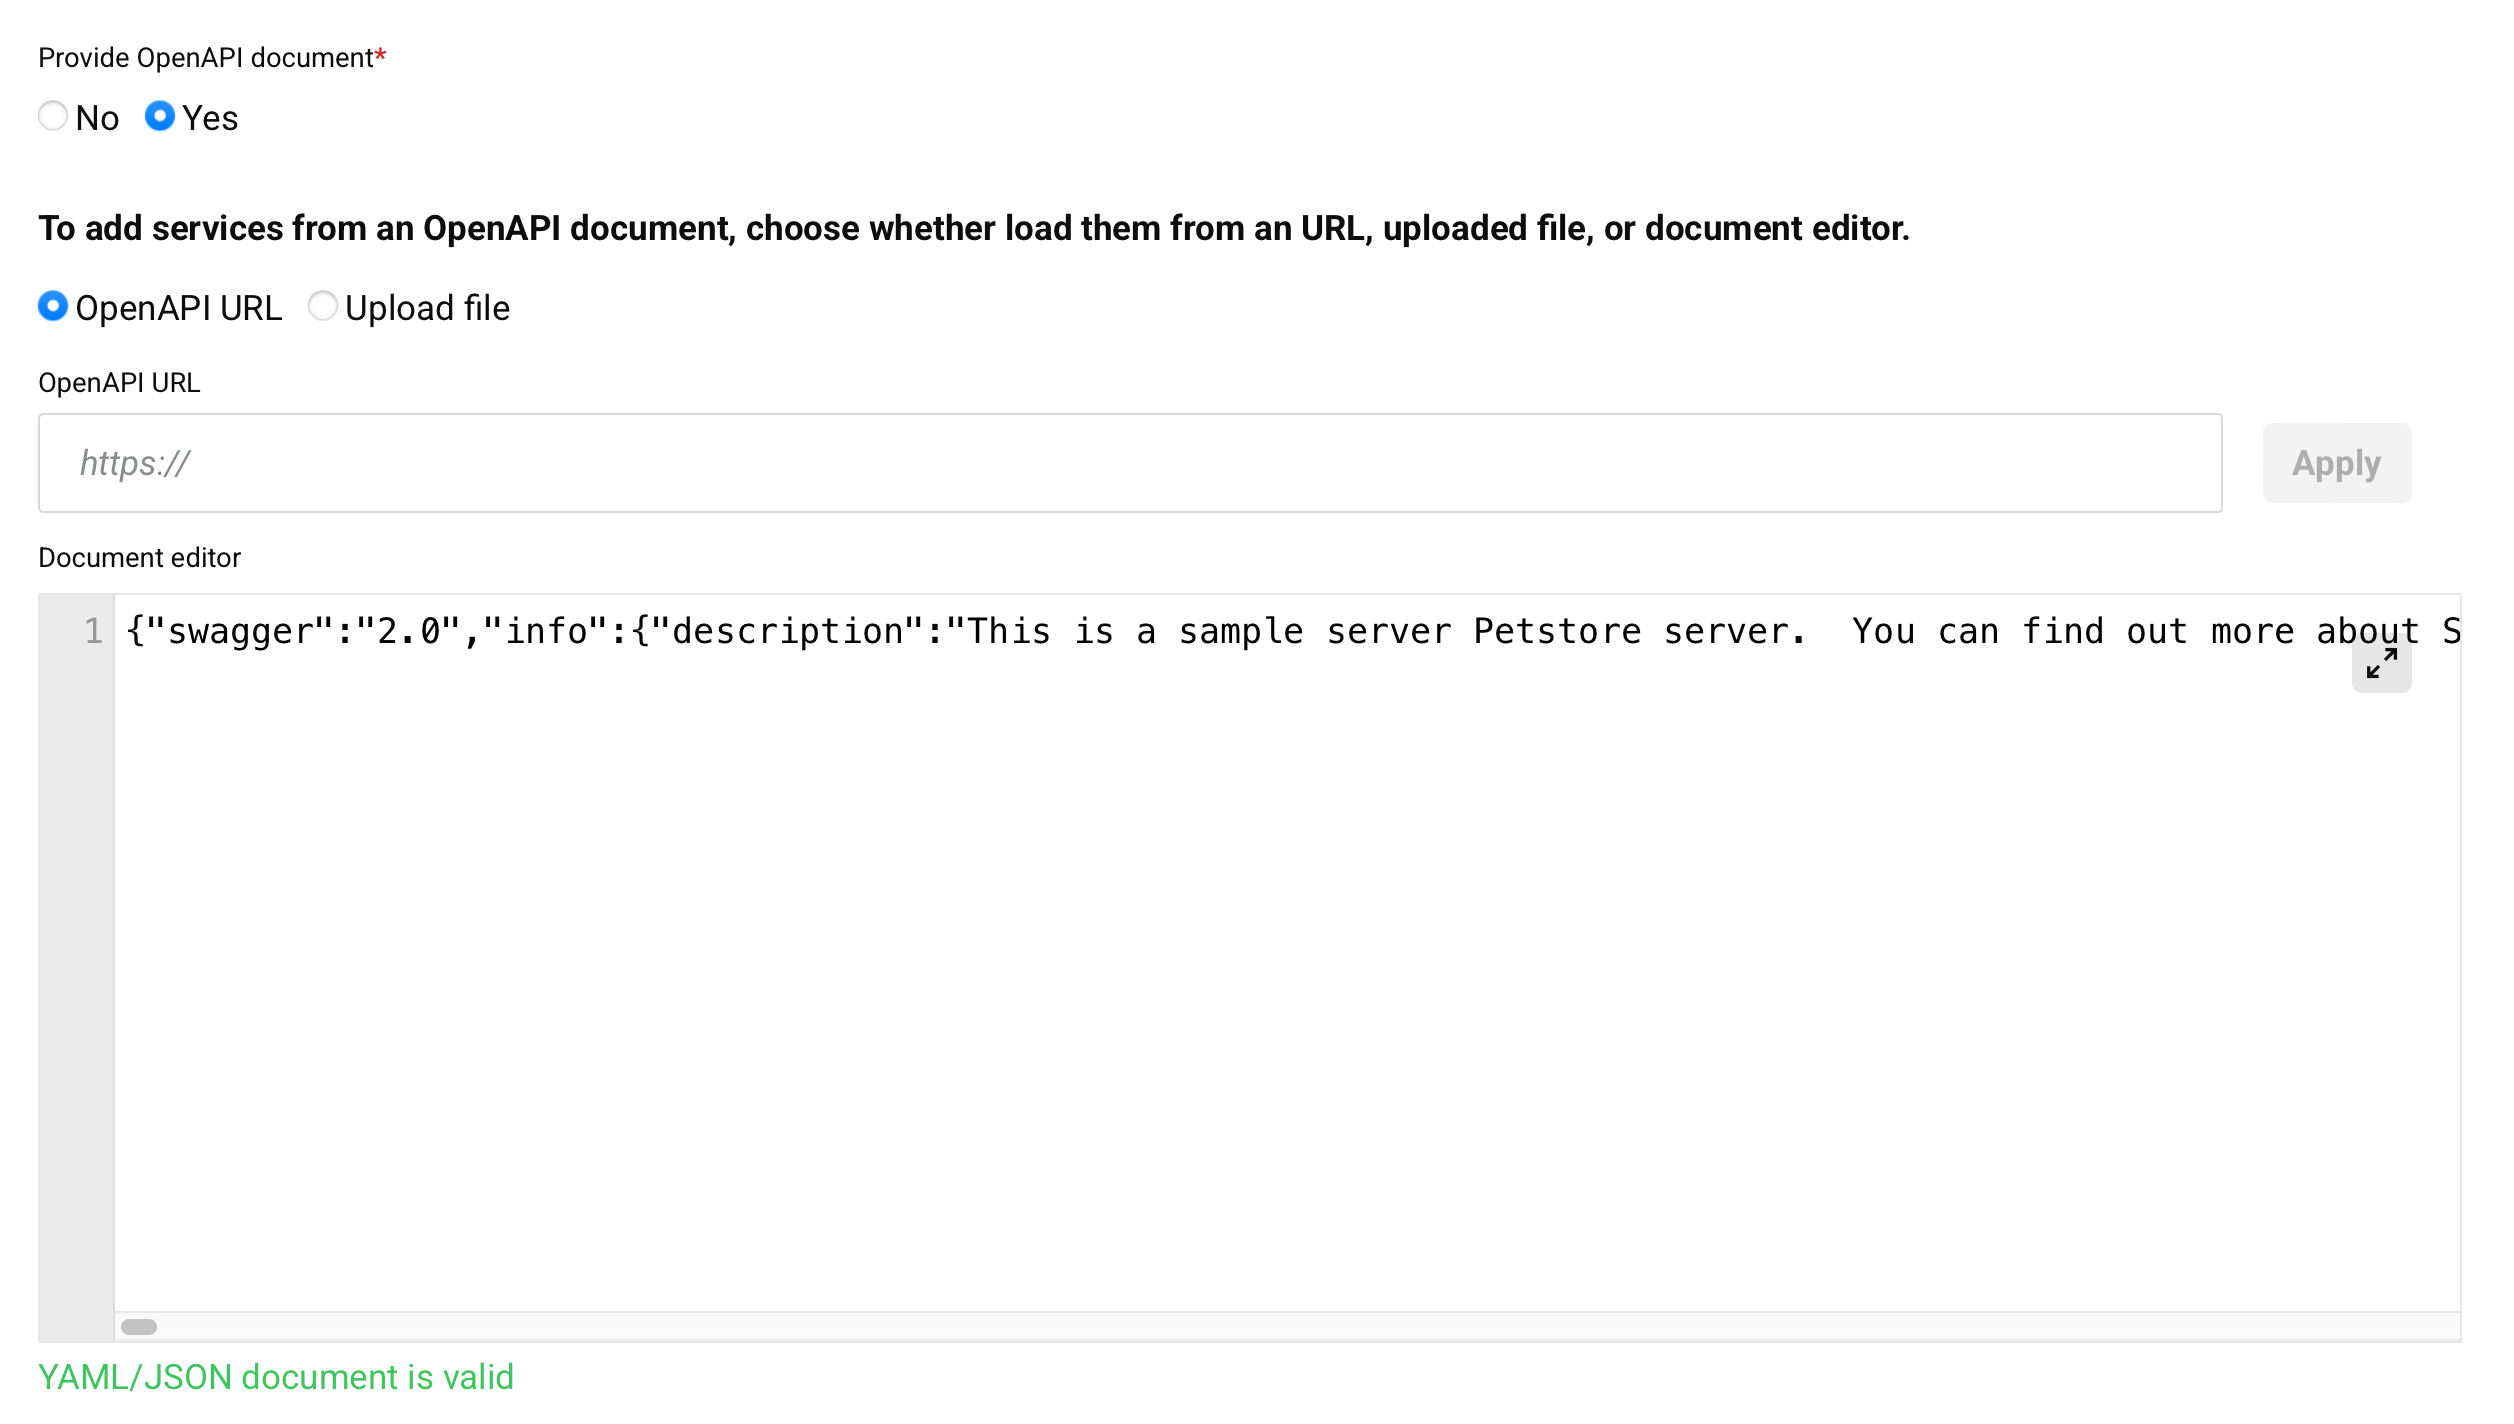
Provide OpenAPI document: When an OpenAPI document is provided, it is used to auto-discover the API's services. Select No to skip or Yes to expand an additional area for providing the OpenAPI document:
-
OpenAPI URL: When selected, an OpenAPI URL field becomes available for you to enter a URL. Click Apply to load an OpenAPI document in YAML or JSON format from the URL.
-
Upload File: When selected, uploads an OpenAPI document in YAML or JSON format after using Browse to select the file:

-
Document editor: Allows viewing and editing of a provided OpenAPI document. You can also provide an OpenAPI document by entering it here directly. To view and edit the OpenAPI document in a larger area, click the popout icon (after opening that area, click the return icon to return to this screen).
-
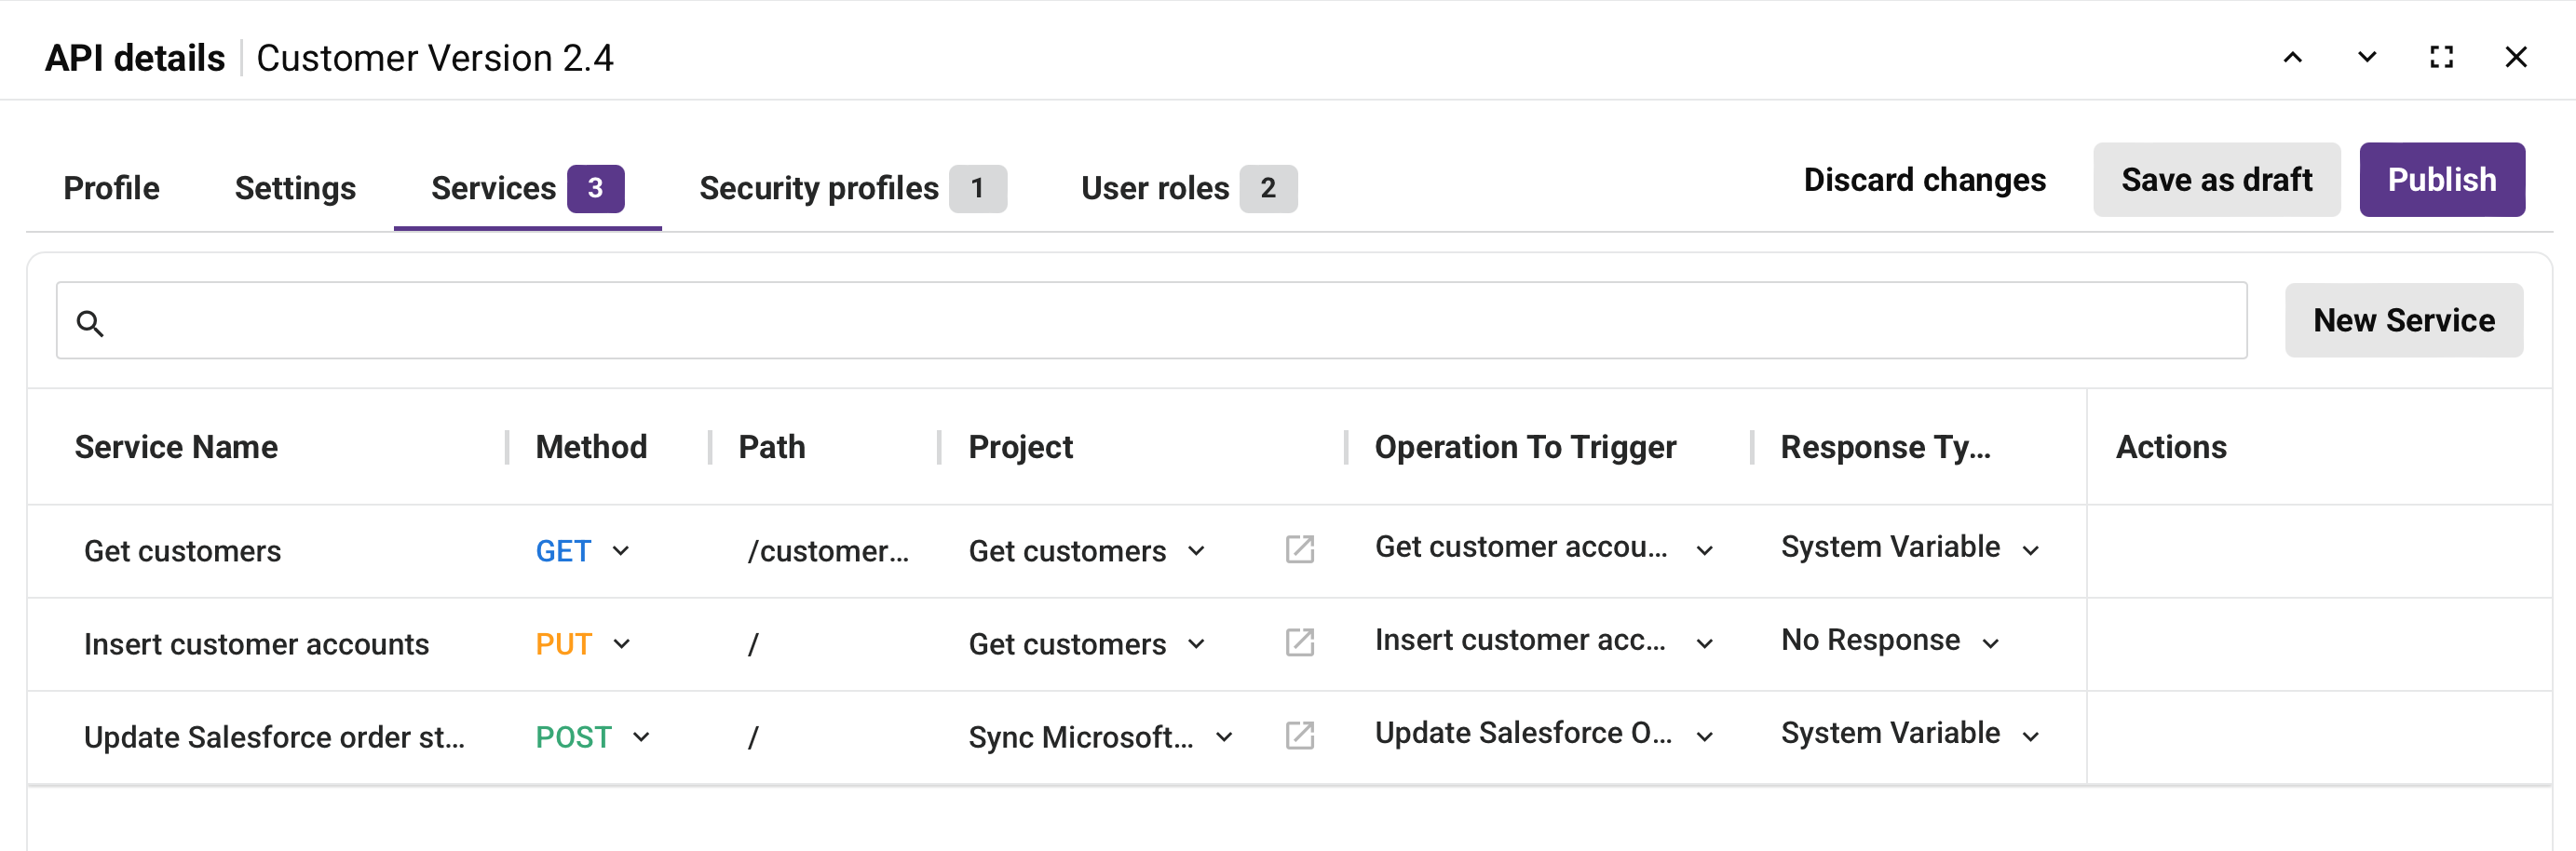
Services tab
In the Services tab, you can add new services or view and edit current API services. Click an API service to edit it.
Note
This tab is visible only for proxy APIs.
You can sort the table by Service Name, Method, Path, Project, Operation to Trigger, or Response Type by clicking the respective header row.
-
Search: Enter any part of the service name, method, path, project, operation, or response type into the search box to filter the list of services. Use alphanumeric characters only. The search is not case-sensitive.
-
New Service: Adds an API service row to the bottom of the table. Enter or select values for each field in the table (described below).
-
Service Name: The name of the API service.
-
Method: The request method for the API service, one of GET, POST, PUT, DELETE, ALL, or (if the Method is set to CUSTOM) the name of the custom method.
-
Path: The path for the request.
-
Project: (Visible only for custom APIs and OData APIs.) The name of the Studio project.
-
Operation to Trigger: (Visible only for custom APIs and OData APIs.) The name of the operation being called.
-
Response Type: (Visible only for custom APIs and OData APIs.) The response type, one of Final Target, System Variable, or No Response.
-
Actions: Hover over the service row to reveal additional actions:
-
Copy API service URL: Click to copy the API service URL to your clipboard. (A confirmation of the action appears.)
-
Go to API Service: Opens the Summary & Confirmation page for the API, where you can edit the API's settings.
-
Duplicate: (Visible only for custom APIs and OData APIs.) Creates a duplicate of the API service. You must change either the request method or the Path as each API service must have a unique combination of those fields.
-
Delete: Deletes the API service.
When you click a custom API service row, these tabs appear:
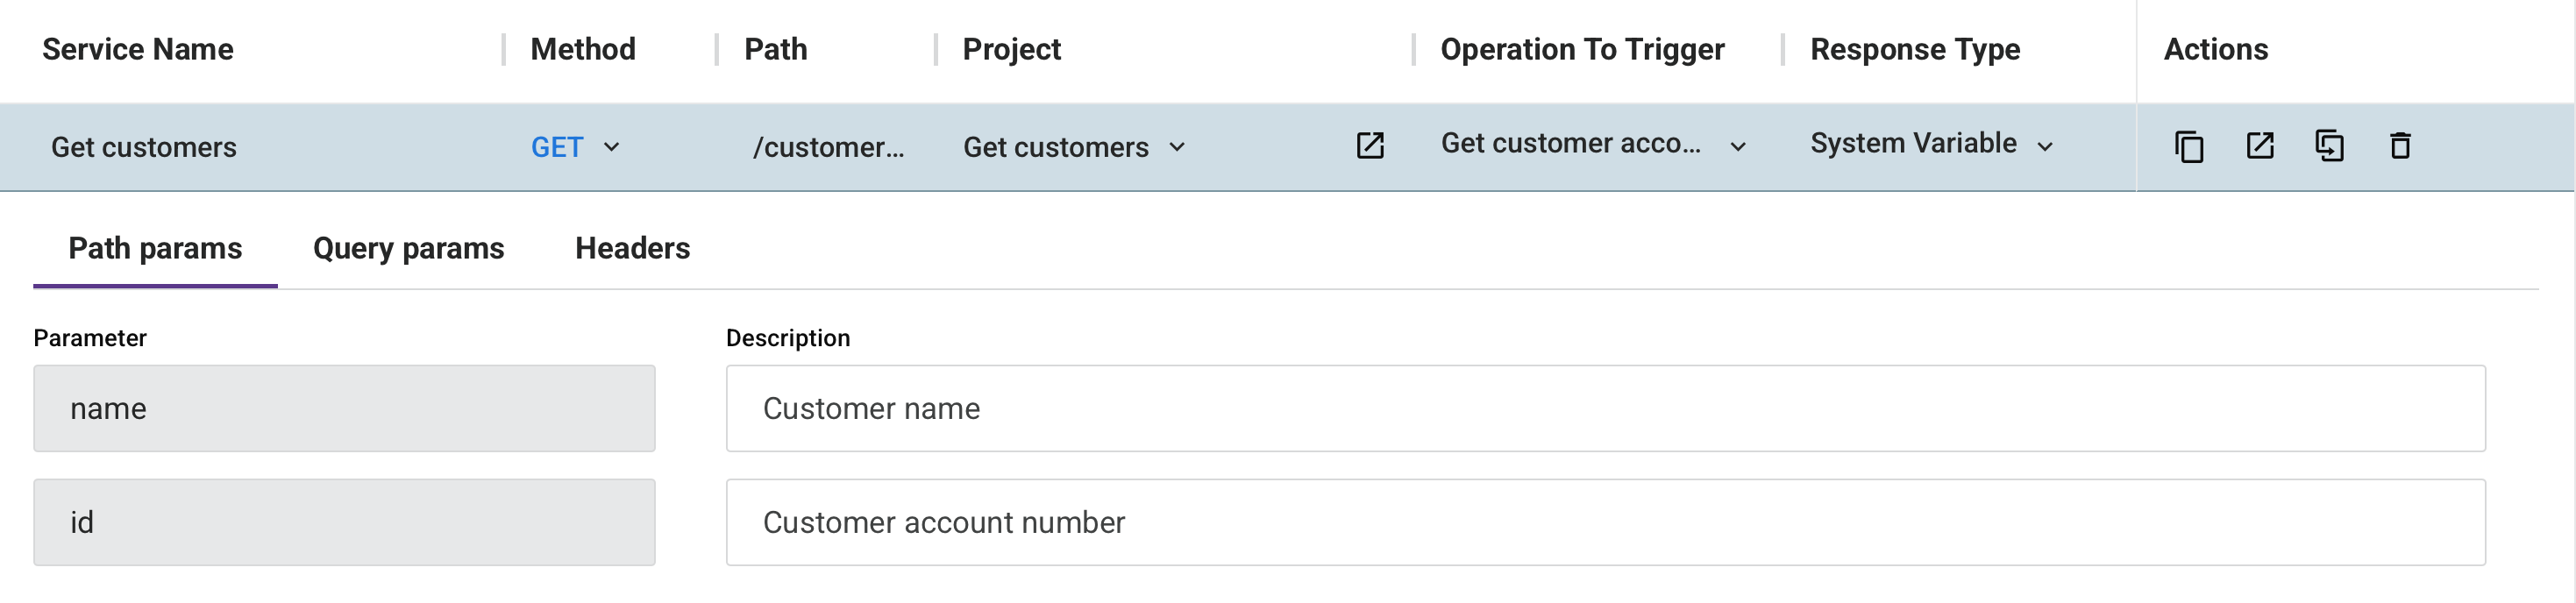
Path params tab
When request parameters are included in the Path, this tab is populated with these fields:

-
Parameter: Displays the request parameters defined in the Path.
-
Description: Optionally, enter a description for the request parameters.
Query params tab
This tab allows you to add query parameters to the API service:

-
Add Parameter: Click to add a query parameter to the API service. When clicked, these fields become available:
-
Parameter: Enter the name of the query parameter.
-
Description: Optionally, enter the description of the query parameter.
-
Delete: Click the delete icon next to a query parameter to delete that parameter.
-
Headers tab
This tab allows you to add request headers to the API service:
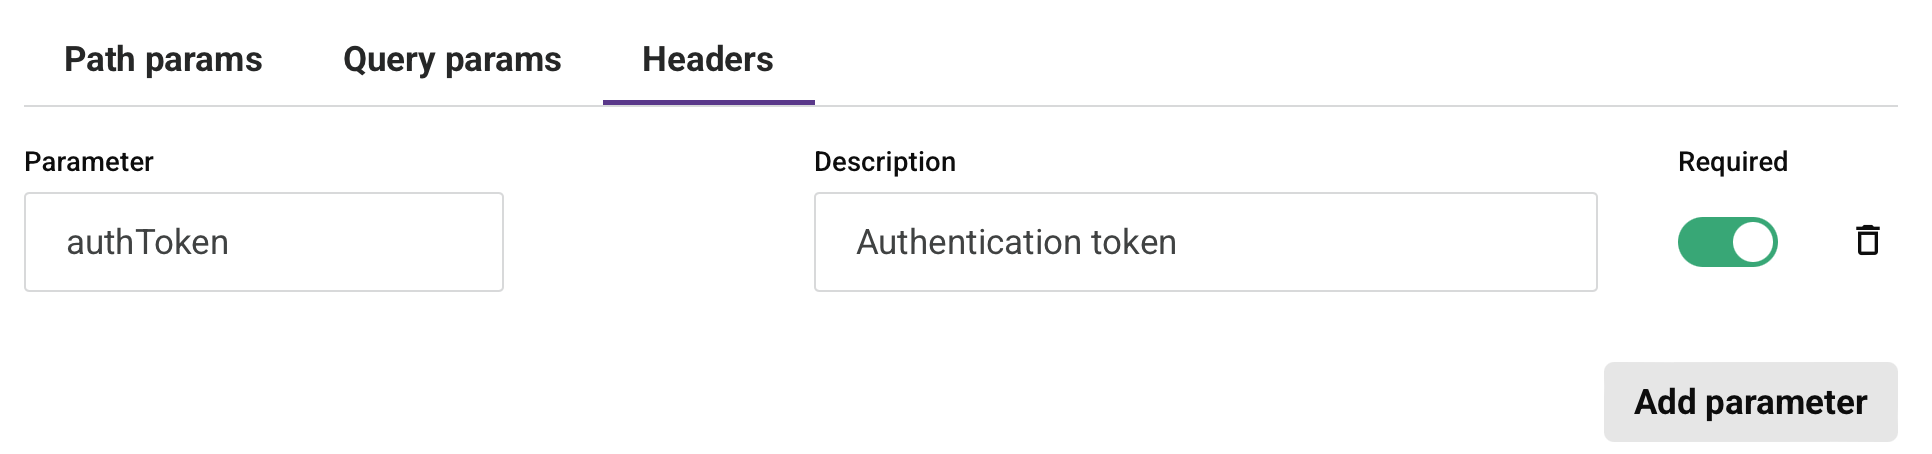
-
Add Parameter: Click to add a request header to the API service. When clicked, these fields become available:
-
Parameter: Enter the name of the request header.
-
Description: Optionally, enter the description of the request header.
-
Required: Select if the request header should be required for each API service request.
-
Delete: Deletes the request header.
-
-
Security profiles tab
The Security profiles tab provides a list of security profiles available in the environment:
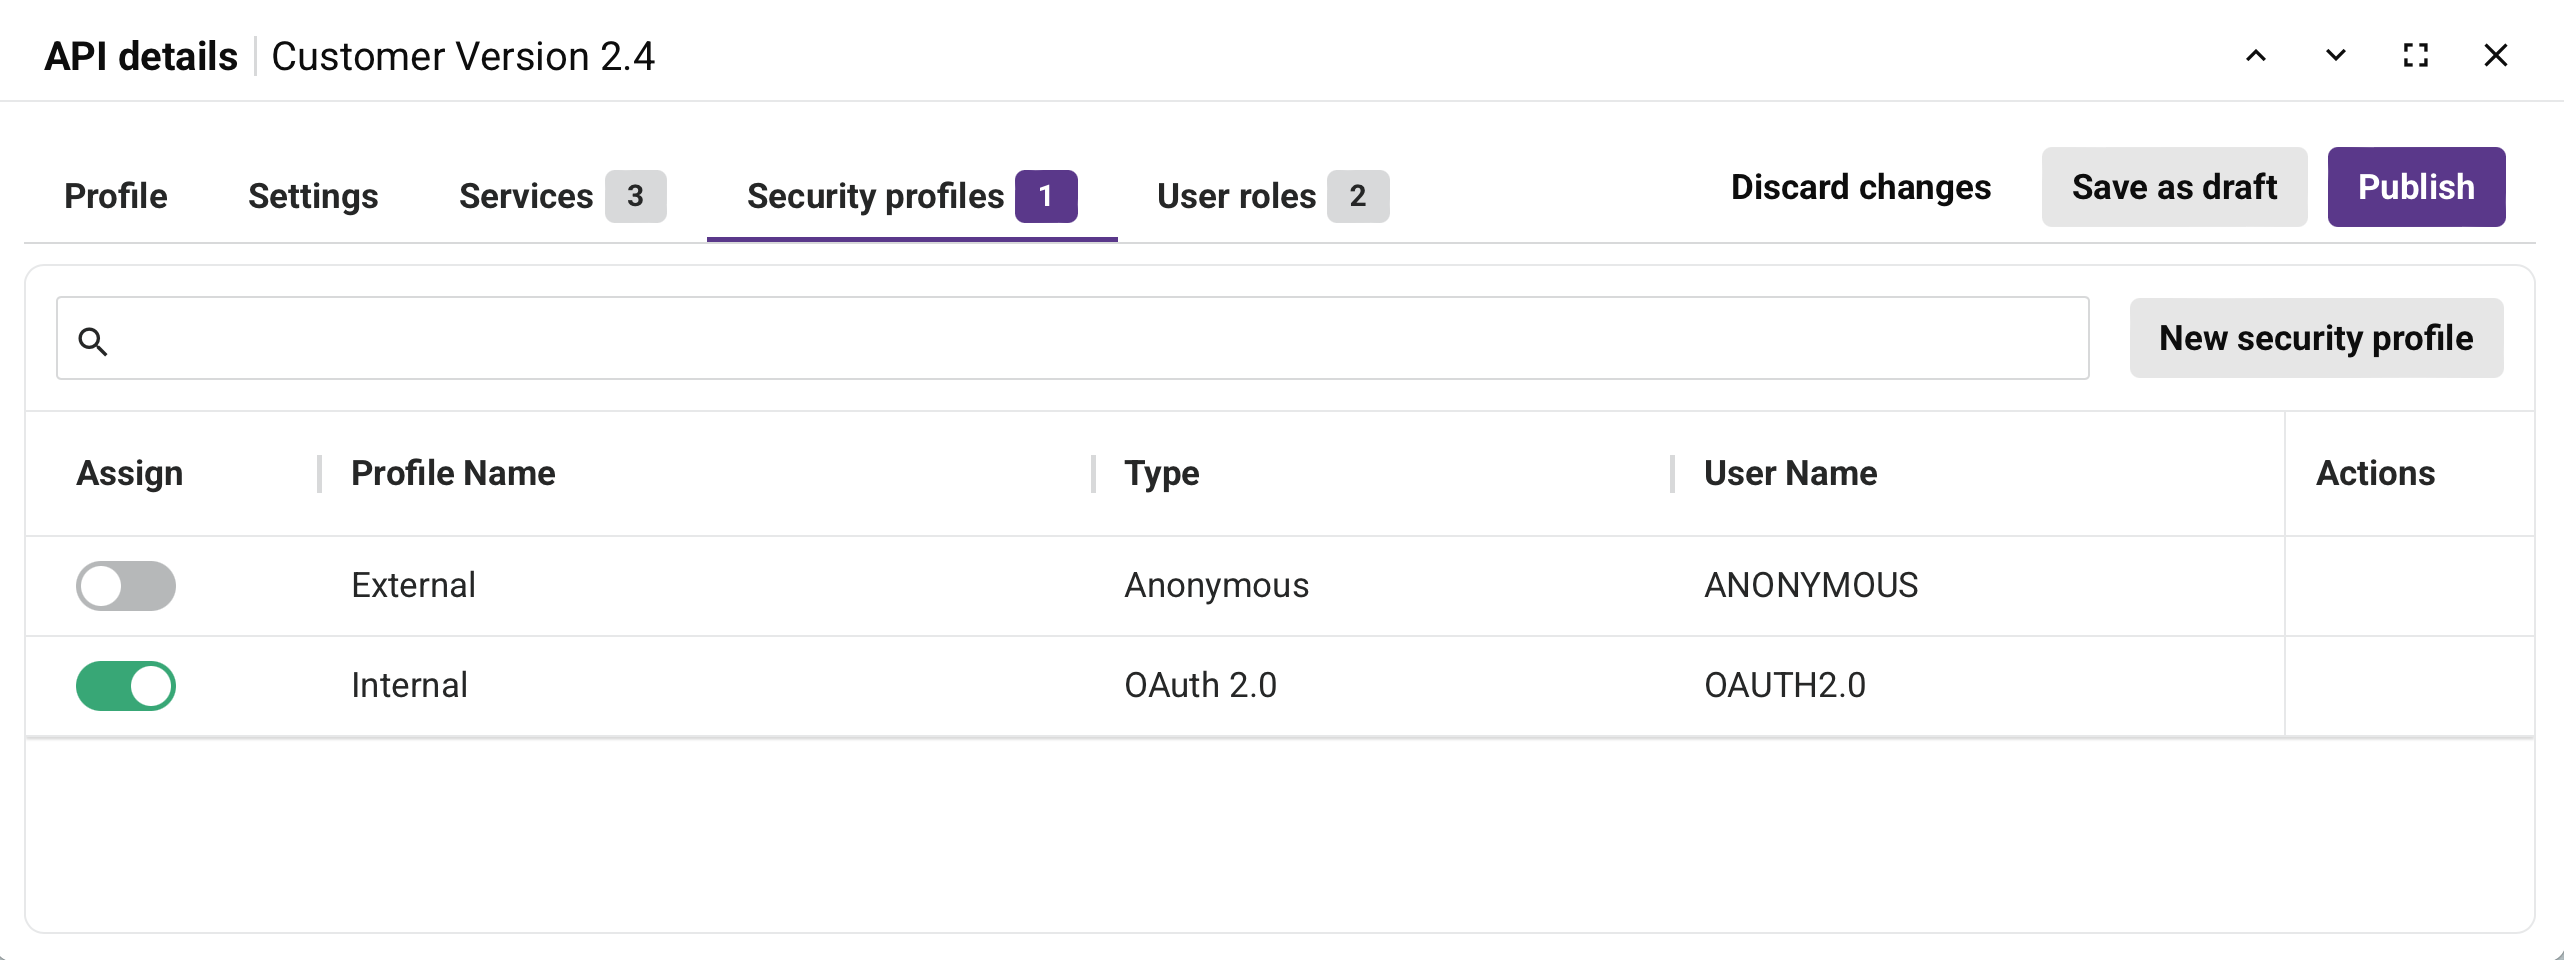
You can sort the table by Profile Name, Type, or User Name by clicking the respective header row.
-
Search: Enter any part of the security profile name, type, or username into the search box to filter the list of services. Use alphanumeric characters only. The search is not case-sensitive.
-
Assign: Use the toggle to assign or unassign the security profile to the API.
Security profile assignment rules
-
Multiple profiles: You can assign multiple security profiles with the same authentication type to an API. Only
basicandAPI keyauthentication types can be used together. -
Publishing changes: When you unassign a security profile from an API using the toggle, the change is saved as a draft. You must publish the API (using Publish in the drawer header) for the change to take effect. Until the API is published, the security profile is still considered "in use" and cannot be deleted from the Security Profiles page.
-
-
Profile Name: The name of the security profile.
-
Type: The authentication type, one of Anonymous, API key, Basic, or OAuth 2.0.
-
User Name: Displays the username for any security profiles using Basic authentication. Otherwise, the authentication type is displayed.
-
Actions: Hover over the security profile row to reveal an additional action:
- Go to security profile: Opens the configuration screen for the security profile.
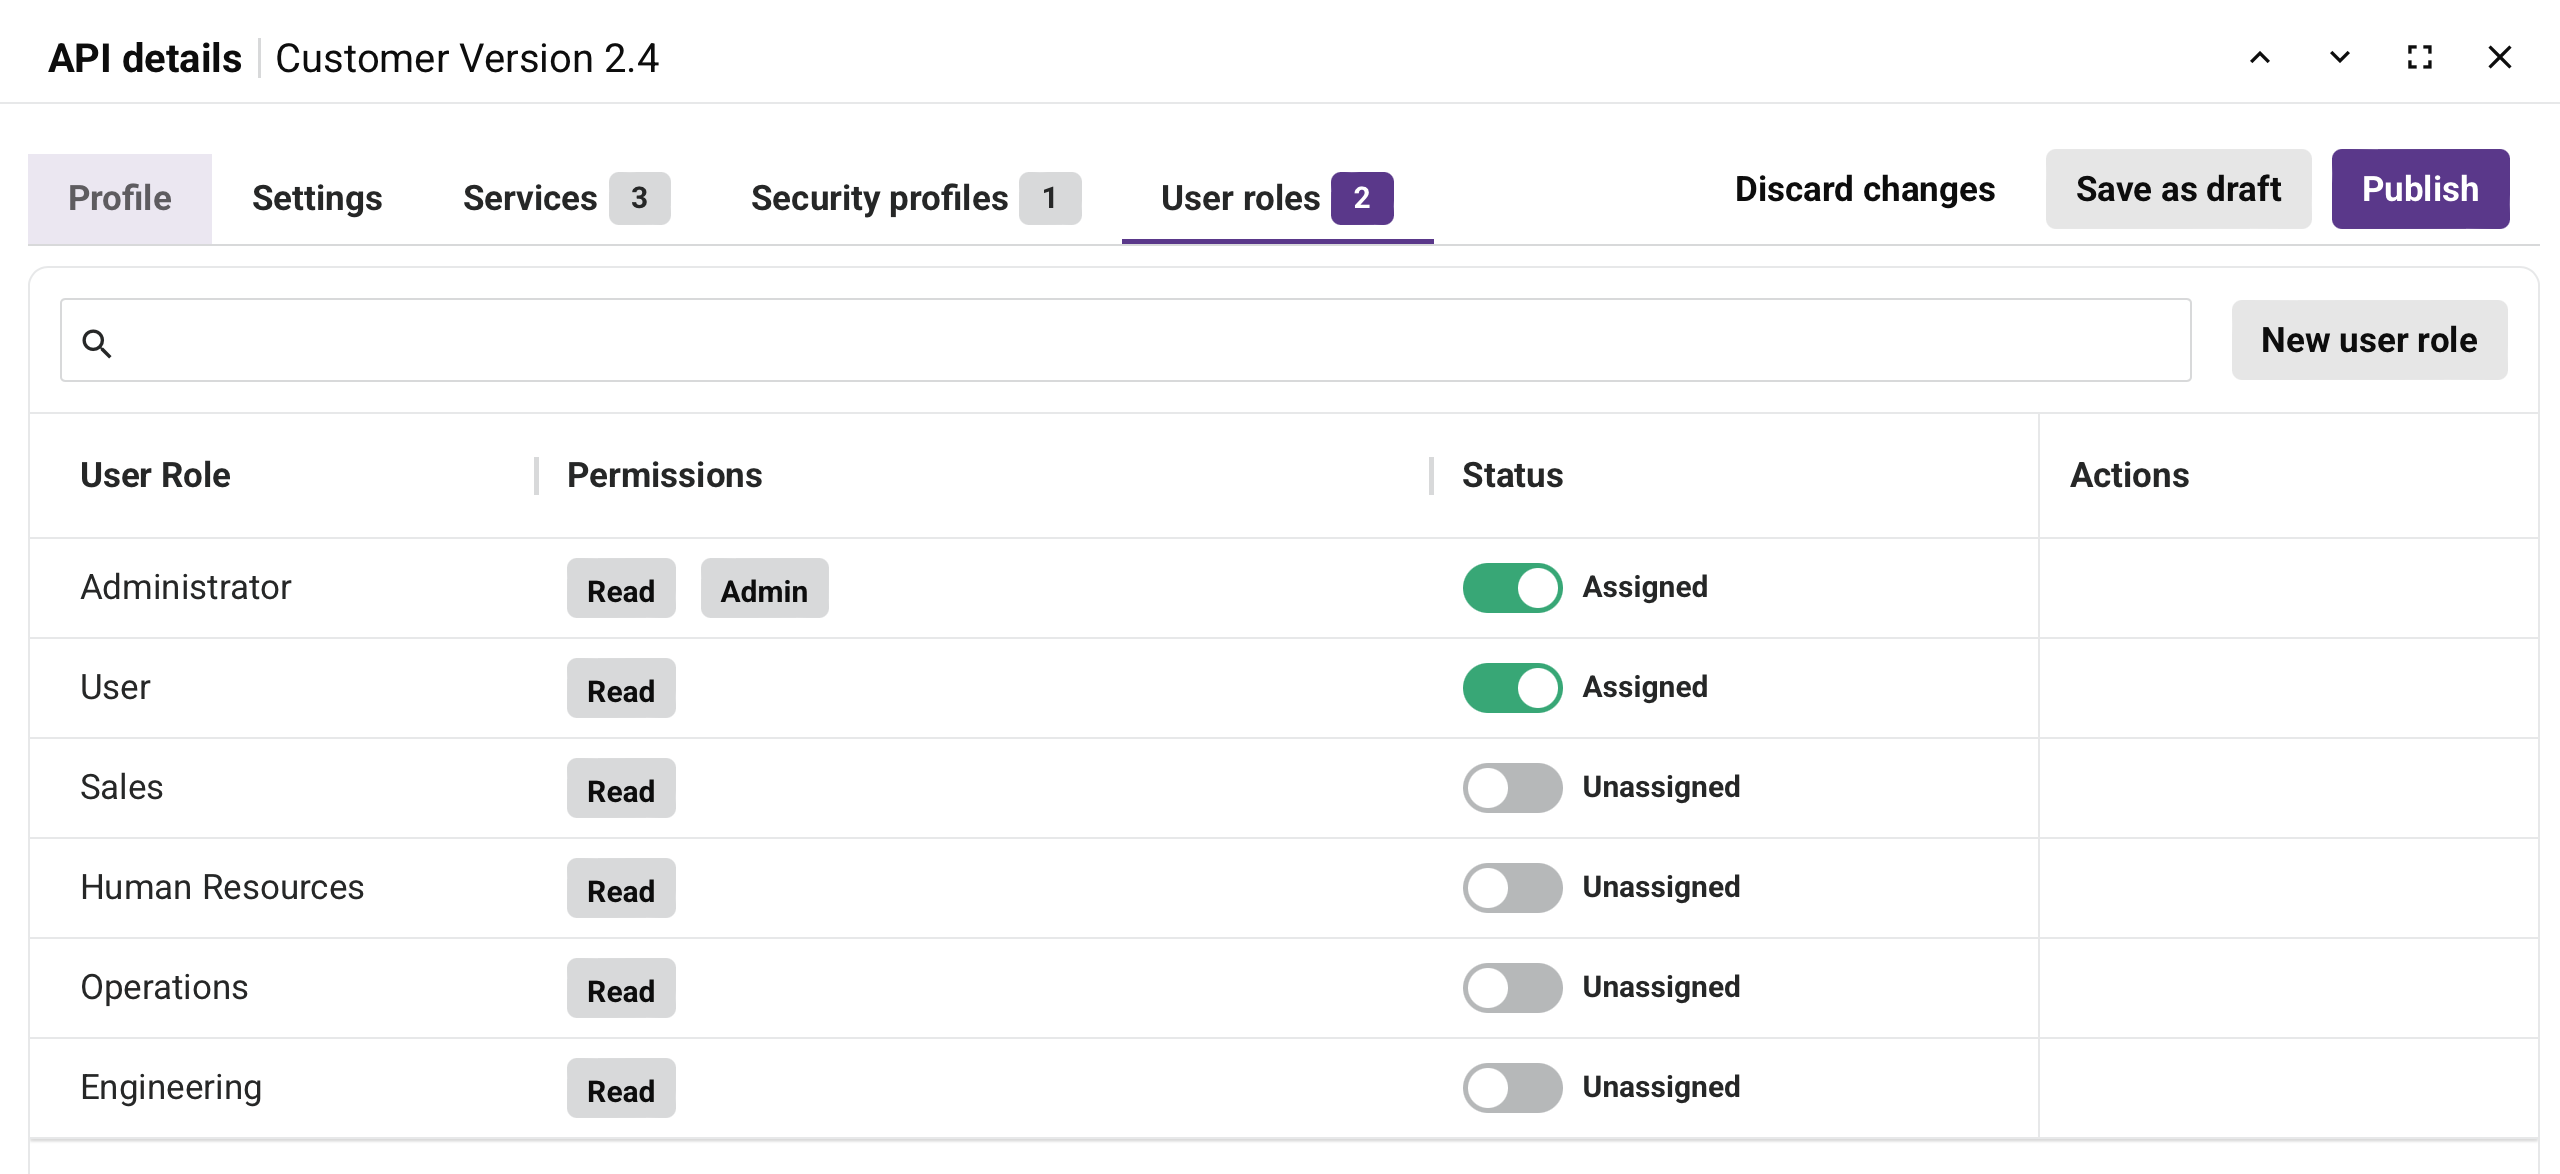
User roles tab
The User roles tab provides a list of the organization roles whose members have access to the API:
Note
This tab is visible only for custom APIs and OData APIs.
You can sort the table by User Role by clicking the respective header row.
-
Search: Enter any part of the user role, permission, or status into the search box to filter the list of services. Use alphanumeric characters only. The search is not case-sensitive.
-
New user role: Opens a drawer to configure a new user role:
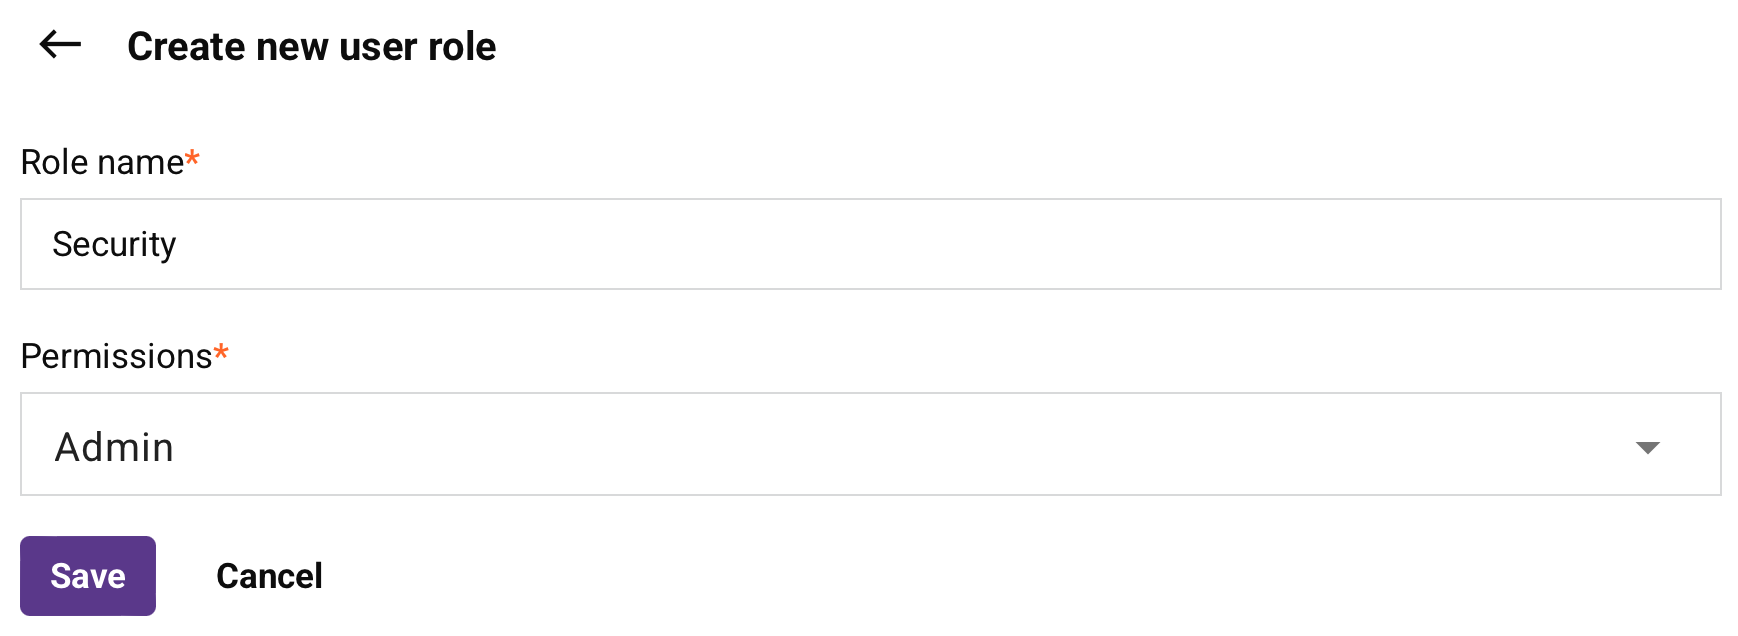
- Role name: Enter a unique name for the role.
- Permissions: Click to open the menu, then select at least one permission from the list.
-
Status: Displays whether the user role is assigned or not assigned to the API.
Role management rules
These rules apply for managing roles in APIs:
- Users with Admin permission or Write environment access can assign or unassign roles to APIs.
- Users with Admin permission can create and assign new roles.
- Users with Admin permission cannot be unassigned from any API by any user.
-
Save: Saves the role and adds it to the table of roles.
-
Cancel: Closes the drawer without saving changes.
-
User Role: The name of the Harmony user role.
-
Actions: Hover over the user role row to reveal an additional action:
- Go to user role: Opens the Management Console's User Management page.
Request headers tab
The Request headers tab provides a list of a proxy API's request headers:
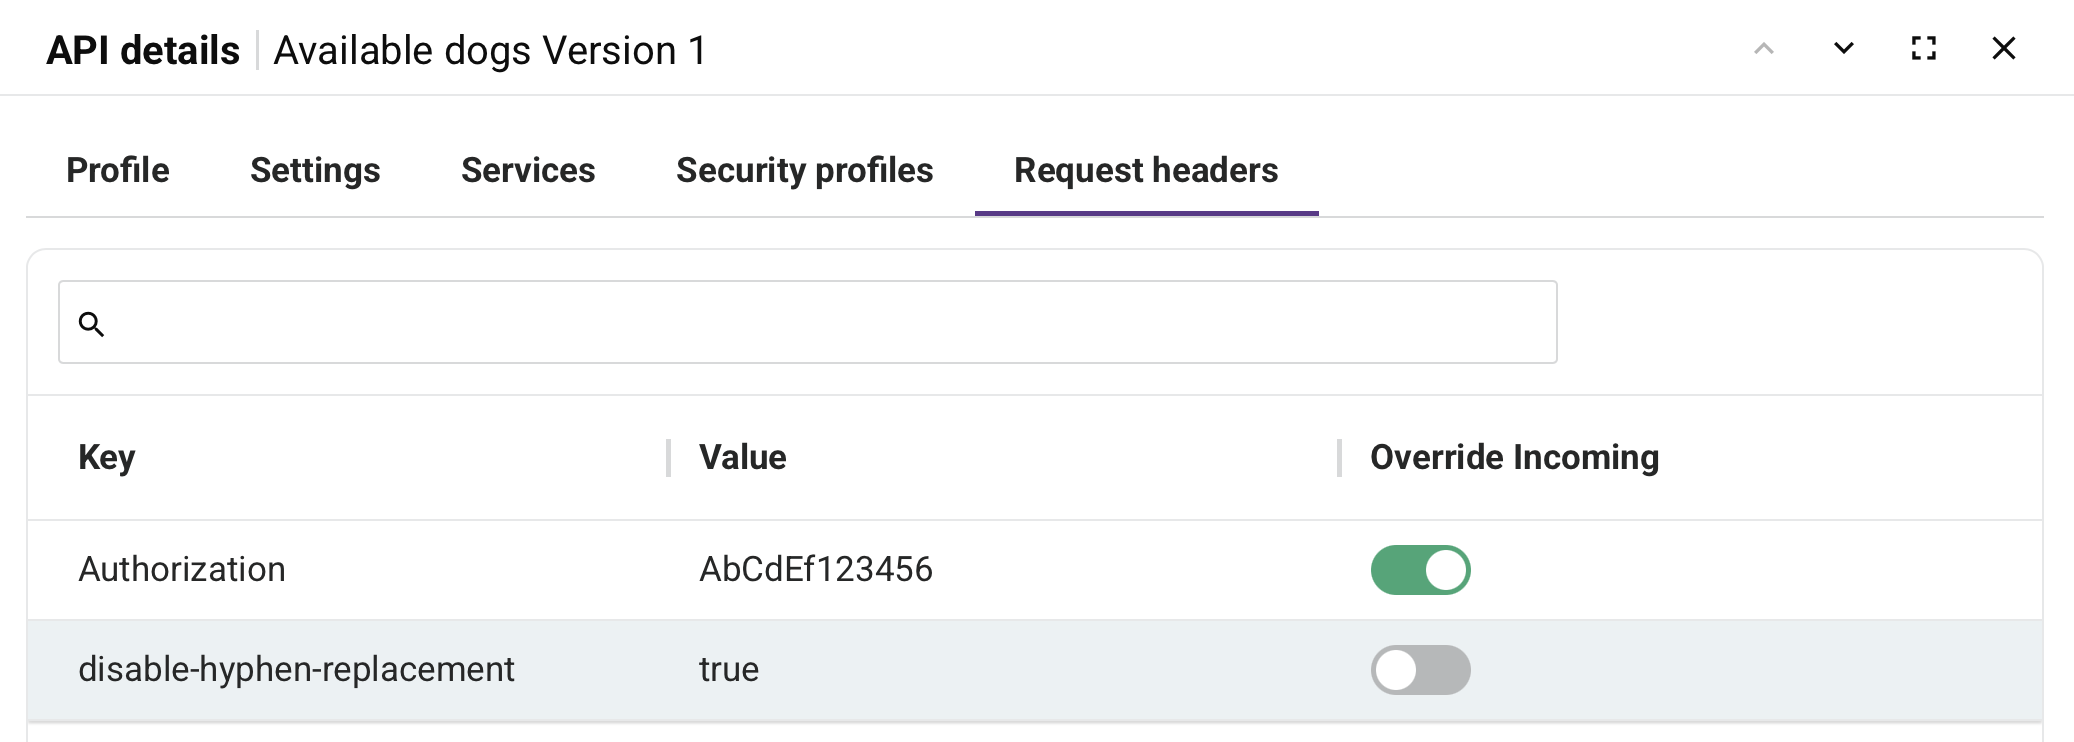
You can sort the table by Key or Value by clicking the respective header row.
-
Key: The request header's key.
-
Value: The request header's value.
-
Override Incoming: When enabled, the request header overrides other request headers that use the same Key.
Note
To edit this setting, you must click Edit on the API's Action column in the table.
-
Actions: Hover over the request header row to reveal an additional action:
- Delete header: Deletes the request header row.
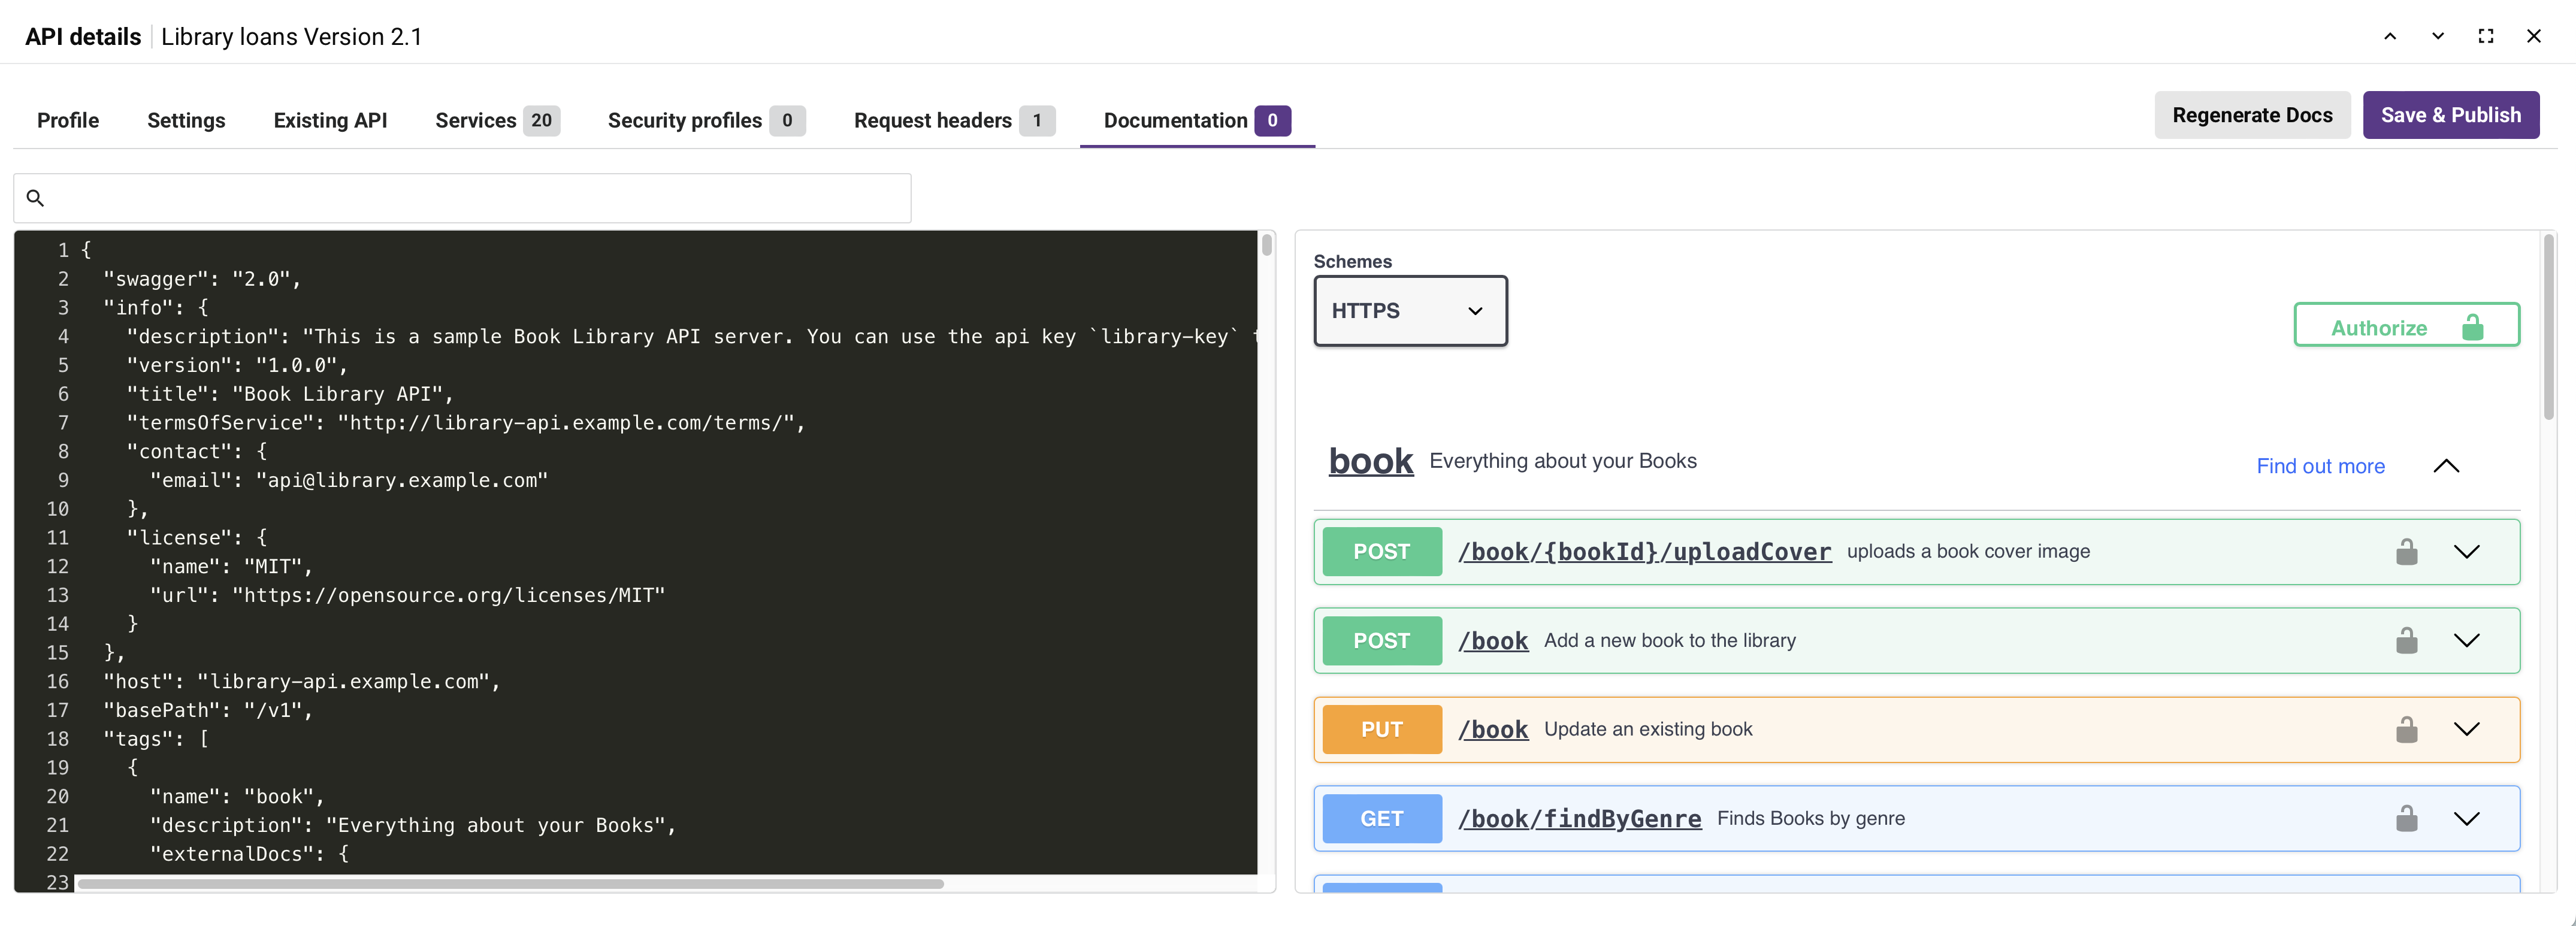
Documentation tab
The Documentation tab is available when editing a published API and allows you to view, edit, and publish OpenAPI documentation for that individual API. This tab is available for published custom, proxy, and OData APIs.
-
Regenerate Docs: Click to regenerate and overwrite the OpenAPI documentation for this API only. This option is available only for APIs that are already published.
Warning
Using this option overwrites existing documentation for this API, including any customizations. Back up the existing documentation by copying it into an external text editor before using this option. After regenerating documentation, manually re-apply any customizations by pasting them into the editor as appropriate.
-
Save & Publish: Click to save and publish documentation changes for this API only to the API Portal page.
-
Editor: Edit the YAML documentation content for this API directly within the editor. Changes are reflected in the Swagger preview on the right side of the tab.
After making edits, click Save & Publish to publish the updated documentation to the API Portal page.
-
Swagger preview: Displays the interactive Swagger UI documentation for the API. You can use the preview to test the API directly from the Documentation tab using the same controls described in Test APIs on the Portal Manager page.