Página de Plugins no Jitterbit Management Console
Visão Geral
| Propósito | Gerenciar plugins em agentes privados |
| Localização | Menu do portal Harmony > Management Console > Personalizações > Plugins |
| Acesso à página | Usuários com permissão de Admin papel |
Introdução
Plugins são instalados em agentes Jitterbit e podem ser usados em projetos tanto do Studio quanto do Design Studio.
A página Plugins é uma tabela que lista os plugins disponíveis:

No topo da página, há uma barra de ferramentas com o seguinte:
-
Pesquisar: Digite o texto e pressione enter para buscar um plugin.
-
Configurações de Colunas: Clique para abrir a gaveta de Configurações de Colunas.
-
Adicionar Plugin: Clique para adicionar um novo plugin.
Importante
Plugins fornecidos pela Jitterbit estão obsoletos.
Adicionar um plugin
Para adicionar um plugin, siga estas etapas:
-
Clique no ícone Adicionar Plugin. Uma nova linha aparece na tabela:

-
Clique no botão Upload, em seguida, navegue até o plugin no formato
.zip. O ZIP deve conter um arquivoplugin.xml.
-
Clique em Salvar para salvar, ou Cancelar para cancelar.
Excluir um plug-in
Para excluir um plug-in personalizado, passe o mouse sobre a coluna Ações, em seguida, clique no ícone Excluir . (Para plug-ins padrão, essa opção ficará desativada.)
Detalhes
Quando você seleciona um plug-in, as seguintes abas se abrem em um painel na parte inferior da janela:
Quando aberto, o painel inferior possui os seguintes controles:
-
Próximo: Selecione o próximo plug-in na tabela.
-
Anterior: Selecione o plug-in anterior na tabela.
-
Expandir: Expanda o painel para preencher a janela do navegador.
-
Fechar: Feche o painel.
Manifesto
A aba Manifesto mostra o arquivo de manifesto para o plug-in selecionado:

Para copiar o XML para a área de transferência do seu sistema, clique no ícone Copiar conteúdo .
Para baixar o XML como um arquivo, clique no ícone Baixar manifesto .
Grupos de Agentes Privados
A aba Grupos de Agentes Privados mostra quais grupos de agentes privados estão associados ao plug-in selecionado:

Para associar ou desassociar um grupo de agentes ao plug-in selecionado, clique no botão de alternância do grupo.
Para mostrar ou ocultar os detalhes de um grupo de agentes, clique no ícone Expandir ou no ícone Ocultar :

Para encontrar um grupo de agentes ou agente, insira texto na barra de Pesquisa . Todos os campos são pesquisados.
Para ver apenas os grupos associados, clique no botão de alternância Mostrar apenas associados.
Grupos de Agentes em Nuvem
A aba Grupos de Agentes em Nuvem mostra quais grupos de agentes em nuvem estão associados ao plug-in selecionado:

O toggle de cada grupo é um dispositivo somente leitura que mostra o status de associação para o plugin selecionado.
Para mostrar ou ocultar os detalhes de um grupo de agentes, clique no ícone Expandir ou Ocultar:

Uso
A aba Uso lista quaisquer projetos que estão atualmente utilizando o plugin. A aba também inclui o ambiente em que o projeto está, a operação específica e o tipo de uso.

Nota
O ambiente, projeto e operação serão exibidos apenas quando o plugin for adicionado a uma atividade. O uso não será exibido quando o plugin for chamado em um script.
Configurações de coluna
Você pode classificar o conteúdo da tabela, ajustar as larguras das colunas e reorganizar as colunas:
-
Classificar: Para classificar uma tabela em ordem crescente, clique em um cabeçalho de coluna. Clique novamente para inverter a ordem da classificação.
-
Redimensionar colunas: Arraste a barra Redimensionar de uma coluna para redimensioná-la.
-
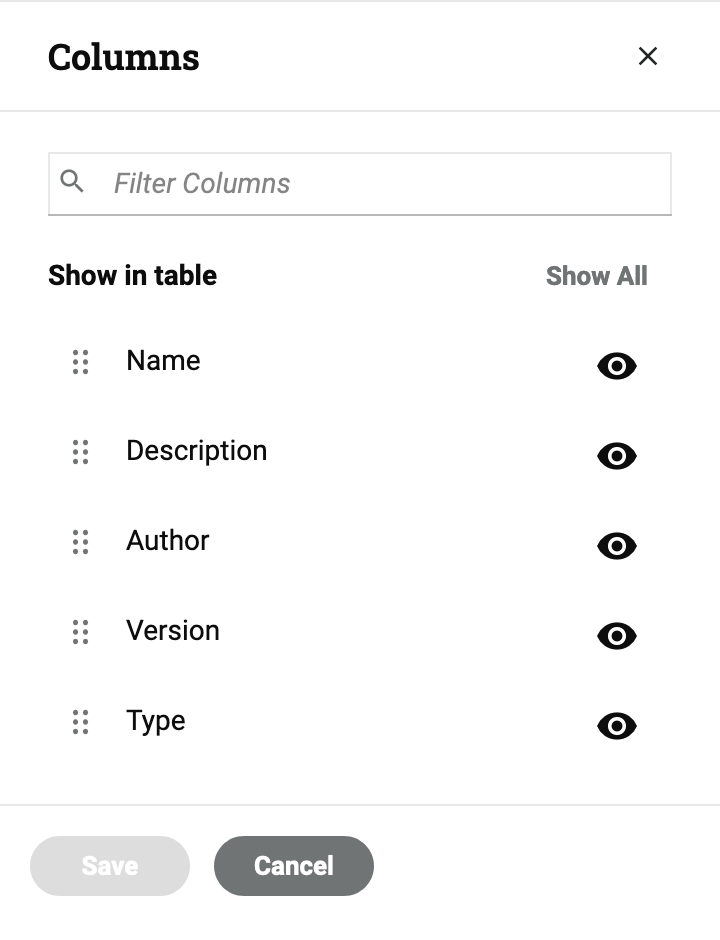
Colunas: Para alterar a disposição e a visibilidade das colunas, clique em Configurações de Colunas. O painel Colunas se abre:

O painel possui os seguintes controles:
-
Fechar: Fechar o painel.
-
Filtrar Colunas: Digite texto para pesquisar uma coluna.
-
Mostrar Todas: Tornar todas as colunas visíveis.
-
Mover: Arraste e solte para alterar a posição da coluna em relação às outras.
-
Ocultar: A coluna está visível. Clique para ocultá-la.
-
Mostrar: A coluna está oculta. Clique para mostrá-la.
-
Salvar: Salvar as colunas.
-
Cancelar: Fechar o painel de colunas sem salvar as alterações.
-