Adicione um painel de chat ao seu aplicativo no Jitterbit App Builder
Visão geral
Esta página mostra como adicionar um painel de chat a uma página no seu aplicativo App Builder. Este é um passo opcional na configuração do recurso de UI Conversacional.
Por padrão, a UI Conversacional é acessada através de uma bolha de chat flutuante. Adicionar um painel de chat incorpora a interface de chat diretamente em um layout de página. Quando uma página inclui um painel de chat, a bolha de chat não é exibida nessa página.
Pré-requisitos
Para adicionar um painel de chat, primeiro você precisa configurar o comportamento padrão do recurso de UI Conversacional. Consulte Configurar um agente para instruções.
Adicionar um painel de chat
-
Crie uma nova página ou abra uma página existente para edição.
-
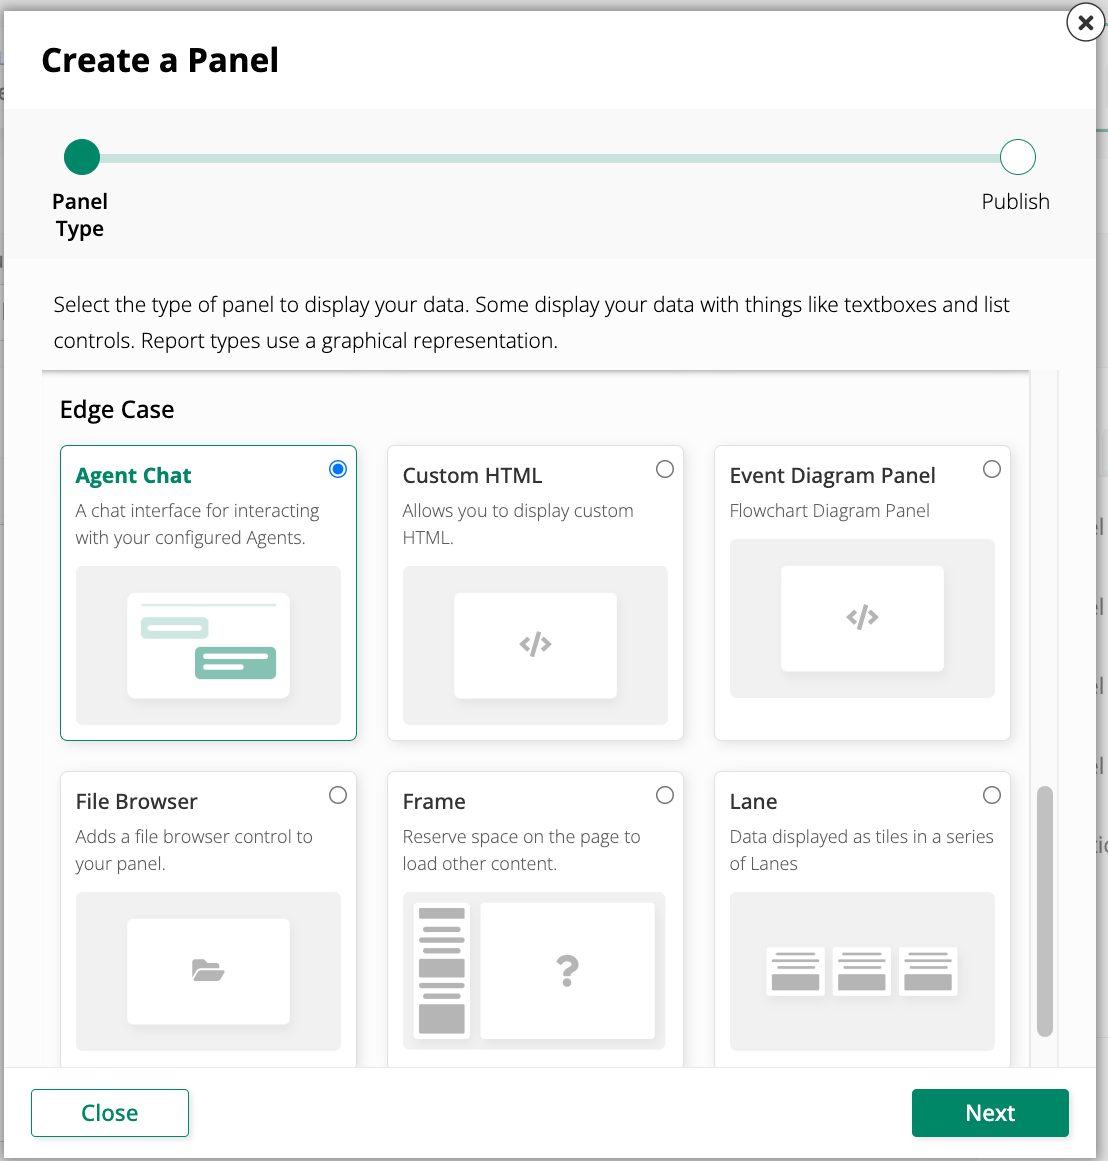
Clique em + Adicionar Painel, depois clique em + Escolher tipo de painel. O assistente Criar um Painel é aberto.
-
Em Edge Case, selecione Agent Chat Panel, depois clique em Próximo.
-
Complete as etapas restantes no assistente e publique o painel.
-
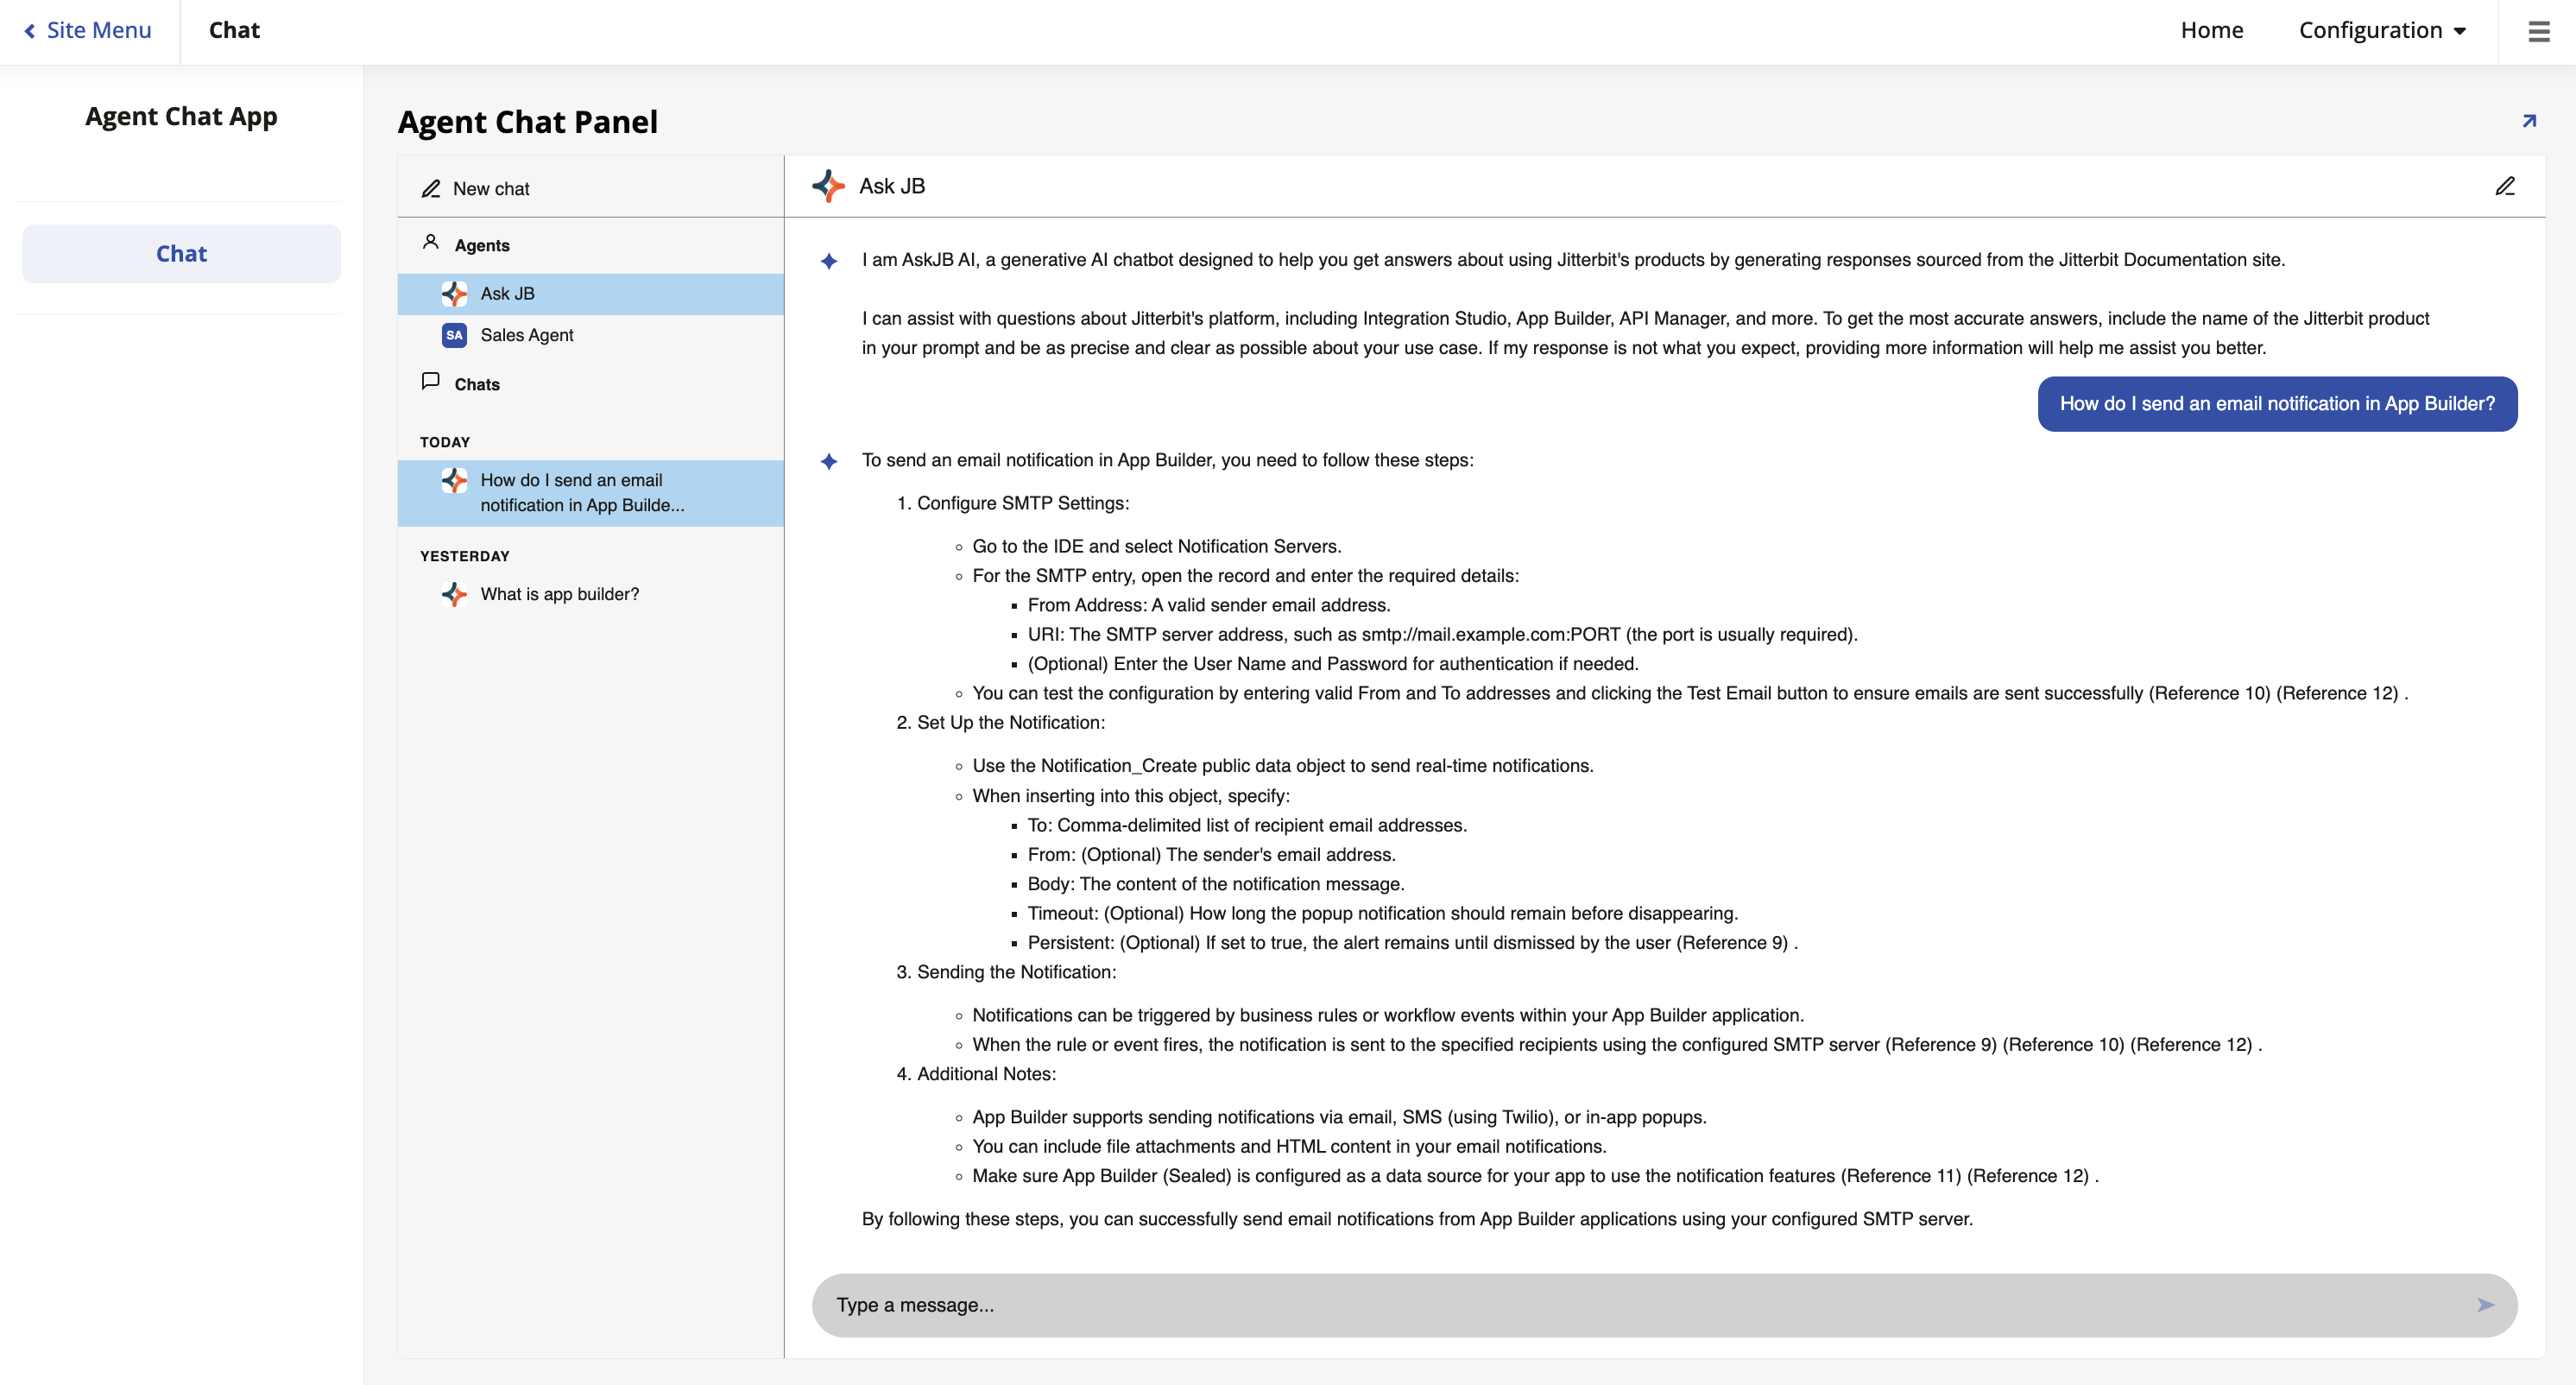
Inicie a página. A interface de chat aparece no painel. A bolha de chat não é visível nesta página.
Nota
Se a página contiver vários painéis, o painel de chat do Agente não é exibido em modo de tela cheia. Clique no ícone de expandir no painel para entrar na visualização em tela cheia.
Importante
Apenas usuários pertencentes a um grupo com acesso à fonte de dados do agente de IA podem interagir com o painel de chat. Quando um usuário sem acesso navega para uma página contendo um painel de chat, verá uma mensagem informando que nenhum agente está definido.