Send an email notification from a Studio operation in Jitterbit Studio
Introduction
This integration design pattern sends an email from a Studio operation, typically to alert a team when an operation succeeds or fails. Studio's email notifications are a built-in mechanism that requires no connector or transformation: the notification is configured as a reusable component and then attached to an operation action.
This is the most widely used email pattern in Studio and is supported by all agent types. For a comparison of all email methods available in Studio, see Ways to send email.
Part 1: Create an email notification
-
In Studio, open your project and select the Components tab in the project pane.
-
Expand the Emails category and select Create New from the actions menu.
-
Email Notification Name: Enter a descriptive name, such as
Operation Failure Alert. -
SMTP Email Server(s): Enter at least one SMTP server in the format
server:port, for examplesmtp.example.com:587. To specify multiple servers, separate them with commas. Servers are tried in order until one accepts the message. -
To Email Address(es): Enter at least one recipient email address. To specify multiple recipients, separate them with commas.
Tip
Store the recipient address as a project variable such as
[notify_email]. This allows the recipient to be changed without editing the project. -
From Email Address: Enter the address the email will appear to come from.
-
Use SSL/TLS: Select the checkbox if your SMTP server requires an encrypted connection.
-
Use Authentication: Select the checkbox if your SMTP server requires authentication, then enter the Account and Password.
Tip
Store the account and password as project variables with their values hidden. This keeps credentials out of the notification configuration and makes them easier to rotate.
-
Subject and Message: Enter the subject line and message body. Global variables, project variables, and Jitterbit variables are supported in both fields and can be used to include dynamic content such as error details, record counts, or timestamps.
-
Click Test to send a test email and verify that the configuration is correct. Then click Save.
Part 2: Add the notification as an operation action
-
On the design canvas, right-click the operation and select Settings to open the operation settings.
-
Select the Actions tab.
-
Condition: Select On Fail to trigger the email when the operation fails, or On Success to trigger it when the operation completes successfully.
-
Action: Select Send Email Notification.
-
Email Notification: Select the notification created in Part 1.
-
Click Add Action.
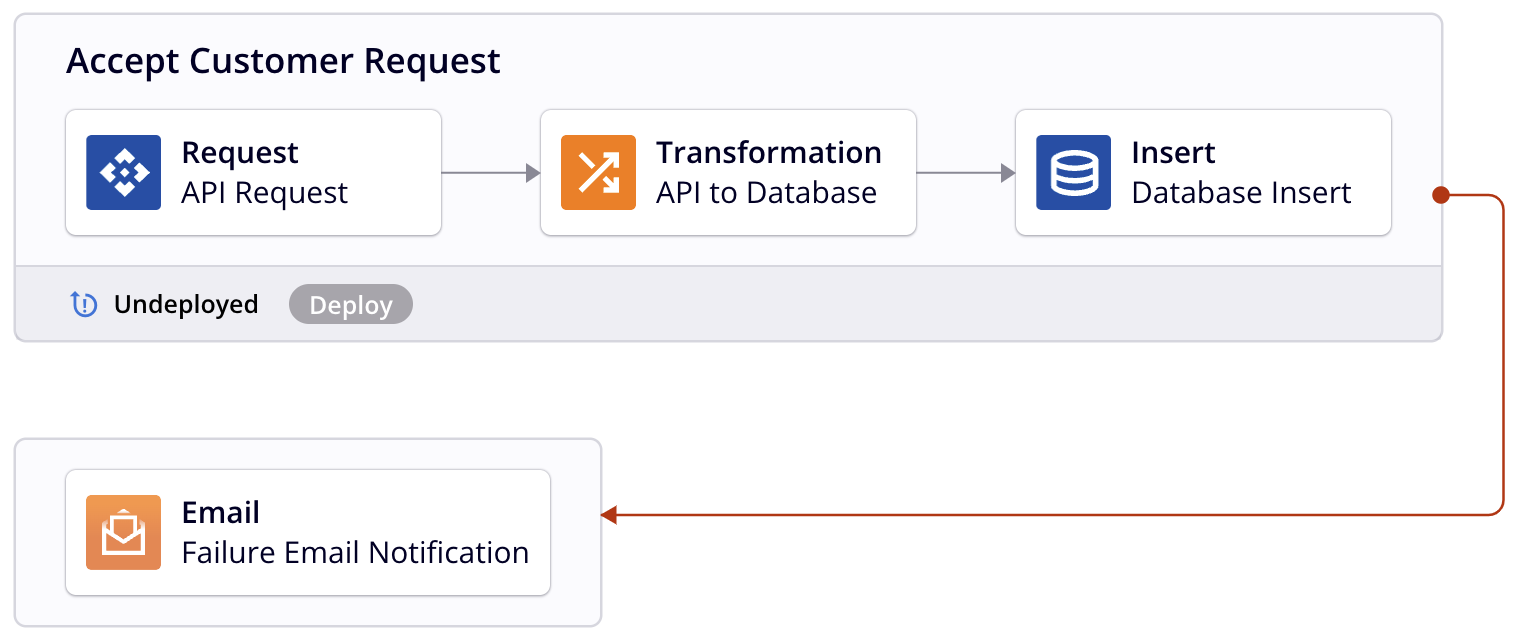
The email notification appears as a linked component on the design canvas connected to the operation:
For a full description of available conditions and actions, see Operation actions.
Part 3: Alternatively, send from a script
If you need more control over when and how the email is sent (for example, to send only when a specific error condition is met, or to build a dynamic recipient list at runtime), use the SendEmail or SendEmailMessage function in a script.
SendEmail
Use SendEmail to specify the full email configuration inline:
SendEmail(
    $from_address,
    $notify_email,
    "Operation completed with errors",
    "The following error occurred: " + $error_detail,
    "smtp.example.com:587",
    $smtp_account,
    $smtp_password,
    "", "", "",
    1);
Where error_detail is a global variable populated earlier in the operation, and $from_address, $notify_email, $smtp_account, and $smtp_password are project variables.
SendEmailMessage
Use SendEmailMessage to trigger a notification component already configured in the project:
SendEmailMessage("<TAG>email:Operation Failure Alert</TAG>");
This sends the email notification named Operation Failure Alert using the configuration defined in Part 1.
Tip
Use a script with SendEmail or SendEmailMessage when you need conditional logic (for example, to check a global variable before deciding whether to send the notification, or to build the recipient list dynamically during the operation).
Verify the integration
Deploy and run the operation and trigger the condition that should send the email. For an On Fail action, introduce a deliberate failure on the first run to confirm the notification fires. Check the operation logs to confirm the email action executed without errors. If no email arrives, verify the SMTP server address and port, check that authentication credentials are correct, and confirm that the Test button in the notification configuration succeeds.