Create your first transformation in Jitterbit Studio
Introduction
This page shows you how to create a simple transformation that maps customer data from a database to JSON format. You'll learn the basic workflow for building transformations in Studio.
When you follow this guide, you'll create a transformation that does the following:
-
Takes customer data from a database query.
-
Maps the fields to a JSON output format.
-
Adds a calculated field for the full customer name.
The database query provides data using this schema:
firstName: "Rosario"
lastName: "Garcia"
email: "rosario.garcia@example.com"
status: "active"
{
  "fullName": "Rosario Garcia",
  "contactEmail": "rosario.garcia@example.com",
  "isActive": true
}
Prerequisites
Before you create a transformation, you need the following:
-
An existing project in Studio.
-
Basic familiarity with the Studio interface.
-
Understanding of key transformation concepts.
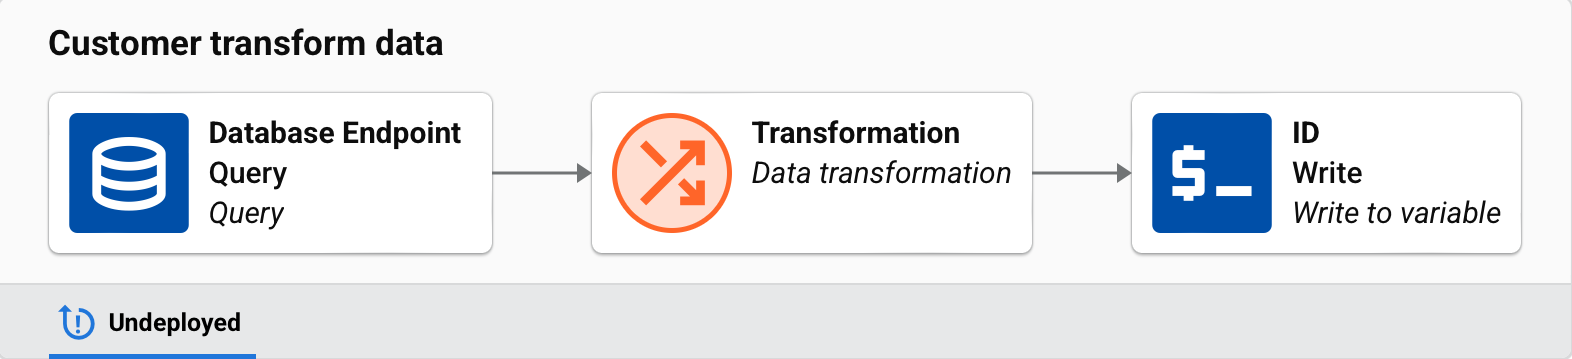
Step 1: Create an operation
First, create an operation with configured source and target activities. In this guide, a Database Query activity is being used as the source and a Variable Write activity is being used at the target:
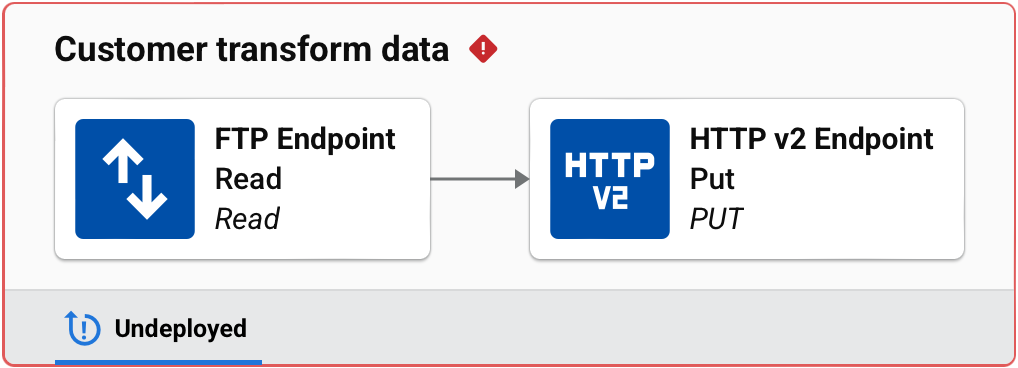
For information on configuring a specific endpoint, see the Connectors documentation. To understand how schemas are inherited from activities, see Choose schema sources.
Step 2: Add a transformation
-
Hover between the two activities until you see the transformation drop zone:
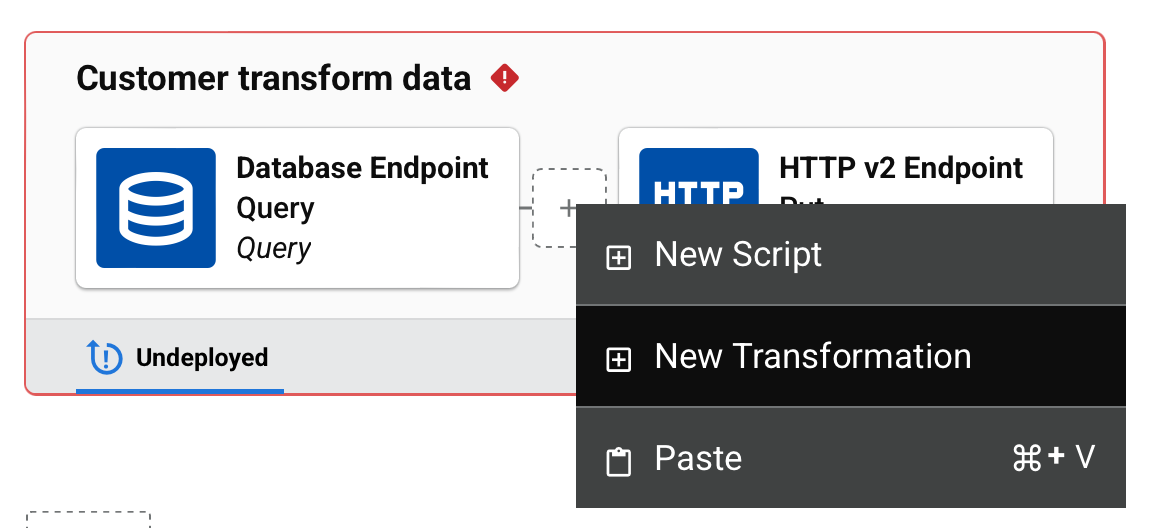
-
Click New Transformation.
-
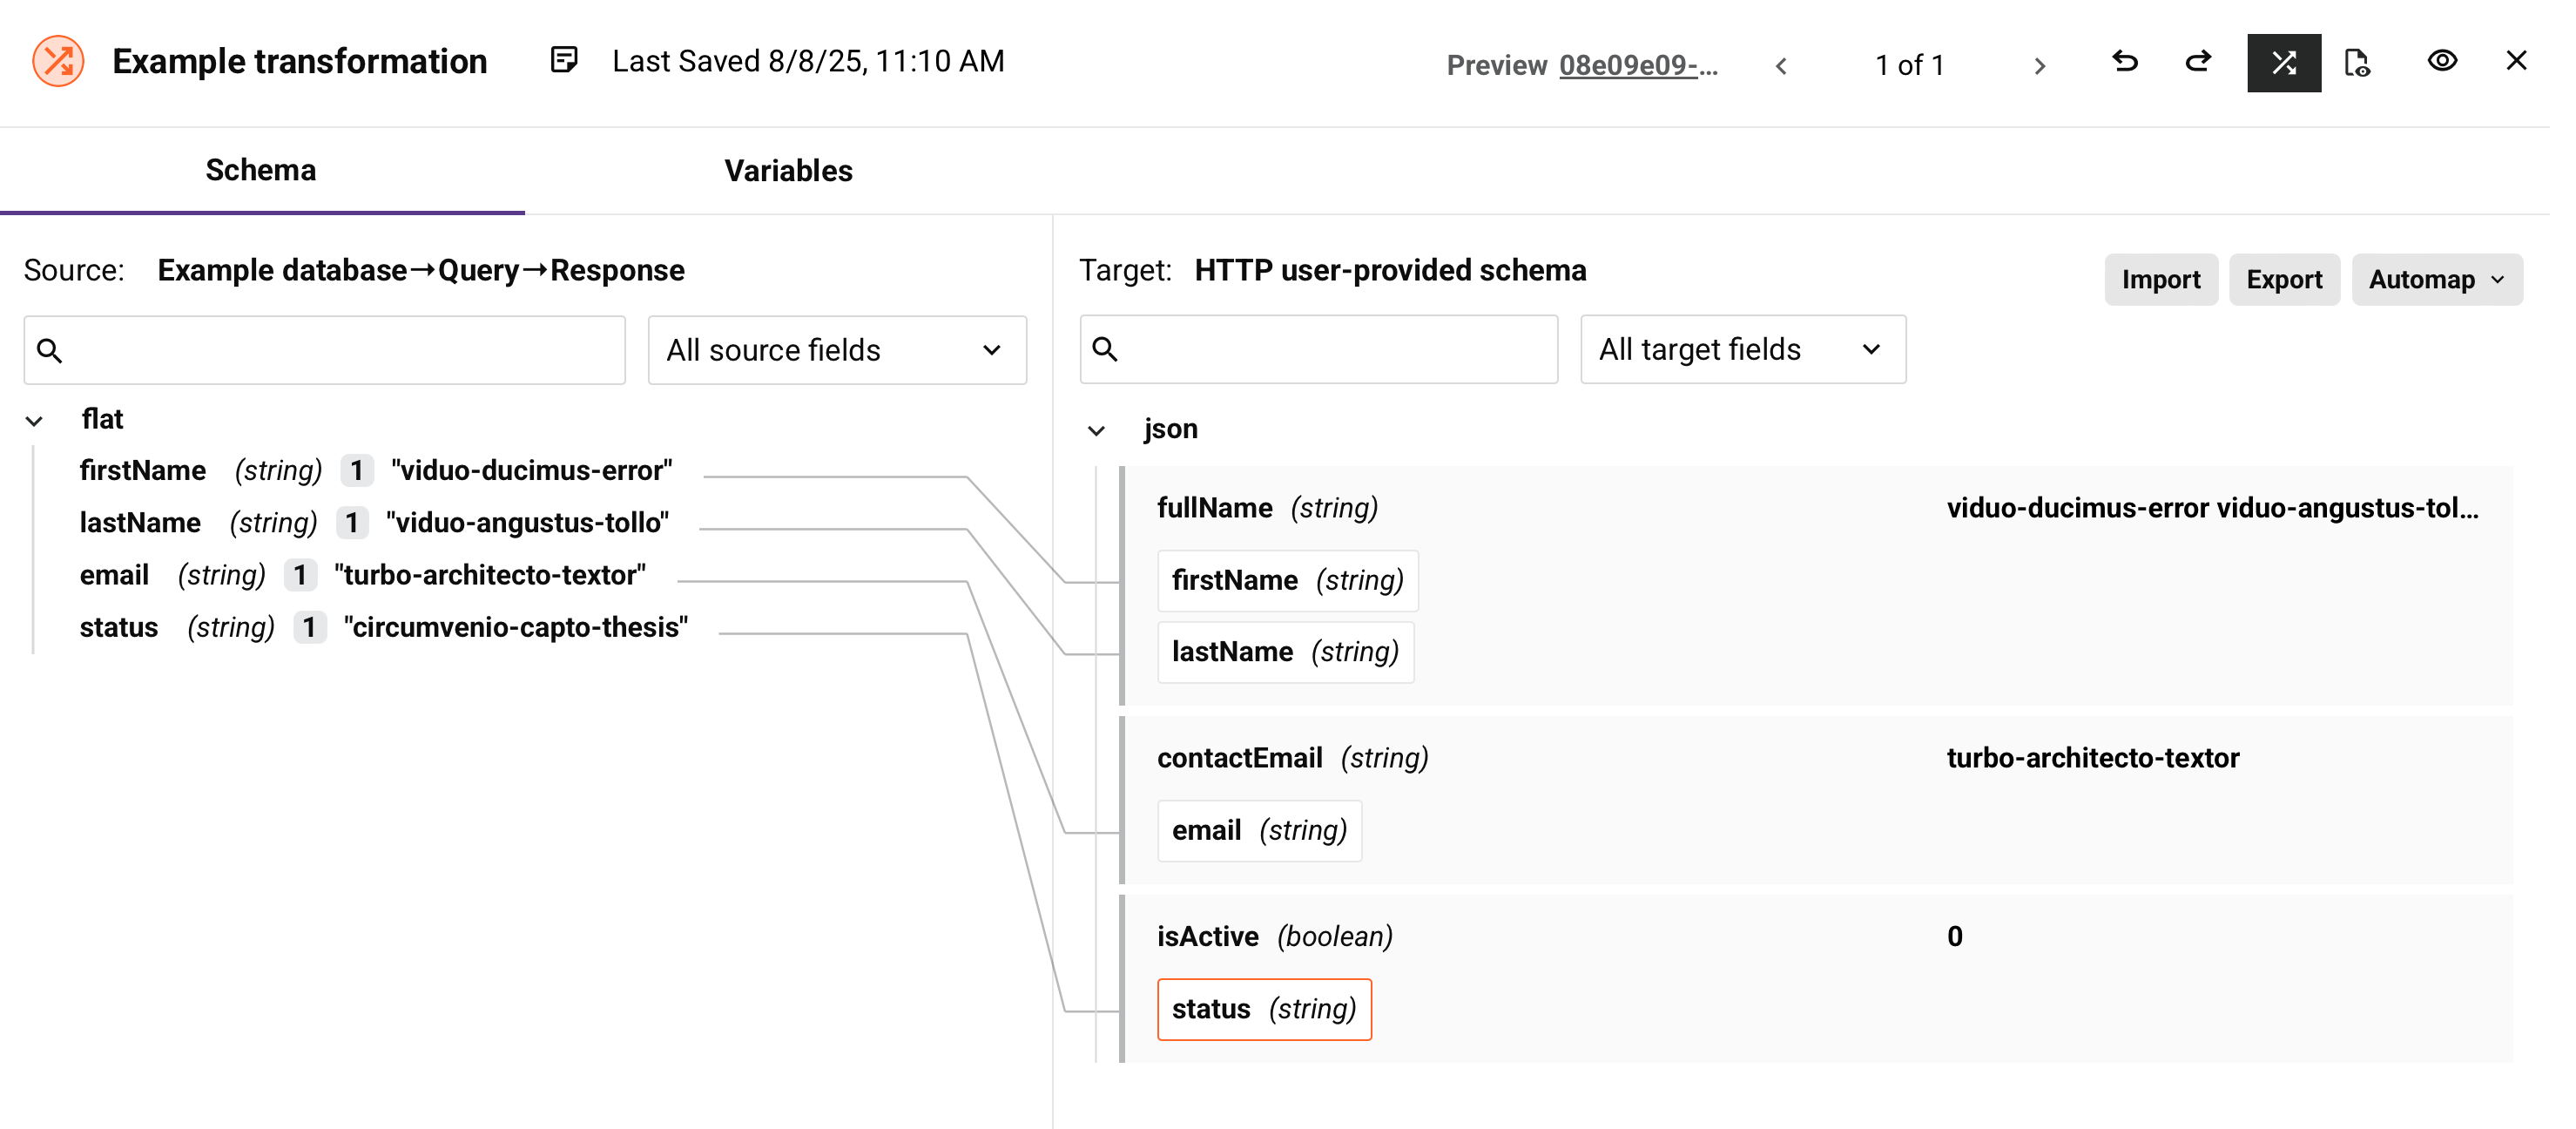
A new transformation opens with these schemas:
- Source schema on the left (inherited from the Database activity).
- Target schema on the right (inherited from the user-defined schema provided in the HTTP v2 activity).
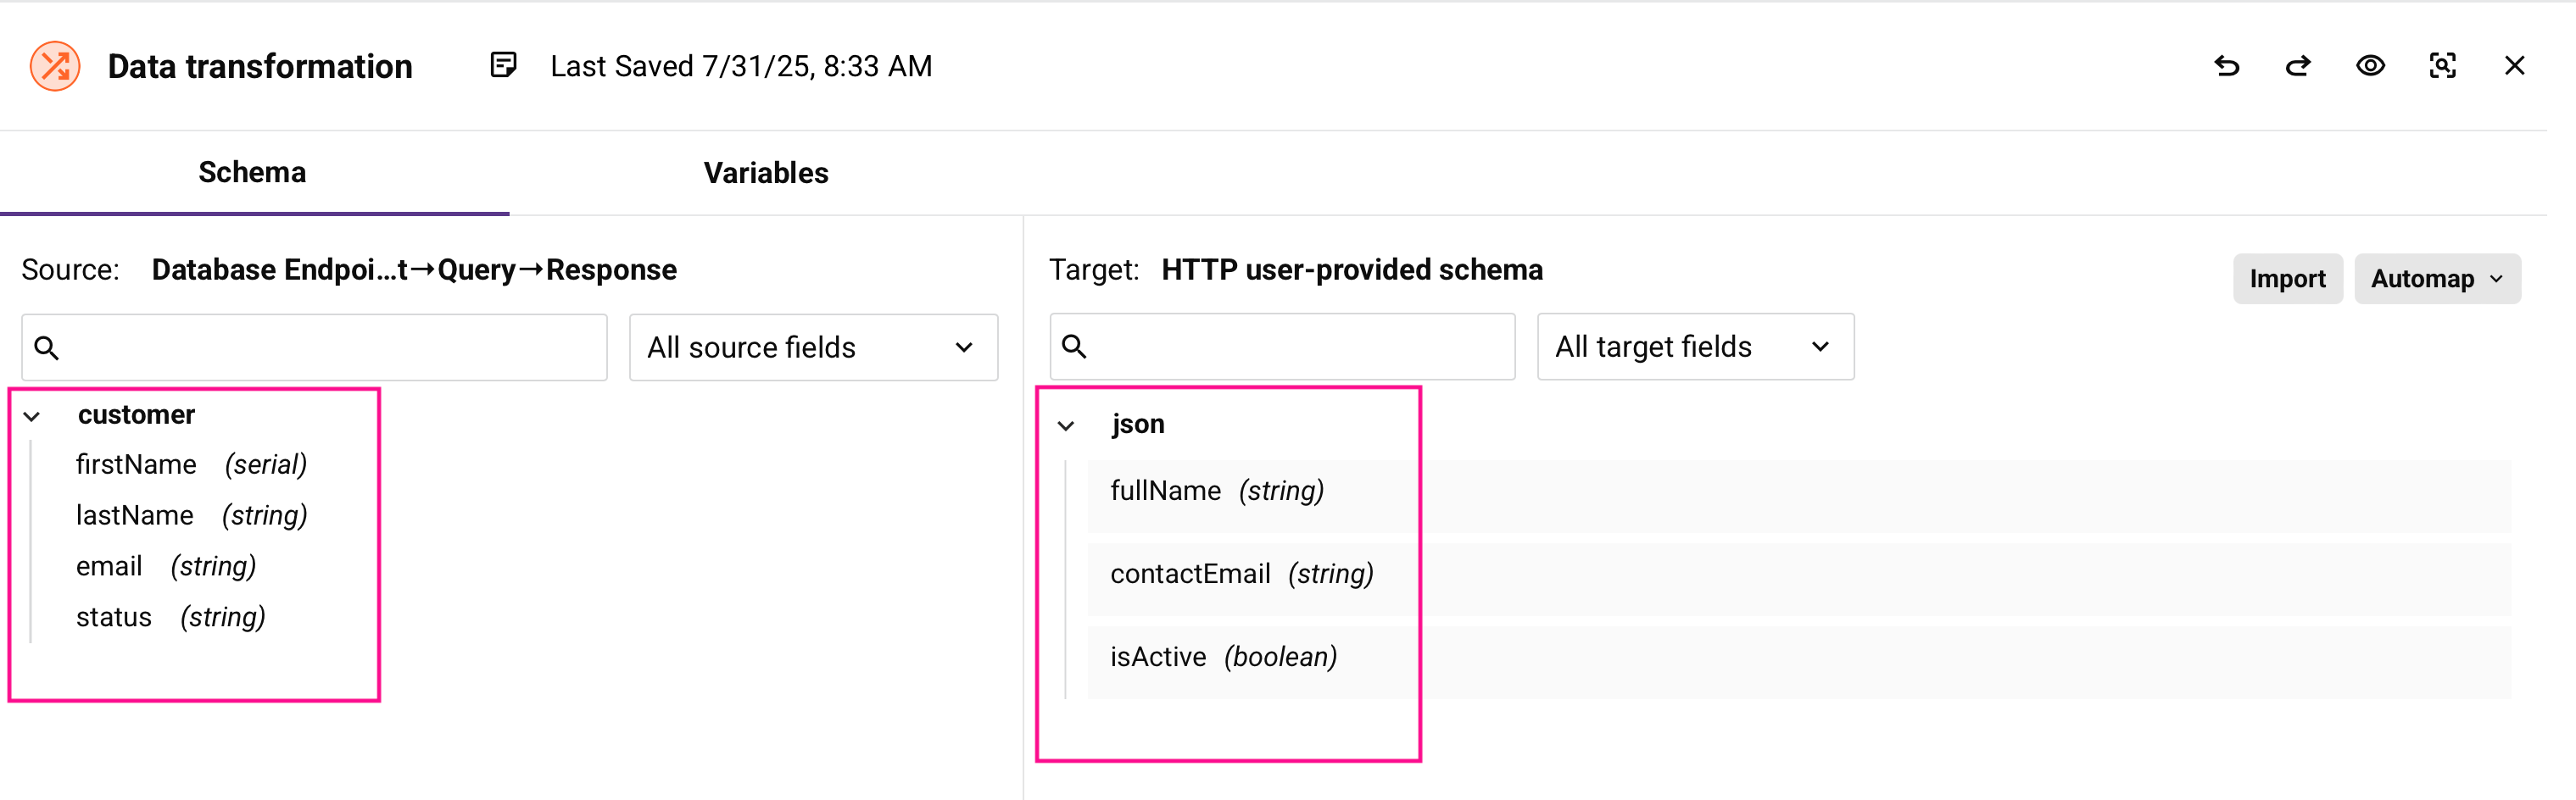
Step 3: Map fields
Create mappings between source and target fields.
Note
The examples in the following sections describe basic field mapping. For more complex scenarios like nested data structures, see Work with hierarchical data, or for repeating data, see Control data loops.
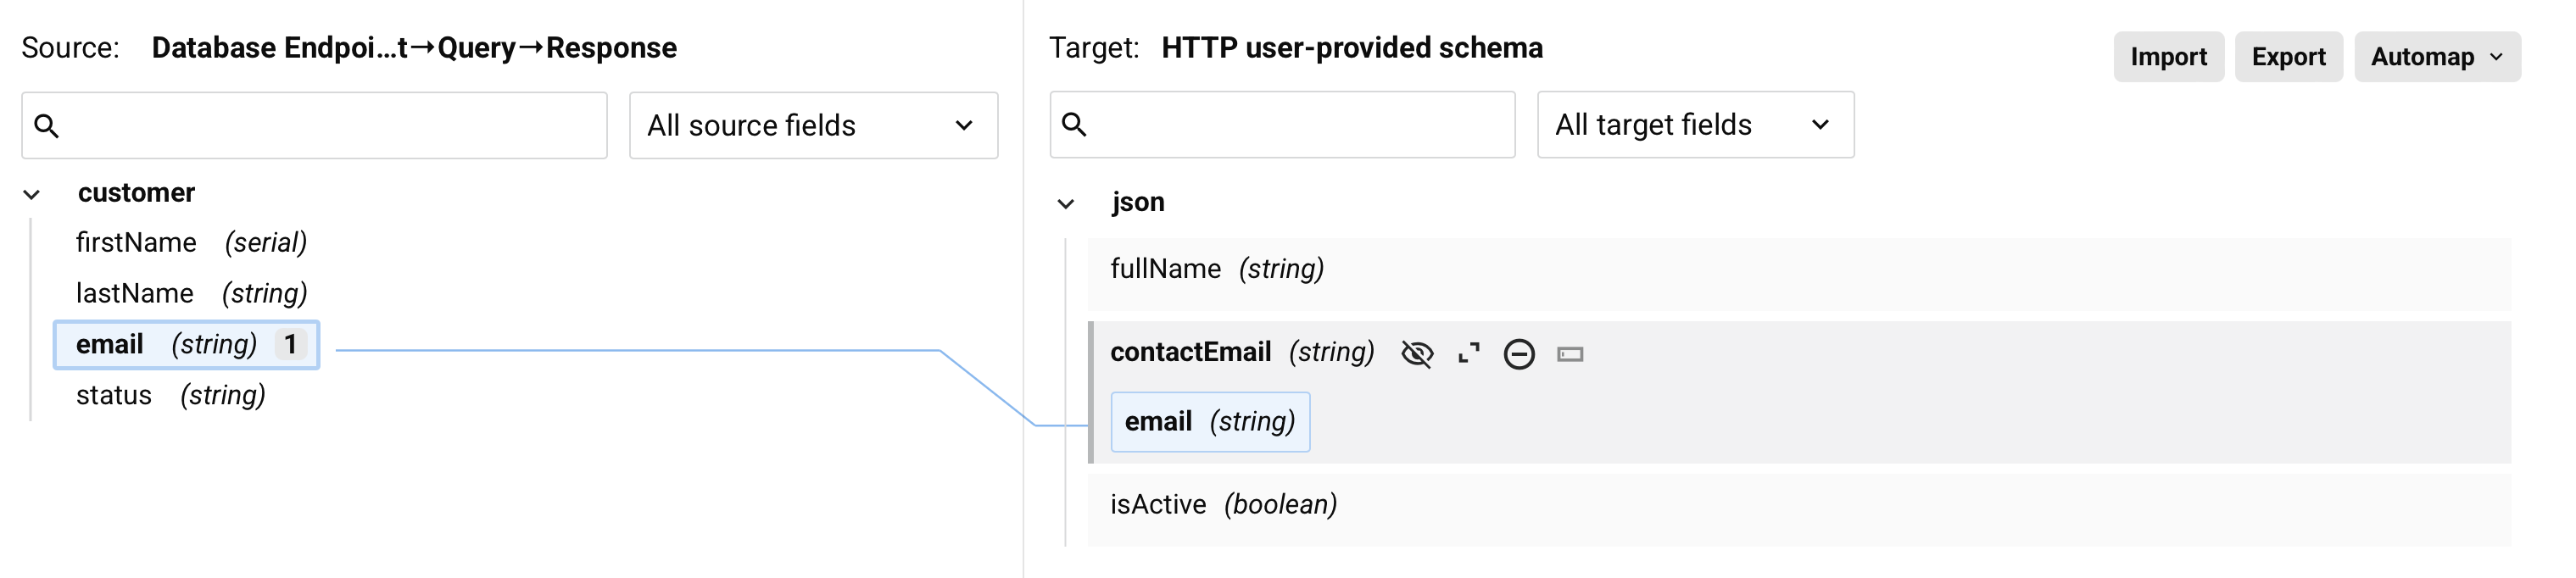
Map the email field manually
-
From the source side, drag the
emailfield to the targetcontactEmailfield. -
The mapping appears as a line connecting the fields, and the target field shows the mapped source:
Map the status field with transformation
-
Hover over the target
isActivefield and click Expand or Add custom value. -
In the script area that opens, enter this script:
If(status == "active", 1, 0)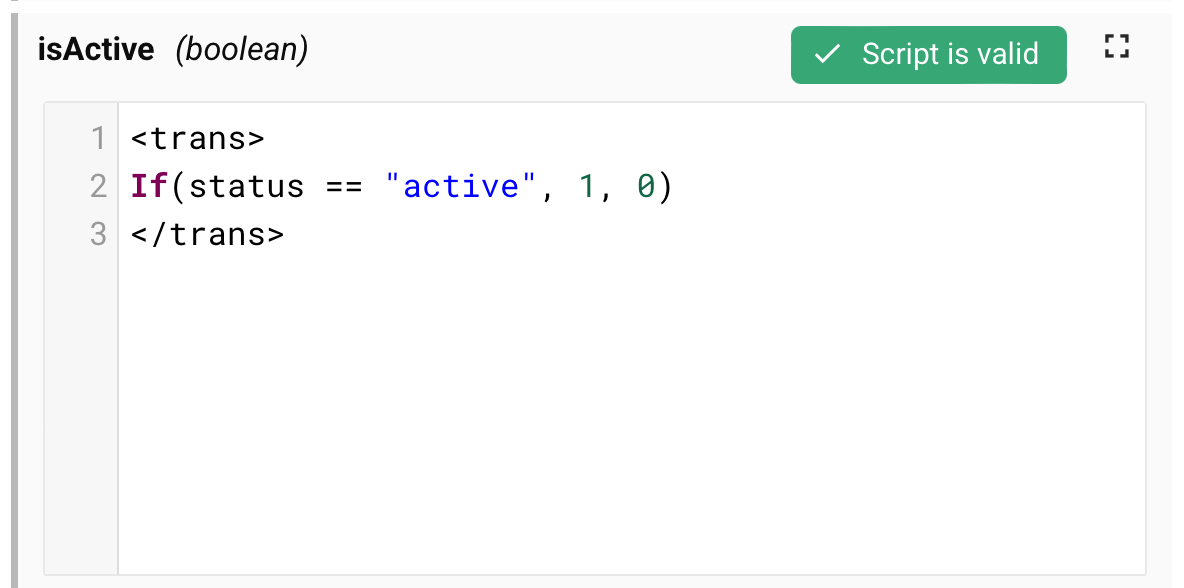
The script converts the text status to a boolean value at runtime.
Create a calculated field
-
Hover over the target
fullNamefield and click Expand or Add custom value. -
Enter this script to combine first and last names:
firstName + " " + lastName
Step 4: Test your transformation
Use preview mode to test your transformation with sample data:
-
Click Preview in the transformation toolbar.
-
On the configuration screen, select Create mock data from source structure.
-
Click Finished.
-
Review the sample data in preview mode to verify your mappings work correctly:
The preview shows the following:
- Source data on the left with sample values.
- Target data on the right with your transformed values.
- Any mapping errors highlighted in red.
Step 5: Validate
-
Close the transformation to return to the operation view:
-
Check that your operation shows no validation errors.
Next steps
To continue learning about transformations see these resources:
- Choose schema sources to learn about different ways to define schemas.
- Navigate the interface to explore transformation tools.
- Map identical structures to learn about automapping.