Module 6: Creating a schedule for the Introduction to Jitterbit Integration Studio training course
Introduction
Module 6 in the Introduction to the Jitterbit Integration Studio training course demonstrates creating a custom schedule to run the operation automatically on that schedule.
Prerequisites
The operation created in Module 5 - RESTful web service is used as an example. However, a schedule may be applied on any operation.
Summary
In this module, you will add a schedule to the operation created in Module 5 - RESTful web service.
The completed operation will look like this:

1. Create and assign a schedule
For this module, you continue working within the same workflow as Module 5 and add a schedule to the operation:
- In the top right of the operation, click the actions menu icon and from the menu select Settings.
- Within the Schedules tab, click Create New Schedule.
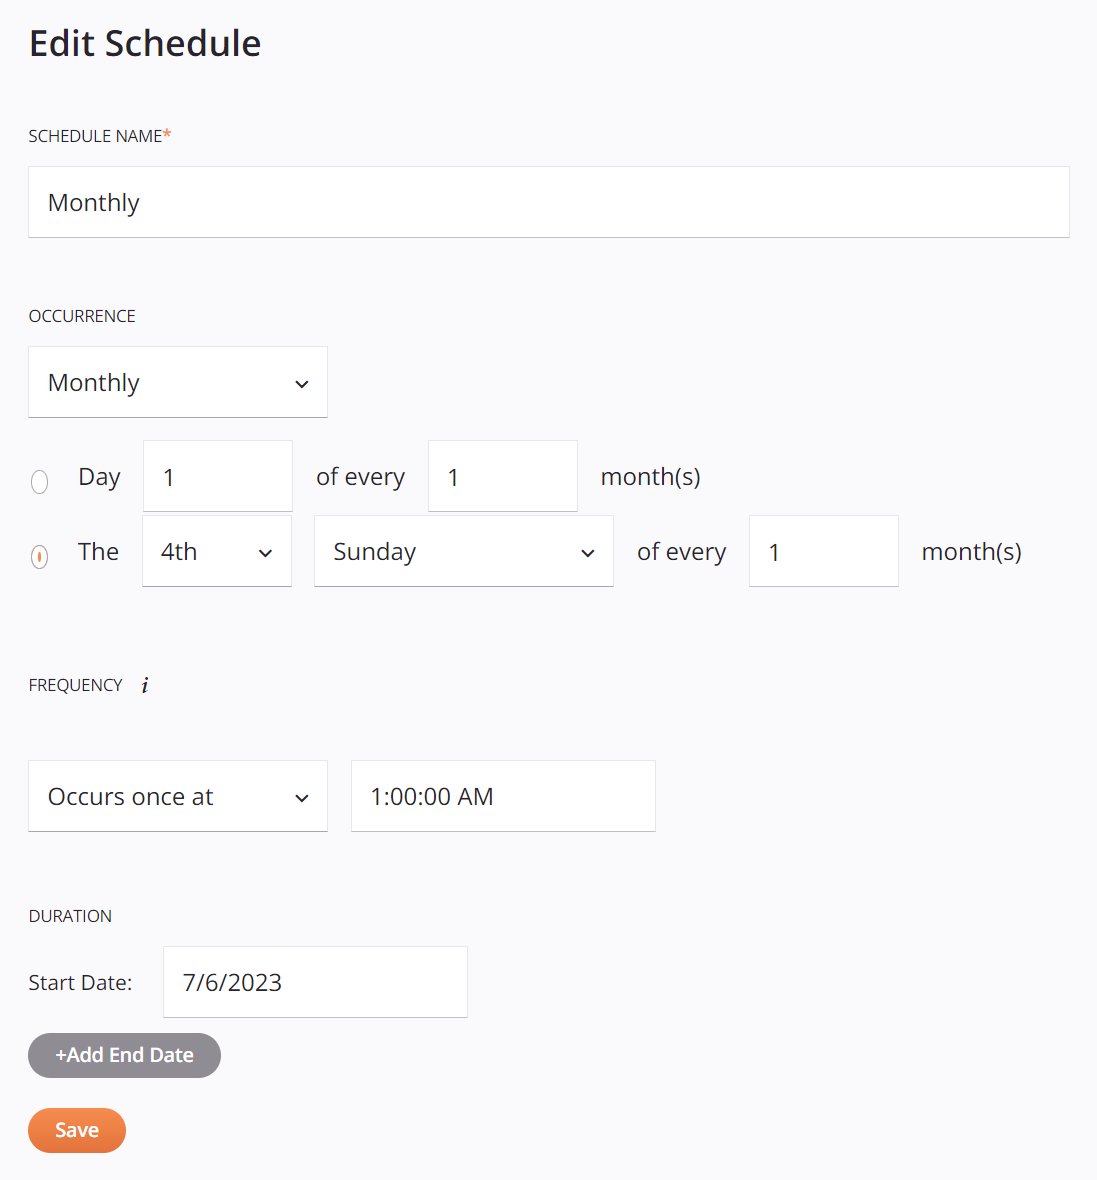
- Configure the operation schedule:
- Name: "Monthly"
- Occurrence: Select Monthly, then select the second radio button and configure the schedule for the 4th Sunday of every 1 month.
- Frequency: Select Occurs once at and 01:00 AM. Click Save.
- Within the Schedules tab, use the first dropdown to select On Schedule. Under Available Schedule, select the "Monthly" schedule you just created. Click Assign. Then close the operation settings.
The schedule should have a configuration similar to this:

When a schedule is assigned to an operation, a schedule icon appears in the bottom left of the operation:

2. Deploy the operation
Next, you re-deploy the operation so that the assigned schedule will take effect:
- In the top right of the operation, click the actions menu icon and from the menu click Deploy. The operation will now run on the assigned schedule.
3. Remove or edit a schedule
You can also remove or edit the schedule:
- In the bottom left of the operation, click the schedule icon.
- Under Assigned Schedule, click the edit icon to reopen the schedule configuration or click the remove icon to unassign the schedule from the operation.
- After making changes or removing a schedule, remember to redeploy for the changes to take effect.