Introducción a App Builder - Lección 7: Más sobre reglas
Esta es la séptima lección de la serie de tutoriales Introducción a App Builder.
Hemos estado utilizando reglas para desarrollar nuestra aplicación Northwinds desde la Lección 3, pero ahora profundizaremos nuestro entendimiento de ellas familiarizándonos con algunos conceptos más sobre las reglas y su uso.
Reglas predeterminadas
Si deseas que ciertos datos se agreguen por defecto a los nuevos registros tan pronto como se crean, necesitas usar lo que llamamos una regla predeterminada. Por ejemplo, si estás agregando un nuevo producto, debe haber un precio predeterminado.
Las reglas predeterminadas se crean en la misma área de App Builder donde construyes otras reglas, pero antes de crear nuestra primera regla predeterminada, echaremos un vistazo a otro concepto importante: uniones.
Uniones
Cuando estamos creando reglas, a veces es necesario extraer datos de dos tablas separadas. Para hacer esto, unimos las tablas, utilizando lo que llamamos una unión. Hay tres tipos de uniones: interna, izquierda externa y derecha externa.

-
Unión interna: Una unión interna solo devuelve los valores que existen en ambas tablas.
-
Unión izquierda externa: Una unión izquierda externa devuelve todos los valores de la tabla izquierda, independientemente de si también aparecen en la tabla derecha.
-
Unión derecha externa: Una unión derecha externa devuelve todos los valores de la tabla derecha, independientemente de si también aparecen en la tabla izquierda.
Crear una regla predeterminada
Vamos a crear una regla predeterminada para el ejemplo que usamos arriba: no queremos que los usuarios finales de nuestra aplicación Northwinds establezcan un precio unitario. Por lo tanto, crearemos una regla que extraiga los precios unitarios de la fuente de datos.
En la Lección 6, ya hemos configurado los controles de Precio Unitario en la interfaz de usuario de la aplicación para que sean de solo lectura, así que ahora crearemos una regla que dicte específicamente este valor.
-
Ve a App Workbench > Rules y haz clic en + Rule.
-
Siguiendo las convenciones de nomenclatura de App Builder, dale el nombre
OrderDetail (Default UnitPrice). -
En el campo Purpose, selecciona Default.
-
En el campo Target, selecciona la tabla OrderDetail.
-
Haz clic en Create.
-
Una vez que App Builder crea la regla, verás la tabla OrderDetail en la pestaña Tables. Necesitaremos las columnas OrderID y ProductID.
-
Aún en la pestaña Tables, haz clic en + Tables y selecciona también la tabla Product. Aparecerá vinculada a la tabla OrderDetail, porque están conectadas por una relación de clave foránea.
-
Selecciona la columna UnitPrice en la tabla Product.
-
App Builder escribirá automáticamente la unión, pero haz clic en la pestaña Joins para asegurarte de que no haya errores:

-
Como con todas las reglas, siempre es una buena práctica validarla haciendo clic en el botón Results. Deberías ver tres columnas, siendo una de ellas el precio unitario para un producto dado.
Agregar una regla predeterminada a un panel
Las reglas predeterminadas deben estar conectadas a un panel para tener algún efecto. Así que volvamos a la pantalla de edición de la página Orders y seleccionemos el panel OrderDetails.
-
Haz clic en More > Defaults. Se abrirá el diálogo Defaults.
-
Haz clic en Register y se abrirá otro diálogo, con algunas opciones:
-
En el campo Type, selecciona Rule.
-
En el campo Rule, selecciona OrderDetail (Default UnitPrice).
-
En el campo Binding, selecciona Implicit.
Nota
Para aprender más sobre las dos opciones de enlace, consulta Implicit and explicit binding.
-
Haz clic en Save.
-
Si regresas a la vista previa de la página Orders ahora y tratas de agregar una nueva entrada en el panel Order Details, verás que ahora el Unit Price se completa automáticamente cuando haces una selección en el campo Product, lo que significa que tu regla predeterminada está funcionando.
La lista se recupera
Las recuperaciones de lista son una forma de expandir la funcionalidad de los controles de lista. Un control de lista regular te permite obtener el valor de ID de un registro dado. Una recuperación de lista te permite también obtener otros valores. Demostraremos cómo funcionan las recuperaciones de lista mejorando nuestra regla existente de Producto (Lista).
-
Navega a la regla de Producto (Lista) buscándola en App Workbench > Reglas.
-
En la pestaña Columnas, haz clic en + Columna.
-
En el campo Columna o Expresión, ingresa
P.UnitPrice. -
En el campo Objetivo, selecciona UnitPrice.
-
Haz clic en Guardar.
-
Ahora actualicemos el control que utiliza esta regla. Navega a la pantalla de edición de la página de Órdenes buscándola en App Workbench > Páginas.
-
En el panel de Detalles del Pedido, selecciona Controles para ver la lista de controles presentes en el panel.
-
Haz doble clic en la fila del control de Producto.
Nota
También puedes acceder a estas mismas opciones previsualizando la página de Órdenes con el botón Ver Página, luego abriendo el diseñador en vivo en el cajón de acciones y seleccionando el control de Producto.
-
En la pestaña Opciones de Lista, haz clic en el botón Recuperaciones.
-
En el diálogo de Recuperaciones, haz clic en + Agregar Recuperación.
-
En el campo Columna del Panel, selecciona UnitPrice. En el campo Columna (Fuente de Lista), selecciona UnitPrice.
-
Haz clic en el ícono de confirmación para guardar y salir del diálogo.
App Builder tomará unos momentos para guardar. Después de que lo haga, regresa a la vista previa de la página de Órdenes y prueba editar uno de los productos en la página de Detalles del Pedido, verás que el control de Precio Unitario se actualiza automáticamente según tu selección.
Reglas de validación
Las reglas de validación se utilizan para asegurar que los datos requeridos siempre se proporcionen y que los datos ingresados en App Builder sean válidos. Las reglas de validación se configuran en la capa de negocio.
En este ejemplo, crearemos una regla de validación para hacer que el Nombre en la tabla de Empleado sea un campo requerido. Sigue estos pasos:
-
En App Workbench > Rules, haz clic en + Rule.
-
En el campo Name, ingresa
Employee (FirstName Required). -
En el campo Purpose, ingresa Validation.
-
En el campo Target, asegúrate de que Employee esté seleccionado.
-
Haz clic en Create.
-
Cuando App Builder crea la regla, mostrará automáticamente la tabla Employee en la pestaña Tables, con la clave primaria, EmployeeID, seleccionada. Selecciona también la columna FirstName.
-
En la pestaña Where, haz clic en + Where Clause.
-
En el campo Left Expression, ingresa
E.FirstName. -
En el campo Operator, selecciona
IS NULL. -
Haz clic en Save.
La regla ahora está creada.
Asigne la regla de validación a un evento
Las reglas de validación deben estar adjuntas a un evento para ser utilizadas. Para este caso de uso, queremos que la validación se ejecute cada vez que un usuario intente guardar un registro de empleado. Por lo tanto, la adjuntaremos al evento de guardado intrínseco.
-
En App Workbench > Rules, busca el objeto de negocio Employee (Source) y ábrelo.
-
En el panel Rule, haz clic en Events. Se abre el diálogo All Events (Employee (Source)).
-
Busca el evento Save y haz clic en Rule Event Detail.
-
En el panel Validations, haz clic en Register.
-
En el campo Type, asegúrate de que Rule esté seleccionado.
-
En el campo Rule, selecciona Employee (FirstName Required).
-
En el campo Binding, asegúrate de que Implicit esté seleccionado.
Nota
Lee más sobre lo que significa este campo en Appendix B.
-
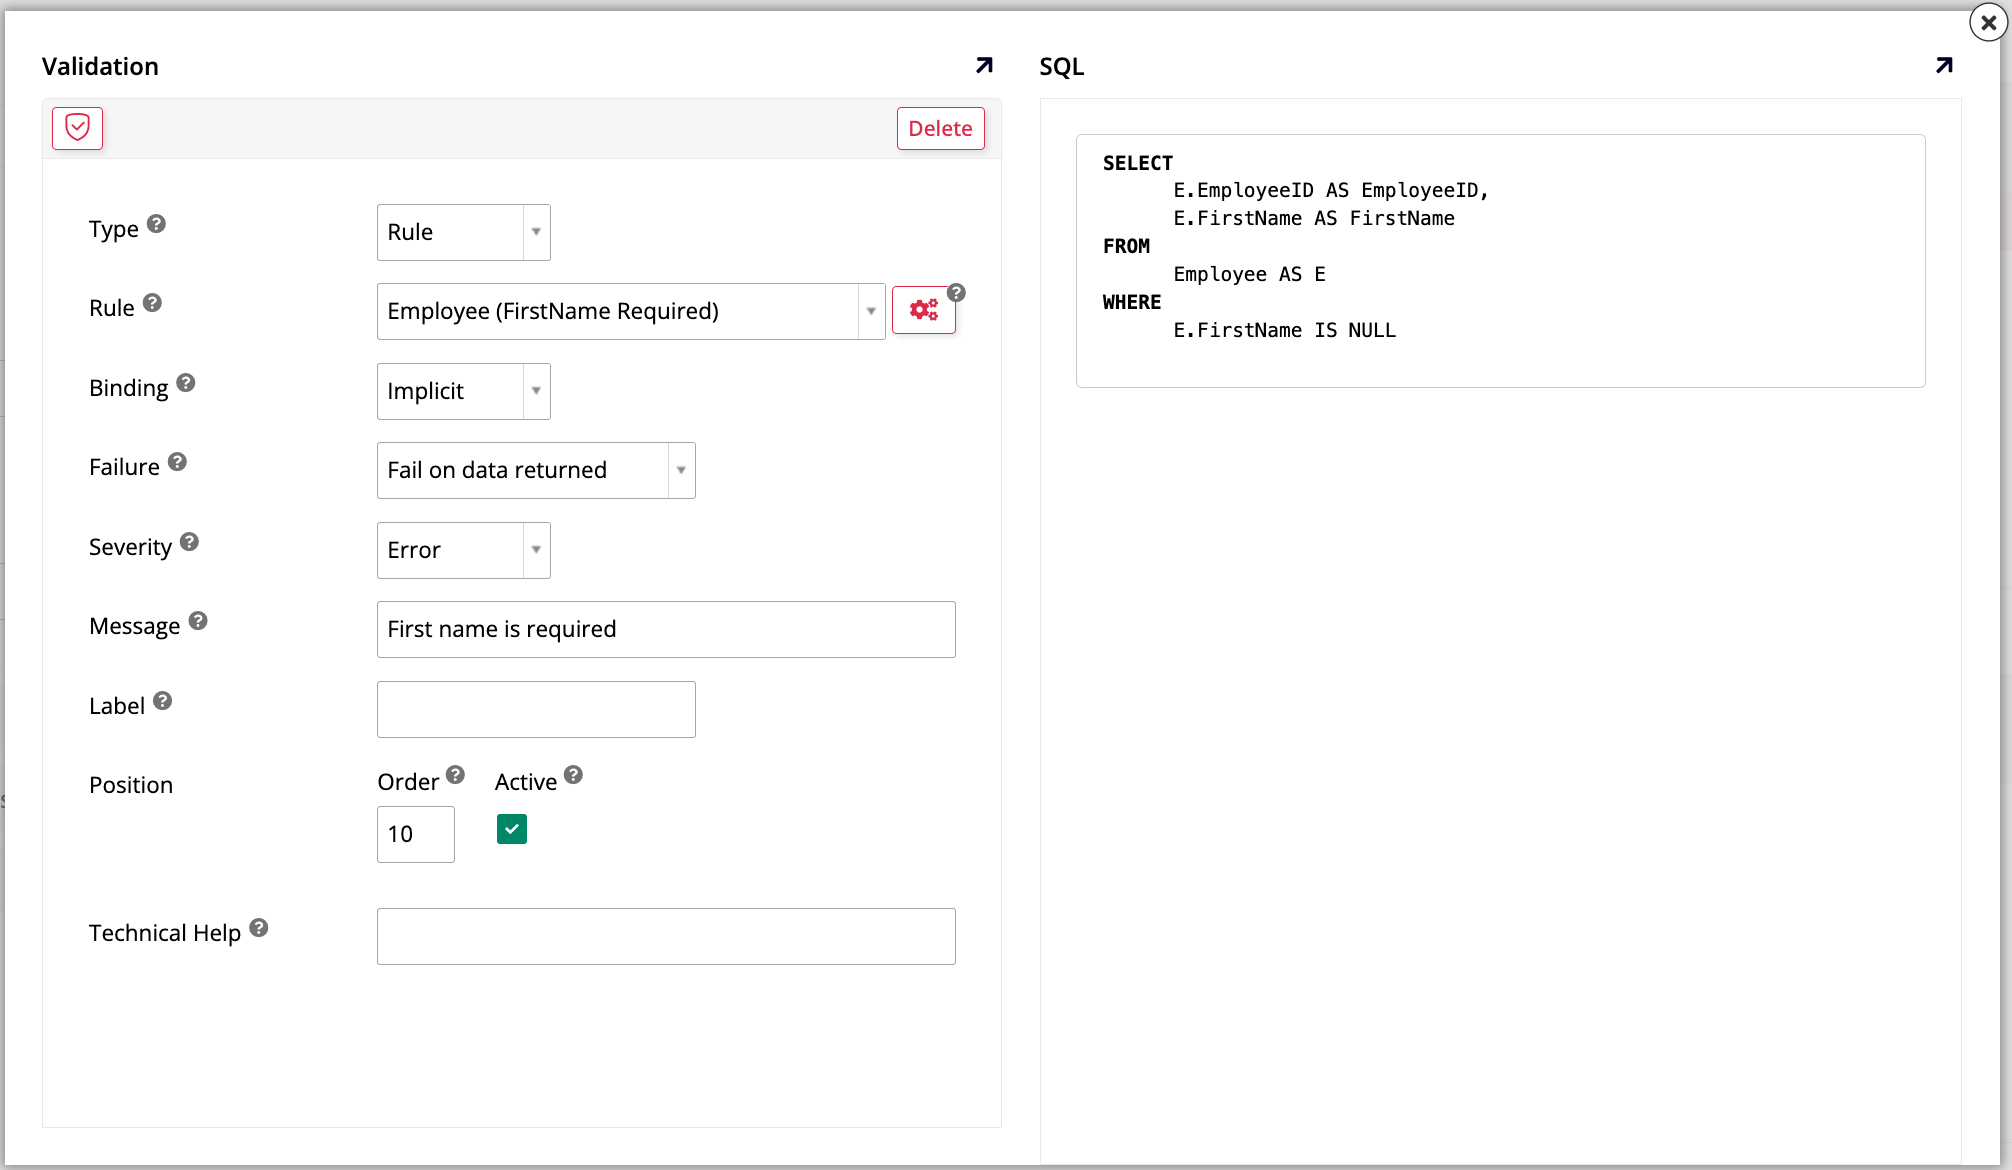
En el campo Message, ingresa un mensaje descriptivo que se mostrará a los usuarios cuando esta validación falle. Algo simple, como "El nombre es obligatorio," debería ser suficiente.
-
Deja los otros campos con sus selecciones predeterminadas y haz clic en Save.
-
La validación ha sido creada y adjuntada a los eventos de guardado en la tabla Employee. Para probarla, visita la vista previa de la página Employees e intenta agregar una nueva entrada en el panel de Employees sin un nombre de pila. Deberías ver el mensaje que ingresaste.
Tiempo de práctica: Crea otra regla de validación
Siguiendo los mismos pasos que arriba, crea otra regla de validación para hacer que la columna LastName de la tabla Employee también sea obligatoria. Después de crear la regla de validación, adjúntala al evento de guardado intrínseco y pruébala.
Reglas CRUD
El último tipo de regla que discutiremos son las reglas CRUD, que se utilizan para actualizar datos en grandes cantidades. Las reglas CRUD pueden ser utilizadas para crear, insertar, actualizar o eliminar registros, y a menudo es necesario hacerlo en tus aplicaciones de App Builder. Veremos cómo trabajar con reglas CRUD y, en el proceso, conoceremos dos funciones importantes. Esta vez trabajaremos en la página Employees.
Crea una regla CRUD superior
-
Ve a App Workbench > Rules.
-
Haz clic en + Rule.
-
Asigna el nombre
Employee (FirstName Upper Update). -
En el campo Purpose, selecciona CRUD.
-
Aparece un nuevo campo, Action. Selecciona Update.
-
En el campo Target Layer, selecciona Data Layer.
-
En el campo Target, selecciona Employee.
-
Haz clic en Create.
-
En la pestaña Tables, App Builder seleccionará automáticamente la columna EmployeeID, que es la clave primaria de la tabla Employee. No necesitamos ninguna otra, así que adelante, haz clic en + Column.
-
Cuando se abra el cuadro de diálogo Add Column, ingresa la siguiente sintaxis en el campo Column or Expression:
Upper(E.FirstName).Nota
Esta sintaxis invoca la función de base de datos Upper(), que toma una cadena como argumento para ser capitalizada y luego devuelta. Varias otras funciones de base de datos están disponibles para usar con App Builder.
-
En el campo Alias, ingresa
UpperFirstName. -
En el campo Target, selecciona FirstName.
-
Haz clic en Save.
Una vez que App Builder guarde la nueva regla, verifica si está funcionando haciendo clic en Results en el panel Rule. La función Upper toma el nombre de cada empleado y lo reescribe usando todas las letras mayúsculas.
Adjuntar la nueva regla CRUD Upper a un evento
Siempre es mejor colocar tus reglas CRUD en las tablas, ya que eso ayuda a agilizar y organizar los eventos, especialmente si alguna vez necesitas hacer actualizaciones o cambios en el futuro.
-
Localiza la regla Employee (Source) en App Workbench > Rules y ábrela.
-
Haz clic en Events.
-
Cuando se abra el diálogo All Events, haz clic en + Rule Event.
-
Asigna el nombre
Upper First Name. Puedes dejar los otros campos con sus valores predeterminados. Haz clic en Save. -
Cuando regreses al diálogo All Events, el nuevo evento que acabas de crear debería estar disponible. Haz clic en el botón Rule Event Detail.
-
En el panel Actions, haz clic en Register.
-
Cuando se abra el diálogo Action, utiliza el campo Rule para seleccionar Employee (FirstName Upper Update), la regla CRUD que hemos creado previamente. Haz clic en Save.
-
Luego verás la página de confirmación, mostrando detalles sobre el nuevo evento:
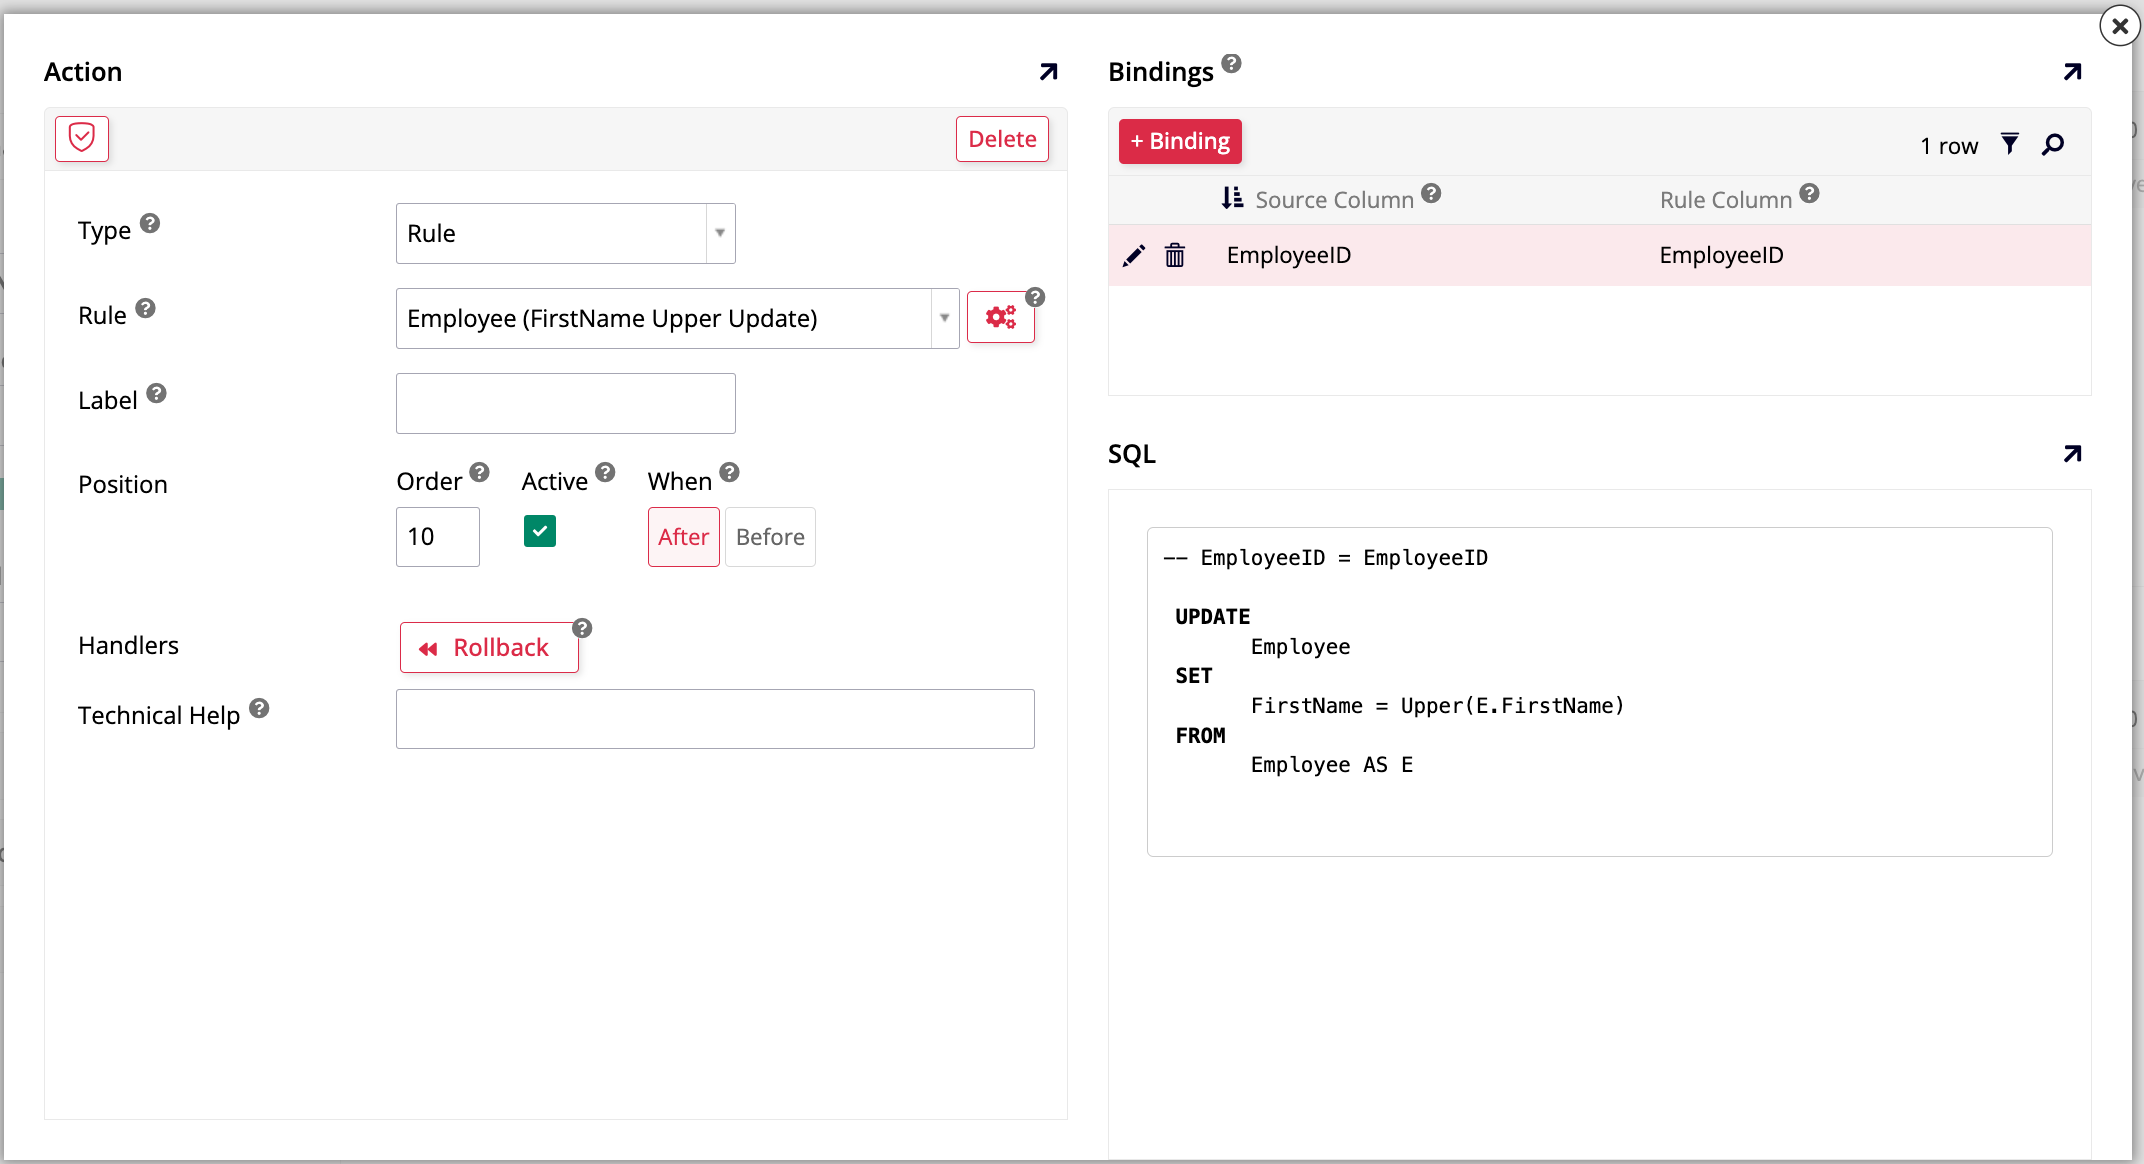
Observa el panel Bindings. Muestra qué columnas hemos utilizado para vincular los registros en la capa de UI (el campo Source Column) a los registros en la regla (el campo Rule Column). Con esta vinculación en su lugar, la regla solo se ejecutará contra los registros en la UI con valores correspondientes. Sin la vinculación, la regla afectaría todas las filas devueltas en la regla CRUD.
Ahora que hemos creado un evento, vamos a agregar un botón que lo ejecute en nuestra página.
-
Navega a la pantalla de edición de la página Employees y accede a la lista de controles en el panel Employees.
-
Haz clic en + Control para agregar un nuevo control.
-
En el campo Tipo de Control, selecciona Botón.
-
En el campo Nombre, ingresa
First Name Upper. Haz clic en Siguiente. -
En el campo Ejecutar un Evento, selecciona UpperFirstName, nuestro evento recién creado.
-
Haz clic en Siguiente y luego en Finalizar.
Ahora, accede a la vista previa de la página de Empleados y prueba el nuevo botón. Al hacer clic en él, el primer nombre de un empleado debería aparecer en letras mayúsculas.
Tiempo de práctica: Crea una regla CRUD en minúsculas
Para practicar, intenta repetir estos pasos que acabamos de seguir, pero esta vez creando un botón que realice el proceso opuesto. Usando la función de base de datos Lower(), crea un botón que cambie los nombres de los empleados para que se muestren en letras minúsculas.
Revisión y conclusión
En esta lección, hemos ampliado enormemente nuestro conocimiento sobre reglas en App Builder, aprendiendo sobre reglas predeterminadas, de validación y CRUD, así como parámetros a nivel de aplicación y recuperaciones de listas. Esto concluye esta serie de tutoriales.
¡Tu aplicación Northwinds ahora es funcional! Muestra información sobre clientes, los pedidos que realizan, empleados, proveedores y transportistas de manera organizada y eficiente. Los conceptos y técnicas que has aprendido durante su construcción se pueden aplicar para construir cualquier otra aplicación.