Introducción a App Builder - Lección 2: Agregar datos a tu aplicación
Esta es la segunda lección de la serie de tutoriales Introducción a App Builder.
Crear una tabla
Para comenzar, irás a la capa de datos y crearás una tabla para la aplicación Northwinds. Como estás creando una aplicación simple de cumplimiento de pedidos, crearás una tabla para ayudar a diferenciar entre los mercados de la Costa Oeste y la Costa Este.
-
Selecciona Cajón de acción > App Workbench.
-
Ve a la pestaña Tablas y haz clic en el botón + Tabla. Se abre la página de Definición de tabla:

Nota
También se puede encontrar un botón + Tabla en la página de inicio de App Workbench.
-
En el panel Tabla, ingresa
Regiónen el campo Nombre.Nota
De acuerdo con las convenciones de nomenclatura de App Builder, los nombres de las tablas siempre deben ser singulares.
-
(Opcional) En el campo Ayuda técnica, ingresa una descripción del propósito de esta tabla. Esta información no será visible para los usuarios finales; está destinada a ayudar a otros desarrolladores.
-
Haz clic en Guardar. Después de unos momentos, la tabla será creada y podrás editarla.
-
Si miras en el panel Columnas, verás que tu tabla ya tiene una columna. Se llama
RegionID, y App Builder la creó automáticamente. Ha sido designada como la Clave primaria de la tabla, lo que significa que será un identificador único para los registros en la tabla. Su Tipo de dato se ha establecido en UUID, lo que significa que se genera automáticamente una cadena de caracteres única de 128 bits para esta columna. -
La columna RegionID será utilizada por App Builder, pero no es legible para los humanos. Necesitamos crear una columna amigable para el usuario que identifique los registros en la tabla Región. Estas columnas que están destinadas a ser utilizadas como identificadores por los usuarios finales se llaman columnas de título. Pueden ser creadas automáticamente o manualmente.
-
Para agregar la columna de título manualmente:
1. Haz clic en el botón **+ Columna**. Se abrirá el diálogo de **Columna**: {style="width: 500px"} 2. En el campo **Nombre**, ingresa `Región`. 3. En la sección **Tipos de Datos**, selecciona **Cadena** en el menú **Lógico**. Al hacer esto, el menú **Físico** debería seleccionar automáticamente **NVarchar**, pero si no lo hace, selecciónalo manualmente. 4. En la sección **Avanzado**, el campo **Tipo de Uso de Columna** ayuda a señalar el uso previsto de una columna dada, lo que puede acelerar los pasos posteriores del proceso de desarrollo de la aplicación. Es probable que el App Builder ya haya detectado que estás creando un identificador amigable para el usuario y haya seleccionado automáticamente **Título** en este campo, pero puedes hacerlo manualmente si no lo ha hecho. Haz clic en **Guardar**. -
Para agregar la columna de título automáticamente:
1.  Haz clic en el botón **+ Título**. El App Builder pedirá confirmación de que estás intentando crear una columna de título. Haz clic en **Proceder**.

2.  El App Builder creará y configurará automáticamente la columna de título. Ten en cuenta que el botón **+ Título** desaparece una vez que se ha creado una columna de título.
Nota
Para una descripción completa de todas las opciones, consulta Editar una tabla en Pestaña de Tablas del App Workbench.
Ahora que tu tabla tiene las columnas que necesitaremos por ahora, tu panel de Columnas debería verse similar a esto:
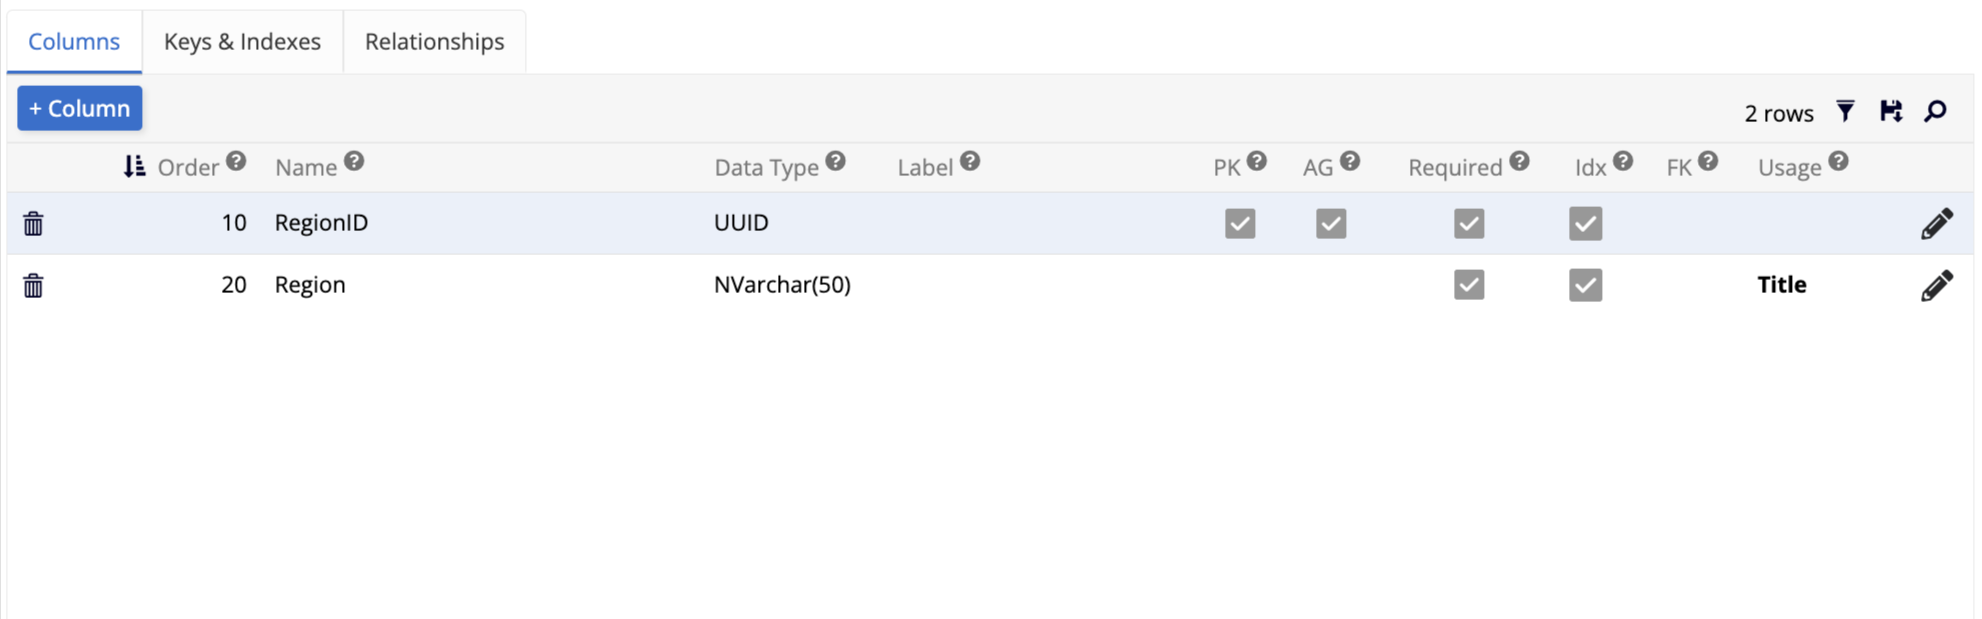
Tu nueva tabla aún no contiene registros, pero la estructura subyacente está lista para recibir algunos. La columna RegionID contendrá un identificador único que utilizará el App Builder, y la columna Región contendrá un nombre legible para los humanos.
Agregar registros
Ahora que tienes una nueva tabla lista para contener registros, agreguemos los dos que nos ayudarán a diferenciar entre las diferentes áreas donde se encuentran nuestros clientes:
-
En el panel de Tabla, haz clic en el botón Resultados. Se abrirá la página Dinámica.
-
Haz clic en Crear. Aparecerá un campo donde puedes escribir información. Para guardar, haz clic en el ícono de marca de verificación . Recuerda que solo debes escribir en el campo Región, ya que el campo RegionID se creará automáticamente por App Builder.
-
Crea dos registros: Región de la Costa Oeste y Región de la Costa Este. Cuando termines, la página Dinámica debería verse así:

Eso es todo, los dos registros han sido almacenados y podremos usarlos en las próximas lecciones.
Auditoría lite
Una buena práctica recomendada por Jitterbit es siempre agregar información de auditoría a las tablas en tu capa de datos. Para facilitar esto, App Builder ofrece una función llamada Auditoría Lite, con la cual puedes hacer que tus tablas sean auditables fácilmente. Utilizaremos la función de auditoría lite en todas las tablas de nuestra base de datos Northwinds, excepto en Parámetro.
-
En la pestaña App Workbench > Tablas, selecciona cualquiera de tus tablas.
-
En el panel de Tabla, en la sección de Aceleradores, haz clic en Mejorar Tabla, luego en Proceder. App Builder creará automáticamente las siguientes columnas:
-
AddedBy: El nombre de usuario de la persona que agregó un registro.
-
AddedOn: La fecha en que se agregó un registro.
-
ChangedBy: El nombre de usuario de la última persona que modificó un registro.
-
ChangedOn: La fecha en que se modificó por última vez un registro.
-
IsActive: Indica si un registro está actualmente activo o no.
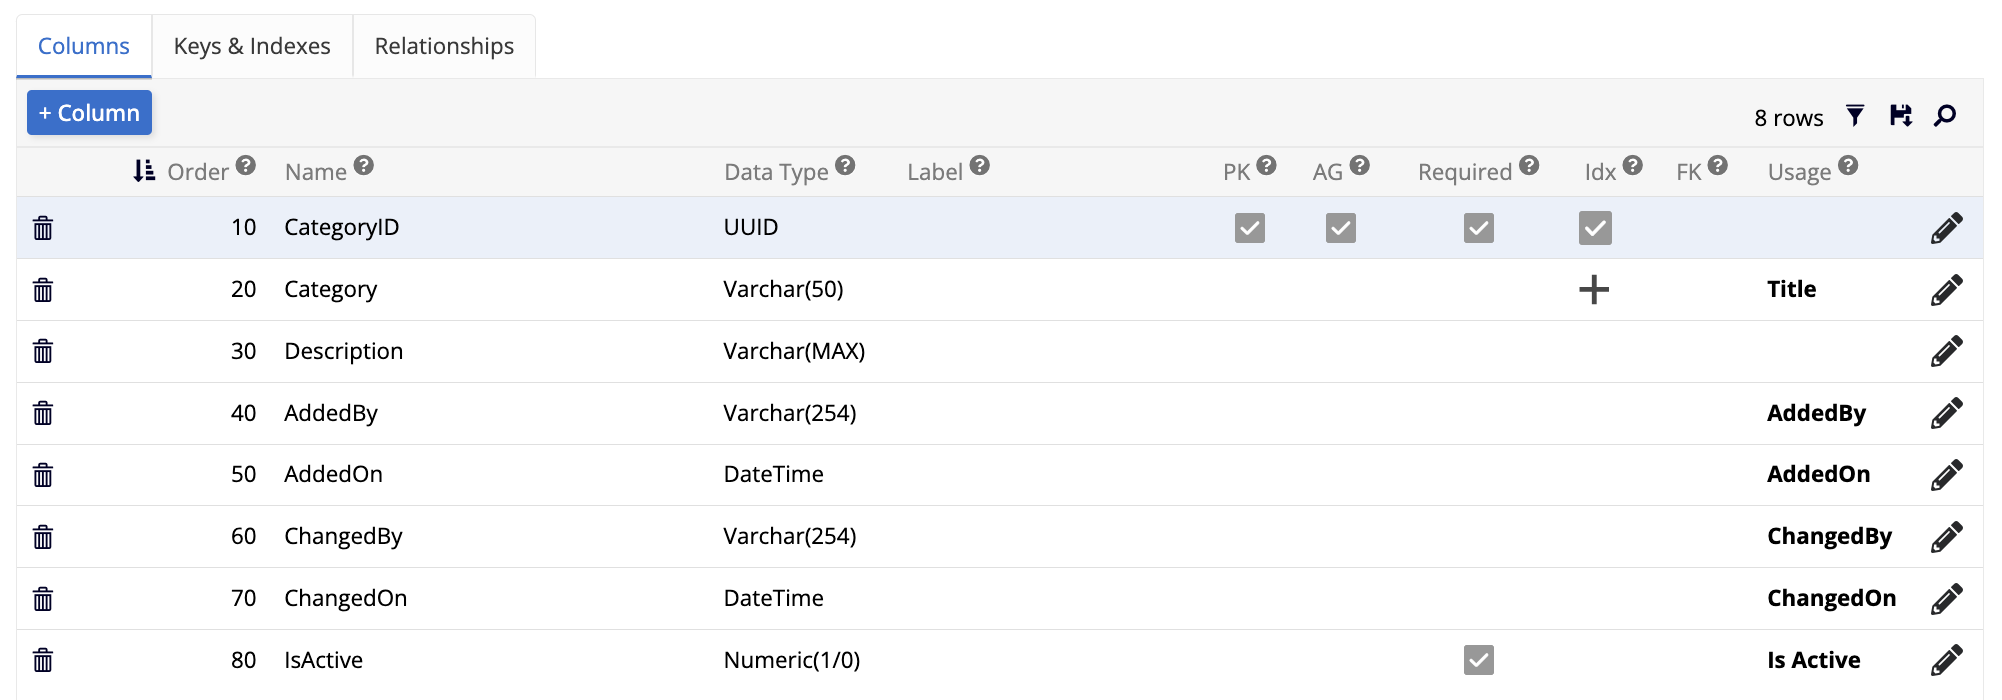
Por ejemplo, así debería verse la tabla Categoría después de que se hayan agregado las columnas de auditoría:
-
Repite estos pasos para todas las demás tablas en la base de datos Northwinds, excepto en Parámetro. Utilizar auditoría lite en tus tablas es una buena práctica que Jitterbit recomienda encarecidamente.
Revisión y conclusión
Revisemos lo que hemos hecho en esta lección. Comenzamos con una aplicación recién creada conectada a una fuente de datos. Luego, añadimos una nueva tabla, que utilizaremos junto con las otras tablas que ya estaban allí. Una vez que nuestra nueva tabla estuvo configurada y lista para recibir registros, añadimos algunos.
Ahora estamos listos para pasar a la siguiente capa del desarrollo de aplicaciones, la capa de negocio. Ve a Lección 3: Crear reglas.