Configurar un agente de IA Conversacional en Jitterbit App Builder
Descripción general
Esta guía muestra cómo configurar la interfaz de chat en App Builder utilizando la página Registrar Agentes en el IDE. Este es el segundo paso para configurar la funcionalidad de IA Conversacional.
Después de completar este paso, aparecerá una burbuja de chat en la esquina inferior derecha de su aplicación, permitiendo a los usuarios interactuar con su agente de IA.
Requisitos previos
Antes de configurar los agentes, debe haber conectado su agente de IA a App Builder como una fuente de datos de API REST. Consulte Conectar un agente de IA para obtener instrucciones.
Agregar un agente
-
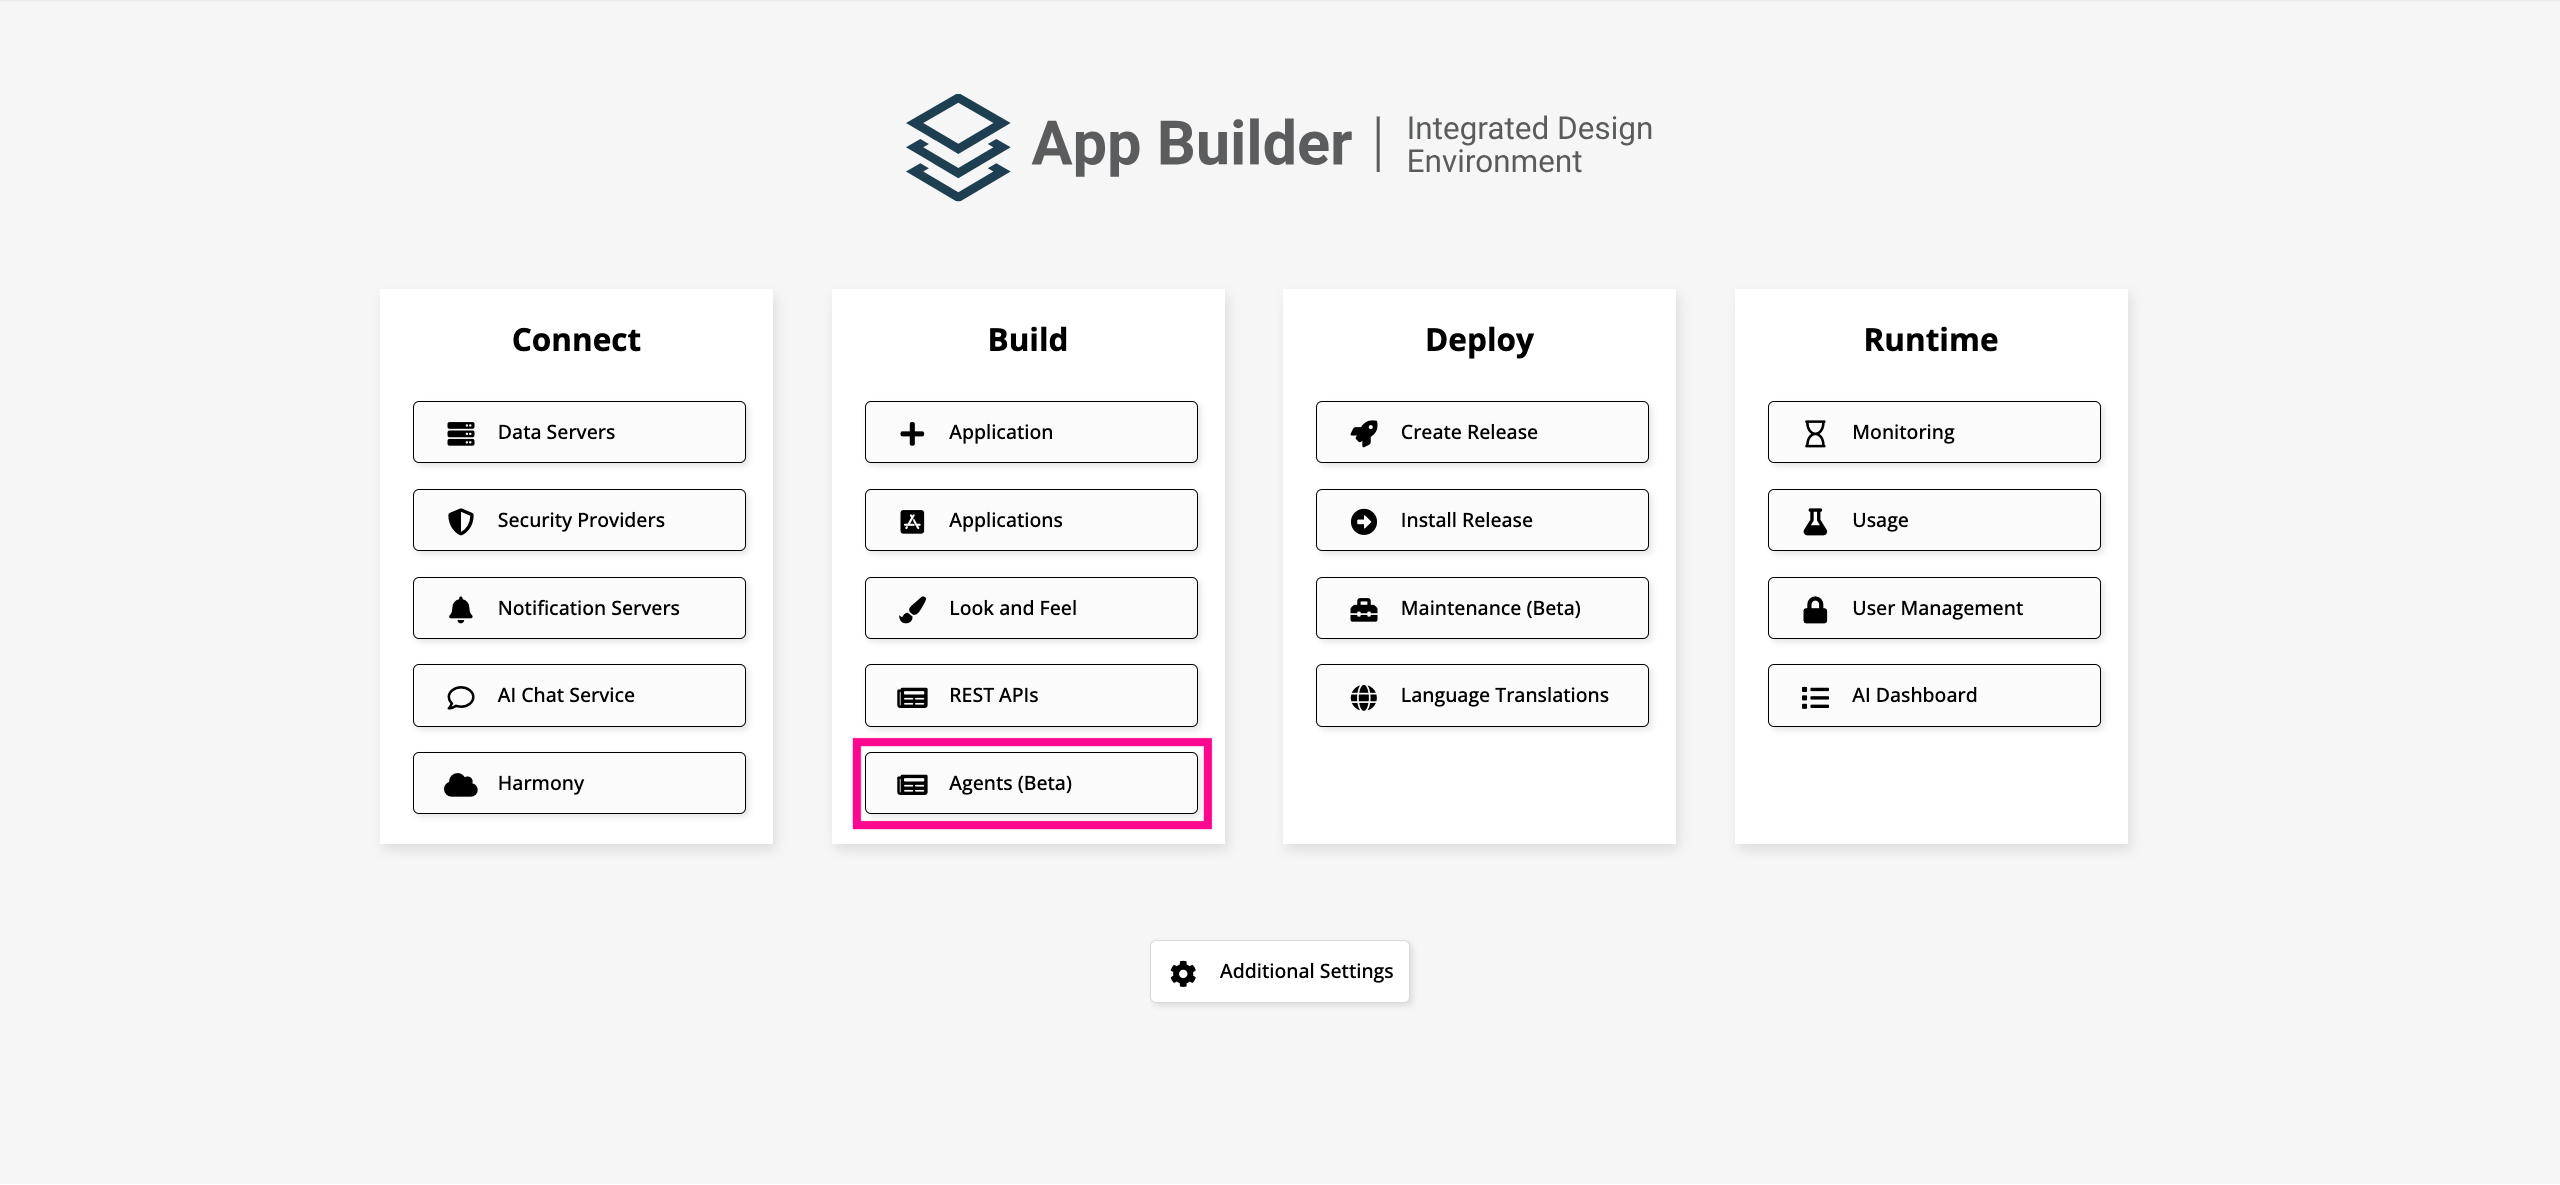
Acceda al IDE.
-
En Construir, haga clic en Registrar Agentes.
-
Haga clic en Registrar. Se abre el cuadro de diálogo de configuración del agente.
-
Configure el agente:
-
Nombre: Ingrese un nombre para el agente.
-
Fuente de Datos: Seleccione la fuente de datos de API REST que configuró en el paso anterior.
-
Destino: Seleccione el endpoint que se utilizará para la interacción del agente.
-
Descripción: (Opcional) Ingrese una descripción del agente.
-
Mensaje de Bienvenida: (Opcional) Ingrese un mensaje para mostrar a los usuarios cuando abran la interfaz de chat.
-
Incluir Todos los Mensajes: (Opcional) Habilite esta opción para incluir el historial completo de la conversación en cada solicitud enviada al agente. Si está deshabilitada (por defecto), solo se envía el último mensaje.
-
Es Predeterminado: Habilite esta opción para hacer de este el agente predeterminado para la aplicación. El agente predeterminado es el que se abre cuando un usuario hace clic en la burbuja de chat .
-
Está Activo: Habilite esta opción para que el agente esté disponible para los usuarios.
-
Archivo de Icono: (Opcional) Seleccione una imagen para usar como avatar del agente en la interfaz de chat. Haga clic en Examinar para localizar el archivo y cargarlo. Si no se proporciona un icono, la interfaz de chat mostrará un icono predeterminado utilizando las dos primeras letras del nombre del agente.
-
Vista previa del ícono: Si has seleccionado un avatar para el agente en el campo Archivo de ícono, se muestra una vista previa del ícono seleccionado.
-
-
Haz clic en Guardar. El burbuja de chat aparece en la esquina inferior derecha. En el cuadro de diálogo de configuración, aparece un mensaje recordándote que uses el botón Asignaciones para configurar las asignaciones. Consulta la siguiente sección, Configurar asignaciones de tipo de uso.
Importante
La burbuja de chat es visible solo para los usuarios que pertenecen a un grupo que tiene acceso a la fuente de datos a la que se conecta el agente de IA. Los usuarios sin acceso no verán la burbuja de chat.
Configurar asignaciones de tipo de uso
Las asignaciones de tipo de uso indican a App Builder qué columnas de la fuente de datos de tu agente de IA contienen el mensaje del usuario, la respuesta del agente y otros datos de sesión. La interfaz de chat requiere estas asignaciones para comunicarse correctamente con el agente. Si ya has configurado las asignaciones manualmente en el área de Servidores de Datos, omite esta sección y procede a Configurar visibilidad del agente.
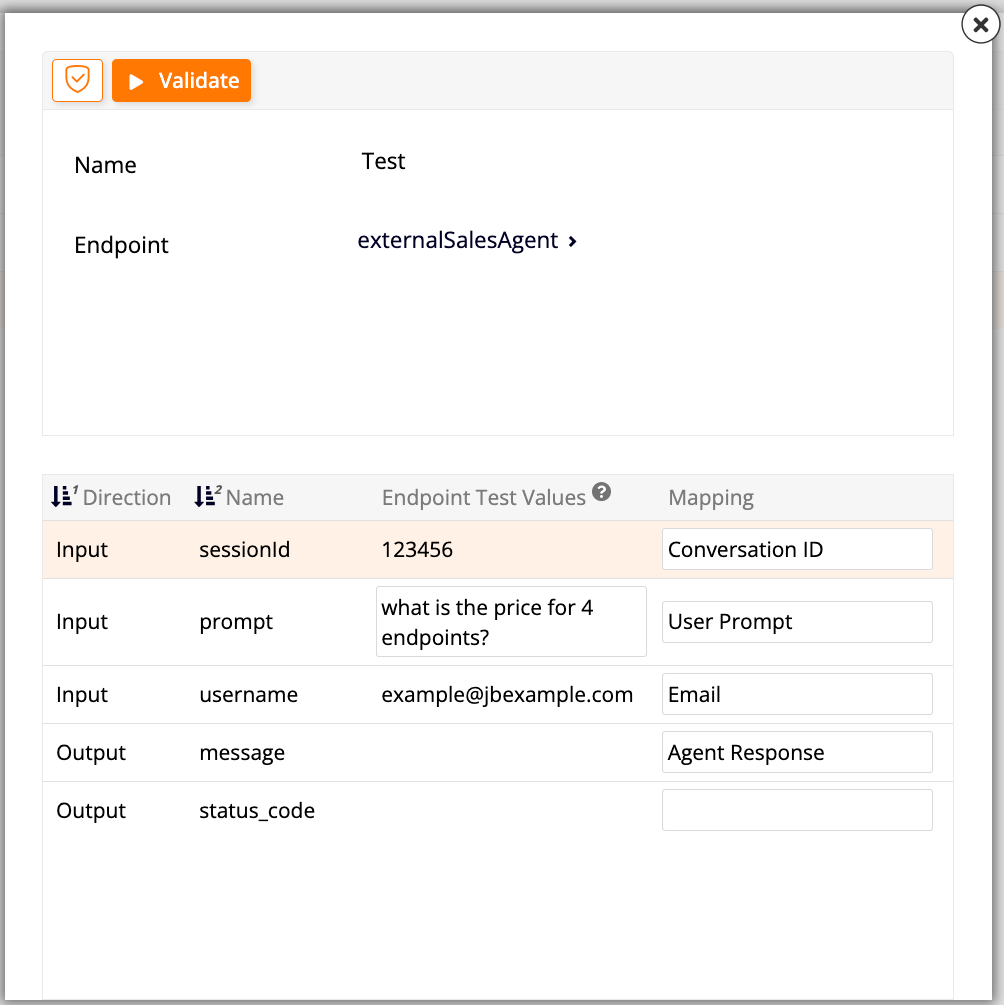
Después de crear un agente, haz clic en Asignaciones en el cuadro de diálogo de configuración. Se abre un nuevo cuadro de diálogo, mostrando el nombre del agente y el servidor de datos en la parte superior, y una tabla con las siguientes columnas:
-
Dirección: Identifica si una columna dada se utiliza para entrada o salida.
-
Nombre: El nombre de la columna.
-
Valores de prueba de punto final: Muestra los valores de muestra utilizados durante el descubrimiento del punto final, proporcionados solo para contexto. Estos valores no se utilizan al probar el registro del agente.
-
Asignación: Para cada fila en la tabla, utiliza este menú desplegable para asignar el tipo de uso apropiado. Las opciones disponibles dependen del valor en la columna Dirección:
- Las columnas de Salida reciben datos del punto final. La única asignación disponible es Respuesta del Agente, la respuesta de texto recibida del agente personalizado.
-
Las columnas de entrada envían datos al endpoint. Las asignaciones disponibles son:
| Asignación            | Descripción                                                          |
|-----------------------|----------------------------------------------------------------------|
| **Mensaje del Usuario**| El mensaje de chat o aviso enviado al agente personalizado.          |
| **ID del Usuario**    | Pasa el ID único del usuario que ha iniciado sesión.                 |
| **Correo Electrónico**| Pasa el correo electrónico del usuario que ha iniciado sesión.       |
| **Nombre de Usuario** | Pasa el nombre de usuario del usuario que ha iniciado sesión.        |
| **ID de Conversación**| Pasa el ID único de la conversación de chat actual.                 |
Después de configurar las asignaciones, haz clic en Validar en la parte superior del diálogo. La validación ejecuta una prueba contra el endpoint e informa cualquier problema de configuración. Si la prueba del endpoint falla, los resultados se muestran en el panel superior para ayudar a diagnosticar el problema.
Configurar la visibilidad del agente
Por defecto, la burbuja de chat de un agente es visible en todas las aplicaciones personalizadas y está oculta en las páginas del sistema. Desde App Builder 4.62, se puede anular este comportamiento por agente; por ejemplo, para mostrar un agente de Ventas solo en una aplicación de Ventas y ocultarlo en todas las demás aplicaciones.
Para configurar la visibilidad de un agente:
-
Accede al IDE.
-
En Construir, haz clic en Registrar Agentes.
-
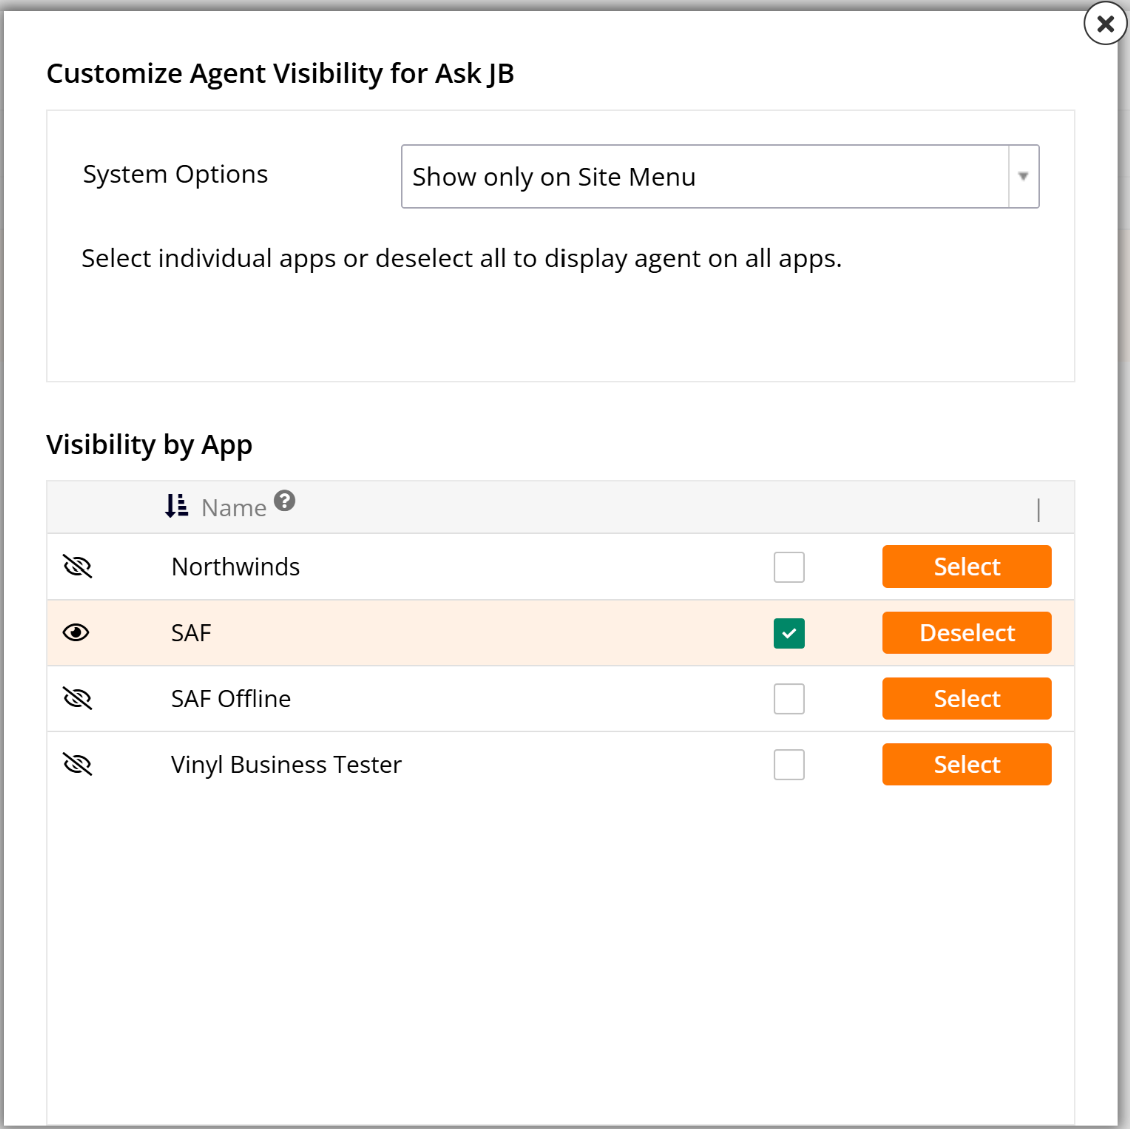
Localiza el registro del agente y haz clic en Visibilidad. Se abre el diálogo Personalizar la Visibilidad del Agente.
-
En el menú desplegable Opciones del Sistema, selecciona cómo se comporta el agente en las páginas del sistema de App Builder:
| Opción | Descripción | |------------------------------------------|-------------| | **Ocultar en Aplicaciones del Sistema** (predeterminado) | El agente está oculto en todas las páginas del sistema y visible en todas las aplicaciones personalizadas. | | **Mostrar en Aplicaciones del Sistema** | El agente es visible en todas las páginas del sistema (Menú del Sitio, IDE, Diseñador, Gestión de Usuarios, y otras) y en todas las aplicaciones personalizadas. | | **Mostrar solo en el Menú del Sitio** | El agente es visible solo en el [Menú del Sitio](/es/app-builder/how-to/site-menu/), oculto en todas las demás páginas del sistema, y visible en todas las aplicaciones personalizadas. | | **Ocultar en Todas Partes** | El agente está oculto en todas las páginas del sistema y en todas las aplicaciones personalizadas. El agente es accesible solo a través de [paneles de chat](/es/app-builder/documentation/conversational-ai/chat-panel/) personalizados. | -
Bajo Visibilidad por Aplicación, configura qué aplicaciones personalizadas muestran el agente:
- Por defecto, no se seleccionan aplicaciones, lo que significa que el agente aparece en todas las aplicaciones personalizadas. Un ícono junto a una aplicación indica que el agente será visible en esa aplicación; un ícono indica que no lo será.
- Para restringir el agente a aplicaciones específicas, haz clic en Seleccionar junto a cada aplicación que desees incluir.
Consejo
Deja todas las aplicaciones deseleccionadas para asegurar que el agente aparezca en todas las aplicaciones personalizadas actuales y futuras. Seleccionar aplicaciones individuales significa que el agente no aparecerá en nuevas aplicaciones añadidas al sistema más tarde. Esta configuración se aplica solo cuando el agente no está configurado para Ocultar en Todas Partes en Opciones del Sistema.
Nota
Cuando Ocultar en Todas Partes está seleccionado en Opciones del Sistema, los controles de selección de aplicaciones están deshabilitados.
-
Haz clic en Guardar para aplicar los cambios.
Burbuja de chat
Después de guardar el agente, aparece una burbuja de chat en la esquina inferior derecha. Puedes arrastrarla y soltarla para reposicionarla en la pantalla. Hacer clic en la burbuja de chat abre una ventana de chat como un panel lateral, desplazando el contenido de la página hacia la izquierda:
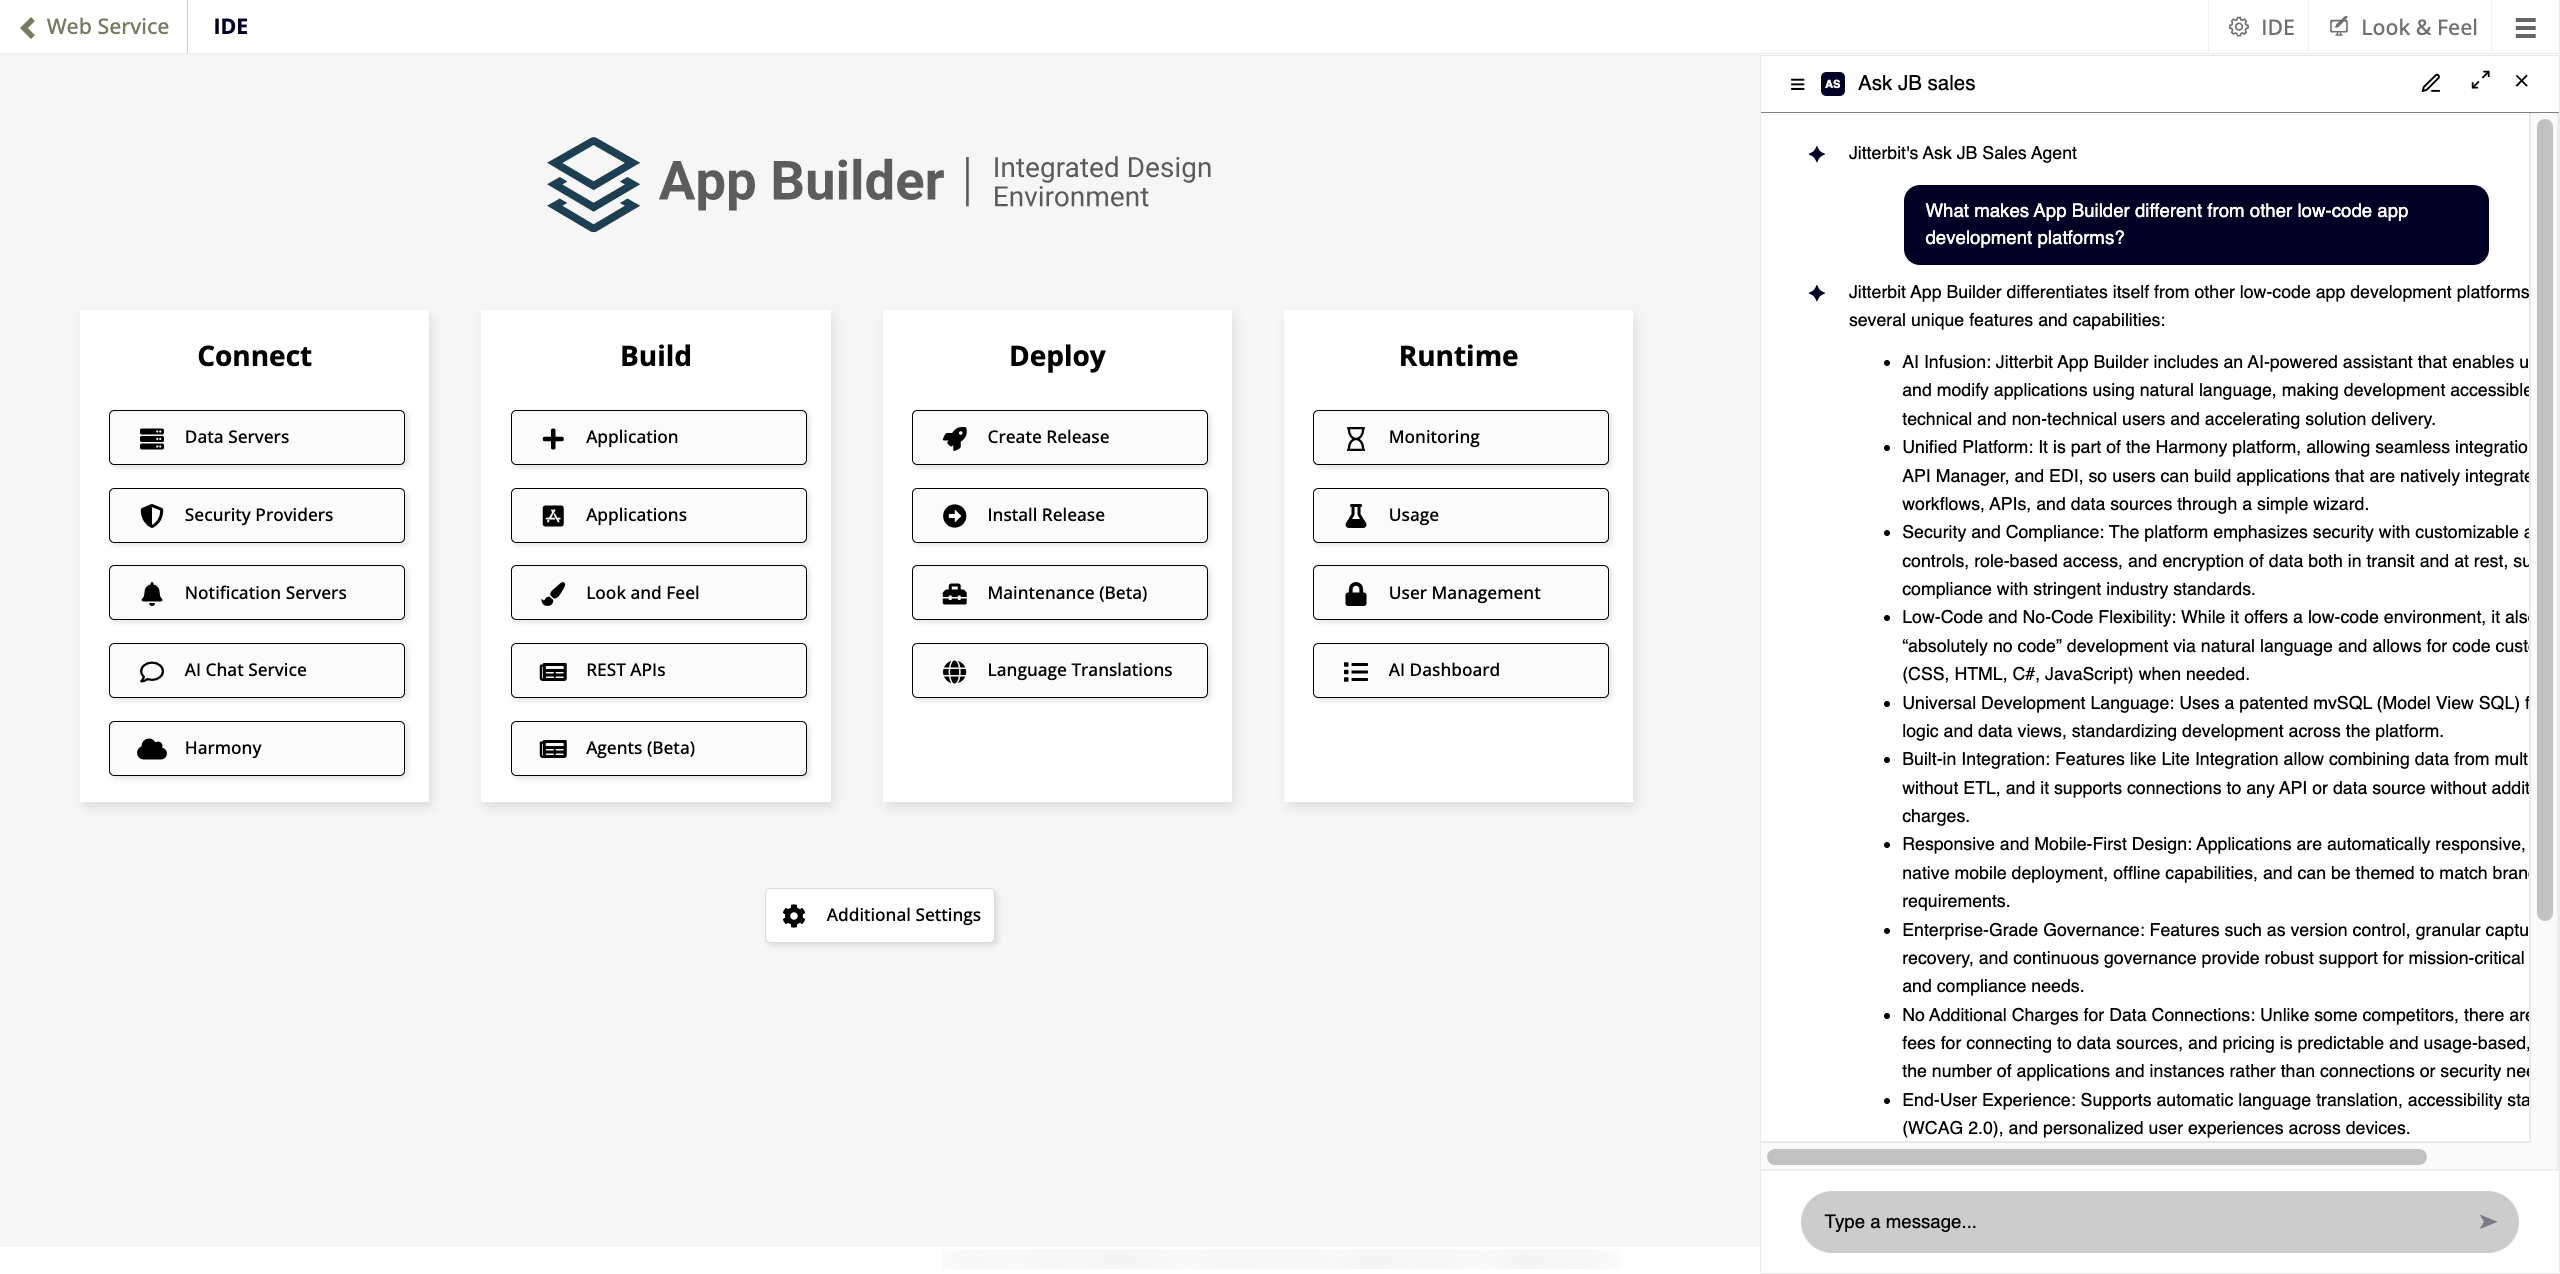
La ventana de chat muestra lo siguiente:
-
El nombre y el logo del agente por defecto en la parte superior.
-
El mensaje de bienvenida configurado para el agente.
-
Un cuadro de texto de aviso en la parte inferior con un botón de enviar (o presiona Enter para enviar un mensaje).
La esquina superior derecha de la ventana de chat tiene los siguientes controles:
-
Ícono de lápiz: Abre un nuevo chat, borrando el historial de mensajes actual. El mensaje de bienvenida se muestra nuevamente.
-
Ícono de maximizar: Expande el chat a pantalla completa. En modo de pantalla completa, aparece una barra de navegación a la izquierda.
-
X: Cierra la ventana de chat.
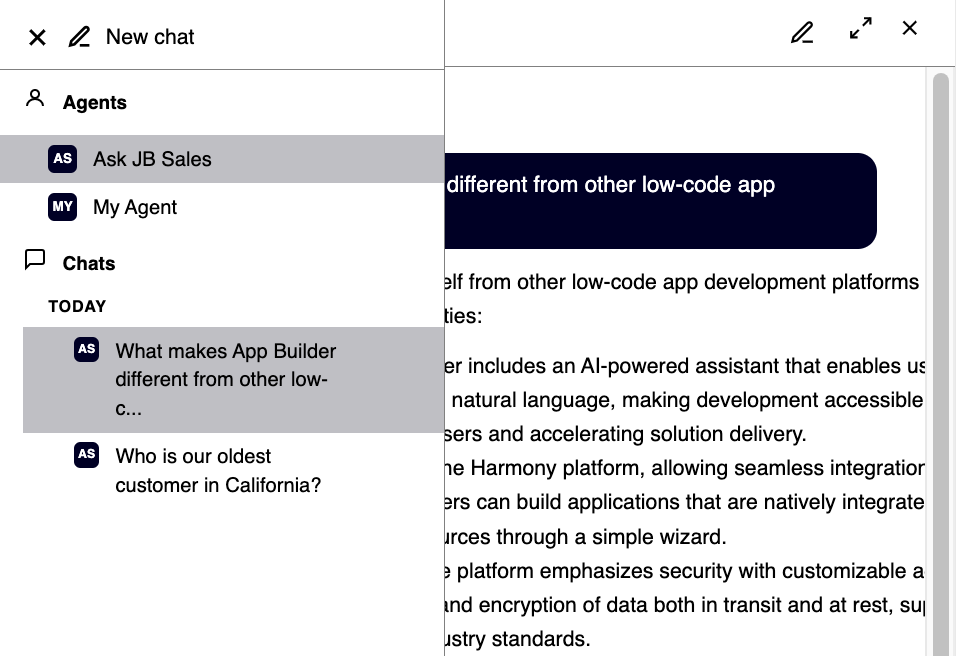
En la vista del panel lateral, hacer clic en el menú de hamburguesa en la esquina superior izquierda abre la barra de navegación, que muestra lo siguiente:
-
Agentes: Lista todos los agentes disponibles. Haz clic en un agente para cambiar a él.
-
Chats: Muestra el historial de chats organizado por fecha, con cada entrada mostrando el ícono del agente utilizado en esa conversación.
Siguientes pasos
Después de configurar un agente, puedes opcionalmente incrustar la interfaz de chat directamente en un diseño de página en lugar de usar la burbuja de chat flotante . Consulta Agregar un panel de chat para continuar.