Navigieren Sie durch die Transformationsoberfläche in Jitterbit Studio
Einführung
Diese Seite zeigt Ihnen, wie Sie durch die Transformationsoberfläche navigieren und verschiedene Ansichten sowie Anzeigeoptionen nutzen. Die Transformationsoberfläche bietet Werkzeuge, um Daten zwischen Quell- und Ziel-Schemas zuzuordnen.
Für praktische Übungen mit diesen Oberflächenelementen siehe Erstellen Sie Ihre erste Transformation.
Elemente der Transformationsoberfläche
Transformations-Minimap
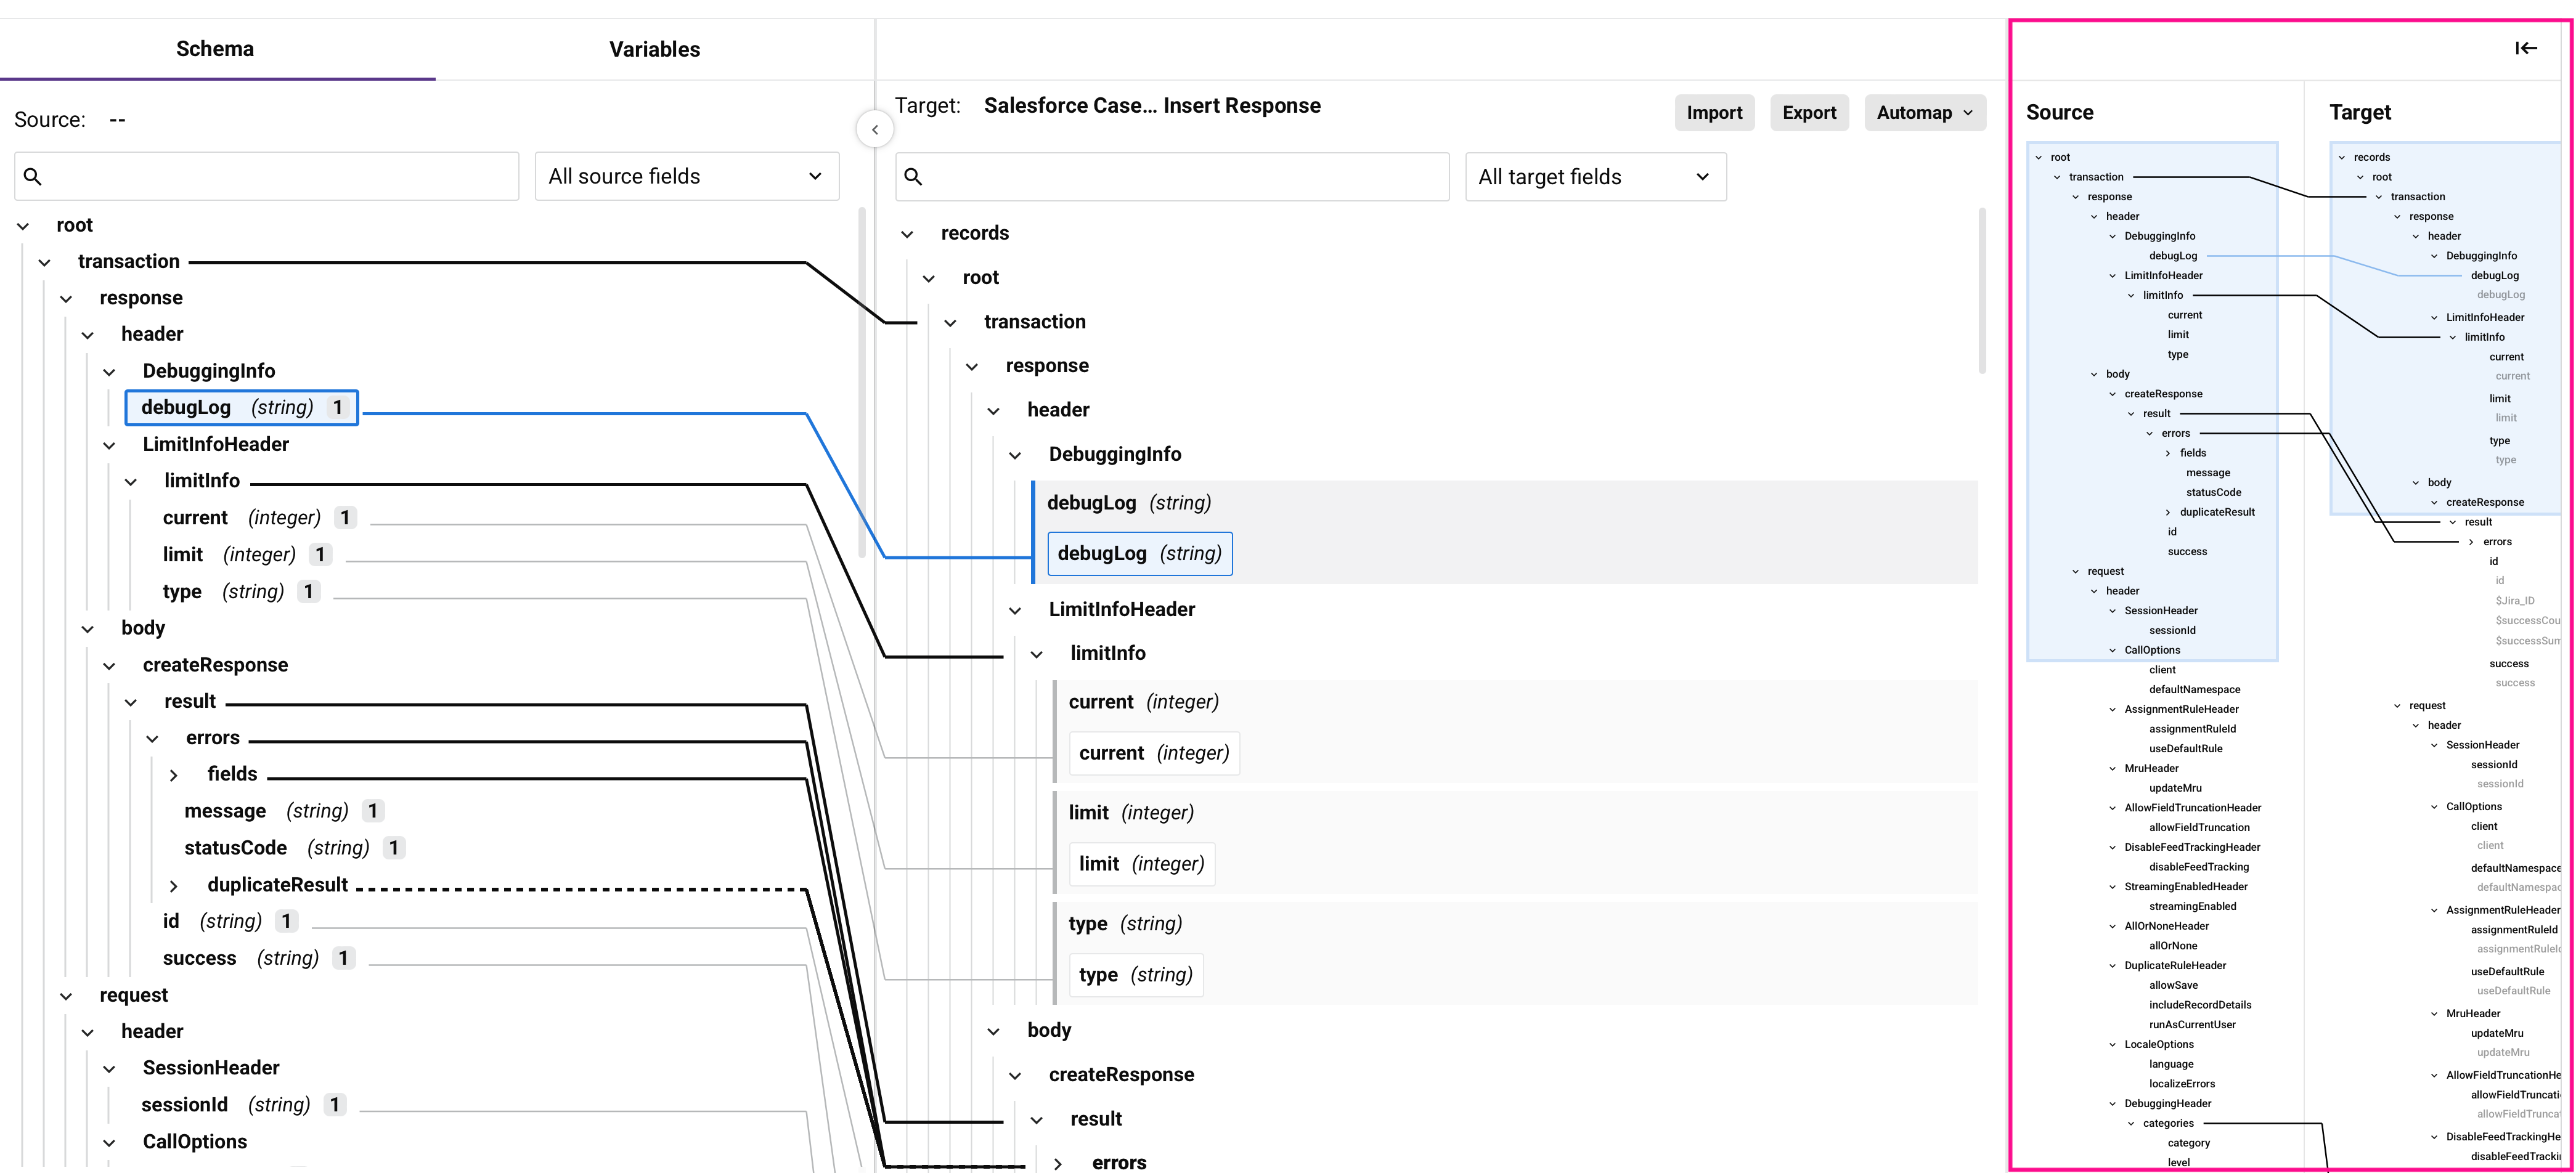
Die Transformations-Minimap bietet einen navigationalen Überblick über die Strukturen der Quell- und Ziel-Schemas, was das Navigieren durch komplexe Transformationen erleichtert. Die Minimap zeigt eine komprimierte Darstellung beider Schemata und zeigt den aktuellen Ansichtsbereich, ausgewählte Felder und Zuordnungsbeziehungen an.
Die Minimap erscheint neben der Haupt-Transformationsoberfläche. Klicken Sie auf Minimap öffnen/schließen, um die Minimap anzuzeigen oder auszublenden.
Ansichtsbereich-Indikatoren
Die Minimap zeigt visuelle Hinweise, um Ihre aktuelle Position innerhalb jedes Schemas anzuzeigen:
Im obigen Beispiel zeigen pinke Annotationen das Quell-Schema an, während lila Annotationen das Ziel-Schema anzeigen.
Die hellblauen Kästchen repräsentieren Ansichtsbereiche, die anzeigen, welcher Teil jedes Schemas derzeit in der Haupt-Transformationsansicht sichtbar ist. Sie können diese Ansichtsbereiche ziehen, um zu verschiedenen Teilen Ihrer Schemata zu navigieren.
Die Minimap zeigt zusätzliche visuelle Indikatoren sowohl in der Hauptansicht als auch in der Minimap an:
-
Ausgewählte Felder werden als blaue Zuordnungslinien angezeigt.
-
Schleifen-Knoten werden als durchgehende schwarze Linien angezeigt.
Transformationswerkzeugleiste
Die Transformationswerkzeugleiste enthält Werkzeuge zur Interaktion mit Transformationen:

| Icon | Beschreibung |
|---|---|
| Rückgängig macht Ihre letzte Aktion rückgängig (siehe Rückgängig und Wiederherstellen in Studio-Berechtigungen, Zusammenarbeit und Speichern). | |
| Wiederherstellen macht Ihre letzte Rückgängig-Aktion rückgängig (siehe Rückgängig und Wiederherstellen in Studio-Berechtigungen, Zusammenarbeit und Speichern). | |
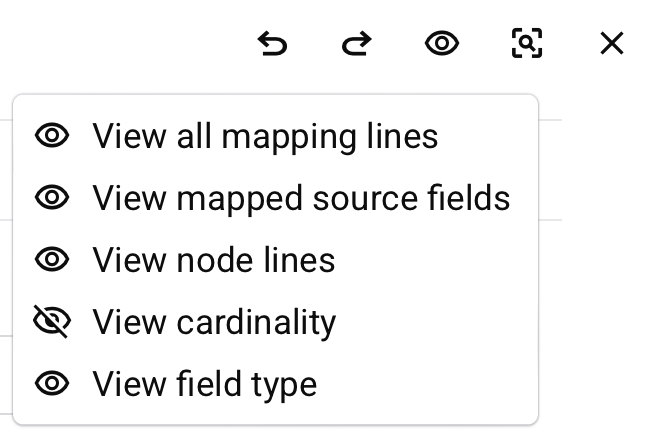
| Klicken Sie, um die Ansichtseinstellungen der Transformation anzupassen. Sie können auswählen, ob Sie diese visuellen Indikatoren anzeigen oder ausblenden möchten:
|
|
| Vorschau ändert die Ansicht der Transformation in den Vorschau-Modus (siehe Transformationen testen und validieren). Diese Option ist nur verfügbar, wenn die Transformation sowohl ein Quellschema als auch ein Zielschema angegeben hat. |
|
| Schließen schließt die Transformation. |
Filter und Suche
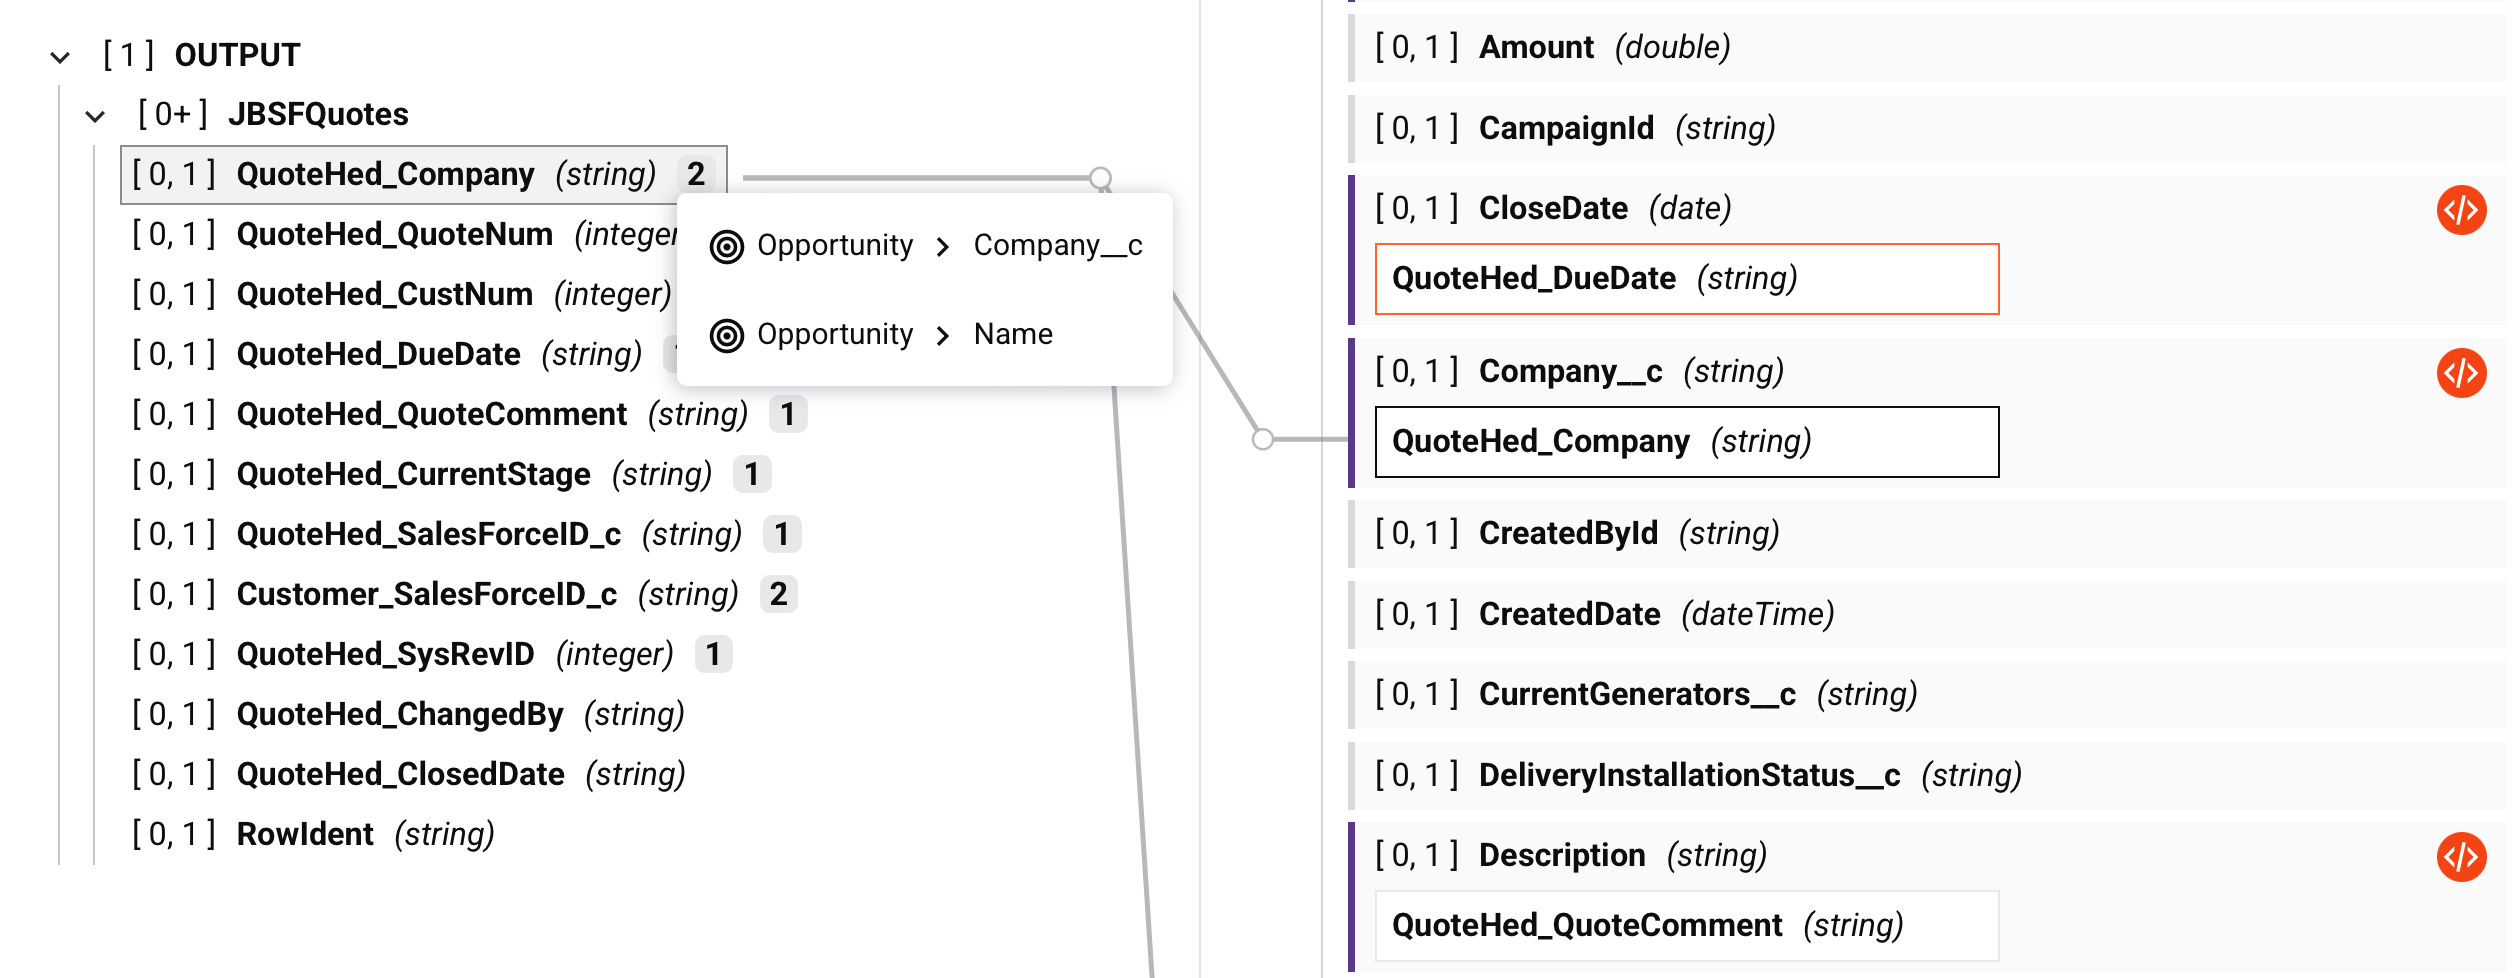
Sie können Filter und Suche verwenden, um spezifische Felder innerhalb der Quell- oder Zielstrukturen zu lokalisieren. Sie können auch die Suche in der Quellstruktur verwenden, um eine bestimmte Variable zu finden, die in der Zielstruktur verwendet werden soll, oder die Suche in der Zielstruktur, um innerhalb von Transformationsmapping-Skripten zu suchen.
Filter
Das Dropdown-Menü für die Ansicht befindet sich oben in den Quell- und Ziel-Strukturen:
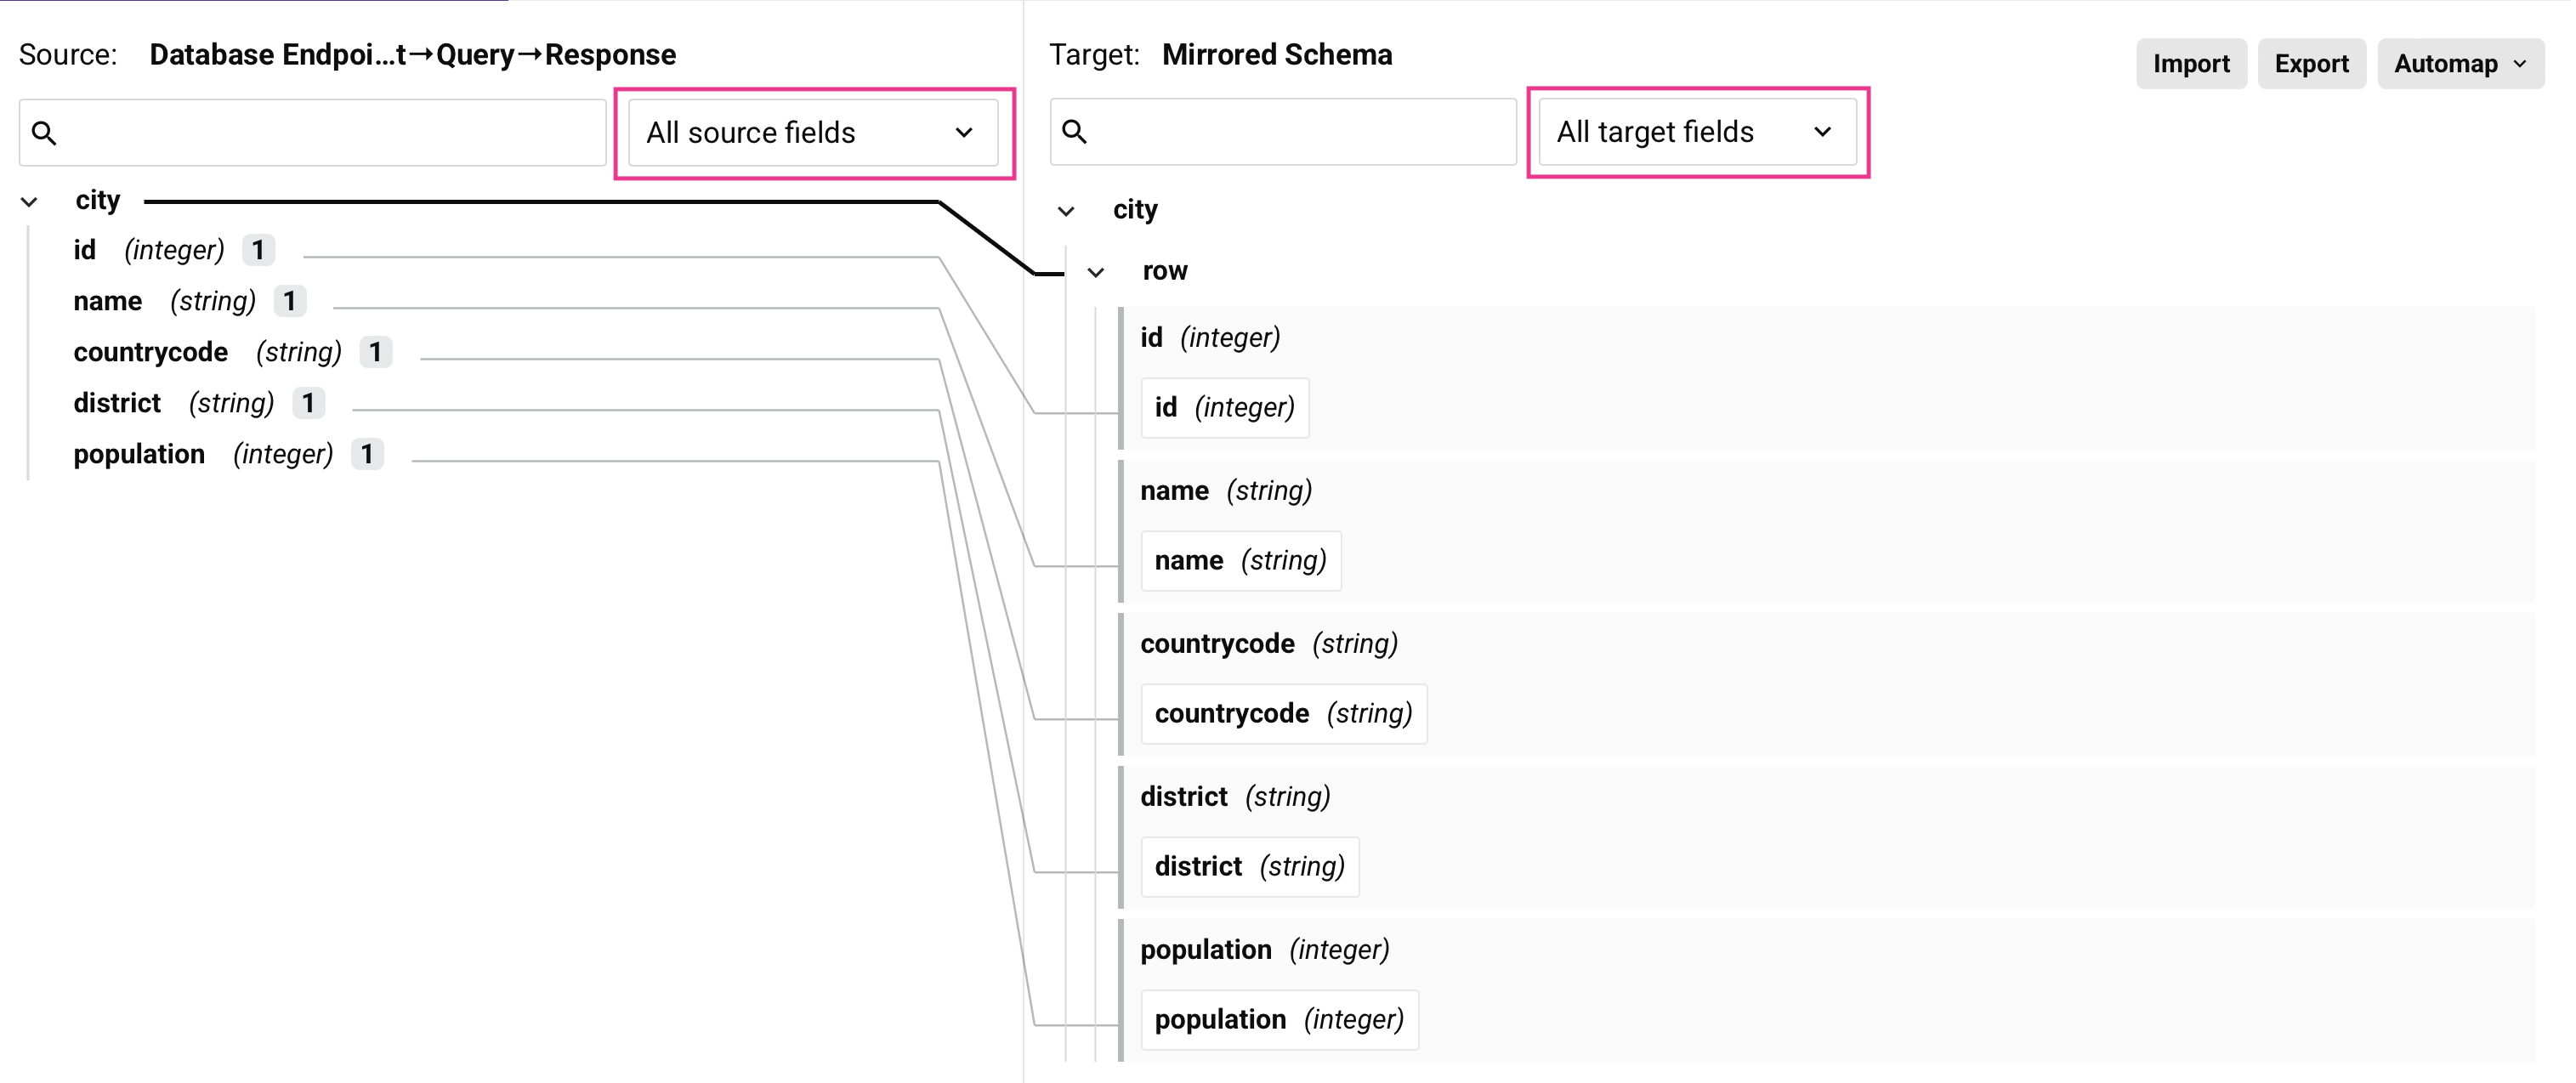
Dieses Dropdown-Menü ermöglicht es Ihnen, nach diesen Auswahlmöglichkeiten zu filtern:
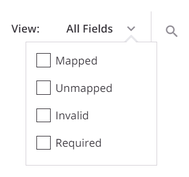
- Alle Ziel-/Quellfelder auswählen: Alle Felder werden angezeigt.
- Ungültig: Diese Option ist nur in der Ziel-Struktur verfügbar. Es werden nur Felder angezeigt, die zugeordnet wurden, bei denen die Zuordnung nicht gültig ist. Die Gültigkeit der Zuordnung wird unter Gültigkeit der Transformationszuordnung detailliert.
- Zuordnungen: Es werden nur Felder angezeigt, die zugeordnet wurden. Innerhalb der Quell-Struktur sind die zugeordneten Objekte auf diejenigen beschränkt, die einem Ziel-Feld zugeordnet wurden. Für die Ziel-Struktur sind zugeordnete Felder diejenigen, die in irgendeiner Weise definiert wurden (mit einem Quellobjekt, einer Variablen, einem benutzerdefinierten Wert oder einer anderen Skriptlogik).
- Erforderlich: Diese Option ist nur in der Ziel-Struktur verfügbar. Es werden nur Felder angezeigt, die einen Kardinalitätsschlüssel von
[1]oder[1+]haben. Weitere Informationen finden Sie in der Kardinalitätsnotation in Schlüsselkonzepten. - Nicht zugeordnet: Es werden nur Felder angezeigt, die nicht zugeordnet wurden.
Suche
Verwenden Sie das Suchfeld, das sich über der Quell- oder Ziel-Struktur befindet, um innerhalb dieser Struktur zu suchen:
-
Quelle: Bei der Suche in der Quellstruktur werden Felder oder Variablen, die einen Teil der Schlüsselwörter in ihrem Namen enthalten, hervorgehoben.
-
Ziel: Bei der Suche in der Zielstruktur werden Felder, die einen Teil der Schlüsselwörter im Feldnamen oder innerhalb des Transformationsmapping-Skripts enthalten, zurückgegeben und hervorgehoben. Die Suche liefert bis zu 100 Transformationsmapping-Skripte, die den Suchkriterien entsprechen. Wenn dieses Limit erreicht ist, wird eine Nachricht angezeigt:
Die Suchergebnisse für Skripte wurden auf 100 Skripte beschränkt. Alle Pfade wurden durchsucht.
Quell- und Ziel-Schemas, die mehr als 999 Knoten enthalten, erfordern, dass zwei oder mehr Zeichen in das Suchfeld eingegeben werden, um eine Suche zu starten.
Wenn eine Suche gestartet wird, wird die Gesamtzahl der Ergebnisse zurückgegeben:

Verwenden Sie die vorherigen und nächsten Icons, um durch die Ergebnisse zu navigieren.
Hinweis
Innerhalb des Quell-Tabs und der Ziel-Struktur ist die Suche auf den ausgewählten Filter beschränkt. Um sowohl gemappte als auch nicht gemappte Felder zu durchsuchen, stellen Sie sicher, dass Sie Alle Felder im Filter-Dropdown auswählen.
Quellschema erweitern und reduzieren
Verwenden Sie die Erweiterungs-/Reduktionsschaltflächen zwischen den Schemata, um das Quellschema anzuzeigen oder auszublenden (standardmäßig erweitert).
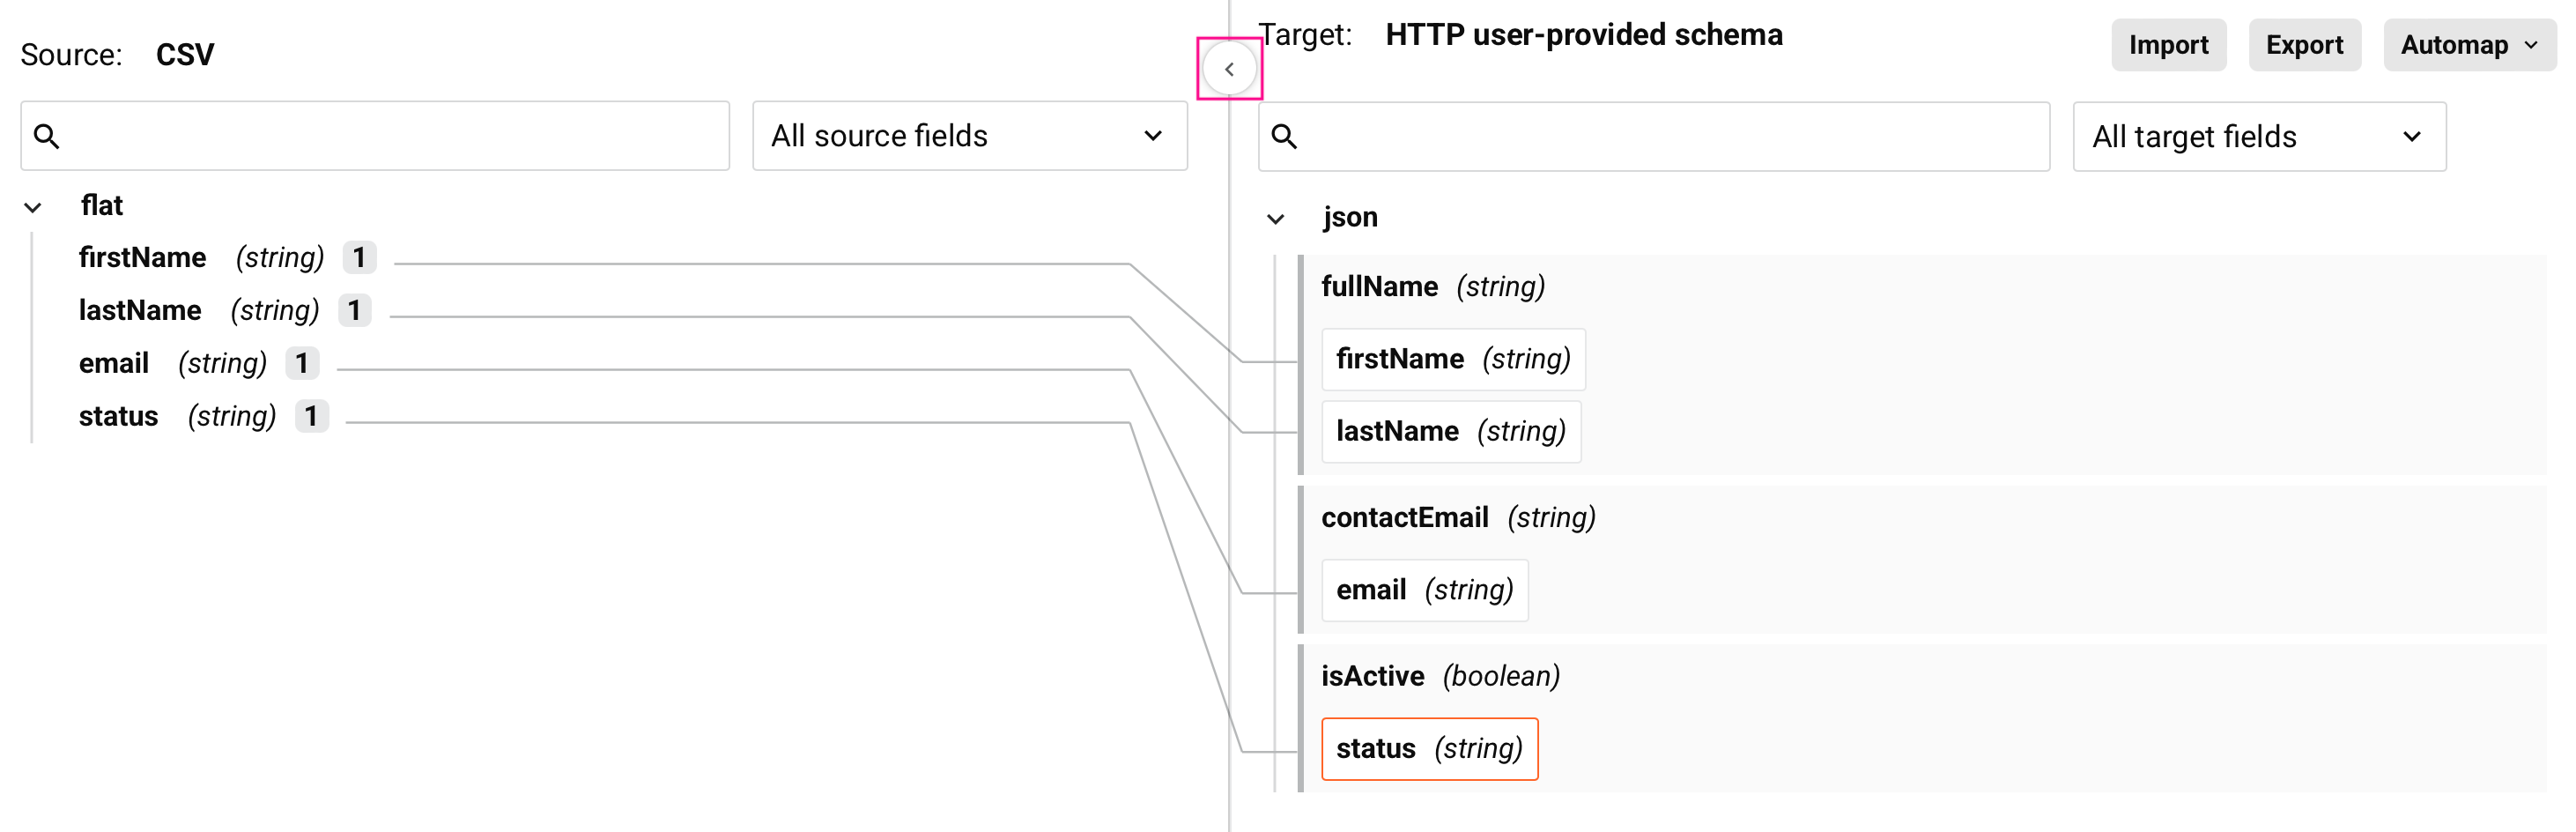
Visuelle Indikatoren für gemappte Felder
Wenn Sie gemappte Objekte im Quell- oder Variablen-Tab anzeigen, zeigt eine Zahl an, wie oft jedes Objekt auf der Zielseite der Transformation referenziert wird. Klicken Sie auf die Zahl, um den Zielpfad in einem Tooltip anzuzeigen.
Darüber hinaus erscheinen beim Überfahren eines Quellobjekts Linien, die das Quellfeld mit den Ziel-Feldern verbinden, auf die es gemappt ist, oder Knoten, in denen es referenziert wird.
Wenn Sie gemappte Objekte innerhalb der Ziel-Struktur anzeigen, zeigt das Überfahren des Feldes eine Linie, die das gemappte Zielfeld mit seinen Ursprüngen im Quell- oder Variablen-Tab verbindet, sofern zutreffend. Klicken Sie auf das gemappte Quellobjekt, um automatisch zu dem Objekt im Tab zu gelangen.
Klicken Sie auf den Namen eines zugeordneten Zielobjekts, um es zu minimieren, sodass die zugeordneten Objekte nicht sichtbar sind:
Tipp
Wenn ein minimierter Knoten Ziel-Feldzuordnungen enthält, wird dieser Knoten fett angezeigt, um anzuzeigen, dass er Zuordnungen enthält.
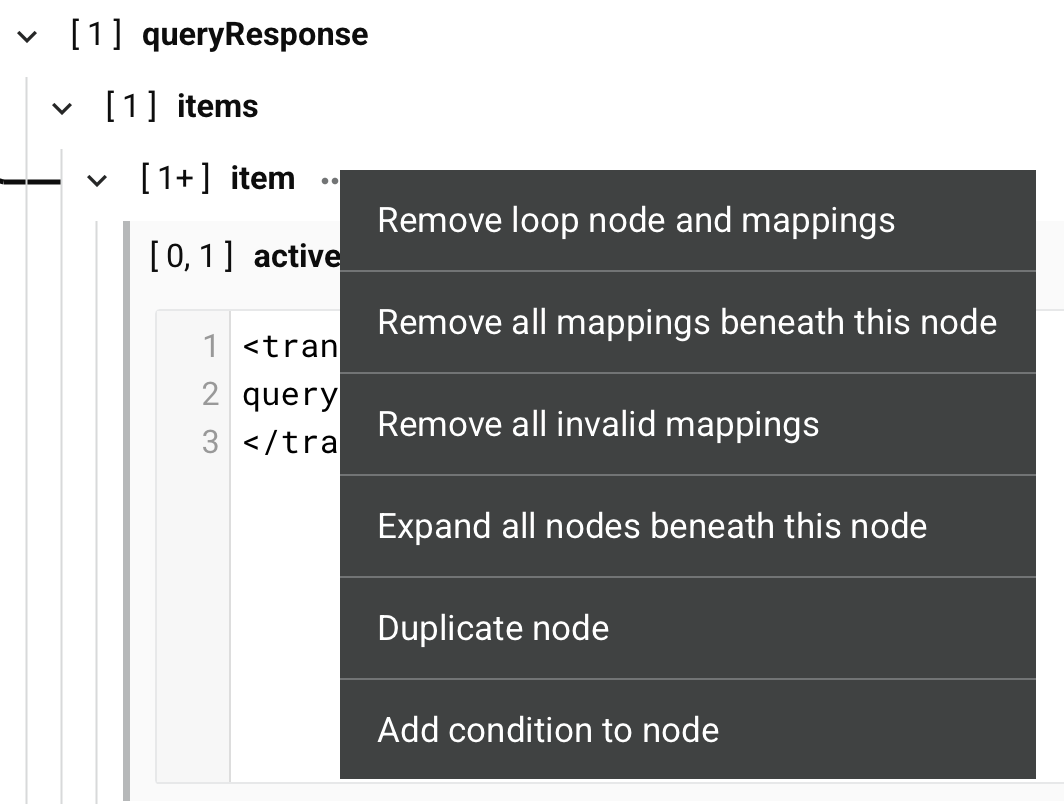
Aktionen für Zielknoten
Wenn Sie mit der Maus über einen Zielknoten fahren und das Aktionsmenü anklicken, stehen diese Aktionen zur Verfügung:
| Menüelement | Beschreibung |
|---|---|
Schleifenknoten entfernen entfernt die Definition des Schleifenknotens. Diese Aktion ist nur für Knoten verfügbar, die einen manuell definierten Schleifenknoten haben. Hinweis Wenn Sie alle direkten Blattzuordnungen eines manuell definierten Schleifenknotens entfernen, bleibt die Definition des Schleifenknotens bestehen. |
|
Schleifenknoten und Zuordnungen entfernen entfernt die Definition des Schleifenknotens aufgrund von Zuordnungen, die direkte Blattkinder sind, die mit dem Schleifenknoten verbunden sind, und entfernt diese Zuordnungen. Alle anderen Zuordnungen innerhalb von Kindschleifenknoten unter dem übergeordneten Schleifenknoten bleiben erhalten, und der Knoten behält seine Definition des Schleifenknotens, wenn mindestens ein Enkel zugeordnet ist. Diese Aktion ist nur für Knoten verfügbar, die einen Schleifenknoten definiert haben (entweder manuell oder durch automatische Generierung). |
|
Alle Zuordnungen unter diesem Knoten entfernen entfernt alle Zuordnungen auf Feldern, die im Knoten enthalten sind, sowie alle Zuordnungen auf Feldern, die in Kindknoten dieses Knotens enthalten sind. Die Verwendung dieser Aktion auf einem Wurzelknoten entfernt alle Zuordnungen in einer Transformation. Bei Auswahl dieser Aktion wird eine Nachricht angezeigt, die Sie auffordert zu bestätigen, dass Sie die Zuordnungen entfernen möchten. |
|
Alle ungültigen Zuordnungen entfernen entfernt alle ungültigen Zuordnungen auf Feldern, die im Knoten enthalten sind, sowie alle ungültigen Zuordnungen auf Feldern, die in Kindknoten dieses Knotens enthalten sind. Für weitere Informationen zu ungültigen Zuordnungen siehe Gültigkeit von Transformationszuordnungen. |
|
Alle Knoten unter diesem Knoten erweitern erweitert alle Kindknoten unter dem übergeordneten Knoten. (Standardmäßig werden Knoten bis zu 8 Ebenen tief für Schemata mit 750 oder weniger Knoten und bis zu 5 Ebenen tief für Schemata mit mehr als 750 Knoten erweitert.) |
|
Knoten duplizieren dupliziert den Knoten und seine Felder sowie alle Kindknoten und deren Felder. Zuordnungen werden nicht dupliziert. Diese Aktion ist für Wurzelknoten in flachen Schemata und für Knoten verfügbar, deren Kardinalität angibt, dass Elemente mehr als einmal auftreten können. Der Knoten darf nicht bereits eine Duplikation eines anderen Knotens sein. Nur zu Anzeigezwecken während der Entwurfszeit wird der Name des duplizierten Knotens mit einem Hash ( Ob ein duplizierter Knoten an anderen Stellen im Projekt reflektiert wird, hängt davon ab, wie das Schema definiert wurde:
|
|
Duplizierten Knoten entfernen entfernt den duplizierten Knoten und seine Felder sowie alle duplizierten Kindknoten und deren Felder. Diese Aktion ist nur für Knoten verfügbar, die mit Knoten duplizieren erstellt wurden. |
|
Duplizierten Knoten umbenennen ermöglicht es Ihnen, einen duplizierten Zielknoten umzubenennen. Der neue Name dient nur zu Anzeigezwecken während der Entwurfszeit. Zur Laufzeit wird der ursprüngliche Name des duplizierten Knotens (der Knotename, der mit einem Hash ( Diese Aktion ist nur für Knoten verfügbar, die mit Knoten duplizieren erstellt wurden. |
|
Bedingung zum Knoten hinzufügen wird verwendet, um eine Zuordnung bedingt auf die Felder anzuwenden, die in einem Knoten enthalten sind. Diese Aktion ist nur für Knoten verfügbar, die bereits keine Bedingung angewendet haben. Bei Auswahl dieser Aktion öffnet sich ein bearbeitbarer Skriptbereich, in dem Sie die Bedingung erstellen können. Für Details zur Erstellung der Bedingung siehe Bedingte Logik. |
|
Bedingung bearbeiten öffnet einen bearbeitbaren Skriptbereich Diese Aktion ist nur für Knoten verfügbar, die bereits eine Bedingung angewendet haben. Für weitere Details siehe Bedingte Logik. |
|
Bedingung entfernen entfernt die Bedingung. Diese Aktion ist nur für Knoten verfügbar, die bereits eine Bedingung angewendet haben. |
Zielbereichsaktionen
Wenn Sie über ein Zielgebiet fahren, sind diese Aktionen verfügbar:
| Icon | Beschreibung |
|---|---|
| Zeigt oder verbirgt die Namen der zugeordneten Quellobjekte im Zielbereich. Um alle zugeordneten Quellobjektnamen anzuzeigen oder zu verbergen, verwenden Sie die Transformationsansicht-Option in der Transformationswerkzeugleiste. | |
| Öffnet den Skripteditor für das Feld. | |
| Entfernt die Zuordnung für das Feld. | |
| Öffnet ein Textfeld, um einen benutzerdefinierten Wert hinzuzufügen. Diese Aktion ist für zugeordnete Felder deaktiviert. Verwenden Sie für zugeordnete Felder Erweitern, um das Skript zu bearbeiten. |
Entfernen mehrerer Feldzuordnungen
Für Zuordnungen in hierarchischen Schemata sind Optionen zum Entfernen mehrerer Ziel-Feldzuordnungen im Aktionsmenü eines Knotens verfügbar (beschrieben in Zielknoten).
Schemaaktionen
Aktionen im Projektbereich
Nachdem ein Schema erstellt wurde, sind die Menüaktionen für dieses Schema im Komponenten-Tab des Projektbereichs zugänglich (siehe Menüaktionen für Komponenten im Projektbereich Komponenten-Tab).
Diese Menüaktionen sind verfügbar:
| Menüelement | Beschreibung |
|---|---|
| Ausschneiden platziert eine Kopie des Schemas in Ihrer Zwischenablage und löscht das ursprüngliche Schema aus dem Projekt (siehe Komponentenwiederverwendung). | |
| Kopieren platziert eine Kopie des Schemas in Ihrer Zwischenablage (siehe Komponentenwiederverwendung). | |
| Umbenennen positioniert den Cursor auf dem Schemanamen, damit Sie bei Bedarf Änderungen vornehmen können. | |
| Abhängigkeiten anzeigen ändert die Ansicht im Projektbereich, um andere Teile des Projekts anzuzeigen, von denen das spezifische Schema abhängt (siehe Komponentenabhängigkeiten, Löschung und Entfernung). | |
| Zur Gruppe hinzufügen öffnet einen Dialog, um eine neue benutzerdefinierte Gruppe zu erstellen oder das Schema einer bestehenden Gruppe hinzuzufügen (siehe Komponentengruppen). | |
| Löschen löscht das Schema dauerhaft (siehe Komponentenabhängigkeiten, Löschung und Entfernung). |
Transformation actions
Nachdem ein Quell- oder Zielschema in einer Transformation festgelegt wurde, stehen Menüaktionen für dieses Schema oben auf dem Konfigurationsbildschirm der Transformation zur Verfügung. Wenn Sie über den oberen Bereich der Quell- oder Zielseite fahren, erscheinen die Schemaaktionen:

| Menüelement | Beschreibung |
|---|---|
| Aktivität bearbeiten öffnet die Aktivitätskonfiguration, damit Sie bei Bedarf Änderungen vornehmen können (siehe In einer Aktivität definierte Schemata). Diese Aktion ist nur verfügbar, wenn die Transformation ein Schema von einer angrenzenden oder ursprünglich angrenzenden Aktivität erbt. Für Aktivitäten mit benutzerdefinierten Schemata können Sie die Konfiguration bearbeiten, um die Datei zu löschen oder auszutauschen, die Sie für das Schema ausgewählt haben. Für andere Aktivitäten können Sie die Abfrage bearbeiten, die Objektauswahl ändern oder andere solche Konfigurationen vornehmen. |
|
| Schema bearbeiten öffnet den Schema-Editor, damit Sie das Schema bearbeiten können (siehe In einer Transformation definierte Schemata). Diese Aktion ist nur für editierbare Schemata verfügbar. Wenn Sie ein Schema bearbeiten, das aus einer Beispieldatei in einer Transformation erstellt wurde, öffnet sich der Konfigurationsbildschirm für ein benutzerdefiniertes Flachschema oder benutzerdefiniertes hierarchisches Schema, um Felder und/oder Knoten nach Bedarf hinzuzufügen oder zu bearbeiten. Schemata, die von einer angrenzenden Aktivität bereitgestellt werden, sind nicht editierbar. Beim Öffnen eines Schemas, das von mehreren Komponenten referenziert wird, wird ein Dialog angezeigt, der eine Liste aller Komponenten enthält, die das Schema referenzieren und von Änderungen betroffen sein werden: Dialogtext Dieses Schema wird von allen folgenden Komponenten verwendet. Änderungen daran können die Gültigkeit dieser Komponenten beeinträchtigen.
|
|
| Schema aktualisieren regeneriert das Schema vom Endpunkt. Diese Aktion ist nur für Schemata verfügbar, die von einer angrenzenden Aktivität mit einem von einem Connector generierten Schema geerbt werden (außer für Datenbank, NetSuite, Salesforce, Salesforce Service Cloud, oder ServiceMax-Endpunkte). Diese Aktion regeneriert auch das Schema an anderen Stellen im Projekt, wo dasselbe Schema referenziert wird, z. B. in einer angrenzenden Aktivität. Weitere Informationen finden Sie unter Schema-Regeneration. |
|
Schema löschen entfernt ein von der Transformation bereitgestelltes Schema aus der Transformation. Diese Aktion ist nur für in einer Transformation definierte Schemata verfügbar. Beim Entfernen eines Schemas wird eine Nachricht angezeigt, die Sie auffordert, die Entfernung des Schemas zu bestätigen, mit diesen Ergebnissen:
Hinweis Wenn ein von der Transformation bereitgestelltes Schema vor der Konfiguration einer angrenzenden Aktivität vorhanden war, ist die Option Schema löschen deaktiviert. Obwohl ein von der Transformation bereitgestelltes Schema weiterhin von der Transformation referenziert wird, wird es nicht in der Verarbeitung verwendet. Um ein von der Transformation bereitgestelltes Schema unter diesen Umständen zu löschen, entfernen Sie vorübergehend die angrenzende Aktivität, und die Option Schema löschen wird aktiviert. Sobald Sie das von der Transformation bereitgestellte Schema gelöscht haben, ersetzen Sie die Aktivität in der Operation. |
Script-Komponentenpalette
Die Script-Komponentenpalette bietet Zugriff auf verschiedene Komponenten, die innerhalb eines Skripts verwendet werden können:
Um die Script-Komponentenpalette zu minimieren, klicken Sie auf das Minimieren-Symbol in der oberen rechten Ecke der Palette. Wenn die Palette minimiert ist, können Sie sie erweitern, indem Sie auf einen der Tabs der Palette klicken.
Um innerhalb eines Tabs zu suchen, verwenden Sie das Suchfeld, um ein einzelnes Schlüsselwort oder eine Schlüsselwortzeichenfolge einzugeben. Um die Suche zu löschen, klicken Sie auf das Entfernen-Symbol .
Jeder Tab der Script-Komponentenpalette wird im Folgenden zusammengefasst, mit zusätzlichen Details in Jitterbit Script oder JavaScript, je nach Sprache.
| Tab | Beschreibung |
|---|---|
| Quellobjekte | Der Tab Quellobjekte ist nur für Skripte vorhanden, die innerhalb einer Transformation erstellt wurden. Da dieser Skripttyp auf solche beschränkt ist, die die Sprache Jitterbit Script verwenden, ist das Referenzieren von Quellobjekten in Skripten, die in JavaScript geschrieben sind, nicht anwendbar. Innerhalb eines Transformationsskripts können Sie auf Quelldaten zugreifen, indem Sie den Referenzpfad eines Feldes einfügen, oder Sie können auf Quelldatenknoten zugreifen, indem Sie den Referenzpfad eines Knotens einfügen. Um einen Feld- oder Knotenreferenzpfad zu einem Transformationsskript (nur Jitterbit Script) hinzuzufügen, verwenden Sie eine dieser Methoden:
|
| Funktionen | Der Tab Funktionen bietet eine Liste von Funktionen, die in einem Skript für die im Skript ausgewählte Sprache (entweder Jitterbit Script oder JavaScript) verwendet werden können. Innerhalb eines Skripts können Sie Funktionen verwenden, indem Sie die für die Skriptsprache geeignete Funktionssyntax einfügen. Um die Funktionssyntax zu einem Skript (Jitterbit Script oder JavaScript) hinzuzufügen, verwenden Sie eine dieser Methoden:
|
| Variablen | Der Tab Variablen bietet Zugriff auf Variablen, die global im gesamten Projekt referenziert werden können, einschließlich globaler Variablen, Projektvariablen und Jitterbit-Variablen. Innerhalb eines Skripts können Sie Variablen verwenden, indem Sie die Variablen-Syntax einfügen. Um die Variablen-Syntax zu einem Skript (Jitterbit Script oder JavaScript) hinzuzufügen, verwenden Sie eine dieser Methoden:
|
| Plugins | Der Tab Plugins bietet eine Liste von Plugins, die innerhalb eines Skripts ausgeführt werden können. Innerhalb eines Skripts können Sie ein Plugin als Argument für die Funktion RunPlugin verwenden, indem Sie den Plugin-Referenzpfad einfügen.Um einen Plugin-Referenzpfad zu einem Skript (nur Jitterbit Script) hinzuzufügen, verwenden Sie eine dieser Methoden:
|
| Operationen | Dieser Tab bietet eine Liste von Operationen im Projekt, die in einem Skript referenziert werden können. Innerhalb eines Skripts können Sie eine Operation als Argument für Funktionen verwenden, indem Sie den Operations-Referenzpfad einfügen. Um einen Operations-Referenzpfad zu einem Skript (nur Jitterbit Script) hinzuzufügen, verwenden Sie eine dieser Methoden:
|
| Benachrichtigungen | Die Benachrichtigungen bieten eine Liste von Benachrichtigungen im Projekt, die in einem Skript referenziert werden können. Innerhalb eines Skripts können Sie eine Benachrichtigung als Argument für die Funktion SendEmailMessage verwenden, indem Sie den Benachrichtigungs-Referenzpfad einfügen.Um einen Benachrichtigungs-Referenzpfad zu einem Skript (nur Jitterbit Script) hinzuzufügen, verwenden Sie eine dieser Methoden:
|
| Skripte | Der Tab Skripte bietet eine Liste aller anderen eigenständigen Projektkomponenten-Skripte im Projekt — geschrieben in entweder Jitterbit Script oder JavaScript — die in einem Skript referenziert werden können. Innerhalb eines Skripts können Sie ein anderes Skript als Argument für die Funktion RunScript verwenden, indem Sie den Skript-Referenzpfad einfügen.Um einen Skript-Referenzpfad zu einem Skript (nur Jitterbit Script) hinzuzufügen, verwenden Sie eine dieser Methoden:
Hinweis Während ein Jitterbit-Skript ein JavaScript aufrufen kann, ist das umgekehrte nicht möglich. Ein Jitterbit-JavaScript kann kein anderes Skript einer beliebigen Sprache aufrufen. |
| Endpunkte | Der Tab Endpunkte bietet eine Liste von Endpunkten im Projekt, die in einem Skript referenziert werden können. Innerhalb eines Skripts können Sie Endpunkte als Argument für Funktionen verwenden, indem Sie den Verbindungs- oder Aktivitätsreferenzpfad einfügen. Um einen Verbindungs- oder Aktivitätsreferenzpfad zu einem Skript (Jitterbit Script oder JavaScript) hinzuzufügen, verwenden Sie eine dieser Methoden:
Für zusätzliche Details siehe Endpunkte in Jitterbit Script oder Endpunkte in JavaScript. |
Tastenkombinationen
Diese Tastenkombinationen können bei der Arbeit an einer Transformation verwendet werden:
- Ctrl+S (Windows/Linux) oder Cmd+S (macOS): Transformation manuell speichern.
- Ctrl+Z (Windows/Linux) oder Cmd+Z (macOS): Aktion rückgängig machen.
- Ctrl+Y (Windows/Linux) oder Cmd+Y (macOS): Aktion wiederherstellen.
- Ctrl+Space: Autovervollständigungsvorschläge in Skripten anzeigen.
- Esc: Dialoge schließen oder zur vorherigen Ansicht zurückkehren.