Erstellen Sie Ihre erste Transformation in Jitterbit Studio
Einführung
Diese Seite zeigt Ihnen, wie Sie eine einfache Transformation erstellen, die Kundendaten aus einer Datenbank in das JSON-Format überträgt. Sie lernen den grundlegenden Workflow zum Erstellen von Transformationen in Studio kennen.
Wenn Sie dieser Anleitung folgen, erstellen Sie eine Transformation, die Folgendes tut:
-
Nimmt Kundendaten aus einer Datenbankabfrage.
-
Ordnet die Felder einem JSON-Ausgabeformat zu.
-
Fügt ein berechnetes Feld für den vollständigen Kundennamen hinzu.
Die Datenbankabfrage liefert Daten mit diesem Schema:
firstName: "Rosario"
lastName: "Garcia"
email: "rosario.garcia@example.com"
status: "active"
{
  "fullName": "Rosario Garcia",
  "contactEmail": "rosario.garcia@example.com",
  "isActive": true
}
Voraussetzungen
Bevor Sie eine Transformation erstellen, benötigen Sie Folgendes:
-
Ein bestehendes Projekt in Studio.
-
Grundlegende Vertrautheit mit der Studio-Oberfläche.
-
Verständnis der wichtigen Transformationskonzepte.
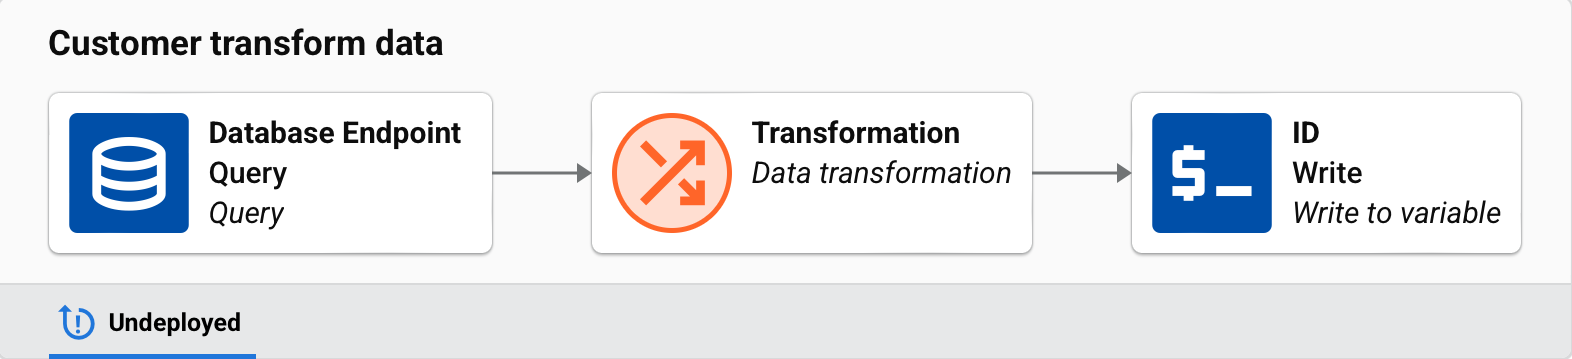
Schritt 1: Erstellen Sie eine Operation
Zuerst erstellen Sie eine Operation mit konfigurierten Quell- und Zielaktivitäten. In dieser Anleitung wird eine Datenbankabfrage-Aktivität als Quelle und eine Variablen-Schreibaktivität als Ziel verwendet:
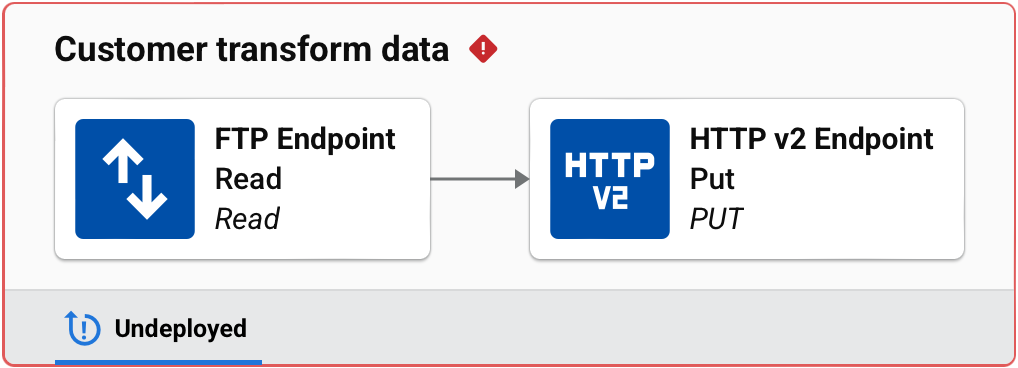
Für Informationen zur Konfiguration eines bestimmten Endpunkts siehe die Dokumentation zu Konnektoren. Um zu verstehen, wie Schemas von Aktivitäten geerbt werden, siehe Schemaquellen auswählen.
Schritt 2: Fügen Sie eine Transformation hinzu
-
Fahren Sie mit der Maus zwischen die beiden Aktivitäten, bis Sie die Drop-Zone für die Transformation sehen:
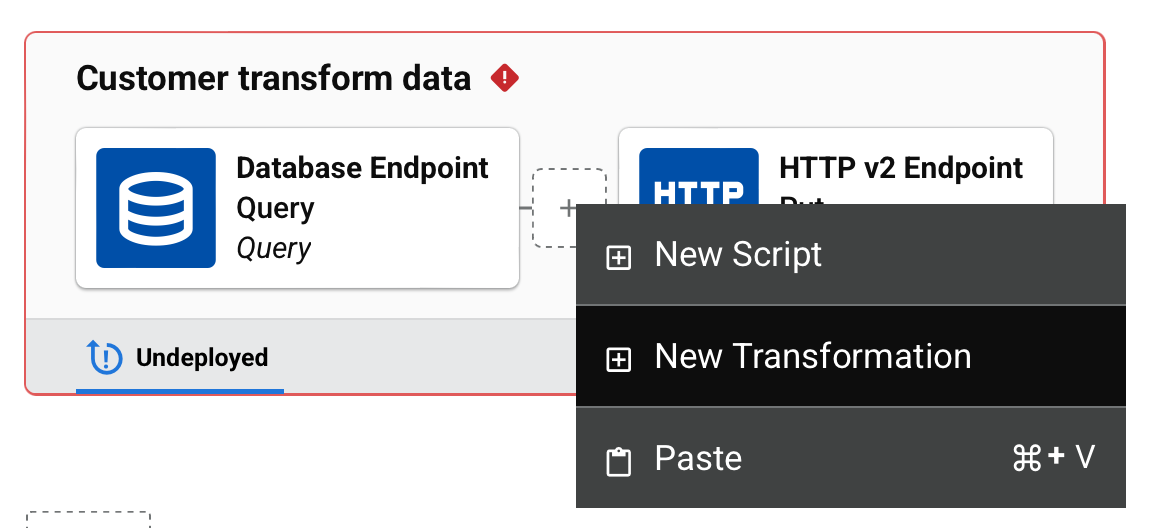
-
Klicken Sie auf Neue Transformation.
-
Eine neue Transformation öffnet sich mit diesen Schemata:
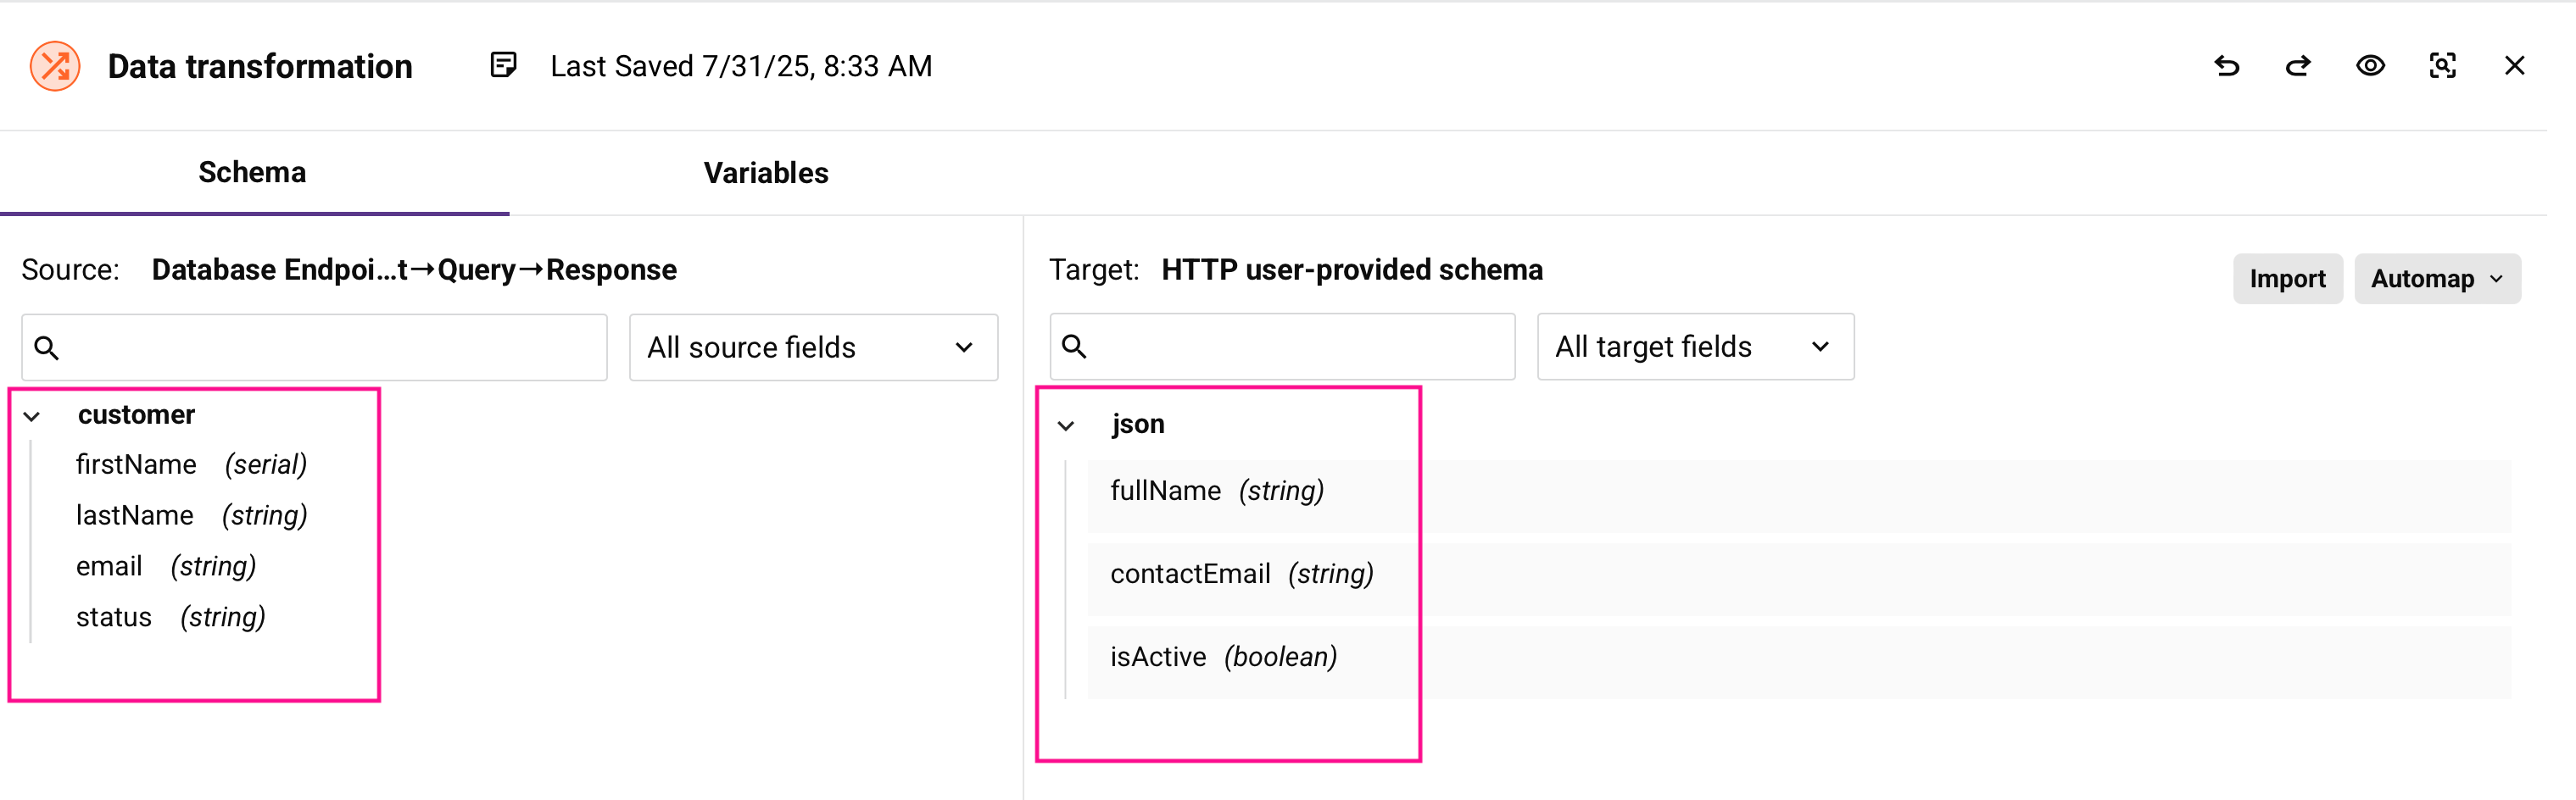
- Quellschema auf der linken Seite (vererbt von der Datenbankaktivität).
- Zielschema auf der rechten Seite (vererbt vom benutzerdefinierten Schema, das in der HTTP v2-Aktivität bereitgestellt wird).
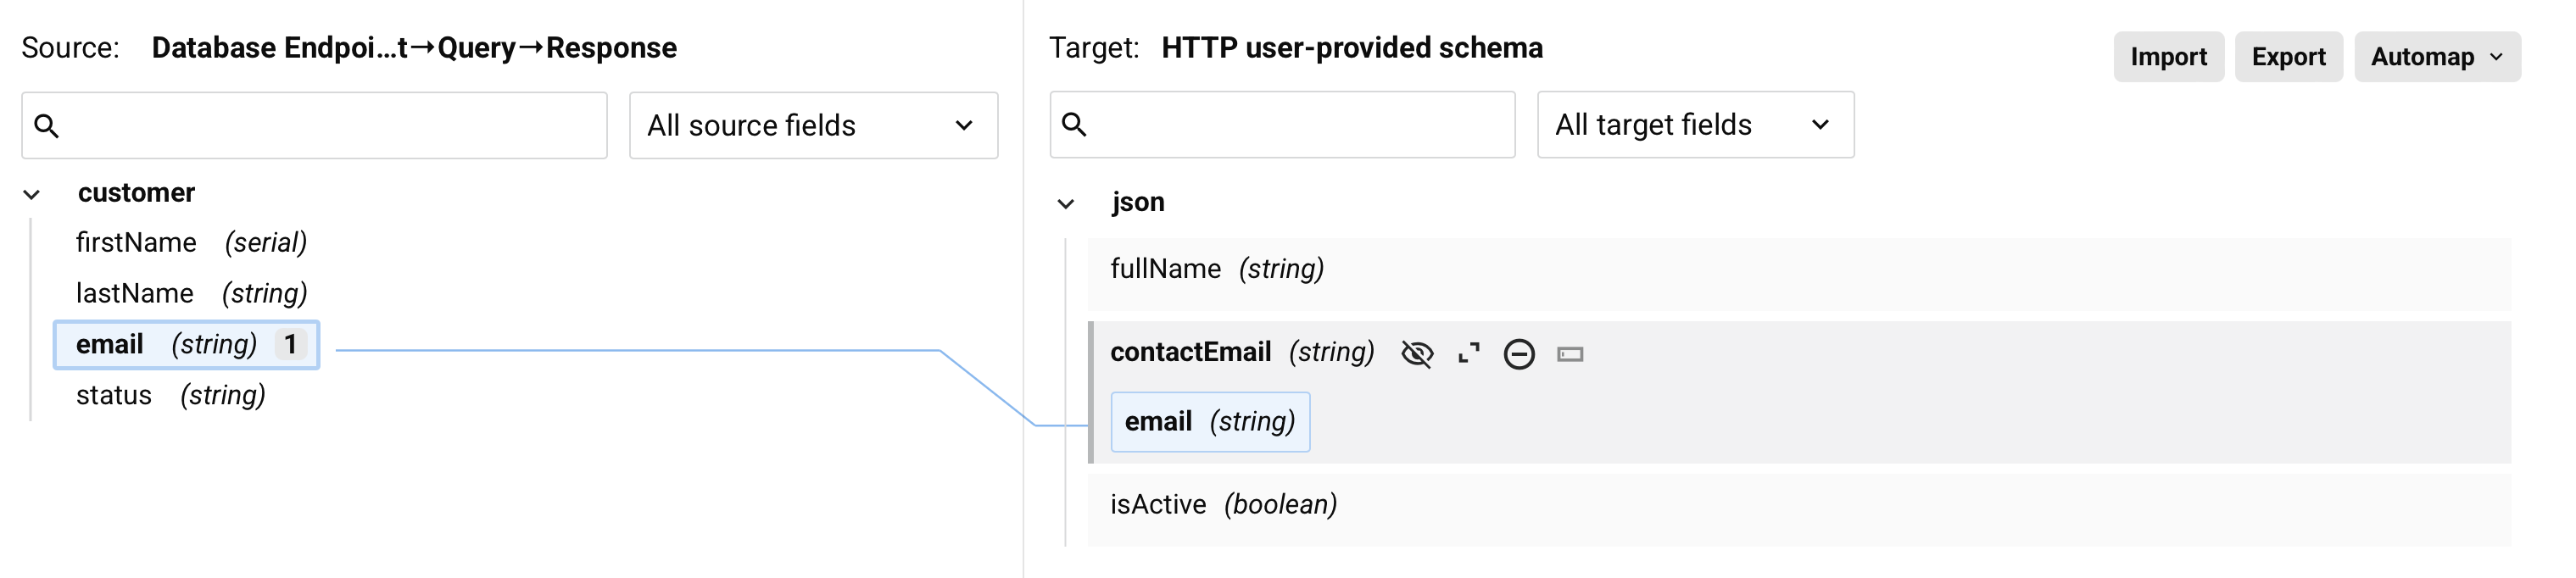
Schritt 3: Felder zuordnen
Erstellen Sie Zuordnungen zwischen Quell- und Zielfeldern.
Hinweis
Die Beispiele in den folgenden Abschnitten beschreiben die grundlegende Feldzuordnung. Für komplexere Szenarien wie verschachtelte Datenstrukturen siehe Mit hierarchischen Daten arbeiten, oder für wiederholende Daten siehe Daten Schleifen steuern.
Ordnen Sie das Email-Feld manuell zu
-
Ziehen Sie das
email-Feld von der Quellseite zum ZielcontactEmail-Feld. -
Die Zuordnung erscheint als Linie, die die Felder verbindet, und das Zielfeld zeigt die zugeordnete Quelle an:
Ordnen Sie das Statusfeld mit Transformation zu
-
Fahren Sie mit der Maus über das Ziel
isActive-Feld und klicken Sie auf Erweitern oder Benutzerdefinierten Wert hinzufügen. -
Geben Sie im sich öffnenden Skriptbereich dieses Skript ein:
If(status == "active", 1, 0)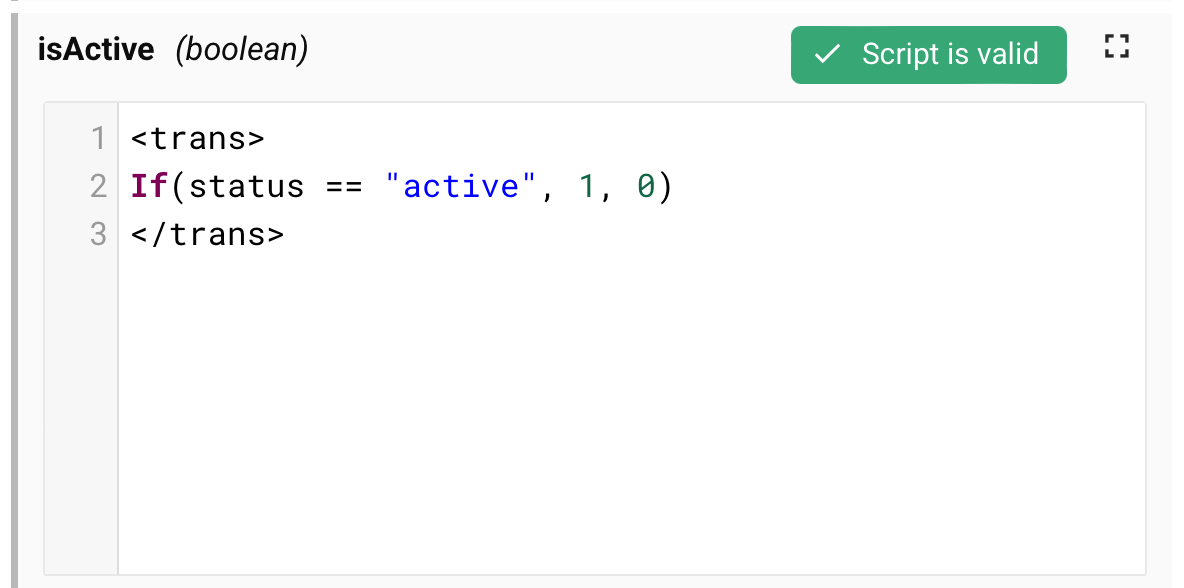
Das Skript konvertiert den Textstatus zur Laufzeit in einen booleschen Wert.
Erstellen Sie ein berechnetes Feld
-
Fahren Sie mit der Maus über das Ziel
fullName-Feld und klicken Sie auf Erweitern oder Benutzerdefinierten Wert hinzufügen. -
Geben Sie dieses Skript ein, um Vor- und Nachnamen zu kombinieren:
firstName + " " + lastName
Schritt 4: Testen Sie Ihre Transformation
Verwenden Sie den Vorschau-Modus, um Ihre Transformation mit Beispieldaten zu testen:
-
Klicken Sie auf Vorschau in der Transformationswerkzeugleiste.
-
Wählen Sie auf dem Konfigurationsbildschirm Mock-Daten aus der Quellstruktur erstellen.
-
Klicken Sie auf Fertig.
-
Überprüfen Sie die Beispieldaten im Vorschau-Modus, um zu verifizieren, dass Ihre Zuordnungen korrekt funktionieren:
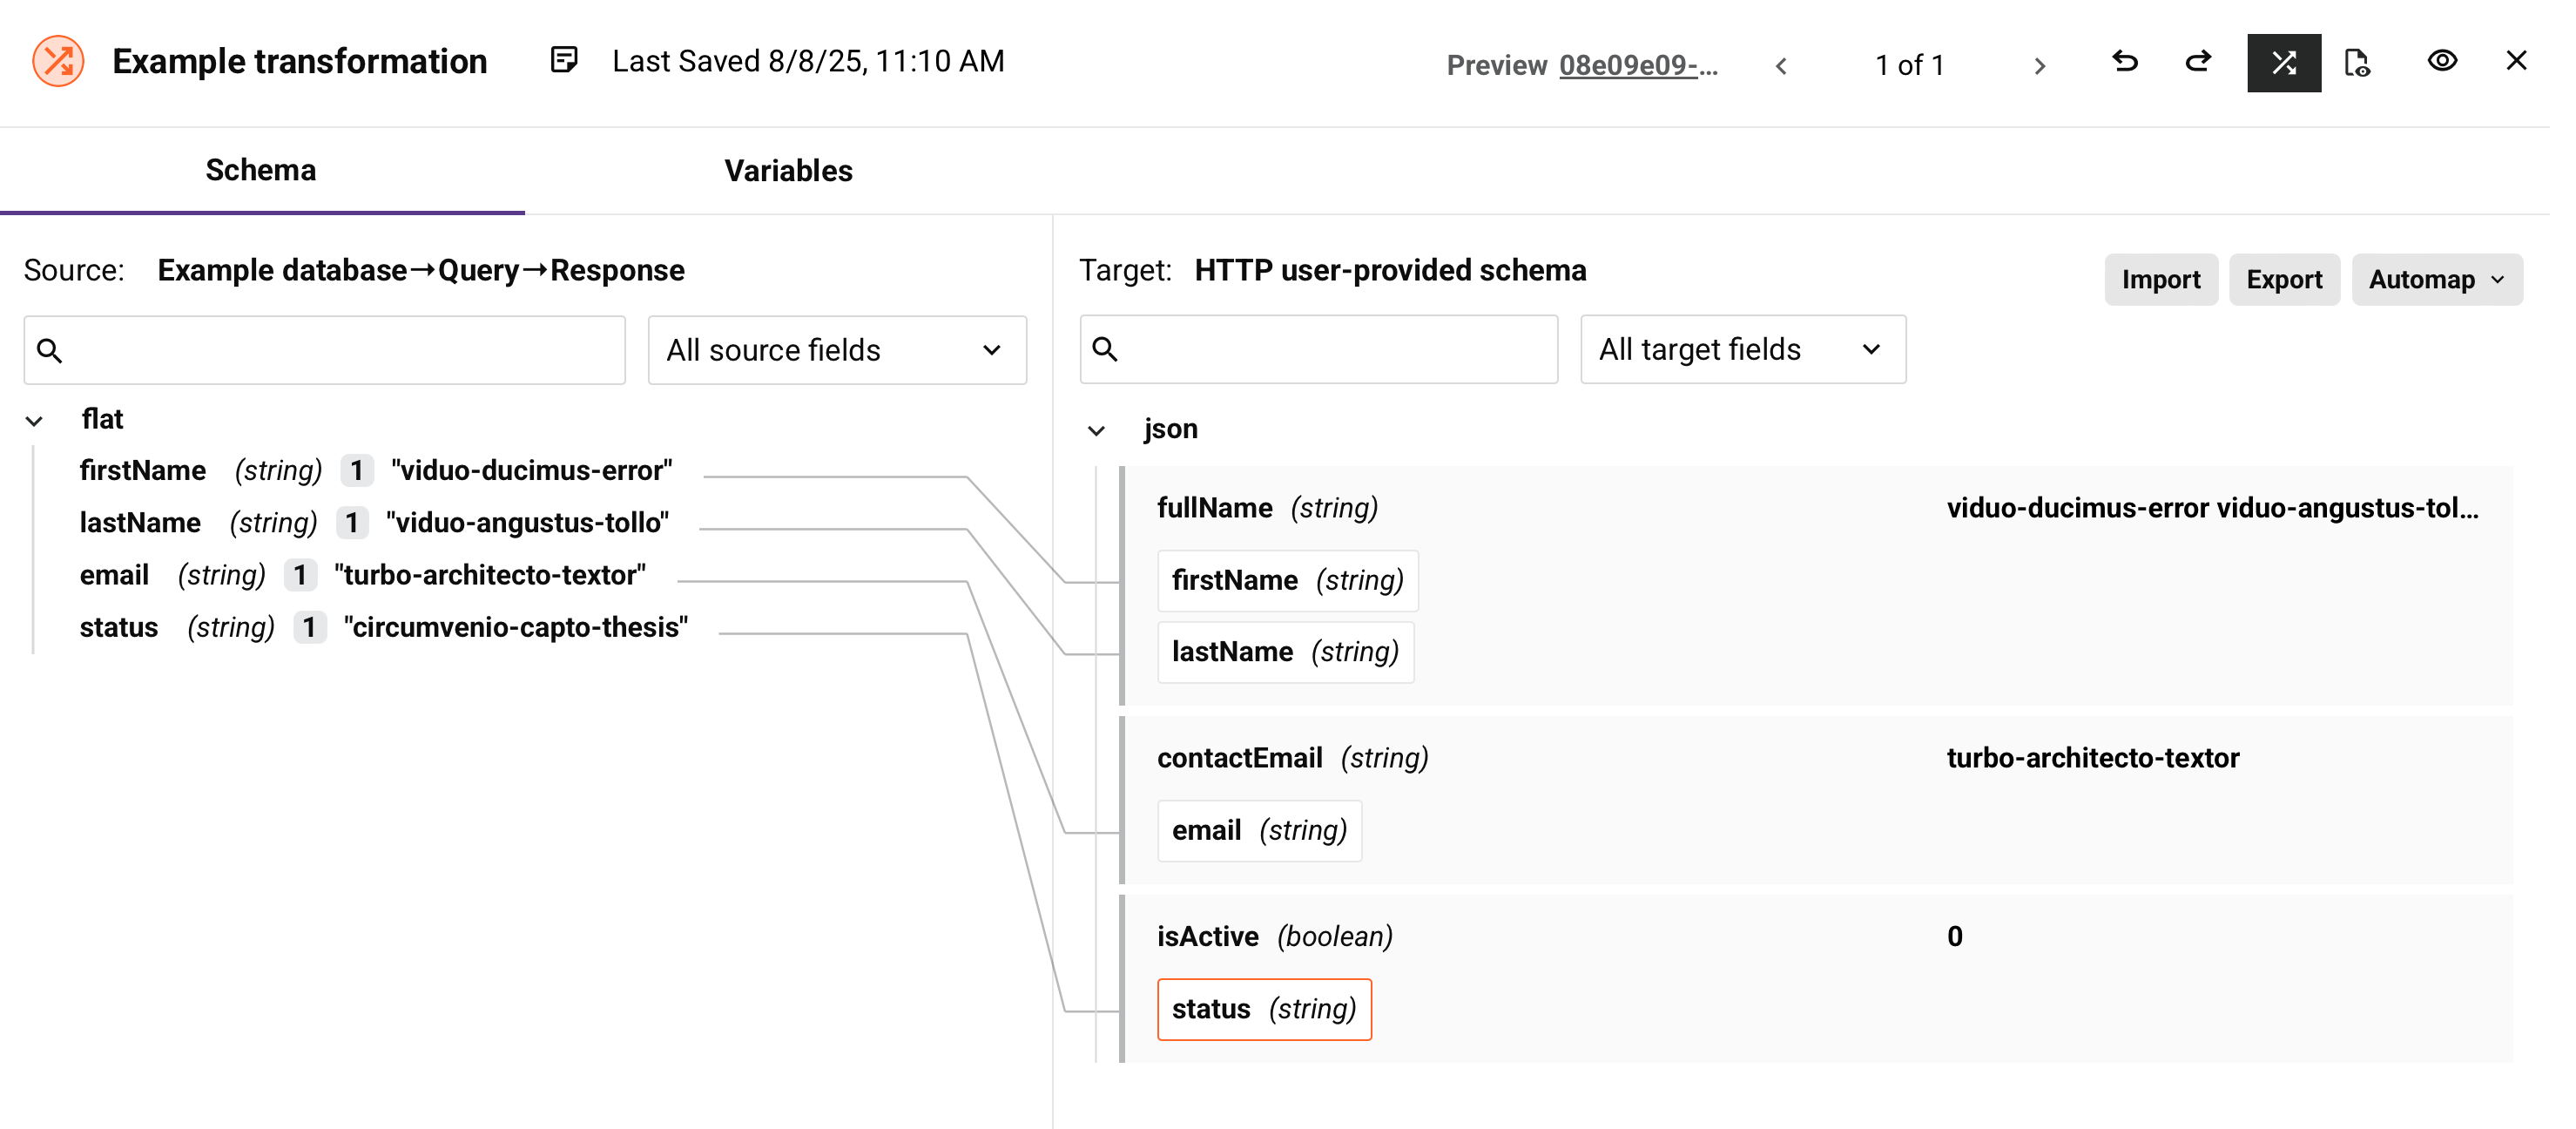
Die Vorschau zeigt Folgendes:
- Quelldaten links mit Beispieldaten.
- Zieldaten rechts mit Ihren transformierten Werten.
- Alle Zuordnungsfehler, die rot hervorgehoben sind.
Schritt 5: Validieren
-
Schließen Sie die Transformation, um zur Betriebsansicht zurückzukehren:
-
Überprüfen Sie, dass Ihre Operation keine Validierungsfehler anzeigt.
Nächste Schritte
Um mehr über Transformationen zu lernen, sehen Sie sich diese Ressourcen an:
- Schemaquellen auswählen, um verschiedene Möglichkeiten zur Definition von Schemata kennenzulernen.
- Die Benutzeroberfläche navigieren, um die Transformationswerkzeuge zu erkunden.
- Identische Strukturen zuordnen, um mehr über das Automapping zu erfahren.