Führen Sie ein Jitterbit App Builder Docker-Image auf Microsoft Azure Container Apps aus
Einführung
App Builder kann als Docker Container mit dem Jitterbit App Builder Docker-Image und einer gültigen App Builder-Lizenz ausgeführt werden. Detaillierte Anweisungen, wie dies zu tun ist, finden Sie in Jitterbit App Builder auf Docker ausführen. Es ist jedoch auch möglich, Ihren App Builder Docker-Container auf Microsofts Azure Container Apps bereitzustellen. Diese Seite zeigt Ihnen, wie das geht.
Voraussetzungen
Neben allen Voraussetzungen für die Ausführung von App Builder auf Docker müssen Sie auch über ein Azure-Konto mit einem aktiven Abonnement verfügen.
Bereitstellung eines App Builder Docker-Images auf Azure Container Apps
Der Prozess zur Bereitstellung eines App Builder Docker-Images auf Azure Container Apps ist in 6 Schritte unterteilt.
Wenn Sie keine Ressourcengruppe in Ihrem Azure Container Apps-Konto haben oder wenn Sie eine neue erstellen möchten, um App Builder auszuführen, beginnen Sie mit Schritt 1. Wenn Sie bereits eine Ressourcengruppe haben, die die Voraussetzungen erfüllt, und diese verwenden möchten, melden Sie sich im Azure-Portal an, gehen Sie zu Ihrer Übersicht > Ressourcen-Seite und beginnen Sie dieses Tutorial mit Schritt 2.
-
Schritt 2: Konfigurieren Sie die grundlegenden Einstellungen
-
Schritt 3: Definieren Sie die Containerdetails und Ressourcen
Schritt 1: Erstellen Sie die Container-App-Ressource
Um zu beginnen, müssen Sie die Container-App-Ressource in Ihrer Azure-Umgebung bereitstellen. Dies dient als Host für Ihr Docker-Image. Wenn Sie dies nicht tun, folgen Sie den untenstehenden Schritten, um eine zu erstellen.
-
Melden Sie sich im Azure-Portal an.
-
Klicken Sie auf die Schaltfläche Ressource erstellen, um eine neue Ressource hinzuzufügen.

-
Geben Sie in der Suchleiste des Marktplatzes
Container Appein. -
Wählen Sie die Option Container App aus den Ergebnissen aus und klicken Sie auf Erstellen.
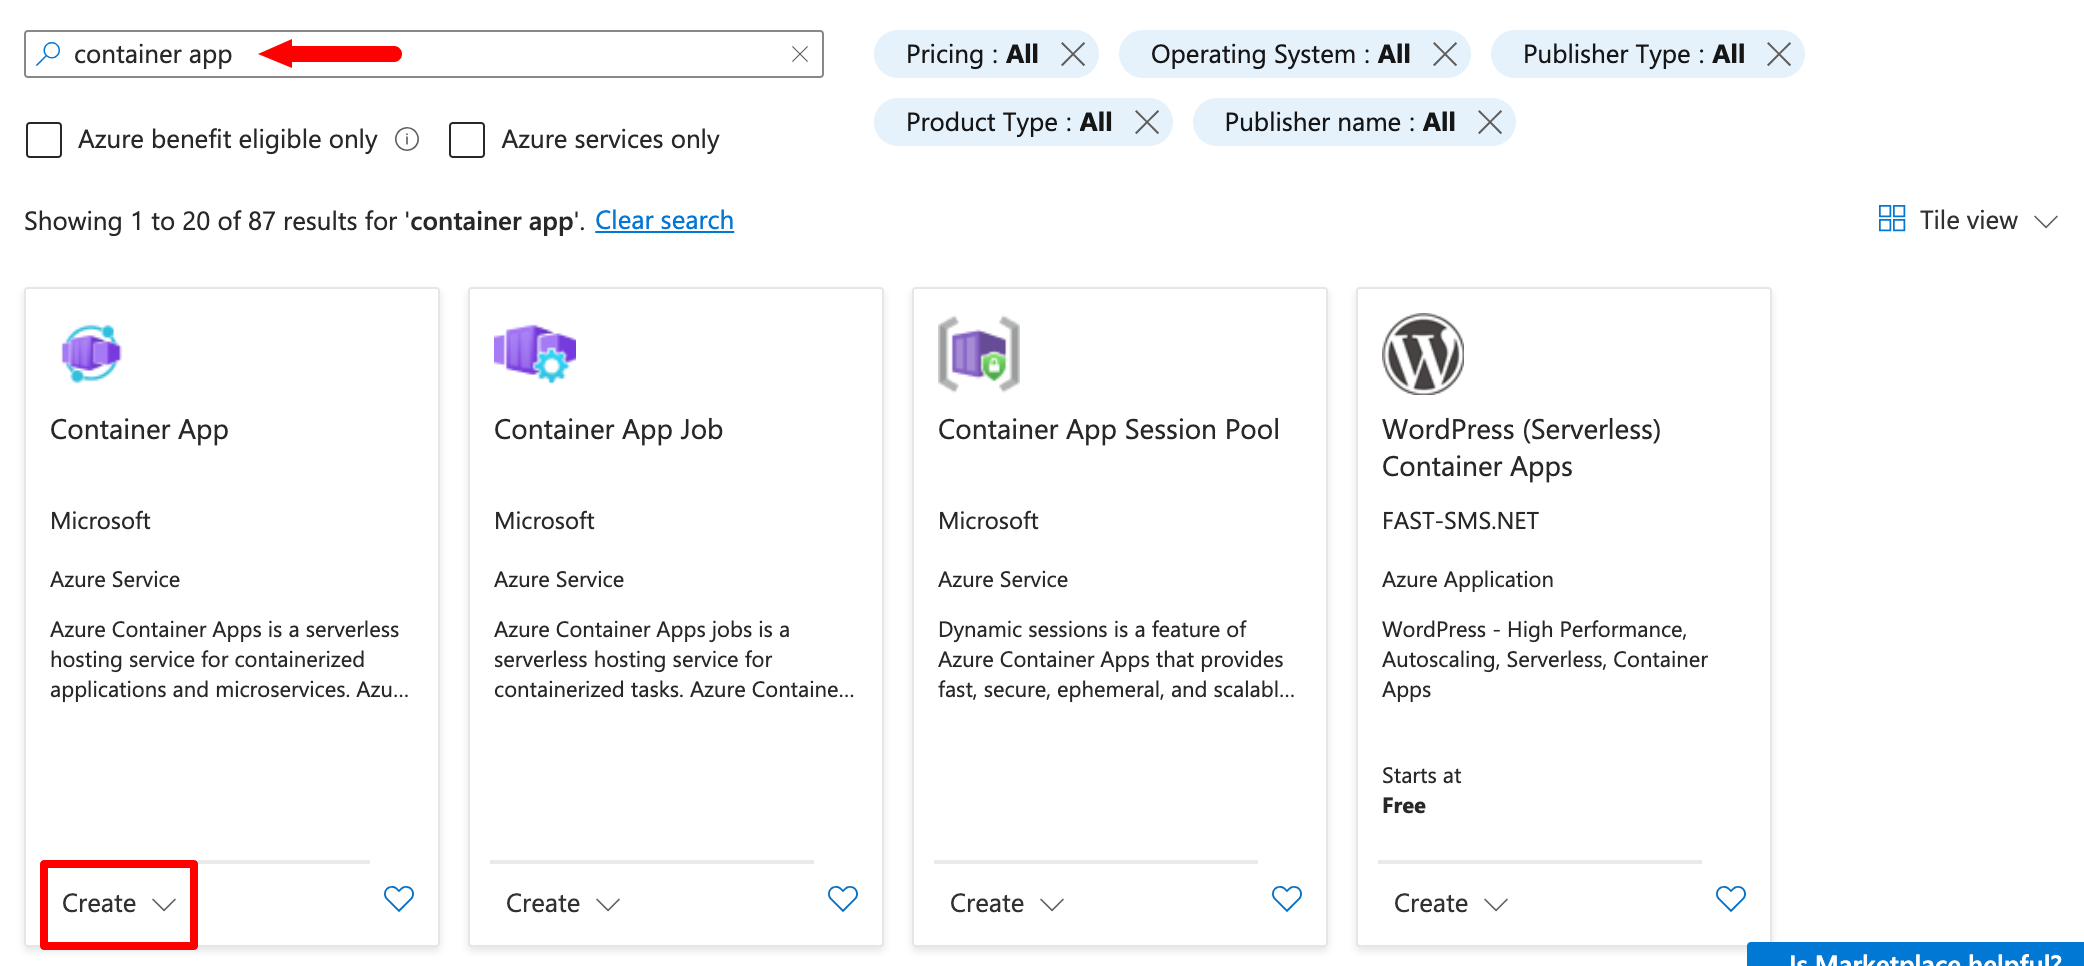
Ein Assistent wird gestartet, um Ihnen bei der Erstellung zu helfen. Der Konfigurationsprozess wird im folgenden Schritt beschrieben.
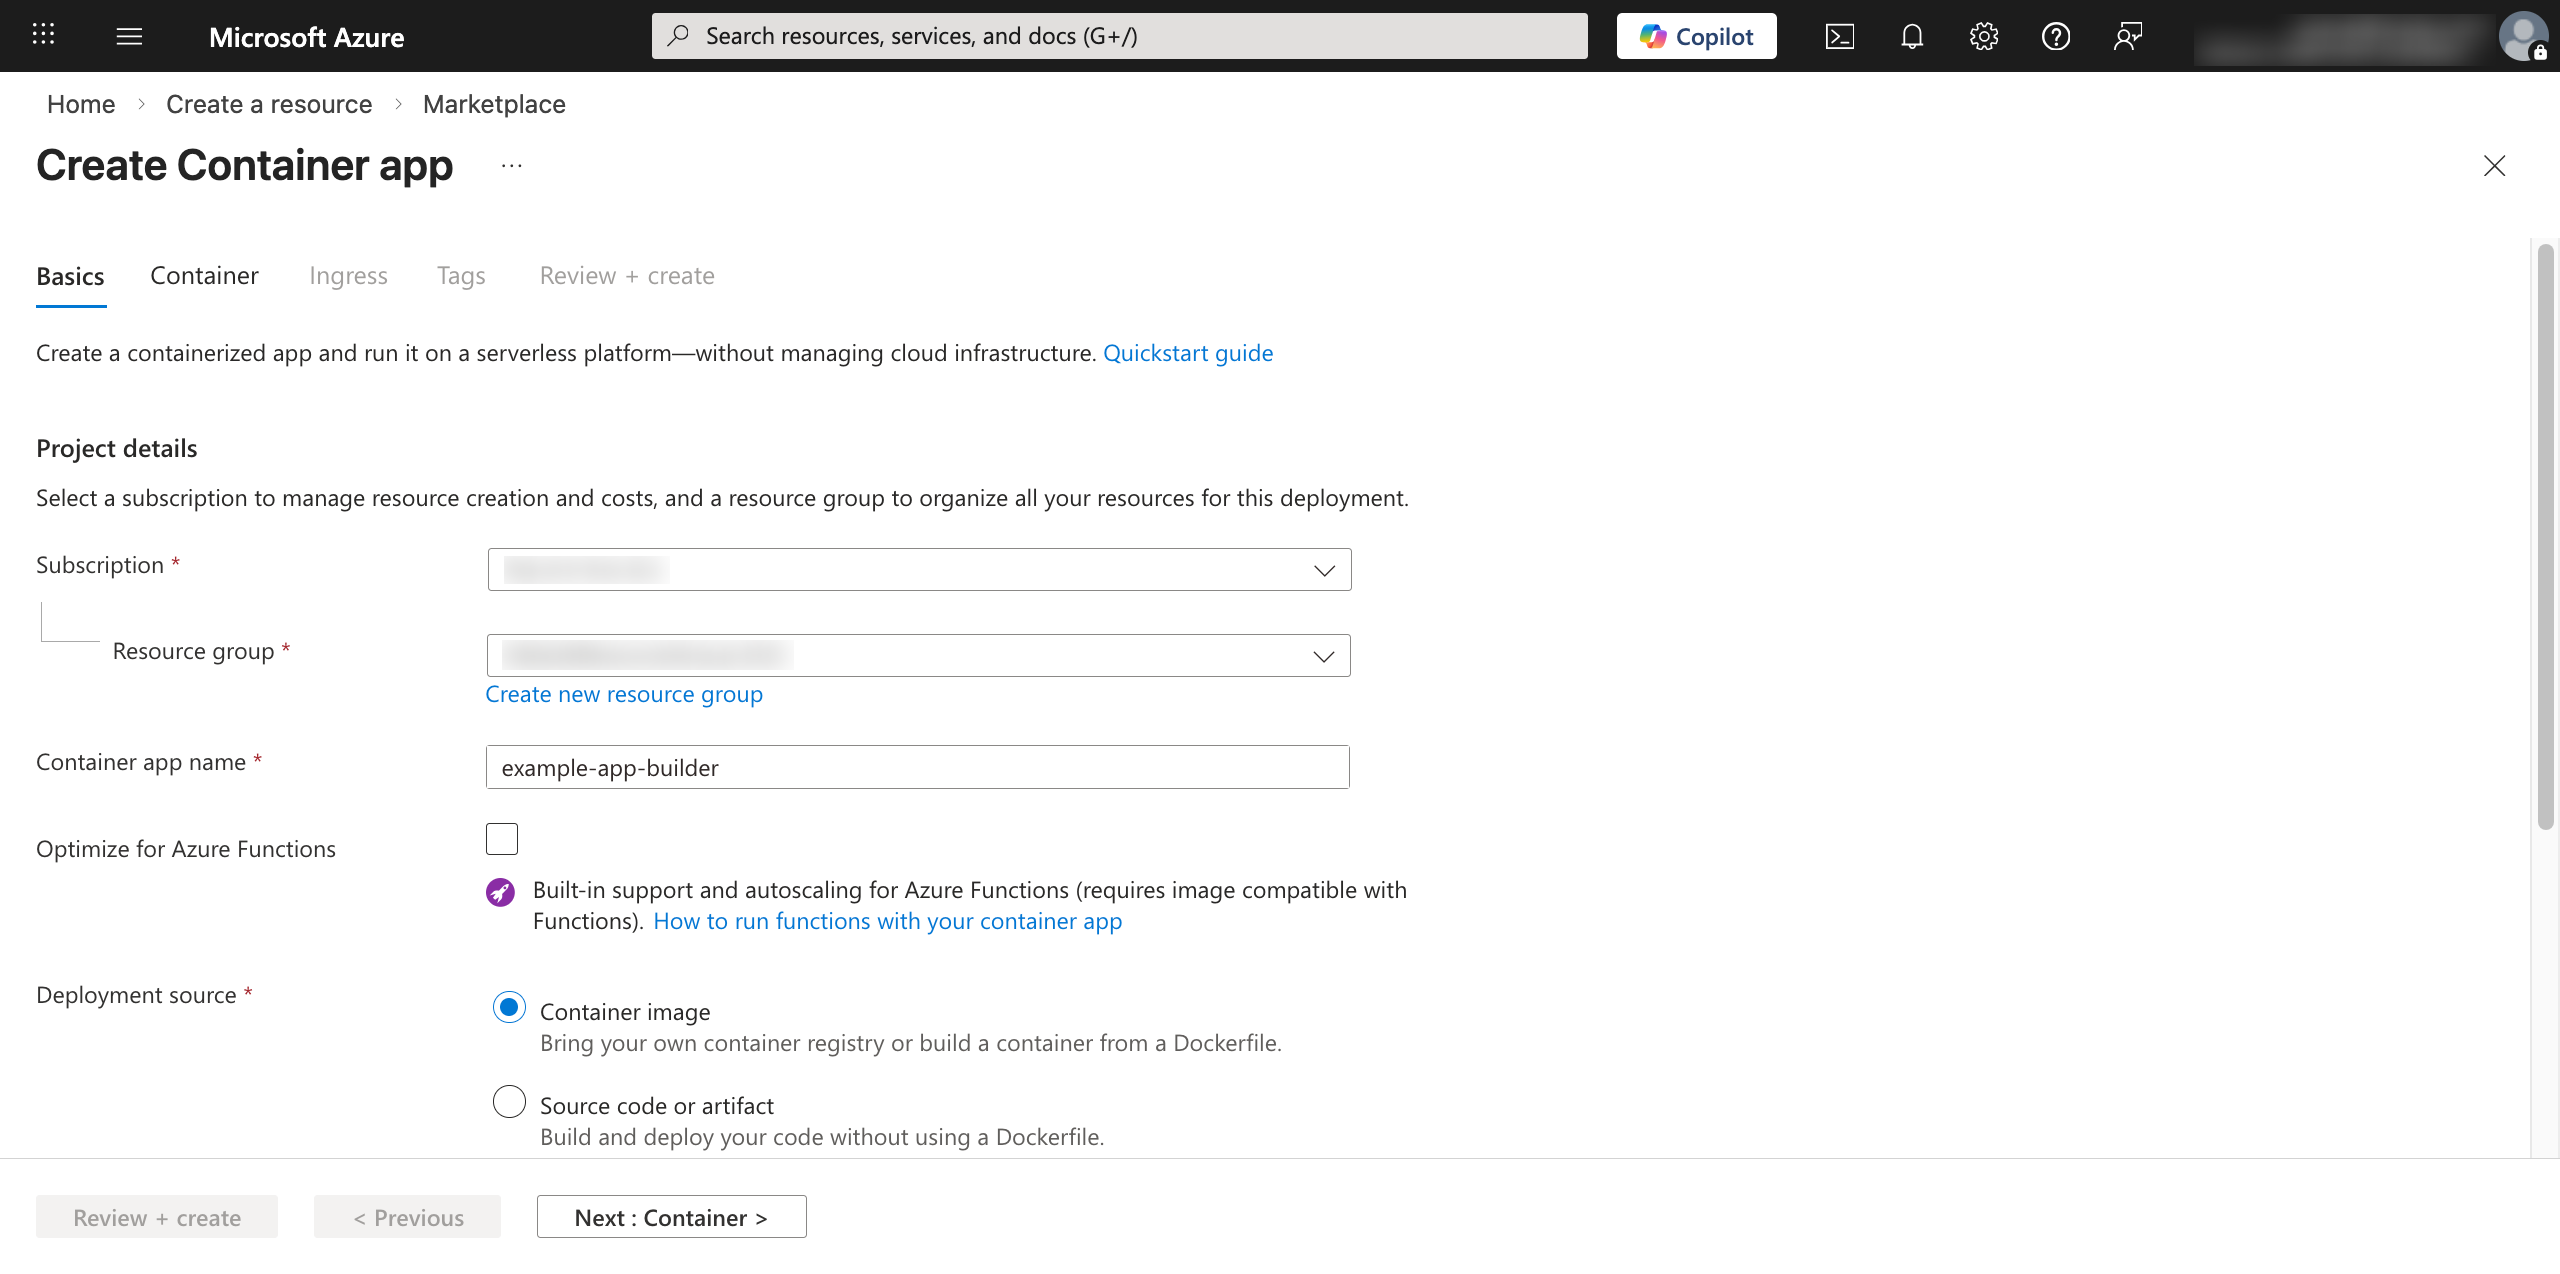
Schritt 2: Grundlegende Einstellungen konfigurieren
Der Tab Grundlagen des Ressourcen-Erstellungsassistenten legt die Identität und Umgebung für Ihre Anwendung fest.
-
Konfigurieren Sie im Abschnitt Projektdetails diese Felder:
-
Abonnement: Wählen Sie Ihr Abonnement aus.
-
Ressourcengruppe: Wählen Sie Ihre Ressourcengruppe aus.
-
Name der Container-App: Geben Sie einen Namen für Ihre App ein.
-
Bereitstellungsquelle: Wählen Sie Container-Image.
-
-
Im Abschnitt Container-App-Umgebung können Sie eine andere Region als die Standardauswahl auswählen, dies ist jedoch optional. Es wird empfohlen, Ihre Datenbank und die Container-App-Umgebung in derselben Region zu belassen.
-
Klicken Sie auf Weiter: Container >.
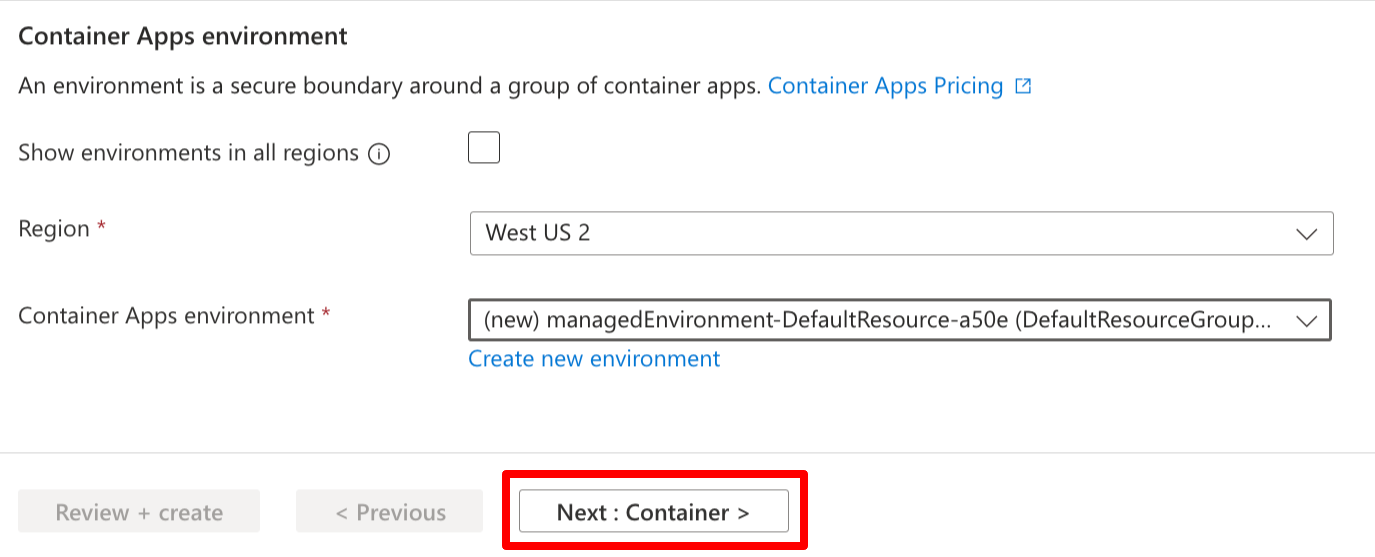
Sie werden zum nächsten Tab im Ressourcen-Erstellungsassistenten weitergeleitet.
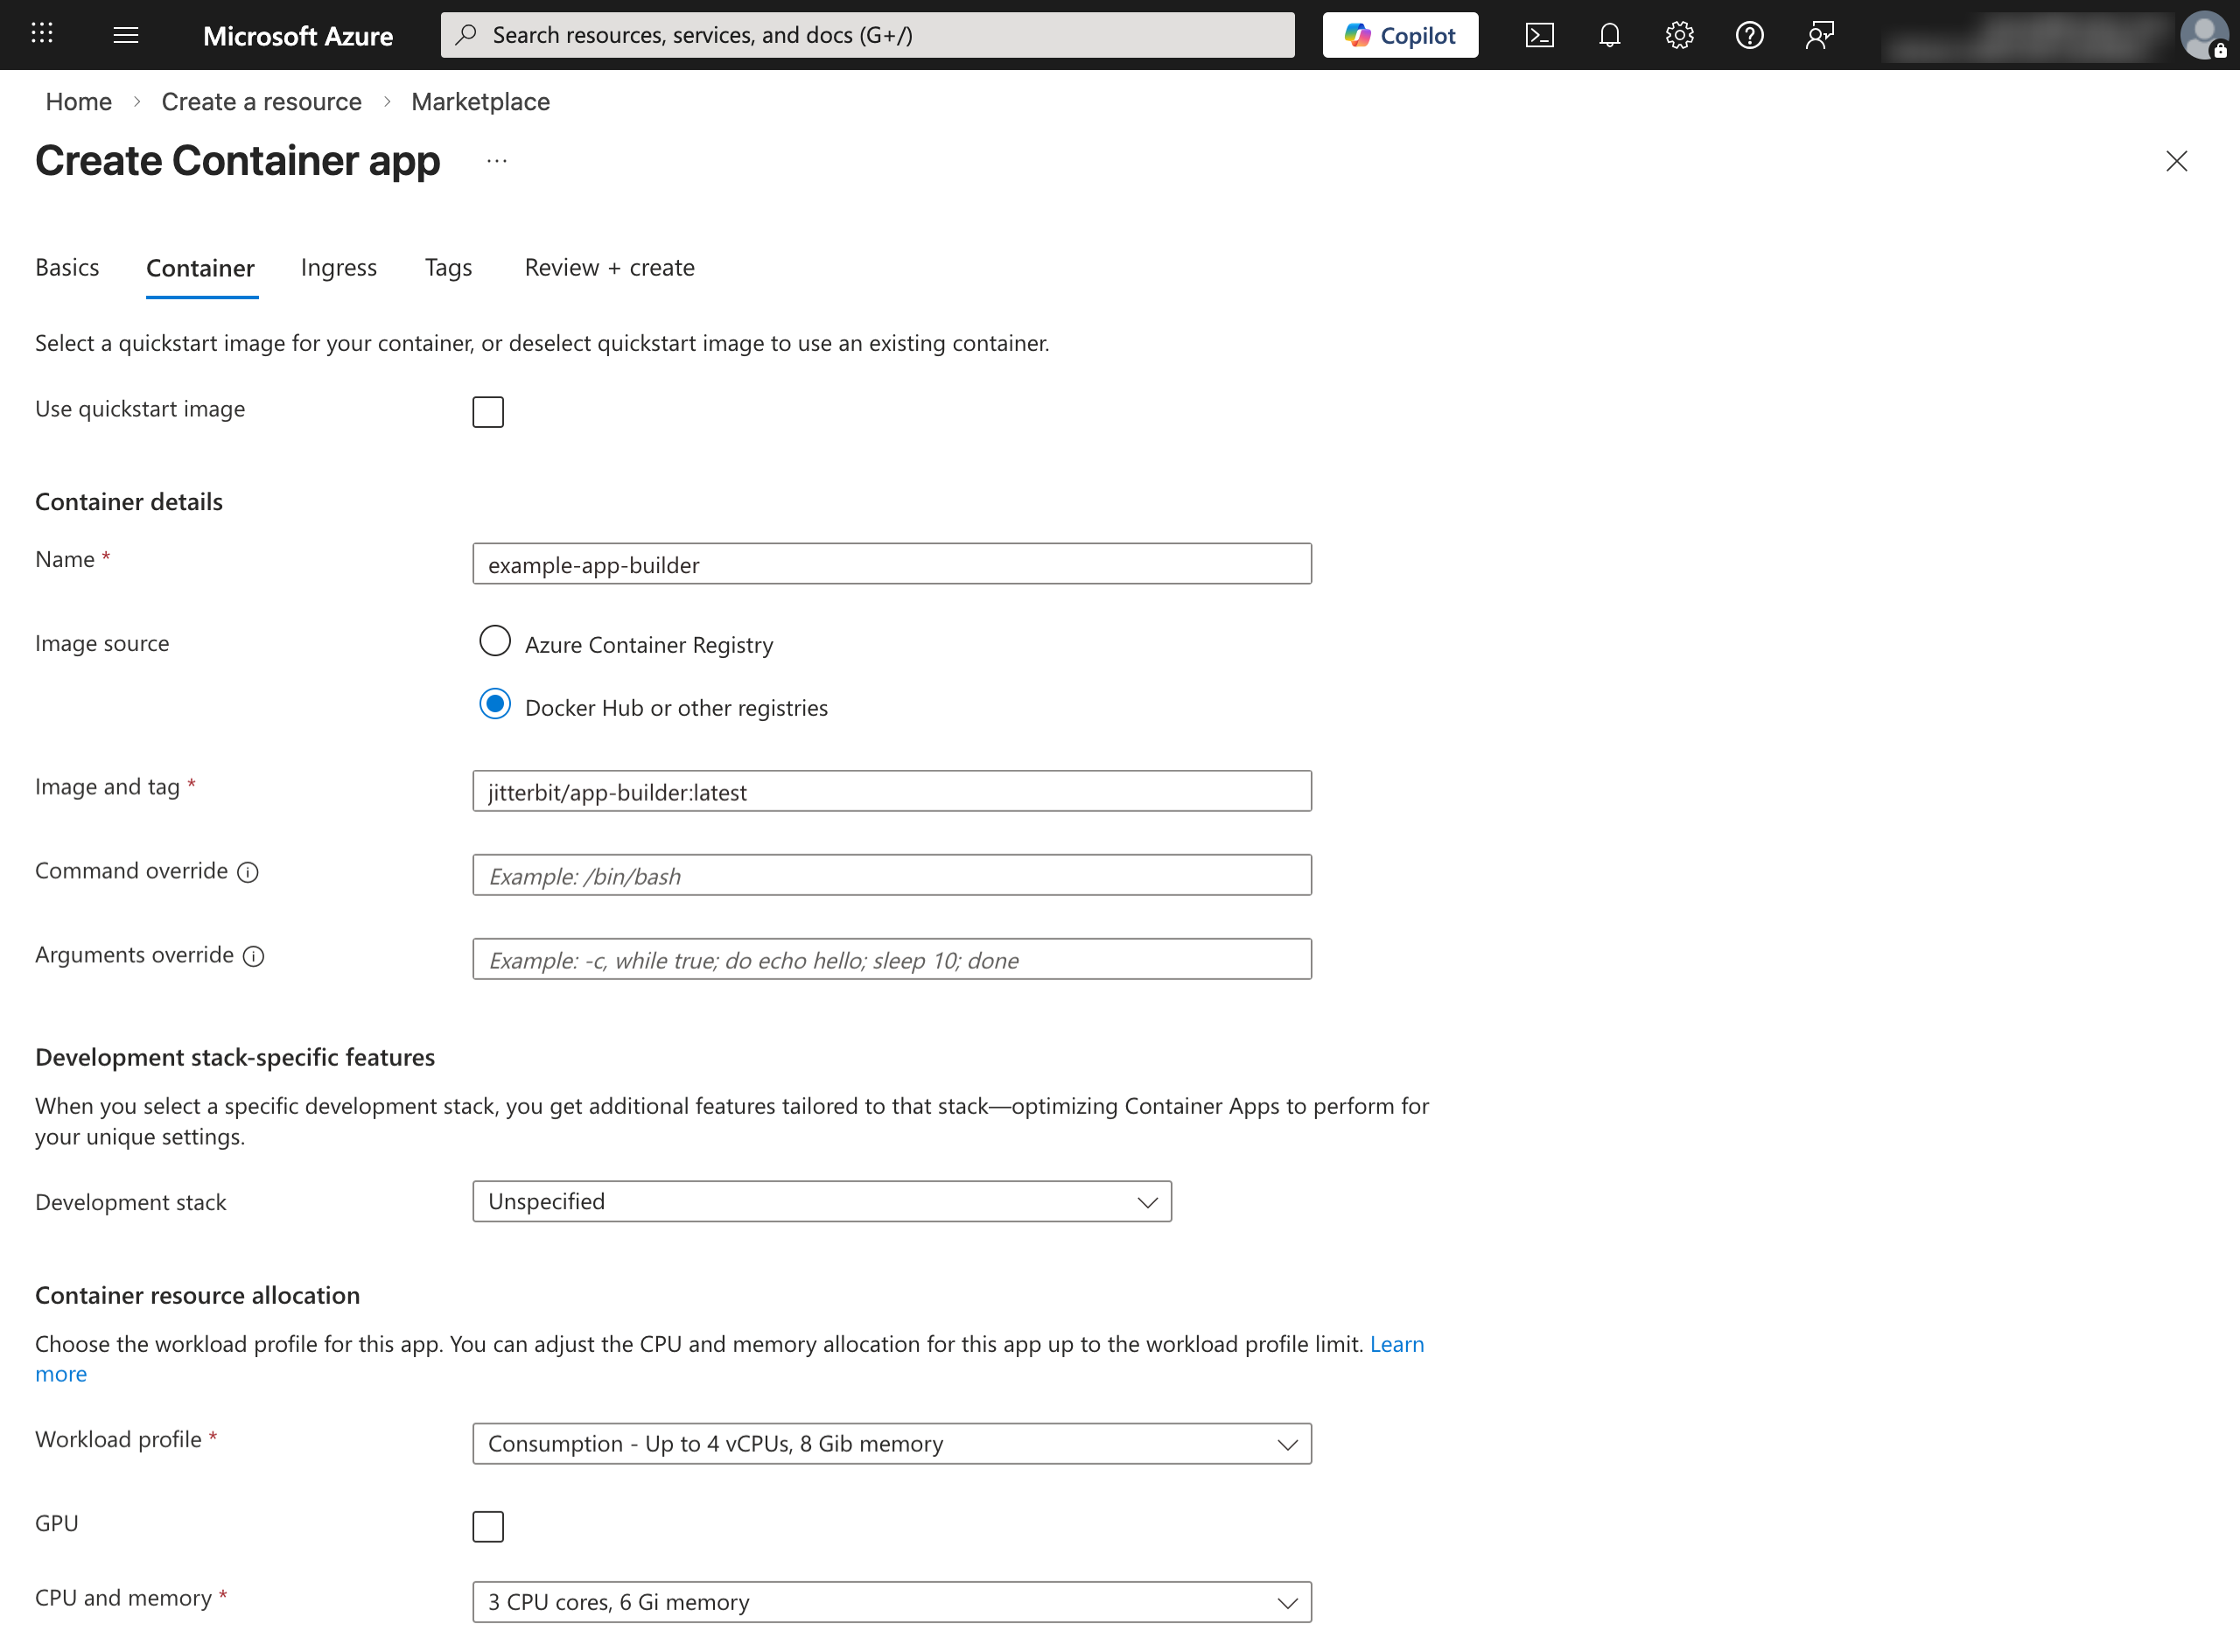
Schritt 3: Containerdetails und Ressourcen definieren
Der nächste Schritt besteht darin, Azure auf das Jitterbit-Docker-Image zu verweisen und die erforderlichen Hardware-Ressourcen über den Tab Container zuzuweisen.
-
Konfigurieren Sie im Abschnitt Containerdetails diese Felder:
- Bildquelle: Wählen Sie Docker Hub oder andere Registrierungen.
-
Bildtyp: Wählen Sie Öffentlich.
-
Registrierungs-Login-Server: Geben Sie
docker.ioein. -
Bild und Tag: Geben Sie das Tag des App Builder-Bildes ein, zum Beispiel
jitterbit/app-builder:latest. -
Lassen Sie die Felder Befehlsüberschreibung und Argumenteüberschreibung leer.
-
Im Abschnitt Entwicklungsstackspezifische Funktionen konfigurieren Sie das folgende Feld:
-
Entwicklungsstack: Wählen Sie Unbestimmt.
-
Im Abschnitt Containerressourcenzuteilung konfigurieren Sie die Felder Arbeitslastprofil und CPU und Speicher gemäß den Voraussetzungen.
Schritt 4: Umgebungsvariablen festlegen
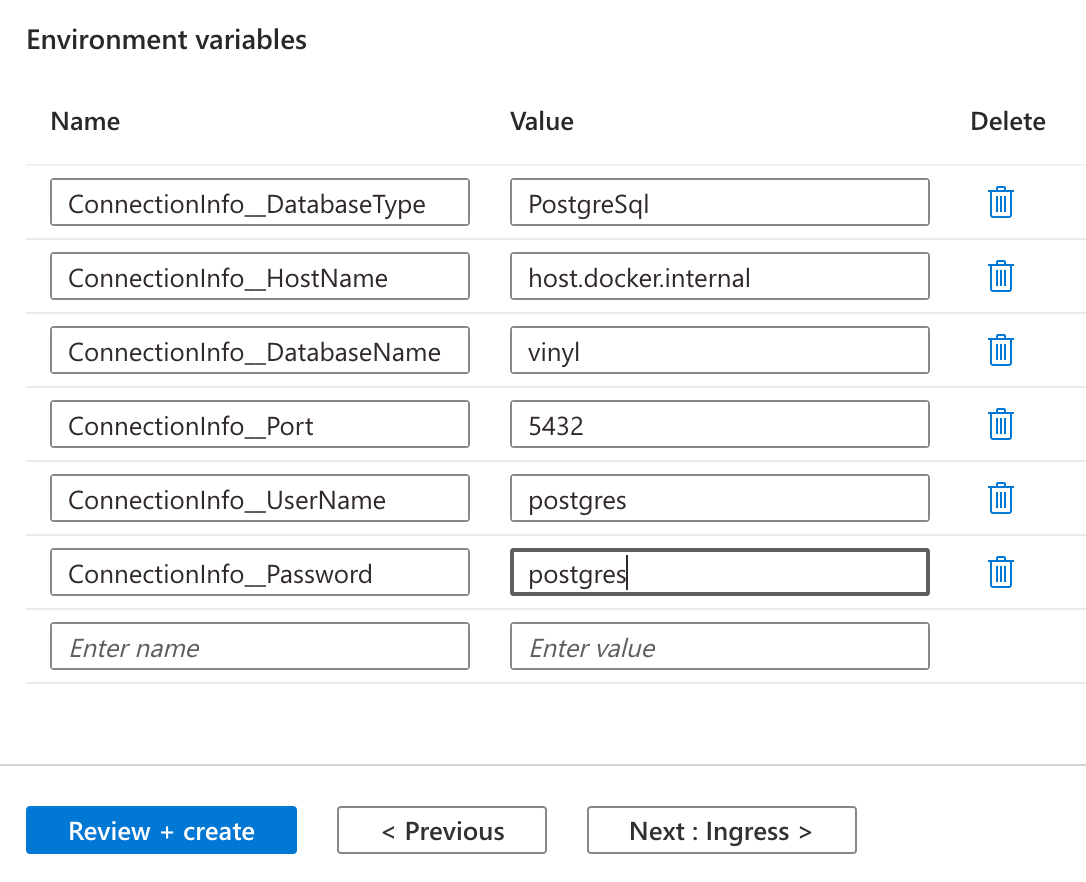
Bleiben Sie im Tab Container und richten Sie die Umgebungsvariablen ein. Geben Sie im Abschnitt Umgebungsvariablen die folgenden Name- und Wert-Paare ein. Die Werte hängen davon ab, wie Sie Ihre Datenbank hosten. Die folgende Tabelle zeigt eine Beispielkonfiguration:
| Name | Wert |
|---|---|
ConnectionInfo__DatabaseType |
PostgreSql |
ConnectionInfo__HostName |
host.docker.internal |
ConnectionInfo__DatabaseName |
vinyl |
ConnectionInfo__Port |
5432 |
ConnectionInfo__UserName |
postgres |
ConnectionInfo__Password |
postgres |
Klicken Sie dann auf Weiter: Ingress >, um zum nächsten Tab im Ressourcen-Erstellungsassistenten zu gelangen.
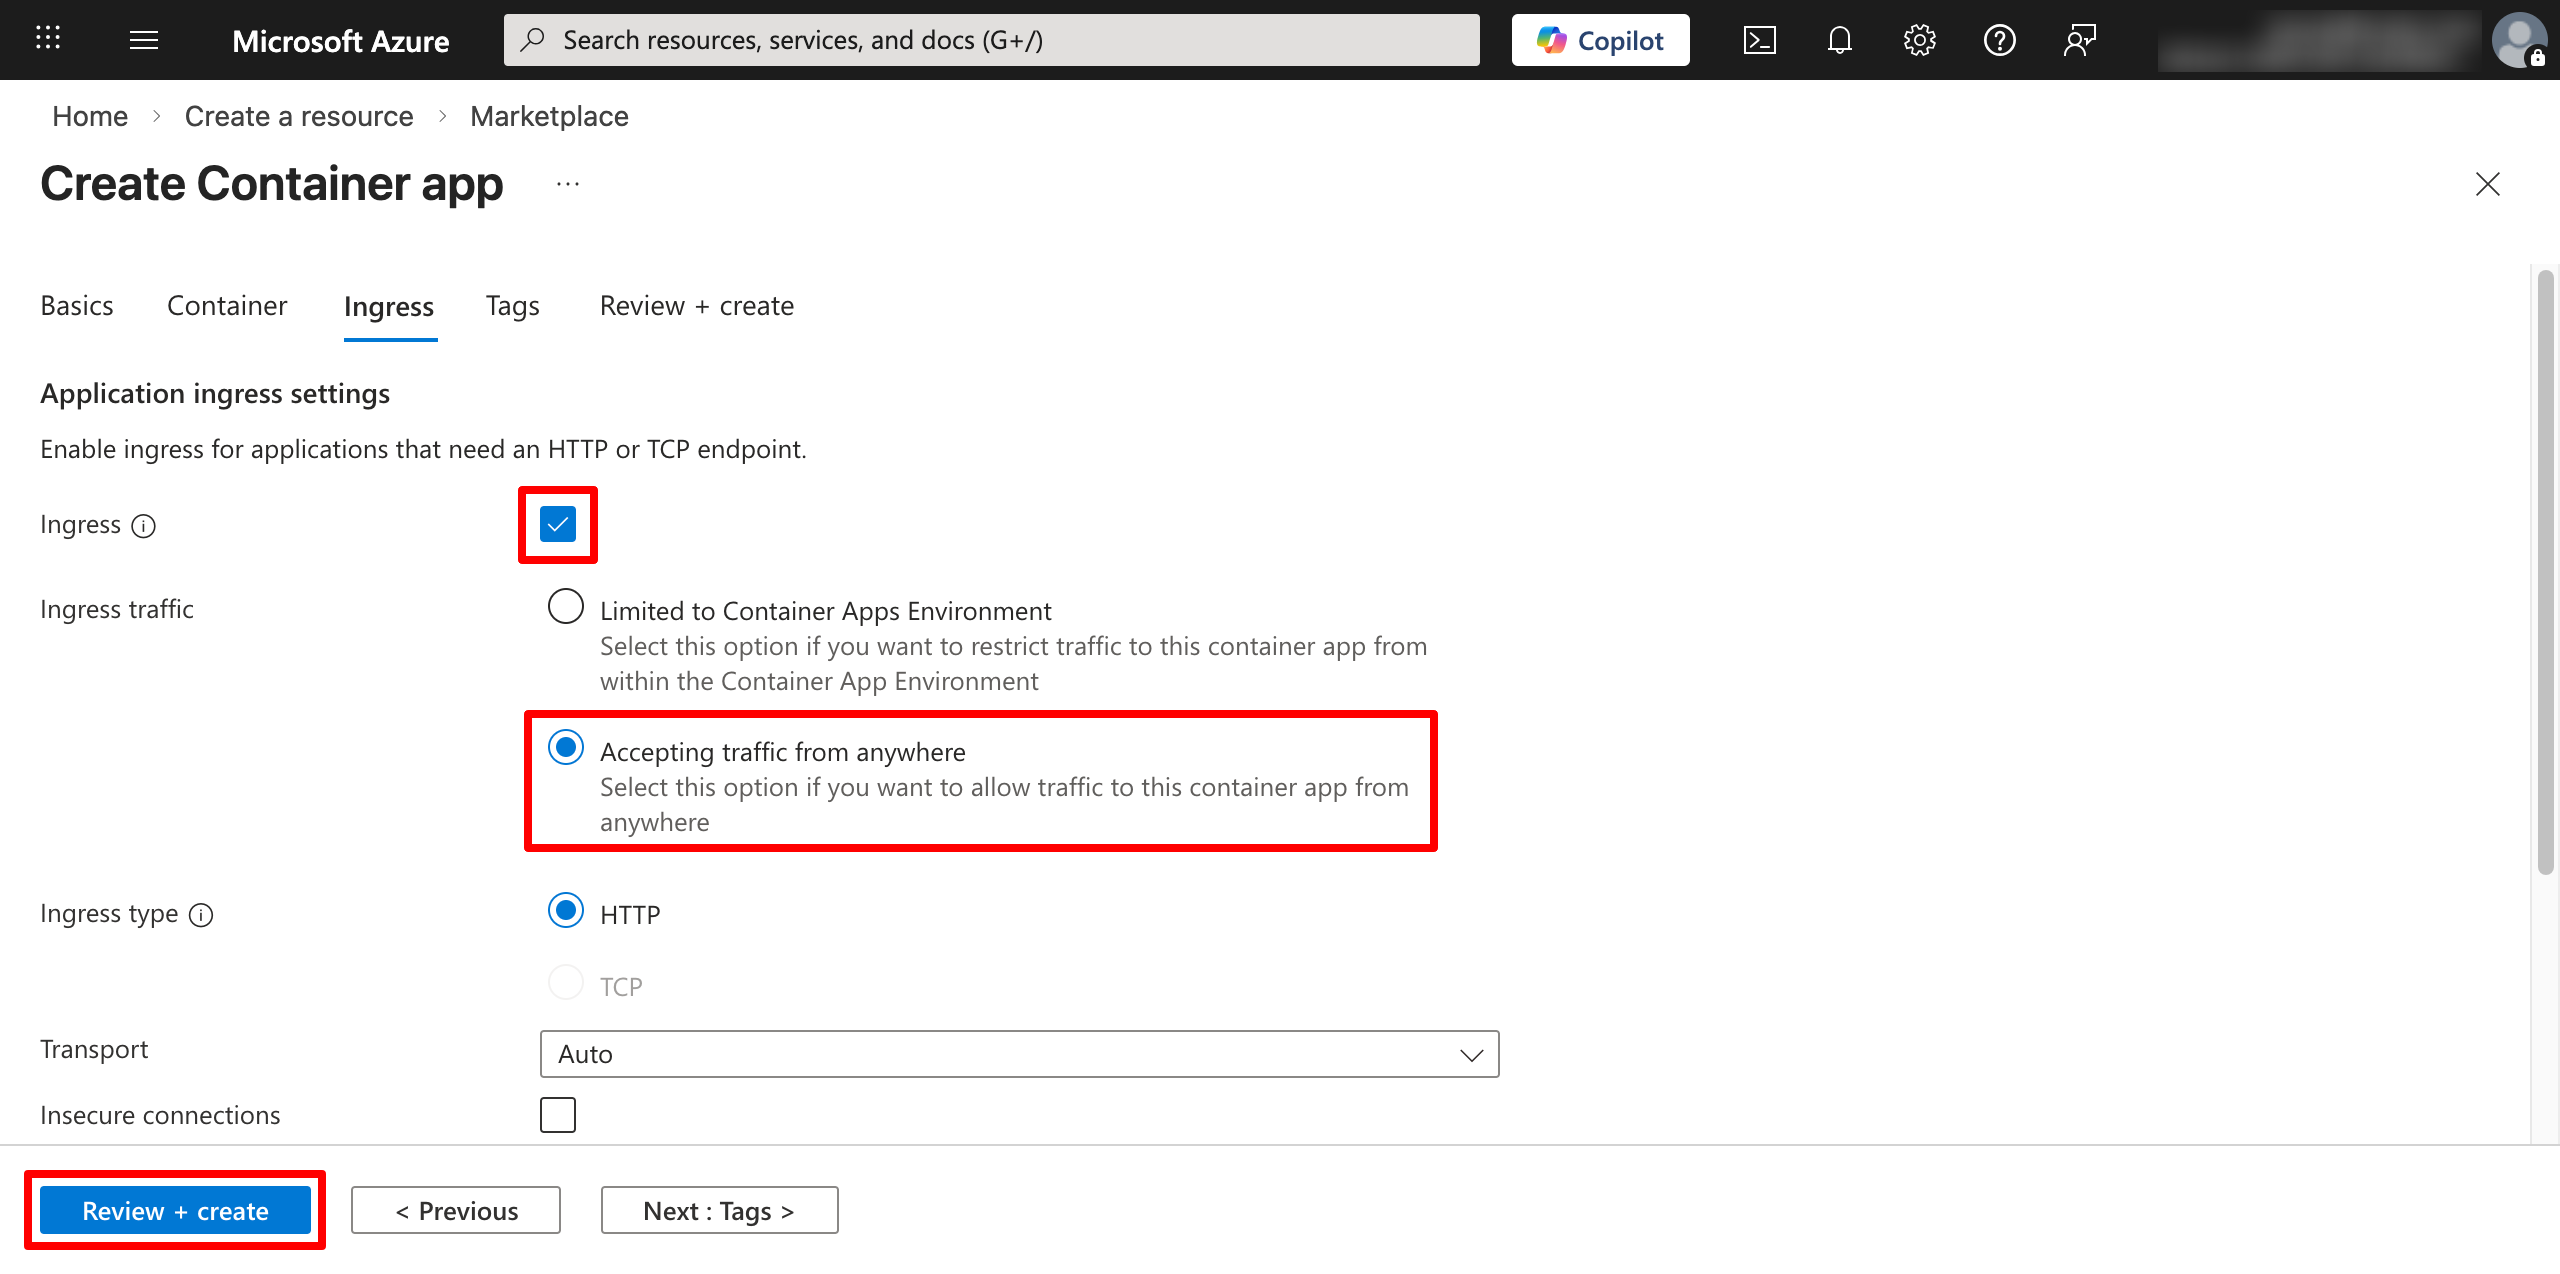
Schritt 5: Netzwerk konfigurieren (Ingress)
Die Ingress-Einstellungen bestimmen, wie Benutzer über das Internet auf Ihre Anwendung zugreifen. Konfigurieren Sie die folgenden Felder:
-
Ingress: Aktivieren Sie dieses Kontrollkästchen.
-
Ingress-Verkehr: Wählen Sie Verkehr von überall akzeptieren.
-
Lassen Sie die anderen Felder mit ihren Standardauswahlen und klicken Sie auf Überprüfen + erstellen.
Die Ressourcengruppe wird erstellt.
Schritt 6: Bereitstellung überprüfen und anmelden
Auf Ihrer Übersicht > Ressourcen-Seite werden zwei neue Einträge angezeigt: einer vom Typ Container App und ein anderer vom Typ Container Apps Environment. Wählen Sie die Container App-Ressource aus.
-
Klicken Sie auf der Übersichtsseite auf Anwendungs-URL.
-
Um die anfängliche Datenbankeinrichtung zu überwachen, klicken Sie im Abschnitt Überwachung auf Protokollstream.
-
Sobald die Einrichtung abgeschlossen ist, gelangen Sie zur Anmeldeseite von App Builder.
-
Melden Sie sich mit den Standard-Administratoranmeldeinformationen an:
-
Benutzername:
admin -
Passwort:
P@55w0rd
-