Introduction to App Builder - Appendix D: Security in App Builder (Advanced)
This is the fourth and final appendix of the Introduction to App Builder tutorial series. These appendices complement the lessons in the series, and provide more in-depth information about concepts introduced.
In this lesson, we'll explore the security layer of App Builder, the area where we control who can access our application, and which parts of its data each user is allowed to see or change.
Roles
Roles are how App Builder organizes permissions for a data source. A role can be granted Read, Insert, Update, and Delete permissions on a table or business object, and users get their roles indirectly, through membership in one or more security groups. Groups organize users; roles organize permissions. See Roles for a complete explanation of what a role is, or Privileges and permissions for how each permission affects what a user can see and do.
Let's create a set of roles for our Northwinds data source that reflect common job functions in a company: Superuser, Read Only, Operations, HR, and Sales. Each one introduces a different way to grant permissions, from broad accelerators to precise, object-by-object control.
Superuser
Create a Superuser role by following these steps:
-
In App Workbench > Data Sources, select the Northwinds (Default) source.
-
In the Business Logic Layer section, click Roles. The Roles dialog opens.
-
Click + Superuser. App Builder automatically creates a role named Superuser with full permissions on every table and business object in the data source.
Tip
+ Superuser is an accelerator: instead of creating a role and then granting Read, Insert, Update, and Delete one object at a time, it creates the role and grants all four permissions on everything at once.
Read Only
Now, create a Read Only role by following these steps:
-
Click + Role.
-
In the Name field, enter
Read Only. -
In the Description field, enter a description such as
View-only access to all Northwinds data. -
Click Save.
-
Expand the Tables accordion and click Grant Read to give the Read Only role read access to every table at once.
-
Expand the Business Objects accordion, then click Grant Read to do the same for every business object.
Tip
The Roles dialog offers several accelerators for granting permissions in bulk:
- Grant Full grants every permission (Read, Insert, Update, and Delete) on every table or business object at once, and Grant Read grants read permission the same way.
- Grant on Create automatically grants a new permission to a role whenever a new table or business object is created, so you don't have to revisit the Roles dialog every time your data model grows.
- The Default Permissions checkboxes set which permissions Grant on Create applies automatically, and which permissions Grant Default grants to existing tables and business objects.
- Revoke All removes every permission the role has on every existing table or business object at once.
See Table and business object permissions for the complete reference.
Operations
The Operations role manages the core inventory, vendor relationships, and order fulfillment that keep the business running behind the scenes. It oversees product categories, updates pricing and stock levels, manages supplier contacts, and assigns shipping carriers to deliver customer orders.
-
Click + Role.
-
In the Name field, enter
Operations. -
Click Save.
-
Click the Pages icon on the Operations row for another way to accelerate role creation: instead of granting permissions table by table, you select which pages a role needs, and App Builder grants the underlying permissions those pages depend on.
-
Select the Suppliers, Supplier, Shippers, Shipper, Products, Product, and Categories pages, and grant full access (Read, Insert, Update, and Delete) to all of them.
-
Select the Home, Customers, Customer, Orders, Order, Employees, and Employee pages, and grant only Read access to all of them, since Operations needs to view this data without being able to change it.
HR
The HR role manages employee records, their regional assignments, and the organization's reporting structure. It needs precise, granular access instead of broad table- or page-level grants.
-
Click + Role.
-
In the Name field, enter
HR. -
Click Save.
-
On the role's panel, click + Permission to add specific objects one at a time.
-
Add the Employee (Source), Region (Source), Region (List), and Employee (Network) rules to grant HR full access to each. Adding a permission this way grants full access (Read, Insert, Update, and Delete) by default.
Practice time: Create the Sales role
The Sales role needs to manage customers and orders, view product, category, shipper, and employee data, and see the reports we've built. It shouldn't have access to administrative data like suppliers or the parameter table.
Using the same Pages icon accelerator you used for Operations, create a Sales role with the following access:
- Full access to the Customers, Customer, Orders, and Order pages.
- Read access to the Products, Product, Categories, Shippers, Shipper, Employees, Employee, and Order Total by Employee pages.
Don't select the Suppliers, Supplier, or Parameter pages, so Sales has no access to them.
Application Groups
Once roles exist, permissions become restrictive by default: a user only gets a role's permissions if their groups grant them that role. Since your own user account isn't in any group yet, creating the roles above locks you out of your own application unless you connect them to real users. See How roles affect application access for why this happens.
-
On the Roles page, click Application Groups.
-
Click Create.
-
In the Name field, use the pattern [App Name] [Role], for example
Northwinds Superuser. In the Description field, describe who belongs in the group. -
Click the checkmark icon to save.
-
In the Roles panel, click Grant next to the Superuser role to connect it to the Northwinds Superuser application group.
Important
Prefer application groups over regular groups when a group's purpose is specific to one application. Application groups ship together with the application as part of a release (LP), so they're automatically carried to upstream environments like QA and Production. Regular groups exist per App Builder environment and don't move with the application. See Users and groups to learn more about the difference.
Practice time: Create the remaining application groups
Repeat the steps above to create an application group for each of the other roles you built: Read Only, Operations, HR, and Sales.
Finally, add yourself to the Northwinds Superuser group so you don't lose access to the application you've been building:
-
Navigate to IDE > User Management > Groups.
-
Find the Northwinds Superuser group and click + Membership.
-
Select your user.
-
Click the checkmark icon to save.
You should now have full permissions again since your user belongs to the Northwinds Superuser group, which grants you the Superuser role.
Reach
Reach is App Builder's implementation of row-level security. While the roles we just created control which operations a user can perform on a data object as a whole, Reach controls which rows of that data object a user can see or affect in the first place. Reach is implemented by the App Builder business engine, so it works the same way regardless of the underlying database.
Reach is built from three concepts:
-
Reach rule: A regular business rule, like the ones we built in Appendix B, that determines which segments of the data a user can access. Reach rules typically use the
who()mvSQL function to correlate the current user with the data they're allowed to see. -
Reach token: The single column selected in a Reach rule, identified by the Reach Token column usage type, that identifies a segment of data, such as a region or a business unit.
-
Reach registration: The configuration that attaches a Reach rule to a data object, specifying which column on that data object corresponds to the Reach rule's token, and, optionally, which role the restriction applies to.
Recall from Lesson 5 that we added a RegionID column to our Employee table, and assigned some employees to the East Coast Region and others to the West Coast Region. We'll use that same setup to restrict the Employees page so that each user only sees employees from their own region.
First, we need a way to identify which employee record corresponds to the currently logged in user. We'll use the employee's UserID rather than their username, since a username can change over time while a UserID stays constant for the life of the account.
-
Link the built-in Vinyl (Sealed) data source to your application so you can use its public data objects: in App Workbench > Data Sources, click + Data Source. The Add a Source to your application dialog opens.
-
Select Link to existing source, then find and select Vinyl (Sealed) in the list of existing data sources.
-
Click Link Sources.
-
Click Done.
Now, let's give the Employee table a matching column.
-
In App Workbench > Tables, find the Employee table and open it.
-
Click + Column.
-
Give the new column the name
UserID. In the Data Types section, make sure the Logical field has Unique ID selected, which automatically sets the Physical field to UUID. -
Click Save.
-
In App Workbench > Rules, find the Employee (Source) rule and open it.
-
In the Tables tab, find the UserID column and select its checkbox to include it.
Instead of typing this value manually, let's add a control so it can be set through the UI, the same way you'd need to in a real, production environment.
-
In App Workbench > Pages, find the Employee page and open it.
-
In the Page Panel Layout panel, click Controls.
-
Click + Control.
-
In the Column menu, select UserID and click Next.
-
In Source, select User_Read, the public data object exposed by the Vinyl (Sealed) data source you linked above. The Key (Column) selection should be UserId and the Title (Column) should be UserName.
-
Click Next, then Finish.
-
Navigate to the Employees page, open any employee already assigned to a region, and use the new field to select the user you log in to App Builder with.
Further reading
User_Read is one of several public data objects App Builder makes available for use in your rules. See User_Read and Access to public data objects to learn more.
Now, let's create the Reach rule.
-
In App Workbench > Rules, click + Rule.
-
In the Name field, enter
Employee (Region Access). -
In the Purpose field, select Reach.
-
In the Target field, select Employee.
-
Click Create.
-
In the Tables tab, select RegionID and UserID, in addition to the EmployeeID primary key column that's already selected.
-
In the Where tab, click + Where Clause. In the Left Expression field, enter
E.UserID, in the Operator field, select=, and in the Right Expression field, enterwho('userid'). Click Save. -
In the Columns tab, double-click the RegionID column. In the Advanced section, set its Column Usage Type to Reach Token. Click Save.
-
Click Results in the Rule panel to confirm that the rule returns a single row, containing the region of the employee record you selected earlier.
Finally, let's register this Reach rule so it restricts the Employee (Source) business object.
-
In App Workbench > Rules, find and open the Employee (Source) rule.
-
In the Rule panel, click More > Edge Case. The Edge Case Settings dialog opens.
-
Click Reach. The Reach Registration dialog opens.
-
Click Create.
-
In the Rule field, select Employee (Region Access).
-
In the Binding Column field, select RegionID.
-
Leave the Role field blank for now, so the restriction applies to every user, including yours, while we test it. Make sure Active is checked.
-
Click Save.
Visit the Employees page preview. You should now only see employees who share a region with the employee record you selected, instead of the entire list.
Note
In a real application, you likely wouldn't want this restriction to affect administrators. Now that the rule is confirmed to be working, edit the Reach registration again and set its Role field to the Sales role we created earlier. This way, only users whose groups grant them the Sales role are restricted by region, while users with the Superuser role keep full visibility.
Note
Registering a Reach rule on a business object only restricts that specific object, not every rule built on top of its underlying table. For example, the Employee (Network) rule we built in Appendix C also queries the Employee table, but since it's a separate business object from Employee (Source), it isn't restricted by a Reach rule registered only on Employee (Source). To restrict every rule built on a table, register the Reach rule at the table level instead of on an individual business object.
Practice time: Extend region access to customers
Employees aren't the only Northwinds data that could benefit from region-based access. Let's apply the same restriction to the Customer table.
-
Following the steps used above for the Employee table, add a RegionID column to the Customer table, add it to the Customer (Source) rule, and add a Region list control (sourced from Region (List)) to the Customer popup page. Use the new control to assign a region to a few customer records.
-
Create a new Reach rule named
Customer (Region Access), with Purpose set to Reach and Target set to Customer. In the Tables tab, click + Tables to add the Employee table, joined to Customer on RegionID. -
Reuse the same Where clause and Reach Token column usage type from the Employee (Region Access) rule, this time selecting RegionID from the Employee table. Combined with the join, the rule now returns only customers who share a region with the currently logged in employee.
-
Register the new rule on the Customer (Source) business object, this time binding it to the Customer table's own RegionID column.
-
Visit the Customers page preview to confirm that only customers from your region are visible.
Tip
In App Workbench, navigate to the Roles tab. Selecting a role from the grid shows its page diagram on the right; pages with row-level security applied show a hand icon, making it easy to see at a glance which of that role's pages are restricted by Reach.
Further reading
This example only scratches the surface of what Reach can do. For a complete description of Reach concepts, supported scenarios, and limitations, see Reach.
Block
The Block column usage type prevents a row from being edited, deleted, or both. Unlike roles, which apply to an entire data object, and Reach, which controls row visibility, Block controls what a user can do to a row they can already see. A data object can only use one Block column, and its value determines the restriction:
| Cell value | Description |
|---|---|
1 |
Prevent editing of that row. |
2 |
Prevent deleting of that row. |
3 |
Prevent both editing and deleting of that row. |
| Any other value | Does not prevent anything. |
You can add a Block column at two different levels, and where you add it changes how far the restriction reaches. Adding it to a table in the data layer applies the restriction globally, everywhere that table's data is used throughout the app. Adding it as an expression on a business object in the logic layer, like we'll do below, applies the restriction only where that specific business object is used.
Instead of returning these numbers directly, we can also use the BlockOption() mvSQL function, which accepts the more legible values None, Edit, Delete, and EditAndDelete.
Once an order has shipped, its line items shouldn't change anymore. Let's block editing and deleting OrderDetail rows for any order that already has a ShippedDate.
-
In App Workbench > Rules, find and open the OrderDetail (Source) rule.
-
In the Tables tab, click + Tables and add the Order table.
-
In the Joins tab, App Builder should have already created an inner join between OrderDetail and Order on OrderID. If it hasn't, create it.
-
In the Columns tab, click + Column. In the Column or Expression field, enter
IIF(O.ShippedDate IS NOT NULL, BlockOption(EditAndDelete), BlockOption(None)). In the Alias field, enterBlock. -
Click Save.
-
Double-click the new Block column. In the Advanced section, set its Column Usage Type to Block. Click Save.
Visit the Orders page preview and select an order that already has a ShippedDate. In its Order Details panel, the edit and delete icons should no longer appear for any row. Select an order that hasn't shipped yet, and those icons should be available as usual.
Practice time: Block the order itself
Line items aren't the only records that shouldn't change after shipping. Apply the same logic directly to the Order (Source) rule: add a Block column with the expression IIF(ShippedDate IS NOT NULL, BlockOption(EditAndDelete), BlockOption(None)), and set its Column Usage Type to Block. Since ShippedDate already belongs to the Order table, no join is required this time. Test your results on the Orders page preview: shipped orders should no longer show their own edit and delete icons.
Capability bindings
Capability bindings are a specialized binding type that links the functional state of a child panel to the data of a parent panel or page data object. They can be used to hide or disable controls, similarly to Block, but with one key advantage: capability bindings can also affect a panel's Create button. This is something Block can't do, since that button exists independently of any specific row.
A capability-bound column can return different values to control the state of a bound control:
| Cell value | Description |
|---|---|
1 |
Hides the control. |
2 |
Disables the control, leaving it visible but unusable. |
| Any other value | Reverts to the control's default behavior. |
Let's use this to disable the Create button on the Order Details panel whenever its parent order has already shipped, preventing new line items from being added to a shipment that's already gone out.
-
In App Workbench > Rules, find and open the Order (Source) rule.
-
In the Columns tab, click + Column. In the Column or Expression field, enter
IIF(ShippedDate IS NOT NULL, 2, 0). In the Alias field, enterLockNewDetails. -
Click Save.
-
Open the Orders page and select Action Drawer > Live Designer.
-
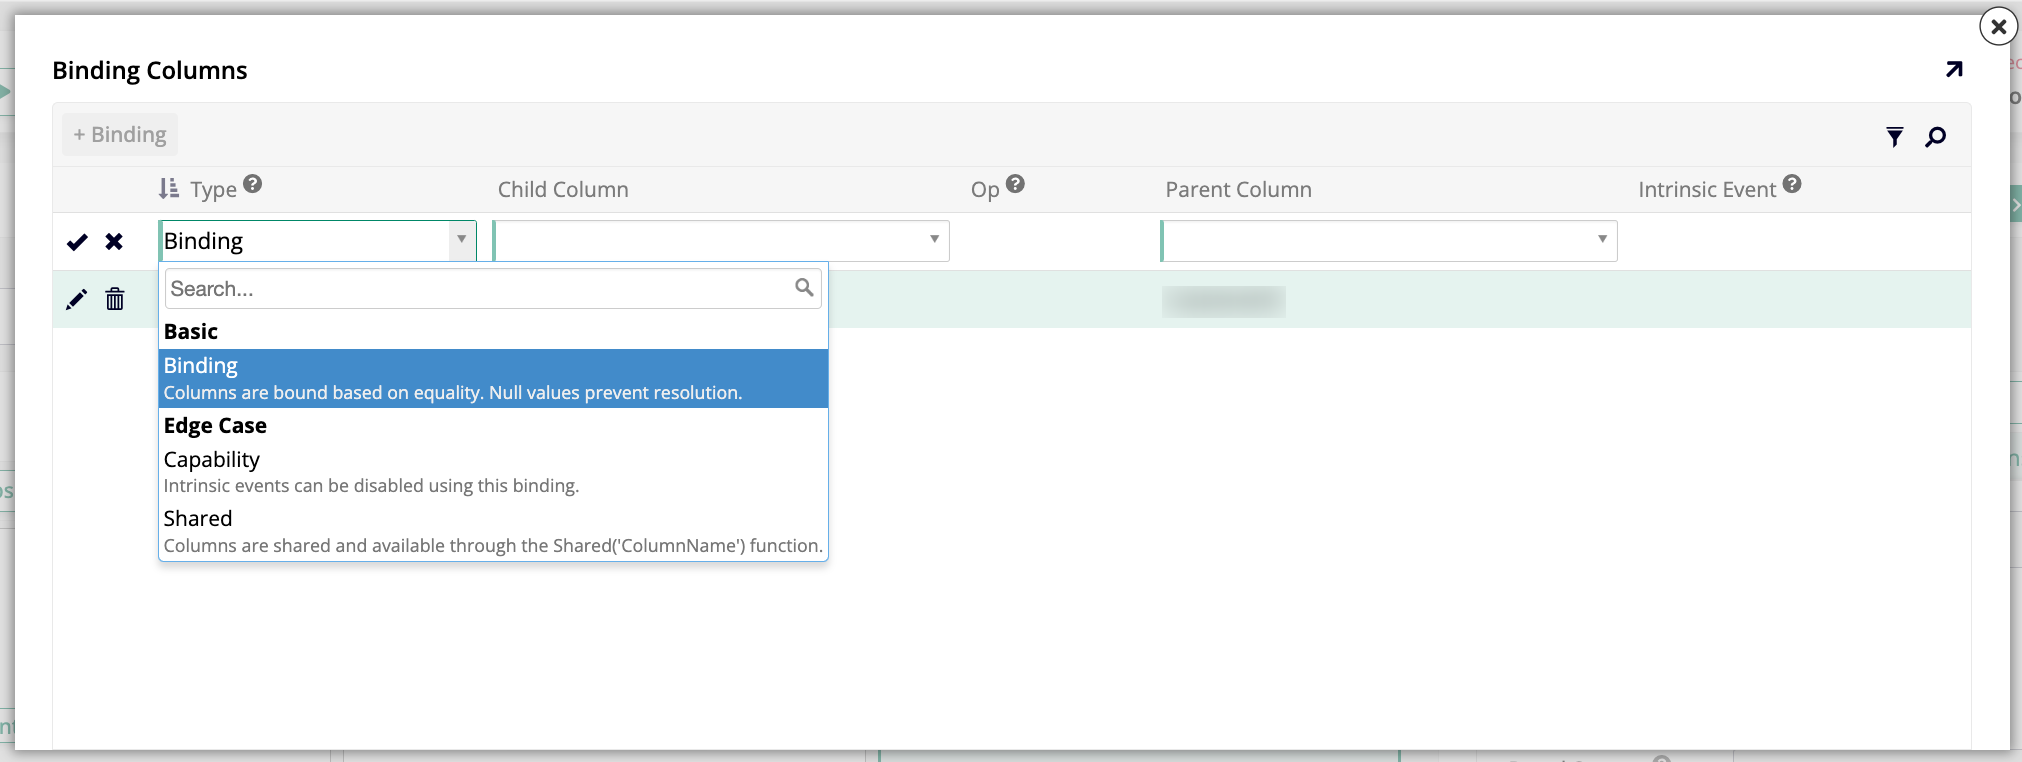
Click the binding column icon on the Order Details panel. The Binding Columns dialog opens:
-
Click + Binding and set the Type field to Capability.
-
In the Parent field, select LockNewDetails.
-
In the Intrinsic Event field, select Insert.
-
Click Save.
Visit the Orders page preview and select a shipped order. The Create button on the Order Details panel should now be disabled. Select an order that hasn't shipped, and the button should be clickable again.
Practice time: Hide instead of disable
Capability bindings support other statuses besides disabling a control. A value of 1 hides a control entirely instead of disabling it. Change the LockNewDetails expression to IIF(ShippedDate IS NOT NULL, 1, 0) and test your results: the Create button on the Order Details panel should now disappear entirely on shipped orders, instead of remaining visible but unusable.
Conditional formatting
Block and capability bindings cover the built-in ways users interact with a record: the edit and delete icons, and a panel's Create button. However, any button wired to a custom event, like the Quantity Plus and Quantity Minus buttons we added in Appendix B, bypasses both. Neither Block nor a capability binding's Intrinsic Event applies to a custom event, so these buttons keep working even on shipped orders, letting users change a Quantity that should no longer be editable.
Conditional formatting lets you hide or disable a control based on the value of any column, regardless of what event it's wired to. Let's use it to disable the Quantity Minus button once an order has shipped.
However, the ShippedDate column belongs to the Order table, not OrderDetail, and the Block exercise above only referenced it inside an expression rather than adding it as a column in its own right. Since the Quantity Minus button lives on the Order Details panel, which is sourced from OrderDetail (Source), add ShippedDate to that rule first so it's available for conditional formatting.
-
In App Workbench > Rules, find and open the OrderDetail (Source) rule.
-
In the Tables tab, find the Order table, already joined during the Block exercise above, and select the checkbox for its ShippedDate column.
-
Click Save.
-
Open the Orders page and select Action Drawer > Live Designer.
-
Select the button that executes the Quantity Minus event.
-
Click More > Styles.
-
Click + Conditional Formatting.
-
In the Source Column field, select ShippedDate.
-
In the Operator field, select Is not Null.
-
In the State field, select Disabled.
-
Click Save.
Visit the Orders page preview and select a shipped order. The Quantity Minus button should now be disabled. Select an order that hasn't shipped, and the button should be clickable again.
Practice time: Extend conditional formatting
Repeat the steps above for the button that executes the Quantity Plus event.
Then, apply the same restriction to the Delete Order Details button on the Orders panel, this time setting its State to Hidden instead of Disabled, so you can see how the two states differ. Once an order has shipped, the button should disappear entirely rather than remain visible but unusable.
Further learning
This concludes this deep dive into the details of App Builder's security layer. If you haven't yet, see Appendix A for a closer look at the data layer, Appendix B for the business layer, or Appendix C for the UI layer.
To continue learning about App Builder, visit Jitterbit University.