Introduction to App Builder - Appendix B: The business layer in App Builder (Advanced)
This is the second appendix of the Introduction to App Builder tutorial series. These appendices complement the lessons in the series, and provide more in-depth information about concepts introduced.
In this lesson, we'll further explore the business layer of App Builder, the area where we create business objects, or rules.
Unions
Joins, introduced in Lesson 7, are used when we work with rules that pull data from more than one table in the data layer. App Builder is capable of constructing the joins automatically based on your selections of source tables for your rules.
Unions are a similar concept, but they combine data vertically, that is, they stack the results of two queries, producing a list of results from more than one table, provided they have a certain column with the same name.
To demonstrate how a union works, let's manually create a union that shows all the countries that exist in the Northwinds data source. There are two tables, Supplier and Customer, that contain a column named Country, so we'll combine the entries from both.
-
In App Workbench > Rules, click + Rule.
-
When the rule creation screen appears:
-
In the Name field, enter Supplier (Countries for Supplier and Customer).
-
In the Purpose field, select Business Object.
-
Make sure Supplier is selected in the Target field.
-
Click Create.
-
-
App Builder will create the rule. By default, it adds the target table and selects its primary key. However, in this rule we're only interested in the countries present in the tables, so uncheck the primary key, SupplierID, and select the Country column.
-
We need to add the other table that contains country information, so click + Tables.
-
Find the Customer table and click Add. App Builder will add the Customer table and you will be able to see it in the Tables tab next to Supplier.
-
Go to the Joins tab.
-
App Builder has created a join, but adjust it to make it the kind you want. Make sure Supplier is selected in the Left field and that the Type field says Union.
-
Some countries appear more than once. To avoid repeated results, go to the Rule panel and click More > Edge Case. In the Edge Case Settings dialog, check the Select Distinct checkbox.
-
Click the SQL tab if you want to see the syntax of your union:

-
To see your results, click the Results button in the Rule panel.
CRUD rules
We introduced CRUD rules in Lesson 7, but now let's take a closer look at them.
The acronym CRUD stands for "Create, Read, Update, Delete". This means that CRUD rules are what App Builder developers use to insert, retrieve, alter, or erase records from the tables present in the data source.
Target layer: business vs. data
When you create a CRUD rule, you must select a target layer: either the business or data layer. This choice is critical and has significant implications.
Targeting the business layer is the recommended approach for most operations. When your CRUD rule targets the business layer (e.g., the Order (Source) business object), it acts like a user interacting with the application. It triggers all the intrinsic events (Save, Update, etc.) associated with that business object. This means all your configured validation rules, custom actions, and audit lite tracking will be executed automatically. This approach ensures data integrity and consistency with your application's logic. It also allows you to use success and failure handlers for the event.
Targeting the data layer bypasses all business logic. When you target the data layer (e.g., the Order table), your rule interacts directly with the database. It will not trigger any intrinsic events, validations, or audit tracking configured on the business object. This is a "back door" approach, useful for high-performance bulk operations where you intentionally want to bypass business logic.
You can see this difference visually in the visual workflow; a rule targeting the business layer will show subprocesses for its event logic, while one targeting the data layer will not.
Note
App Builder also supports XP CRUD rules, which are specialized rules for writing data between two different data sources. These rules always run through the business layer to ensure all logic is applied. See CRUD (rule) for more.
CRUD update
First, let's see how to create a CRUD update rule. This means modifying existing records in a table. To demonstrate, let's create a rule that increases all quantities of the products ordered.
-
In App Workbench > Rules, click + Rule.
-
In the Name field, enter
OrderDetail (Quantity + 1). -
In the Purpose field, select CRUD.
-
In the Action field, select Update.
-
Under Target Layer, select Data Layer. (For this simple bulk update, we will bypass the business logic).
-
In the Target field, select OrderDetail.
-
Click Create. App Builder will take a few seconds to create the rule.
-
In the Tables tab, the OrderDetail table will appear, with its primary key, OrderDetailID, selected. Select the Quantity column as well by clicking its checkbox.
-
We'll add a new column with an alias to help us visualize that the rule is working. Go to the Columns tab and click + Column. When the Column - Add Column dialog opens, enter the following information:
-
In the Column or Expression field, enter
OD.Quantity + 1. -
In the Alias field, enter a legible name. We'll use
QuantityPlus. -
In the Target field, select Quantity. This tells App Builder to write the result of this expression into the Quantity column.
-
Click Save.
-
-
In the Columns tab, you will now see both Quantity and QuantityPlus. The original OD.Quantity column will also be targeted to Quantity by default. We must untarget it to avoid ambiguity:
-
Find the OD.Quantity row in the Columns list.
-
Click its Target dropdown. An X button appears next to it. Click it to untarget the column.
This ensures that only our QuantityPlus expression is used to update the Quantity column. If both were targeted, the one with the higher index would "win", leading to unpredictable behavior.
-
-
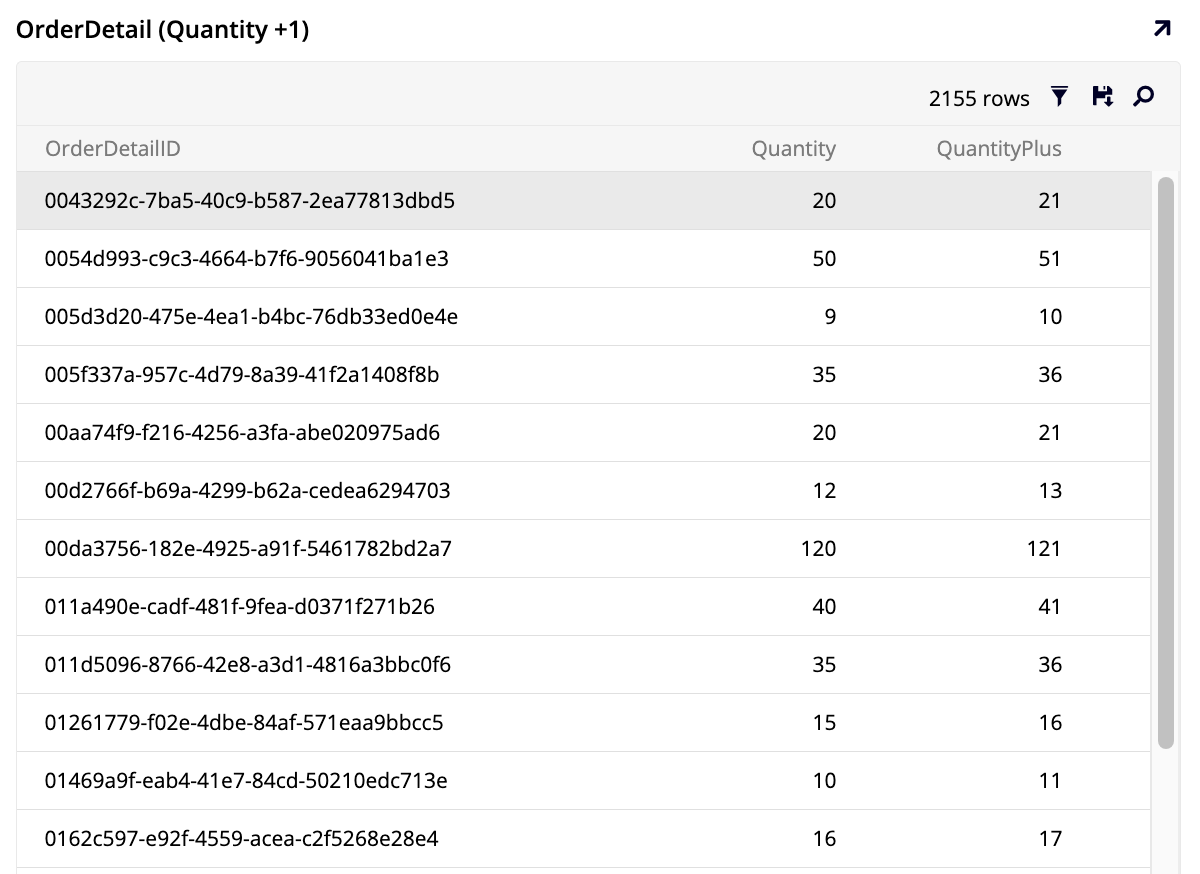
The rule is ready. In the Rule panel, click the Results panel to see it working. Notice the extra column you've added increases all quantities by one:
Practice time: Create a CRUD update rule
Think about how you would create a CRUD update rule similar to the one we've created above, but with the opposite effect, that is, a rule that modifies all entries in the Quantity column of the OrderDetail table by subtracting one.
CRUD delete
CRUD delete rules are used to erase records from the tables. However, because it's easy to use UI elements to delete individual records, CRUD delete rules are typically only used to delete many records at a time. To demonstrate, let's create a CRUD delete rule that deletes all the order details associated with an individual order, in order to eliminate the need to delete all order details separately when an order is cancelled.
-
In App Workbench > Rules, click + Rule.
-
In the Name field, enter
OrderDetail (Delete OrderDetail for Order). -
In the Purpose field, select CRUD.
-
In the Action field, select Delete.
-
Under Target Layer, select Data Layer.
-
In the Target field, select OrderDetail.
-
Click Create.
-
In the Tables tab, App Builder has added the OrderDetail table and selected its primary key, OrderDetailID. Keep this selected, as targeting the primary key is the most efficient and safest way to perform a delete operation. Select the OrderID column as well; we will use this column in the next section to bind the rule to a specific order.
Attach CRUD rules to events
CRUD rules can only be used in the application layer when they're attached to events, which are processes built into tables or business objects that get executed in response to certain actions, such as saving a record. All tables and business objects intrinsically have four events: save, update, delete and insert, which execute as you alter records in App Builder.
Let's activate the CRUD rules we created by either adding them to an intrinsic event or creating our own custom events. Unlike intrinsic events, custom events must be attached to a control on the application layer to be executed. The CRUD rules we are creating will require custom events to execute when we want them to.
First, let's create a custom event to associate with our CRUD delete rule, so that when an order gets deleted, the related order details get deleted as well.
-
In App Workbench > Rules, locate and select the Order (Source) table.
-
In the Rule panel, click Events. The All Events (Order (Source)) dialog opens.
-
Because we are creating a custom event, click + Rule Event. The Event page opens, where you can add the new event's details:
-
Under Event Information, in the Name field, enter
Delete Order Details. -
Under Messages, in the Confirmation field, enter a message that will be shown to users prior to event execution. The message should be informative, clearly stating what will happen if the user proceeds. Here's an example:
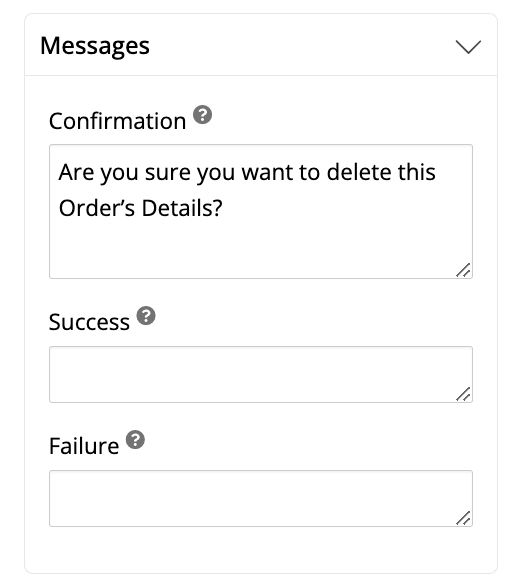
-
Leave the other fields with their default selections and click Save. App Builder will create the event.
Note
See Event detail options for a complete description of all fields.
-
-
The event has been created, and App Builder shows you its configuration screen:
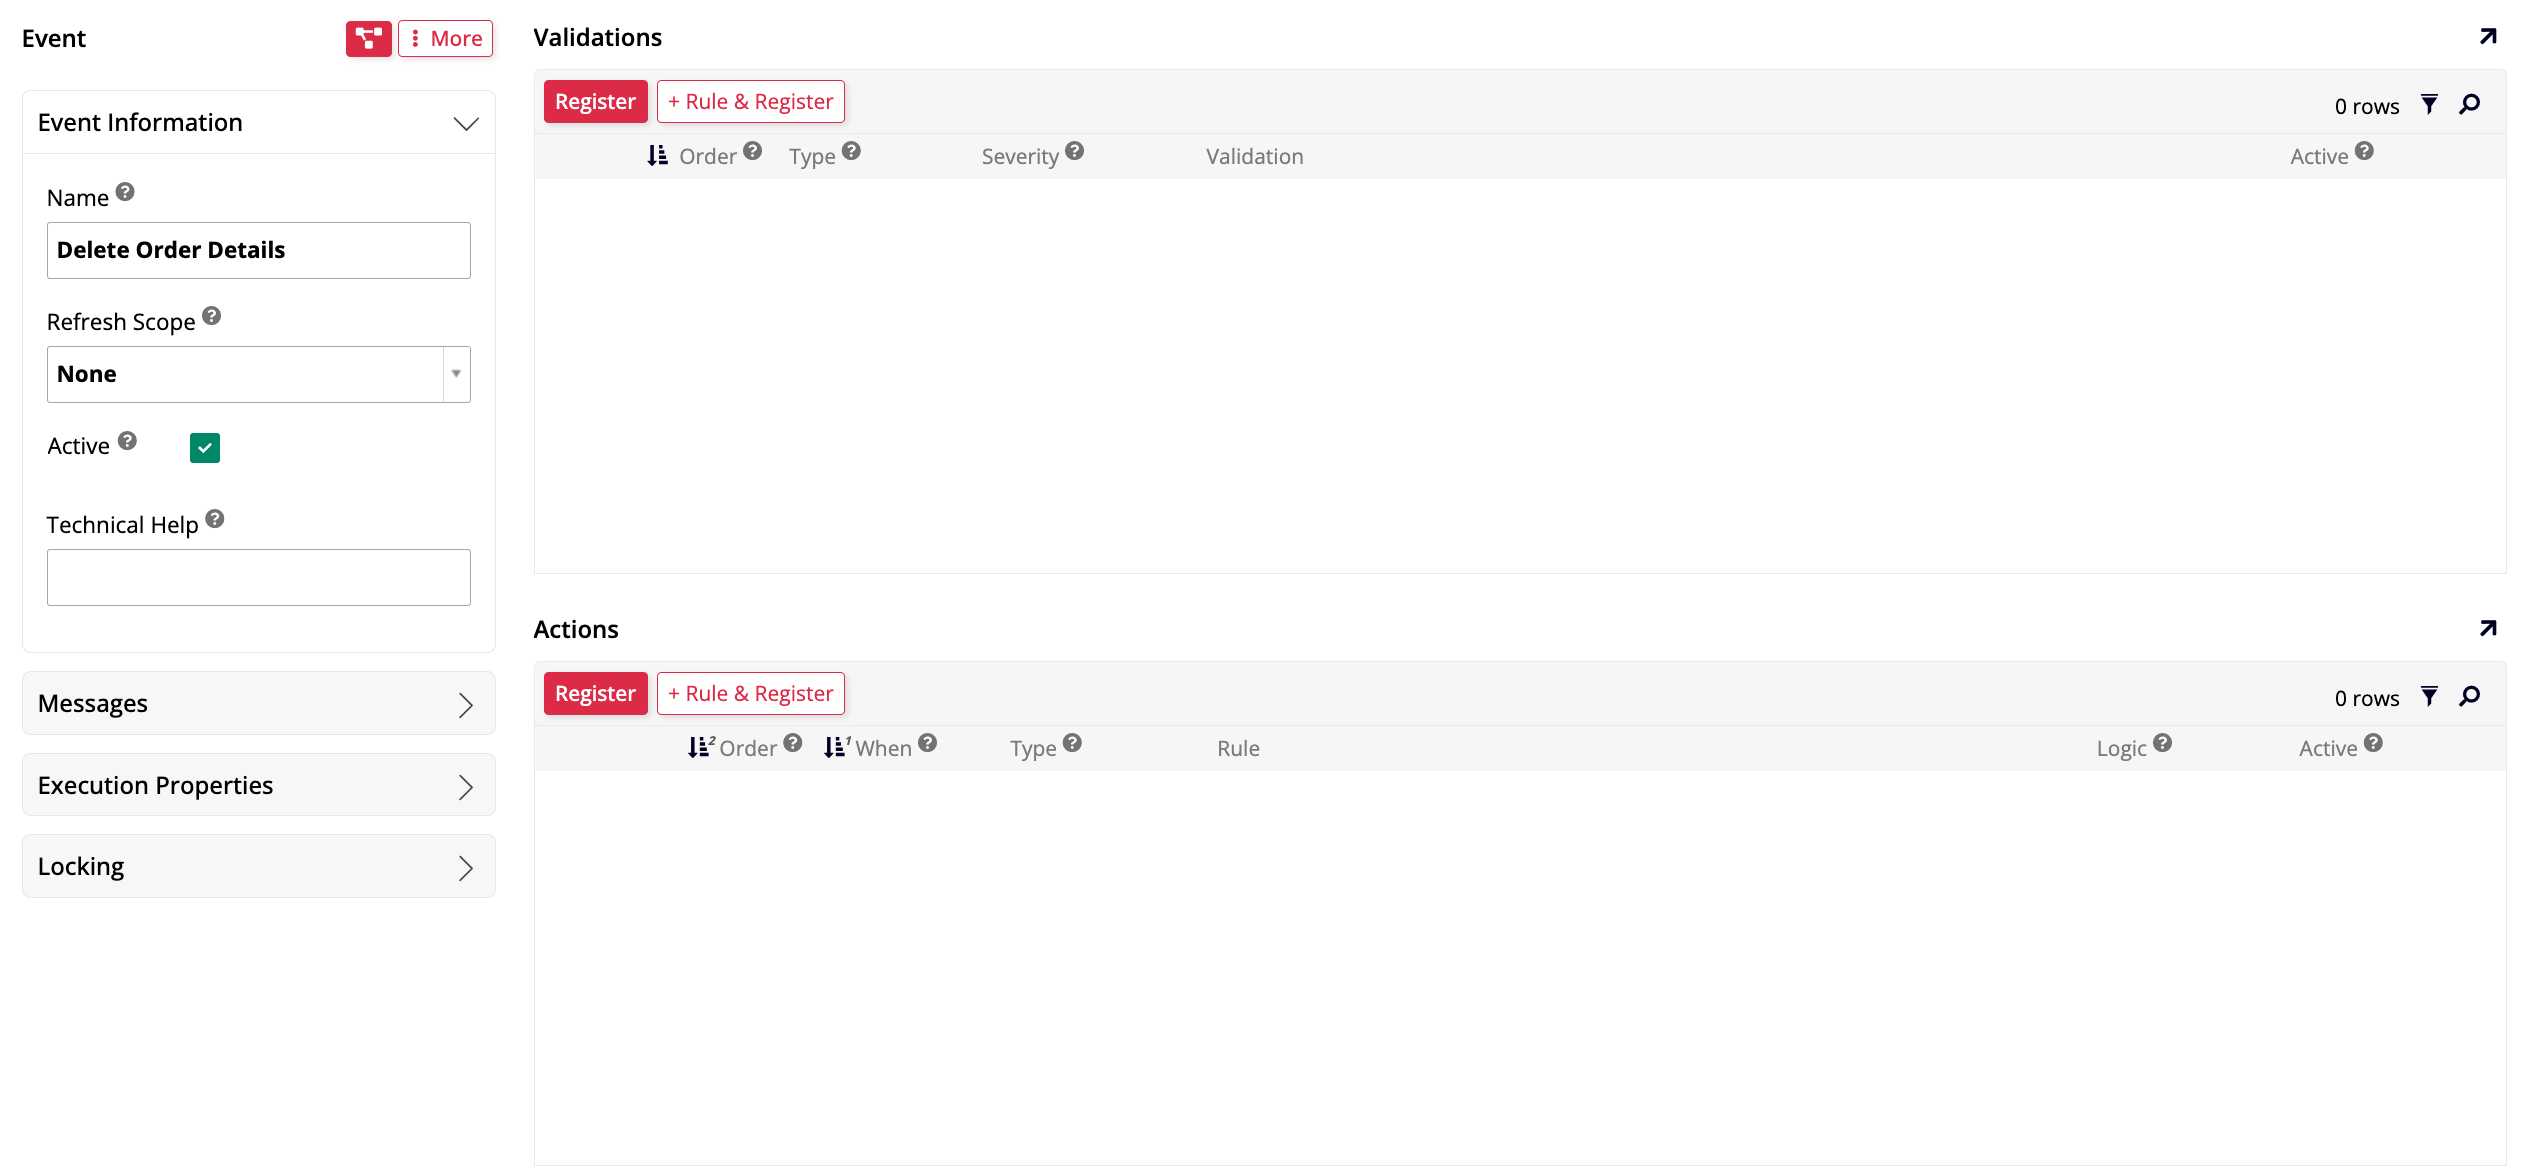
Notice that it doesn't have any rules attached yet. CRUD rules, like the ones we're working with, are attached to events in the Actions panel. Click the Register button there. The Action dialog opens:
-
In the Type field, select Rule.
-
In the Rule field, select OrderDetail (Delete OrderDetail for Order), the CRUD delete rule we've created previously.
-
You can leave the other fields with their default selections. Click Save. The dialog for the action will show further details:
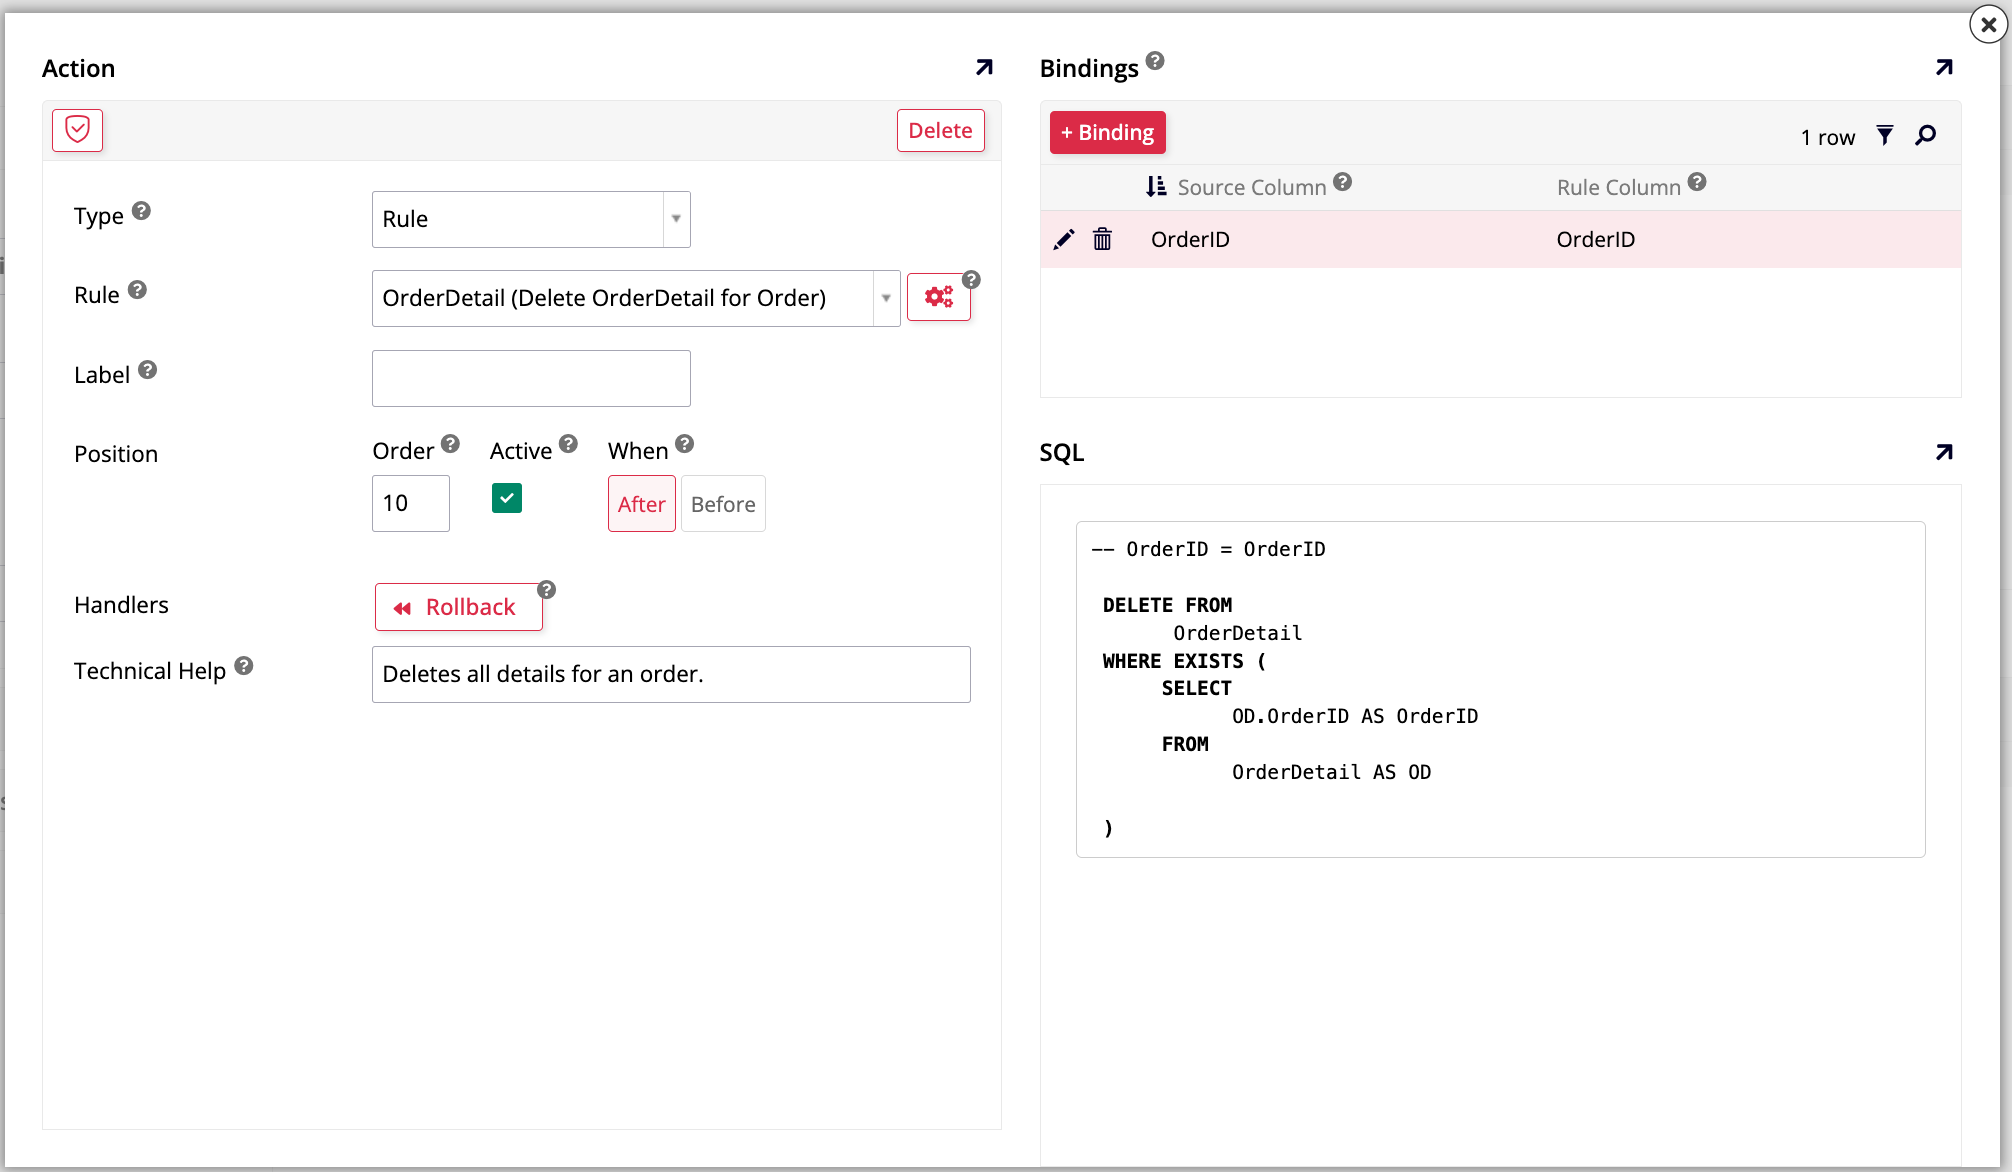
-
In the Bindings panel, click + Binding. Select OrderID as the Source Column and OrderID as the Rule Column.
Note
This binding step is critical, as it filters the results of your rule by the panel record you've executed the event against. If left "unbound", the delete rule would affect all records in the OrderDetail table. By binding the Source Column (OrderID from the Order (Source) panel record) to the Rule Column (OrderID in our delete rule), we add an implicit filter (e.g.,
WHERE OrderID = 10248).This ensures that only the OrderDetail records matching that specific OrderID are deleted. If this binding were omitted, triggering the event would delete all records from the OrderDetail table.
-
Click Save.
-
-
The custom event is now ready to be implemented.
Further reading
In addition to what's shown in this example, App Builder event configuration can also include the following:
-
Where events get configured: Events can be configured on the business layer (business objects) or the data layer (tables). Registering events on the business layer allows for distinct logic per interface, whereas data layer events are global. Read more in Where events get configured.
-
Event inheritance: Business objects can inherit event logic from the underlying table or other sources. Read more in Event inheritance.
Practice time: Create CRUDs and custom events
-
Create an event titled Quantity + 1 on the OrderDetail (Source) business object, and add the CRUD OrderDetail (Quantity + 1) as an action.
-
Create another event in the same location as the previous exercise, but use the Quantity - 1 CRUD rule.
Once you have created these custom events and associated them with CRUD rules, you'll be ready to implement them in the application.
Trigger events
We've attached the CRUD rules we created to custom events. Therefore, to add them to our application, we need to use a control that will trigger, or fire, the event. In contrast, when a rule is associated with one of the intrinsic events (save, insert, update, or delete), we don't need to.
There are several control types available, but we'll use button controls to trigger our custom events. To start, let's add the Order Detail (Delete OrderDetail from Order) rule to a button on the Order panel of the Order page.
-
In the App Workbench homepage, click the button to run your application in its current state. App Builder will open it in a new tab.
-
In the app preview, navigate to the Orders page.
-
Click the hamburger icon to open the action drawer, then select Live Designer.
-
Click the Orders panel. That will make the live designer show edit options for it.
-
In the Orders - Panel tab, click + Control. The Add a Control dialog opens:
-
Skip the Column field because we're not adding data to the panel. In the Control Type field, select Button.
-
In the Name field, enter Delete Order Details.
-
In the Control Subtype field, select Primary.
-
Click Next. The Add a Control dialog will advance to the next step, Navigation.
-
In the Execute an Event field, select Delete Order Details, the custom event we've created.
-
In the After Event Action field, select Stay.
-
Click Next.
-
Confirm that the details are correct and click Finish.
-
-
App Builder will add the button to the rows in the Orders panel. Exit out of the live designer and make sure you can see a button that says Delete Order Details for each row on the panel.
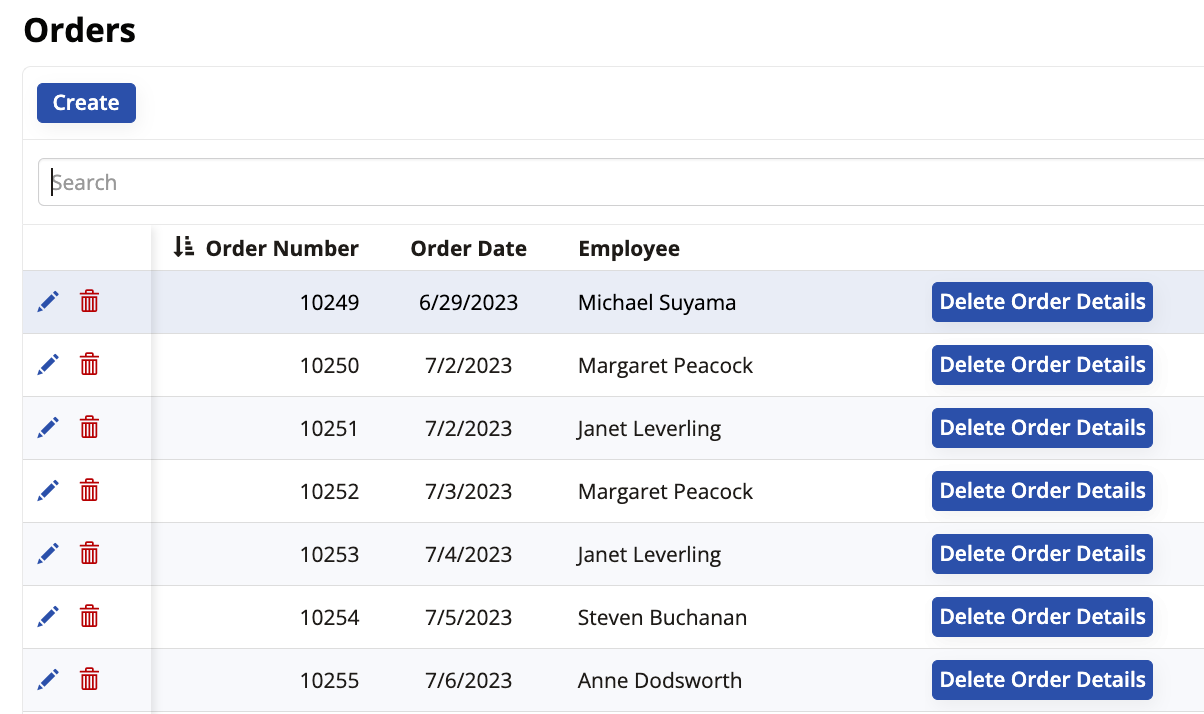
-
Test the button by clicking on it. If you've configured everything correctly, only the order details of the order you selected will be deleted.
Practice time: CRUDs and events
Still on the Orders page, add two buttons to the OrderDetails panel. One of them should fire the Quantity + 1 custom event, and the other should trigger the Quantity - 1 event we've previously created.
Subquery rules
Subquery rules are intermediaries between a table and its rules. Subquery rules are used to calculate or adjust the data, and pass that new information along to whatever object it is placed in.
We will demonstrate by making a subquery rule. It will be used to find the maximum OrderNumber of the Order table, and then add one to it. We'll later create a CRUD rule with the purpose of copying an order, and it will depend on this subquery to work.
-
In App Workbench > Rules, click + Rule.
-
In the Name field, enter
Order (OrderNumber + 1). -
In the Purpose field, select Subquery.
-
In the Target field, select Order.
-
Click Create. App Builder will create the new rule.
-
App Builder will automatically select the Order table's primary key, but we won't need it for this rule. Deselect it in the Tables tab.
Why deselect OrderID?
When using an aggregate function like we'll do here, adding any other column to the query (like OrderID) will cause the database to apply a
GROUP BYclause for that column.If we included OrderID, the expression would find the maximum OrderNumber per OrderID. This would just return the OrderNumber for each order, which is not what we want.
To find the single maximum OrderNumber across the entire table, we must not include any other columns in our query. This is why we use a subquery: to perform this aggregate calculation first so it can be used in another rule.
-
In the Columns tab, click + Column. The Column - Add Column dialog will open.
-
In the Column or Expression field, enter the expression
Max(O.OrderNumber) + 1. The syntaxMax()invokes the Max function, which finds the largest value in theO.OrderNumbercolumn. Then, one is added to it. -
In the Alias and Target field, enter an appropriate alias for this column, such as
MaxOrderNumber. -
In the Logical Data Type field, select Number, as OrderNumber isn't a UUID value, but a natural number.
-
Click Save.
-
Check that the rule is working correctly by clicking the Results button. There should be only one row with one order number, which should be one number higher than the biggest order number currently present in the Order table.
Now, let's create a CRUD rule capable of copying an order. This CRUD rule will rely on the subquery rule we've just created to work.
-
In App Workbench > Rules, click + Rule.
-
In the Name field, enter
Order (Copy Order). -
In the Purpose field, select CRUD.
-
In the Action field, select Insert.
-
In the Target Layer field, select Data Layer.
-
In the Target field, select Order.
-
Click Create. App Builder will create the rule.
Once the rule is created, you need to configure its details.
-
In the Tables tab, App Builder has automatically added the Order table, but we'll need more. Click + Tables.
-
Select the subquery rule we've created for this purpose, Order (OrderNumber + 1). Click Add.
-
Now let's select the columns we'll need:
-
From the Order table, select all columns except the columns created for audit lite. We are including CustomerID, EmployeeID, and ShipperID to make the copied order more complete.
-
From the Order (OrderNumber + 1) subquery rule, select its only column, MaxOrderNumber.
-
-
In the Columns tab, we must configure the rule targets. A rule's target defines which column in the base table will receive the value from the source expression.
-
Find the OON.MaxOrderNumber row and, in the Target dropdown, select OrderNumber. This maps our new, incremented number to the correct column.
-
Find the OrderID row. Ensure its Target dropdown is None. This includes OrderID in the rule, allowing us to use it for binding, but prevents the rule from trying to copy the original OrderID, which would violate the primary key constraint.
-
Verify all other columns (like CustomerID, OrderDate, etc.) are targeting their corresponding columns.
Further reading
Learn more about this concept in Target in business object rules.
-
-
Click Results in the Rule panel to validate that the rule is working correctly.
We've now created the rule that copies existing orders. Let's attach it to a custom event.
-
In App Workbench > Rules, locate and select the Order (Source) table.
-
In the Rule panel, click Events. The All Events (Order (Source)) dialog opens.
-
Click + Rule Event. The Event page opens, where you can add the new event's details:
-
Under Event Information, in the Name field, enter
Copy Order. -
Under Messages, in the Confirmation field, enter the confirmation message that will be shown to users prior to event execution.
-
Leave the other fields with their default selections and click Save.
Further reading
Read about the other fields in Event detail options.
-
-
The event has been created. In the Actions panel, click Register to add our new rule. The Action dialog opens:
-
In the Type field, select Rule.
-
In the Rule field, select Order (Copy Order).
-
In the Bindings panel, click + Binding and select OrderID as the Source Column and OrderID as the Rule Column. Using the OrderID (a primary key) for binding is more reliable than using OrderNumber, which may not be unique.
-
-
Now that the new rule is configured and attached to an event, add a button to the Orders panel in the Orders page that triggers it. Repeat the steps we took in the Trigger events section, but this time add the new Order (Copy Order) rule.
-
Finally, verify that your new button is working as expected by visiting the Orders page preview and clicking it.
Validations
Validation rules are used to ensure that data entered into App Builder is valid before it gets saved. In Lesson 7, we covered a simple "required field" validation. Now, we'll explore a more complex validation scenario, including custom logic and dynamic error messages.
Like other rules, validation rules must be attached to an event to be used. The choice of event depends on the use case:
-
Intrinsic event: Use this when you want the validation to run automatically during standard operations (e.g., preventing a save if data is invalid).
-
Custom event: Use this when you want to trigger the validation on demand from a specific control (e.g., a button click).
Let's create a validation rule to ensure that a discount on an order is never greater than 10%. We want this to run every time an OrderDetail record is saved, so we will attach it to the intrinsic save event.
-
In App Workbench > Rules, click + Rule.
-
In the Name field, enter
OrderDetail (Validate Discount). -
In the Purpose field, select Validation.
-
In the Target field, select OrderDetail.
-
Click Create.
-
In the Tables tab, select the Discount column (you can deselect OrderDetailID).
-
In the Where tab, click + Where Clause. A dialog opens where you can create
WHEREclauses: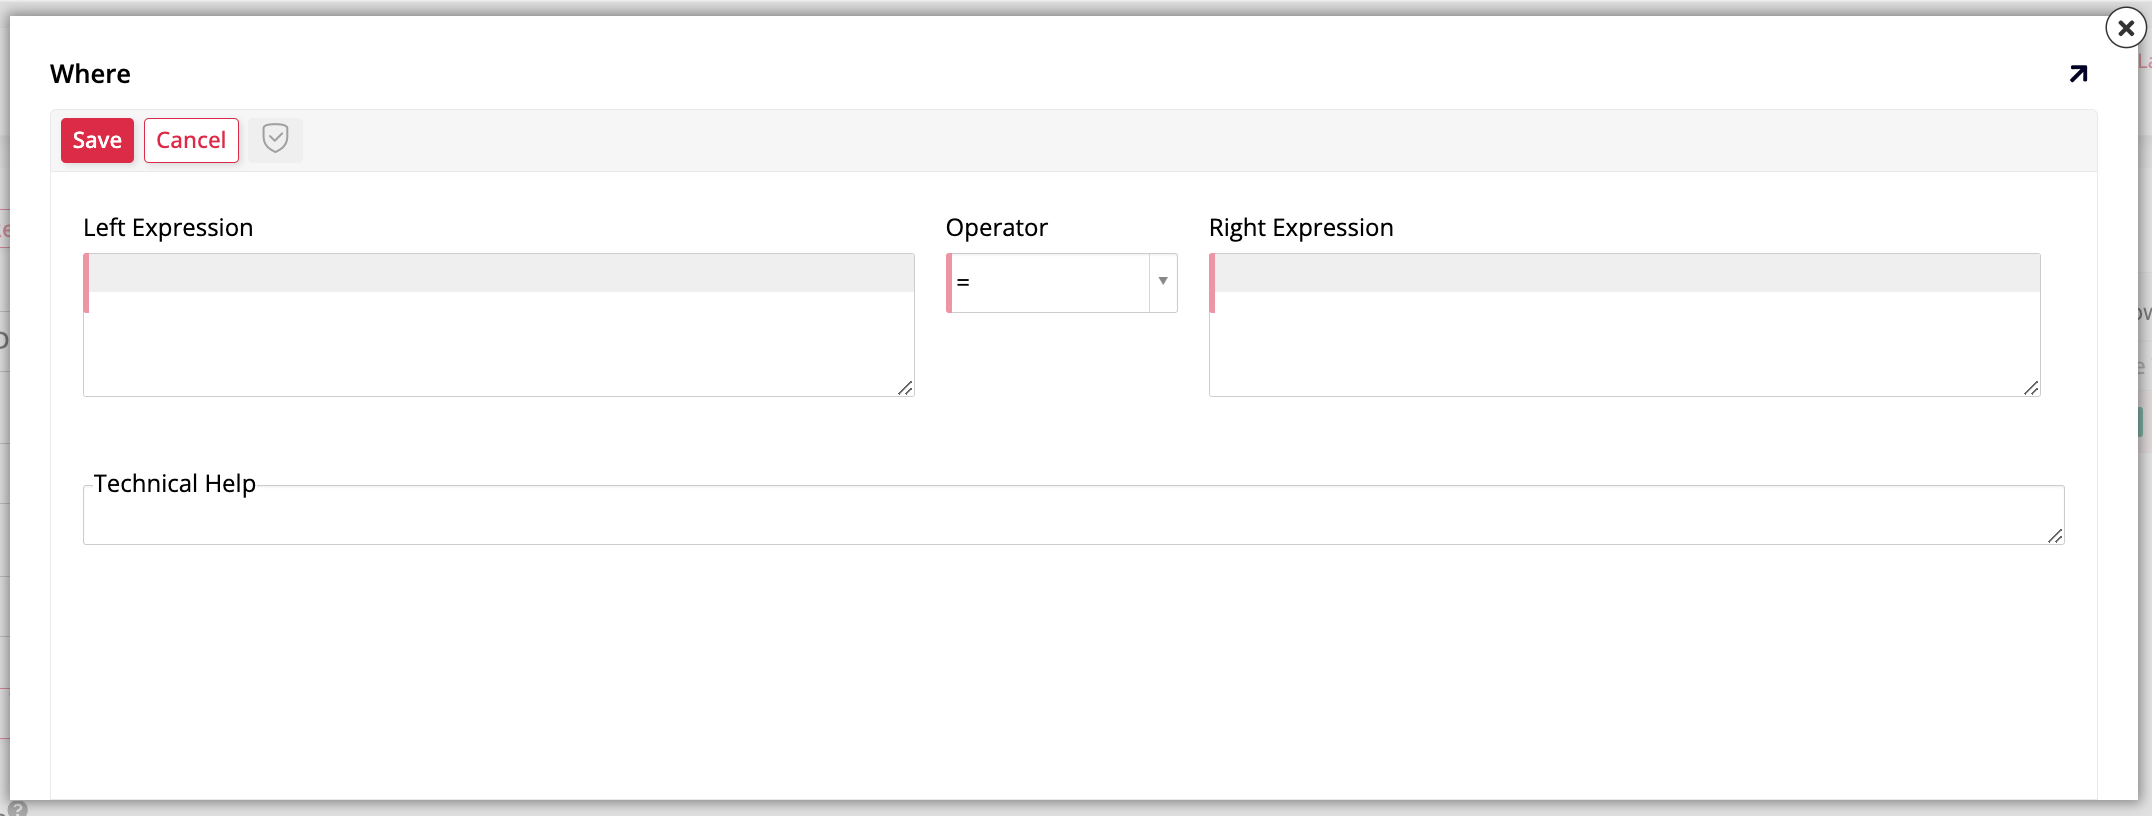
-
In the Left Expression field, enter
OD.Discount. -
In the Operator field, select
>. -
In the Right Expression field, enter
0.1.
-
-
Click Save.
The rule is now created. It is designed to find "bad" data (records where the discount is over 10%).
Attach the validation rule
Now, let's attach our validation rule to the intrinsic save event for OrderDetail.
-
In App Workbench > Rules, find the OrderDetail (Source) business object and open it.
-
In the Rule panel, click Events. The All Events (OrderDetail (Source)) dialog opens.
-
Find the save event and click Rule Event Detail.
-
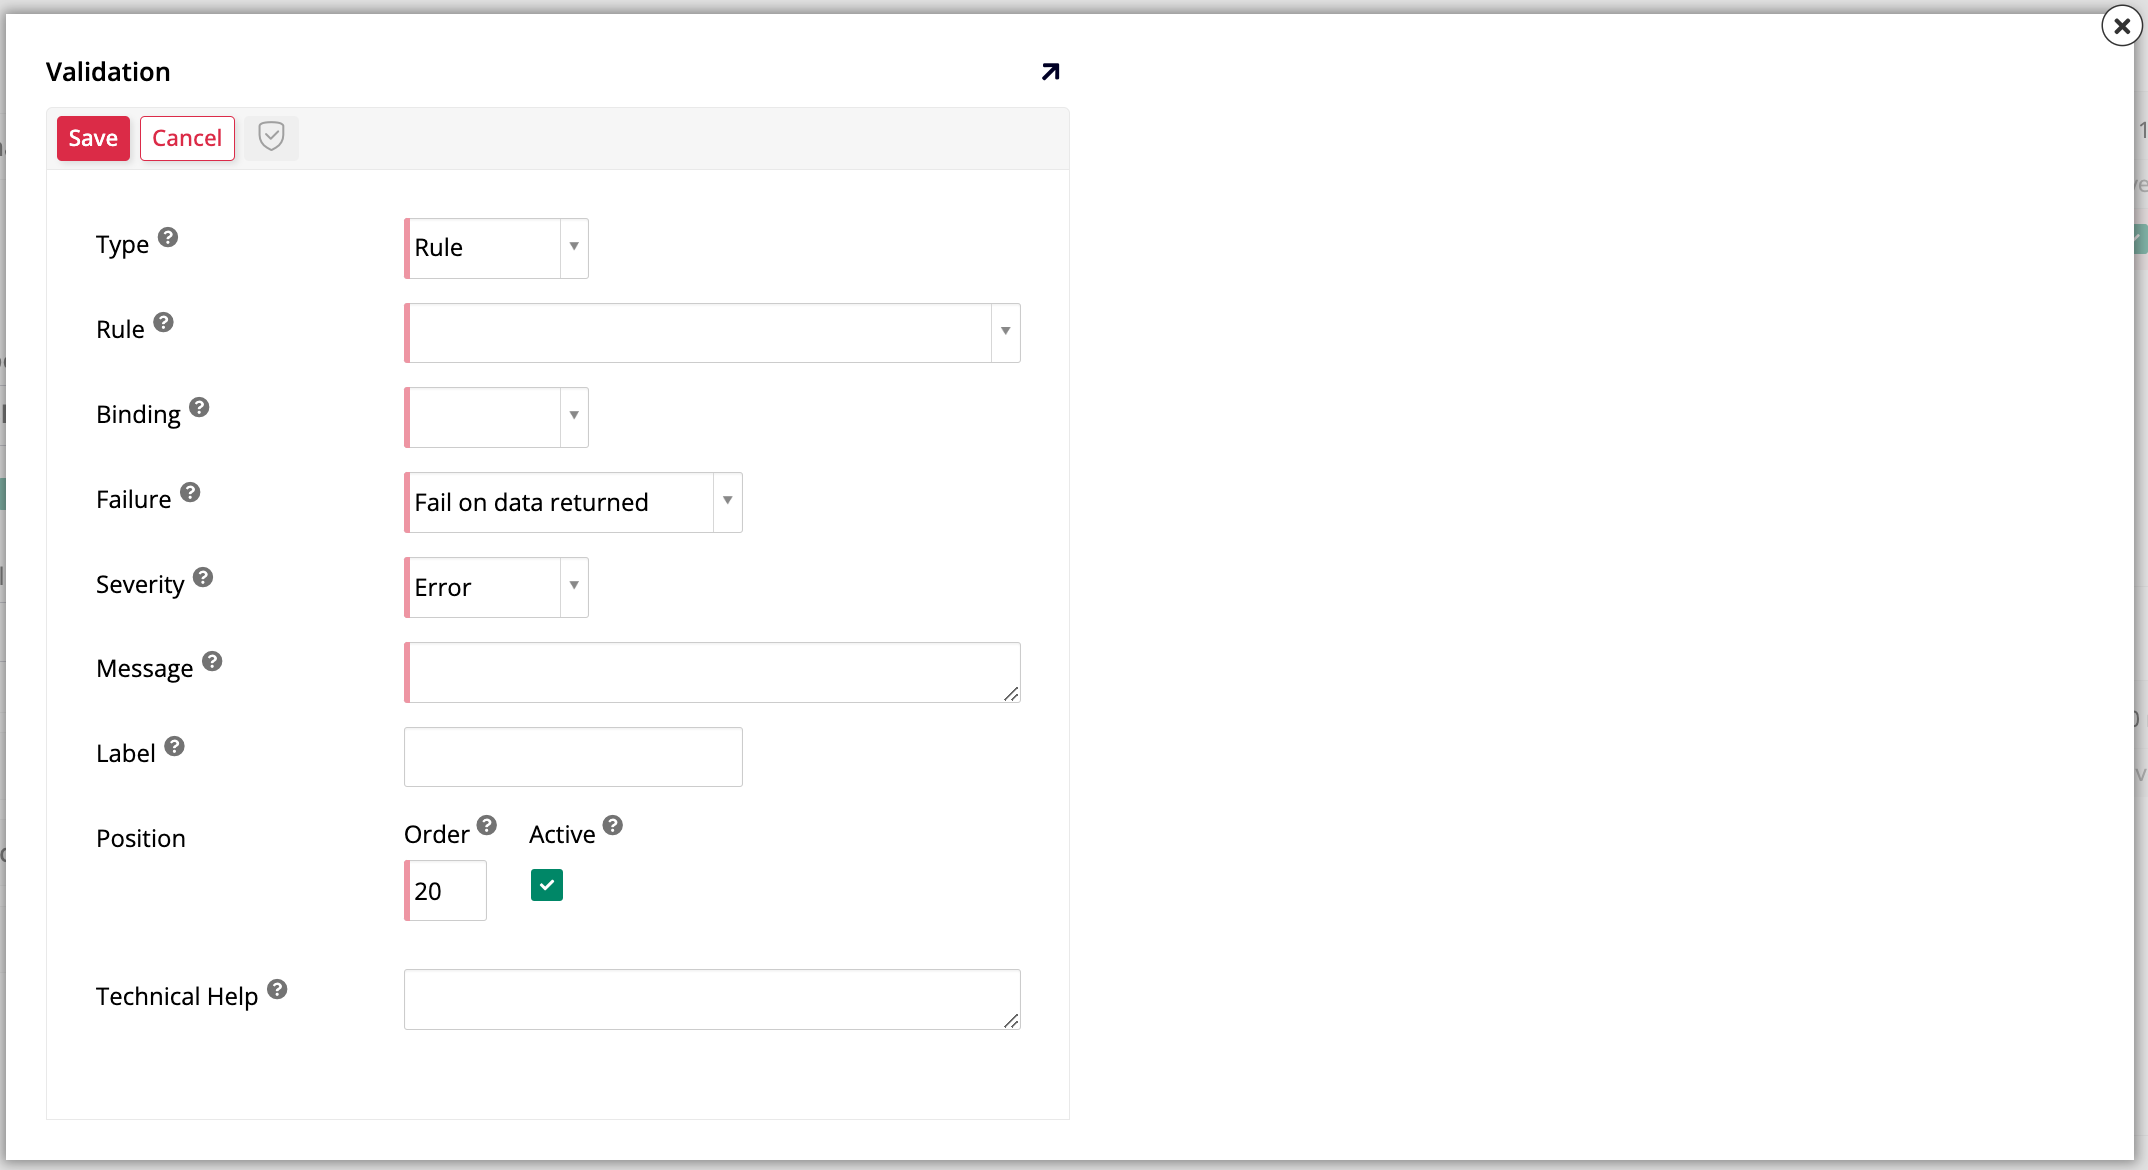
In the Validations panel, click Register. The Validation dialog opens:
-
In the Type field, select Rule.
-
In the Rule field, select OrderDetail (Validate Discount), the validation rule we've just created.
-
In the Binding field, select Implicit.
Note
Implicit binding validates against the data currently "in memory" on the user's screen. This is the value the user has typed, before it has been saved to the database. We use implicit binding here because we want to stop the user from saving a new record while the Discount value is invalid (that is, greater than 10%). On the other hand, Explicit binding validates against the data that is already saved in the database.
To illustrate, imagine a record was saved with an invalid discount of 50%. A user opens that record, corrects the Discount field to a valid value like 7%, and submits it. If the validation event uses explicit binding, it will check the database, see the original 50% value, and fail the validation. However, if the validation event uses implicit binding, it will check the in-memory value (7%), see that it is not greater than 10%, and pass the validation, allowing the save.
Read more in Implicit and explicit binding.
-
In the Failure field, select Fail on data returned.
Note
App Builder validations can be configured in two ways. The default, which we are using, is Fail on data returned. This means the validation rule is written to find the bad data (e.g., Discount is greater than 10%). If the rule finds any records matching this "bad" criteria, it fails and shows the error message. The alternative is Fail on no data returned, which is used when a rule is written to find good data.
-
In the Message field, enter a descriptive, but simple message, something like:
Discount cannot be greater than 10%. This field cannot be left empty. -
Click Save to exit out of the dialog.
The validation is attached. To test it, go to the Orders page preview, select an order, and try to edit an OrderDetail item to have a discount greater than 10%. When you click to save, you should see the error message you wrote.
Practice time: Dynamic substitution in validation messages
Instead of limiting the discount that users can apply directly through a rule like we just did, we can also make the discount limit a value that users can modify. The way that we can do that is by adding it as an application level parameter and storing it in the Parameter table.
-
In App Workbench > Pages, navigate to the Parameter page, which was created back in Lesson 4.
-
In the Panel tab, find the Panel Source field and click the table icon. This will take you to the Parameter table edit screen.
-
In the Columns tab, add a new column by clicking + Column.
-
Give it the name
DiscountMaximum. -
In the Logical field, select Number.
-
In the Physical field, select Decimal.
-
Click Save.
-
Now, let's add the new column to the business object that's based on the Parameter tab. You can either find it in App Workbench > Rules or by returning to the previous screen and then clicking the business logic icon next to the Panel Source field.
-
Once you're at the Parameter (Source) rule edit screen, go to the Tables tab and find the new DiscountMaximum column in the list of columns from the Parameter table. Click the checkmark to select it.
-
Now return to the Parameter page, either by finding it in App Workbench > Pages or by returning to the previous screen. Add the new DiscountMaximum column to the list of controls in the Parameter panel.
-
Now in the Parameter page preview, use the Edit button to choose whatever maximum discount you want. For instance, enter
.3to allow discounts of up to 30%.
Further reading
For more techniques on how to ensure data integrity, see Validation tips.
Edit the validation rule to use the new parameter value
Even though we want to allow our users to determine the maximum discount, the validation rule we created before uses a fixed, hard-coded maximum discount, so it still won't tolerate any discounts bigger than 10%. Let's edit it to use whatever value we enter in the Parameter page. Follow these steps:
-
Go to App Workbench > Rules and open the OrderDetail (Discount Validation) rule.
-
In the Tables tab, click + Tables.
-
Click Add for the Parameter table.
-
Now that the Parameter table is also being displayed in the Tables tab, select the DiscountMaximum column.
-
Go to the Where tab. We need to edit the
WHEREclause we created because we no longer want to use a hard-coded value here. Click the pencil icon to edit it. -
In the Right Expression field, enter
P.DiscountMaximum. App Builder will take a moment to save. -
Now, revisit the Orders page preview. If you try adding a new product in the Order Details panel, you'll see that now you are allowed to give discounts of up to 30%.
If you try to give a discount above 30% now, you won't be allowed to. However, the error message still says the previous limit, 10%, because we also hard-coded that when we first created the validation rule. To avoid having to edit the message every time the limit changes, we are going to use dynamic substitution to make the message be automatically updated along with the limit.
-
In App Workbench > Rules, navigate to the OrderDetail (Source) rule.
-
This rule currently only pulls data from the OrderDetail table, so in the Tables tab, click + Table and select the Parameter table. When it appears, select the DiscountMaximum column.
-
Now the rule has access to the latest maximum discount and will be able to "see" when it changes. It is good practice to give it an Alias that we'll use to refer to it in the message, so enter
MaxDiscountin that field. To make sure the number will be displayed correctly in the UI, go to the Columns tab and cast it as a Percent. -
Next, navigate back to the error message we wrote previously by heading to the Rule panel and clicking Events. When the dialog opens, find the Save row and click Rule Event Detail. The validation we implemented is shown in the Validations panel. Click to edit it.
-
Finally, in the Message field, replace the hard-coded
10%with{{ MaxDiscount }}. Surrounding the alias with the double curly brackets will make App Builder apply dynamic substitution to show the current maximum discount instead of a fixed, unchangeable value.
Further learning
This concludes this deep dive into the details of App Builder's business layer. See Appendix A for a closer look at the data layer, or Appendix C for the UI layer.