Users and groups in Jitterbit App Builder
Overview
App Builder's security model is built around the concept of users and groups, both of which are detailed on this page. Users provide the basis for authentication, while groups provide the basis for authorization.
Anyone who accesses an App Builder application does so as a user, whether they've signed in or are browsing anonymously. What a user can see and do depends on the privileges granted to the groups they belong to. App Builder ships with several default users and groups. These are managed by the site administrator, so they remain intact across upgrades. Administrators can also create additional users and groups as their organization requires.
Learn about users and groups in the sections below:
-
Users: Learn the two ways a user can authenticate, then how to view and manage a user's attributes. See a list of App Builder's default users, followed by an overview of user passwords and how to reset the administrator's password if access is lost.
-
Groups: Learn how groups grant privileges to their members, then how to view a group's attributes and permissions. See a list of App Builder's default groups, followed by the steps for creating a custom group, granting or revoking a role, granting a group access to a new application or data source, and assigning a user to a group.
-
Application Groups: Learn how application groups differ from regular groups, including their attributes and how they're managed through the App Workbench rather than the IDE. Includes the steps for creating an application group and assigning users to one.
Users
Anyone who accesses an App Builder application does so as a user, whether they've signed in or are browsing anonymously. App Builder authenticates users in one of two ways: internally, using a user name and password validated against App Builder's own local credential store, or externally, by delegating authentication to another system, such as single sign-on (SSO), Windows integrated authentication, or Active Directory. See User authentication methods for a comparison of every method App Builder supports.
To view or manage a user's attributes, go to the IDE, then click User Management in the Runtime panel. This opens the Users page, with three panels: Users, which lists every user account; Membership, which shows the groups the selected user belongs to; and Identities, which lists the external identity records mapped to the selected user.
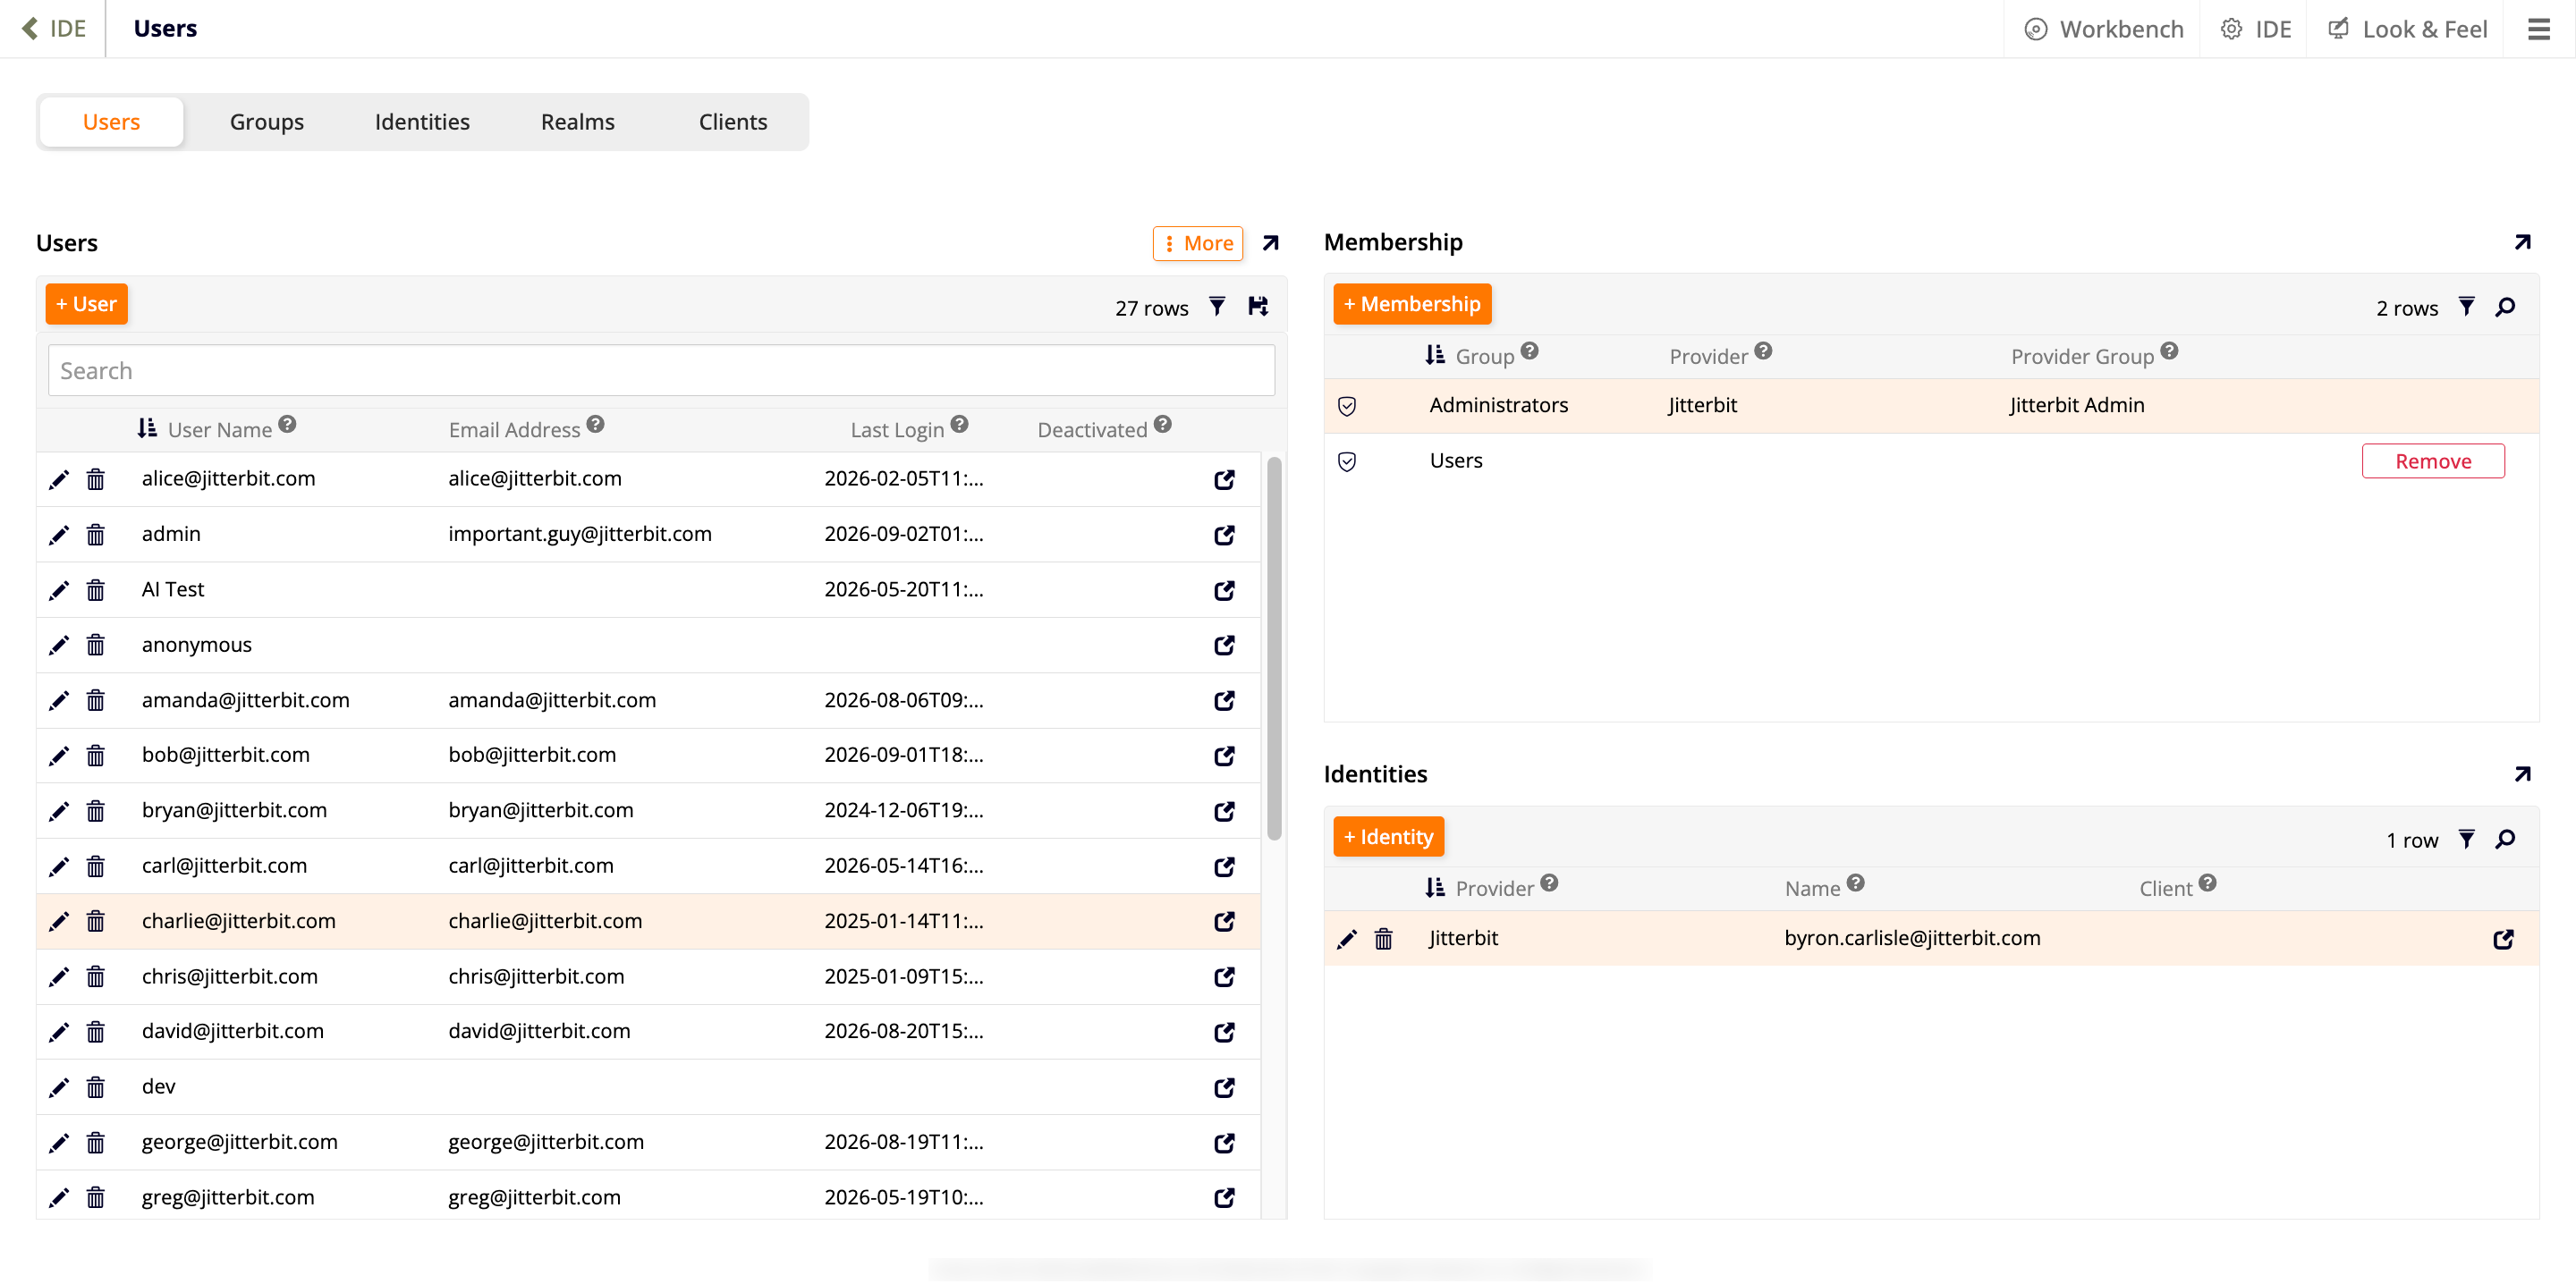
To view a specific user's attributes, click the details icon at the end of its row in the Users panel. This opens the User dialog, which organizes the user's attributes into five accordions:
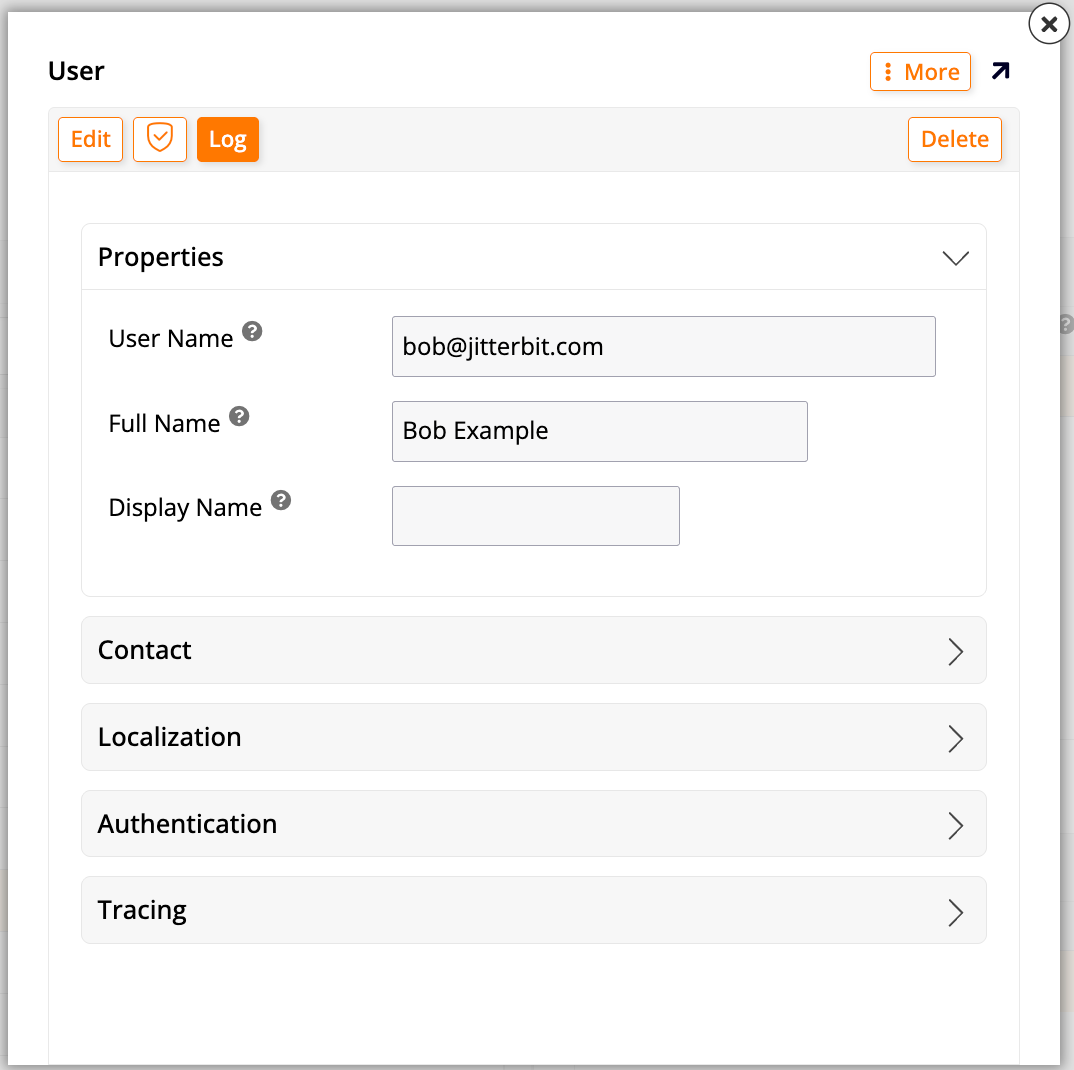
-
Properties:
- User Name: The user's login name, which must be unique across the system.
- Full Name: The user's full name.
- Display Name: The user's preferred name.
-
Contact:
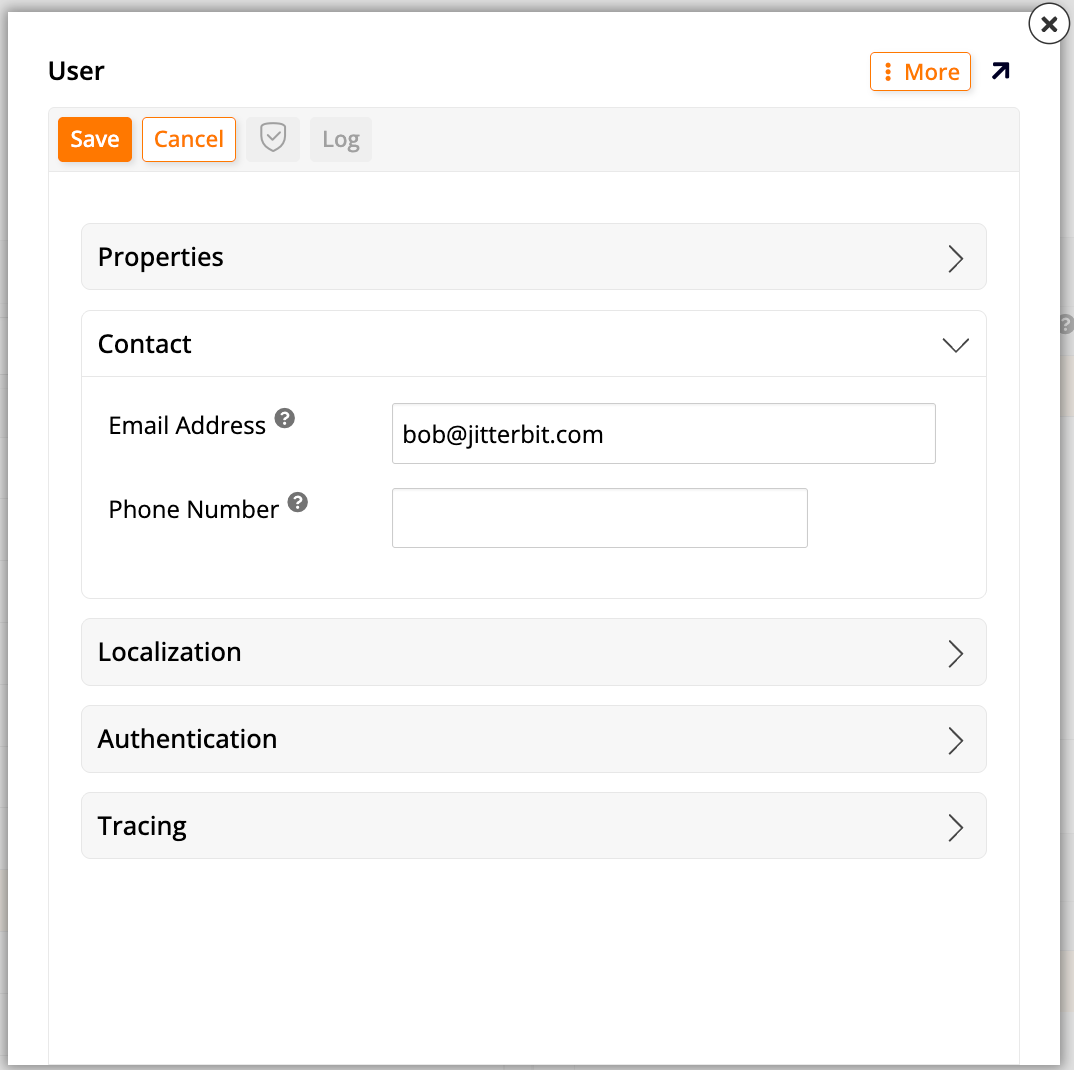
- Email Address: The user's email address, which may be used for sending email notifications.
- Phone Number: The user's phone number, which may be used for sending text notifications.
-
Localization:
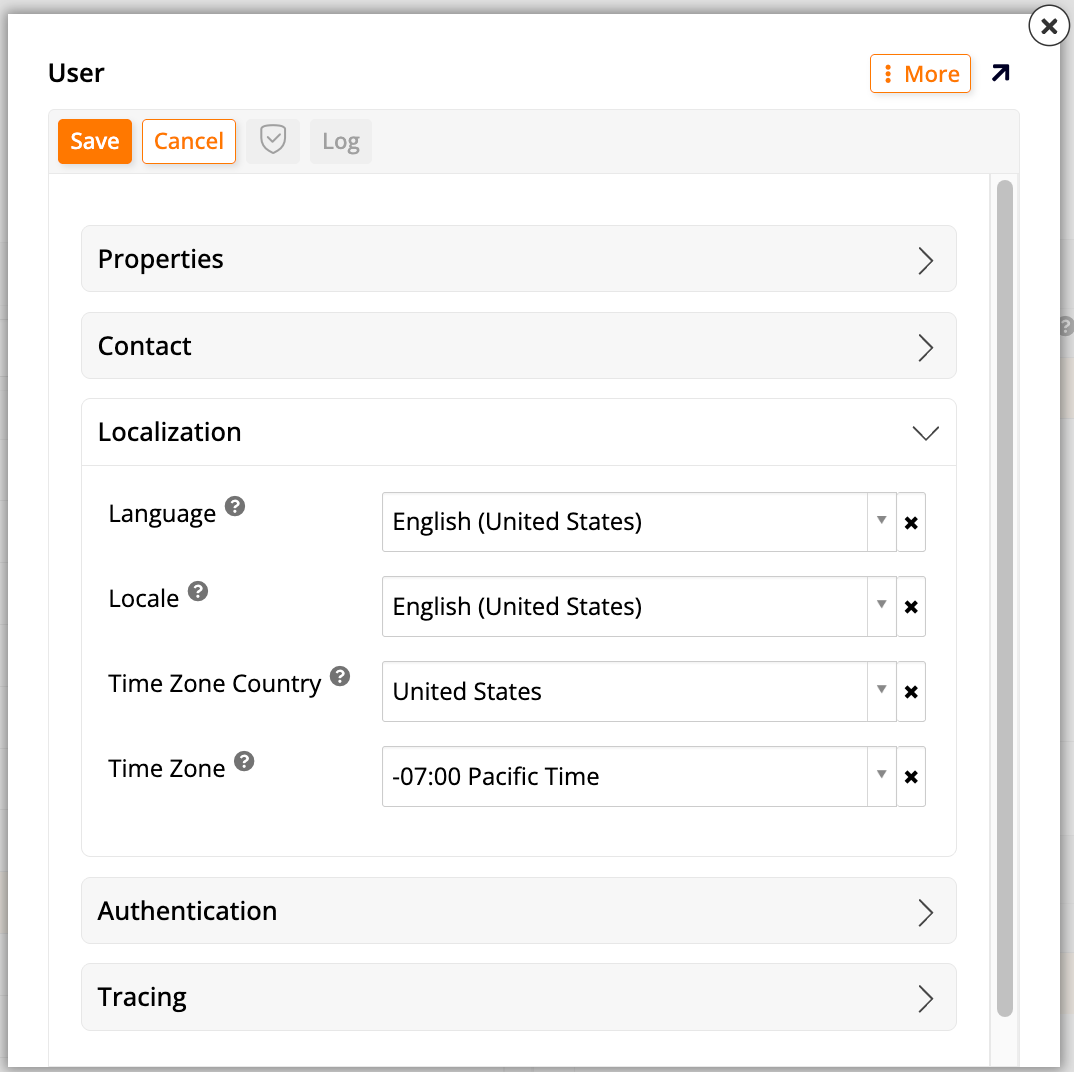
- Language: The user's primary language. Translations are shown to the user in this language.
- Locale: Determines how dates and numeric values are formatted for the user.
- Time Zone Country: The country associated with the user's time zone.
- Time Zone: The user's time zone. Dates are displayed in this time zone where applicable.
-
Authentication:
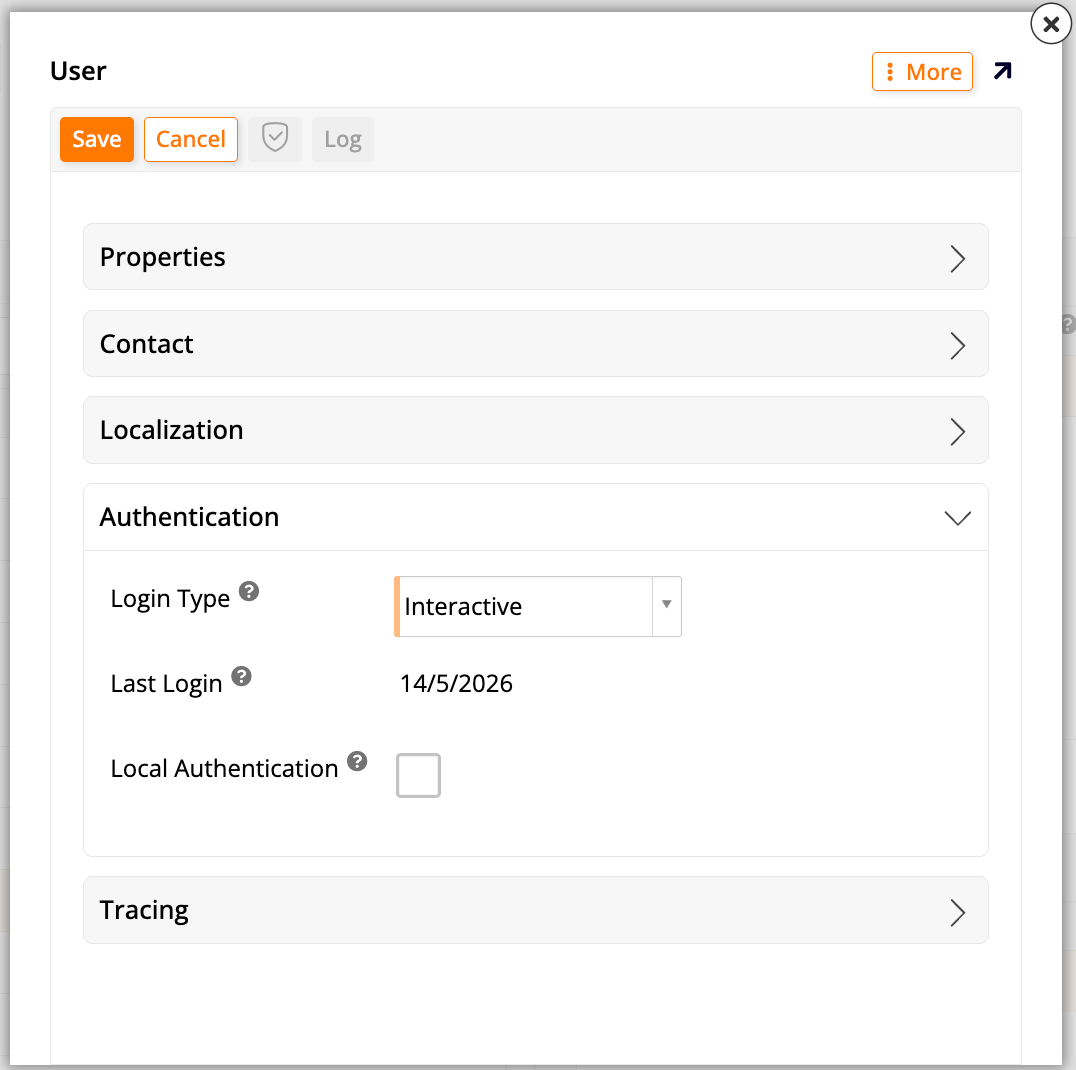
- Login Type: Determines whether the account can sign in interactively, or only be used by the system to execute a scheduled event, as with the Service Accounts group.
- Last Login: The date and time the user last logged in. Read-only.
- Local Authentication (checkbox): Indicates whether the user can log in using a password associated with the account. This option is typically disabled for non-interactive accounts and for accounts that use single sign-on (SSO) instead.
- Change Password On Login (checkbox): Indicates whether the user must change their password the next time they sign in. This setting only applies to local authentication; it has no effect for users signing in through SSO. See Change password on logon for more information.
- Password: Presents two buttons:
- Set Password: Sets a password so the user can sign in with local authentication. If no password is set, the user must sign in through SSO instead.
- Remove Password: Prevents the user from signing in with local authentication. The user can still sign in through SSO.
-
Tracing:
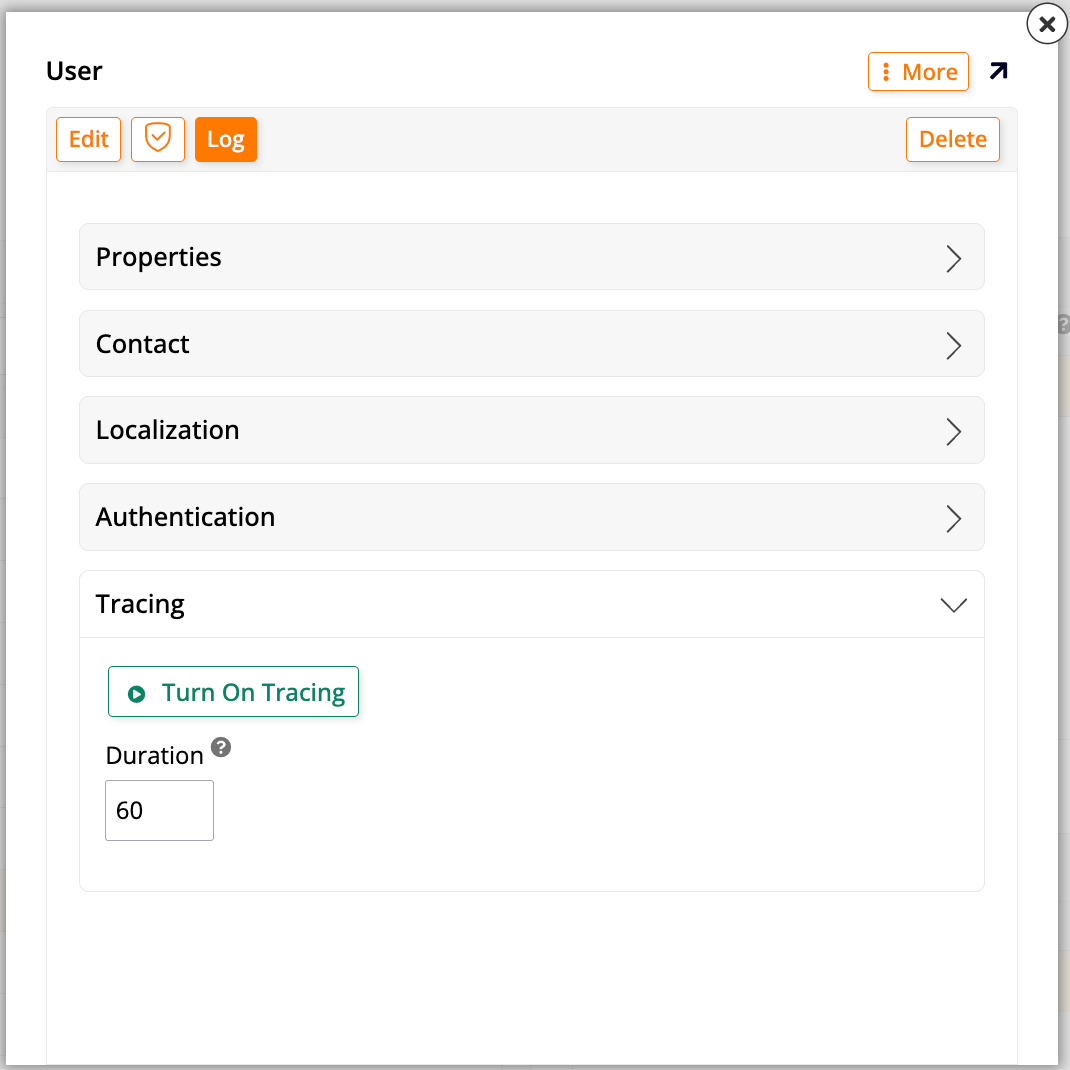
- Turn On Tracing: Starts a tracing session for the current user, capturing diagnostic information for troubleshooting.
- Duration: The number of minutes tracing stays enabled once started.
Default users
App Builder ships with the following default users:
| User | Name | Description |
|---|---|---|
admin |
System Administrator | The system administrator has access to all applications shipped with App Builder. In addition, the administrator user is granted privileges to any newly created data sources or applications through its membership in the Administrators security group. See Default groups for more information. |
anonymous |
Anonymous Users | The anonymous user account is the principal assigned to any unauthenticated request. The anonymous user is not a member of any security groups by default and therefore does not have access to any applications shipped with App Builder. See Anonymous access for more information. |
service |
Local Service User | The service account is the default user account used to execute scheduled events. |
Note
The built-in user accounts cannot be deleted or modified. Any changes to the built-in users will be reverted during an App Builder upgrade.
Passwords
App Builder supports forms-based local authentication using a local credential store: the website visitor provides a user name and password, and after App Builder verifies the credentials, it signs the user into the system. This is the same password that's set or removed using the Password field under Authentication.
App Builder stores these passwords using industry-standard security practices, hashing them with PBKDF2 using the following parameters:
| Parameter | Value |
|---|---|
| Hash algorithm | SHA-256 |
| Salt length | 128 bits |
| Iterations | 10,000 |
| Key length | 128 bits |
Reset the administrator's password
Password reset lets a user request a new password by email, but that self-service flow depends on SMTP and anonymous access already being configured, and requires the user to still be able to reach the login screen. If the administrator's password is unknown and none of that is true, configure a new one directly in appsettings.json, applied the next time App Builder starts:
{
  "Security": {
    "Administrator": {
      "Password": "s3cr3t"
    }
  }
}
Setting the Security__Administrator__Password environment variable has the same effect. See Configuration for more information.
Groups
Groups provide the basis for authorization in App Builder: rather than granting privileges to users individually, administrators grant privileges to a group, and every member inherits them. A user can belong to more than one group. If a data source uses roles-based authorization, its groups must also be granted membership in one or more of the data source's roles. See Roles for more information about roles. App Builder supports both groups, defined at the global environment level, and application groups, defined at the individual application level; see Application groups for the latter.
Groups can be organized however best fits your organization. For example, you might create groups based on job titles (such as Accounts Payable or Accounts Receivable), departments (such as Finance or HR), or generic permission levels (such as Admin or Read-Only).
To view or manage groups, go to the IDE, then click User Management in the Runtime panel, then click Groups at the top left. This opens the Groups page, with three panels:
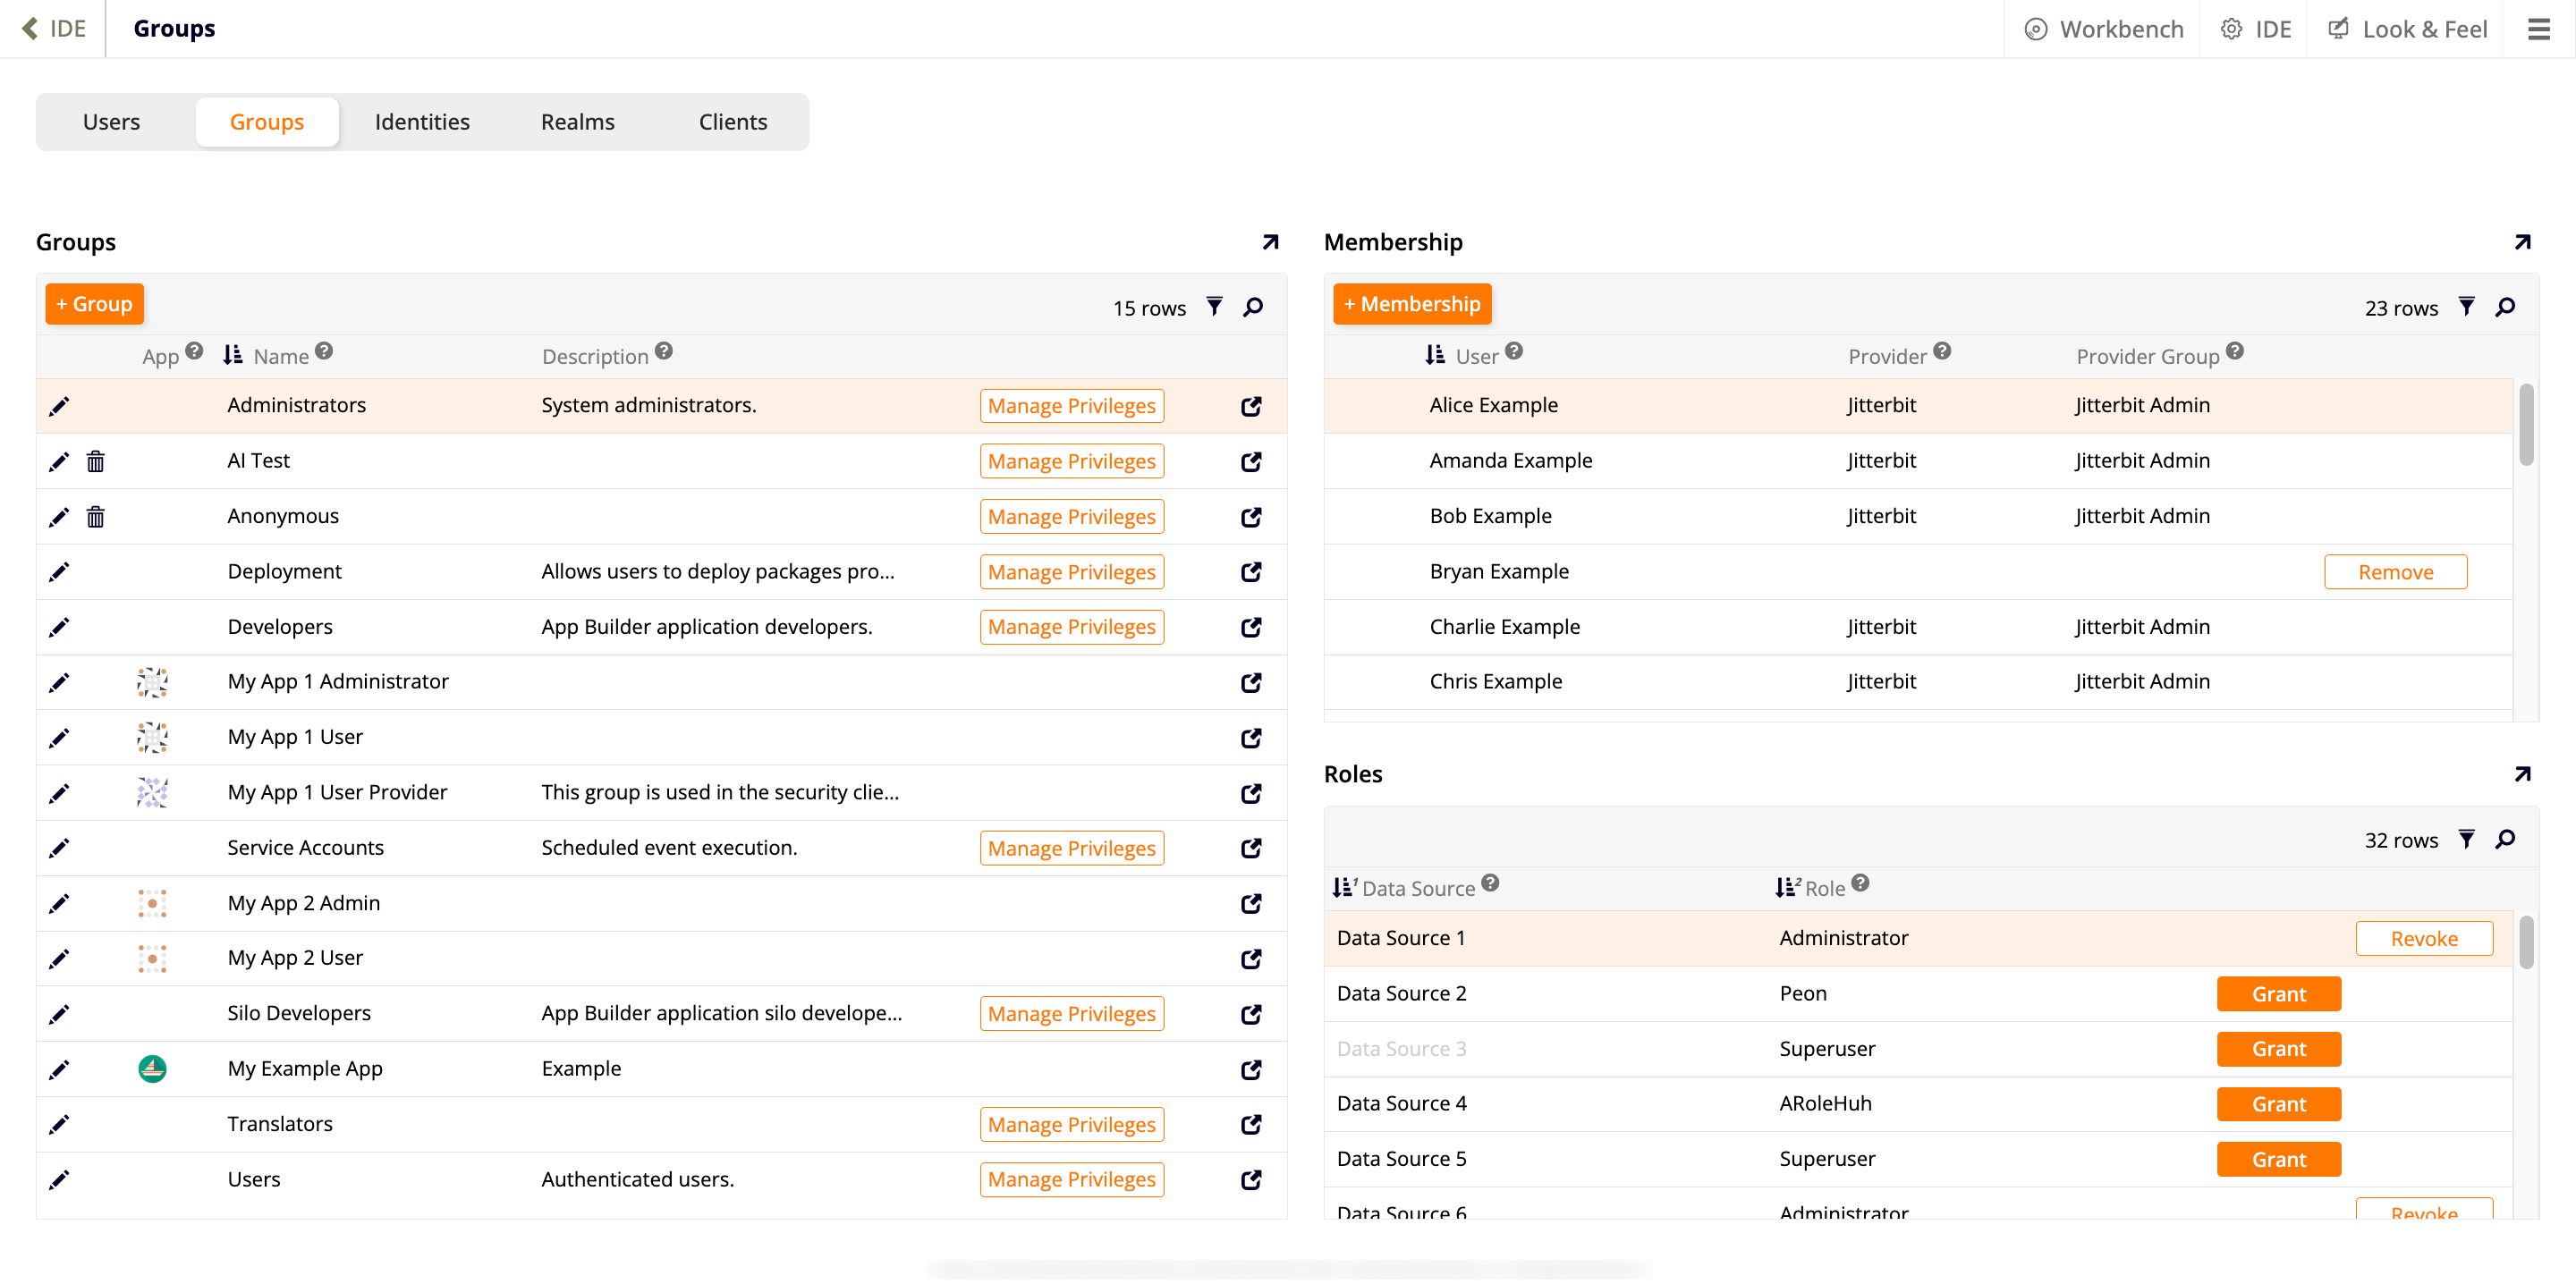
- Groups: Lists every group. Click + Group to add a new custom group (see Create a custom group for step-by-step instructions). The App column identifies the application an application group belongs to, and is blank for regular groups (see Application groups for more information).
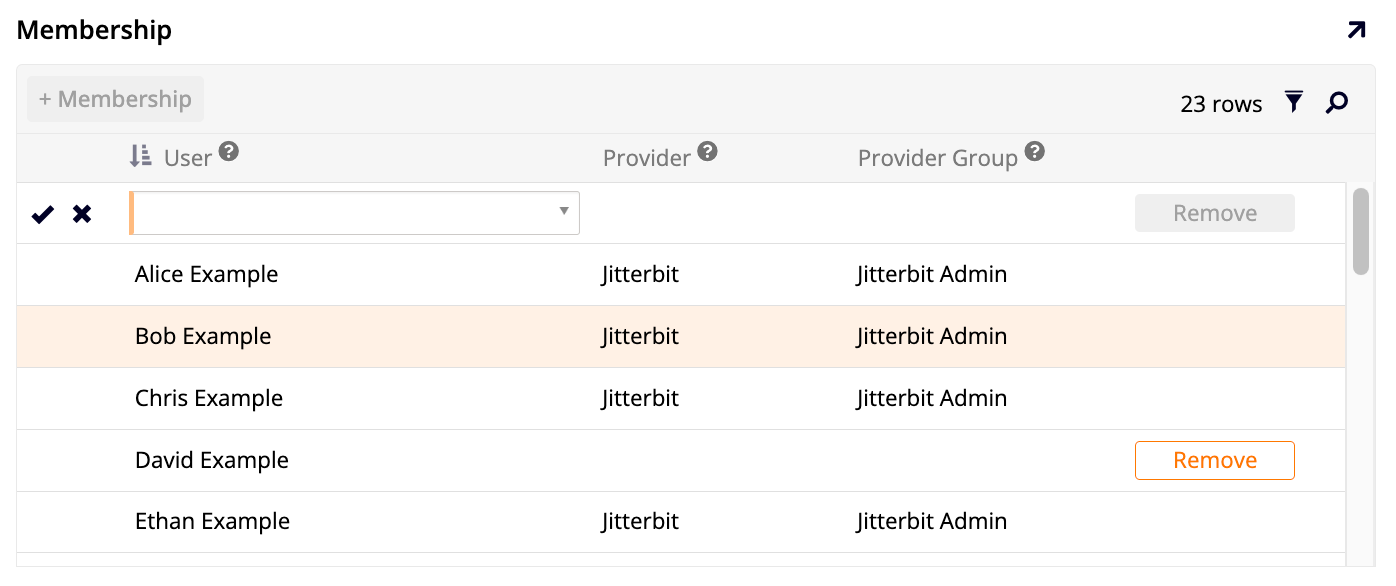
- Membership: Shows the users belonging to the selected group. Click + Membership to add a new member to the group (see Assign a user to a group for step-by-step instructions). If a member's group assignment came from an external identity provider, the Provider and Provider Group columns show that provider and its external group name (see Provider security groups for more information).
- Roles: Lists the roles currently granted to the selected group, and lets you grant or revoke them directly. This is the same data shown in the Privileges popup's Roles pane (see Grant or revoke a role for a group for step-by-step instructions).
To view a specific group's attributes, click the details icon at the end of its row in the Groups panel. This opens the Group dialog, which has the following attributes:
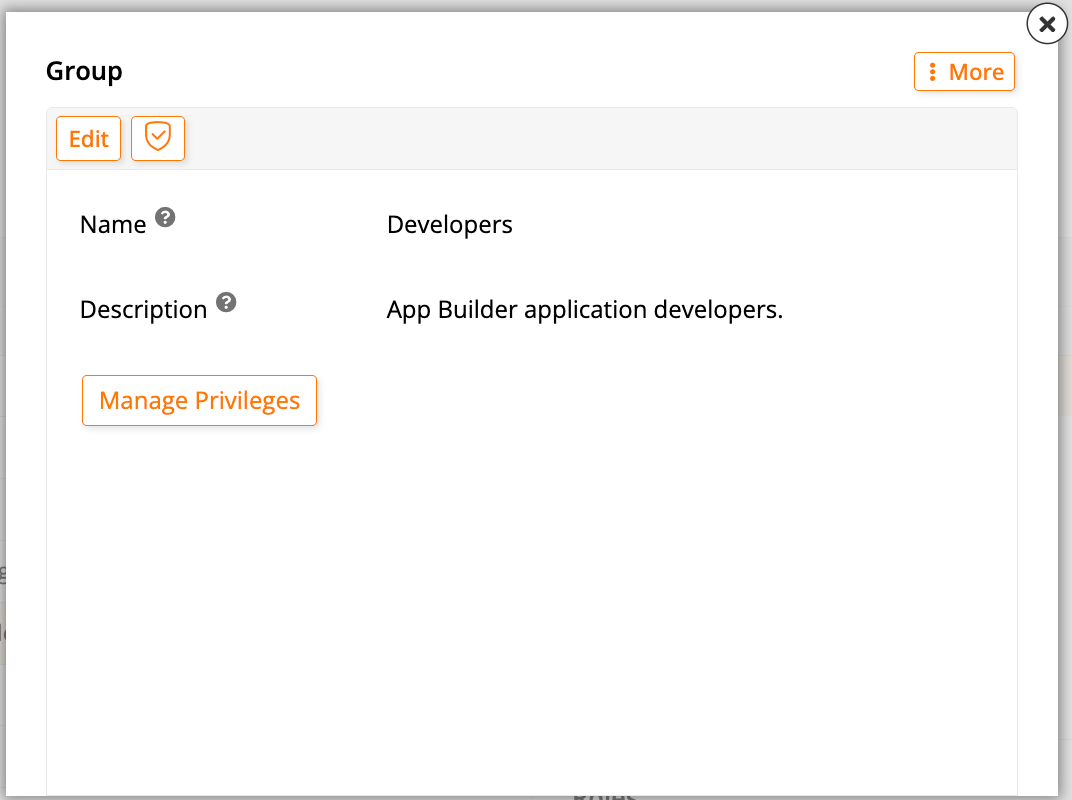
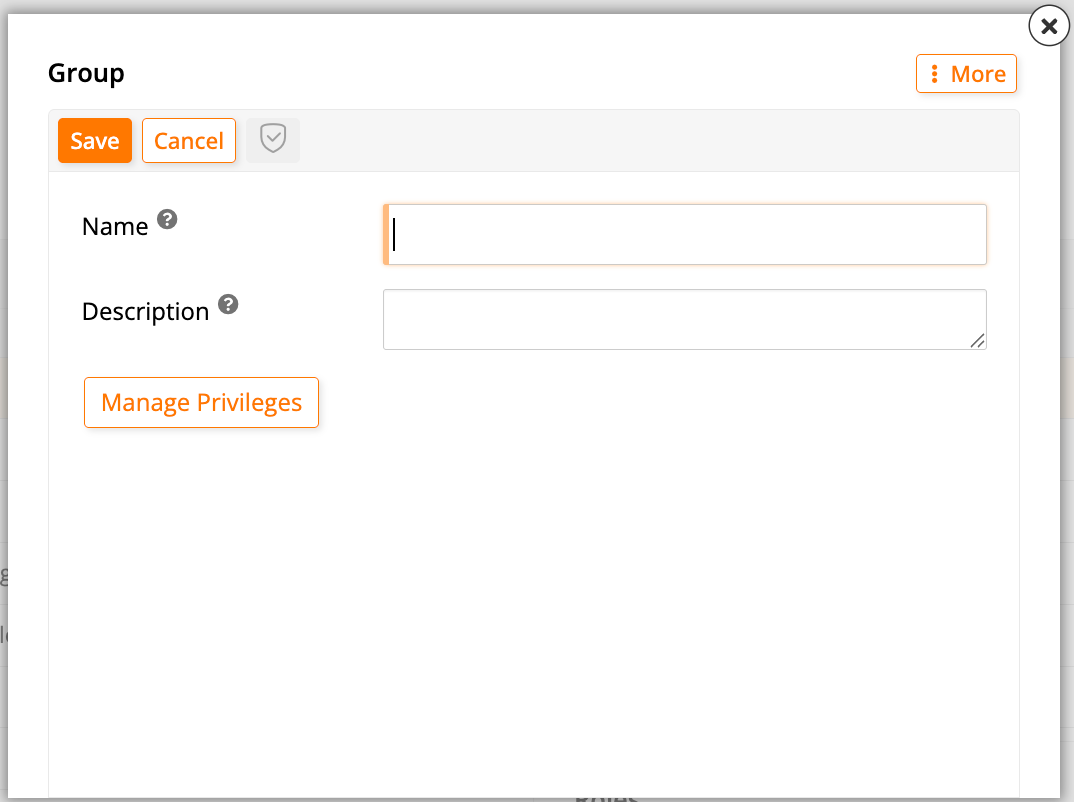
- Name: The group's display name.
- Description: An informational description displayed beneath the group name in selection lists.
Both the Groups panel and the Group dialog have a Manage Privileges button, which opens the same Privileges popup described in Grant or revoke a role for a group. The dialog's icon opens the Audit Full dialog, showing the group's Audit Lite and Full Audit history.
The Group dialog's More menu has three options:
-
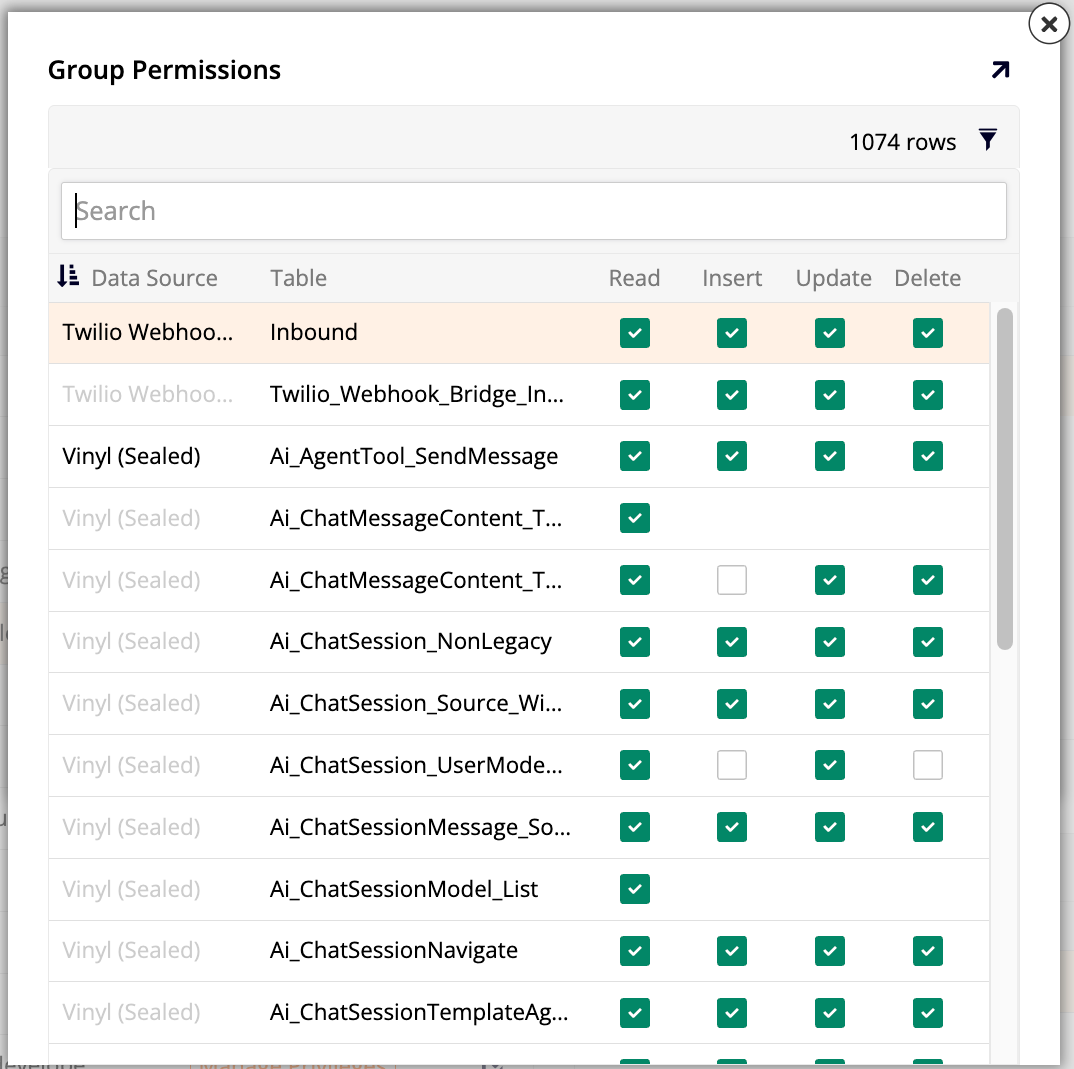
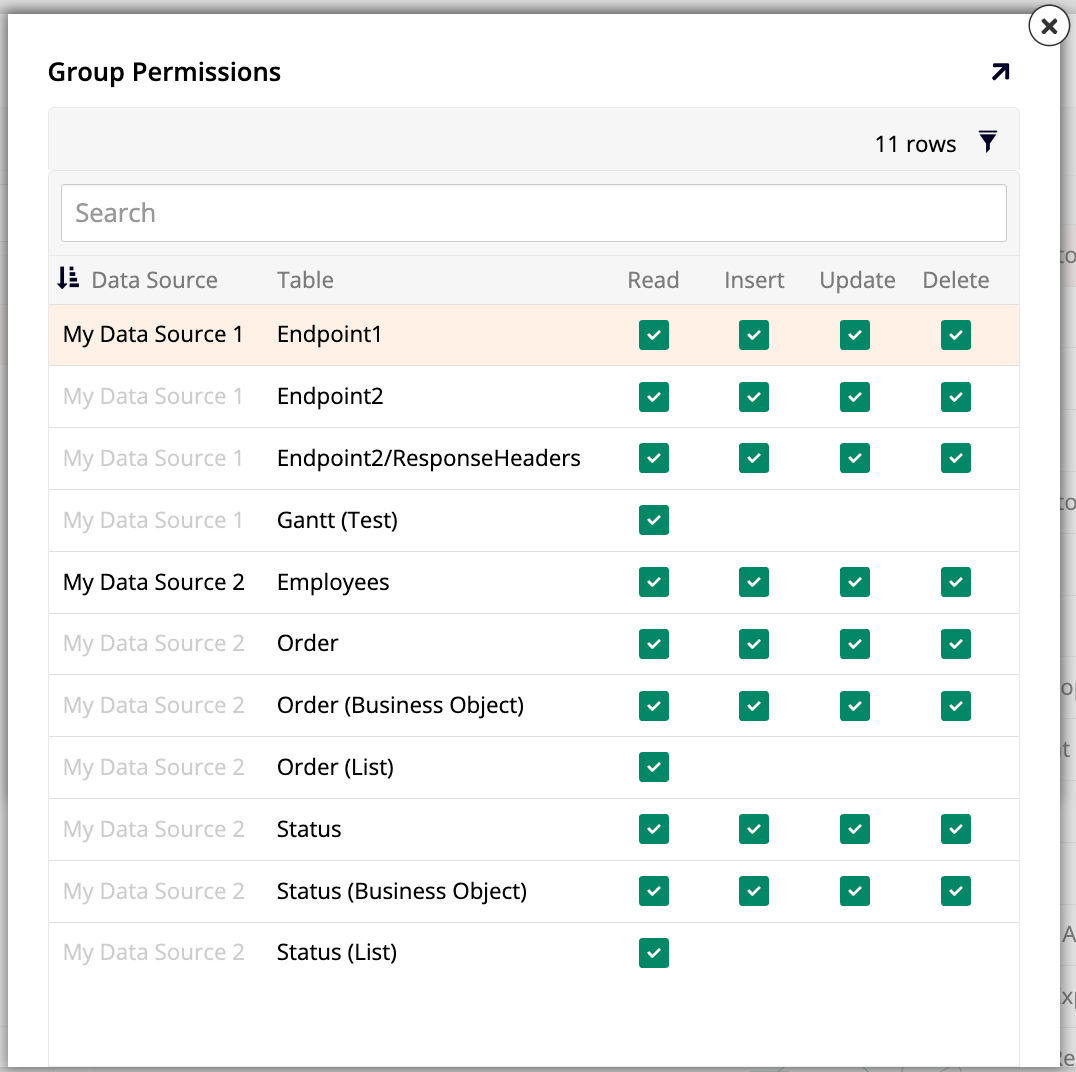
View Permissions: Opens the Group Permissions dialog, listing every table the group can access across all data sources, along with its Read, Insert, Update, and Delete permissions.
-
Edge Case: Opens the Edge Case dialog, which has the following attributes:
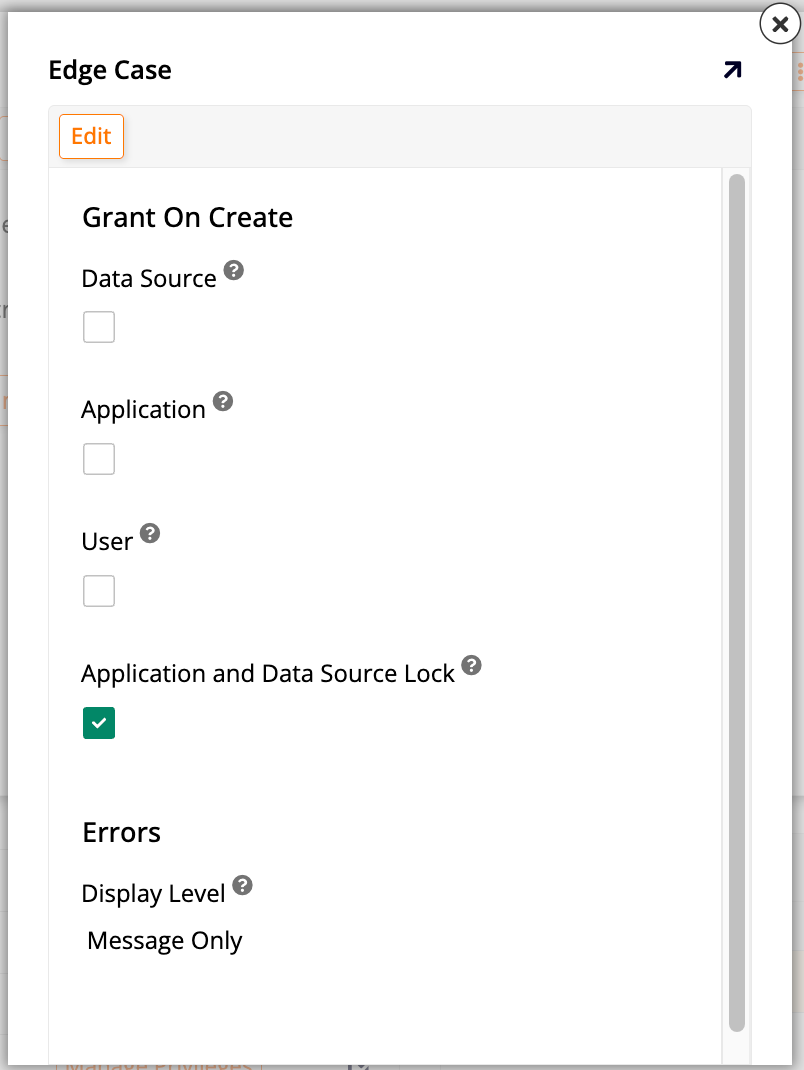
The following attributes appear under Grant On Create:
- Data Source: Grants the group privilege to any newly created data source. This is typically reserved for the Administrators group.
- Application: Grants the group privilege to any newly created application. This is typically reserved for the Administrators group.
- User: Automatically adds any newly created user to the group. This is typically reserved for the Users group.
- Application and Data Source Lock: Automatically grants the group access to an application or data source while it's locked during a guided maintenance workflow. This is typically reserved for groups that need to keep working during maintenance, such as developers and QA testers.
By default, only the Administrators group has the Application and Data Source options enabled.
The following attribute appears under Errors:
-
Display Level: This menu determines how much detail members of the group see in error messages:
- Detailed: Shows the specific error message along with its stack trace.
- Message Only: Shows the specific error message, without the stack trace.
- Generic: Shows a generic error message, hiding the specific error.
-
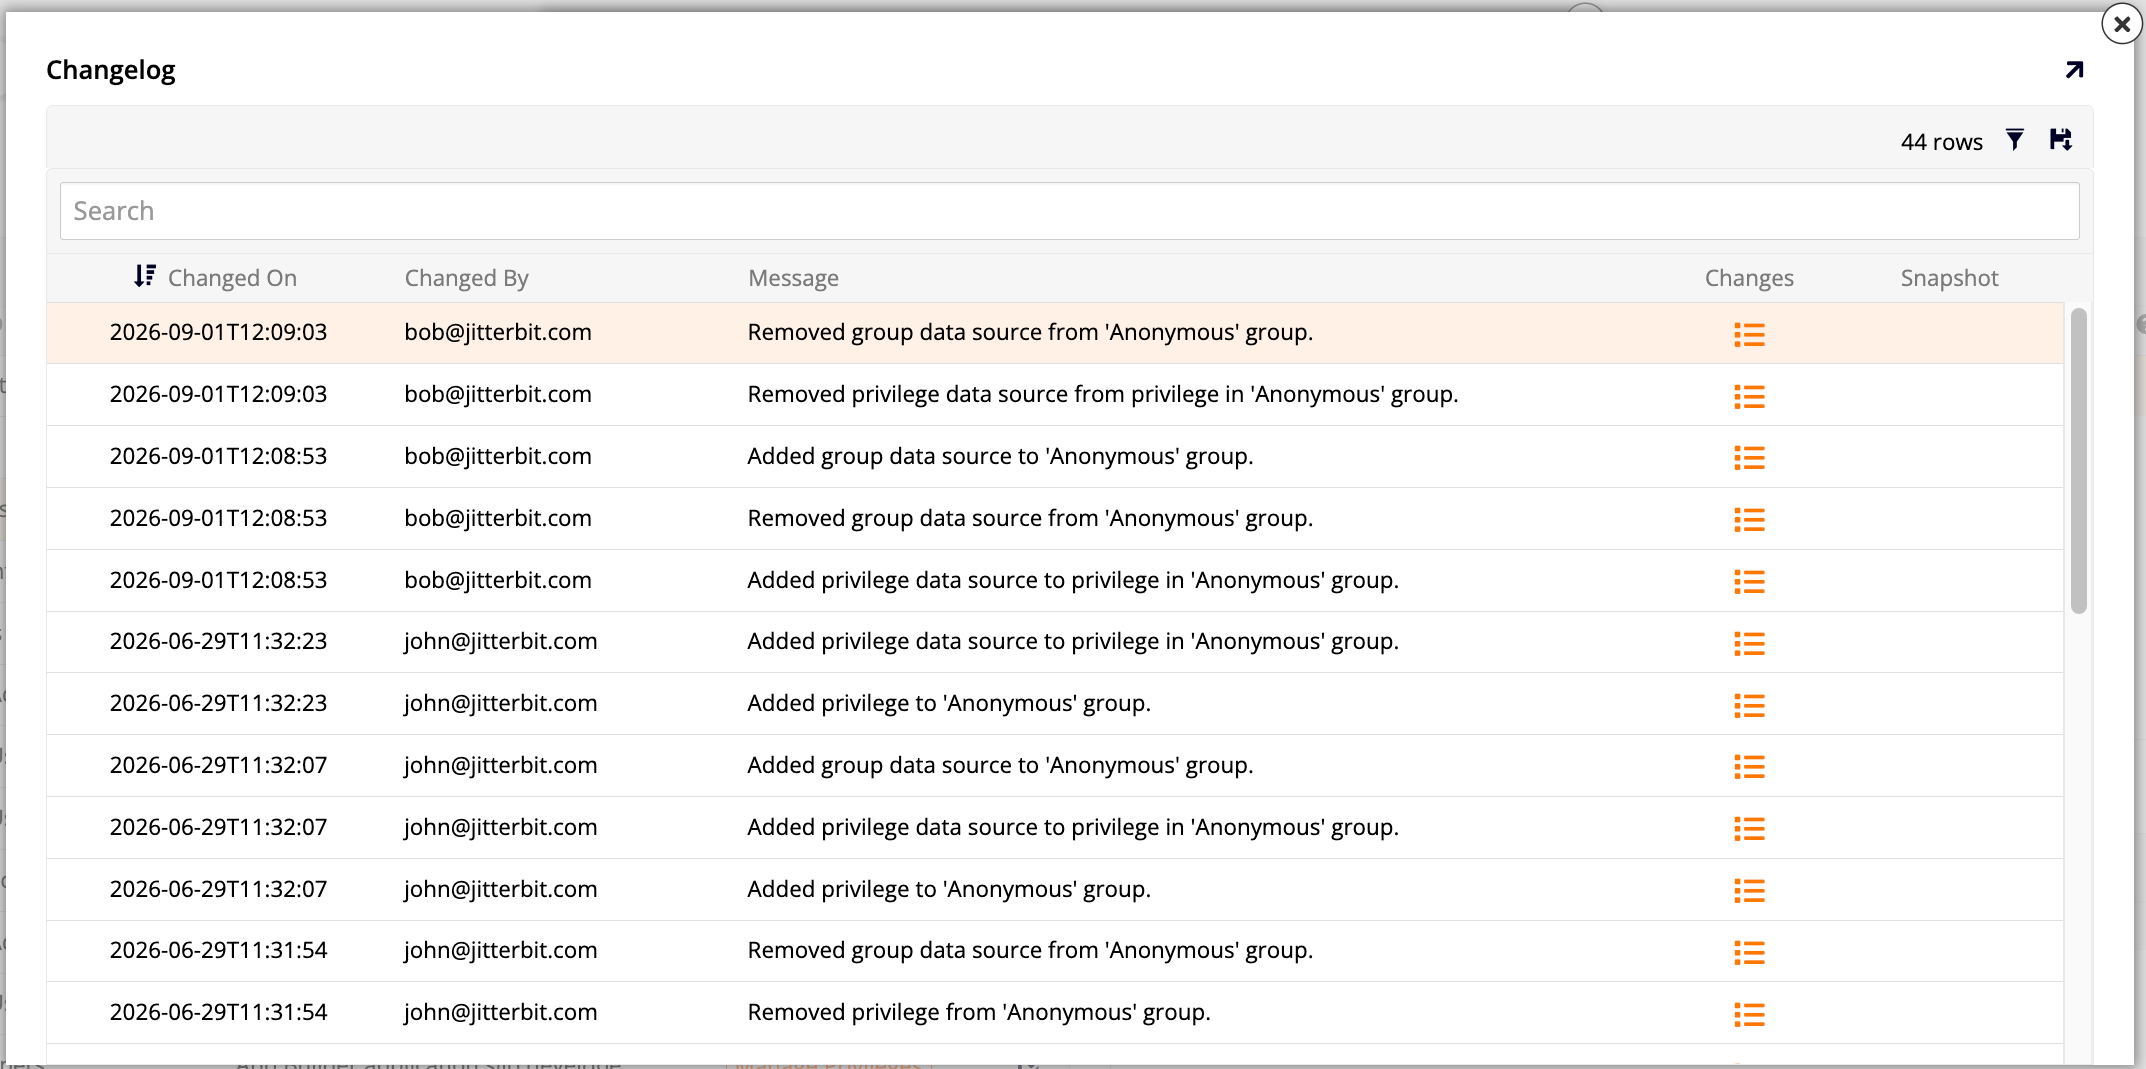
Changelog: Opens the Changelog dialog, showing a history of changes made to the group. See Changelogs for more information.
Default groups
App Builder ships with the following default groups:
| Group | Description |
|---|---|
| Administrators | Users assigned to the Administrators group can access any applications or data sources shipped with App Builder. In addition, members are automatically granted access to new applications and data sources as they're created, though role permissions for those applications and data sources must still be granted manually. |
| Deployment | Grants the Deployment role. Use this group instead of a custom group for the account a target environment authenticates as during a one-click deployment, since that account only needs to receive deployed releases. |
| Developers | Grants the Developer role, letting members build and edit pages, tables, rules, and other components in any application, but not create or delete applications or data sources. Access to view an application's pages or a data source's results isn't included by default and must be granted separately. Use this group instead of a custom group for developers who need broad build access without administrative privileges. |
| Service Accounts | Users assigned to the Service Accounts group can execute App Builder's scheduled events. This security group can be granted privileges and permissions to execute scheduled events in other data sources as well. |
| Silo Developers | Restricts a developer's access to a defined set of applications and data sources. As with Developers, viewing an authorized application's pages or a data source's results isn't included by default and must be granted separately. Use this group instead of Developers when a developer's access should be limited to specific applications. See Developer silos for configuration steps. |
| Translators | Grants the Translators role. Members can edit translation values on the Language Translations page without requiring developer-level access to the IDE. Use this group instead of a custom group for translators who only need to manage translations. See Translations for more information. |
| Users | Members of the Users security group are granted the minimum set of privileges required to run an App Builder application. However, they don't have access to any specific App Builder applications on a default install. New users are added to the Users group as they are created. |
Note
The built-in security groups cannot be deleted or modified. Any changes to the built-in security groups will be reverted during an App Builder upgrade.
Create a custom group
To create a new custom group, follow these steps:
- Select IDE > User Management.
- Select the Groups tab.
-
Click + Group. The Group dialog opens.
-
Enter a Name and, optionally, a Description for the group.
- Click Save, then close the popup.
Grant or revoke a role for a group
If a group already has access to an application or data source, follow these steps to grant or revoke a role for it. For example, the Audit role isn't granted to any default group by default; you might grant it to the Developers or Users group so members can view the full audit history for records.
- Select IDE > User Management.
- Select the Groups tab.
- Locate the group you want to modify in the Groups panel. For example, Developers.
- Click the group's Manage Privileges button.
- Locate the application or data source in the Privileges panel and select it.
- Locate the role you need to add or remove in the Roles panel, and click Grant or Revoke as needed.
Warning
Revoking a group's only permissioned role can remove its members' access to the application entirely, and granting a role's first permission does the same for every group that doesn't have a permissioned role yet. See How roles affect application access before revoking or granting a role.
Grant a group access to an application or data source
If a group doesn't yet have access to an application or data source, follow these steps to grant it:
- Follow steps 1-4 in Grant or revoke a role for a group to open the group's Manage Privileges popup.
- Click Create in the Privileges panel. The Privilege dialog opens.
- In the Type field, select either Application or Data Source.
- Use the menu that appears to select the specific application or data source.
- Click Save. The roles available for that application or data source appear in the Roles panel.
- In the Roles panel, click Grant for each role you want to assign to the group.
Note
Except for the Administrators group, App Builder doesn't automatically grant a default group access to any application or data source. For example, members of the Developers group can build and edit pages, tables, and rules in any application by default, but can't view an application's pages as an end user, or view rule results, until an administrator grants that application or data source to the group using the steps above.
Assign a user to a group
To assign a user to a group, follow these steps:
- Select IDE > User Management.
- Select the Groups tab.
- Locate the group in the Groups panel and select it to populate the other panels with its details.
-
Click + Membership in the Membership panel.
-
Select a User to assign to the group.
- Click the checkmark icon to save.
Note
Since App Builder 4.65, anonymous users cannot be assigned to any of the default groups. Trying to add one results in the following message being displayed:
The changes could not be saved. The anonymous user cannot be added to the security group.
See Anonymous access for information on how to grant limited access to anonymous users.
Application groups
Application groups are a variant of security group scoped to a single application, rather than to the whole environment like Groups. Application groups are created and maintained by the application developer, primarily through the App Workbench, though managing group membership is done through the IDE, the same as for regular groups. Application groups ship automatically along with their application as part of an LP, and are therefore carried to upstream environments.
Application groups have the following attributes:
- Name: The group's display name.
- Description: An informational description displayed beneath the group name in selection lists.
- Application: The named application the security group belongs to.
You can also view application groups from IDE > User Management > Groups, alongside regular groups; use the App column to tell them apart. This lets an administrator review an application group's details without going through the App Workbench, though its Group dialog is more limited than a regular group's: it has no Manage Privileges button, and its More menu offers only View Permissions and Changelog, without Edge Case. This is because an application group's roles are granted directly in the App Workbench when the group is created, rather than through the generic privilege-granting flow described in Groups.
Create an application group
Create an application group when a group's privileges should be scoped to a single application, rather than granted separately to a regular group. To create one:
-
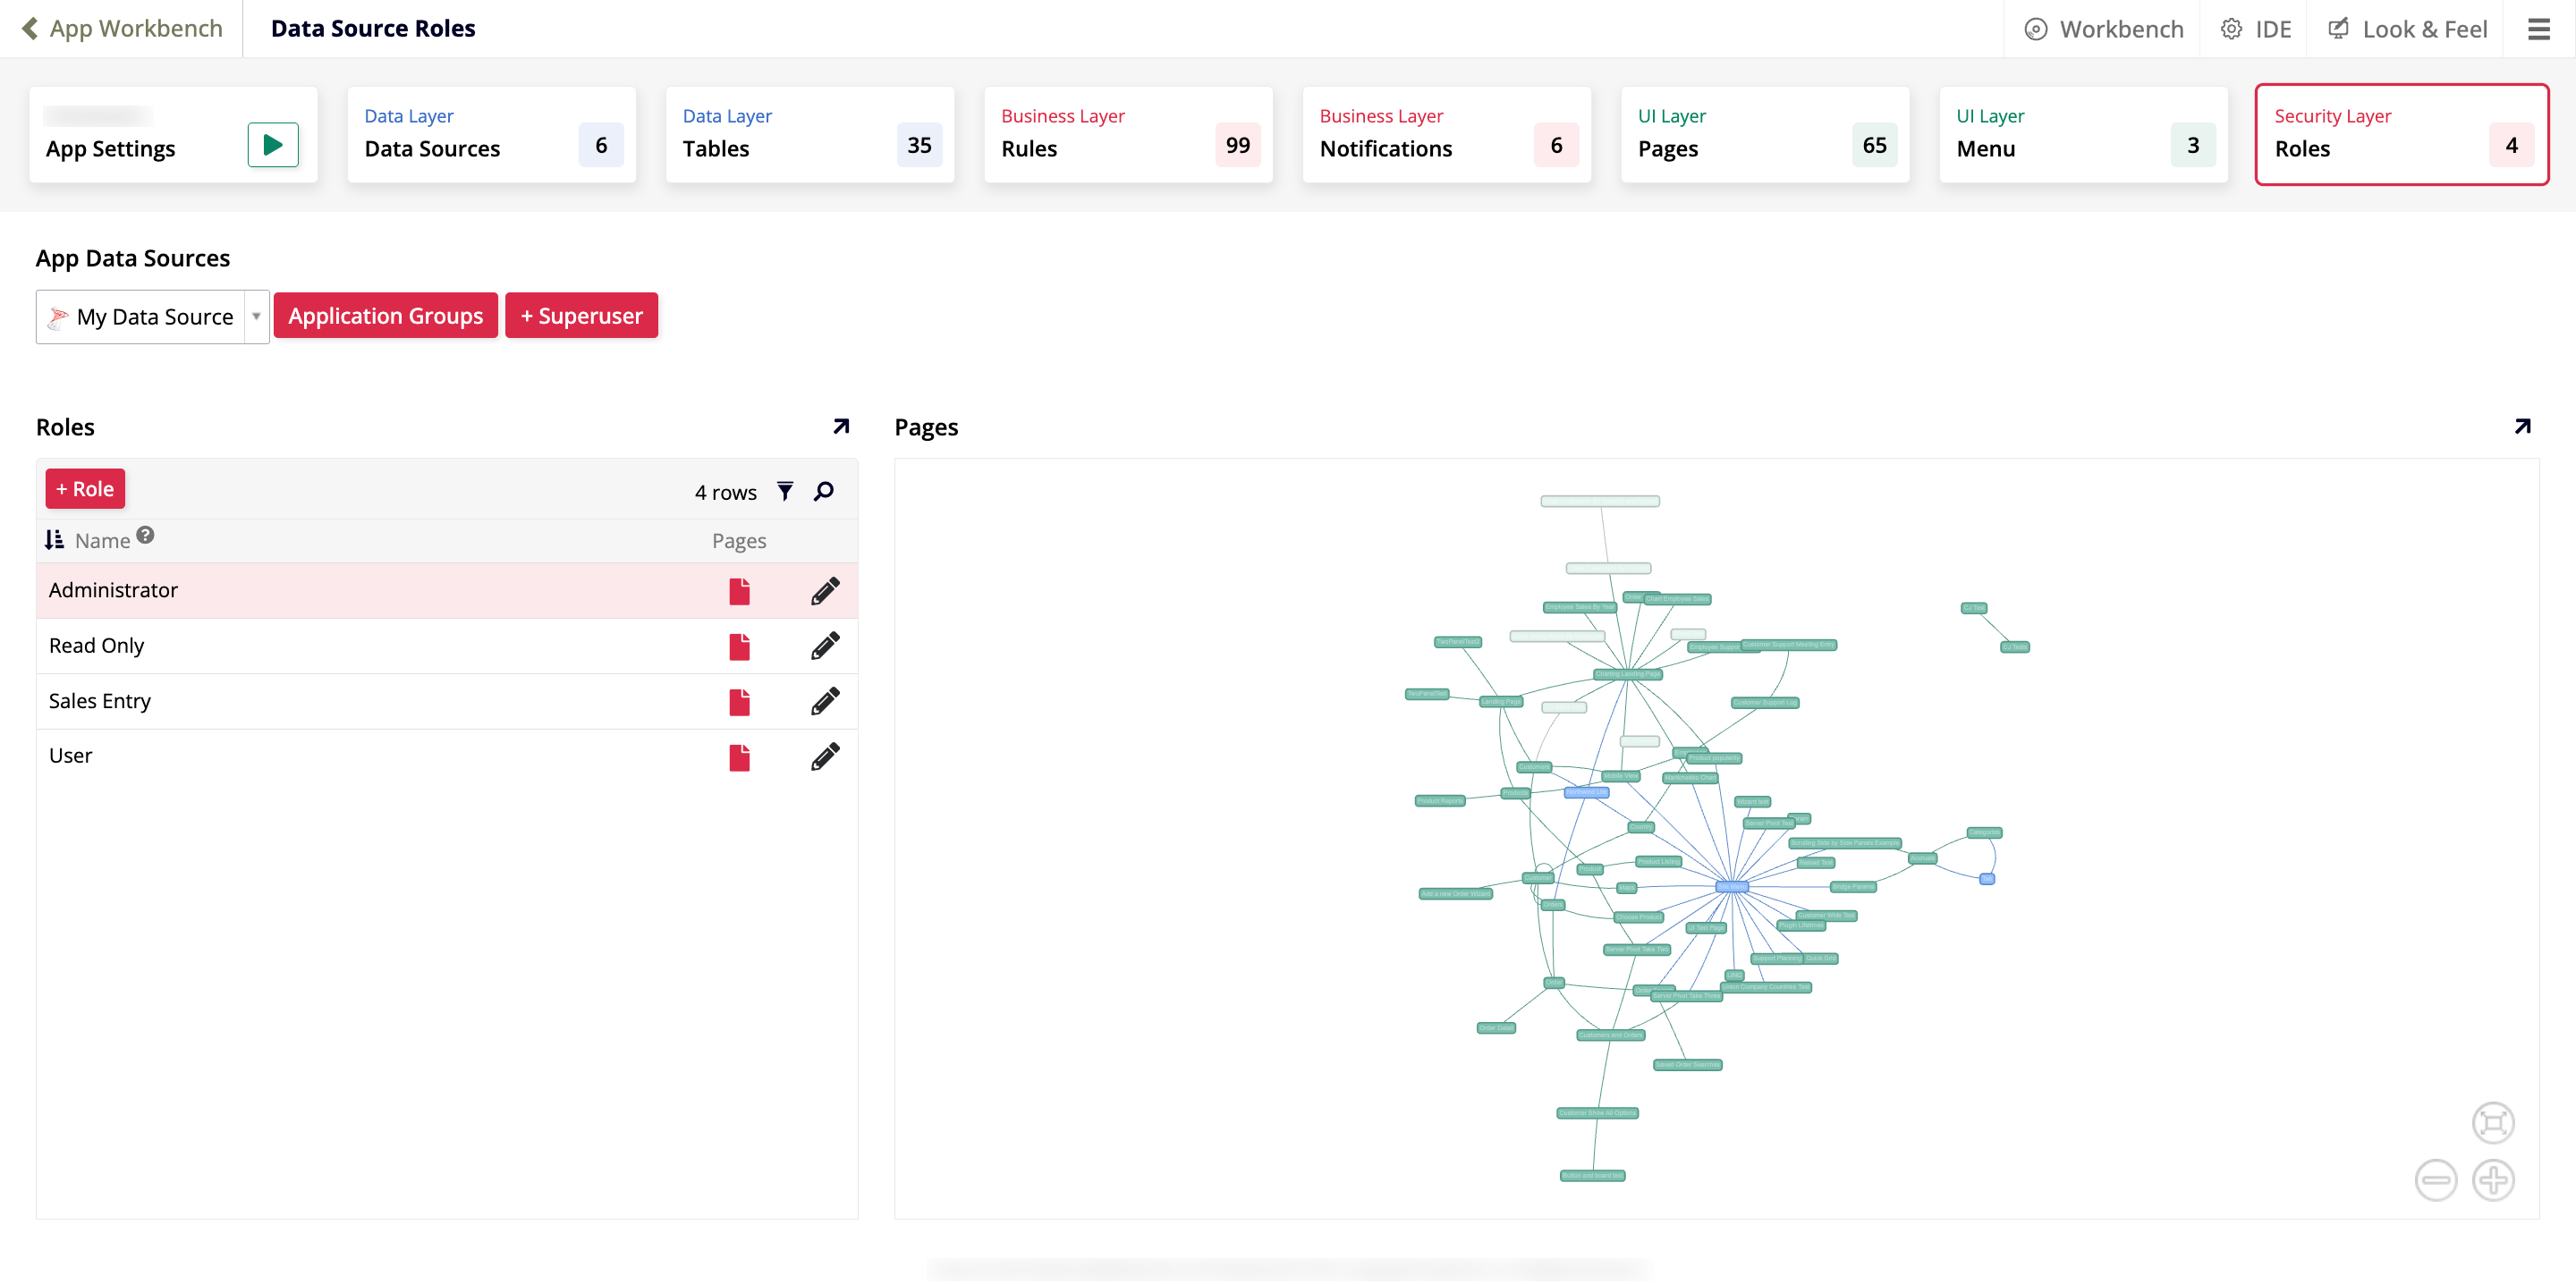
Select App Workbench, then click the Roles tile under Security Layer. This opens the Data Source Roles page.
-
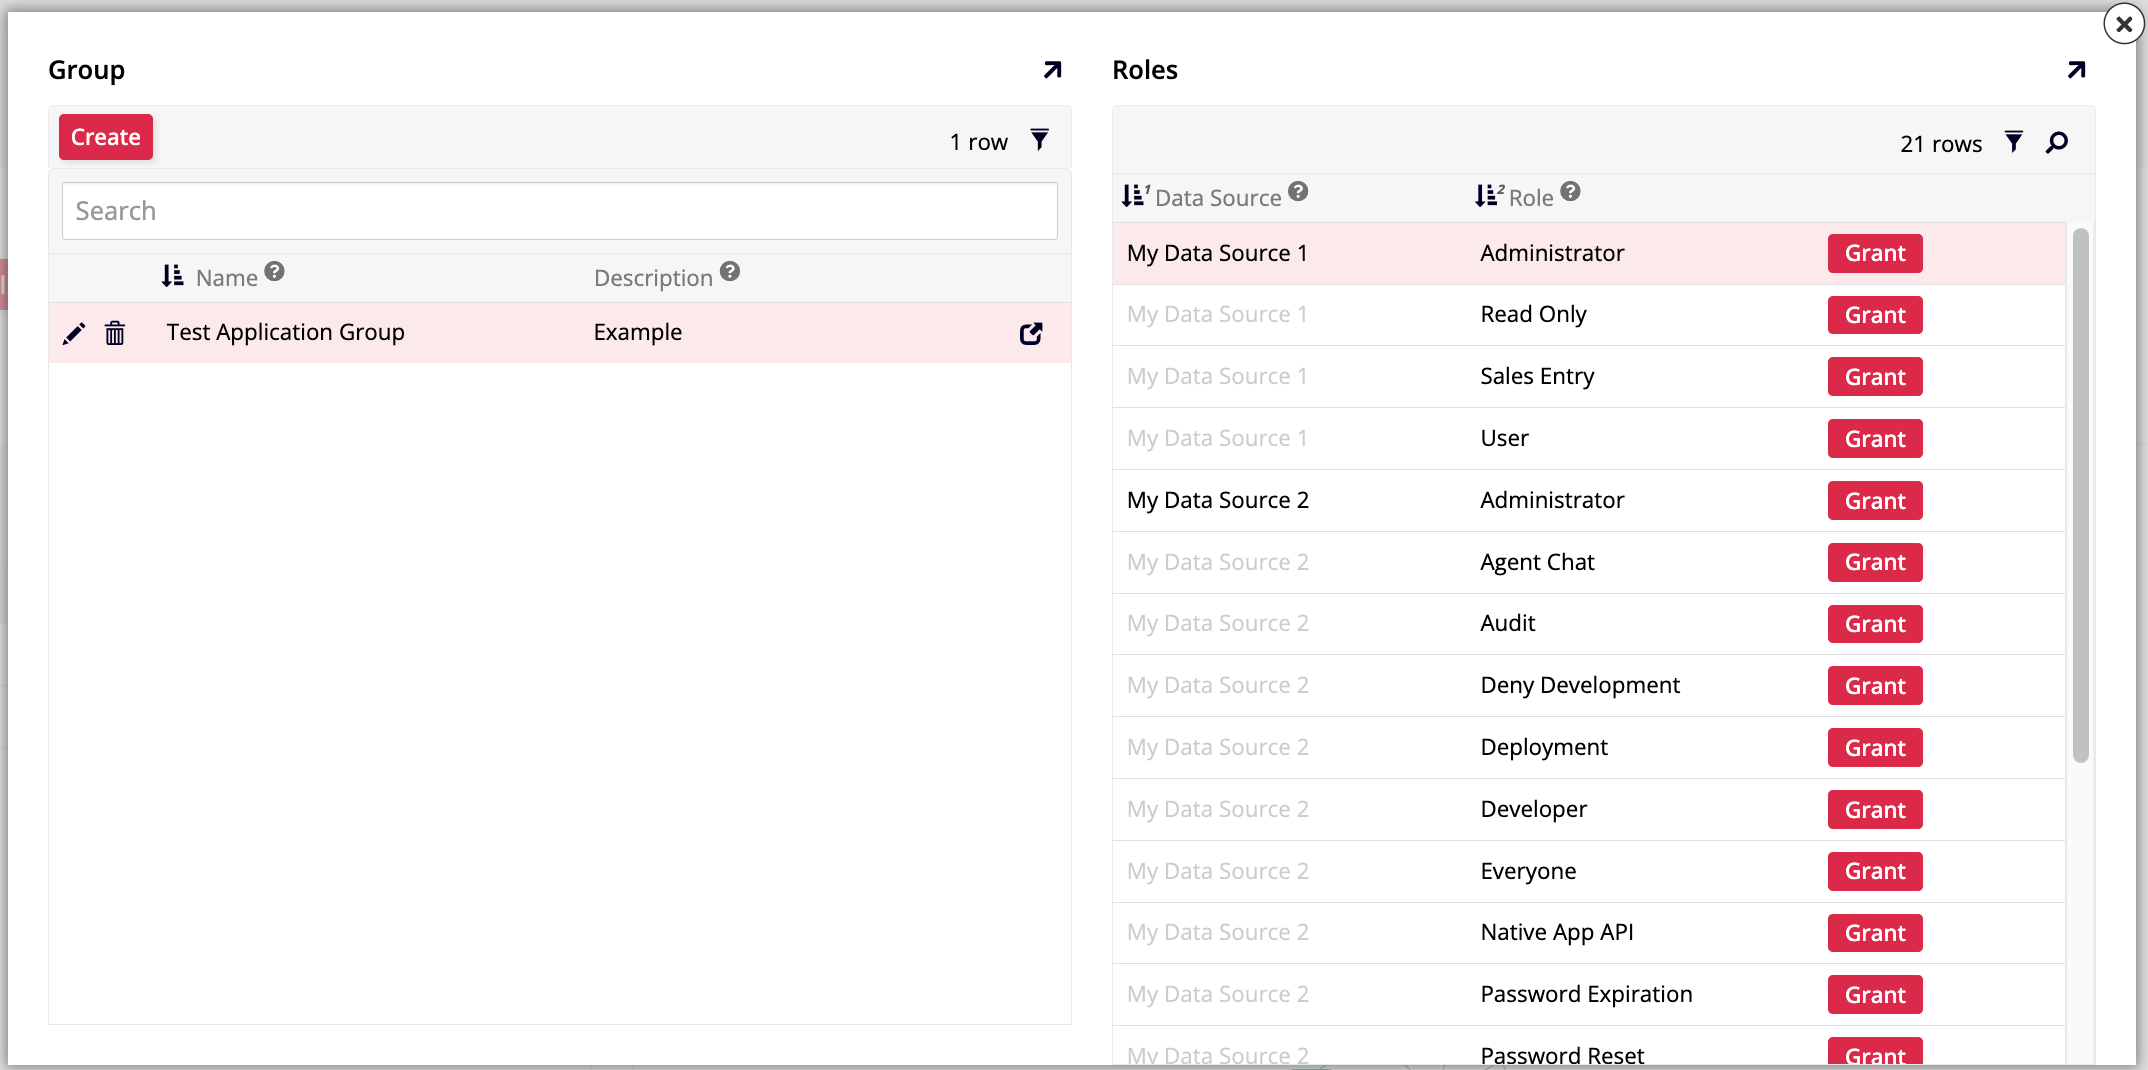
Click Application Groups. This opens the Application Groups dialog, with Group and Roles panels side by side.
-
Click Create in the Group panel.
- Enter a Name for the group, including the application name followed by the group's role type, for example
Global Imports Admin. - Enter a Description, for example
Administrative users. - Click the checkmark icon to save.
- In the Roles panel, review the available roles and click Grant for each one you want to add to the group, for example Administrator.
- Click the Open record icon for the application group. This opens its Group dialog.
-
Select More > View Permissions. The Group Permissions screen shows all the data source tables and objects that members of the group can access.
Assign users to an application group
Once an application group exists, add members to it from the Groups page, the same way you would for a regular group. To assign a user to an application group:
- Select IDE > User Management.
- Select the Groups tab.
- Locate the application group in the Groups panel, using the App column to find groups that belong to a specific application.
- Click + Membership in the Membership panel.
- Select a User to assign to the application group.
- Click the checkmark icon to save.