Roles in Jitterbit App Builder
Overview
A role is a named bundle of permissions defined on a data source: the ability to Read, Insert, Update, and Delete records in its tables and business objects. Roles are how App Builder grants permissions with precision, instead of giving every user with access to a data source the same, all-or-nothing level of access. See Data source authorization below for when App Builder actually requires a role, as opposed to relying on privilege alone.
Users don't receive roles directly. A security administrator grants a role to one or more groups, and every member of those groups inherits all the permissions the role includes. Groups organize users; roles organize permissions. A group also needs privilege to the data source before any role it's granted takes effect: privilege and roles answer two different questions: whether a group can reach a data source at all, and what it can do once there. See Privileges and permissions for the complete authorization model roles are part of.
A single role can combine several permissions to match how a group of users should work with the data. For example, a Contributor role might grant Insert and Update permissions so its members can add and edit records, while a Viewer role might grant only Read permission so its members can look but not touch. See Permissions for what each individual permission allows.
This page contains:
-
Data source authorization
When App Builder actually requires a role, instead of relying on privilege alone. -
Create a role
Build a role manually, or with the + Superuser accelerator, and connect it to a group. -
Grant permissions to a role
Three ways to grant a role's permissions, from broad accelerators to precise, object-by-object control. -
How roles affect application access
Why creating a role can restrict access for everyone else, and how to avoid locking yourself out.
Data source authorization
Not every data source needs the same level of granularity. A data source is secured using one of two authorization models, depending on whether it defines any roles:
| Model | Description |
|---|---|
| Data source authorization | If a data source doesn't define any roles, privilege alone is enough: any group with privilege to the data source has full permission to all of its data objects. |
| Roles-based authorization | If a data source defines one or more roles, privilege to the data source isn't enough on its own. A security administrator must also add the group to one or more of the data source's roles to determine exactly which actions its members can take. |
Create a role
Roles are created and configured from the App Workbench's Roles tab. This section walks through two paths for creating a role, then a common last step: build one manually, or use the + Superuser accelerator, and either way connect it to a group so its members can use it. See the App Workbench Roles tab for the complete reference of every panel and field these steps use.
This section teaches you how to:
- Create a role manually: Build an empty role, ready to grant exactly the permissions it needs.
- Create a Superuser role: Use an accelerator to create a role with full access to everything at once.
- Grant a role to a group: Connect either kind of role to real users.
Create a role manually
To create a normal role manually, follow these steps:
-
Go to App Workbench > Roles. The Data Source Roles page opens.
-
In the App Data Sources panel, select the data source the role should belong to.
-
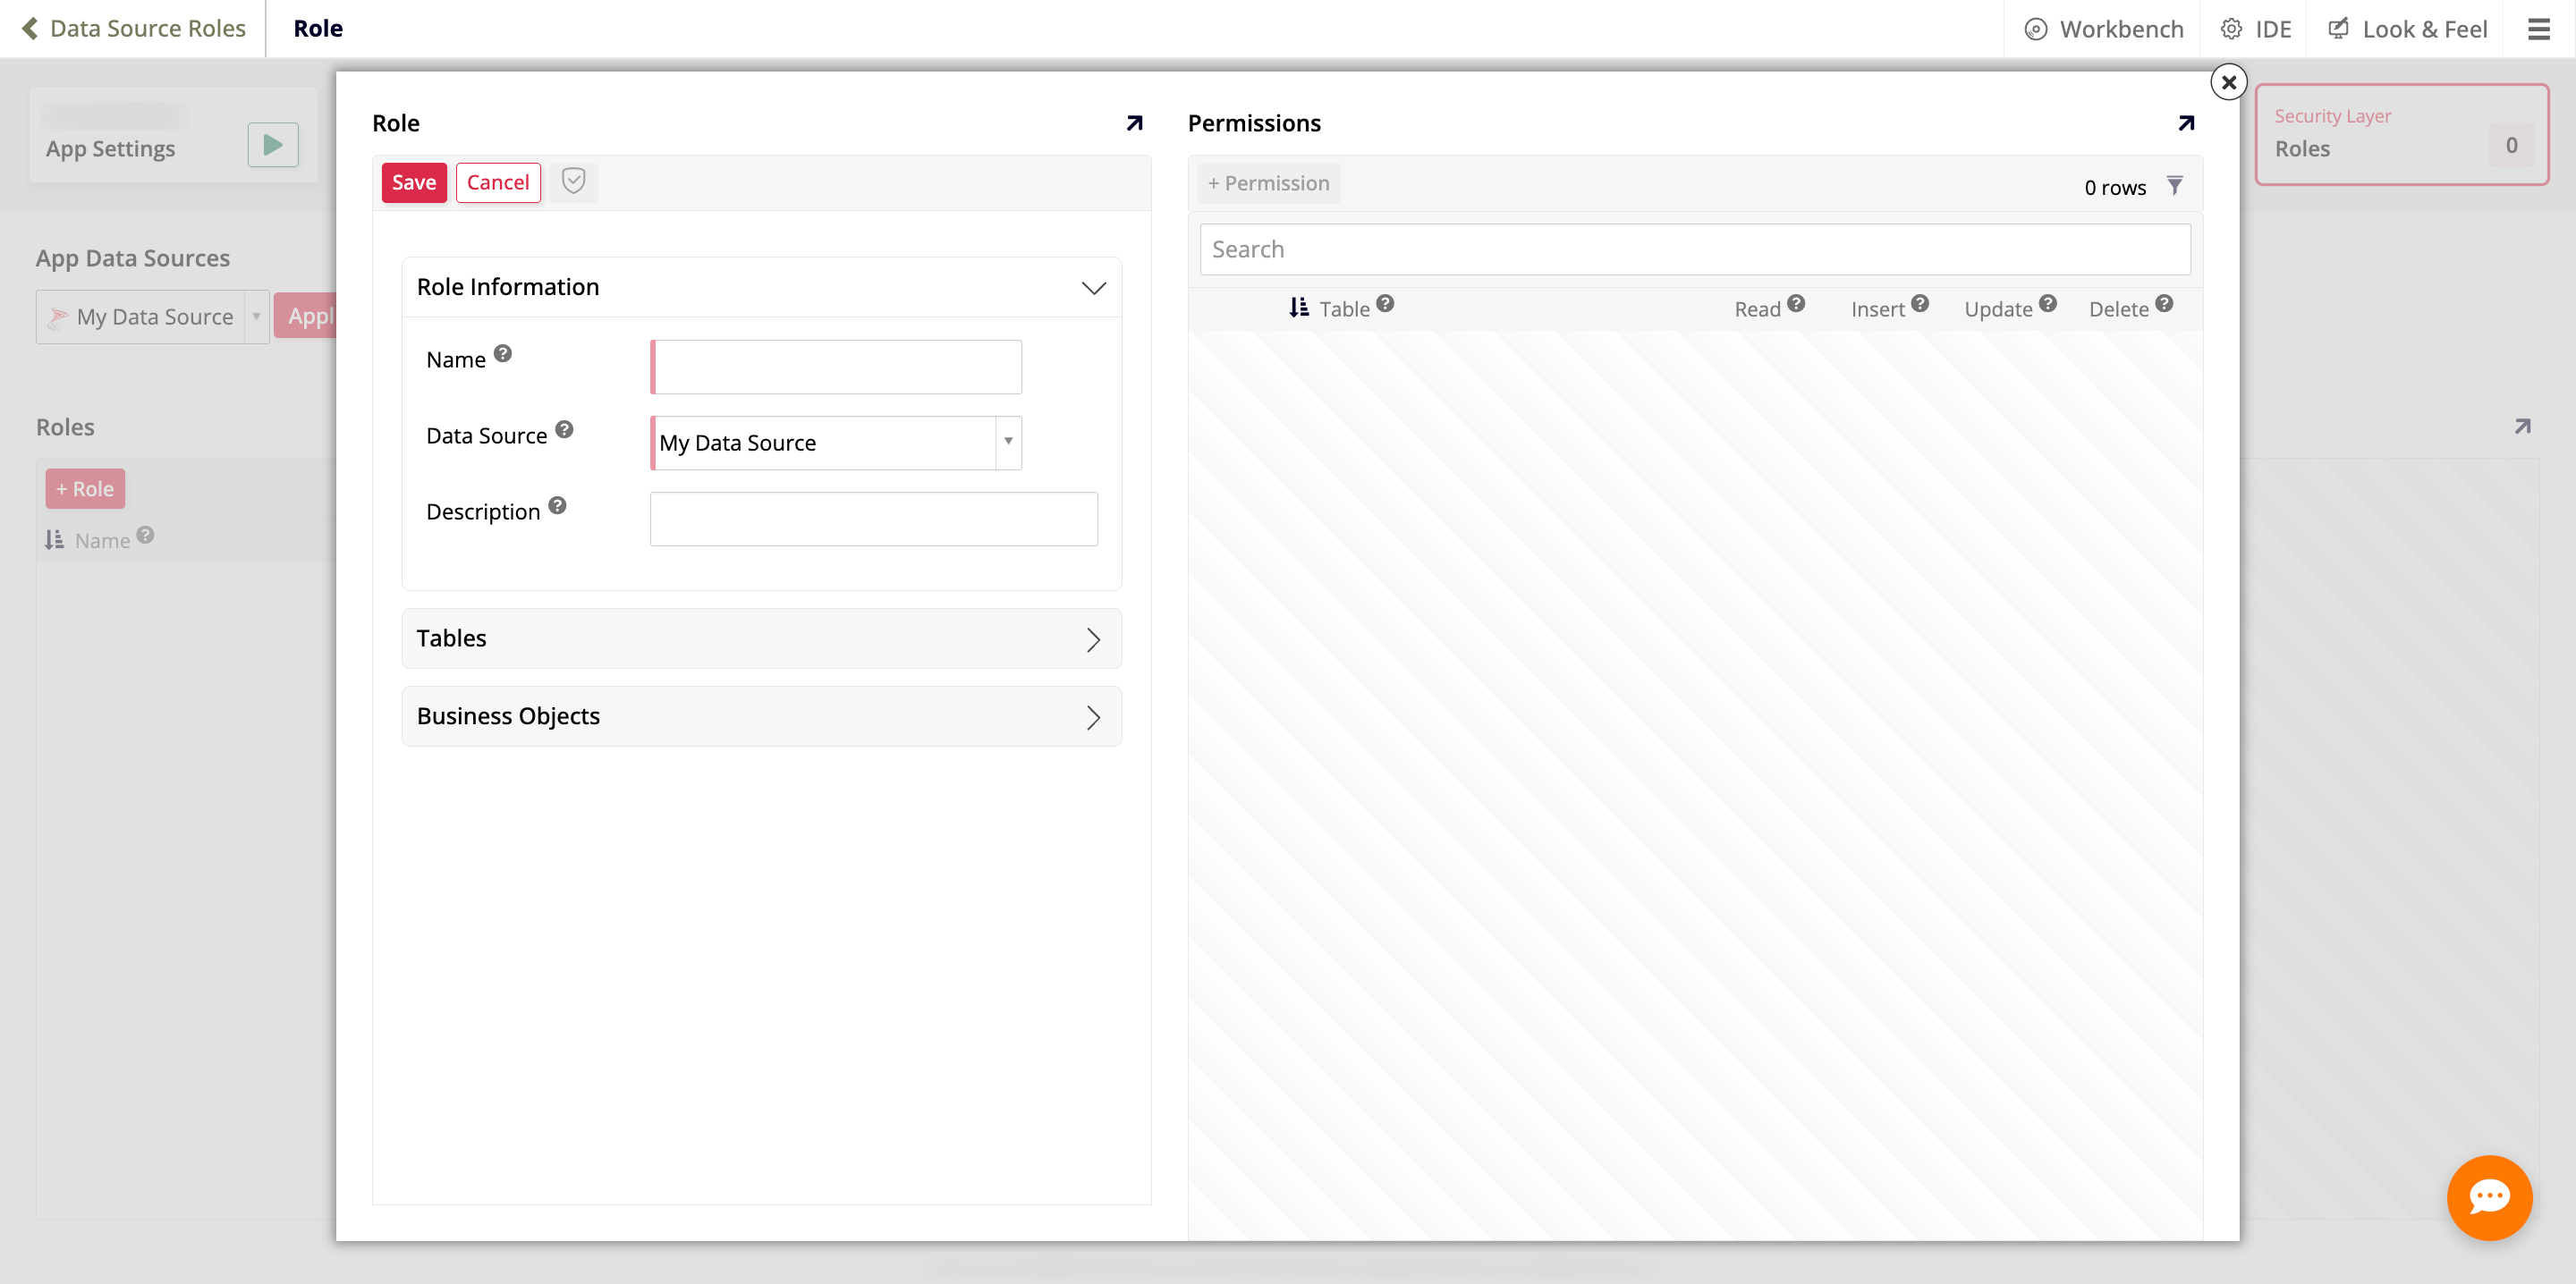
In the Roles panel, click + Role. The Role page will open in creation mode:
-
In the Name field, enter a name for the role, for example
Read Only. -
In the Description field, enter a description to help other administrators understand who the role is for, for example
View-only access to all data. -
Click Save.
The role now exists, but has no permissions of its own yet. See Grant permissions to a role below to give it access to your data.
Create a Superuser role
For an administrator-level role, App Builder offers an accelerator that skips the manual permission-granting process entirely:
-
Go to App Workbench > Roles. The Data Source Roles page opens.
-
In the App Data Sources panel, select the data source the role should belong to.
-
In the same panel, click + Superuser.
App Builder creates a role named Superuser with full permissions (Read, Insert, Update, and Delete) on every existing table and business object in the selected data source, and turns on the Grant On Create option for both the Tables and Business Objects accordions, so that tables and business objects created later are automatically granted to the role too. Because this grants permissions immediately, it also immediately makes the application restrictive for everyone who isn't a member of this role; see How roles affect application access below.
Tip
+ Superuser is an accelerator: instead of creating a role and then granting Read, Insert, Update, and Delete one object at a time, it creates the role and grants all four permissions on everything at once.
Grant a role to a group
A newly created role has no members until you connect it to real users, and no permissions until you grant it some. You can do this step before or after granting its permissions, but doing it right away is a good habit, especially for a Superuser role: granting it to your own administrator group immediately means you won't lock yourself out once the role starts receiving permissions. See How roles affect application access below for why this matters, and Grant or revoke a role for a group for the steps.
Grant permissions to a role
App Builder offers three ways to grant a role's permissions, ranging from broad accelerators to precise, object-by-object control. Which approach to use depends on how precisely a role's access needs to be scoped: broader accelerators are faster to set up, but grant more than a page-by-page or object-by-object approach would.
This section teaches you how to:
- Grant permissions with the Tables and Business Objects accordions: Grant every table or business object in the data source at once.
- Grant permissions page by page: Grant only the permissions a specific page depends on.
- Grant permission on individual objects: Grant one table, business object, or rule at a time.
Warning
Granting a role's first permission, with any of the three methods below, changes access for the whole application, not just for that role. See How roles affect application access below, and make sure you (or an administrator group) already have a permissioned role before you grant one to anyone else.
Grant permissions with the Tables and Business Objects accordions
Use this method to grant a role broad permissions on every table or business object in the data source at once.
-
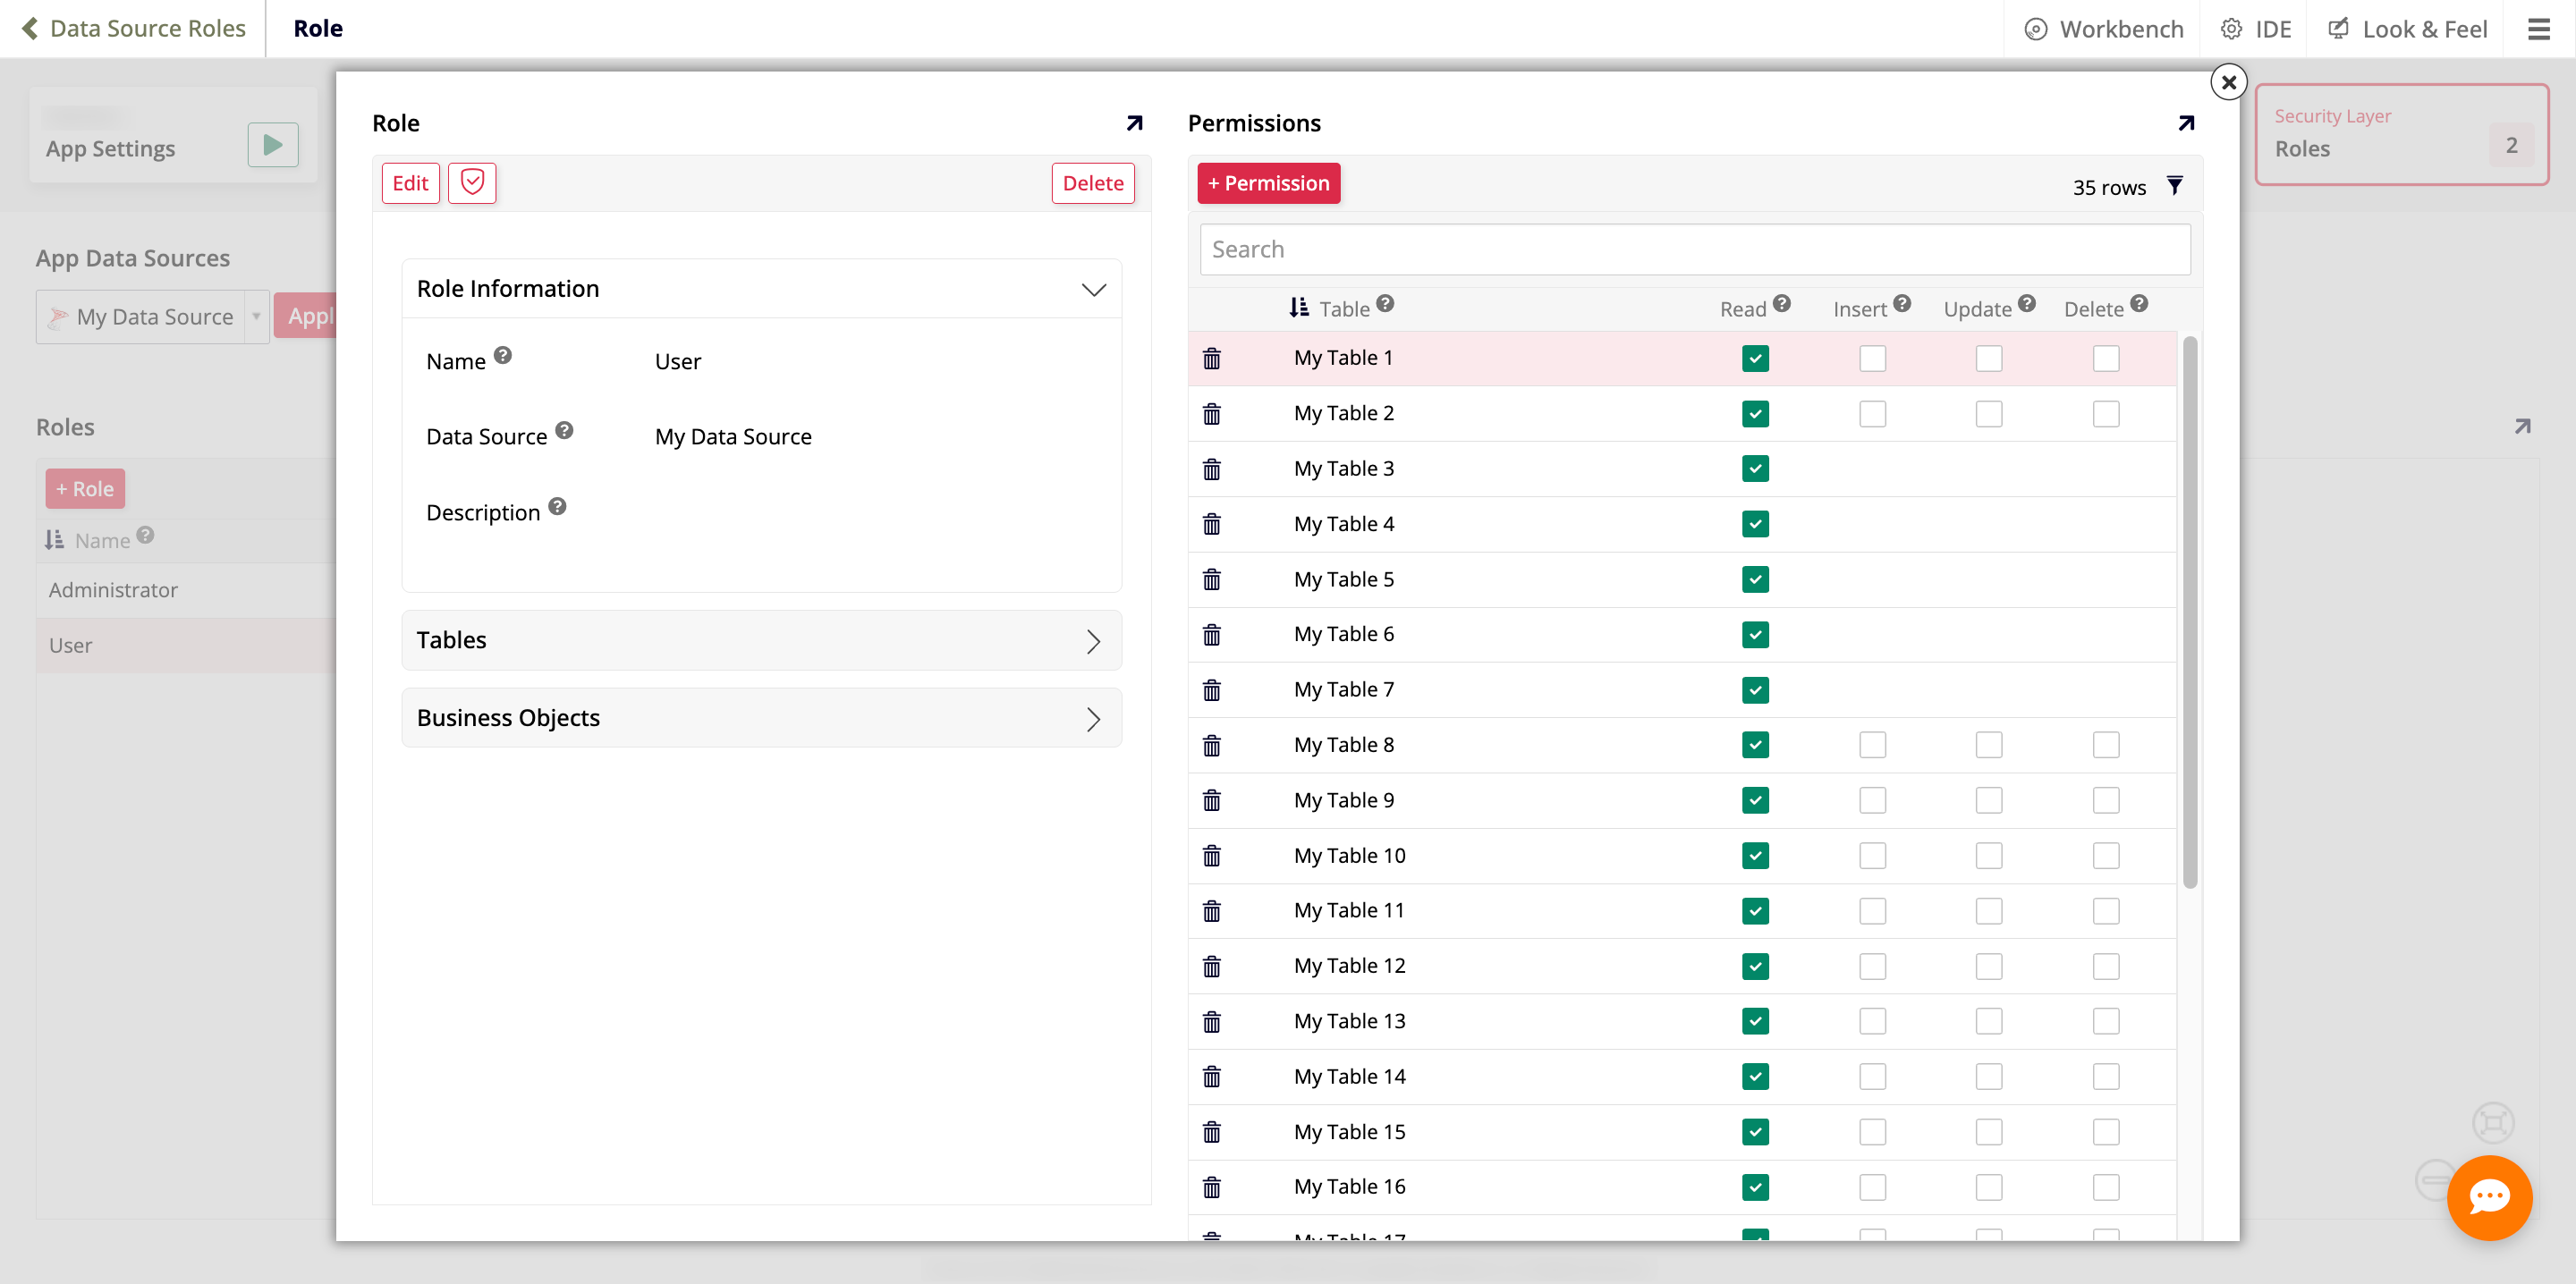
In the Roles panel, click the pencil icon on the role's row. The Role page opens:
-
Expand the Tables accordion to grant permissions on tables, or the Business Objects accordion to grant permissions on business objects.
-
Click one of the following buttons:
- Grant Full grants Read, Insert, Update, and Delete permission on every table (or business object) at once.
- Grant Read grants only Read permission on every table (or business object) at once.
- Grant Default grants the permissions currently checked under Default Permissions.
- Revoke All removes every permission the role has on every table (or business object).
-
If the role also needs permissions on the other kind of object, repeat these steps in the other accordion. The Tables and Business Objects accordions act independently, so granting full permissions in one doesn't grant anything in the other.
Tip
Check Grant On Create, and one or more of the Default Permissions checkboxes, before creating new tables or business objects. Doing so grants the role those permissions on new tables or business objects automatically, so you don't have to revisit this dialog every time your data model grows.
See Table and business object permissions for the complete reference of every field and button in this dialog.
Grant permissions page by page
Use this method to grant a role only the permissions a specific page needs, rather than every table or business object in the data source.
-
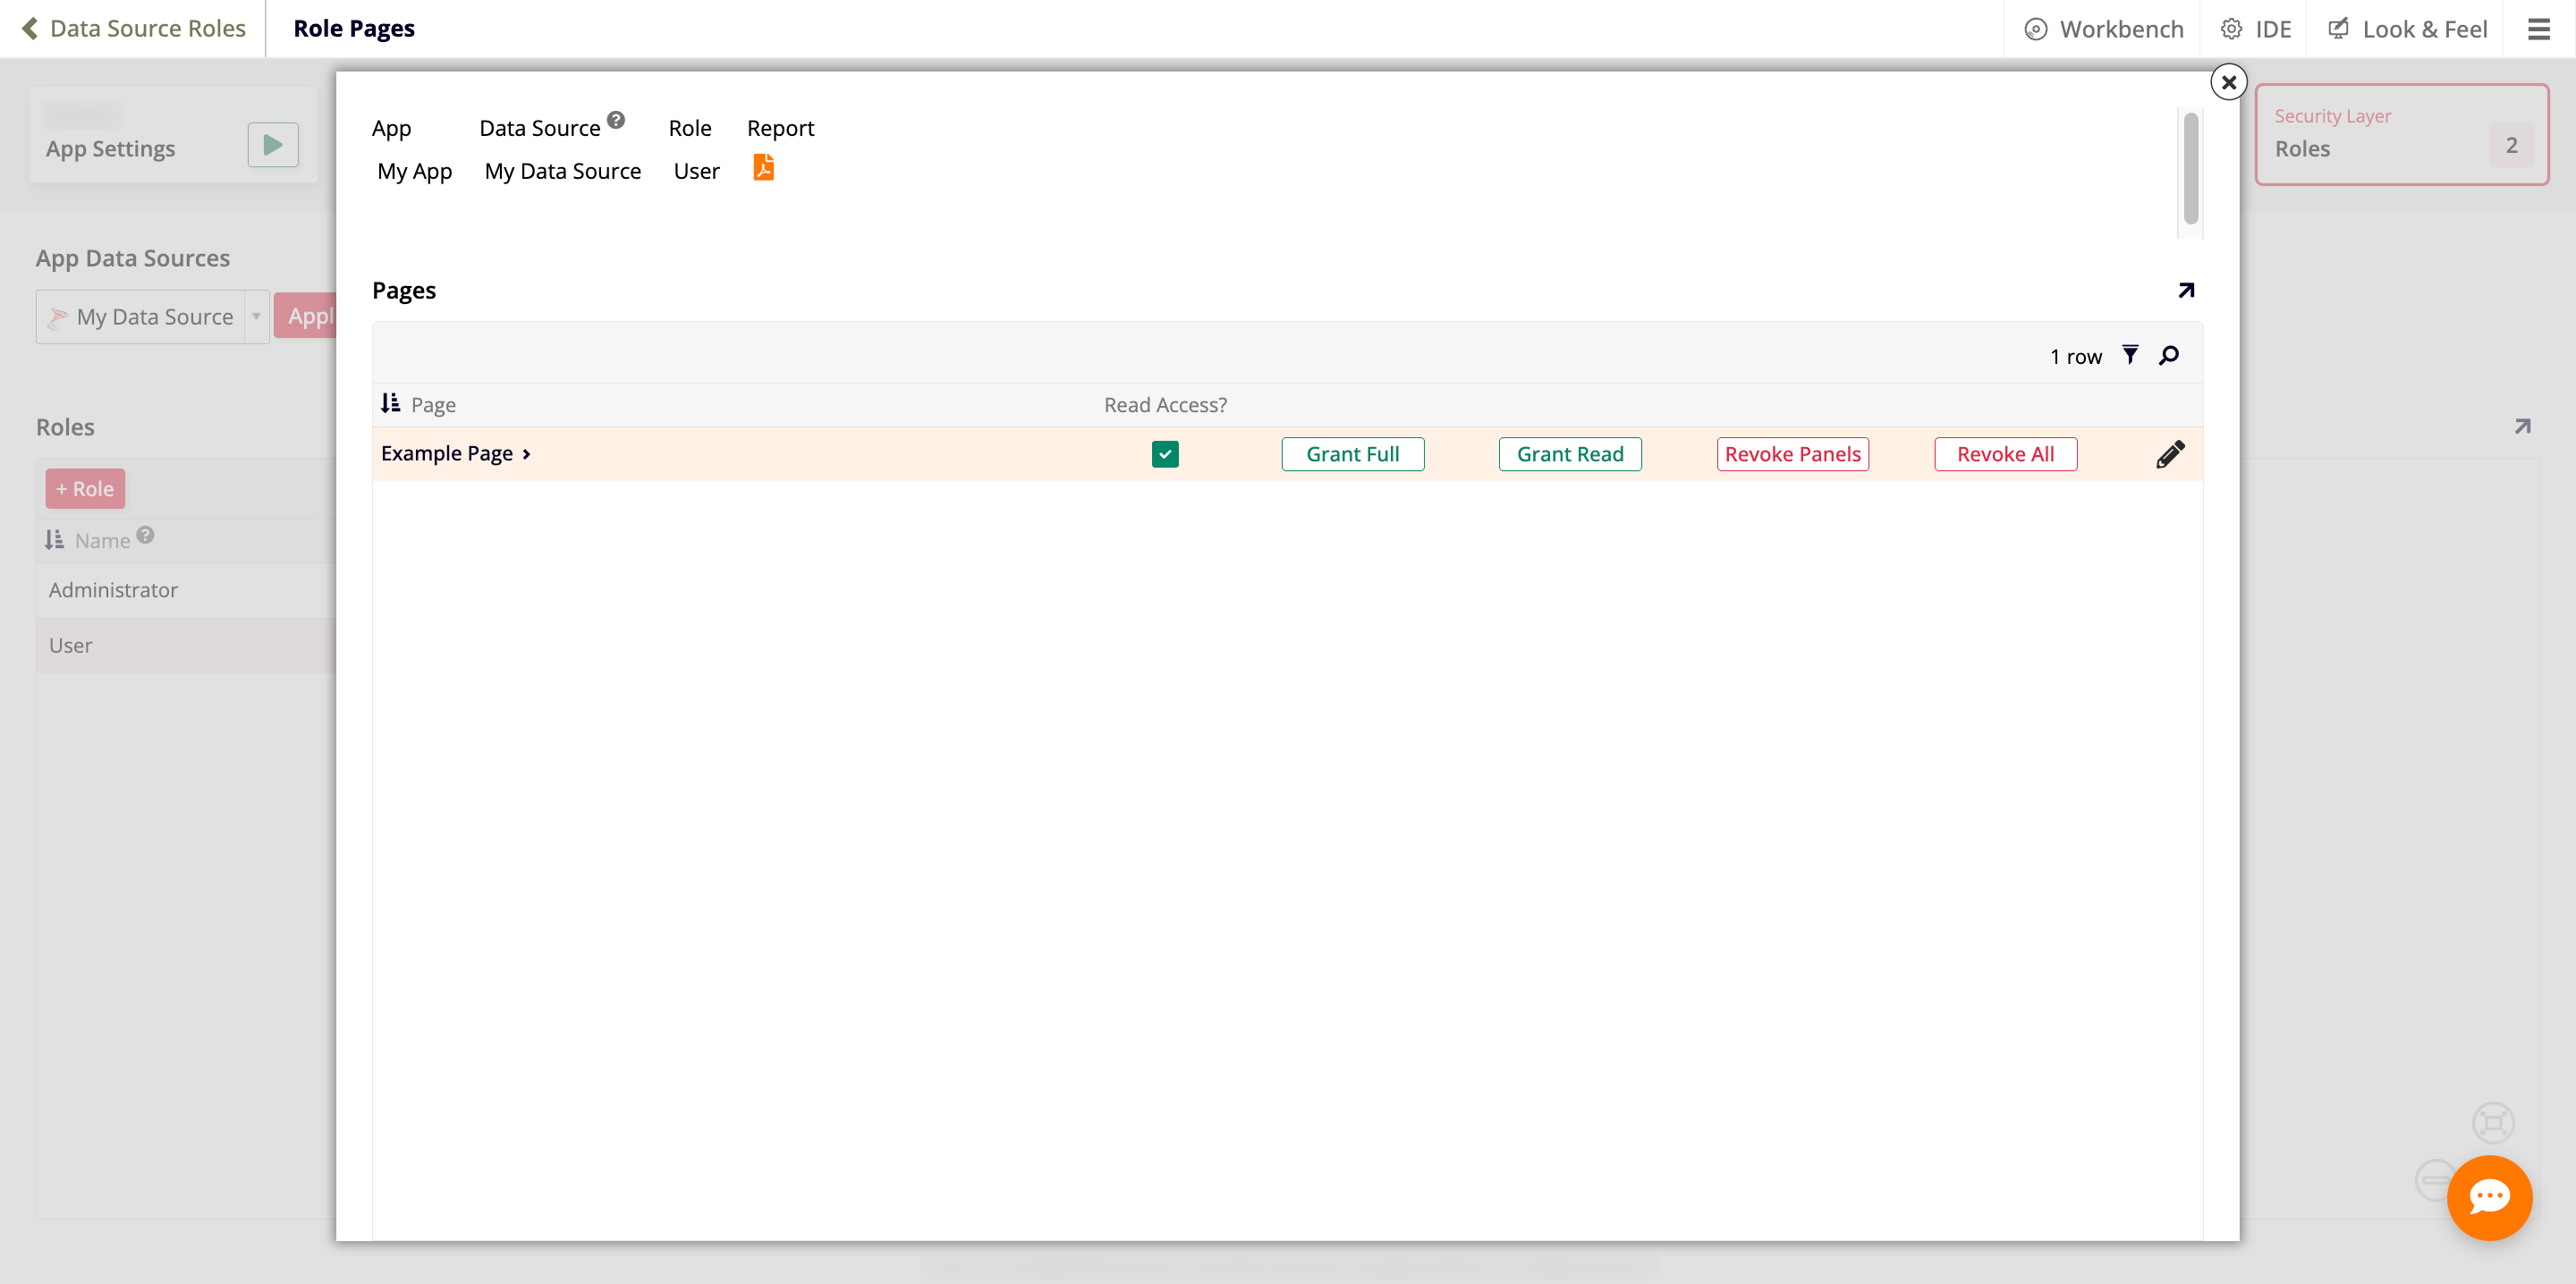
In the Roles panel, click the file icon on the role's row. The Role Pages page opens:
-
Find the page you want to grant or revoke access to.
-
Click one of the following buttons on that page's row:
- Grant Full grants permission on everything the page depends on.
- Grant Read grants only read permission on everything the page depends on.
- Revoke All removes the role's permission on everything the page depends on, including rules used on the page, such as lists.
- Revoke Panels removes the role's permission on the page's panels' source objects only, without affecting other rules used on the page.
Because these buttons act on the tables, business objects, and rules a page depends on, rather than on the page itself, granting or revoking permissions on one page's row can also affect another page that shares those same objects. See Page permissions for the complete reference, including the distinction between Revoke Panels and Revoke All.
Grant permission on individual objects
Use this method when a role needs precise, object-by-object access instead of a broad, table-wide or page-wide grant.
-
In the Roles panel, click the pencil icon on the role's row. The Role page opens.
-
In the Permissions panel, click + Permission.
-
Select the table, business object, or rule to grant access to. App Builder grants full access (Read, Insert, Update, and Delete) by default.
-
If the role needs less than full access to that object, clear the checkboxes for the permissions it doesn't need.
See creating the HR role in the Introduction to App Builder tutorial series for a practical example of this method.
Note
If role changes don't seem to apply to users, try flushing the cache from the System Maintenance options:
- Go to IDE > Additional Settings.
- Select System Maintenance in the Manage panel.
- Click Flush Cache.
How roles affect application access
Roles make permissions restrictive by default. Once any role has permissions on an application, App Builder requires every user to have a role with permissions on it, granted through their groups, before they can see or do anything in that application. A user whose groups don't grant them a permissioned role doesn't just lose some permissions: the application becomes invisible and inaccessible to them entirely.
This means creating a role changes how the application behaves for everyone, not just the role's intended members. Before creating a role, make sure your own user (or an administrator group) is granted a permissioned role too, so you don't lock yourself, or other users, out of the application.