API key security provider in Jitterbit App Builder
The API Key security provider allows administrators to secure App Builder REST APIs using an API key code generated by App Builder. The consumer passes the API key to App Builder when making REST API requests. Because each API key is associated with an individual user, this provides both authentication and authorization.
Definition and use cases
App Builder's API keys consist of a 128-bit, cryptographically random number. The keys are base64url encoded. Below is an example of an API key:
DLOo9sPS5slJEMHpXBFt3g
API keys have the following advantages over standard username/password authentication:
- They have greater entropy than username-password combinations.
- They can survive a password reset.
- They can be easily revoked.
- They can be rotated.
- They are faster. Passwords must be hashed, which is deliberately slow.
The disadvantages, or weaknesses, of API keys include managing their distribution and the risk of leaks. Some of the use cases where API keys can be the most adequate authentication method include:
- Service-level accounts
- Application-to-application communication
- Server-to-server communication
- Read-only access
- Non-sensitive information
Add an API key security provider
To add a new API key security provider, follow these steps:
-
Go to IDE > Security Providers. The Security page opens.
-
In the User Authentication table, click + User Authentication. The Provider dialog appears:
-
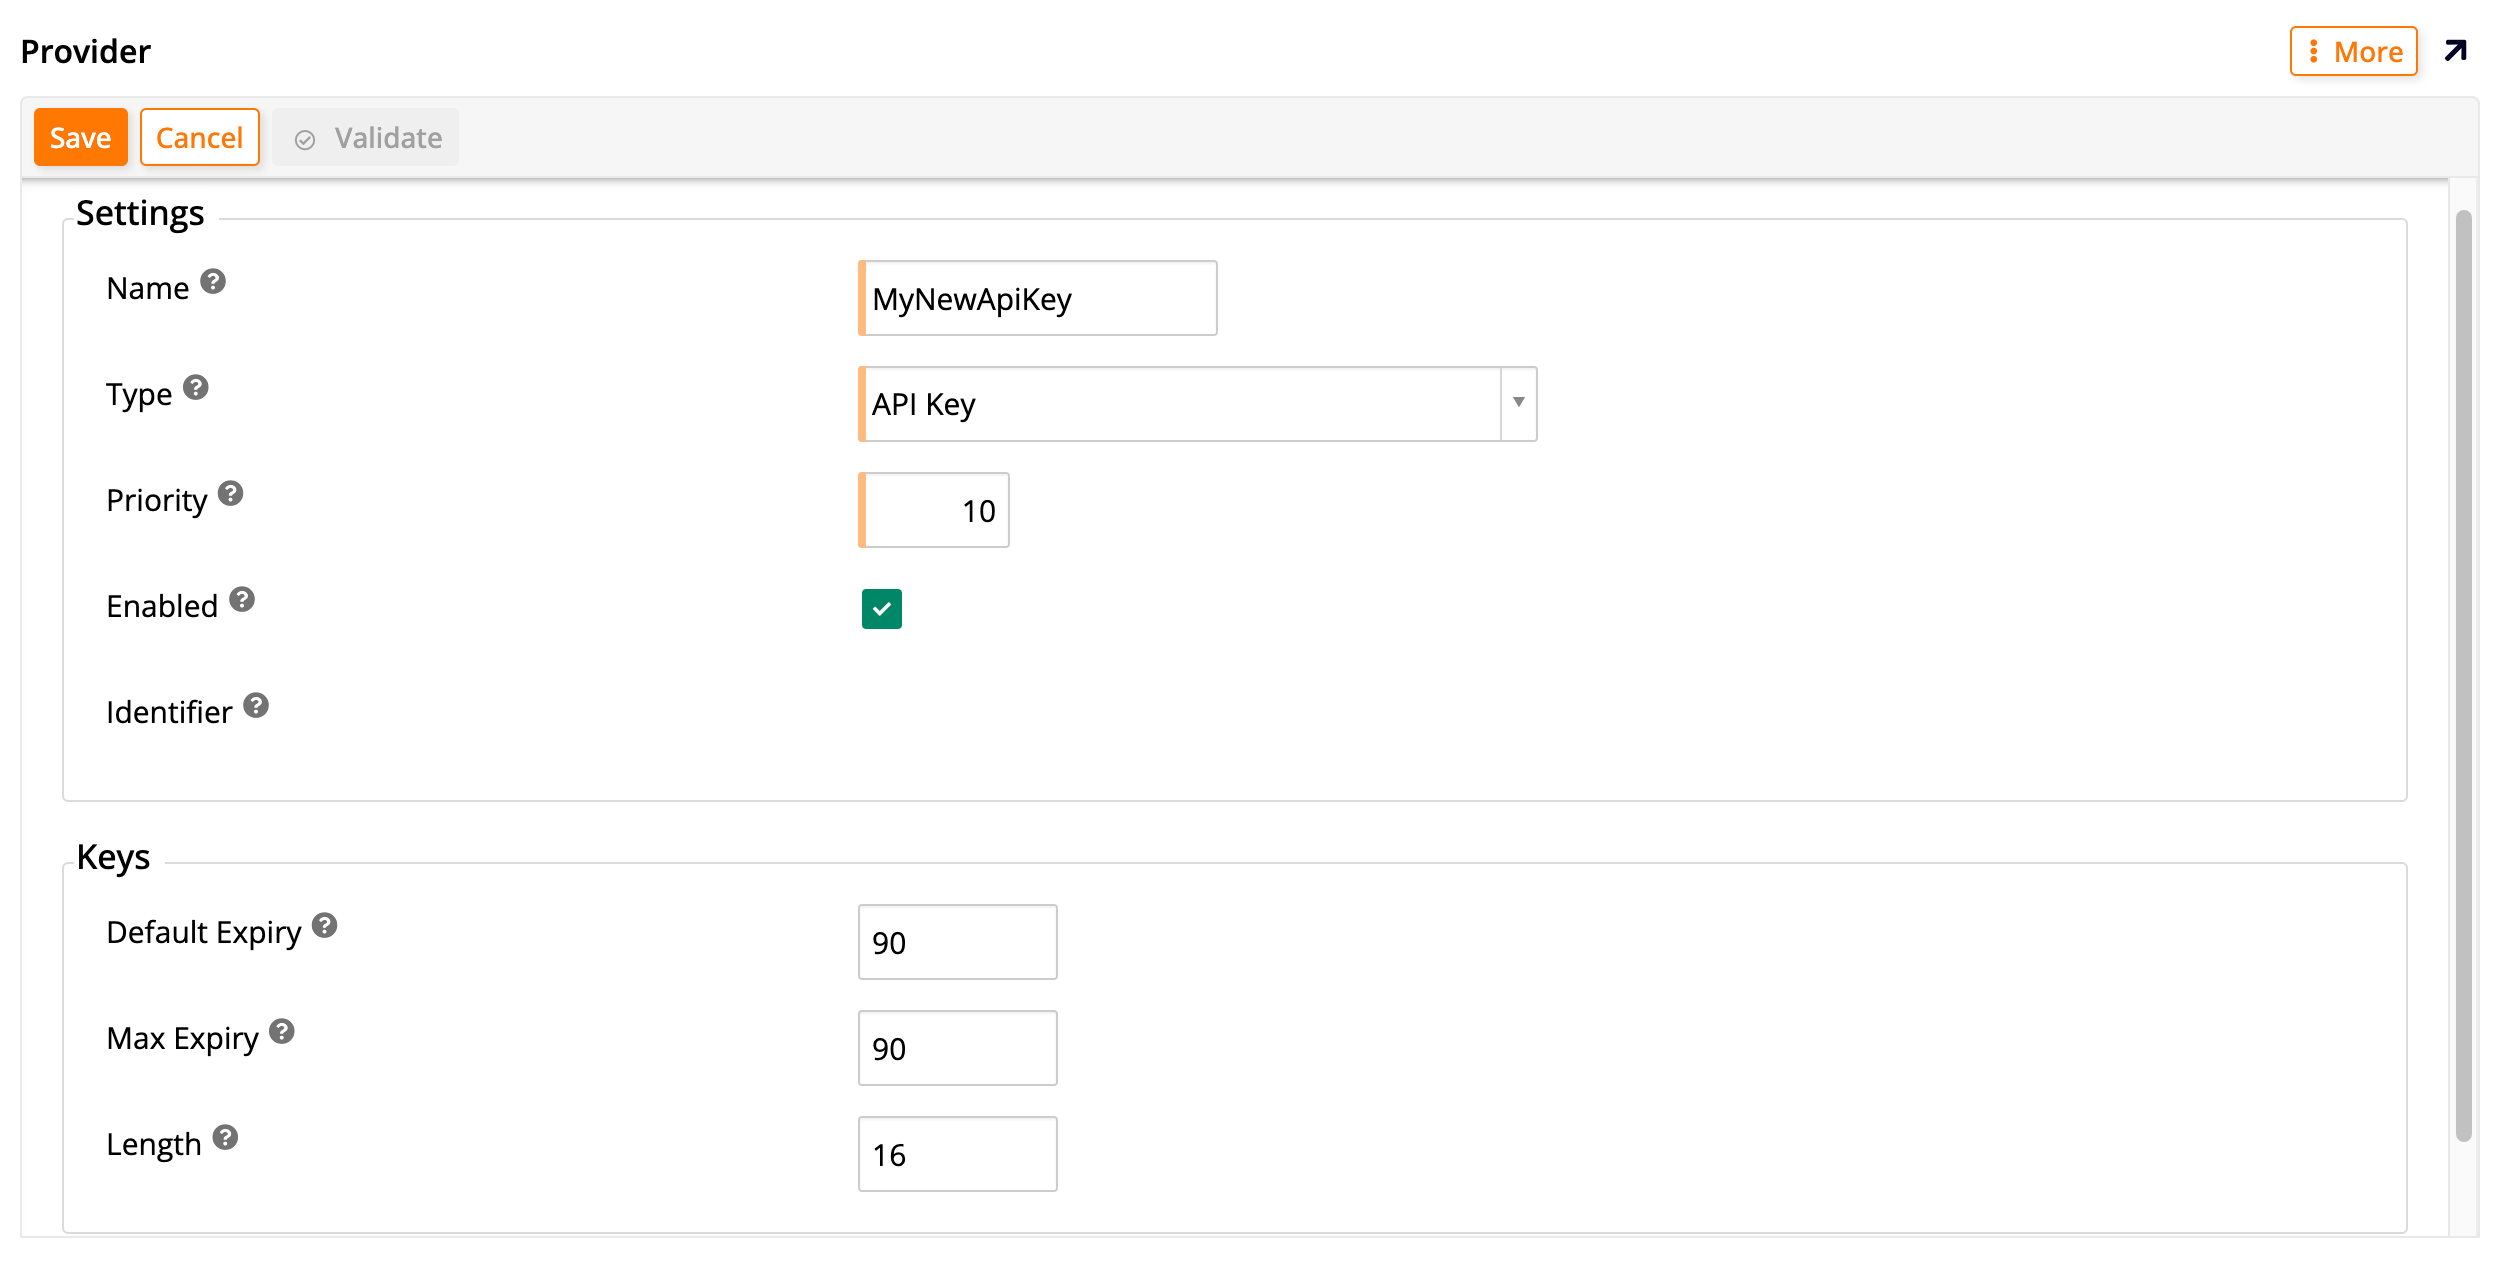
Under the Settings section, fill in these fields:
-
Name: Enter a name to identify your API key security provider.
-
Type: In the dropdown menu, select API Key as the type of security provider you're creating. Doing this will alter the rest of the fields that are shown in the dialog.
-
Priority: Enter a number to set the order in which security providers appear on the login form.
-
Enabled: Click this checkbox to activate the new security provider.
-
Identifier: This field is automatically generated by App Builder.
-
-
Under the Keys section, fill in these fields:
-
Default Expiry: Enter how many minutes for the default lifetime of new keys. (Altering this field does not affect existing keys.)
-
Max Expiry: Enter how many minutes for the maximum lifetime of new keys. (Altering this field does not affect existing keys.)
-
Length: Enter the length (in bytes) of new keys. (Altering this field does not affect existing keys.)
-
-
Click Save.
After you save a new API key security provider, you will be taken back to the Security page, where the User Authentication table will show the new one you've just created. By clicking the icon at the end of its row, you can continue configuring it.
Configure an API key security provider
To configure your API key security provider, go to IDE > Security Providers. Locate it in the User Authentication table and click the icon at the end of its row. The Provider page will be shown, where you can add additional configurations. The Provider panel on the left shows the same settings and keys that are shown when you created the security provider. The Properties panel on the right allows you to set up some extra parameters, described below.
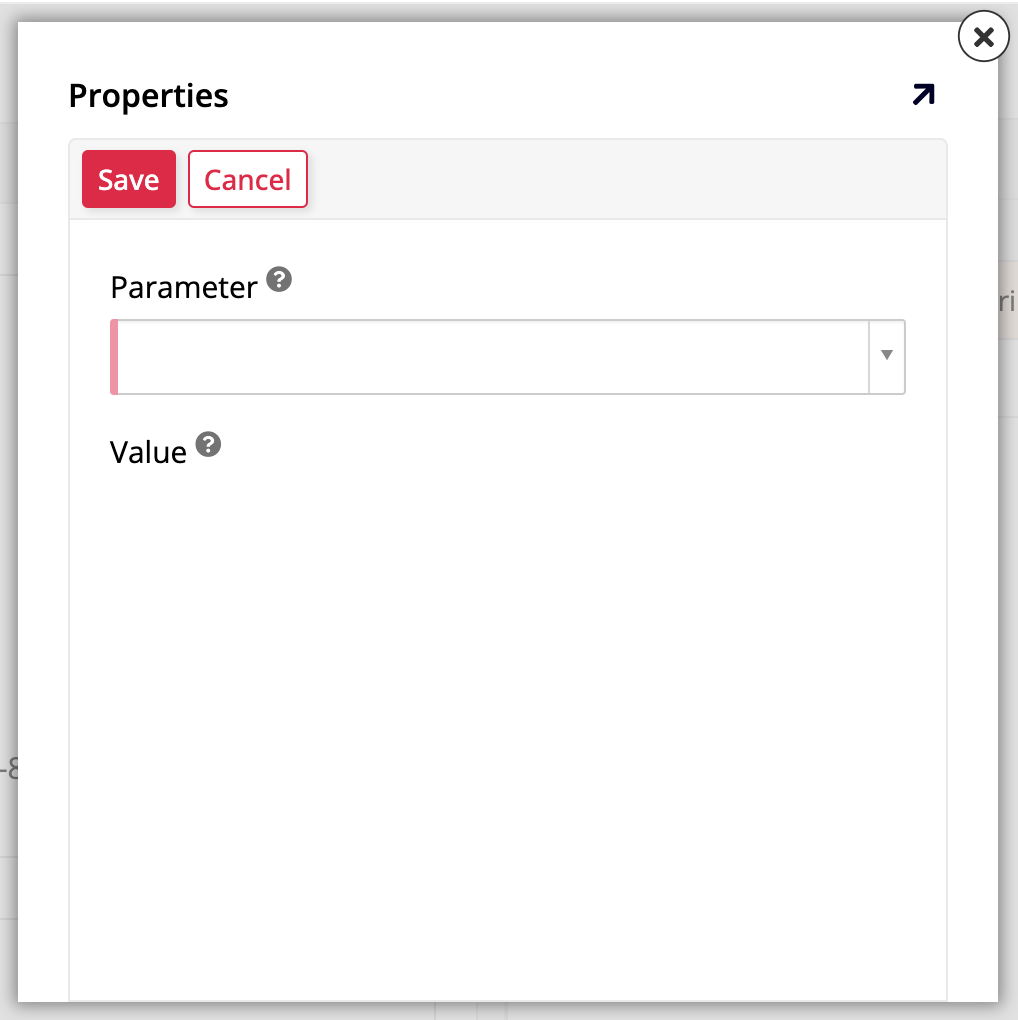
To add a new property, click the + Property button. This will bring up the Properties dialog, which contains the Parameter and Value fields. The following parameters are available:
Note
None of these parameters is required. You should only add them if there is a need to change the way that your API key will be passed from the default configuration. See Pass an API key to learn more.
-
AllowApiKeyInQueryString: Use this parameter to allow the API key to be passed in the query string instead of in the HTTP header (see the Pass an API key section). The default value isFalse. -
AllowInsecureHttp: Use this parameter to allow the API key to be passed via an insecure HTTP request instead of a secure HTTPS request (see the Pass an API key section). The default value isFalse. -
HttpHeaderName: Use this parameter to change the name of the HTTP header that will pass the API key from the defaultX-API-Key. -
QueryStringParameterName: When you have also used theAllowApiKeyInQueryStringoption to pass the API key via one of the query string parameters, you can use this option to change the parameter's name from the default nameapiKey(see the Pass an API key section).
Click Save and close the Properties dialog. The new parameter you've added will be listed in the Properties table.
Generate an API key
When you have a configured API key security provider, you can generate API keys associated with users by following these steps:
-
Go to IDE > Runtime > User Management.
-
The Users panel lists all users. Locate the user you want to generate an API key for and click the icon at the end of its row.
-
In the User dialog, click More > Keys. The Keys dialog opens.
-
Click Create. The Generate Key dialog will open.
-
In the Provider menu, select the API key security provider that you created.
-
(Optional) Provide a Description for this key and enter a customized expiration time in the Expires In field.
-
Click Save. The API key will be created.
Pass an API key
In most scenarios, Jitterbit recommends that the client pass the API key via a custom header in a secure HTTPS connection to limit the risk of exposure. The following example illustrates this:
GET /Vinyl/rest/v1/sales/customers HTTP/1.1
Host: example.com:443
Accept: application/json
X-API-Key: ABCd0eFG1hiJKLMnOPQr2s
This is the default behavior, which App Builder selects automatically. You can also use the HttpHeaderName parameter when configuring your API key to change the name of the HTTP header that will pass the API key from the default X-API-Key.
The following examples are some exceptions to this recommendation:
-
In some scenarios, HTTPS connections may be prematurely terminated. To work around this issue, you can force App Builder to accept API keys sent via HTTP connections by setting the
AllowInsecureHttpparameter toTrueduring API key configuration. -
In cases where you don't have access to the HTTP request headers, it is also possible to send the API key via the query string parameters. To enable this option, set the
AllowApiKeyInQueryStringtoTruein the API key configurations. The example below illustrates how the API key is passed in this scenario:GET /Vinyl/rest/v1/sales/customers?apiKey=ABCd0eFG1hiJKLMnOPQr2s HTTP/1.1 HOST: example.com:443 Accept: application/jsonNote
In the example above the key was sent under the name
apiKey. You can change this by going to the API key configuration and adding theQueryStringParameterNameparameter to choose a different name.