Table inheritance in Jitterbit App Builder
There is a Table Inheritance feature available for use from the Data Storage Layer. Table Inheritance allows you to not require using the App Builder Connector if everything you are connecting to is local. To use this feature, you will click on the Edge Case button available from the Table you wish to Extend from, when working in the Data Layer. This is where you configure and define this feature for use. The Extends field, available when configuring, displays a list of all public data objects that are available on the server environment.
Inheritance essentially instructs App Builder to inherit a copy of all of the Columns and data records the selected Table has available to it from the existing Data Source. The data records still resides in the table's Data Source location that you Inherit from. The assumption is that you would Inherit a Table and then append new unique Column(s) onto it as needed.
The local table that gets created when using Inheritance stores any Primary Keys along with any newly added Columns. The newly created table will also inherit any validations, logic, and/or Events from the source table selected. You can use the newly created Inherited table to add Business Logic onto or against it.
By design, App Builder will not automatically reflect changes made to the source or master table in the Inherited table. See "To Capture Changes from Inherited Table" to address this situation.
Note
Once Table Inheritance is defined for a given table, that value cannot be modified after it has been saved.

To configure table inheritance
Table Inheritance is available from the Data Layer. The steps outlined here assume that you wish to Extend a table into the same data source, the option to Extend a table into a different data source are outlined in the Example Usage section below.
- Navigate to the App Workbench
- Locate the existing Table you wish to Extend, click the Design button. For example: Customer
- Click the Edge Case button
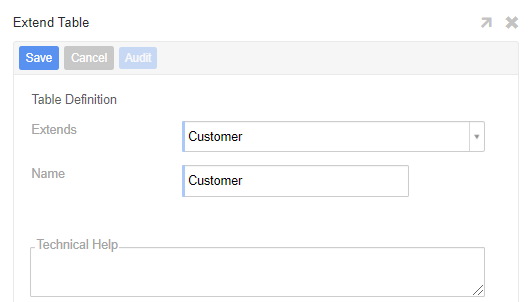
- Click the Extend button
- Leave the Extends value as is, this represents the named table being extended. For example: Customer
- Assign a unique Name for the new Table. For example: CustomerExtend
- Click Save
- App Builder brings in all inherited Columns into the Columns panel
- Click Create and add any new Columns required
To capture changes from inherited table
By design, Table Inheritance will not automatically bring in Column changes made to the selected source or master table you are inheriting from. If you want to capture changes from the source table, you can use the Import button available from the Data Layer.
- Navigate to the App Workbench
- Locate the existing Table you wish to update, click the Design button. For example: CustomerExtend
- Click the Edge Case button
- Click the Import button
- App Builder will prompt to ask "Import changes into current table?", click Proceed
- App Builder will prompt after importing the changes, and any Column updates will be visible from the Columns panel. For example: Successful!
Example usage
The following example describes one scenario where you might use Table Inheritance, in this scenario you want to extend a table from one data source to another data source. One example where you might use Table Inheritance is if you wanted to build a User Parameter table off of a Public Data Object in one data source that you Extend into a different data source. With this scenario we'll outline the basic steps you would take to get started:
- Navigate to the App Workbench, Business Layer and confirm that App Data Sources has the data source selected where you want the Extended table to reside. For example: Northwinds
- Open the record for any of the existing Tables in this data source
- Click the Edge Case button
- Click the Extend button
- Select the Table you want to Extend from the Extends drop down menu. For example: Se_User from the App Builder data source
- Confirm the Name value is what you want the extended table to be Named. For example: Se_User_Extension
- Click Save
- Click on Edge Case and confirm the extension table has CRUD Support checked or enabled for Insertable, Updatable, Deletable
-
Create a new Boolean column on extension table. For example: BooleanTest

-
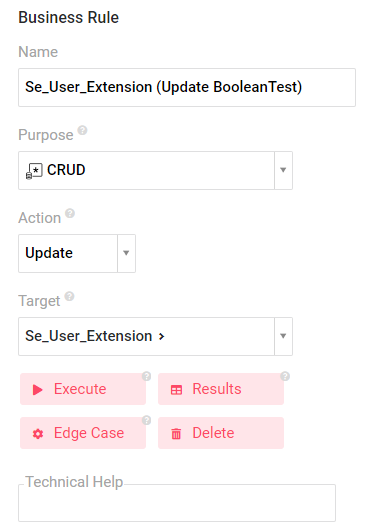
Create a CRUD Rule to update all records for the boolean value to 1. Make sure to enable Business Layer on the CRUD Rule Purpose settings.

-
Click the Edge Case button and check to enable Business Layer
- Click Save
-
Click the x to exit out of the screen

-
Confirm CRUD Rule Results show all existing User Accounts with boolean field marked as 1
- Click the Execute button to execute the CRUD Rule
- Navigate to the Data Storage Layer, to the table you extended and confirm that the Boolean column now reads 1 for all User Accounts