Shared non-binding data between panels in Jitterbit App Builder
In App Builder, shared binding allows panels to exchange data without the need for complex SQL cross-joins within a business object. Traditional joins can be resource-intensive and may degrade application performance. Shared binding bypasses this by making a specific value from a parent panel available to a child panel's logic via the shared() function.
While standard panel binding relies on exact ID matches to filter results, shared binding is used to pass variables that can be referenced anywhere in the target panel's SQL, CRUD rules, or actions. This feature is a key component of panel-to-panel relationships and is not limited to page-to-page links.
Example scenario: Project assignments
To illustrate this concept, consider a page containing a list of Projects and a list of Employees. The goal is to allow a user to assign an employee to a project by clicking a button. In this case, the Project panel will share its ID with the Employee panel so that an assignment record can be created.
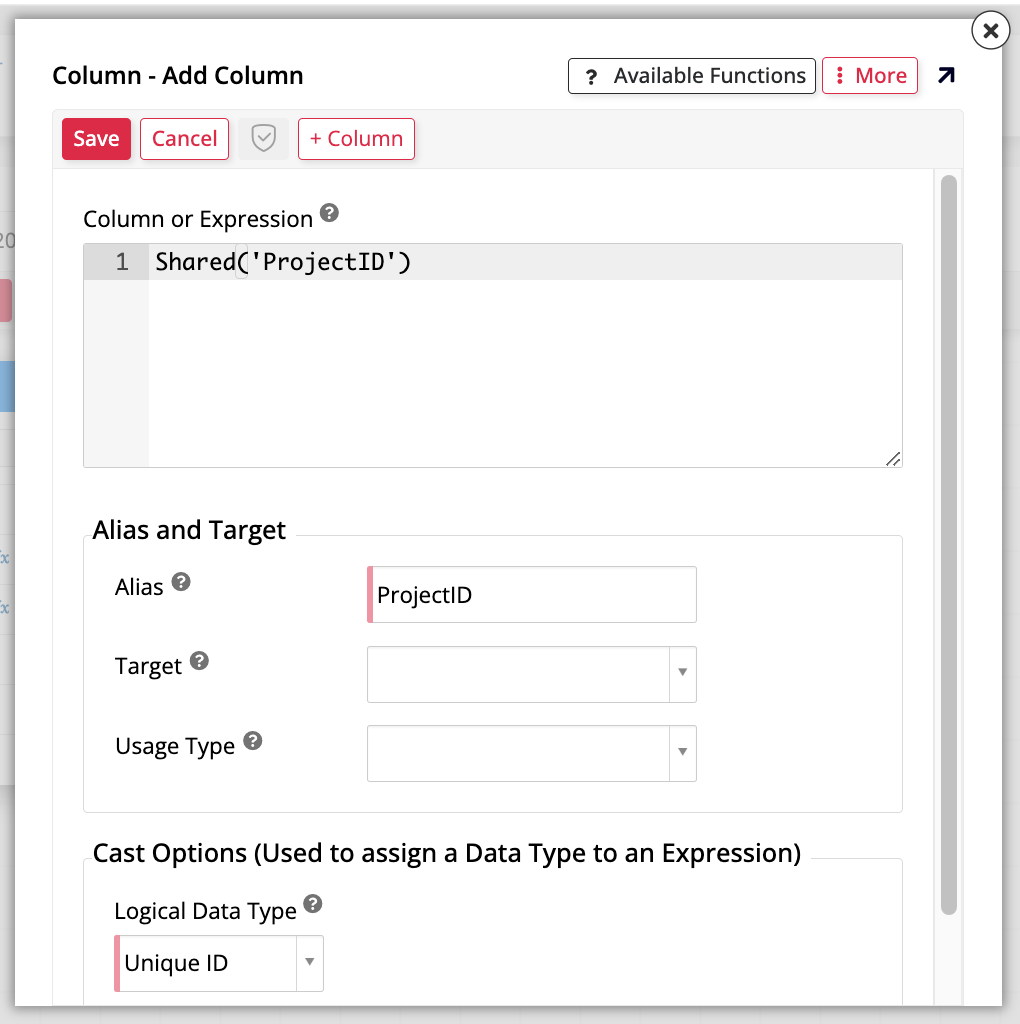
Step 1: Update the Employee business rule
The first step is to prepare the child panel to receive the shared data. You must update the business rule supporting the Employee panel by adding a new column that uses the shared function. For example, add a column to the Employee (Source) rule using the syntax shared('ProjectID'). You should alias this as ProjectID and ensure the logical data type is set to Unique ID.
Step 2: Create a CRUD/Cram rule
Next, create a CRUD/Cram rule involving both the Employee and Project tables to handle the insertion of the assignment. This rule will map EmployeeID and ProjectID to their respective targets, using NEWUUID() to generate a unique identifier for the new project-employee relationship.
Step 3: Register the action and event
With the rule created, add it as an action within a new custom event, such as "AssignEmployee", on the Employee business object. For this operation to work correctly, set the Refresh Scope to Global. During registration, you must configure two binding records for the action to map the EmployeeID and the shared ProjectID.
Step 4: Implement the UI control
To allow users to trigger the logic, add a Button control (labeled "Assign") to the Employee panel. Associate this button with the "AssignEmployee" custom event created in the previous step.
Step 5: Configure shared panel binding
The final step is to establish the actual relationship between the panels. In the page edit screen, configure the panel binding so that the Employee panel is bound to the Projects panel.
Initially, the system will default to a standard binding type. You will need to select a column for the parent (ProjectID) and the child. Once the record is created, open the binding columns' properties and change the Type from "Binding" to "Shared". This confirms that the relationship is intended only to pass the ProjectID value to the child panel's business object rather than filtering the child panel's results based on an exact match.
After refreshing the application, selecting a project and clicking Assign on an employee will successfully link the two records. This process demonstrates how data can be shared and acted upon across panels efficiently.
Tip
Shared values are highly versatile. Depending on your specific use case, a shared column can be used within SELECT statements for display or referenced in WHERE clauses to drive custom filtering logic across actions.