Configure Microsoft Entra ID using WS-Federation in Jitterbit App Builder
App Builder integrates with Microsoft Entra ID using the WS-Federation protocol, enabling single sign-on. Each App Builder instance must be individually configured to work with Microsoft Entra ID and vice versa. To achieve this, make sure you meet the requirements and then follow the instructions on this page, which are divided into three general steps:
-
Step 1: Register App Builder as a Microsoft Entra ID application
-
Step 2: Configure Microsoft Entra ID as an App Builder security provider
-
Step 3: Map App Builder users and groups to Azure identities
Requirements
To configure Microsoft Entra ID with WS-Federation for App Builder, you must meet the following requirements:
-
You must have administrator access to an Azure account with a Microsoft Entra ID service.
-
You must have administrator access to App Builder.
-
App Builder must be available via HTTPS with a valid TLS certificate.
Terminology
The table below defines some of the terms used in this page.
| Example | Notes | |
|---|---|---|
| App Builder URL | https://example.com/Vinyl/ |
App Builder must be accessible via HTTPS. The URL must include the trailing slash. The path is case-sensitive. |
| Provider Name | Azure | Typically, the provider name should match the Active Directory domain name. Since the provider name will appear in the Sign-on URL (see below), avoid spaces, punctuation and special characters. |
| Sign-on URL | App Builder root directory/signin-<Provider-Name>https://example.com/Vinyl/signin-Azure |
Callback URL automatically provisioned when creating the Microsoft Entra ID security provider within App Builder. The example provided here assumes that: example.com is the hostname, https://example.com/Vinyl/ is the App Builder application root directory, and that Azure is the name of the Azure Security Provider. |
Step 1: Register App Builder as a Microsoft Entra ID application
The App Builder instance must be registered as a Microsoft Entra ID application. The Microsoft documentation offers a detailed tutorial of the process. An overview of the steps can be seen below:
-
Log into the Microsoft Azure Portal.
-
Navigate to the Azure Active Directory admin center.
-
Click on Azure Active Directory from the navigation.
-
Click on App Registrations.
-
Create a New Registration and provide the Name as App Builder.
-
Type in your Redirect URI as
https://<your-domain>/signin-<Provider-Name>, replacing<your-domain>with your actual domain and<Provider-Name>with the name you will use within App Builder security providers.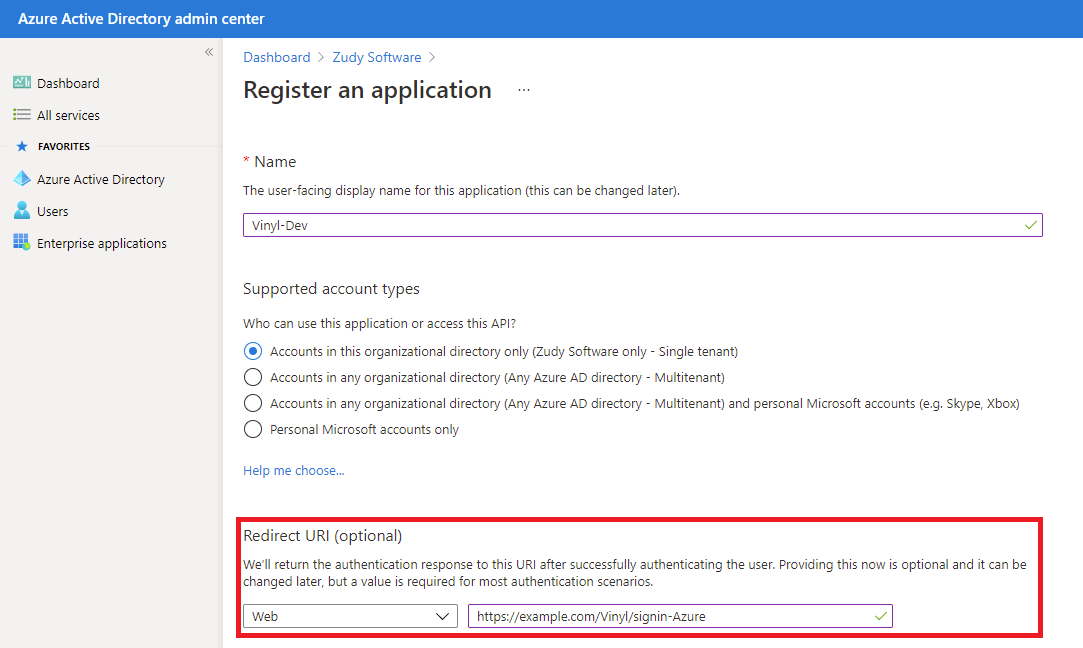
-
Click Register.
-
Open the newly-created application you registered, and under the Manage side-bar, select Manifest:
-
Note the appId string, formatted as a GUID (for example,
012a3b4c-d567-89ef-g012-3hi456jklm7n.) -
Note your primary domain, shown in your Microsoft Entra ID Tenant information.
-
Edit the following lines as follows:
Instead of:
"groupMembershipClaims": null,
    "identifierUris": [],
Change it to:
"groupMembershipClaims": "SecurityGroup",
    "identifierUris": [
        "https://<your-primary-domain>/<app-id>"
    ],
Example: If primary domain for Azure Tenant is
zudy.com:
-
-
Click Save.
-
Click on Overview from the navigation.
-
Click the Endpoints tab.
-
Where it reads Federation metadata document, click on the Copy to clipboard icon and paste it into a temporary text file for use in later steps.
Step 2: Connect and setup new security provider in App Builder
In this step, you will define the new security provider for Microsoft Entra ID. This includes configuring the Entity ID (which serves as the Audience or Wtrealm) using values provided by Microsoft.
-
Select IDE > Security Providers.
-
In the User Authentication panel, click + User Authentication. The Provider page opens.
-
Configure the options as follows:
-
Settings:
-
Name: Enter a name that matches what you used to configure the Redirect URI. For example:
Azure. -
Type: Pick WS-Federation.
-
Enabled: Select this checkbox.
-
-
Tokens:
- Entity ID: This is what Microsoft refers to as the App ID URI or Wtrealm. Enter the URI containing your Azure primary domain and the app ID noted in Step 1 following this format:
https://<your-primary-domain>/<app-id>. (Note: The Audience field will automatically default to match the Entity ID).
- Entity ID: This is what Microsoft refers to as the App ID URI or Wtrealm. Enter the URI containing your Azure primary domain and the app ID noted in Step 1 following this format:
-
Provisioning:
-
User Provisioning: Select this checkbox. This will allow Azure to create users in App Builder.
-
Supplies Group Membership: Select this checkbox.
-
-
-
Click Save. Once you save, App Builder will issue a unique Identifier value for this provider.
After the creation of the provider, you must also configure some other parameters that represent values provided by Microsoft Azure. To do that, follow these steps:
-
Find your security provider in IDE > Security Providers and double-click its row.
-
In the Endpoints panel, click + Endpoint. Set up the following options:
-
Endpoint Type: Select Metadata Endpoint.
-
URL: Enter the following URL:
https://login.microsoftonline.com/<your-tenant-id>/federationmetadata/2007-06/federationmetadata.xml, replacing<your-tenant-id>with your tenant ID from Entra.
-
-
Click Save.
-
Next, in the Claims panel, click + Claim. Set up the following:
-
Identifier: Select:
http://schemas.microsoft.com/ws/2008/06/identity/claims/groups. -
Usage: Select Group.
-
Name: Enter a name to identify this claim.
-
-
Click Save.
-
(Optional) In the Claims panel, click Discover. By selecting the Store Claims checkbox, you can tell App Builder to log all claims extracted from the security token for troubleshooting purposes.
Step 3: Map App Builder users and groups to Azure identities
If you visit IDE > User Management and open the Identities tab, you will now see that the Providers panel contains an entry for the security provider you've created.
With user provisioning
If you've enabled user provisioning and attempt to log in, you may be redirected back to the App Builder login page with a message similar to:
Error text
The user account (bob@example.com) has not been granted access to an application.
Though App Builder was able to successfully provision the user, you must map the Microsoft Entra ID security groups to App Builder security groups to grant access:
-
Log into App Builder as an administrator.
-
Go to IDE > User Management.
-
Click the Identities tab.
-
In the Providers panel, select your new Microsoft Entra ID security provider.
-
In the Provider Groups panel, click + Group:
-
Name: Enter the name of a group you have within Microsoft Entra ID.
-
Identifier: Enter the Object Id of the group found in the Microsoft Entra ID Portal.
-
Group: Use the dropdown menu to select the App Builder group the users should join.
-
-
Click the Save button.
Without user provisioning
If you have not enabled user provisioning, authentication will fail with a message similar to the following:
Error text
Although you've successfully authenticated with Azure, the account bob@example.com (bob@example.com) is not associated with a local account.
There are two ways to fix this:
-
Method 1: Allow App Builder to match existing users:
-
Go to IDE > Security Providers.
-
In the User Authentication panel, locate the security provider you've created and select it.
-
In the Provider panel, click Edit.
-
Under Provisioning, enable the Match Existing User checkbox.
-
-
Method 2: Manually map a new user:
-
Go to IDE > User Management.
-
Open the Users tab.
-
In the Users panel, select the user you would like to map.
-
In the Identities panel, click the + Identity button. A dialog opens. Provide the following:
-
Name: The Azure user name. In the error message shown above, it's the part outside the parenthesis.
-
Identifier: The Azure user name identifier. In the error message shown above, it's the part in parenthesis.
-
Provider: Use the dropdown menu to select the security provider you've created.
-
-
Click Save.
-
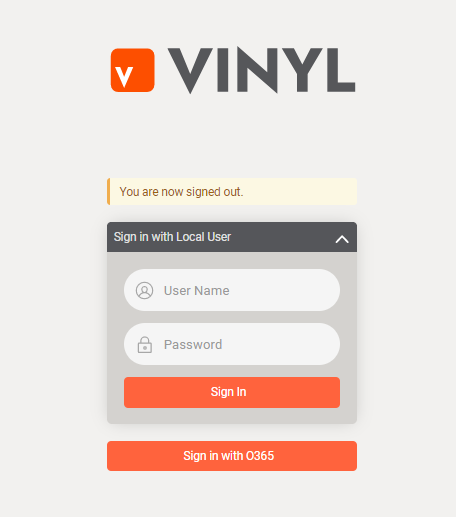
Verify the new login method
Log out of App Builder to verify that the login page now has a Sign in with ... button: