Display help text in Jitterbit App Builder
There is a UI/UX feature that allows you to display Help Text in defined regions of App Builder applications. The Help Text feature is available to be configured on a Page, on a Panel, on an individual Control, and at the Column level (table or business object). Over time, the App Builder IDE itself will start to contain Help Text in areas that warrant it. As it is released in 2.7, citizen developers can make use of this tool to provide Help Text within applications to assist end Users. This article will provide an overview of the defined regions where you can configure and add in Help Text within App Builder. When Help Text has been added, there will be a question mark icon that displays in the region where the Help Text is available. Help Text can be easily edited after it has been added.
Video example
Configure on a page
The actual steps to take to configure Help Text are similar for all regions where you can configure and edit this feature.
To configure help text on a page:
- Navigate to the Page you want to configure Help on
- Go to the Action Drawer > Design this page
- Click the Add Help button from the Page Settings panel
- Enter the information you want to display into the Content (HTML) field
- Click Save
To edit help text on a page:
- Navigate to the Page you want to edit Help on
- Go to the Action Drawer > Design this page
- Click the Edit Help button from the Page Settings panel
- Edit the information you want in the Content (HTML) field
- Click Save

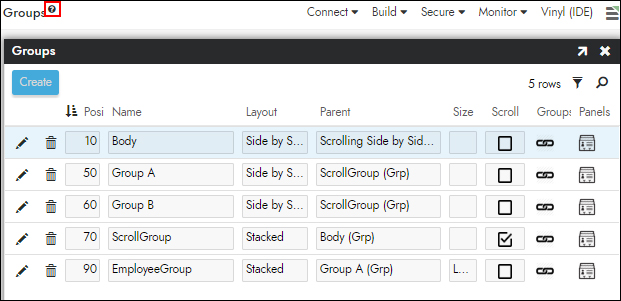
Page configured with Help Text
Configure on a panel
To configure help text on a panel:
- Navigate to the Page containing the Panel you want to configure Help on
- Go to the Action Drawer > Design this page
- Identify the Panel you want to add Help to from the Panels region, and click the corresponding pop-up icon
- Click the Add Help button from the Control Options panel
- Enter the information you want to display into the Content (HTML) field
- Click Save
To edit help text on a panel:
- Navigate to the Page containing the Panel you want to edit Help on
- Go to the Action Drawer > Design this page
- Identify the Panel you want to add Help to from the Panels region, and click the corresponding pop-up icon
- Click the Edit Help button from the Control Options panel
- Edit the information you want in the Content (HTML) field
- Click Save

Panel configured with Help Text
Configure on a control
To configure help text on a control:
- Navigate to the Panel containing the Control you want to configure Help on
- Go to the Action Drawer > Design this page
- Identify the Control you want to add Help to from the Controls region, and click the corresponding pop-up icon
- Click the Add Help button from the Features panel
- Enter the information you want to display into the Content (HTML) field
- Click Save
To edit help text on a control:
- Navigate to the Panel containing the Control you want to configure Help on
- Go to the Action Drawer > Design this page
- Identify the Control you want to add Help to from the Controls region, and click the corresponding pop-up icon
- Click the Edit Help button from the Features panel
- Enter the information you want to display into the Content (HTML) field
- Click Save

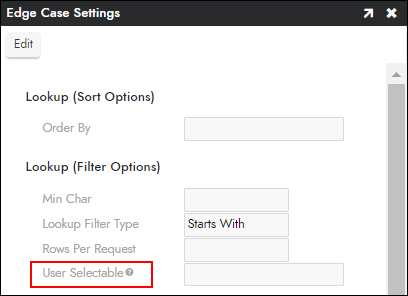
Control configured with Help Text
Configure on a column (table or business object)
Help Text can also be configured on a Column that resides either in a Table or a Business Object. When configured here, the Help Text will end up being displayed at the Control level in the application.
Note
When configuring Help Text in this region, there is an order of precedence: Business Object Column Help -> Storage Table Column Help -> Control Help (where Control Help will get overridden by the two other layers).
To configure help text on a column (business object)
- Navigate to the Business Logic Layer, to the Business Object where you want to configure Help
- Click the SQL cog icon to modify the Business Object
- Locate the Column from the Columns panel, and click the corresponding pop-up icon
- Click the Add Help button from the Column window
- Enter the information you want to display into the Content (HTML) field
- Click Save
To edit help text on a column (business object)
- Navigate to the Business Logic Layer, to the Business Object where you want to configure Help
- Click the SQL cog icon to modify the Business Object
- Locate the Column from the Columns panel, and click the corresponding pop-up icon
- Click the Edit Help button from the Column window
- Edit the information you want to display into the Content (HTML) field
- Click Save
To configure help text on a column (table)
- Navigate to the Data Storage Layer, and drill into the Tables icon for the Data Source where you want to configure Help
- Open the record for the Table containing the Column you want to add Help to
- Locate the Column from the Columns panel, and click the corresponding pop-up icon
- Click the Add Help button from the Column window
- Enter the information you want to display into the Content (HTML) field
- Click Save
To edit help text on a column (table)
- Navigate to the Data Storage Layer, and drill into the Tables icon for the Data Source where you want to configure Help
- Open the record for the Table containing the Column you want to add Help to
- Locate the Column from the Columns panel, and click the corresponding pop-up icon
- Click the Edit Help button from the Column window
- Edit the information you want to display into the Content (HTML) field
- Click Save