Notification rule to build an HTML table from a dynamic query
Introduction
This page gives an example of how to send a notification containing HTML-formatted data.
The example considers the use case of a business that needs an app to manage a server reboot approval process. The app must be able to send an email to each server's designated system manager. Servers may have more than one designated manager. The email should contain an HTML table showing the servers to be rebooted.
To set up this example, follow the steps in each section.
Configure email settings
To configure your app's email settings, follow these steps:
-
Configure the SMTP server:
- Select IDE > Notification Servers.
- Click the open record icon for the SMTP entry. The Notification Server dialog opens.
- In the From Address field, enter the sender's email address.
- In the Uri field, enter your SMTP server's address, including the protocol prefix (
smtp://orsmtps://), and port number suffix (usually:587but can also be one of:25,:465, or:2525). - Expand the Security section.
- Enter the SMTP server's credentials in the User Name and Password fields.
- Expand the Testing section.
- Enter valid email addresses in the From and To fields, then click the Test Email button. This sends an email to and from these addresses via the configured SMTP server.
- When the test is successful, close the Notification Server dialog.
-
Configure your email address:
- Select > View User Profile. The User Profile dialog opens.
- In the Email Address field, enter a valid email address. (This is the address emails appear to be sent from.)
- Press Enter, then close the dialog.
-
Set the default site URL:
- Select IDE > Security Providers.
- In the Configuration panel, select More > Sites.
- Click the open record icon for the row marked as default. The Site dialog opens.
- Click the Edit button.
- In the URL field, enter a value for the app's URL.
- Click the Save button.
- Close the dialog.
Create an app
- From the site menu, click the + App button.
- In the Name field, enter
ServerOwners, then click the Create App button.
Note
If you want to use an existing app, select the correct value for Source Data Source when setting up the rules on this page.
Create tables
To set up the tables for this example, select > App Workbench > Tables, then use the + Table and + Column buttons to add the tables and columns in this section.
Important
For each table, click the Publish to Business Layer button, then click the Publish to UI Layer button, selecting the defaults Home for the menu location and Grid and Form for the panel type.
Table: Servers
This table stores the details of your servers:
| Column name | Data type | Primary key |
Foreign key |
Required | ||||
|---|---|---|---|---|---|---|---|---|
ServerID |
Unique ID | |||||||
ServerName |
String | |||||||
ServerLocation |
String | |||||||
| (Optional) Additional details on the server as required. | | | | | ||||
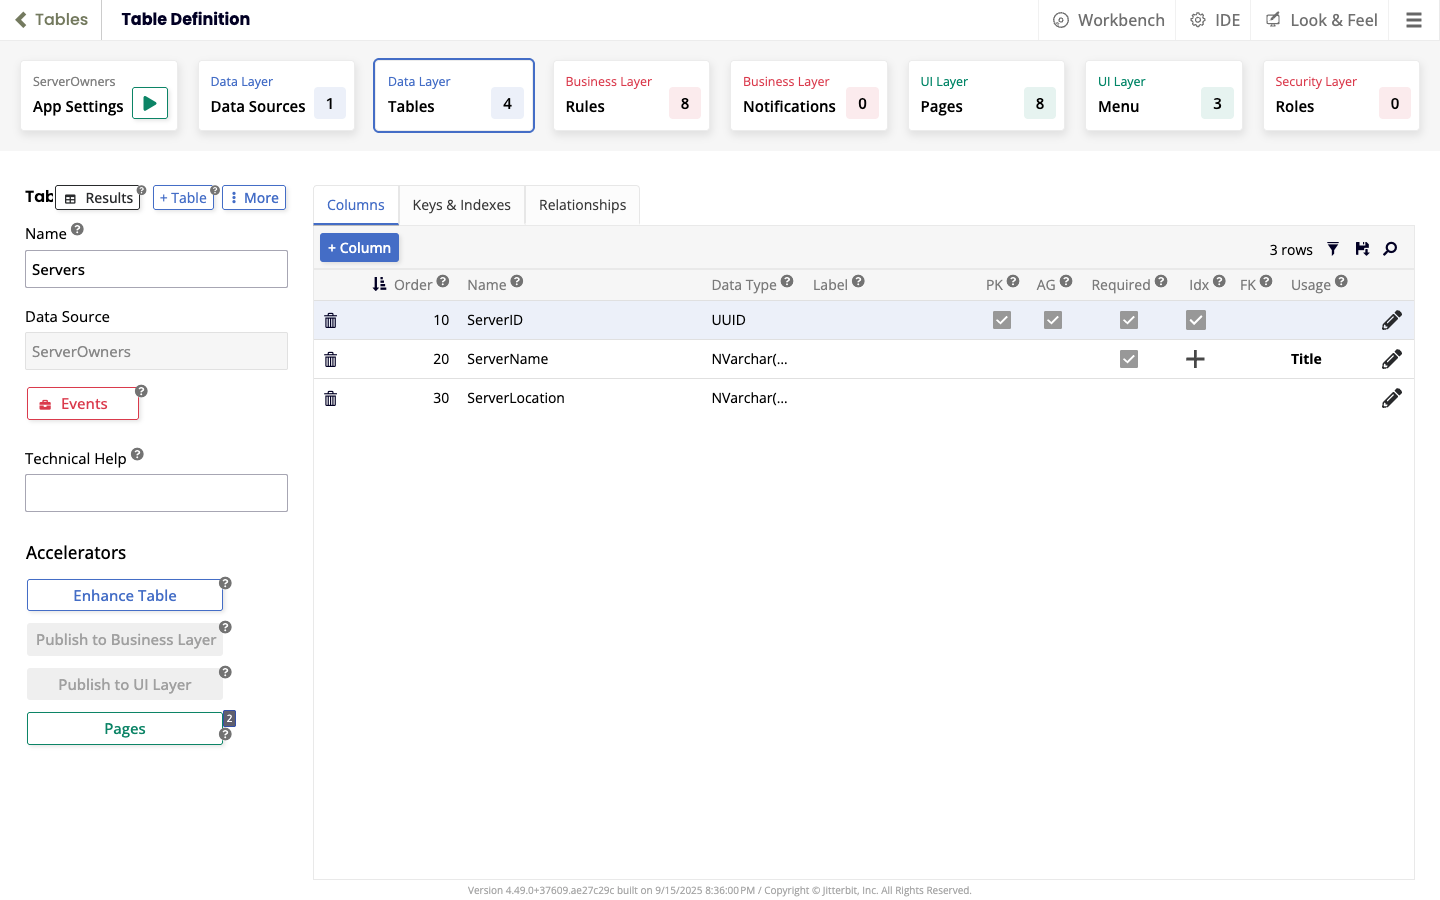
Table: Owners
This table stores the details of the people responsible for the servers:
| Column name | Data type | Primary key |
Foreign key |
Required | ||||
|---|---|---|---|---|---|---|---|---|
OwnerID |
Unique ID | |||||||
OwnerName |
String | |||||||
OwnerEmailAddress |
||||||||
| (Optional) Additional details on the owners as required. | | | | | ||||

Table ServerOwners
This table connects owners with servers:
| Column name | Data type | Primary key |
Foreign key |
Required |
|---|---|---|---|---|
ServerOwnerID |
Unique ID | |||
ServerID |
Unique ID | |||
OwnerID |
Unique ID |
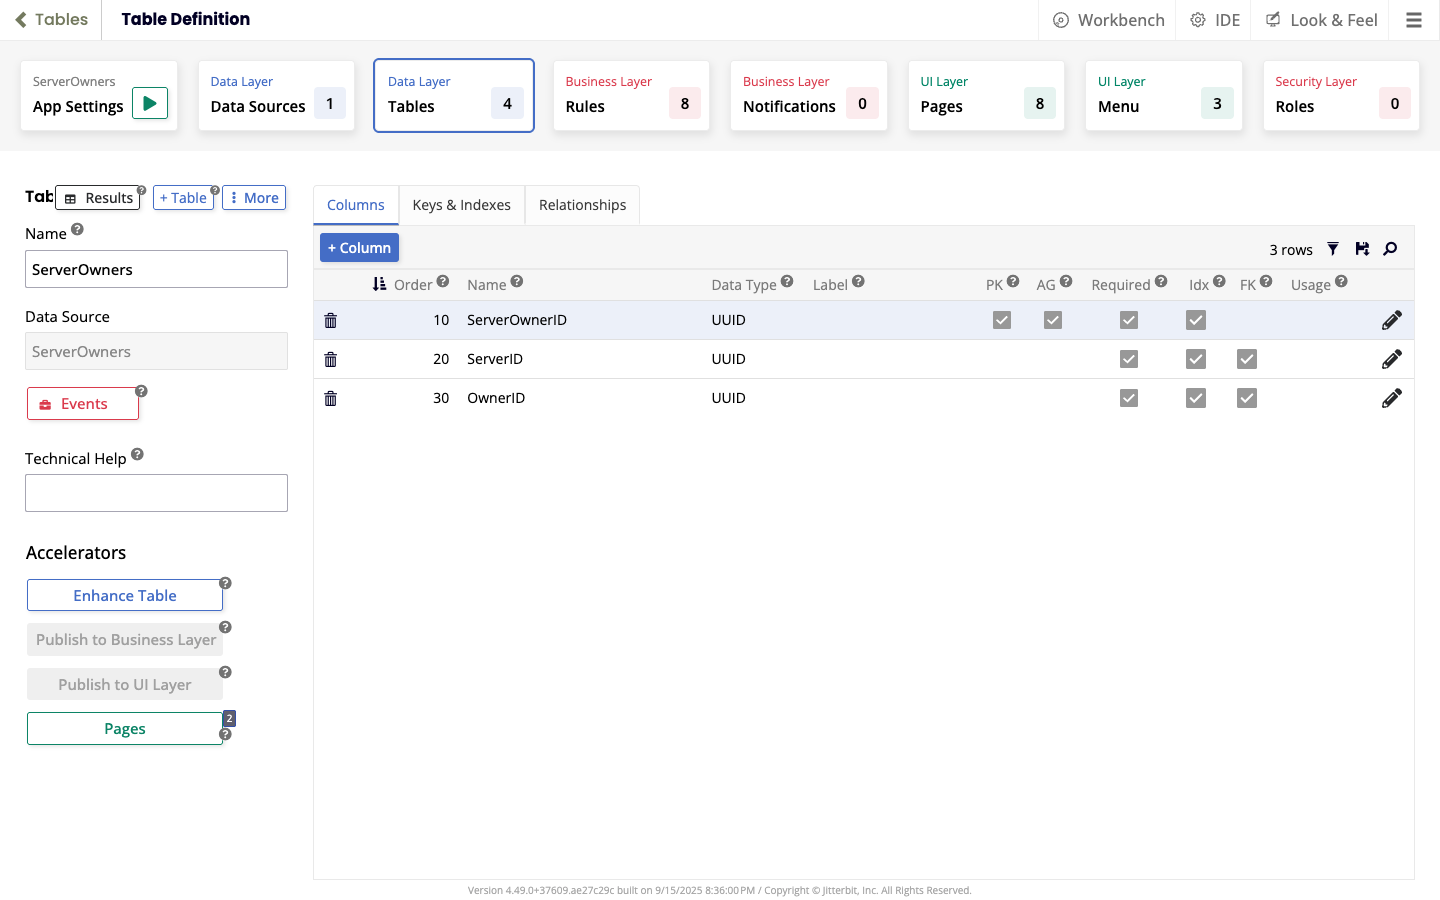
Tip
For this table, select the Columns tab, then click the icon in the FK column to add the foreign keys.
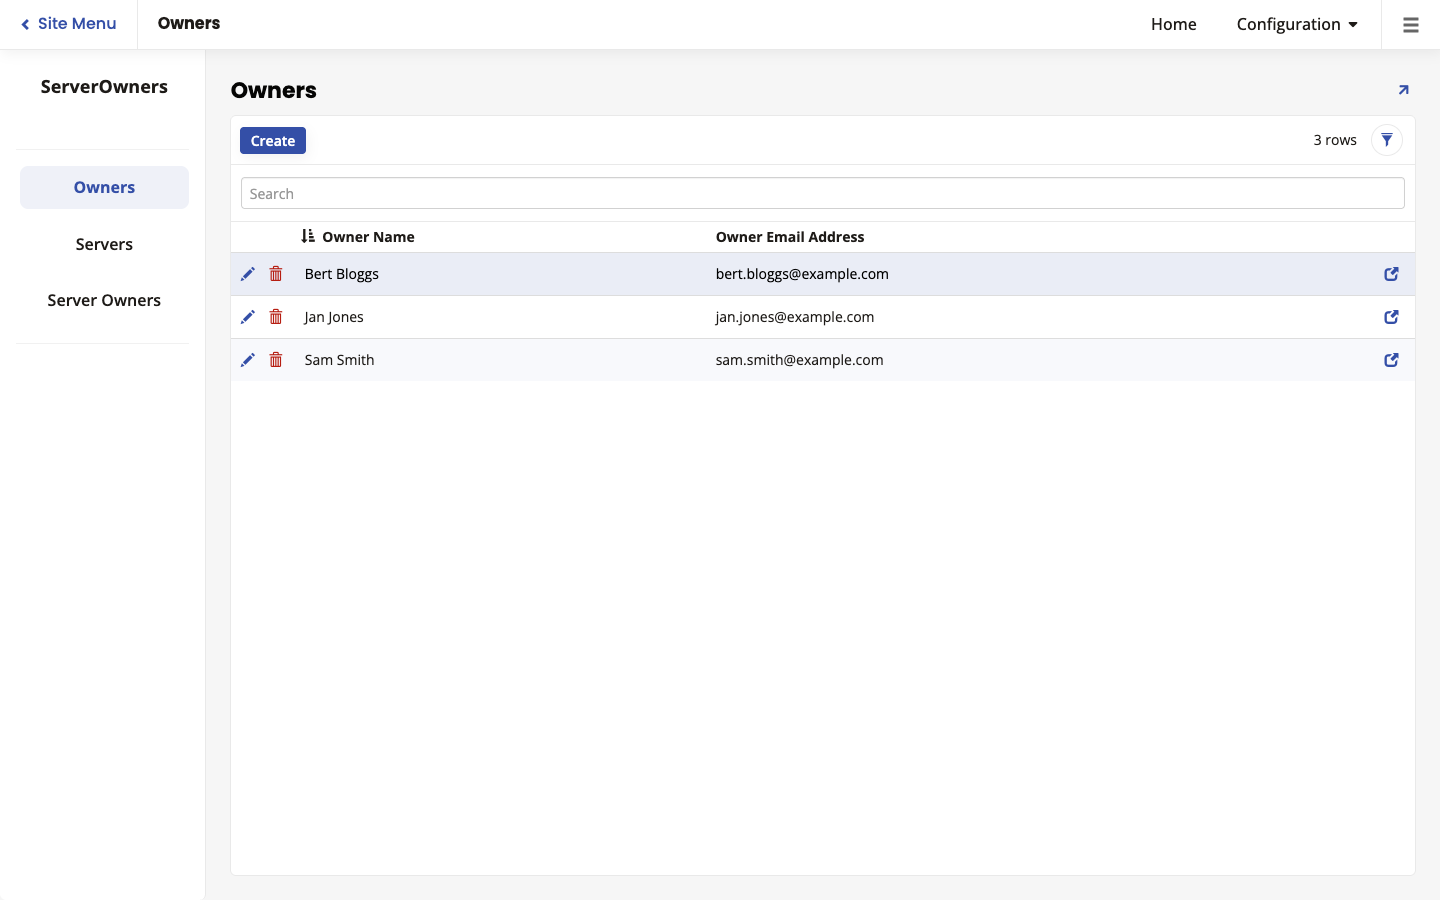
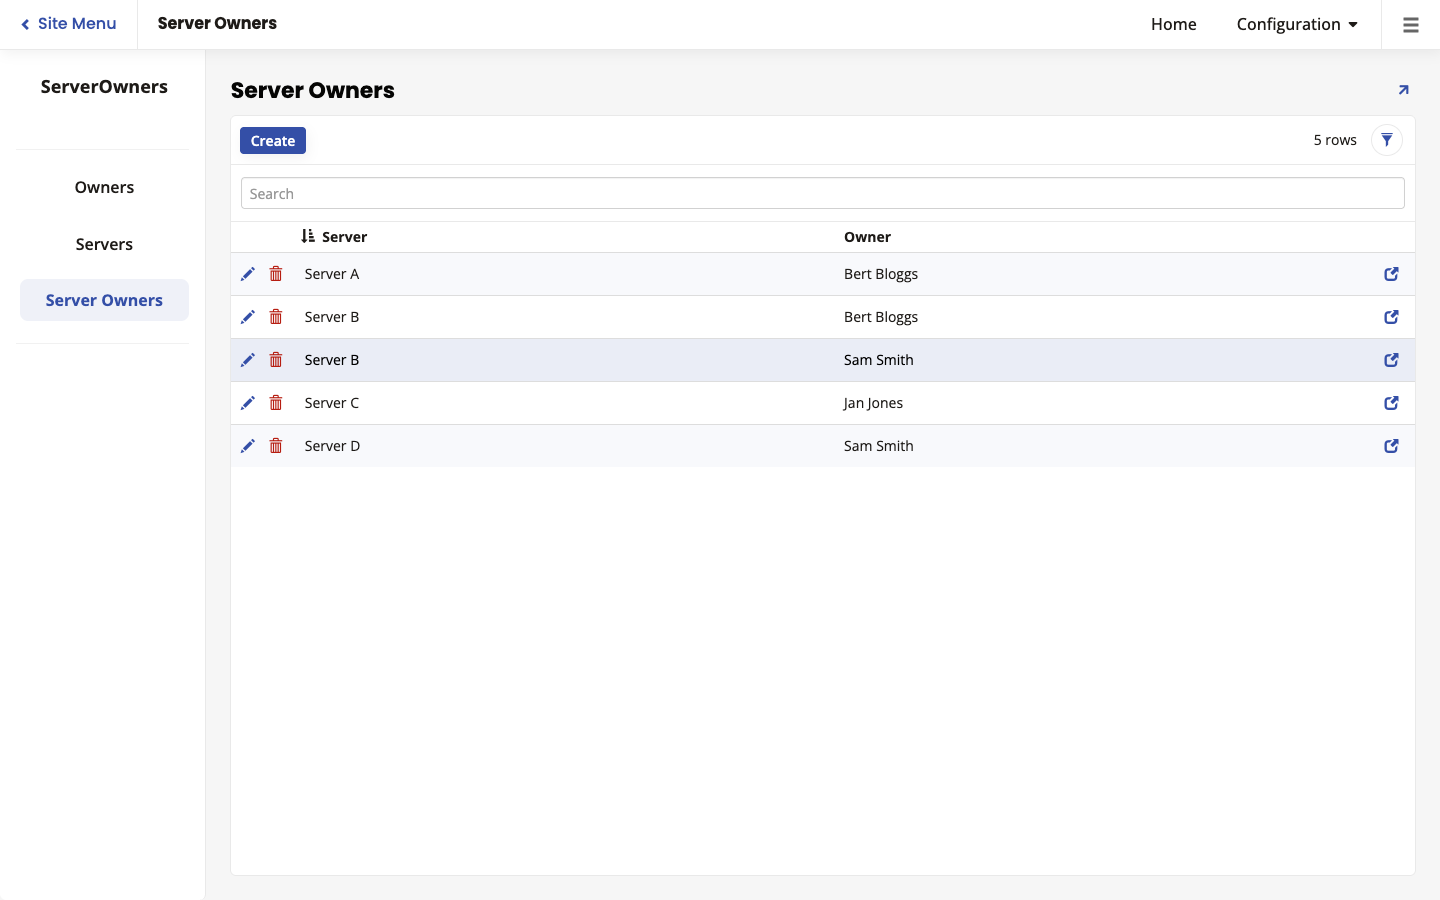
Add sample data
To add sample data, do the following:
-
From the App Workbench, click the App Settings icon to run the app.
-
On the app's Home page, for each of Owners, Servers, and Server Owners, select the option, click the Create button, then add enough entries for the example to make sense to you. For example:

Create rules
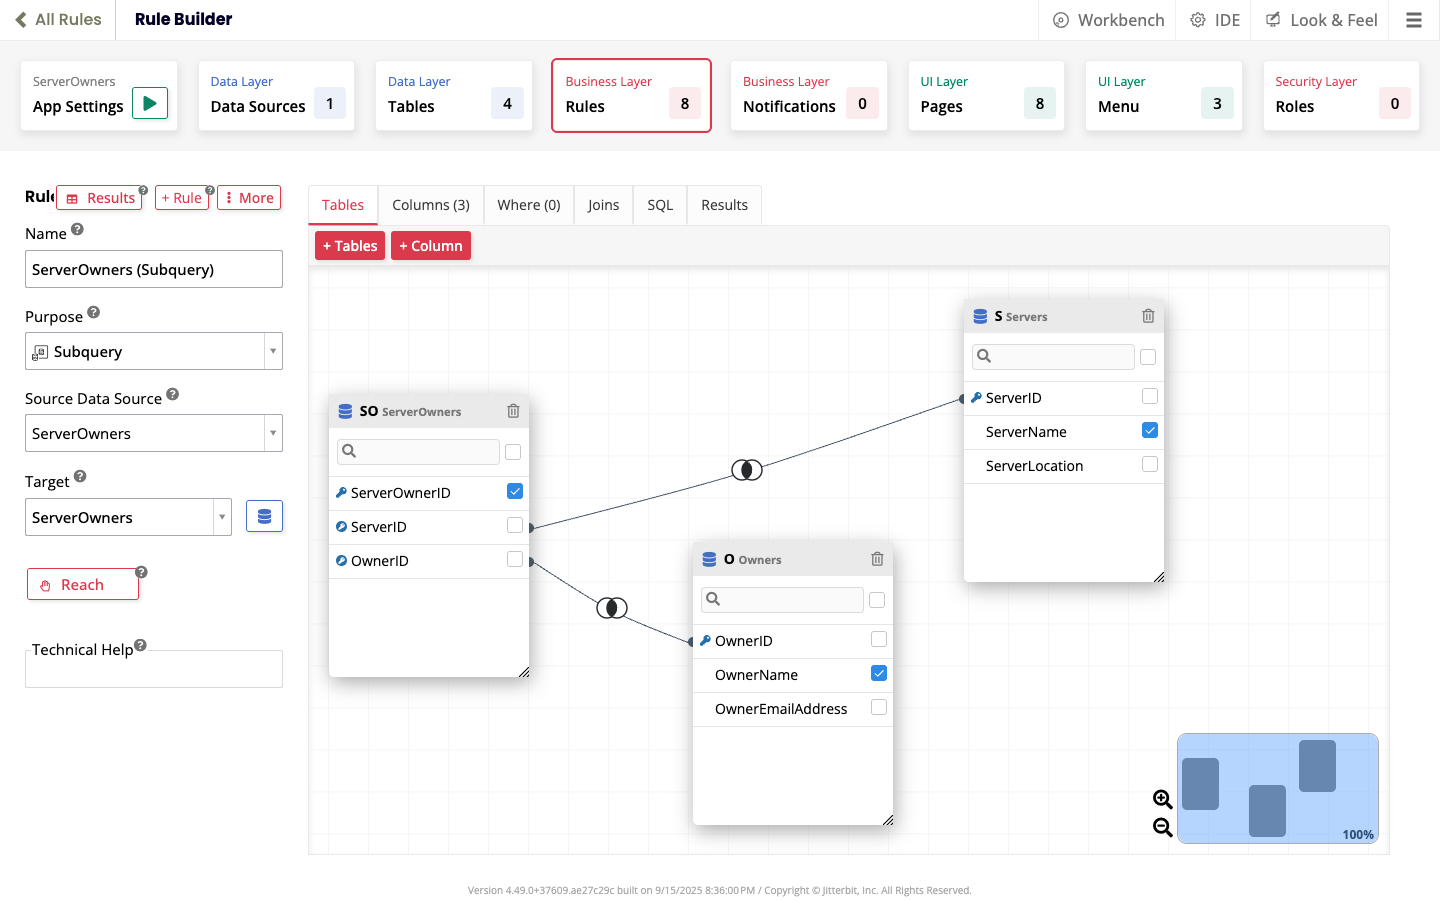
Rule: ServerOwners (Subquery)
This subquery rule outputs the data in the ServerOwners (Business Rule) rule, with the addition of the names of owners and servers:
-
Create the rule:
-
Open your app, then select > App Workbench > Rules.
-
Click the + Rule button.
-
In the Rule panel on the Rule Builder page, set the following values:
- Name:
ServerOwners (Subquery) - Purpose: Subquery
- Source Data Source: ServerOwners
- Target: ServerOwners
- Name:
-
Click the Create button (or press Control+S).
-
-
Add tables:
-
Owners:
- On the Tables Tab, click the + Tables button. A dialog opens.
- Click the Add button on the Owners entry. The dialog closes.
-
Servers:
- Click the + Tables button.
- Click the Add button on the Servers entry.
-
-
Select columns: Select the following columns:
- OwnerName in the Owners table.
- ServerName in the Servers table.
-
ServerOwnerID in the ServerOwners table.
-
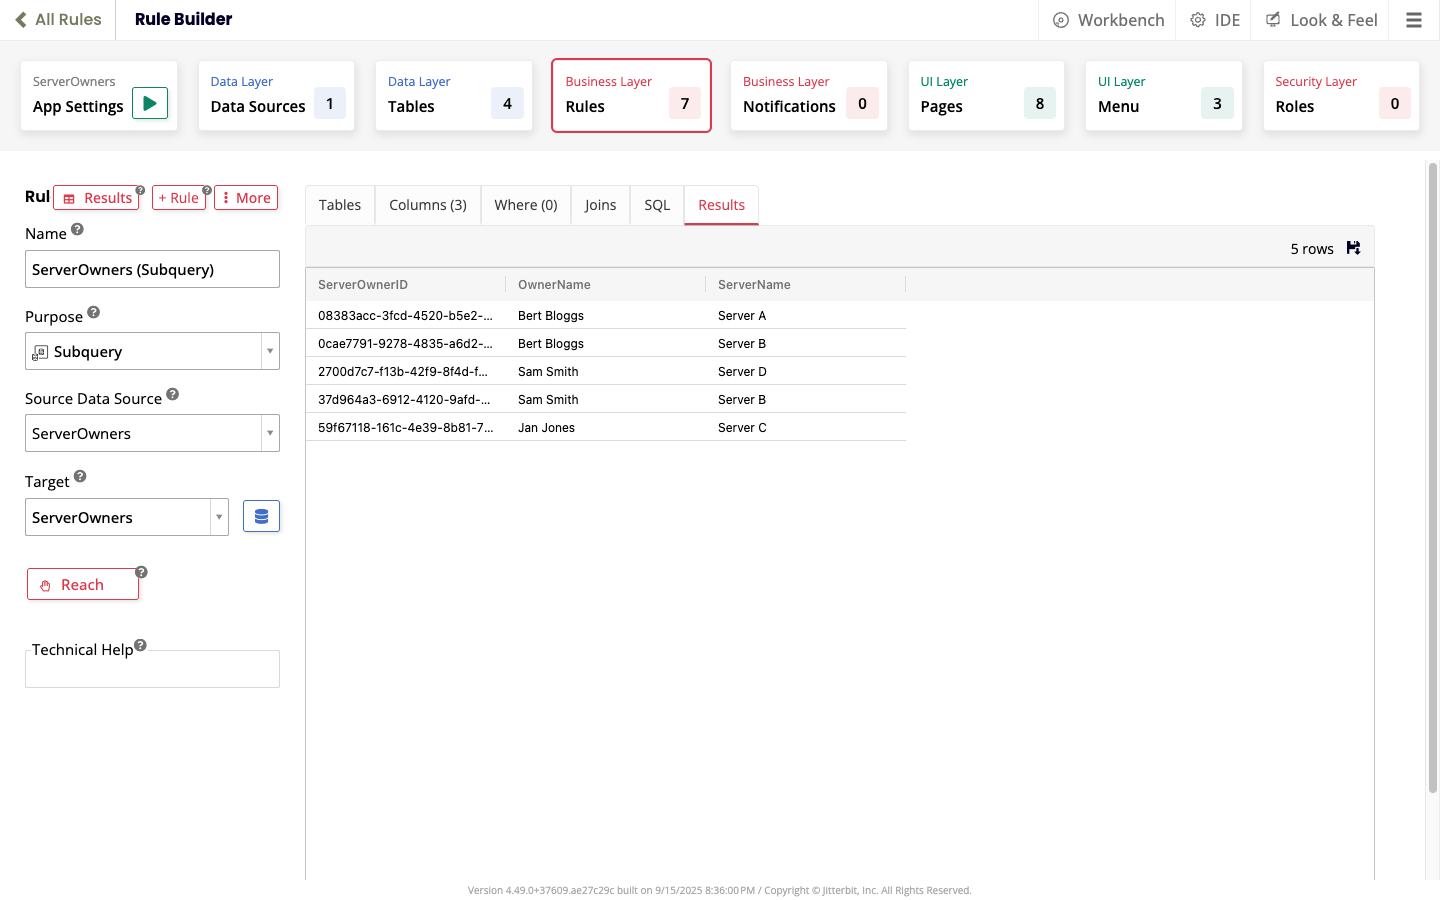
Check the rule:
- Click the Validate button.
-
(Optional) Check the results of the rule in the Results tab:
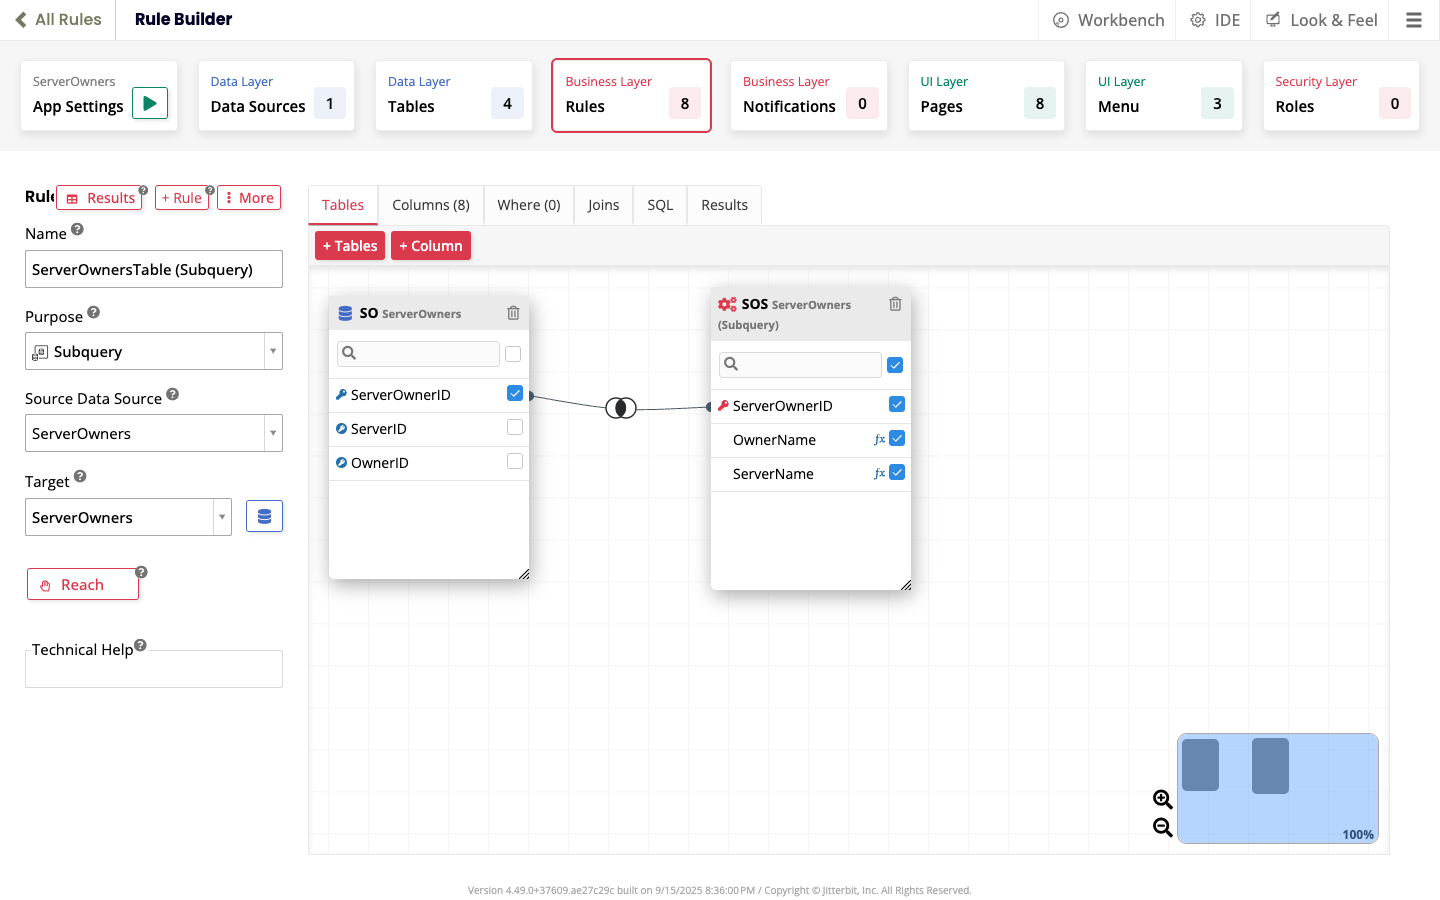
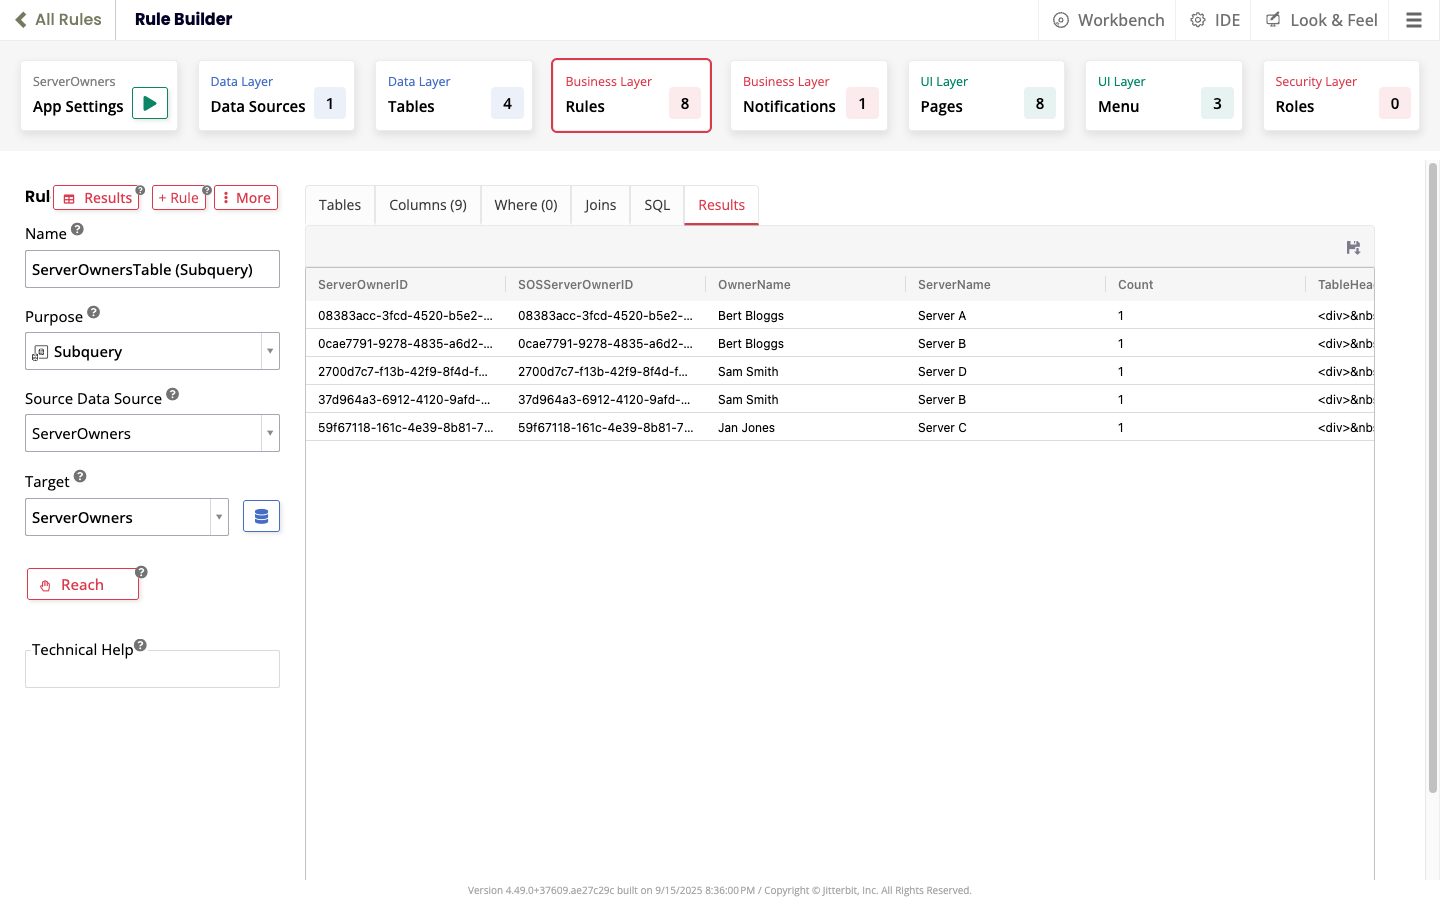
Rule: ServerOwnersTable (Subquery)
This subquery rule produces the HTML used in the body notification.
-
Create the rule:
- Select > App Workbench > Rules.
- Click the + Rule button.
-
In the Rule panel on the Rule Builder page, set the following values:
- Name:
ServerOwnersTable (Subquery) - Purpose: Subquery
- Source Data Source: ServerOwners
- Target: ServerOwners
- Name:
-
Click the Create button.
-
Add tables:
-
ServerOwners (Subquery):
- Click the + Tables button.
- Click the Add button for the ServerOwners (Subquery) rule.
-
-
Join tables: Drag and drop the ServerOwnerID column from ServerOwners to the same column on ServerOwners (Subquery).
-
Select columns: Select all columns in the ServerOwners (Subquery) rule:
-
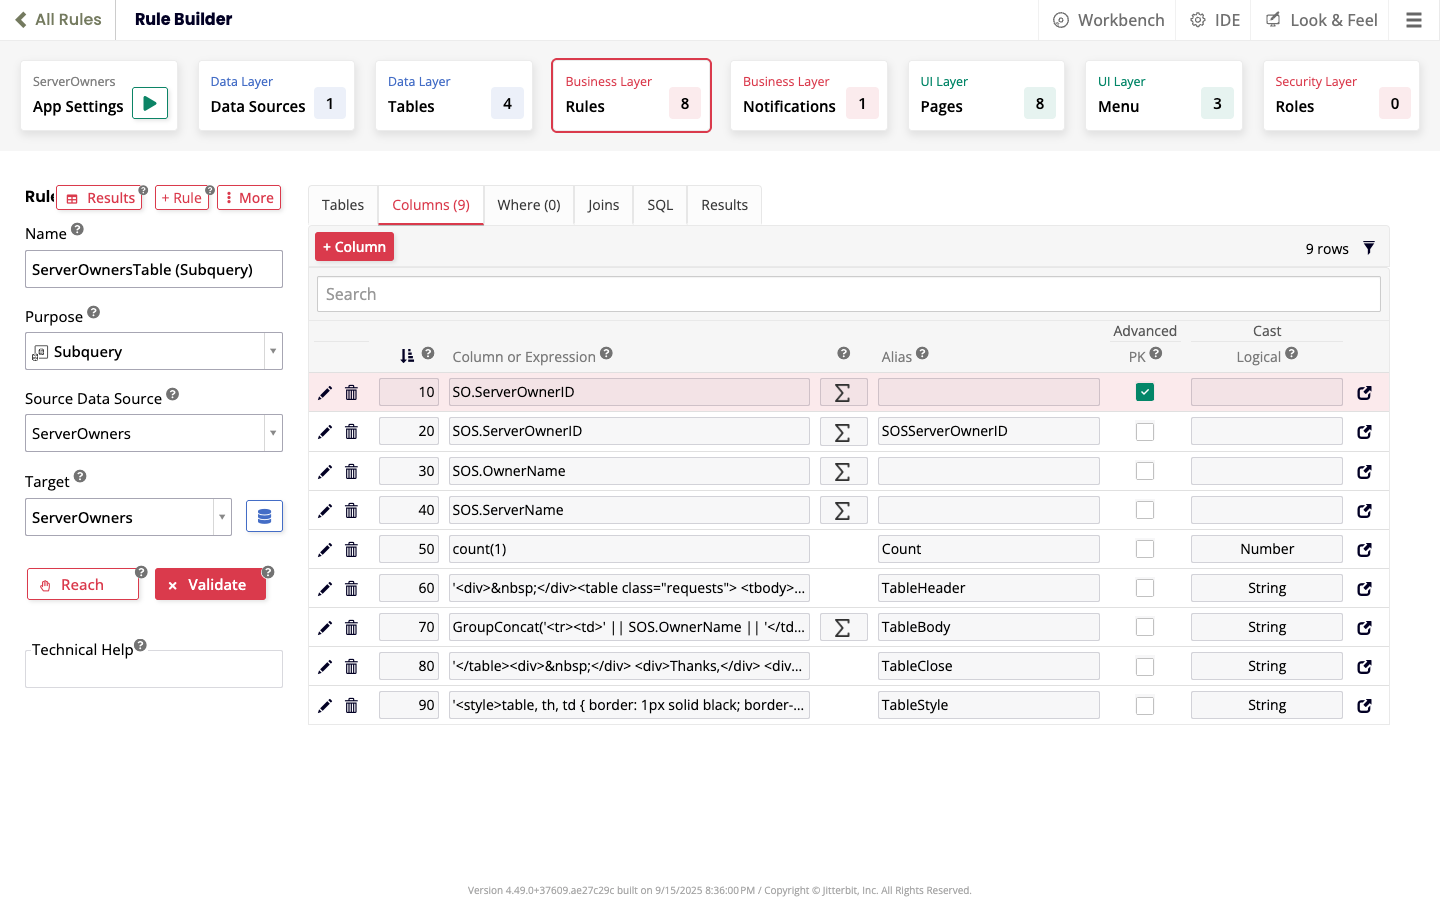
Add columns:
-
Column
count:- Click the + Column button.
-
In the Column or Expression panel, enter the following:
count(1) -
Click the Save button.
-
Column
TableHeader:- Click the + Column button.
-
In the Column or Expression panel, enter the following:
'<table><tbody><tr><td>Server Owner</td><td>Server Name</td></tr>' -
In the Alias field, enter
TableHeader. - Click the Save button.
-
Column
TableBody:- Click the + Column button.
-
In the Column or Expression panel, enter the following:
GroupConcat('<tr><td>' || SOS.OwnerName || '</td><td>' || SOS.ServerName || '</td></tr>','') -
In the Alias field, enter
TableBody. - Click the Save button.
-
Column
TableClose:- Click the + Column button.
-
In the Column or Expression panel, enter the following:
'</table><div> </div> <div>Thanks,</div> <div>Server Team</div>' -
In the Alias field, enter
TableClose. - Click the Save button.
-
Column
TableStyle:- Click the + Column button.
-
In the Column or Expression panel, enter the following:
'<style>table, th, td { border: 1px solid black; border-collapse: collapse; }</style>'Note
This provides some minimal table styling.
-
In the Alias field, enter
TableStyle. -
Click the Save button.
-
-
Check the rule:
- Click the Validate button.
-
(Optional) Check the results of the rule in the Results tab:
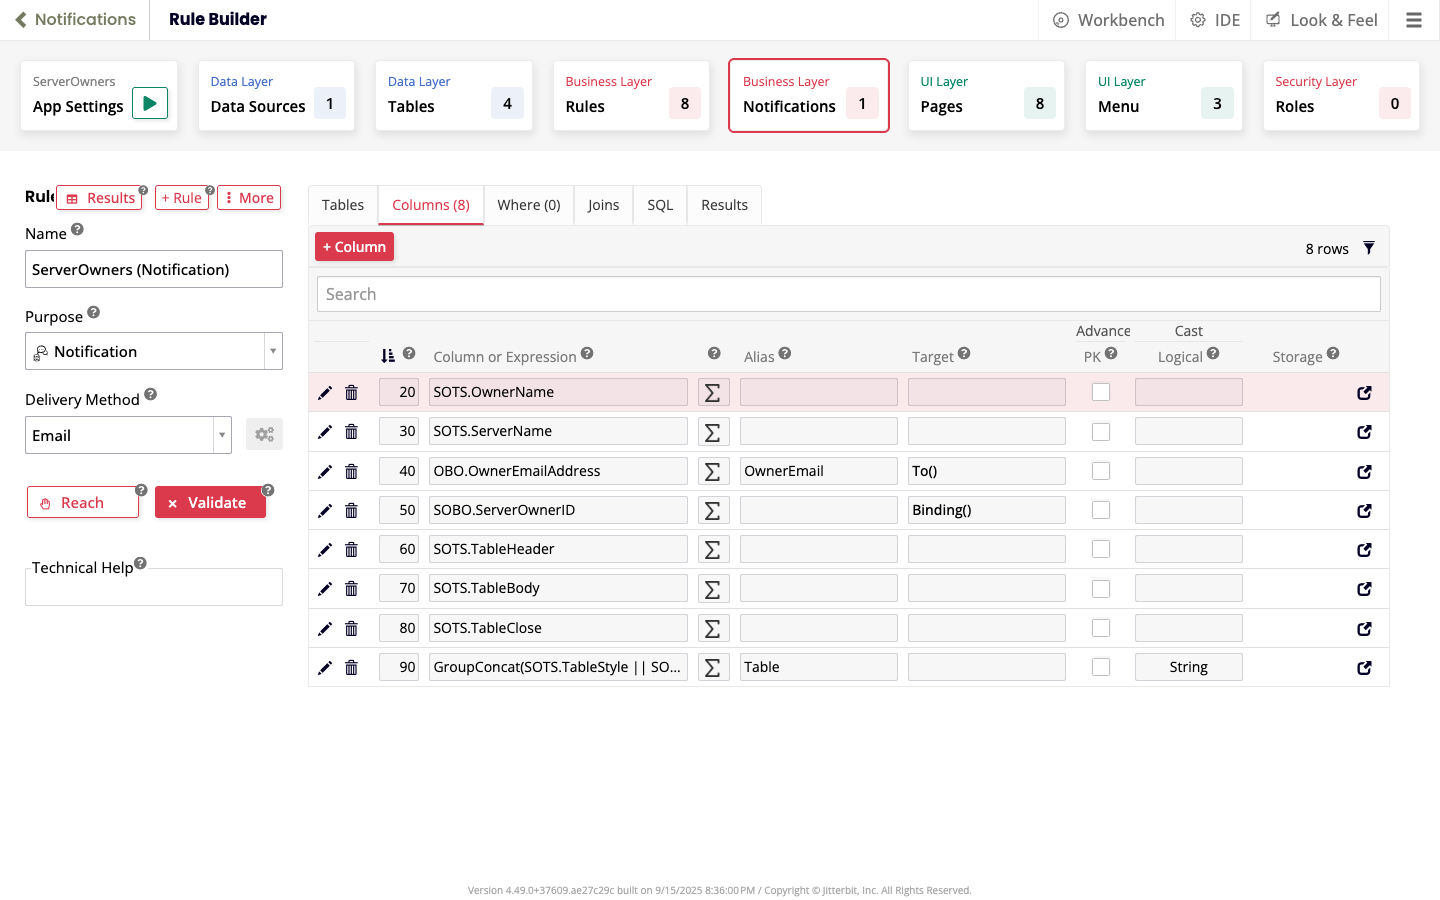
Rule: ServerOwners (Notification)
This rule generates the notification sent to server owners.
-
Create the rule:
- Select > App Workbench > Notifications.
- Click the + Notification button.
-
In the Rule panel on the Rule Builder page, set the following values:
- Name:
ServerOwners (Notification) - Purpose: Notification
-
Delivery Method: Email
Tip
While testing, or when you don't have an SMTP server, set Delivery Method to App Builder Alert.
- Name:
-
Click the Create button.
-
Add tables:
-
ServerOwnersTable (Subquery):
- Click the + Tables button.
- Click the Add button for the ServerOwnersTable (Subquery) entry.
-
ServerOwners (Business Object):
- Click the + Tables button.
- Click the Add button for the ServerOwners (Business Object) entry.
-
Owners (Business Object):
- Click the + Tables button.
- Click the Add button for the Owners (Business Object) entry.
-
-
Join tables: Drag and drop the ServerOwnerID column from ServerOwnersTable (Subquery) to the same column on ServerOwners (Business Object).
Tip
The OwnerID join between ServerOwners (Business Object) and Owners (Business Object) is made automatically.
-
Add columns:
-
Column
To():- Select the Columns tab.
- Click the + Column button.
-
In the Column or Expression panel, enter the following:
OBO.OwnerEmailAddress -
In the Alias field, enter
OwnerEmail. - Open the Target menu, then select To().
- Click the Save button.
-
Column
Binding():- Click the + Column button.
-
In the Column or Expression panel, enter the following:
SOBO.ServerOwnerID -
Open the Target menu, then select Binding().
- Click the Save button.
-
Column
Table:- Click the + Column button.
-
In the Column or Expression panel, enter the following:
GroupConcat(SOTS.TableStyle || SOTS.TableHeader || SOTS.TableBody || SOTS.TableClose, '') -
In the Alias field, enter
Table. -
Click the Save button.
-
Check the rule:
- Click the Validate button.
-
(Optional) Check the results of the rule in the Results tab:

-
Test
- (Optional) Run the app, select the Owners page, then check the owner email addresses are valid.
- Select > App Workbench > Notifications.
- In the Notification Rules panel, select ServerOwners (Notification). (This is already selected if it's the only notification rule.)
- In the Message panel, click the Edit button.
- In the Subject field, enter your choice of subject.
-
In the Body edit panel, enter the following:
{{Table|HTML}} -
Click the Save button.
- Click the Test button, then click the Proceed button.
- Check your email inbox for the message. (If you are testing with an App Builder Alert, a toast message appears containing the body of the message.)