Install Jitterbit App Builder on Microsoft Windows (x64)
Introduction
To install App Builder on Microsoft Windows, follow these steps:
-
Satisfy the software requirements for both the web server and database server.
-
Get and unpack the software.
-
(Optional) Enable Crystal Reports.
-
(Optional) Post-installation configuration.
Tip
App Builder's Docker image is an easier way to get started.
Get and unpack the software
To get and unpack the software, follow these steps:
-
Contact your Customer Success Manager (CSM) to get a copy of the App Builder 4 software.
The software is provided as a compressed file with the name
vinyl-X.Y.N-win.zip, whereX.Yis the version number (for example,4.0) andNis the build number (for example,45678). -
Copy this file to a folder on the host where IIS runs.
-
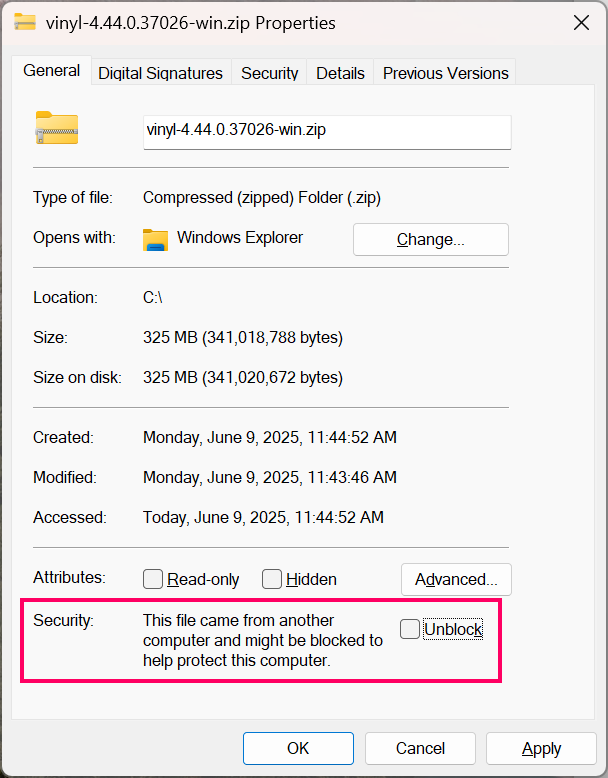
Depending on your system's security settings, you may need to unblock the file. To do this, right-click on the file, then select Properties. In the Properties dialog, select the Security tab, then select Unblock:
-
Right-click on the
vinyl-X.Y.N-win.zipfile, and select Extract All. -
Set the extract destination to be a folder within the default IIS physical root folder (for example,
C:\inetpub\wwwroot\Vinyl). -
Click the Extract button.
Caution
Do not continue until the extraction is complete. This can take many minutes.
Configure IIS
To configure IIS, follow these steps:
Add an application pool
To add an application pool using the IIS Manager, follow these steps:
-
In the Connections panel, right-click on Application Pools, then select Add Application Pool.
-
In the Add Application Pool dialog, set values for the following fields:
-
Name:
Vinyl -
.NET CLR Version: .NET CLR Version v4.0.30319.
-
Managed Pipeline Mode: Integrated.
-
Start application pool immediately: Selected.
-
-
Click the OK button.
To add an application pool using the command line, enter these commands:
cd 'C:\Program Files\IIS'
.\appcmd.exe add apppool /name:"Vinyl" /managedPipelineMode:Integrated /autoStart:true /managedRuntimeVersion:"v8.0"
Multiple instances
If you want to run multiple App Builder instances on the same app server, they should be isolated in separate app pools with the Load User Profile option enabled.
Add an application
To add an application using the IIS Manager, follow these steps:
-
In the Connections panel, expand the Sites folder, right click on Default Web Site, then select Add Website.
-
In the Add Website dialog, set values for the following fields:
-
Site name:
Vinyl -
Application pool:
Vinyl -
Physical path:
C:\inetpub\wwwroot\Vinyl -
Start Website immediately: Selected.
-
-
Click the OK button.
To add an application using the command line, enter these commands:
.\appcmd.exe add site /name:"Vinyl" /id:1 /bindings:http://*:80 /physicalPath:"C:\inetpub\wwwroot\Vinyl"
.\appcmd.exe add app /site.name:"Vinyl" /path:"/" /physicalPath:"C:\inetpub\wwwroot\Vinyl"
Configure authentication
To configure authentication using the IIS Manager, follow these steps:
-
In the Connections panel, under the Sites folder, select the Vinyl entry.
-
Double-click the Authentication icon in the IIS section.
-
Select Anonymous Authentication and click the Edit action.
-
In the Edit Anonymous Authentication Credentials dialog, select Application pool identity, then click the OK button.
To configure authentication using the command line, enter this command:
appcmd.exe set config -section:anonymousAuthentication /username:"" --password
Set permissions
To set permissions using the IIS Manager, follow these steps:
-
In the Connections panel, under the Sites folder, right-click on Vinyl and select Edit Permissions.
-
Select the Security tab, then click the Edit button.
-
In the Permissions for Vinyl dialog, click the Add button.
-
In the Select User or Groups dialog, in the field Enter the object names to select, enter
IIS AppPool\Vinyl, then click the Check Names button. -
Click the OK button.
-
In the Permissions for Vinyl dialog, under Group or user names, select the new Vinyl user.
-
Under Permissions for Vinyl, for the Full control row, select the Allow checkbox.
-
Click the OK button to close the dialog.
-
In the Vinyl Properties dialog, click the OK button.
(Optional) Enable Crystal Reports
App Builder comes with Crystal Reports pre-installed on Windows systems. Crystal Reports is hosted out-of-process in a COM server. To register the Crystal Reports COM server, open a Windows PowerShell as an administrator, then run these commands:
Set-ExecutionPolicy RemoteSigned
cd C:\inetpub\wwwroot\Vinyl\Scripts
.\RegisterCrystalReports.ps1
Create a connection file
To create a connection file, follow these steps:
-
Copy one of the samples in the
Sample_Connection_Filesfolder, and paste it with the nameConnection.xmlin theVinylroot directory. Which one you copy depends on your database type. -
Edit the
C:\inetpub\wwwroot\Vinyl\Connection.xmlfile and set values for the parametersDatabaseName,UserName, andPassword. (TheUserNameuser must have a system administration role.)
Tip
You can also use environment variables or a JSON file to specify the database connection.
Test and run
To run App Builder for the first time, follow these steps:
-
Go to
http://localhost/Vinyl/. -
It can take several minutes to set up the database for the first time. When the login screen appears, enter the following default credentials:
-
User name:
admin -
Password:
P@55w0rd
-
-
Click the Sign In button, and follow the instructions to change the password, and upload a license file.
(Optional) Post-install configuration
-
Configure security providers:
The App Builder security model supports multiple, configurable security providers. If your organization is looking to configure security provider(s), please see the Providers page.
-
Ensure scheduled events run after the application pool is recycled:
You should ensure the application pool is always running, and that any event that may cause the application pool to stop will restart the application immediately.
When App Builder is not running, scheduled events are not executing.
This is important as IIS will shut down the application pool when idle (often during off hours), causing nightly scheduled routines to be ignored.
To have App Builder start automatically after an application pool recycles, or a server restart, you can configure the IIS
ApplicationInitializationcomponent.Note
IIS ApplicationInitialization is not compatible with sites that use Windows Integrated Authentication. Using Windows Integrated Authentication requires Anonymous Authentication to be disabled in IIS. The IIS ApplicationInitialization component requires anonymous access.
There is a workaround for this scenario involving the Windows Scheduler to ping App Builder every 5 minutes to ensure that it starts back up after the application pool is recycled.
-
Install and configure application initialization:
The steps vary depending on the version of IIS. Choose the a link below:
-
Test always running behavior:
The following guide steps through how to test for always running behavior:
By default IIS is set to restart every 29 hours (so that the Application Pool is restarting at different times every day). You should configure a specific time of day when the Application Pool restarts, and be sure that this time does not interfere with scheduled background jobs.

Specify a date and time to recycle the application pool in IIS Manager. Here you would set 11:42:00 to a time that doesn't conflict with scheduled background jobs.