Google Gmail connection guide for Jitterbit App Builder
Overview
This guide describes the system requirements and instructions for connecting App Builder to a Gmail database server.
System requirements
Database server
Gmail Database Server
Client web browser
-
Chrome TM 60 or newer
-
Firefox ® 55 or newer
-
Safari ® 11.0.2 or newer
Connection instructions
Adding an OAuth security provider
-
Navigate to the App Builder IDE
-
From the Connect menu, click on the Connect to your enterprise link
-
Click on Security Providers then click Create under User Authentication
-
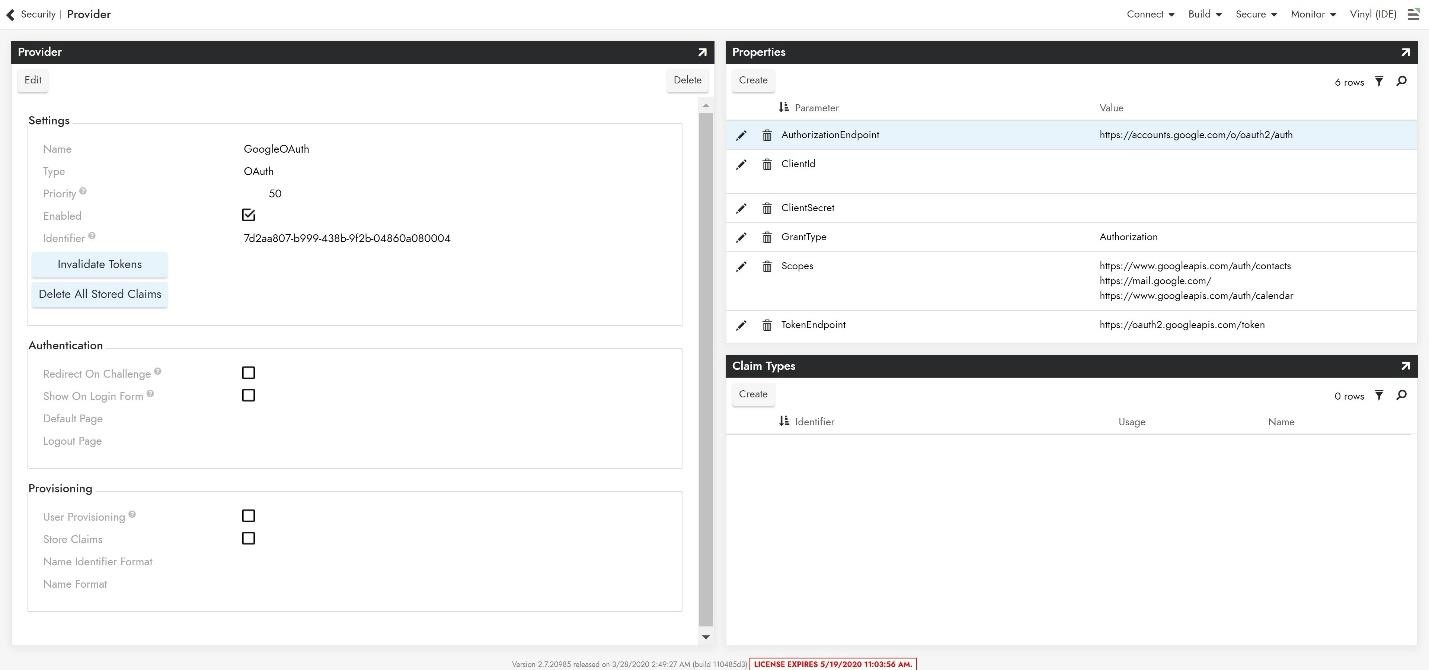
To configure Oauth Security Provider, provide the following information:
-
In Settings panel
-
Name: GoogleOAuth (must be named this to match redirect)
-
Type: Select Oauth from the dropdown menu
-
-
In Properties panel
-
Authorization Endpoint:
https://accounts.google.com/o/oauth2/auth -
ClientId: Credentials from Google API Console (omitted from screenshot)
-
ClientSecret: Credentials from Google API Console (omitted from screenshot)
-
Scopes:
https://mail.google.com/- Visit Google's documentation for further guidance on Scopes. Multiple scopes can be added, separate by a space.
-
-
Token Endpoint:
https://oauth2.googleapis.com/token
-
-
Click Enabled and Redirect on Challenge.
-
Click Save.
Adding a RDBMS security provider
-
Navigate to the App Builder IDE
-
From the Connect menu, click on the Connect to your enterprise link
-
Click on Security Providers then click Create under Data Source Authentication
-
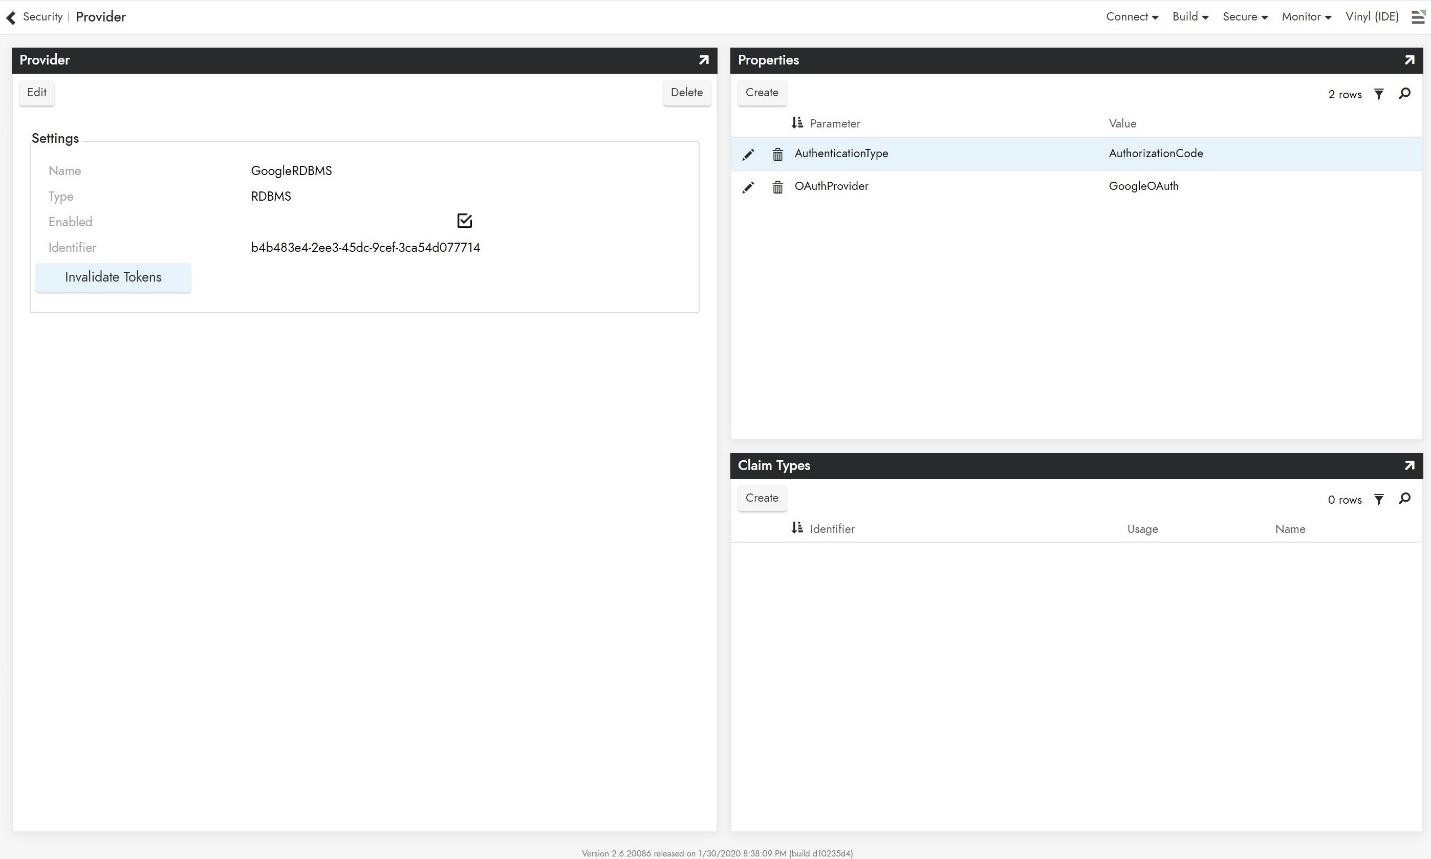
To configure Oauth Security Provider, provide the following information:
-
In Settings panel
-
Name: Recognizable Name
-
Type: Select RDBMS from the dropdown menu
-
-
In Properties panel
-
AuthorizationType: AuthorizationCode
-
OAuthProvider: Oauth Provider created in previous step
-
-
Adding a server
-
Navigate to the App Builder IDE
-
From the Connect menu, click on the Connect to your enterprise link
-
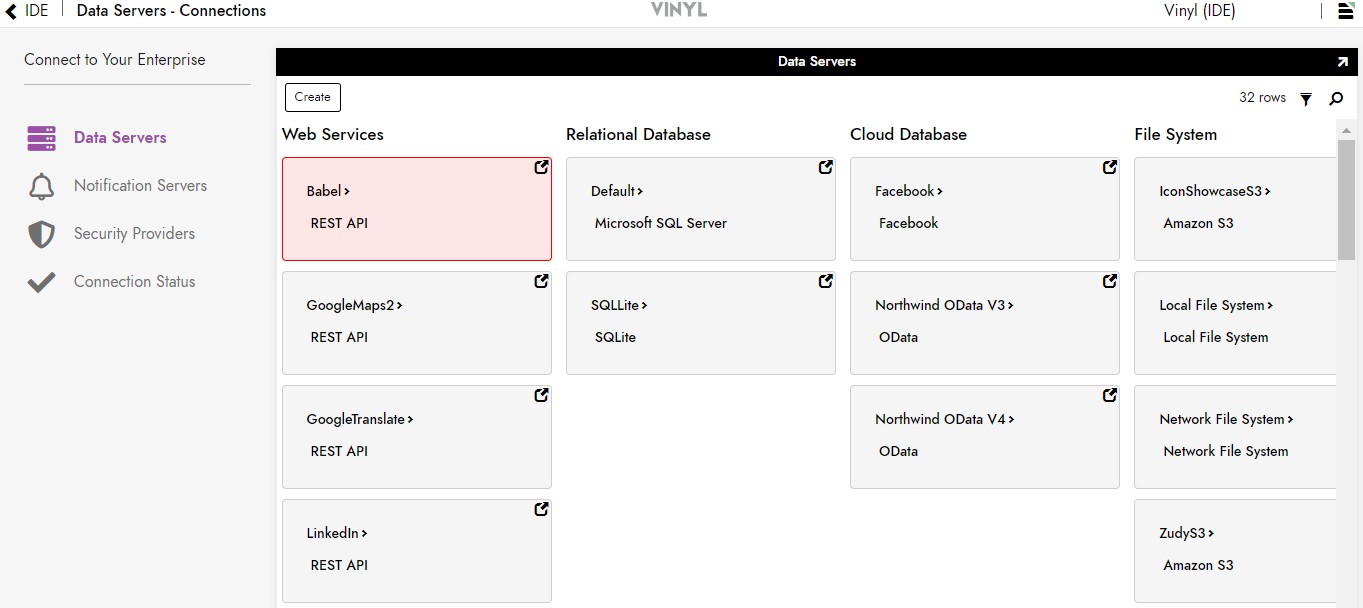
Click the Create button on the top left of the Data Servers panel. This will bring up the Add Server page.
-
To connect to a Gmail server, provide the following information:
-
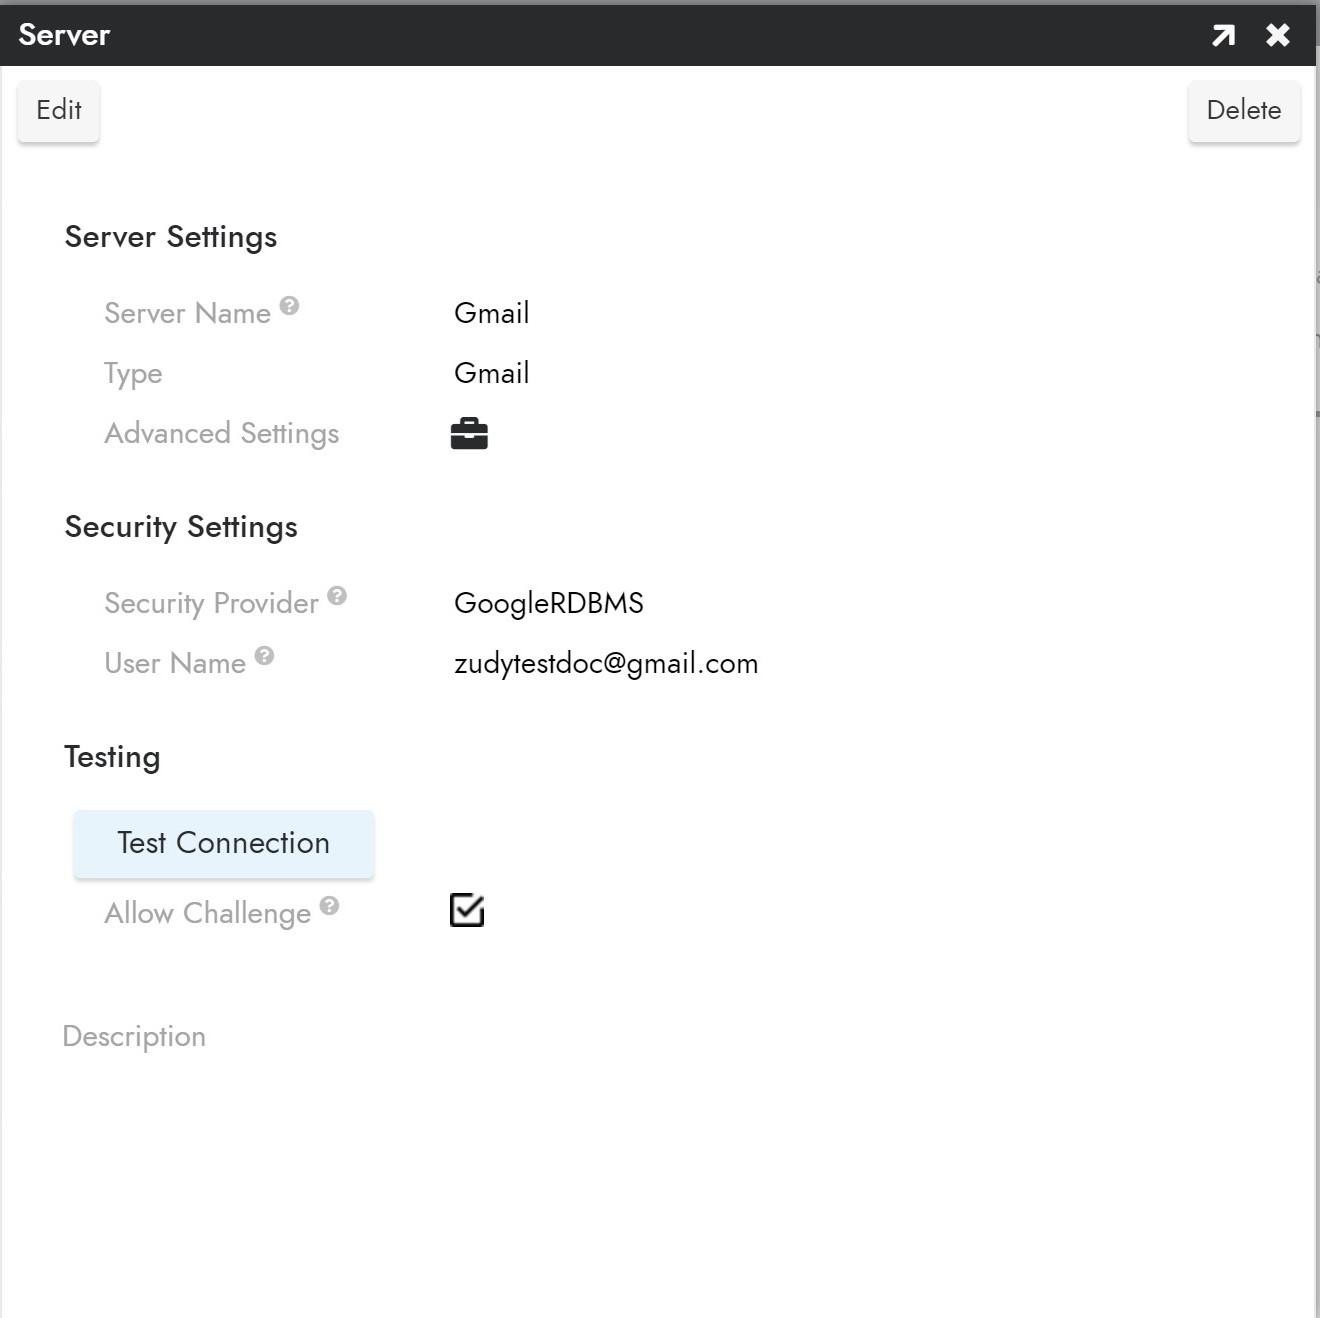
Name: An identifiable and unique server name
-
Type: Select Gmail from the dropdown menu
-
Security Provider: The RDBMS provider set up in previous step
-
User Name: The Gmail account you wish to use for this feature
-
-
After filling in all necessary credentials, click the Save button to save the settings.
-
Click Test Connection to go through the OAuth steps and ensure scopes and redirect are as expected.
Import data source
-
Navigate to App Builder IDE.
-
Click on Build Your Application then click on Data Storage Layer.
-
Under Cloud Database find the Gmail Database with the name you chose earlier.
-
Expand the GoogleCalendar panel and click Import
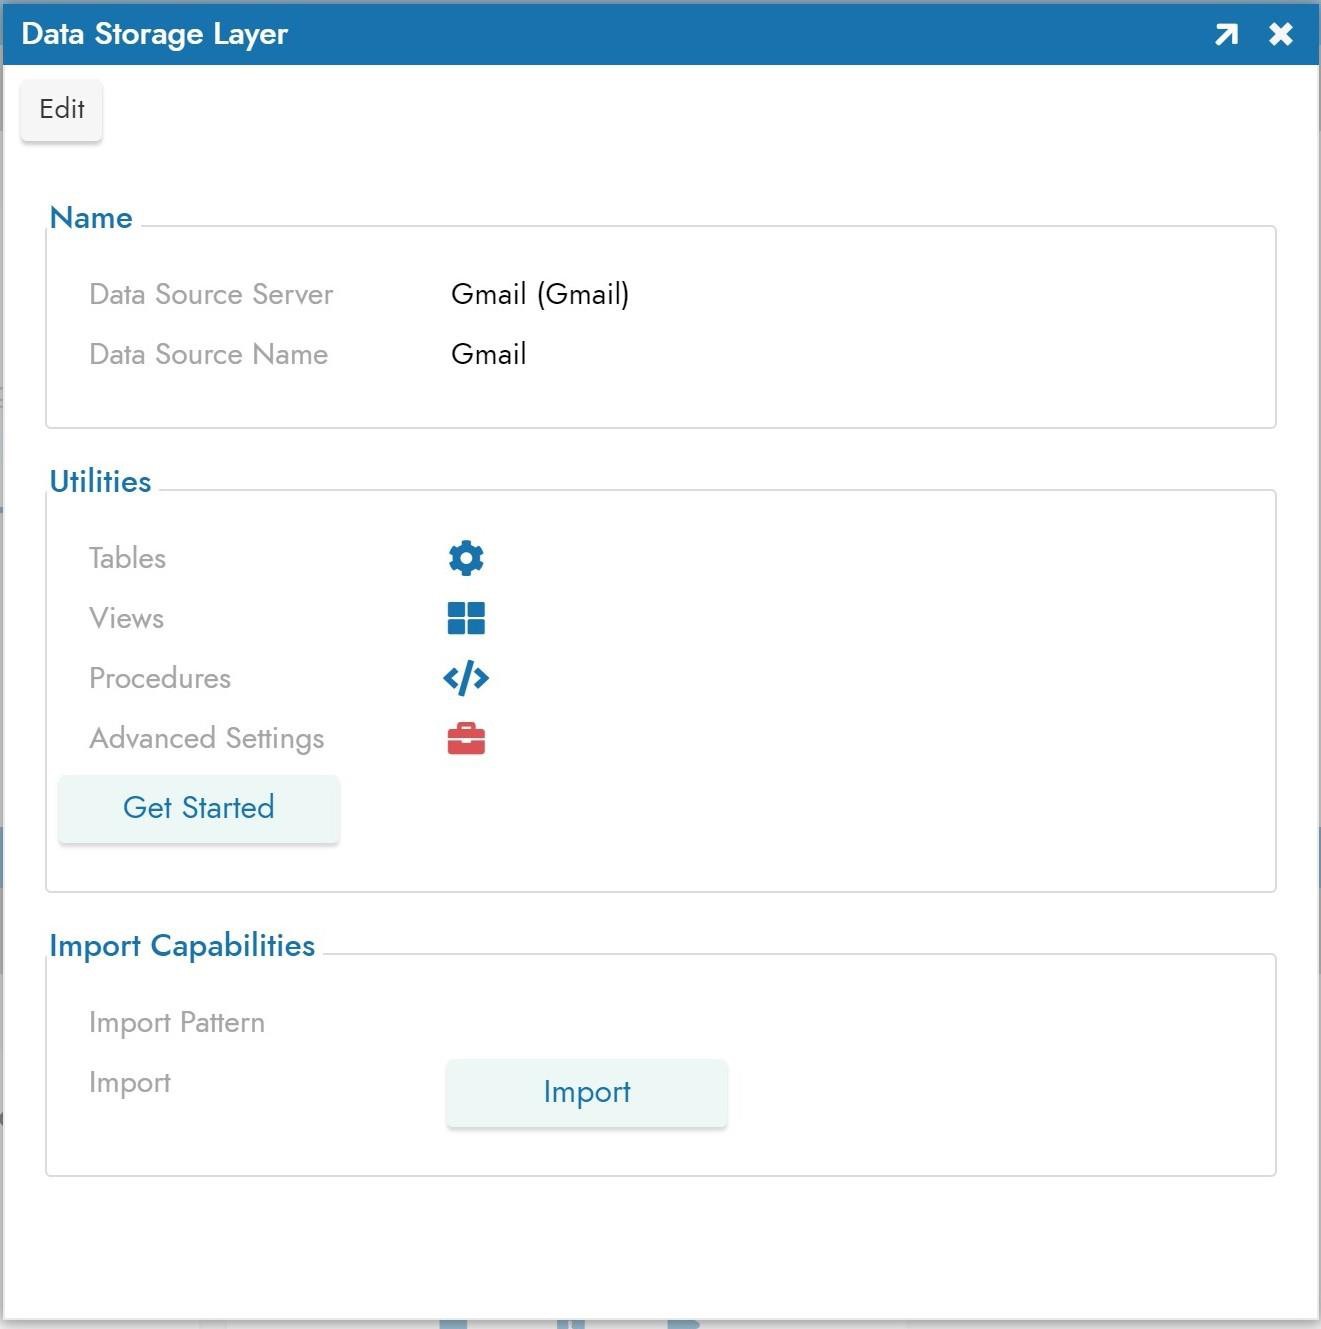
-
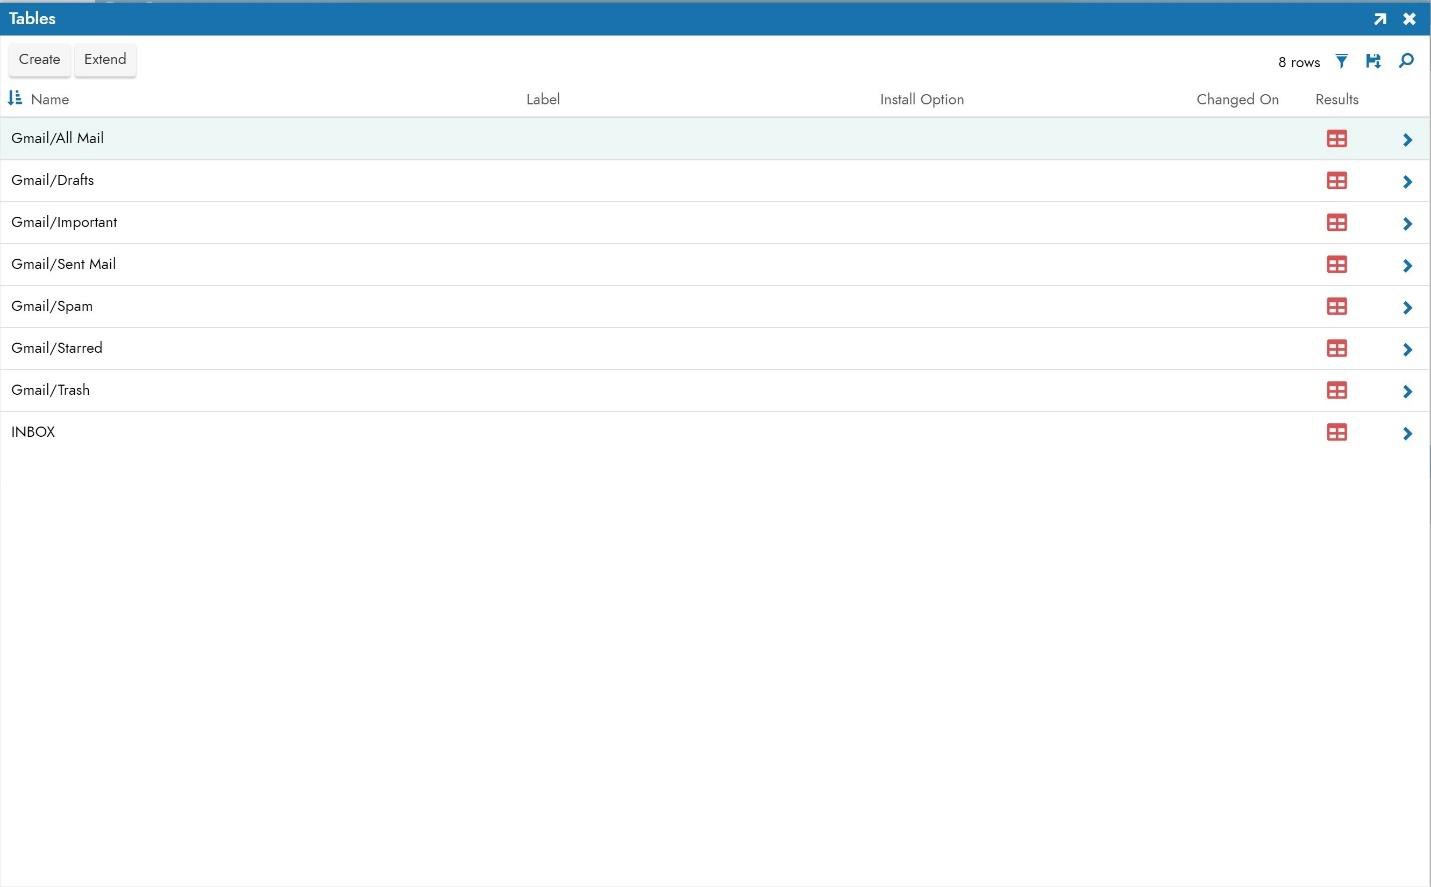
After import, click on Tables to view imported tables from Gmail Server.
Troubleshooting
If you experience issues with the Gmail server, these troubleshooting steps are recommended:
-
Enable data logging to generate log files and data, which you can download and inspect.
-
Refer to the CData ADO.NET Provider for Gmail documentation for detailed information.