File (logical data type) in Jitterbit App Builder
Introduction
Every table in an App Builder application is made up of columns, and each column has a data type that determines what kind of value it stores. The File data type is used to store a file directly in a column, letting your application's users upload and download files such as documents, images, or spreadsheets (see Column data types for an overview of all the available types).
By default, columns with the File logical data type have a physical data type of Binary. However, if you want to connect to a separate data source for the files instead of storing them directly in the column, you can do so by changing to NVarchar when creating the column (see Physical data types for more detail).
This page explains how to use file policies with your File columns.
File policies
Since App Builder 4.67, you can use file policies to restrict the kinds of files a File column accepts. A file policy is an allowlist of file types, defined using Multipurpose Internet Mail Extensions (MIME) syntax.
File policies are attached to a data source: each data source can have its own file policies, defined by you, and it can also use the shared file policies that are bundled with App Builder.
To manage the file policies of one of your data sources, follow these steps:
-
Go to App Workbench > Data Sources.
-
In the Data Sources panel, select the data source whose file policies you want to manage. Doing so populates the other panel with its options.
-
In the Business Logic Layer section, click File Policies.
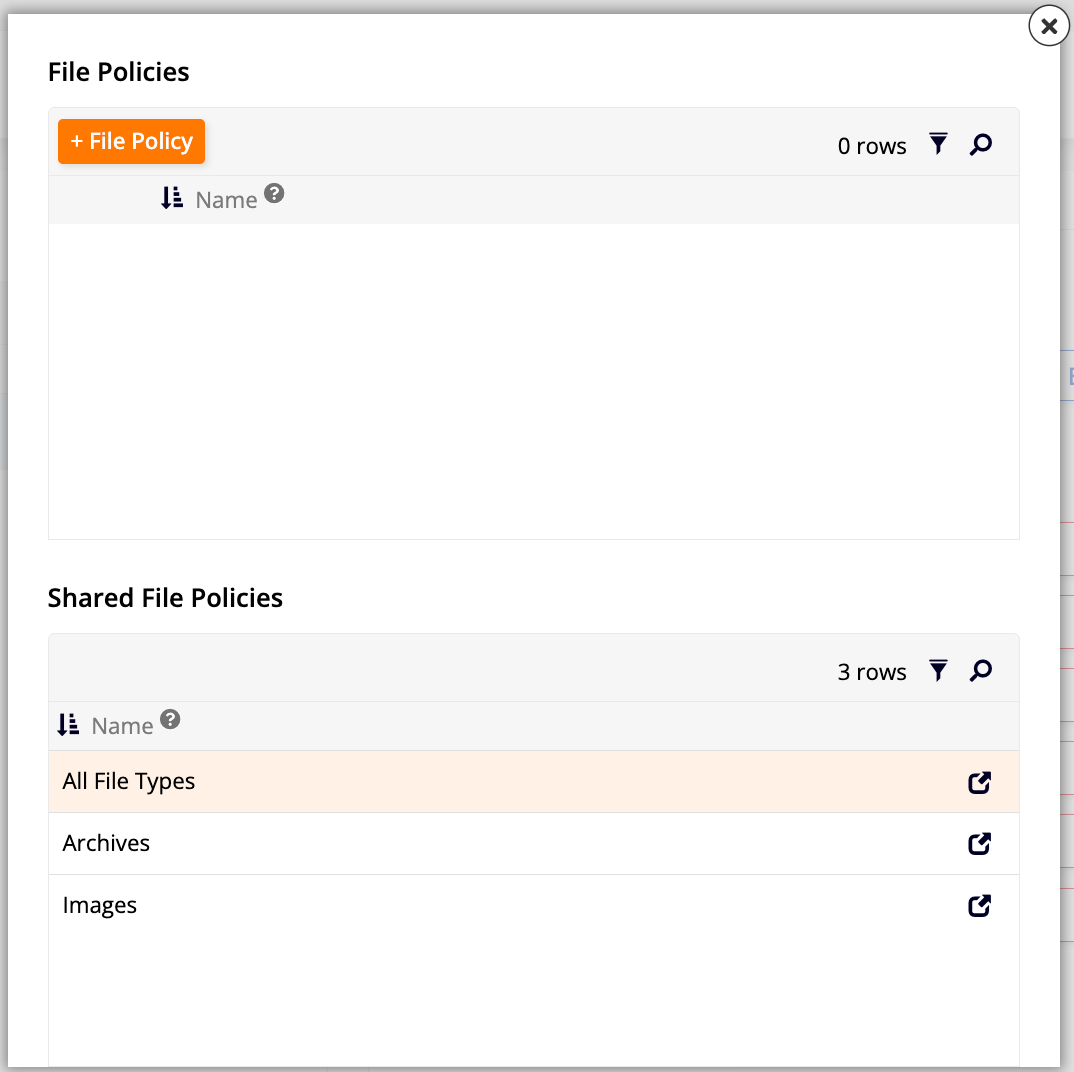
The File Policies dialog opens, containing:
-
The data source's own custom file policies, if any. Click + File Policy to create a new one.
-
Under Shared File Policies, the three file policies that are bundled with App Builder: All File Types, Archives, and Images. You cannot edit or delete the shared file policies.
Click the details icon at the end of a file policy's row to open its Data Source File Policy page. The image below shows the bundled Archives policy:
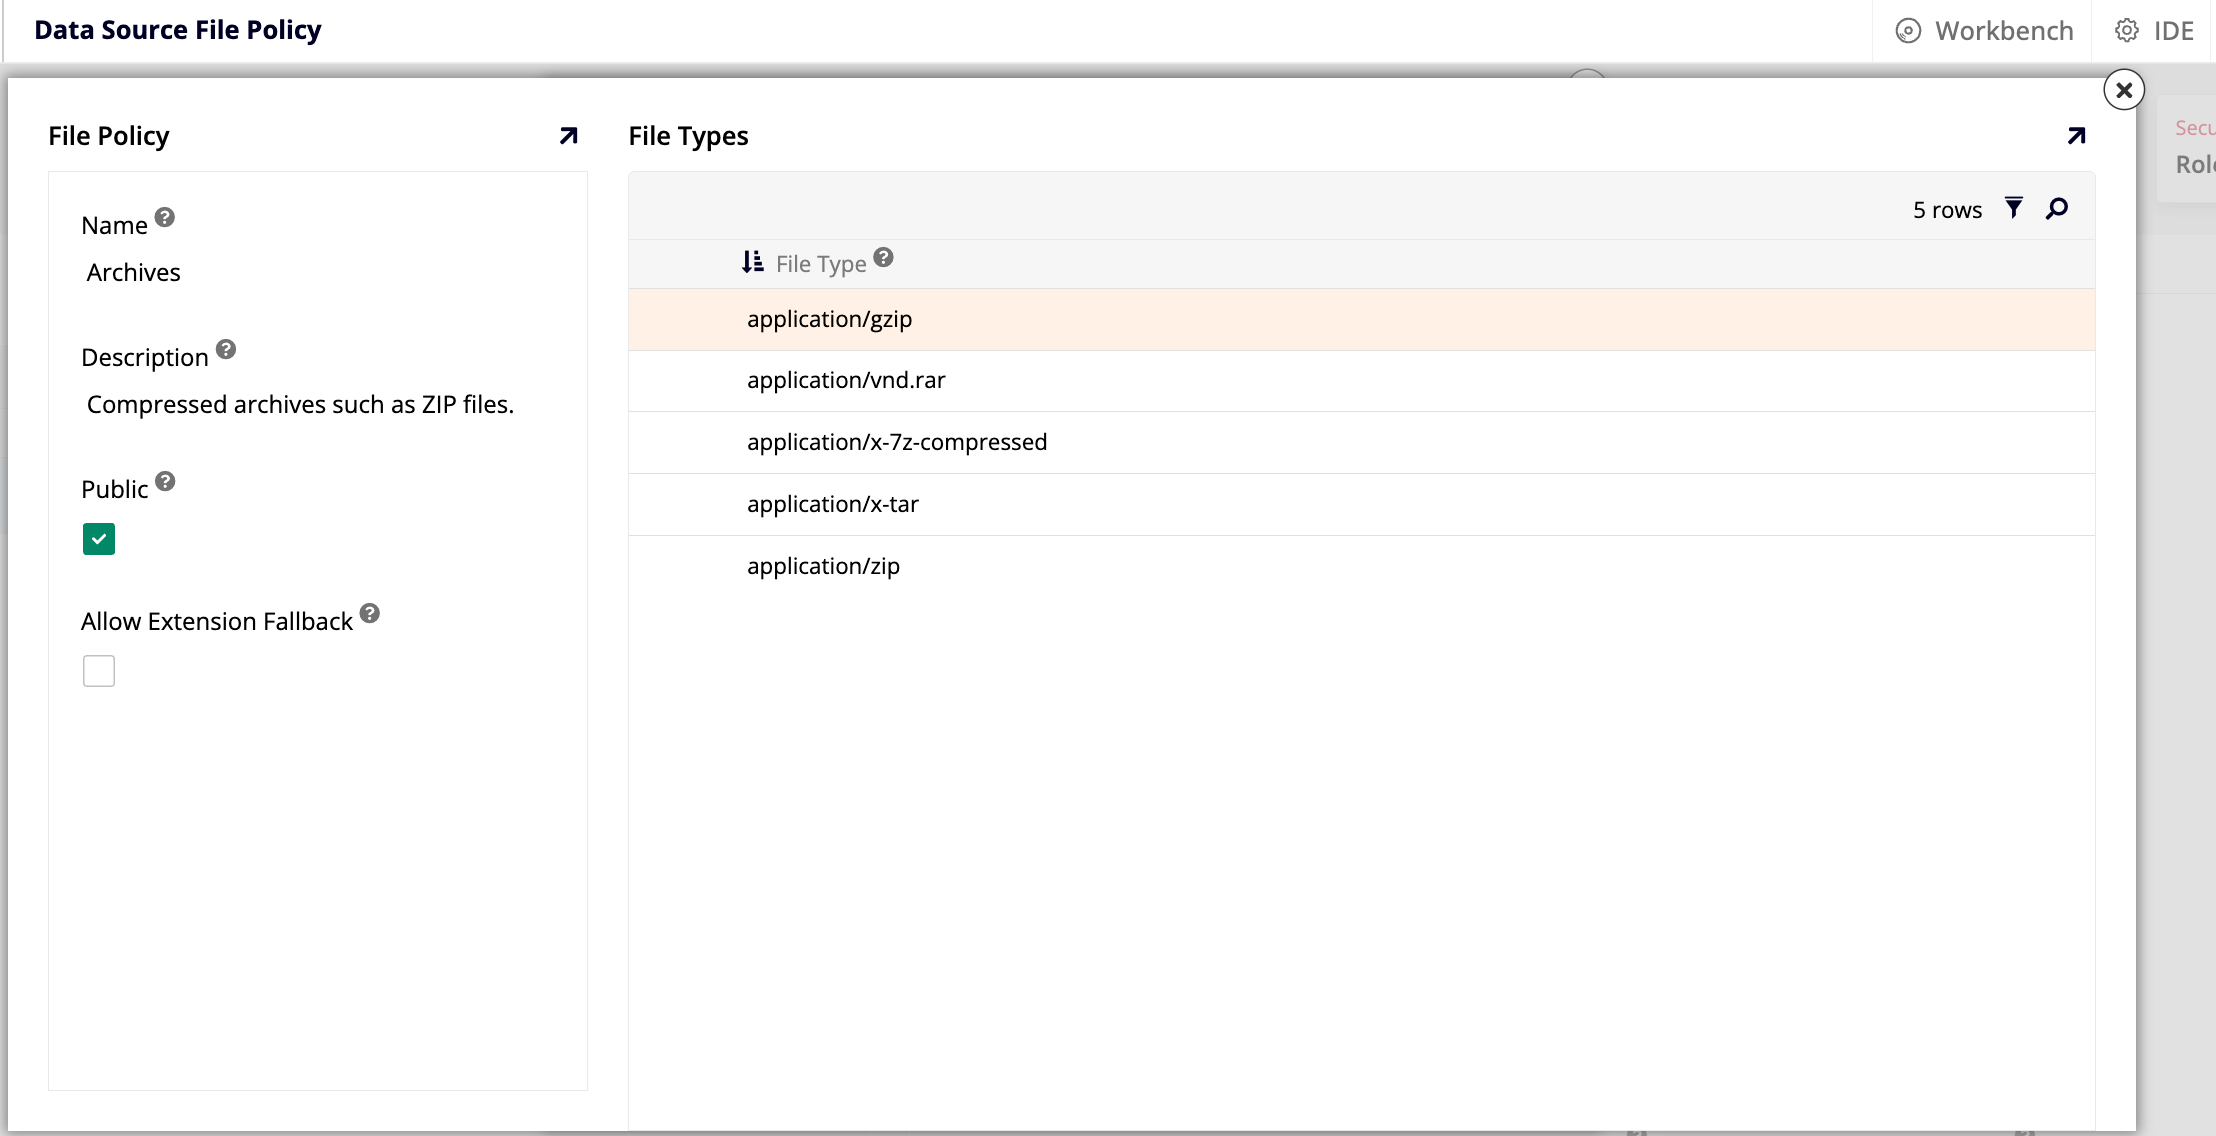
The File Policy panel shows:
-
Edit: Click to edit the file policy. This button is only shown for custom file policies.
-
Delete: Click to delete the file policy. This button is only shown for custom file policies.
-
Name: A user-friendly name for the file policy.
-
Description: (Optional) A description of the file policy's allowed file types.
-
Public: Select to allow other data sources to use this file policy.
-
Allow Extension Fallback: Select to have App Builder fall back to the uploaded file's untrusted file name to determine its file type when the type can't be determined from the file's content.
The File Types panel lists the file types allowed by the file policy:
- File Type: A MIME type, such as
application/jsonorimage/jpeg. Supports wildcards, such asimage/*; a*global wildcard creates a file policy that allows all file types.
To create a new file policy, click + File Policy. The same Data Source File Policy page opens, with the File Policy panel's fields blank. After you fill them in and click Save, the File Types panel becomes available. Click + File Type, enter a MIME type, then click to save it or to delete it.
Assign a file policy to a column
A file policy can be assigned to a column with the File logical data type, from either the data layer or the business layer. A column with no file policy assigned accepts any file type.
Data layer
To assign a file policy to a column from the data layer, follow these steps:
-
Go to App Workbench > Tables.
-
Locate the table containing the column you want to apply a file policy to, then double-click its row or click its pen icon to open the Table Definition page.
-
In the Columns tab, locate the column with the File logical data type, then double-click its row or click its pen icon to open the Column dialog.
-
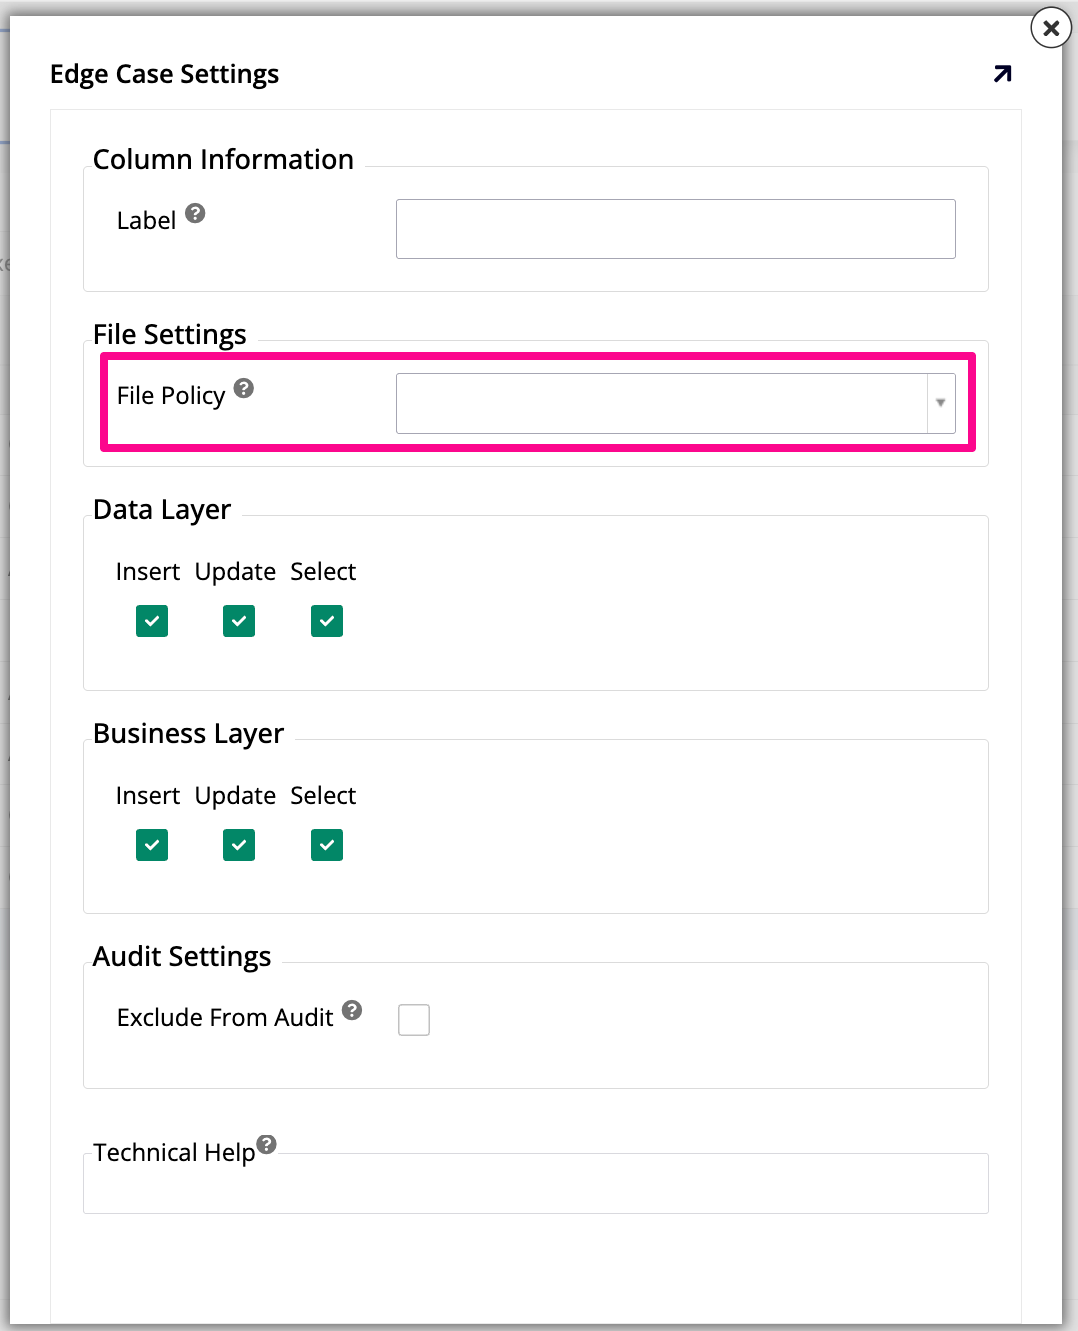
Click Edge Case to open the Edge Case Settings dialog:
-
Under File Settings, use the File Policy dropdown to select the file policy that determines which file types can be stored in the column.
Business layer
To assign a file policy to a column from the business layer, follow these steps:
-
Go to App Workbench > Rules.
-
Locate a business rule that uses a table with the column you want to apply a file policy to, then double-click its row or click its pen icon to edit it in the Rule Builder.
-
Go to the Columns tab.
-
Locate the column, then double-click its row or click its details icon to open the View Column dialog.
-
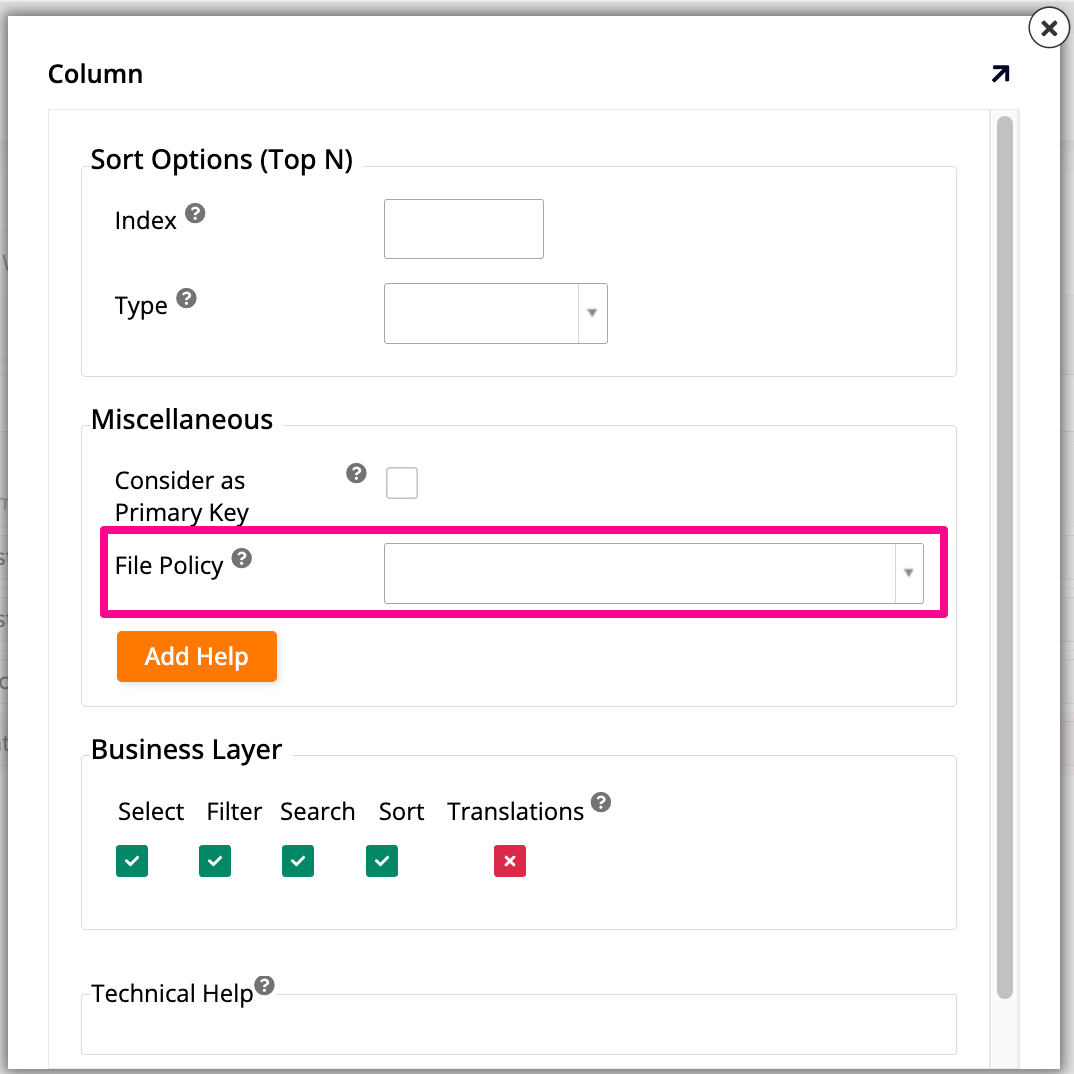
Click More > Edge Case to open the View Column (Edge Case) dialog:
-
Under Miscellaneous, use the File Policy dropdown to select the file policy that determines which file types can be stored in the column.